Builds Evolution of a Land Cruiser: My 80's build thread (2 Viewers)

This site may earn a commission from merchant affiliate
links, including eBay, Amazon, Skimlinks, and others.

Joined
Aug 12, 2011
Threads
125
Messages
4,998
Location
Sacramento, CA
UPDATE INDEX
03/08/13 - In-cab winch controls
03/08/13 - Engine bay LED light
03/10/13 - Finding out I have a head gasket leak
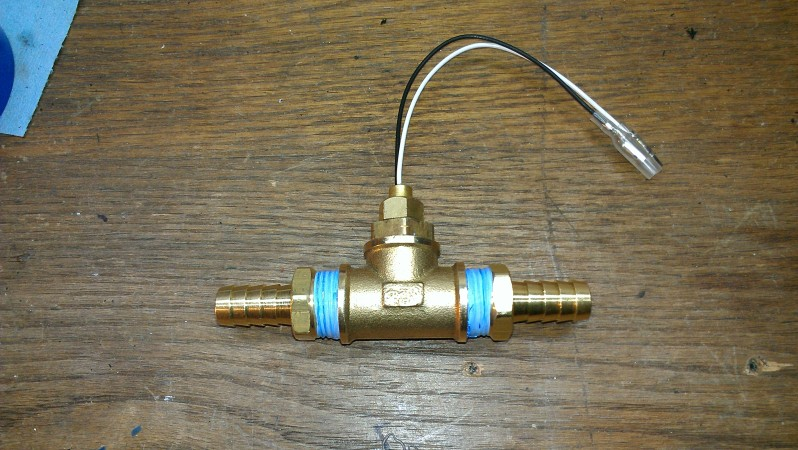
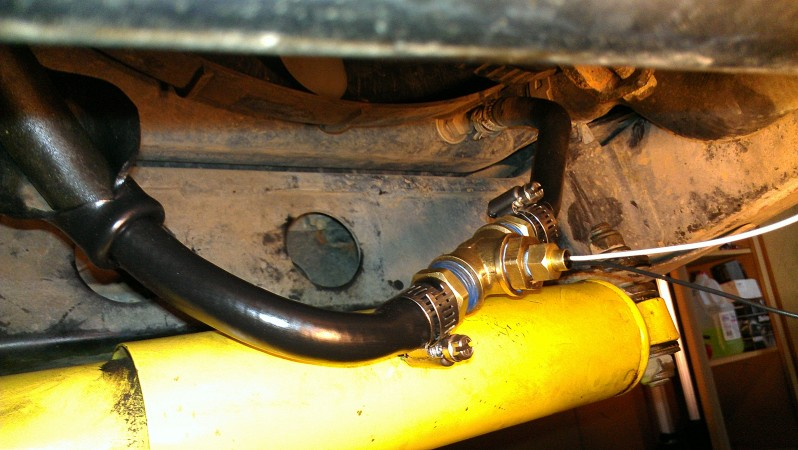
03/10/13 - Rear heater bypass
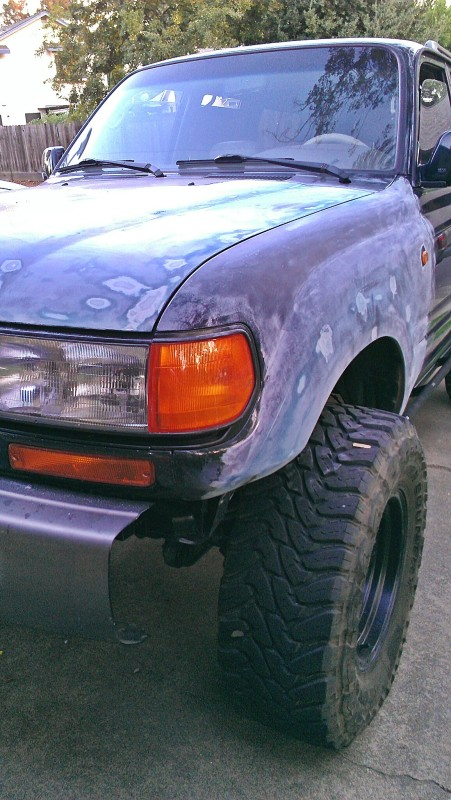
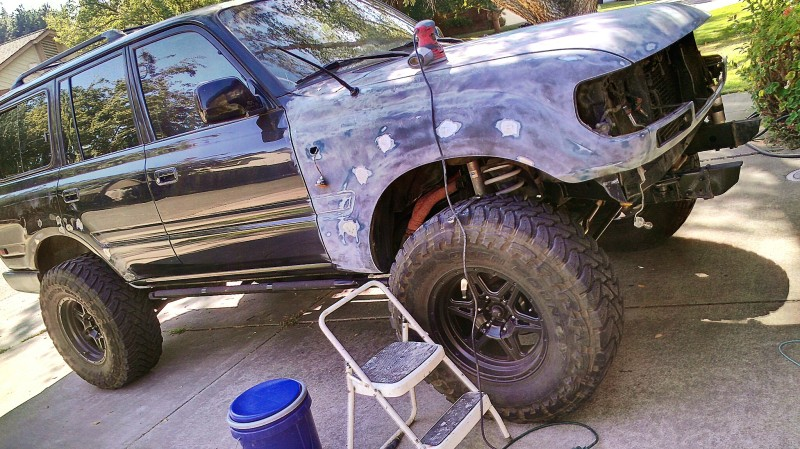
03/10/13 - Choosing Monstaliner colors
03/10/13 - Gauge cluster LEDs
03/11/13 - Head gasket repair parts list
03/12/13 - Head gasket Part 1
03/13/13 - Head gasket Part 2
03/18/13 - Head gasket Part 3
03/19/13 - Head gasket Part 4
03/28/13 - Head gasket Part 5
04/04/13 - Head gasket Part 6
04/04/13 - Head gasket Part 7
04/07/13 - CB Radio install
04/09/13 - Rear bumper install
04/12/13 - Rear bumper spare tire
04/16/13 - Rear bumper accessories
04/18/13 - Head gasket Part 8
04/23/13 - Head gasket Part 9
04/25/13 - Rear bumper axe mount
04/29/13 - Head gasket DONE and shovel mount
05/06/13 - New spare tire and painting the wheels
05/07/13 - 4th brake light for spare rim
05/12/13 - Wheeling - Folsom Lake
06/02/13 - Wheeling - Stanislaus Forest
06/10/13 - Ice chest for rear bumper
06/12/13 - Rear lift spacers
07/07/13 - Wheeling - Bowman Lake
07/10/13 - Painted offroad lights
07/13/13 - Auxiliary fan, VSV and fan clutch
07/14/13 - Test fitting 37" tires
08/03/13 - Monstaliner Part 1
08/03/13 - Wheeling - Eldorado Forest
08/11/13 - Wheeling - Bowman Lake
08/21/13 - Front rotors, calipers and pads
08/26/13 - AC dryer relocation
09/02/13 - Monstaliner Part 2
09/03/13 - Monstaliner Part 3
09/08/13 - Monstaliner Part 4 - finished pics
09/13/13 - LED light bar
09/29/13 - Wheeling - Snake Lake
09/29/13 - Wheeling - Snake Lake (cont.)
10/29/13 - Knuckle rebuild
10/29/13 - LSPV delete and manual proportioning valve
10/29/13 - Cargo totes, seat covers and water can faucet
11/07/13 - Sway bar bushings and 5.29 gears Part 1
11/10/13 - Snorkel install
11/26/13 - Pelican ice chest
12/05/13 - Front door speakers
12/09/13 - New battery
12/14/13 - New brake lines
12/15/13 - Dual battery setup
01/01/14 - Y-link steering & 1-ton TREs
01/05/14 - Painting the new steering setup
01/07/14 - Contemplating rock rings
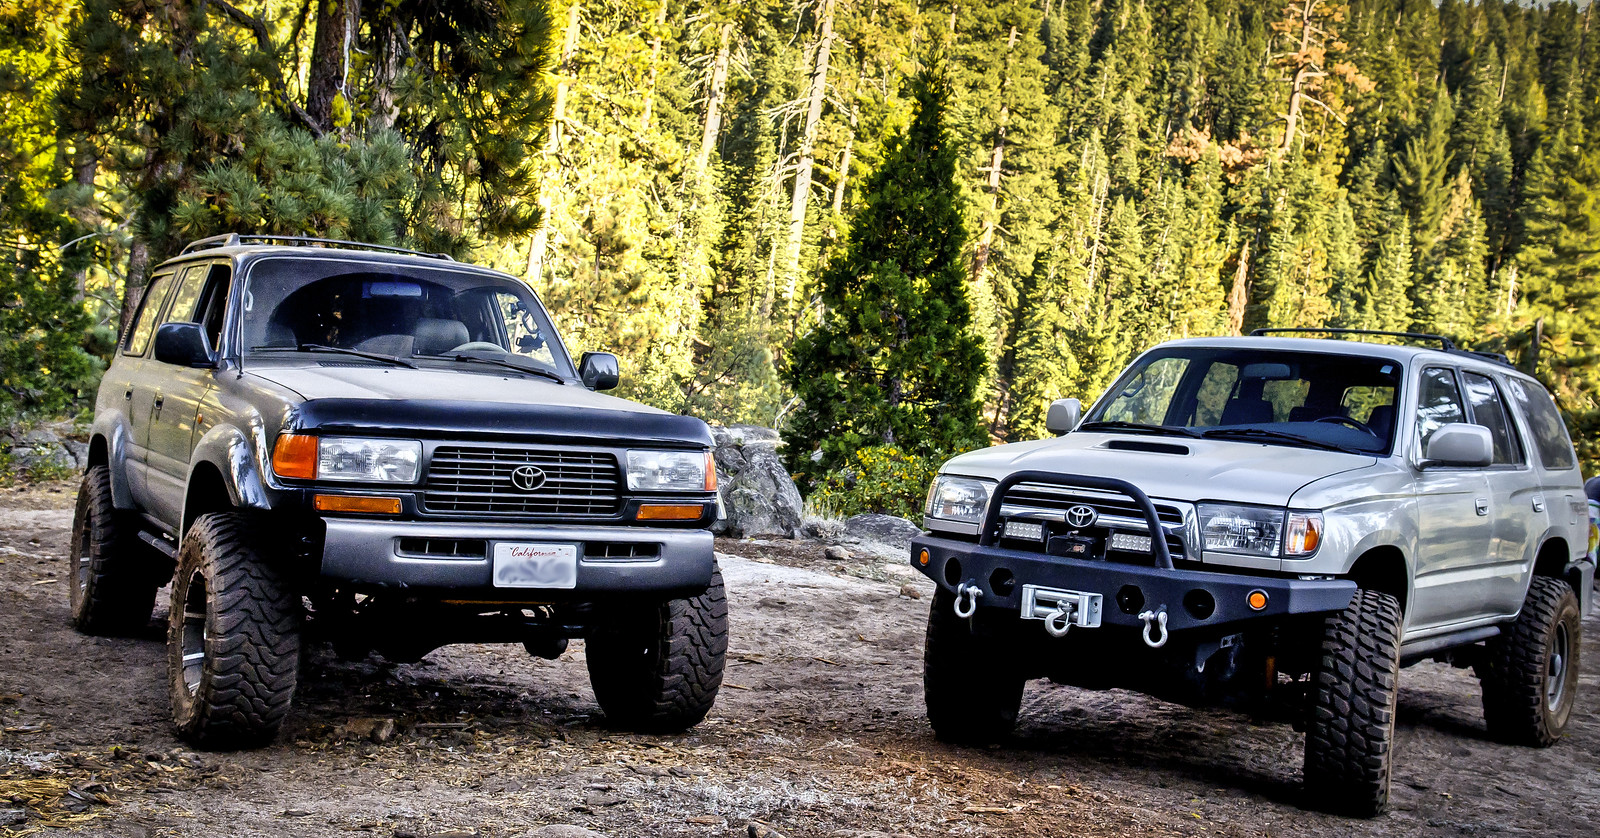
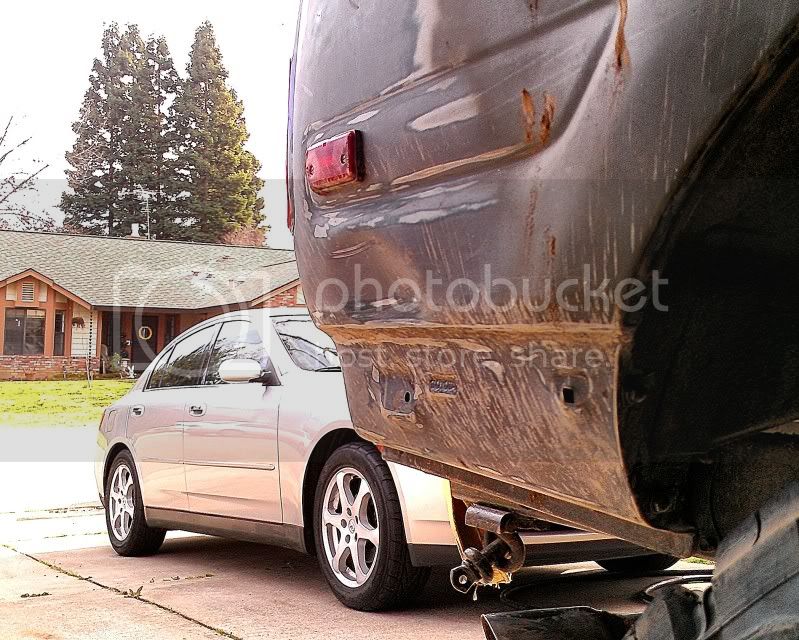
01/12/14 - Parking next to the baddest FJ80 around!
01/19/14 - New Bilstein steering stabilizer
01/19/14 - Wheeling - Signal Peak Part 1
01/19/14 - Wheeling - Signal Peak Part 2
01/19/14 - Wheeling - Signal Peak Part 3
02/18/14 - New daily driver - 2014 4Runner
03/24/14 - New shoes for the daily driver
03/30/14 - Wheeling - Folsom Lake
04/14/14 - New welder and 4x4Labs water can rack
04/15/14 - New summer toy and roof rack load bars
04/17/14 - Custom insert for CDL switch
04/20/14 - 30" LED light bar & drawer slides for ice chest
04/27/14 - ABS delete & charcoal canister relocate
04/28/14 - Custom TEQ badge
05/04/14 - Sway bar disconnects
05/04/14 - yodaTEQ ditch light brackets
05/07/14 - Rear backup / camp LED lights
05/07/14 - Rear Energy Suspension sway bar bushings
05/10/14 - Wheeling - Stanislaus Forest recon trip
05/18/14 - Wheeling - Folsom Lake
05/26/14 - Wheeling - Memorial Day camping, Stanislaus forest
06/03/14 - Photoshopping new bumper color
06/14/14 - Nitro 5.29s & rear brake overhaul
06/22/14 - 37" TIRES!!!!!!!!!!!!!!!
06/24/14 - Roof rack part 1
06/24/14 - Roof rack part 2
06/26/14 - Roof rack part 3
06/29/14 - Trimming for the 37s
07/08/14 - Attic Rack
07/12/14 - Depo Headlights and painted inner housings
07/14/14 - LED pods for front bumper
07/20/14 - Wheeling - Snake Lake
07/30/14 - Part-time hubs
08/10/14 - Wheeling - Signal Peak
08/19/14 - More rear fender trimming
08/23/14 - Wheeling - Hell Hole
09/07/14 - Sleeved & extended rear control arms
09/15/14 - Wheeling - Rubicon Part 1
09/16/14 - Wheeling - Rubicon Part 2
09/18/14 - Wheeling - Rubicon The Movie
09/23/14 - Rear fender surgery done
09/26/14 - New 4x4Labs front bumper
10/09/14 - Front bumper progress part 1
10/20/14 - Front bumper progress part 2
10/24/14 - Front bumper progress part 3
10/27/14 - Front bumper progress
11/14/14 - Front bumper DONE & painted
12/08/14 - Starting the 4x4Labs rear bumper
12/09/14 - 4WU 3link kit arrived!
12/09/14 - 3link reference pics
12/16/14 - More 3link parts
01/05/15 - Rear bumper progress
01/05/15 - New springs and shocks for rear
01/18/15 - Rear bumper progress
01/26/15 - Rear bumper progress
02/02/15 - Rear bumper progress
02/08/15 - Rear bumper done and painted!
02/15/15 - 3 LINK PROJECT #1
02/17/15 - 3 link parts, Hellfire knuckles
02/21/15 - 3 LINK PROJECT #2
03/01/15 - 3 LINK PROJECT #3
03/05/15 - 3 LINK PROJECT #4
03/16/15 - 3 LINK PROJECT #5
05/06/15 - 3 LINK PROJECT #6
05/06/15 - 3 LINK PROJECT #7
05/06/15 - 3 LINK PROJECT #8
05/06/15 - 3 LINK PROJECT #9
05/06/15 - 3 LINK PROJECT #10
05/06/15 - 3 LINK PROJECT #11
05/06/15 - 3 LINK PROJECT #12
05/06/15 - 3 LINK PROJECT #DONE!!!!!!!!!!
05/10/15 - Rear shocks & coils, new wheel paint
05/18/15 - Flex testing
05/26/15 - Lokka part-time 4x4 conversion
05/28/15 - More flex testing
05/31/15 - Wheeling - Signal Peak
06/07/15 - Wheeling - Tahoe National Forest
06/08/15 - DIY adjustable UCAs
06/14/15 - Wheeling - Slick Rock
06/15/15 - DIY rear sway bar links
06/29/15 - Wheeling - Fordyce
07/05/15 - Rocker panel chop
07/14/15 - New wheels, beadlocks
07/19/15 - Rocker panel chop (cont.)
07/27/15 - Bent Hellfire steering arm!
10/04/15 - Hydro assist & steering overhaul
10/12/15 - Wheeling - Prairie City
10/18/15 - Wheeling - Slick Rock
10/27/15 - new DIY sliders
12/07/15 - new seat covers
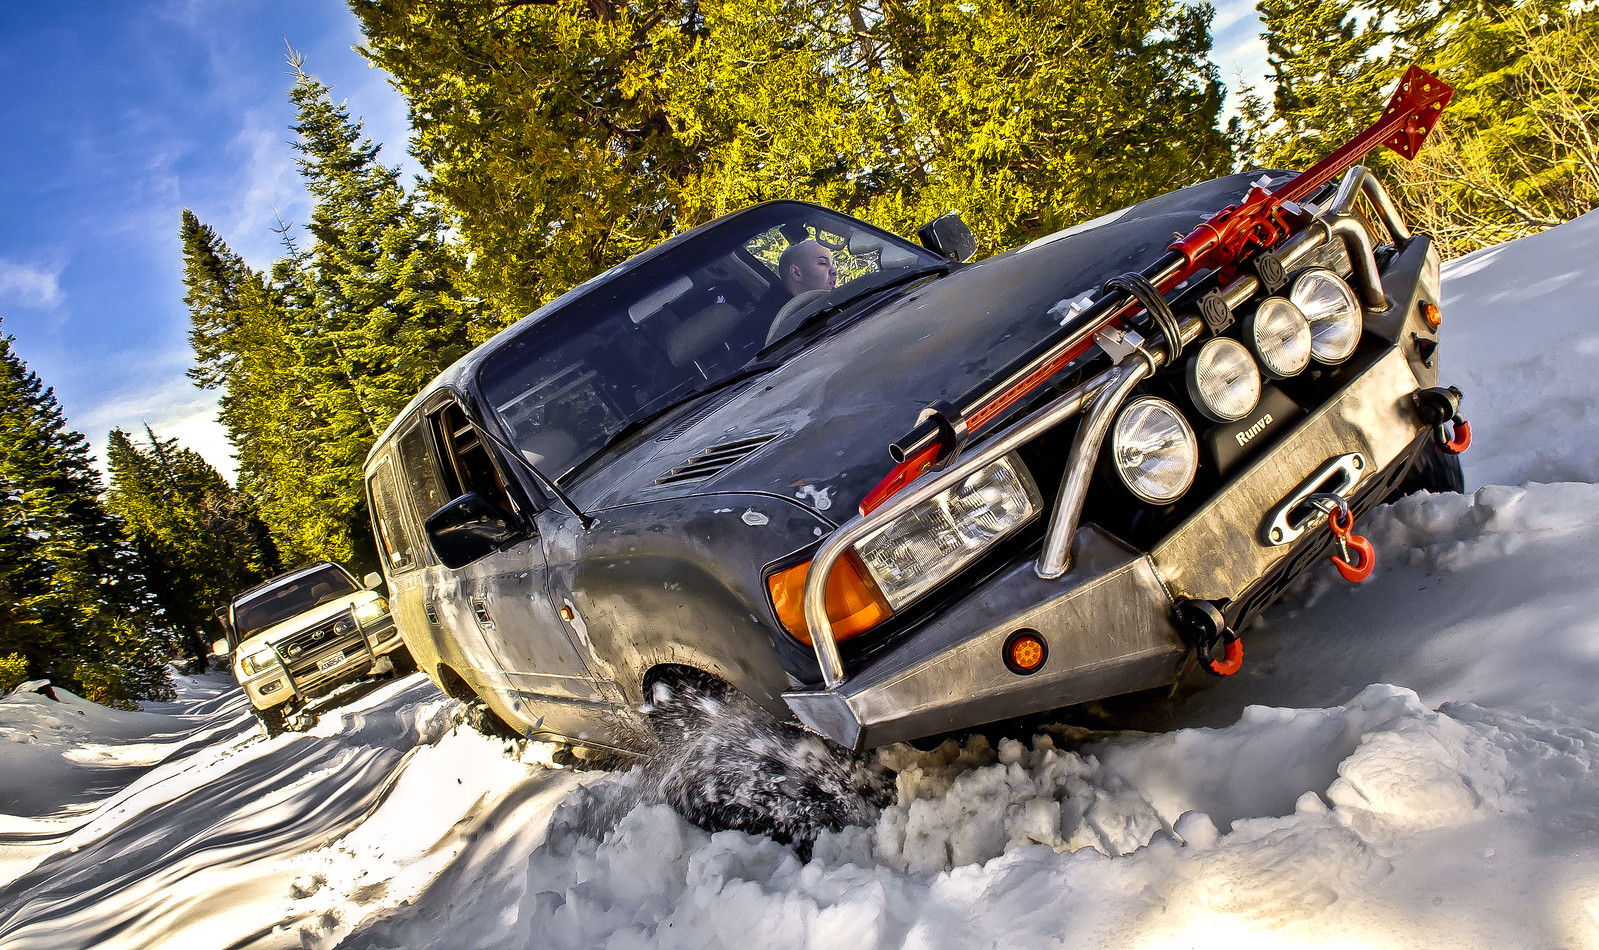
01/24/16 - Wheeling - SNOW
05/31/16 - Wheeling - camping
07/03/16 - Wheeling - Fordyce
07/07/16 - Rear splined sway bar
07/10/16 - E-locker motor guards
07/25/16 - Wheeling - Rubicon
08/29/16 - Wheeling - Barrett Lake
10/18/16 - Rear sway bar update
12/20/16 - Tailgate storage panel
04/17/17 - Cheap half doors
04/18/17 - Rear quarter panel chop/cap
04/30/17 - DIY high-clearance rear bumper part 1
 
Last edited:
05/23/17 - DIY high-clearance rear bumper part 2
06/01/17 - DIY high-clearance rear bumper part 3
06/10/17 - Rear shock mount relocation
06/12/17 - RuffStuff 3 piece rear sway bar part 1
06/16/17 - RuffStuff 3 piece rear sway bar part 2
06/24/17 - RuffStuff 3 piece rear sway bar part 3
06/26/17 - New rear control arm bushings
07/05/17 - WHEEELING - Rubicon
09/17/17 - WHEELING - Sourgrass
10/05/17 - DIY rear diff armor
10/08/17 - WHEELING - Deer Valley
10/08/17 - Raising & Relocating rear panhard bracket
01/02/18 - Calculating rear suspension geometry
01/24/18 - Rear quarter panel armor
01/24/18 - Dometic 12v fridge and fridge slide
02/04/18 - Painting the beadlocks
02/22/18 - Rear triangulated 3/4 link & coilovers part 1
02/26/18 - Rear triangulated 3/4 link & coilovers part 2
03/05/18 - Rear triangulated 3/4 link & coilovers part 3
03/12/18 - Rear triangulated 3/4 link & coilovers part 4
03/19/18 - Rear triangulated 3/4 link & coilovers part 5
03/26/18 - Rear triangulated 3/4 link & coilovers part 6
04/09/18 - Rear triangulated 3/4 link & coilovers part 7
04/16/18 - Rear triangulated 3/4 link & coilovers part 8
04/23/18 - Rear triangulated 3/4 link & coilovers part 9
05/01/18 - Rear triangulated 3/4 link & coilovers part 10
05/02/18 - Rear triangulated 3/4 link & coilovers part 11
05/07/18 - Rear triangulated 3/4 link & coilovers part 12
05/21/18 - Rear triangulated 3/4 link & coilovers part 13
05/27/18 - Rear triangulated 3/4 link & coilovers part 14
06/04/18 - Rear triangulated 3/4 link & coilovers part 15
06/04/18 - Rear triangulated 3/4 link & coilovers part 16 DONE!!!!
07/09/18 - Passenger side rocker chop, slider & cat protection
07/09/18 - WHEELING
08/02/18 - WHEELING
08/02/18 - Subaru WRX seat swap
09/26/18 - WHEELING - Deer Valley
08/12/19 - WHEELING - Slick Rock
08/19/19 - HAM radio & center console overhaul
09/23/19 - WHEELING
10/16/19 - WHEELING - Rubicon
11/18/19 - Rock lights
11/18/19 - Interior illumination overhaul
01/25/21 - Audio system overhaul
03/23/21 - Rear coilover rebuild & overhaul
04/20/21 - 5th gen 4Runner Brake conversion & overhaul
04/26/21 - Round headlight & grill conversion
05/02/21 - Rear RCV 300M axles & hub upgrades
05/04/21 - Under-hood LED lighting
06/28/21 - WHEELING - Strawberry & Niagara Rim
07/01/21 - Front axle rebuild, Speedi Sleeves
07/19/21 - Front axle rebuild (cont.)
07/19/21 - WHEELING - Slick Rock
07/29/21 - Custom tube doors
10/14/21 - Center console cupholder mod
04/24/22 - Fire extinguisher
06/06/22 - Motor mounts, radiator, skid plate
10/14/22 - WHEELING - Slick Rock
01/12/23 - Crossover steering overhaul, new panhard mounting
05/02/23 - Front Antirock swaybar, 38" tires, new beadlocks
05/02/23 - OEM seat & leather refresh
 
Last edited:
Wanted to start a build thread to keep track of everything I’ve done and will do to my Land Cruiser. It will also help to remind me how much money I’ve dumped into this bottomless pit :/

A bit of history…I’ve always loved Toyota rigs, especially the iconic 80-series Land Cruiser. It carries the classic shape of a true sport utility vehicle and you can’t beat its legendary status around the world. I owned a 2wd 4Runner during my college days which I turned into a total mall cruiser with JAOS stuff. It looked pretty, but it was a total pavement queen. No matter, I still loved the truck. It was extremely reliable. After getting rid of the 4Runner I ended up with a 2wd Nissan Frontier as my daily driver. I added a small lift and some wheels to help make it look a bit better. I still own the Nissan and it continues to be my daily driver. I’ve taken it on a few easy trails but I was ready to get a more serious rig.

The purpose of this Land Cruiser will be a camping/hunting/expedition/rock crawling/whatever/etc/etc/etc rig. I kinda want to do a little bit of everything eventually. I DO NOT want a trailer rig that isn't street legal. I want something that is capable yet still looks good and is comfortable to drive legally. I want to run some trails on the weekend, drive the truck around town and take the wife to dinner and a movie in it. The nice thing is that this truck isn’t my daily driver. So I can do as I please and leave it in garage torn-down if need be.

The old ’97 4Runner
umrNXnw.png


The current beater, ’04 Nissan Frontier
5774149925_fc1e76c212_b.jpg


5774686786_cbe1f4cca5_b.jpg


After saving the cash, the time finally came to start looking for a Land Cruiser! I was specific in what I wanted. Had to be a 1996 or 1997. Had to have lockers and could NOT be burgundy. Any other accessories were a bonus. After searching around for a few weeks I lucked out with a local deal. And the best part, she came with a few goodies that would save me a couple thousand bucks :)

1996 Land Cruiser
163,XXX miles
Factory lockers
F.O.R 3.5” lift
Fugly 17x9 wheels
35x12.50/17 Toyo Mud Country tires with plenty of meat left
Rock sliders, welded
Chromoly Birfs (according to the PO, unconfirmed by me)

Parked outside of my office the day I assumed custody (June 22, 2012)
Z875AtR.jpg


The truck was in great shape but was in need of some basic maintenance. The following is a list of all the basic maintenance I performed and parts I changed within the first month or two of ownership. Sorry, no pictures of everything. It’s all I could find on my cell phone. Should have started a build thread sooner!

Oil change (Mobil 1 synthetic) & filter (OEM)
PCV valve (Napa) & catch can (DIY using air compressor separator)
New cat-back exhaust (Flowmaster 40 series), custom piping
Coolant flush (block, radiator, heater cores), Peak Global
All radiator hoses, small bypass hose (OEM)
Thermostat & gasket (OEM)
Fuel filter (OEM)
Distributor cap, rotor, dust gasket (OEM)
Spark plugs (OEM Denso)
Spark plug wires (OEM)
All vacuum hoses replaced (P0401 fix)
Throttle body cleaned, new gasket
Intake manifold cleaned, new gaskets
EGR valve cleaned, new gasket
Fuel injectors tested & cleaned by Dr. Injector
New injector, cylinder #1
Greased U-joints & driveshafts (Green Grease)
Front and rear brake pads (OEM)
Greased knuckles (Valvoline Palladium moly #2)
Front Diff fluid change (Valvoline 75W-90)
Read Diff fluid change (Valvoline 75W-90)
Transfer case fluid (Valvoline Synthetic 75W-90)
O2 Sensor, Bank 2 (OEM)
Courtesy Switch, passenger rear (OEM)
New fluid in fan clutch, 15K CST, 60mL
New charcoal canister (Auto Zone: VC-120)
Front sway bar bushings, lower (OEM)

The day all the work began!
qqsdv3H.jpg


The nasty soup that came out of my front differential.
9GSmpHO.png


I figured that was caused by a bad diff breather that created a vacuum and was pulling grease from the knuckle into the gear housing. This thing was completely clogged!
YL0uw1Nh.png


So I tossed the stock breather and ran it up to the firewall with a fuel filter on the end. I also ran a line from the rear breather and teed it into this line you see here.
0ZM3YCO.png


The DIY catch can/separator. You’ll also notice the VSV valve on the bottom right corner. I relocated it out here when I had the intake manifold pulled off. That way if it ever goes bad, I don’t need to go through the massive headache of replacing this damn thing under the manifold.
YXQqf35.png


After getting the truck in good running order, it was time to make her look pretty and start adding the fun parts. Found a guy on Craigslist to do a detail job and make the paint shine (hood was looking pretty bad).
7511921178_c9590f7eec_b.jpg


Did the 7-pin mod and installed a CDL switch using a Hazard switch from an old 4Runner
YAkW13a.png


I needed a temporary solution to add more 12v outlets in the truck so I added a simple adapter under the radio. Once I figure out the auxiliary power situation I plan to redo this all. This was just to give me a spot to add a phone charger, GPS charger and a few miscellaneous low-power items.
hGVX7oY.png


Blacked out the grill, because chrome is for faucets, not trucks :)
56POhpV.png


Stock antenna was shot and wouldn’t go up or down so I ripped it out and added a universal rubber antenna which I purchased at Auto Zone. I think it looks much better! I also installed some OEM Toyota side markers. What a pain in the ass these were to install. Never doing that again, but I love the way they look.
uaWYLjs.png


Took her out wheeling for the first time on some easy dirt roads and managed to get high-centered. DOH! Rookie move. This is when I realized I need a winch.
7620129202_9c957290ec_b.jpg


7623620848_d21be53980_h.jpg


STUCK!
7623605544_2192512487_h.jpg


Much-need lighting upgrade in the interior. Used the cheap eBay LED panels. About $2 each shipped. It’s a no-brainer. The light output is ridiculous.
7828932412_d5b6889b70_h.jpg


eAodMcQ.png
 
Last edited:
Wanted to fix the issue of one tire sticking out more than the other so I installed the Ironman adjustable panhard in the front (rear was added a few weeks ago)
tQ3aqHT.png


A little more wheeling and posing….
7770549372_c6a15190fe_h.jpg


7926565166_6ba0d2e2c2_h.jpg


7926830900_62f0c8d9dc_h.jpg


7927128810_9f9146f325_h.jpg


7927125094_518e1bf2ff_b.jpg


7937672046_747d10a8b0_h.jpg


Finally got fed up of looking at the blingy mall cruiser wheels so I sold them. Not too many options for a 17” wheel that isn’t blingy these days. Since the tires were in such good shape, I didn’t want to get rid of them and search for a set of 35x16” tires. So I ended up going with a set of Level 8 Strike 6 wheels. 17x9, -12mm, 4.5"BS
8010506421_c31560f922_h.jpg


At this time I also picked up my winch in preparation for the bumper. Little did I know it would take almost 6 months to get my bumper in! Picked up a Runva 12,000lb winch with synthetic line after reading lots of good things about this brand. More details of the winch here: http://runvacanada.com/usa/125XFS.htm
FQomDqF.png


So September 2012 rolls around. My buddies and I decide we need to do a more serious trail run. We’re all rookies in the off-road world after all. We decide to run the Slick Rock 4x4 Trail at Lake Alpine, northern California off of Highway 4. This is a fairly difficult trail, rated a 6 or so. Lots of rock, beautiful scenery and plenty of challenging spots. Need careful spotting when driving a big truck like a Land Cruiser through it. Lots of opportunities for free body work courtesy of granite boulders. Here’s a few of the highlight pics:
8100341112_03f8f83136_h.jpg


8100333445_4798f01d27_h.jpg


8100340458_1f85a0b7cc_h.jpg


8100332715_da6ff5b398_h.jpg


8100328299_45d83a7a19_h.jpg
 
Last edited:
Epic views at 7200ft from the top of the Slick Rock. Here we made a sharp right turn and proceeded to drive down the steep and slick granite mountain. Butt pucker level 9000.
8051548371_b2e754c5ae_h.jpg


And here’s a video of my climbing the Staircase at Slick Rock; the last toughest obstacle of the trail. The lockers sure made it easy!


I didn’t make it out of Slick Rock completely free of damage. I tore off a rear flare after bumping it against a rock. This was a turning point for me. I knew the flares would have to come off eventually if I wanted to do more serious wheeling. And I knew if I removed the flares I might as well repaint the whole truck, or line the whole truck with something more durable. After this it was all downhill. Or uphill??? Ah who knows. Either way, it results in more money being spent. Doesn’t it always? :)
aVoAJGH.png


The very next day, after tearing off all the flares
LMkqMxx.png


After running Slick Rock I realized how important it was to be able to keep an eye on temperatures while doing slow crawling for extended periods of time. I had the Android Torque app and the Bluetooth/OBDII adapter and while it was nice, it was kind of annoying to set up each time I got in the car. I wanted something more permanent, and something that looked cool. I followed all the guides here on MUD on how to modify the Acura Integra gauge pod to fit. Here’s a list of parts used:

Autometer dual gauge pod for 94-01 Acura Integra (#20110)
Rustoleum 'Cobblestone' spray paint to match the tan interior
GlowShift MaxTow digital/analog water temp gauge
GlowShift 40mm water temp sensor adapter
GlowShift 7-color transmission temp gauge

Installed. Transmission probe was not hooked up in this picture, hence its whacky reading.

8069062645_dbdf2da237_h.jpg


Water temp sensor adapter
UTiNhgH.png


Transmission sensor adapter I made using miscellaneous brass fittings
dUpgorc.png


And here it is installed in-line with the trans cooler line
xMEQm37.png
 
Last edited:
At this stage I’m past the point of no return. Fender flares are gone. There’s dozens of holes in my truck. I don’t own a welder and haven’t done any welding since high school when I used an arc welder. I wanted a permanent fix so I found a Craigslist handyman to weld up the holes. Quick and cheap. But now I’m left with a lot of body work to do, which I don’t know anything about either. Armed with a sander and a can of Bondo I get to work and start the tear-down.
9Fbm6qO.png


Ub4ylRX.png


8ol0X1o.png


Body work sucks. I hate it. I have a newfound respect for guys skilled in this craft. After numerous miserable hours of sanding and smoothing I think I finally have everything smooth and leveled out. Not good enough for an OEM-like paint job, but a thick roll-on liner should cover the imperfections well.
sZUTZyv.png


Speaking of liner paints, I settled on using Monstaliner. Hope to have it done by summer of 2013. Here’s a comparison between WWII OD Green and Jungle Love. I’m pretty sure I’ll be painting it the OD Green color.
lIFiMjh.png


While the truck is in shambles I decided to add some hood vents. I’ve seen the various installs and really like the vents from the Chevy Lumina Z34. Picked up a set on eBay complete with the plastic drip pan (yet to be installed) and got to cutting and hacking.
61WoWrv.png


U8iprue.png


wy3LNGl.png


All this body work is depressing. I needed to take the truck out. Bolted the lights back on and went to play in the mud. This was at the La Grange OHV park and some random forest roads in the Stanislaus National Forest.
8321512345_0456743771_h.jpg


8322619678_7c7468f9d7_h.jpg


8324931402_a62c0a7fd8_h.jpg

8323870641_64465c89f3_h.jpg


8326705361_4c0aa5752d_h.jpg


8327760688_0272d383c5_h.jpg


8326697525_d9fd832f2c_h.jpg


8326694085_787d91b63e_h.jpg
 
Last edited:
Also needed some bling to spice things up. Picked up a set of DEPO LED taillights from eBay. They look so much better than the stock lights and their frosted appearance.
skWmh8U.png


Now it was time to address the need for on-board air. I like to air down the tires every time we go wheeling. Although not always needed, it sure does make for a more comfortable ride; it’s not as harsh or rocks and bumps. There was really no other option for me aside from the Puma 12v. Had another MUD member fab me up a little platform and got everything wired up using 6 gauge jumper cables with a set of Anderson SB50 quick-disconnects.
8426236336_df5be8ff07_b.jpg


8426236242_ab1f016048_b.jpg


The platform also gave me a nice spot to mount the base for the Hi-lift jack.
qiRR8xF.png


To deflate, I’m using a simple ARB E-Z Tire Deflator. For inflator, I decided to piece together my own kit. The main part is the Tru-Flate 13-373 lock-on chuck. This thing works great! The rest consists of simple brass fittings from the local Lowe’s store. The hose is a 50’ Plastair coil hose. Simple, effective and easy to carry!
8426236456_f46008ec1b_b.jpg


Now that I’m starting to add all sorts of gadgets and gizmos, I need to add an auxiliary fuse block before it turns into electrical spaghetti behind the dash and under the hood. I decided on the Blue Sea 5029 fuse block with 12 slots. This thing is NICE! Used a lumber tie-plate from Lowe's and attached it to the charcoal canister bracket. This should give me enough room for all the gadgets I will add in the future.
9298070130_dccd4db71a_b.jpg


Added some extra switches in the stock openings in preparation for the lights I’ll be adding up front
lc7gtqs.png
 
Last edited:
AT LAST! After what seemed like an endless wait, my bumper is here! I started off by putting a deposit on a Bink's bumper back in August. After two months of waiting I got a refund and chose to go with AOE's bumper. It took me four long months to get this bumper but the wait was worth it. There was really no other bumper on the market I liked. Bumper seems to be really well built but I really have nothing to compare it to. The whole thing is very solid and went on super easy. I decided to leave it bare steel. I’ll sand/wire wheel it to polish it up and clear coat it. No black bumpers for me :flipoff2:
The bumper gives high approach angles and the way it's built it covers the factory turn signals. So I bought some simple trailer lights at Napa which actually look good IMO. And of course, an offroad bumper is not complete unless it has some bottle opener bling :clap:

Winch is a Runva 12,000lb beast w/ synthetic line. It was a tight fit! Lights are some 8" Pro Comp and 6" FETs I had laying around. I used some KC mounts for the 6" FET lights. The 60" Hi-Lift jack will eventually find its home on the rear bumper.

If you guys are interested in the bumper, give Alex @ AOE a call. Contact info and a lot more pics of 80s bumpers in here (sift through the various albums)
American Overland Expedition - http://www.facebook.com/pages/American-Overland-Expedition/89641896537

8442894899_6ed8896dc6_h.jpg


8442894119_6f7f10fc71_h.jpg


8442893141_feba336b70_h.jpg


8443983250_0e081ccbd5_h.jpg


Now that I had the bumper and winch finally installed it was time to go wheeling again. Went to Hollister Hills SVRA park with some new wheeling buddies. Fun times! First time in the park. Did some Black Diamond trails that were pretty intense for my wheeling skills. The rest of the group were some serious wheelers who went through Tank Trap (triple Black Diamond rating). That was the craziest wheeling I've seen! Hollister is an awesome park. Everything from mild to wild. You can wheel a minivan or an exo-cage rock monster on 50” tires and have a blast.

8485915771_eed2cd54c9_h.jpg


8487003930_34169eb330_h.jpg


8487003034_1735e3cfb8_h.jpg


8485911291_1794a699de_h.jpg


8485909283_189e0254c8_h.jpg


8485899043_c7434f36a2_h.jpg


8486997398_02fd1746b0_h.jpg


8486985230_60c991201d_h.jpg


8485914821_191802314a_h.jpg


8486980546_4ffeb434be_h.jpg


8486978794_2a26db906e_h.jpg


8485885797_7d050154ba_h.jpg
 
Last edited:
Hollister continued...

8486964050_568f2e61fd_h.jpg


8485861513_5412624b5f_h.jpg


8485858723_51f062e409_h.jpg


8485856847_bf10b672cb_h.jpg


8486927296_642e893dba_h.jpg


8485839581_f06ecd8c32_h.jpg


8486925572_d8ef596e04_h.jpg


8485824017_e9f09f354d_h.jpg


8485822101_e9d29d7720_h.jpg


8485819459_8d9ec788b7_h.jpg


8486909154_526c9dd95c_h.jpg


You wanna try Tank Trap in an 80? :flipoff2:
8486908210_1b10f928b9_h.jpg


8486906934_65ea6d0f5f_h.jpg


8486905834_a3103d2038_h.jpg


And I received my fair share of carnage too. Nothing serious though. Ended up with a dent in rear quarter panel and almost tore off my mirror. Some of those trails aren't 80-friendly. Need a lot of articulation to avoid sending the body into the walls, and that's something these rigs don't do well out off the box!
picsay-1361227101_zpsd0238e82.jpg


After Hollister I wanted to do something to address the sagging front end after adding all the weight. I think I lost about 3/4” in lift after the bumper and winch install. So I installed a set of 1” Ironman spacers to bring the front up a bit. This suspension is getting old and tired I think. In the near future I plan on getting new 4” springs and shocks and run 37” tires. But for now, this was a good solution.
IMAG1443_zpsbae73b0b.jpg


Sitting level again.
IMAG1447_zpsd561ab0f.jpg
 
Last edited:
Got an alignment after the spacer install as well as a caster reading. Right now I’m sitting at about 0.0~0.1º (I believe the truck has caster bushings installed).
o9_zps4e1a1025.jpg


A few weeks ago we decided to go play in the snow. What an adventure that was. It was our first time wheeling in the snow. Ended up getting buried up to the axles. It was an endless routine of stuck, unstuck, stuck, unstuck. Took us like 5 hours to finally free all three of us. Made it out right before sunset. Nothing like learning snow recovery as a noob!

8498779883_081fcb2d52_h.jpg


8499914552_4192440759_h.jpg


In this photo you can catch a glimpse of the Ironman adjustable panhard in the rear which I added right after the coil spacer up front.
8499948966_355d2e70ef_h.jpg


8505232893_01c9281685_h.jpg


8506340492_f20d2453d8_h.jpg


8506339720_7124fdfff9_h.jpg


8506339068_04c3678e4d_h.jpg


8506338344_ff653e75a6_h.jpg


8506337844_45644103bc_h.jpg


8506337244_aac6c9107b_h.jpg


And here’s where I’ll stop for now; my latest mod. Added this last night (3/6/13). Replaced the small crappy hook with a Master Pull winch-stop. This this thing one bad ass chunk of aluminum!

IMAG1471-picsay_zps59f4b792.jpg


You’ll also notice I changed all the shackles to the metal finish, including the bottle opener. Since I decided to leave the bumper bare steel, I decided this color would go better :)
 
Last edited:
And things currently in the works:

- CB radio install (waiting on antenna mount to arrive). Will post pics when it's all done

- Rear bumper - put down a deposit on Sean's rear bumper. Can't wait for that one!

- 2 days ago I was treated to a waterfall of coolant leaking around the transmission housing. After doing some research online it looks like it's the hoses for the rear heater. I plan on bypassing the rear heater this weekend and will be ripping out the entire unit out from under the passenger seat.
 
Great thread, subscribed. Did you do the PHH replacement?
Thanks! Luckily that's one of the things that the PO did with some good quality hose and constant-torque clamps. Good thing too, that looks like a pain to replace.
 
Good stuff Jose! Your a lucky man getting Sean's bumper. His setup looks great. I wish he lived up north so I could have him install it too!
 
sweeeeeeet build bruh!!!
 
Nice rig! Looking forward to the Monstaliner. Subscribed :popcorn:
 
Last edited:
Awsome build man, I watched all your videos on YouTube pretty awsome spots to wheel. Good luck with the rest of your build. Looking forward to liner application.
 
Good stuff Jose! Your a lucky man getting Sean's bumper. His setup looks great. I wish he lived up north so I could have him install it too!
Thanks man! Funny thing about the rear bumper...I lurked on this site for a while before buying my LC. When I stumbled upon Sean's thread I knew THAT was going to be my rear bumper. I didn't want anything else. It's the nicest rear bumper I've seen to-date. And that reminds me, I need to order a spare rim!

And thanks for the feedback guys, appreciate it :cheers:
 
Nice rig! Looking forward to the Monstaliner. Subscribed :popcorn:
Monstaliner just came up with a couple new colors and I received the samples in the mail a few days ago. One of the new colors could also be a potential option. It's called "Sans Panties" (aka Commando). It's a olive/army green color. I'll get some pics up of the new color next to the WWII OD Green..
 

Users who are viewing this thread

Back
Top Bottom