Builds Evolution of a Land Cruiser: My 80's build thread (3 Viewers)

This site may earn a commission from merchant affiliate
links, including eBay, Amazon, Skimlinks, and others.

Any regrets on filling your fender holes with bondo? I have to fill mine now so I can put that black monstaliner on! Just waiting for Luke to build my bumpers, tie rods and finish up all the baselining and I’ll finely have something good to show... oh and get the leather redone when I get it from Shane.

Bimrunner, just some friendly insight on the filling holes with "bondo", NEVER EVER do it! Not even the tiniest hole. Filler or "bondo" is like a sponge. It absorbs water and swells, then you have failure. Always weld your holes first then after finishing the welds up you should only need a very thin skim coat of filler before primer and topcoat/monstaliner. I have over 18 years experience in the paint/body business so trust me man. If you do it right you only have to do it once. A bedliner material failure is no easy fix. :cheers:
 
Bimrunner, just some friendly insight on the filling holes with "bondo", NEVER EVER do it! Not even the tiniest hole. Filler or "bondo" is like a sponge. It absorbs water and swells, then you have failure. Always weld your holes first then after finishing the welds up you should only need a very thin skim coat of filler before primer and topcoat/monstaliner. I have over 18 years experience in the paint/body business so trust me man. If you do it right you only have to do it once. A bedliner material failure is no easy fix. :cheers:
what are your thoughts on the aluminum tape to patch the holes? I know you can't beat welding them shut but on the Lexus there are a billion holes!

Sent from my iPhone using IH8MUD
 
Aluminum tape works, I did it and it holds fine. However, you will be able to see an indentation. The rough surface hides it a little.
 
I have seen holes "filled" in soo many ways. The aluminum tape will only provide a temporary backing for the hole. The intentions seen where the holes are located is because you have no solid foundation for the monstaliner. This will only last who knows how long. Not trying to bash anyone's methods or techniques, I'm just giving you insight as to what's a permanent resolution to fill holes. I know welding all of those holes is certainly a pain in the arse! I'm about to tear my rig down and de-flare it and weld my holes and monstaliner the whole thing. I'm redoing door jambs, engine compartment, and all. Welding is your best solution. Taping can be another solution however, with temperature change the tape will expand and contract at a different rate than the sheet metal and the flexing of the tape will ultimately end to failure around the hole. Most likely what will occur is moisture will buildup under the monstaliner around the backside and you'll end up with rust issues. Good luck!

~Chris
 
I wonder if anyone has gone the rivet route? some small doublers and small fillers and a few rivets and then you are not stuck using as much bondo.
 
I wonder if anyone has gone the rivet route? some small doublers and small fillers and a few rivets and then you are not stuck using as much bondo.


Now I wish I would have thought of that since I lined with Al's, that would have been much quicker and cost less!
 
I used little plastic plugs in the holes with 3M Panel adhesive. Was going for cheap and functional. I used foil tape in a couple spots at the rear where there were square holes. I would go that way for all the holes if doing it again.

image-2764611807.jpg
 
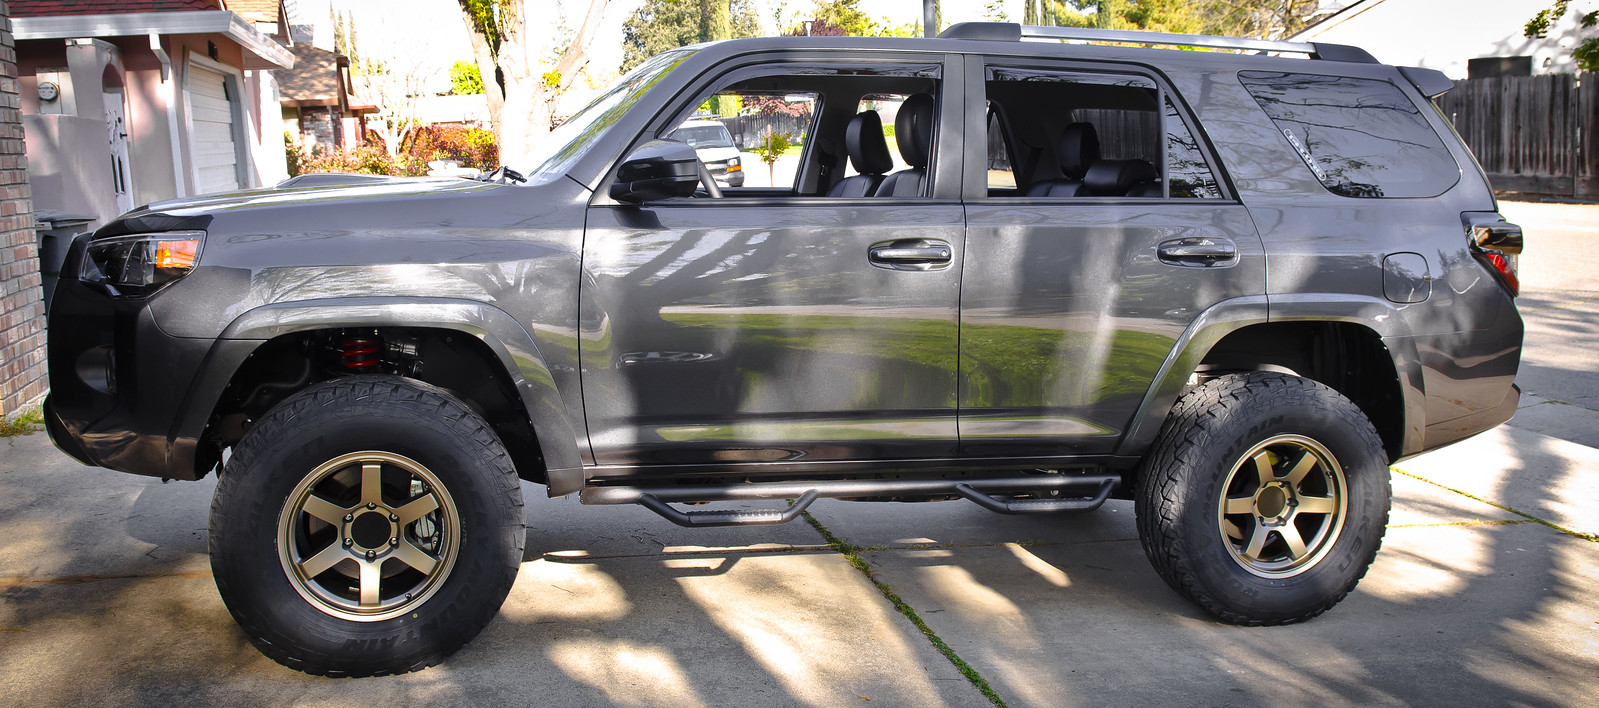
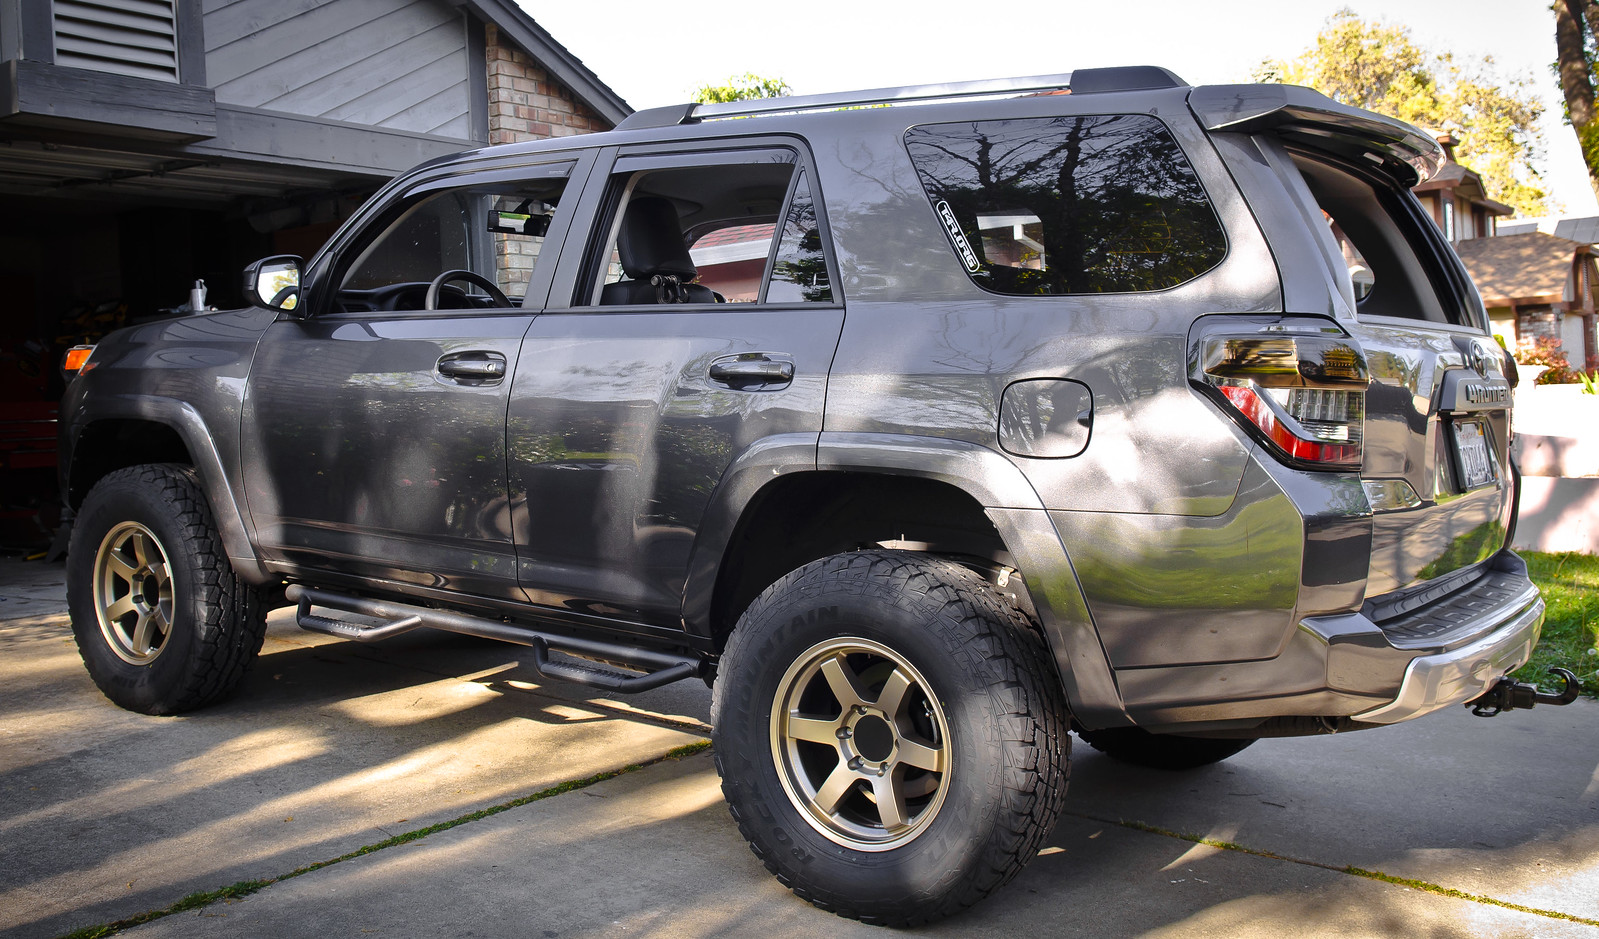
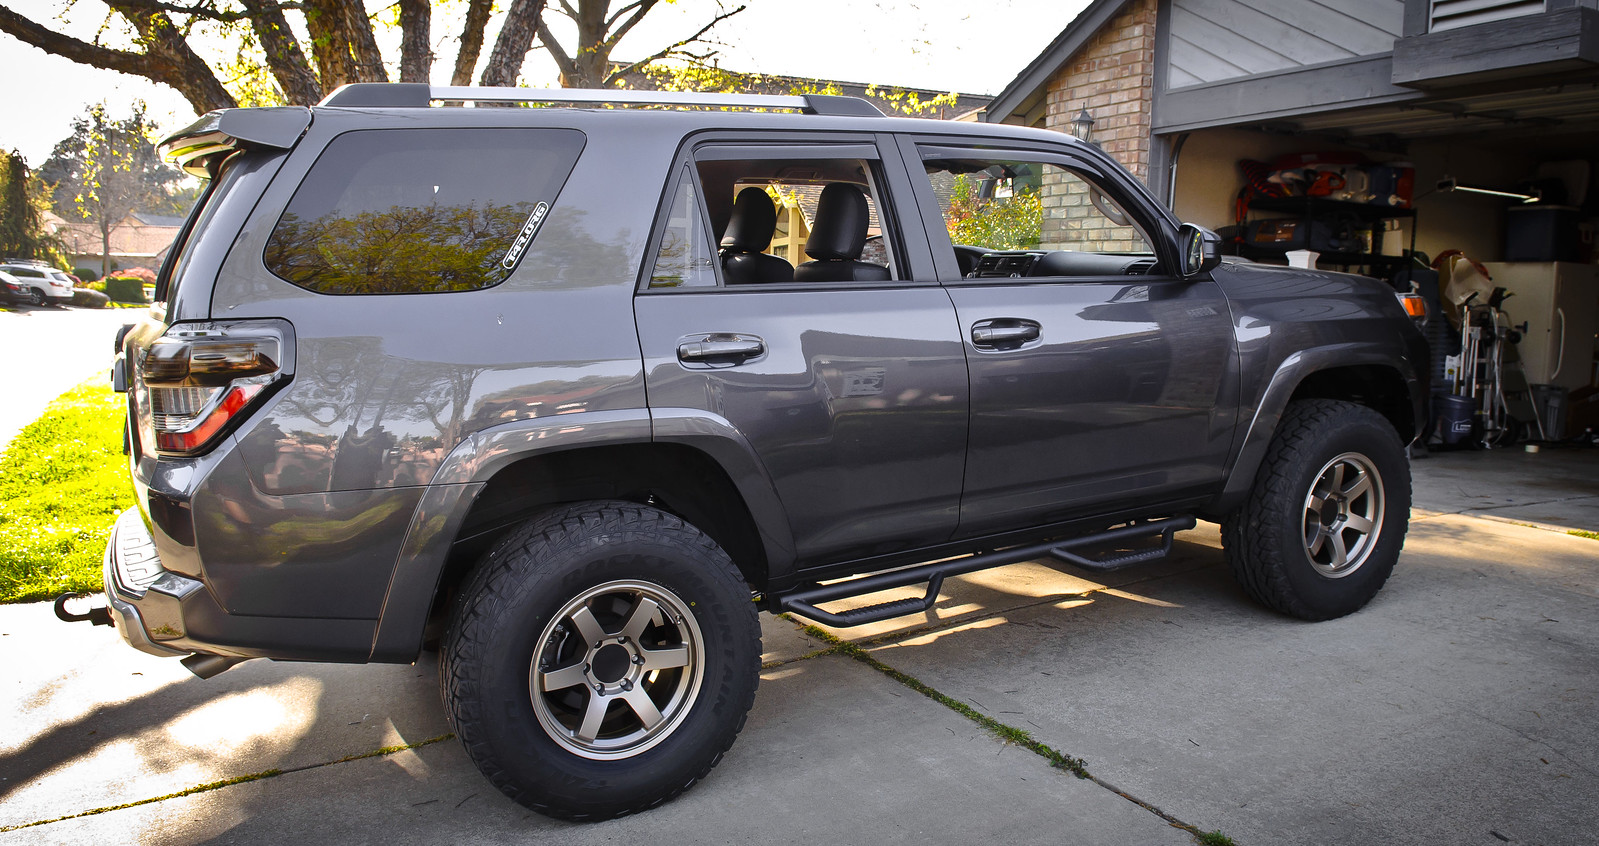
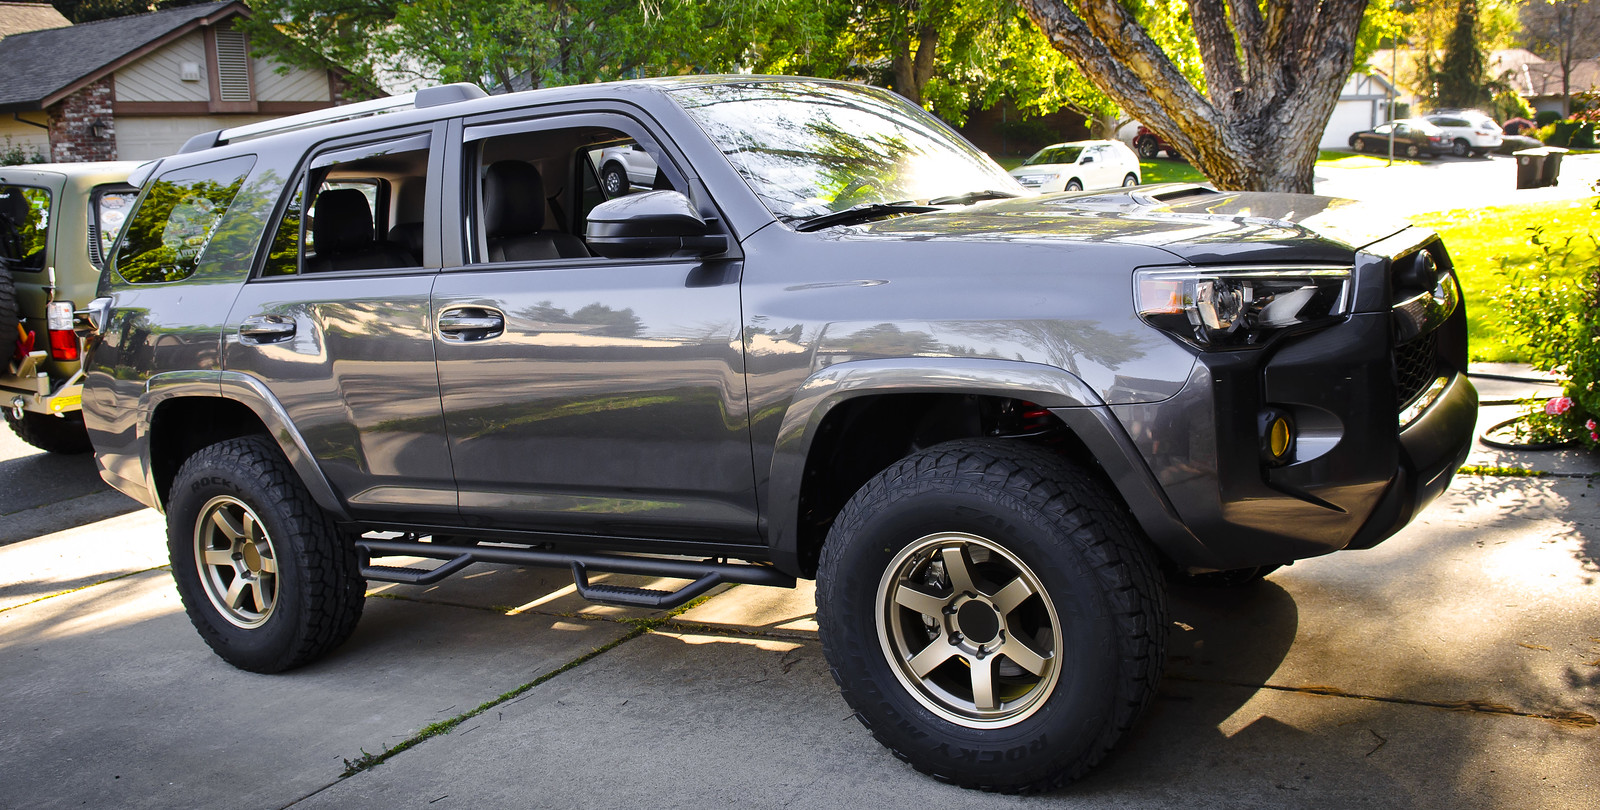
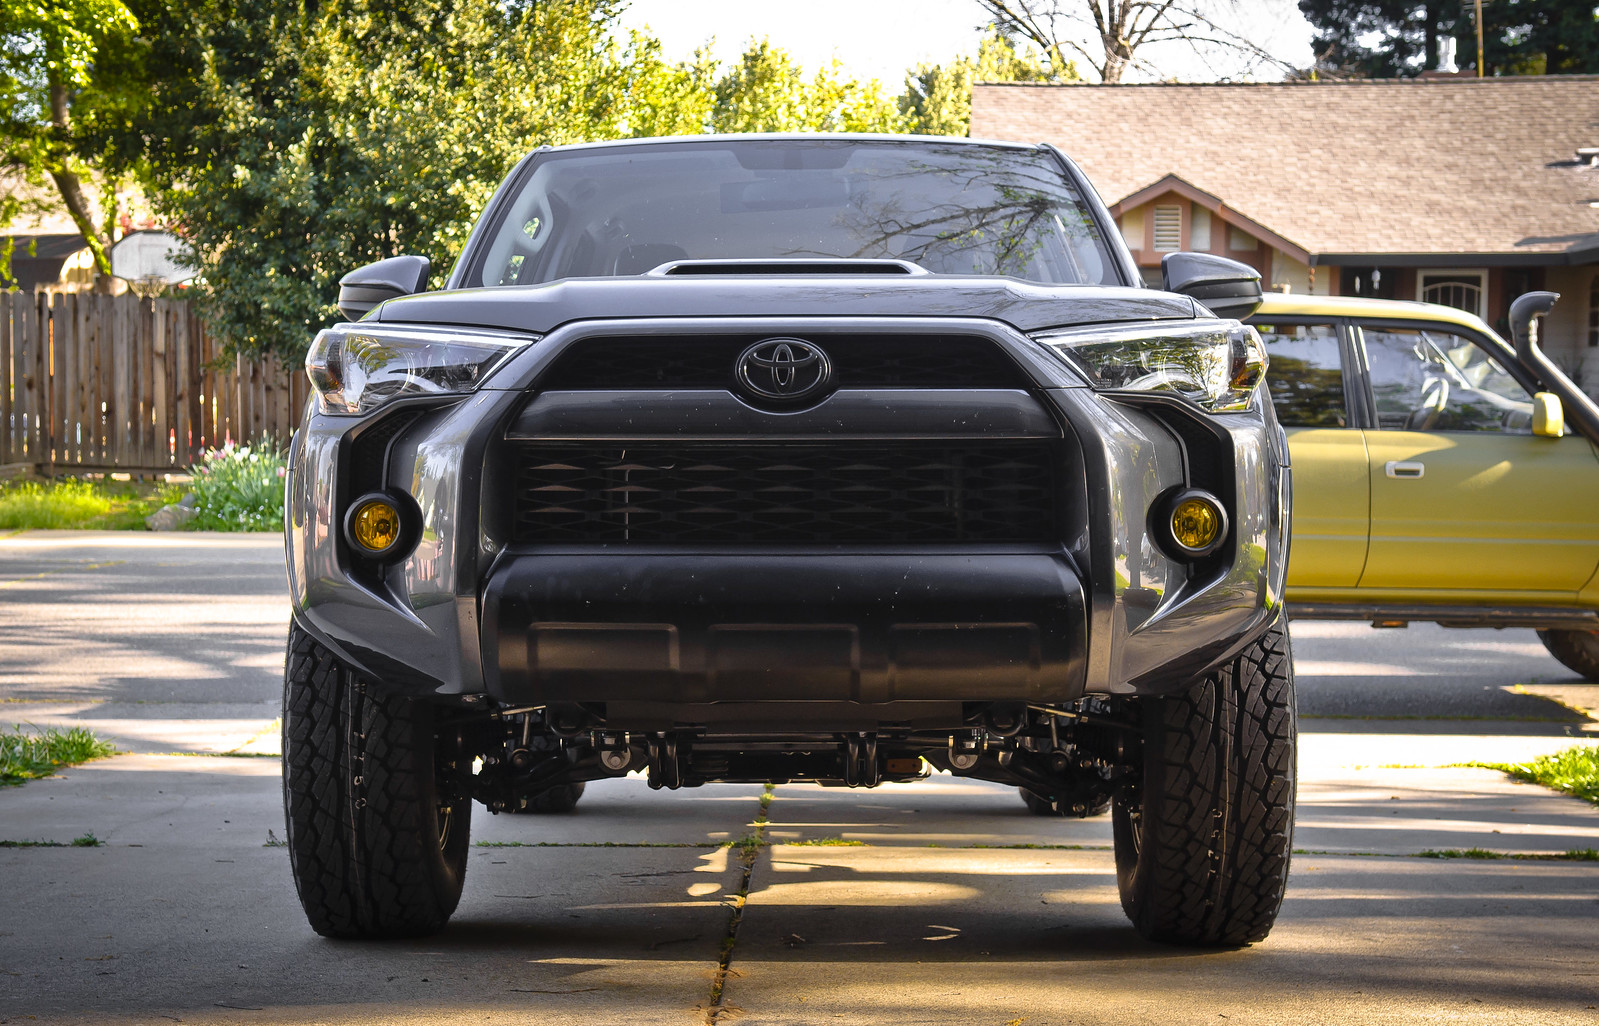
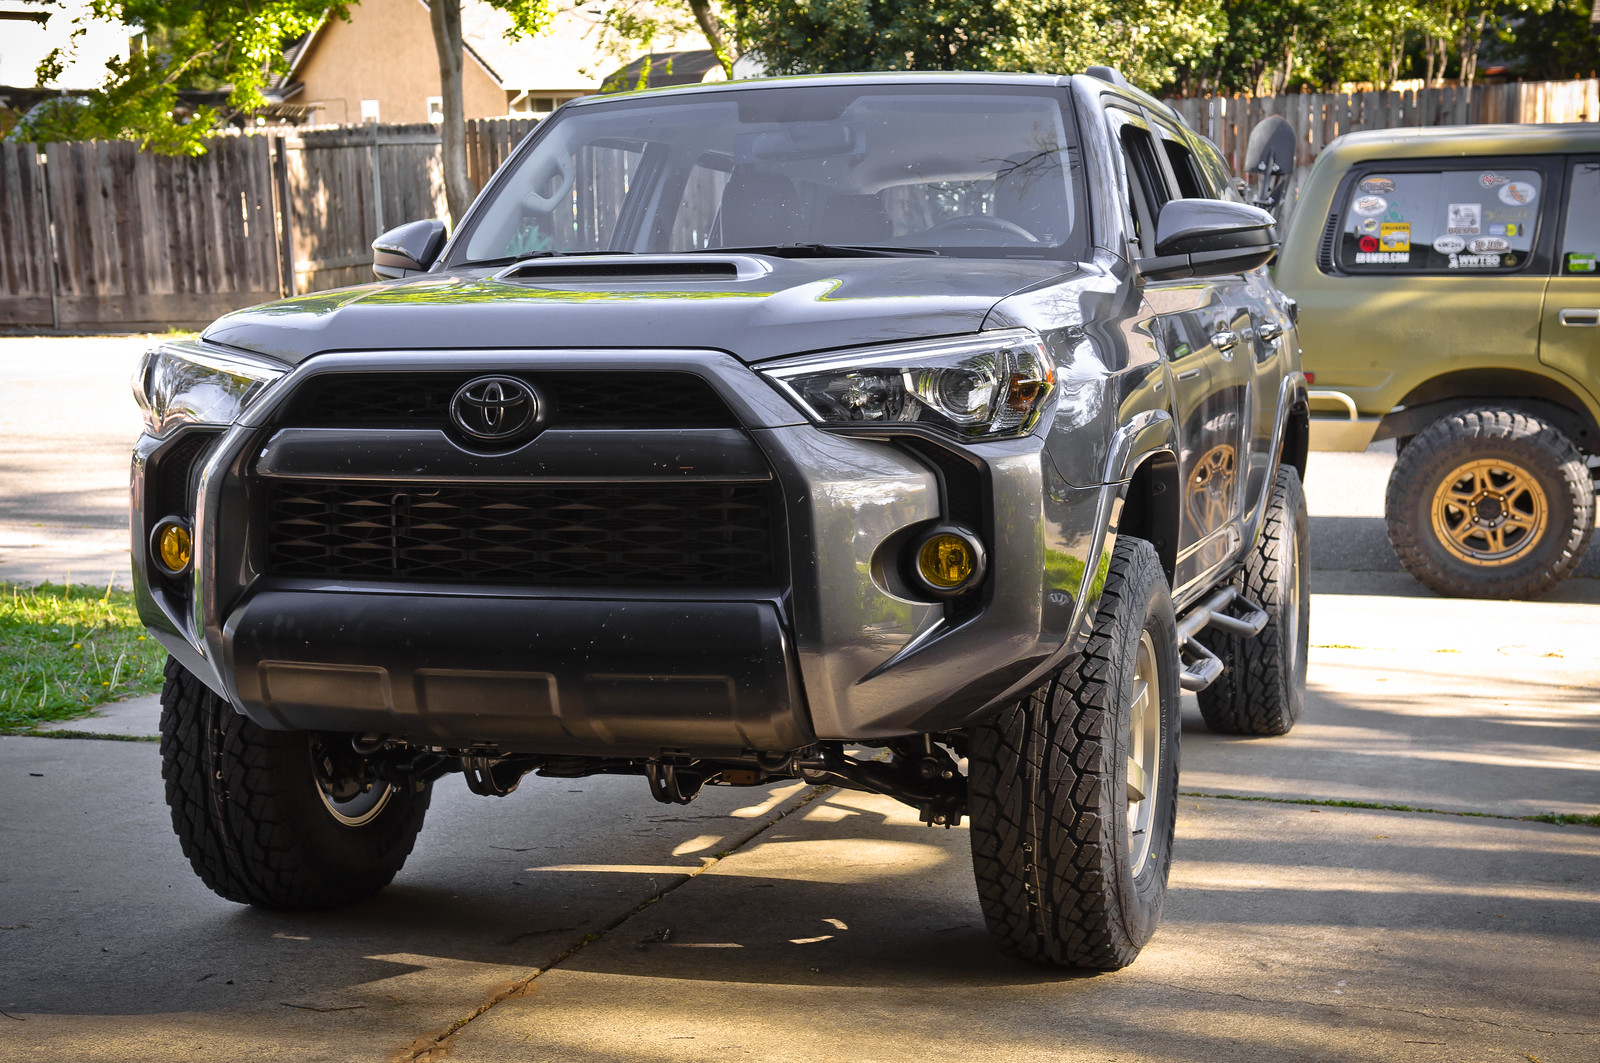
Since I already started putting pics of the 4Runner here, I might as well follow through with the project. Got the lift done, here's a copy/paste from my thread on T4R


IT'S LIFTED!!!

Spent about 8hrs today installing the lift. I thought my IFS days were over. Such a pain working on IFS lifts. My Land Cruiser's solid front axle has me spoiled. Anywho, here's a list of the parts I used:

Toytec Adjustable "DIY" coilovers, $590
http://toyteclifts.3dcartstores.com/Front-adjustable-coil-over-kit-with-Bilstein-5100s_p_325.html

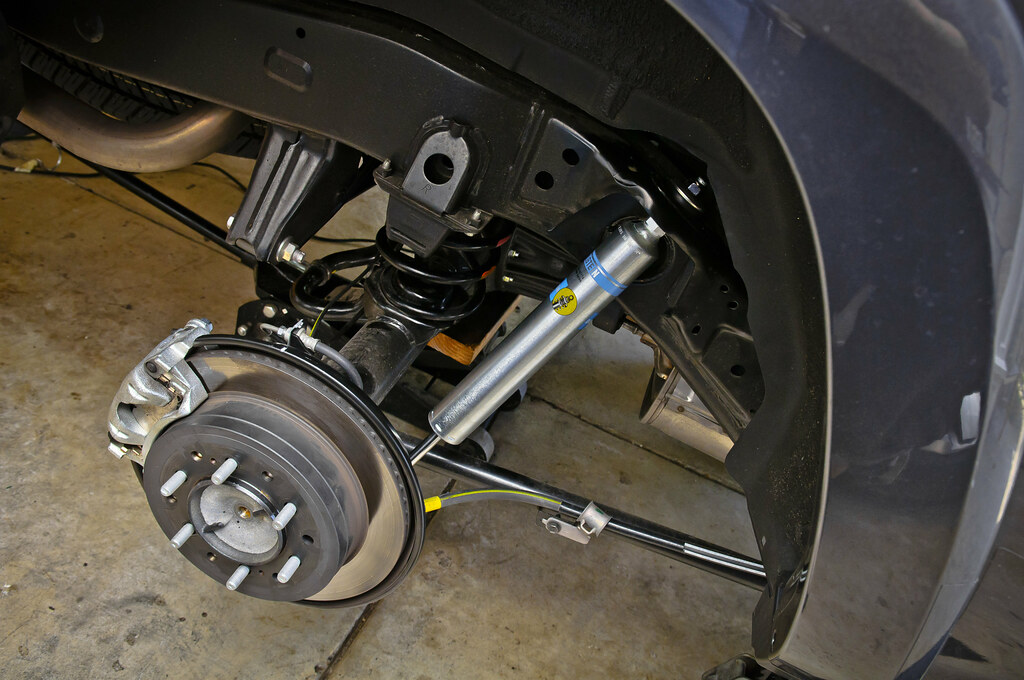
Matching Bilstein 5100 shocks for the rear, $199, but I got them on eBay for $150 shipped
http://toyteclifts.3dcartstores.com/Bilstein-5100-Rear-shocks-for-FJ4Runner_p_269.html

1.5" Rear spacers, $89
http://toyteclifts.3dcartstores.com/Rear-15-lift-Black-Spacers-Poly-for-FJ4Runner_p_165.html

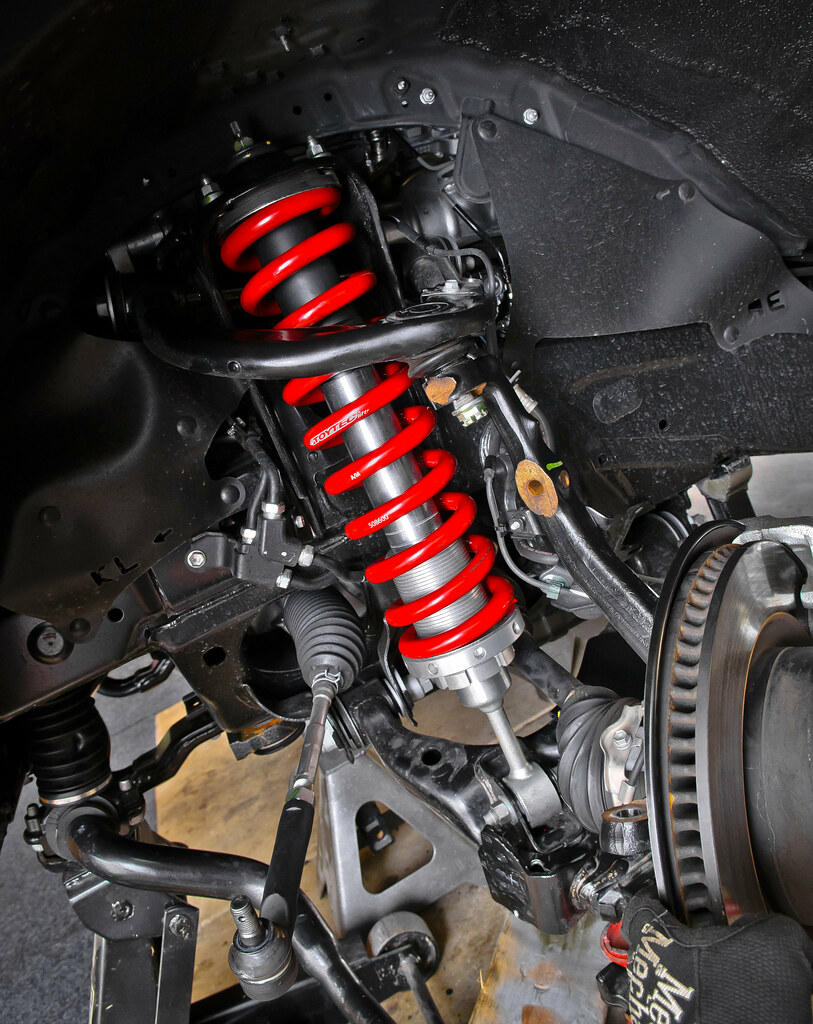
To remove and install the coilovers I ended up removing the tie-rod and separating the spindle from the LCA. That gave me plenty of room. The hardest part of the whole project was setting the lift height in the front. Took a lot of measuring, jacking up, removing the wheels, adjusting, repeat. I think I'm finally happy with the look. Getting an alignment tomorrow. Only quirk is the driver side rear is sitting almost 1" higher than the passenger side rear, not sure why?! Well, onto to the pics:

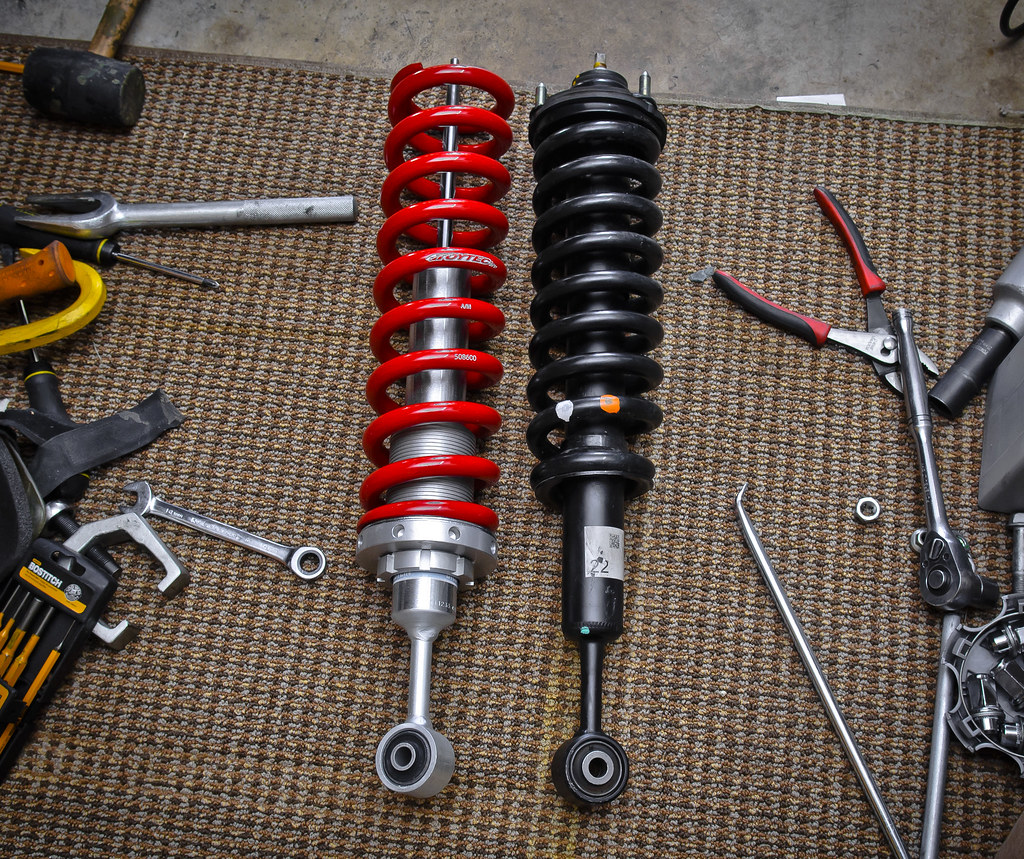
Toytec coilover before assembly and the factory strut
13395805815_44e91b8936_b.jpg


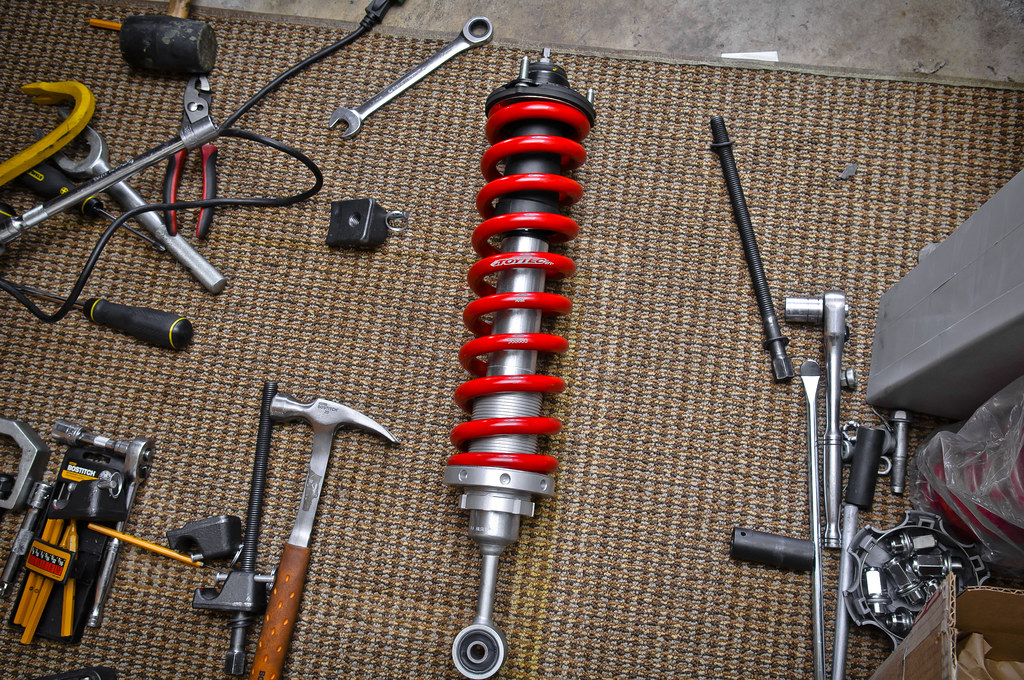
Compressing and disassembling the OEM strut. The Toytec kit uses the stock top plate and hardware and is essentially the same coilovers as the Toytec "Ultimate" kit, just a bit cheaper since you do the labor yourself.
13395804555_02c5928d1c_b.jpg


Toytec coilover assembled using the OEM top plate
13395935323_4221cb1012_b.jpg

13395935323_4221cb1012_b.jpg


Shoved into place! You can see my hand pulling the spindle/rotor assembly out the way. I don't see how you could get this thing in there without disassembling the spindle/LCA
13395933183_a33dfe742b_b.jpg


And the rear, nothing exciting here. The back suspension was a piece of cake compared to the front
13395798755_6995619ae5_b.jpg


And final shots! I had a bit of rubbing in the front fender liner. Did the "liner mod" trick and will trim a bit of the bumper away. That should take care of any rubbing. Trimming should be very minimal.

13395930493_7e0add0c77_h.jpg


13395929793_81d2e1a03f_h.jpg


13395928373_d7197cba92_h.jpg

13396156444_cb3108ffd8_h.jpg


13395926513_92de2ac4a7_h.jpg


13395792195_3968bcd379_h.jpg

 
Last edited:
Looks Badass
 
That is pretty effing sweet
 
Looking good dude! I dont know I still like the 2011 front better than the '14 but still a sweet truck. What kind of gas mileage are you guys getting? We have pretty much settles on about 18.1mpg with city/highway (mostly city though).
 
Looking good dude! I dont know I still like the 2011 front better than the '14 but still a sweet truck. What kind of gas mileage are you guys getting? We have pretty much settles on about 18.1mpg with city/highway (mostly city though).

Thanks! I was convinced I was getting a 2010~2013 model until I saw the 2014s in person. Didn't really like them at first but in person it's a whole different animal. Love how aggressive the front end is. But I still have a soft spot for a 2013 Trail with the black trim and smoked headlights/taillights. Those are really nice! MPGs, we've been averaging out about 18 too, split evenly between city/highway driving. On long highway trips I can easily hit 21 with cruise control. I'm sure that number will drop a bit with the bigger tires now. I wish the 80 had this engine!

Thanks everyone else :)
 
See now the one long trip we have taken we only got 20mpg and that was doing 70ish from Carmel to Sac? Going to reset and do again when we head down there on Wednesday and see what we get.
 
Jose,
I love your green 80, it looks awesome. I looked at the 4runner, even in person, looks like way too much plastic, too futuristic, something.

If you parked yours side by side with your 80, I'd choose the 80, any day of the week.
 
Great looking 4runner, wish I could get some sliders like that for the 80, those steps would be nice.
 
Jose,
I love your green 80, it looks awesome. I looked at the 4runner, even in person, looks like way too much plastic, too futuristic, something.

If you parked yours side by side with your 80, I'd choose the 80, any day of the week.

Thanks! I agree. The new 4Runners look like something from another planet parked next to a twenty year old Land Cruiser. They're both awesome. But if I had neither and money was no object, it would be hard deciding what to build for a serious trail toy; FJ80 with a new V8 power plant or a 5th gen 4Runner with solid front axle.

And they've come a loooooooong way. Just look at the size difference compared to the 3rd gens

Icz3Ci6.jpg


Great looking 4runner, wish I could get some sliders like that for the 80, those steps would be nice.

Thanks! The steps are really nice, but they're not sliders. These bolt to where the factory running boards go, into the body. Sliders are a bit more expensive than these steps I bought.
 
Thanks! I agree. The new 4Runners look like something from another planet parked next to a twenty year old Land Cruiser. They're both awesome. But if I had neither and money was no object, it would be hard deciding what to build for a serious trail toy; FJ80 with a new V8 power plant or a 5th gen 4Runner with solid front axle.

This... I have recently been dreaming of a SAS for my runner! Ahhhhh! I to, am torn between the 80 and Runner. Now I am having serious dilemmas when choosing which to drive on the trails! I like the lift Jose! Those wheels look good in that color. Love it.
 
This... I have recently been dreaming of a SAS for my runner! Ahhhhh! I to, am torn between the 80 and Runner. Now I am having serious dilemmas when choosing which to drive on the trails! I like the lift Jose! Those wheels look good in that color. Love it.

Thanks Ben! I think if anybody is gonna do a SAS on a 5th gen it should be you. It's only the next logical step in your bad ass build. Is this something Luke could do - does he do that type of fabrication? I say DO IT. In the end it's only money and sheet metal :)
 

Users who are viewing this thread

Back
Top Bottom