- Thread starter
- #2,341
SHOCK RELOCATION
In preparation for the rear swaybar I'll be starting soon, I decided to do a quick fix on the shock mounts. In the back I currently have 2.5" emulsion Radflos. They are a 10" shock. Due to the height of my rig, these shocks are too short. I quickly purchased these without doing some homework and measuring beforehand.
I should clarify. 10" shocks provide plenty of travel for the rear suspension on the 80. The problem is the mounting point. At ride height, I have about 7" of shock shaft showing which means I only get about 3" of down travel. This is no good.
The easy solution would be to simply space them down with a steel block up top. But my lower mounts were trashed. I mean they were destroyed. If it weren't for the shock protectors I installed a while back my expensive Radflos would be in bad shape too. The factory mount hangs way too low and is the first thing come in contact with a rock. The mounts work fine for a stock height rig but once you get into the 3~6" lift range, you end up having to get too long of a shock to really take advantage of the suspension travel.
So - I redid the lower mounts. Started by removing the coils and checking suspension travel. With the shock unbolted, I put a tire back and stuffed it into the fenders. Here there is about 1" before the tire contacts the inside of the fenders (they have been previously cut as well).


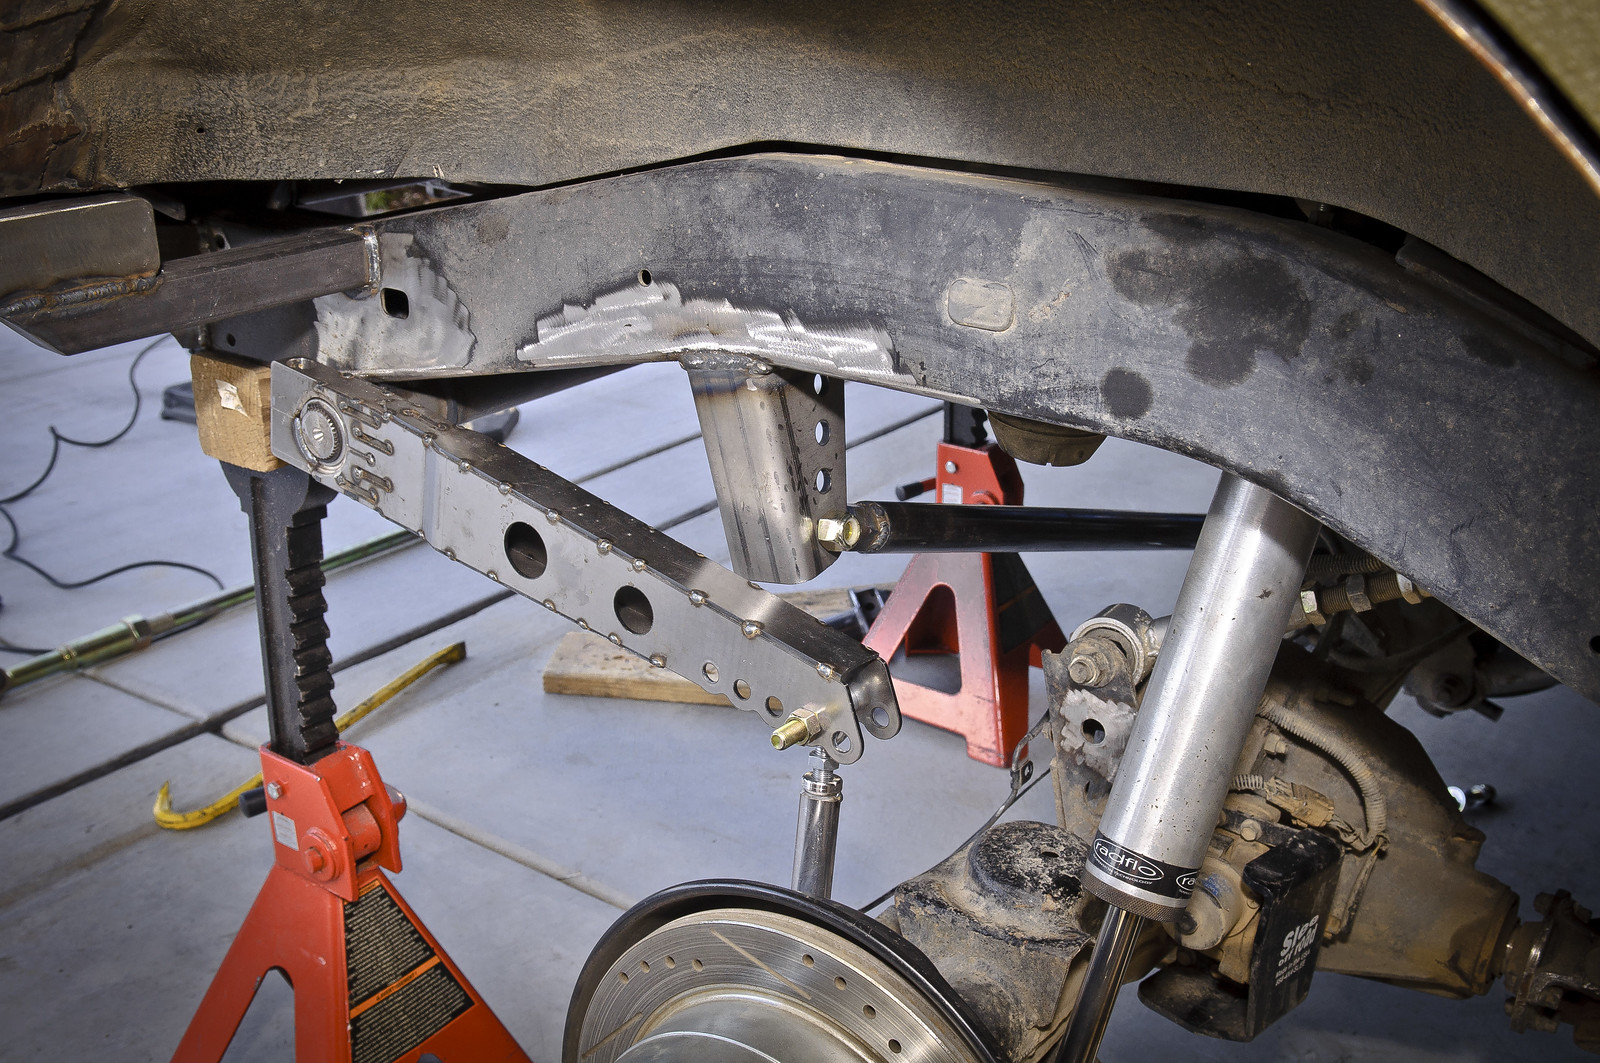
With the tire fully stuffed, this is where the shock should be. As you'll notice, if the shock were still on the stock mount I would have about 3" of shock shaft exposed. This means I'm not effectively using the travel in the shocks.

I purchased some cheap shock mounts from Barnes. These worked out great. Here they are tacked in place. They are angled to match the angle of the shocks in the factory location. Best of all, it changes the orientation of the lower mount. I really hated that pin mount. Makes removal a huge pain in the ass as the heim bearing would seize to the pin. This should also better protect the shocks from rocks as it sits a good bit higher.

Here is the other side at full droop. This is the suspension's 'natural' droop with no downward force applied to it. At this point my OME 5" Comp coils are also completely unseated. I will need to build a spring retainer and perhaps add a limit strap to avoid damaging the shocks at full extension. And again, if the shocks were in the stock mount they would be too short, limiting down travel by about 3".

Lastly, I built some extended bumpstops because the ones I had weren't really doing anything. These measure about 7.5" total length and make contact the same time the built in bump stop on the Radflos start to compress.
Overall pretty quick and easy project. Waiting on some misalignment spacers for the shocks before I can wrap it all up. This is basically a temp fix for when I decided to redo the rear suspension. That will most likely involve moving the shocks to a different location all together.

In preparation for the rear swaybar I'll be starting soon, I decided to do a quick fix on the shock mounts. In the back I currently have 2.5" emulsion Radflos. They are a 10" shock. Due to the height of my rig, these shocks are too short. I quickly purchased these without doing some homework and measuring beforehand.
I should clarify. 10" shocks provide plenty of travel for the rear suspension on the 80. The problem is the mounting point. At ride height, I have about 7" of shock shaft showing which means I only get about 3" of down travel. This is no good.
The easy solution would be to simply space them down with a steel block up top. But my lower mounts were trashed. I mean they were destroyed. If it weren't for the shock protectors I installed a while back my expensive Radflos would be in bad shape too. The factory mount hangs way too low and is the first thing come in contact with a rock. The mounts work fine for a stock height rig but once you get into the 3~6" lift range, you end up having to get too long of a shock to really take advantage of the suspension travel.
So - I redid the lower mounts. Started by removing the coils and checking suspension travel. With the shock unbolted, I put a tire back and stuffed it into the fenders. Here there is about 1" before the tire contacts the inside of the fenders (they have been previously cut as well).
With the tire fully stuffed, this is where the shock should be. As you'll notice, if the shock were still on the stock mount I would have about 3" of shock shaft exposed. This means I'm not effectively using the travel in the shocks.
I purchased some cheap shock mounts from Barnes. These worked out great. Here they are tacked in place. They are angled to match the angle of the shocks in the factory location. Best of all, it changes the orientation of the lower mount. I really hated that pin mount. Makes removal a huge pain in the ass as the heim bearing would seize to the pin. This should also better protect the shocks from rocks as it sits a good bit higher.
Here is the other side at full droop. This is the suspension's 'natural' droop with no downward force applied to it. At this point my OME 5" Comp coils are also completely unseated. I will need to build a spring retainer and perhaps add a limit strap to avoid damaging the shocks at full extension. And again, if the shocks were in the stock mount they would be too short, limiting down travel by about 3".
Lastly, I built some extended bumpstops because the ones I had weren't really doing anything. These measure about 7.5" total length and make contact the same time the built in bump stop on the Radflos start to compress.
Overall pretty quick and easy project. Waiting on some misalignment spacers for the shocks before I can wrap it all up. This is basically a temp fix for when I decided to redo the rear suspension. That will most likely involve moving the shocks to a different location all together.
Last edited: