Builds Hygge's Sawdust FJ62

This site may earn a commission from merchant affiliate
links, including eBay, Amazon, Skimlinks, and others.

If you have to buy a tool for this I wouldn't necessarily recommend buying that tool. I already had it on hand so made it work. If I hadn't had it already I would have searched out and bought a spanner. Good luck with the reseal, mines still going strong.
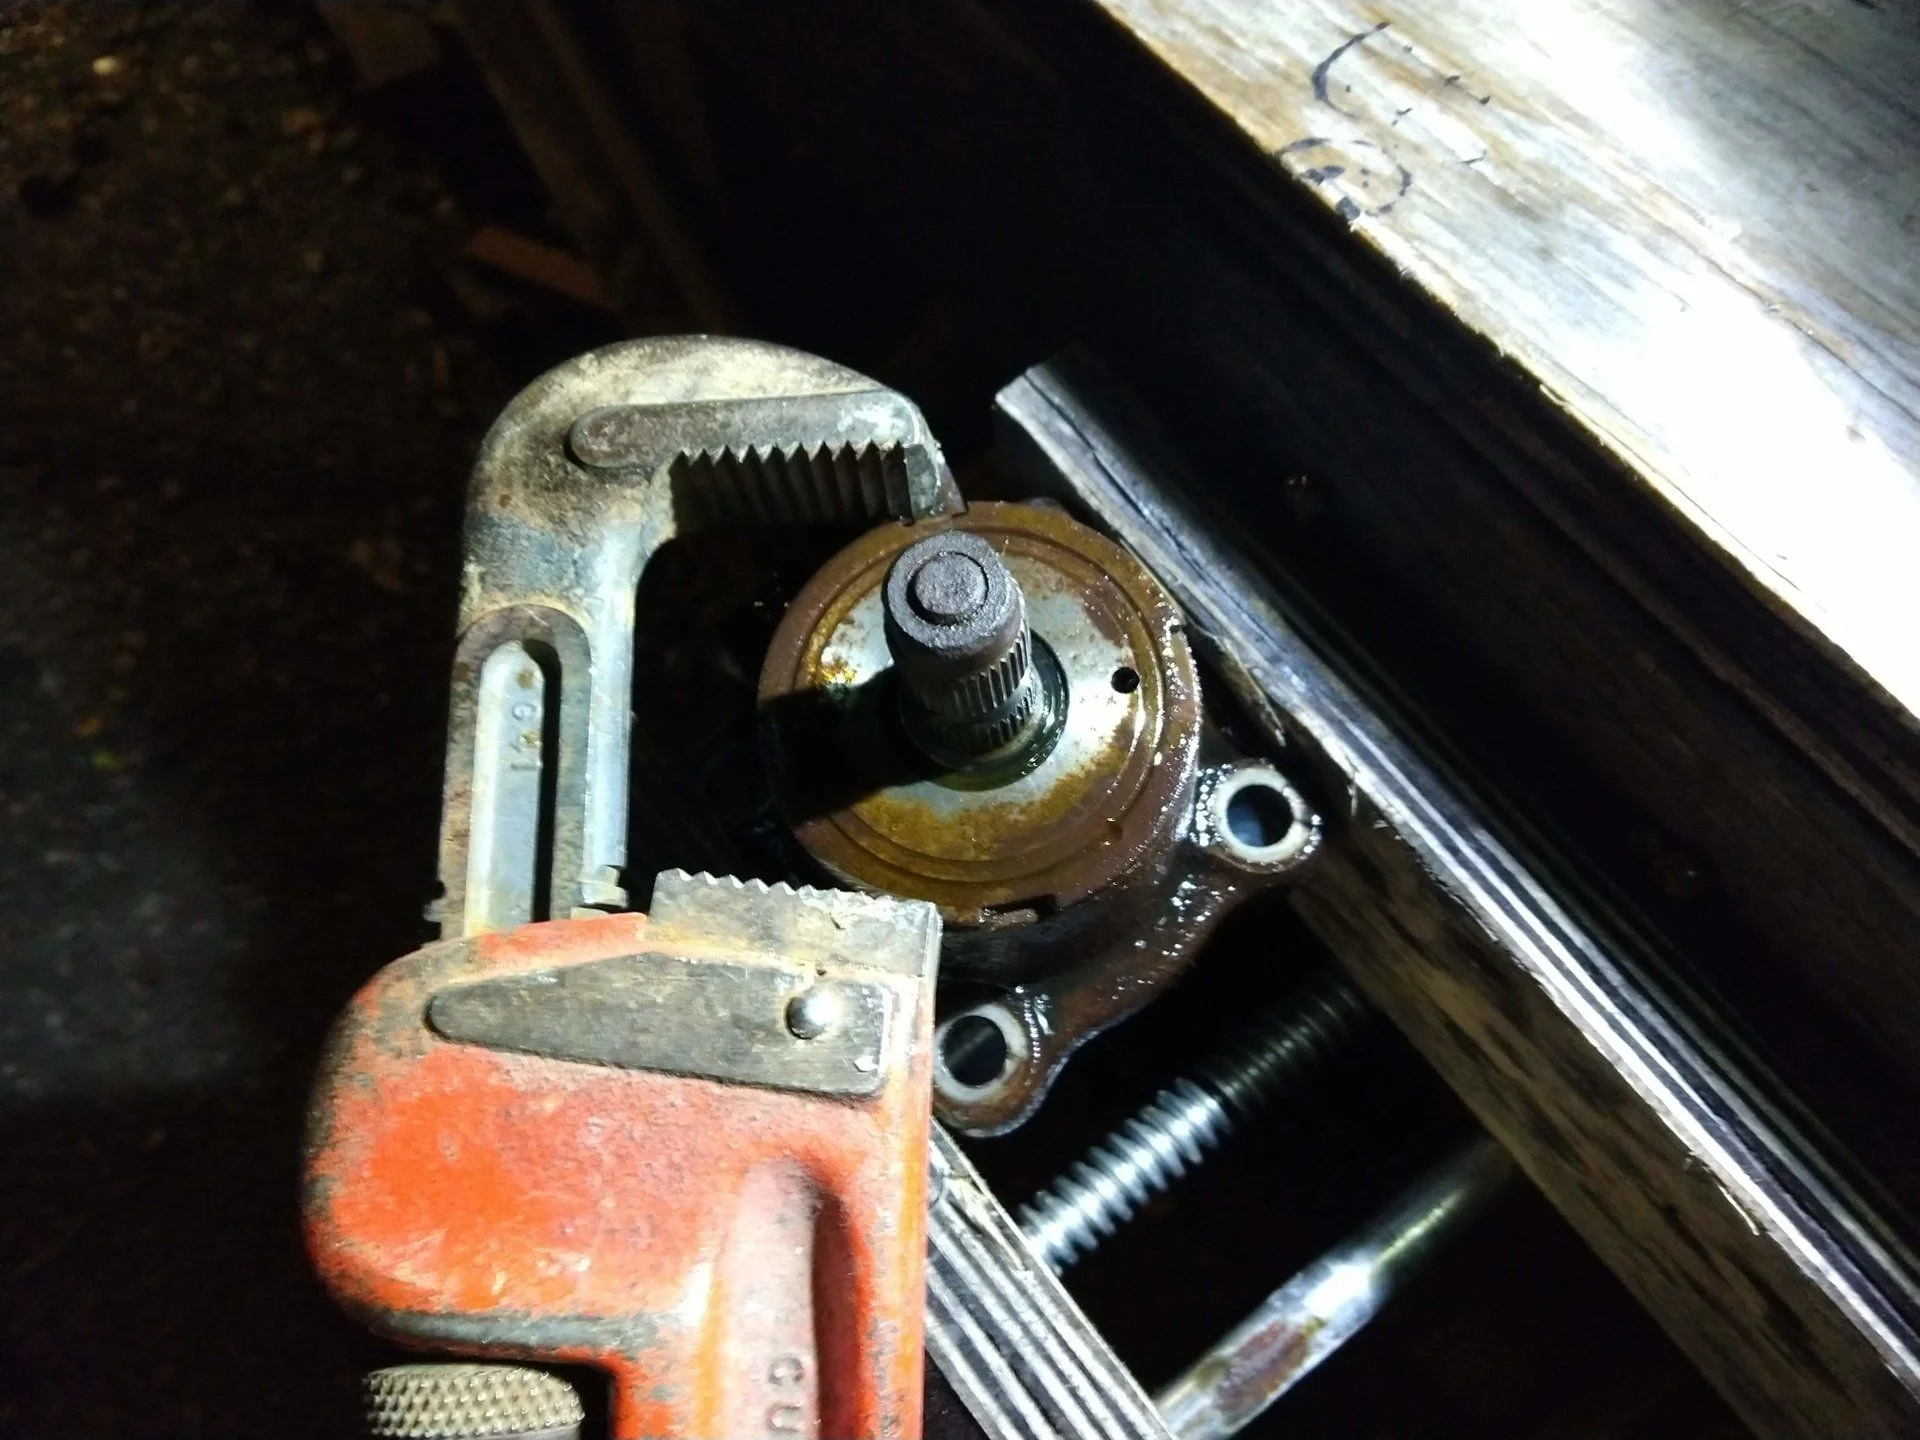
Thanks @ufg8r you're part of my inspiration for doing the reseal! Yeah I don't have a spanner wrench and saw a few on Amazon that might work.

I wouldn't mind finding one at an estate sale, but I don't have time to go driving around the Bay Area to find a wrench. I'll make due with whatever I can to get the project completed (hopefully by next weekend ).

Once this is done, I'll be hopping over to my Aux Trans Cooler project .

@Michael Hanson great last name. Mine is Hansen!
 
Hi, Nice work, great American made tools can be picked up cheap at estate sales. A large vise also is Very helpful. Mike
No large vise yet, but I can definitely see how a large one would be helpful on a project like this. Right now I have a small 6" woodworking vise that will have to do for the time being.

One limitation that I have to constantly workaround is that my house has no garage . Instead I have a shed. So any time I want to do work I have to pull everything out from the shed. It is real annoying.
 
Nice work dude. Glad you didnt drop the tank.
 
Hitting a little bit of a wall here. Any help is appreciated on my Power Steering Gear Box Rebuild.

Per step one of the FSM - I drained as much of the ATF as possible. I did this by rotating the pitman arm back and forth. This caused quite a bit of ATF to drain out both the In and Out valves on the housing.

Use a few pieces of cardboard and lots of paper towels for this step.

Next, I was able to use my newly acquired 32mm socket to get the Nut off of the Pitman Arm. I found out that the Puller I have for the pitman arm is a little bit too small, so I'll have to get a larger one. I've read that you don't need to take off the pitman arm... But trying to follow the FSM and probably a good idea to get a pitman puller that can actually take the arm off.

IMG_20190116_201935825.webp


IMG_20190116_201928908.webp
 
Next step, per the FSM I removed the adjust screw lock nut and four nuts on the End Cover.

The FSM says to remove the End Cover by turning the adjusting screw clockwise. But that didn't do anything for me. Since I haven't been able to pull off the pitman arm or move the adjusting screw, I decided to tackle the Worm Bearing Adjusting Screw Lock Nut and Worm Bearing Adjusting Screw. This is where I am stuck and not really sure on the next step.

See image.

1. It looks like there is an exterior SST required to remove the lock nut ( SST PN # 09617-60010 ). Someone with welding skills and metal work facilities could probably make this, but I have neither. Anyone know a sufficient replacement that could get the job done? I was about to try vise grips, but don't want to damage the lock nut.

2. Step 6 alludes to Removal of the Worm Bearing Adjusting Screw, this requires a special spanner that looks to be about 1 3/4" in diameter. The SST PN# 09616-30020. I am weary of going online to buy some random spanner wrench that might not have that capacity or that might have the little pinchers that will not fit in the small holes.

Any ideas on a good aftermarket spanner wrench and or lock nut wrench. I think once I get passed these two ( and get a larger pitman arm puller), I will be in the clear to disassemble the unit.

Thank you for suggestions !!

IMG_20190116_204935173.webp
 
Here are the sections of the FSM where I am stuck for reference

Screen Shot 2019-01-16 at 9.07.26 PM.webp
 
Dropped by my local Oreilly and picked up a rental pitman arm puller, used my 17mm wrench until I had to swap over to my Pipe Wrench which had more leverage. Probably messed up the rental ( it was free), but maybe they won't take it back after the pipe wrench bit into it.

It worked though - the Pitman Arm is officially off.

I also ended up using the Pipe Wrench to get the Worm Drive Lock Nut off. Pretty handy.

This opened things up for me tonight and allowed me to get everything broken down.

Still have not figured out a good way to separate the Worm Drive Lock Nut from the Worm Bearing Adjusting Screw - but everything is apart.

I counted 42 balls, I've read there should be 44. Its possible two are hiding inside of the Worm Drive... I guess I'll have to take that apart tomorrow and find out.


Great Job on the steer box rebuild. That thing was far to scary for me to rip into. I sent mine to West Texas only to have it come back leaking within a weak. I took it off and brought out to Georg in Stockton and he swapped out a washer or nut or I don;t know what and it's all good again.

Also dig the build so far. Let's meet up for a cruisers and coffee sometime. My bro in law lives right in your hood so I'm over that way pretty regular.
 
@joebattle1 Yeah, I've basically decided that there is no part of this truck that I am unwilling to take apart. I figure its worth the investment to buy all of these random tools, so next time something breaks ( or if I buy another Cruiser), I will be all set. Plus I am learning a ton as I go through the process of finding the parts, sourcing used or OEM. I am not doing everything the FSM-way, but F-it, I am trying my best.

Appreciate the kind words !!

Yes, I've been wanting to get a Bay Area 60s meetup ( or just Toyota in general). I went to last summer's swap meet in Petaluma. The Pacific Mountain group meets up in Santa Rosa which is unrealistic for me during the work week or hard for me to do with a 1.5 year old.

Let me know when you are in Marin and we can meetup for sure!!
 
(You guys should meet up to go off-roading, not Starbucks)

:flipoff2:
 
@cruisermatt when are you going to come out to CA next? Didn’t get to see your ride last time . And realize it was under the knife when I was in town.
 
@cruisermatt when are you going to come out to CA next? Didn’t get to see your ride last time . And realize it was under the knife when I was in town.

Nothing planned... I’d love to road trip my Cruiser there, run the Rubicon, Dusy, and Fordcye and drive it home, that’s probably a bit of a pipe dream though.
 
Got some decent work done last night .


I think I am 85% there just have the dreaded portion where I try and put it all back together .

The two Teflon rings in the worm drive (white with green spreckles) we're a little loose which is a commonly noted problem .

Guess we just have to wait and see if they pose any significant issues while I put everything back together .

Used various sizes sockets to pound in the dust seals .

Getting the C-Clip out was not too bad. Had to use the heart shape on the Teflon ring to get it to sit against the o-ring. Hope this works out alright.

IMG_20190118_204855137.webp


IMG_20190118_223807010.webp


IMG_20190118_233136935.webp


IMG_20190118_233708509.webp
 
Spent some time getting all the seals back in and decided it would be good to get this repainted. It seems most people are rebuilding and THEN painting. I am getting it ready first and after painting will finish rebuilding.

IMG_20190120_151318777.webp


IMG_20190120_154749004.webp


IMG_20190120_152707479_HDR.webp


IMG_20190120_152712782.webp
 
It was dark and getting cold. But if I don't get this done it will never get done.

First used some Rust-Oleum Automotive Primer followed by some bright red Rust-Oleum. Borrowed my wife's hair dryer to speed up the process since it was below the 50 degrees requested by the instructions .

IMG_20190122_203613943.webp


IMG_20190122_203621643.webp


IMG_20190122_203635196.webp


IMG_20190122_210622527.webp
 
Getting ready to put everything back together.

One question I came up with is what is the correct MP Grease for the Steering Gearbox?

In Step 1: It says to apply MP Grease to Bushing, Needle Roller Bearing and Oil Seals.

In Step 4: It says to apply MP Grease to needle bearings

In Step 6: It says to apply liquid sealer to the gasket and end cover

Should this be the same MP Grease used for Knuckle Rebuilds?

Like in this list... Chewbacca's Birfield Grease Guide

What kind of "liquid sealer" do you think the FSM is referencing for Step 6 - Toyota FIPG?

Thanks for the thoughts... I am probably being anal and over thinking this ( like I usually do).

Screen Shot 2019-01-23 at 8.36.43 PM.webp


Screen Shot 2019-01-23 at 8.39.59 PM.webp


Screen Shot 2019-01-23 at 8.37.07 PM.webp
 
Curious if you think these count as Sliders. They came with the truck.

They are burly looking and are welded to the frame. But I wonder if they are too far away from the frame to be considered sliders. Likewise, if I cut them down slightly and made them closer to the frame could they perform as sliders?

 
I used to have those many years ago. They are thin wall and the way they are mounted gives them
no strength. Steps not sliders.
 
I started to get to the task of cleaning up all the old grime that had accumulated or gotten stuck to the various parts of the Exhaust.

The Exhaust Intake was pretty gross.

It was fun getting a wire wheel and a paint scraper onto the engine block to clean up the old exhaust manifold gasket. I felt like Mary Poppins.

View attachment 1816680

View attachment 1816681

View attachment 1816682
Thank you for posting these pictures. I’m getting ready to dive in and do the intake/exhaust manifold gasket. I have an FSM which I will read first. Anything you learned while doing this that would help me that wouldn’t be readily apparent by reading the manual?
Thanks
 

Users who are viewing this thread

Back
Top Bottom