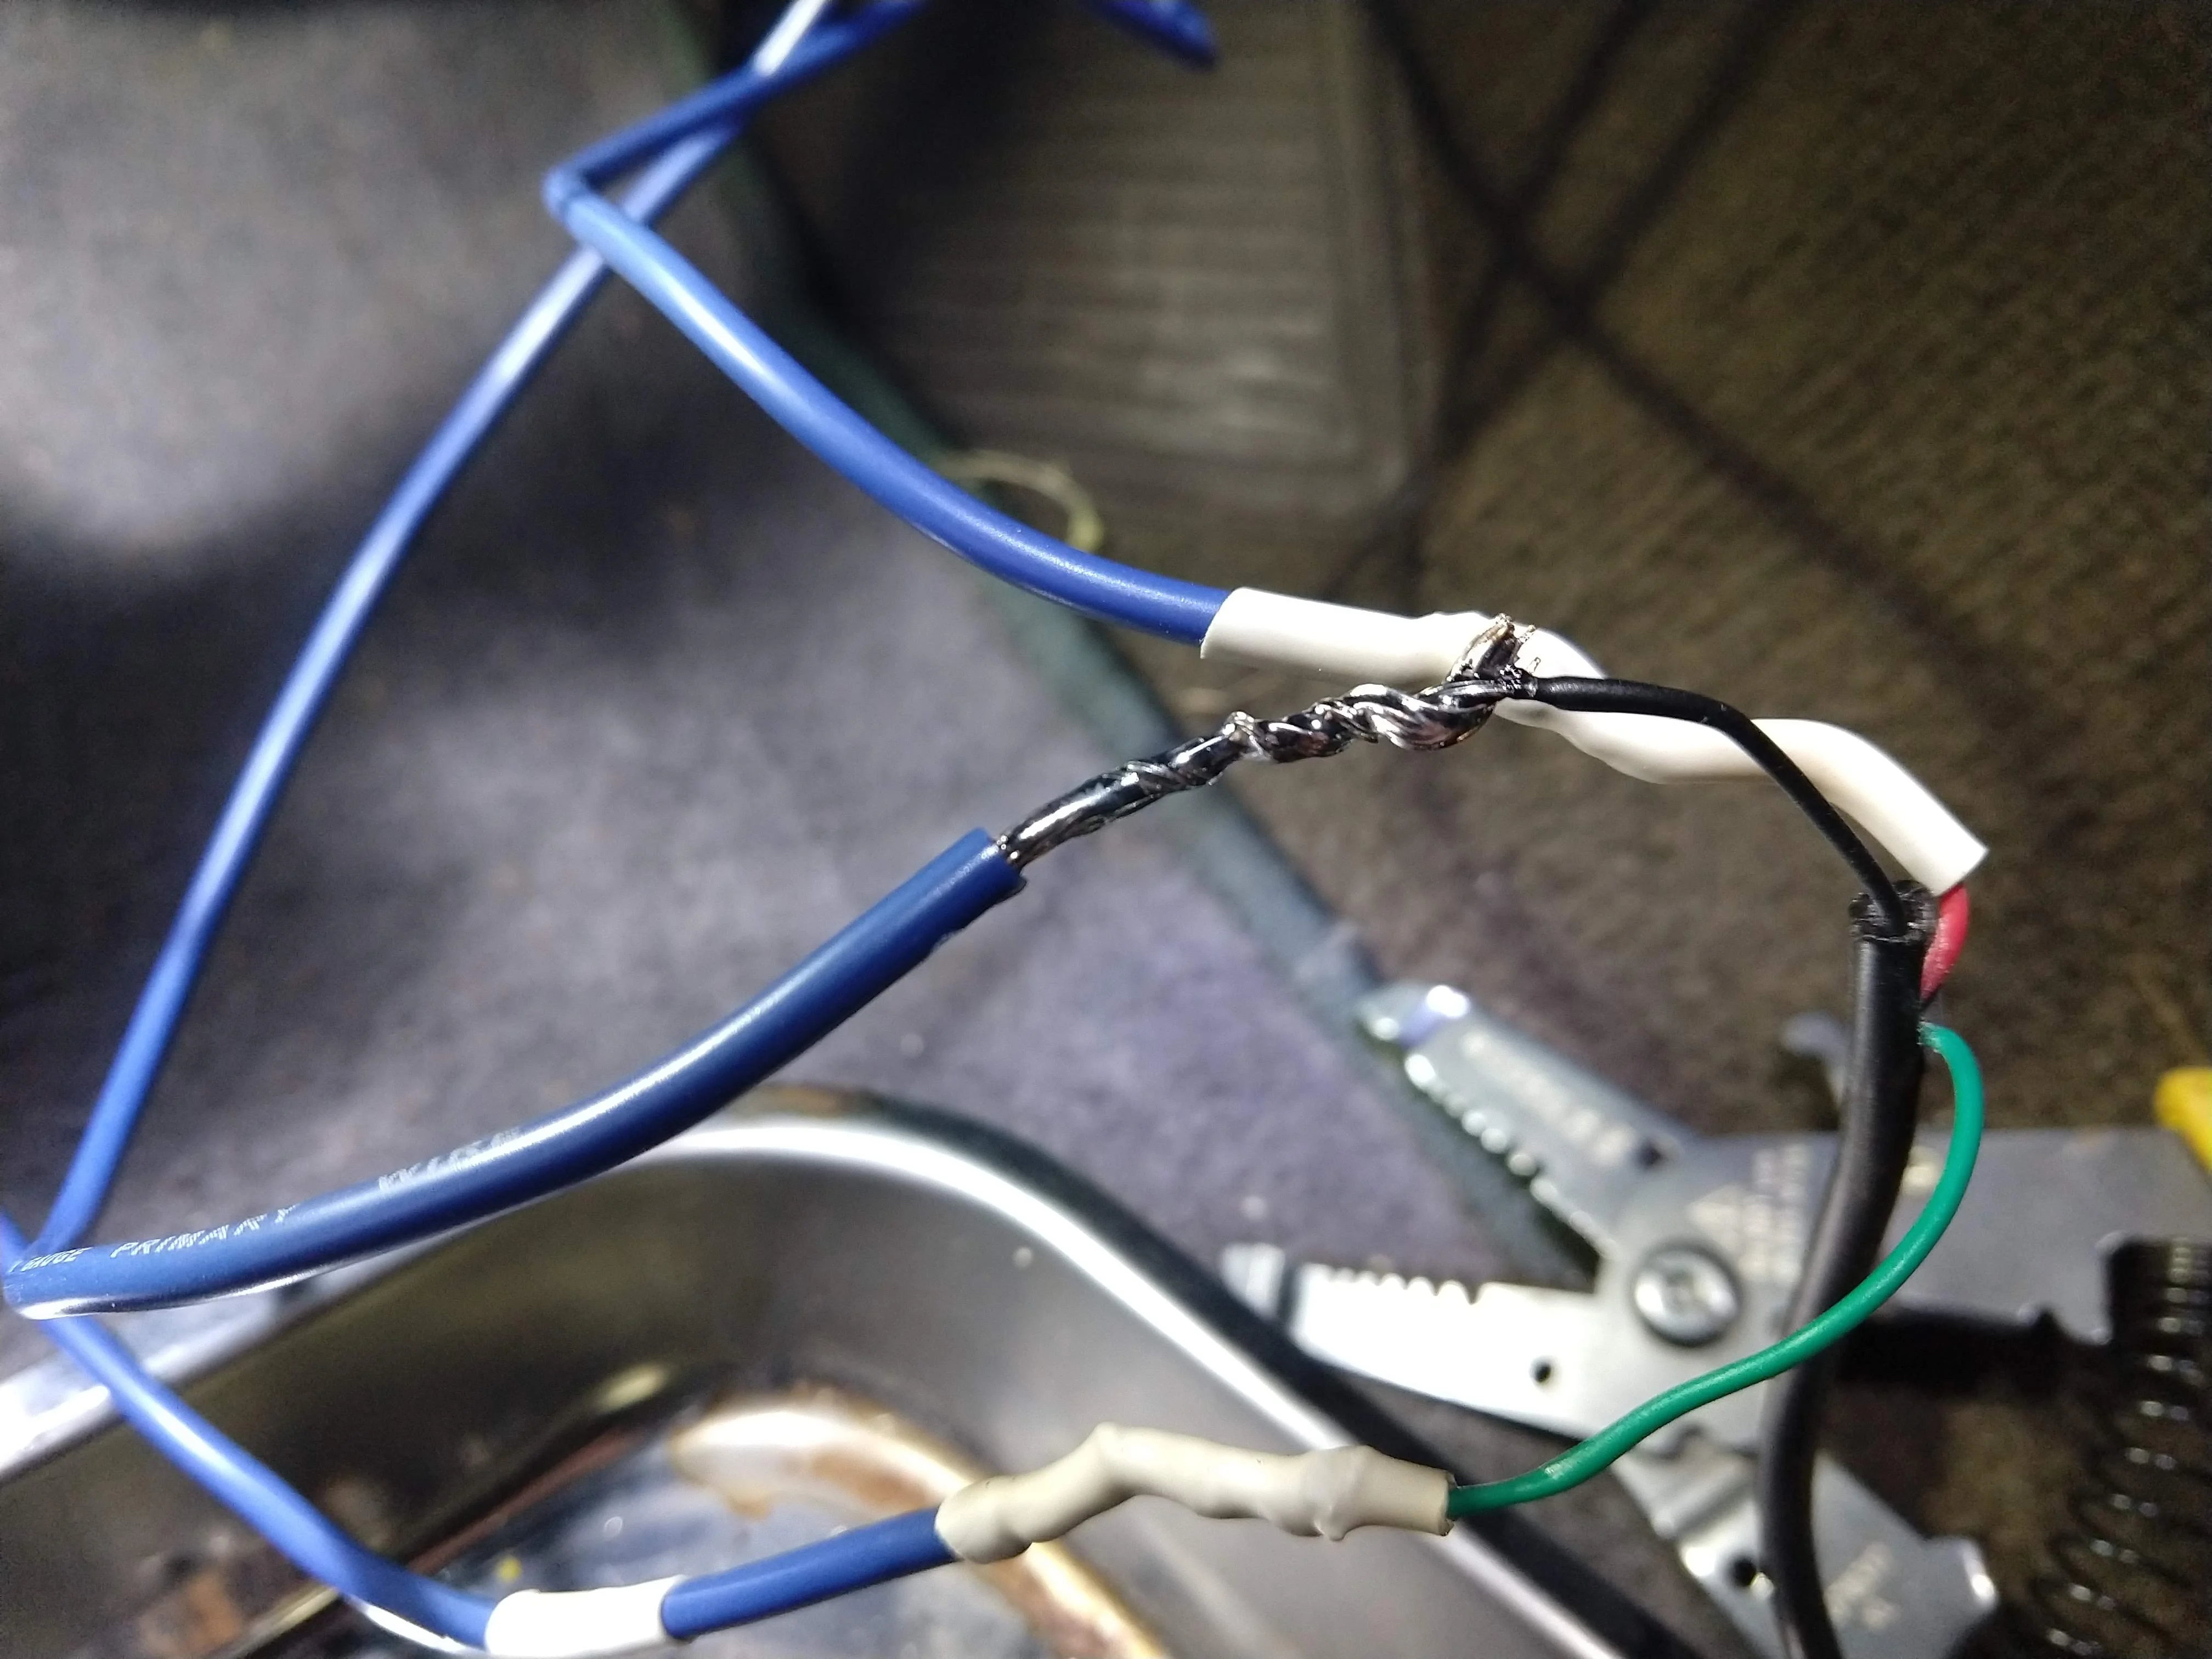
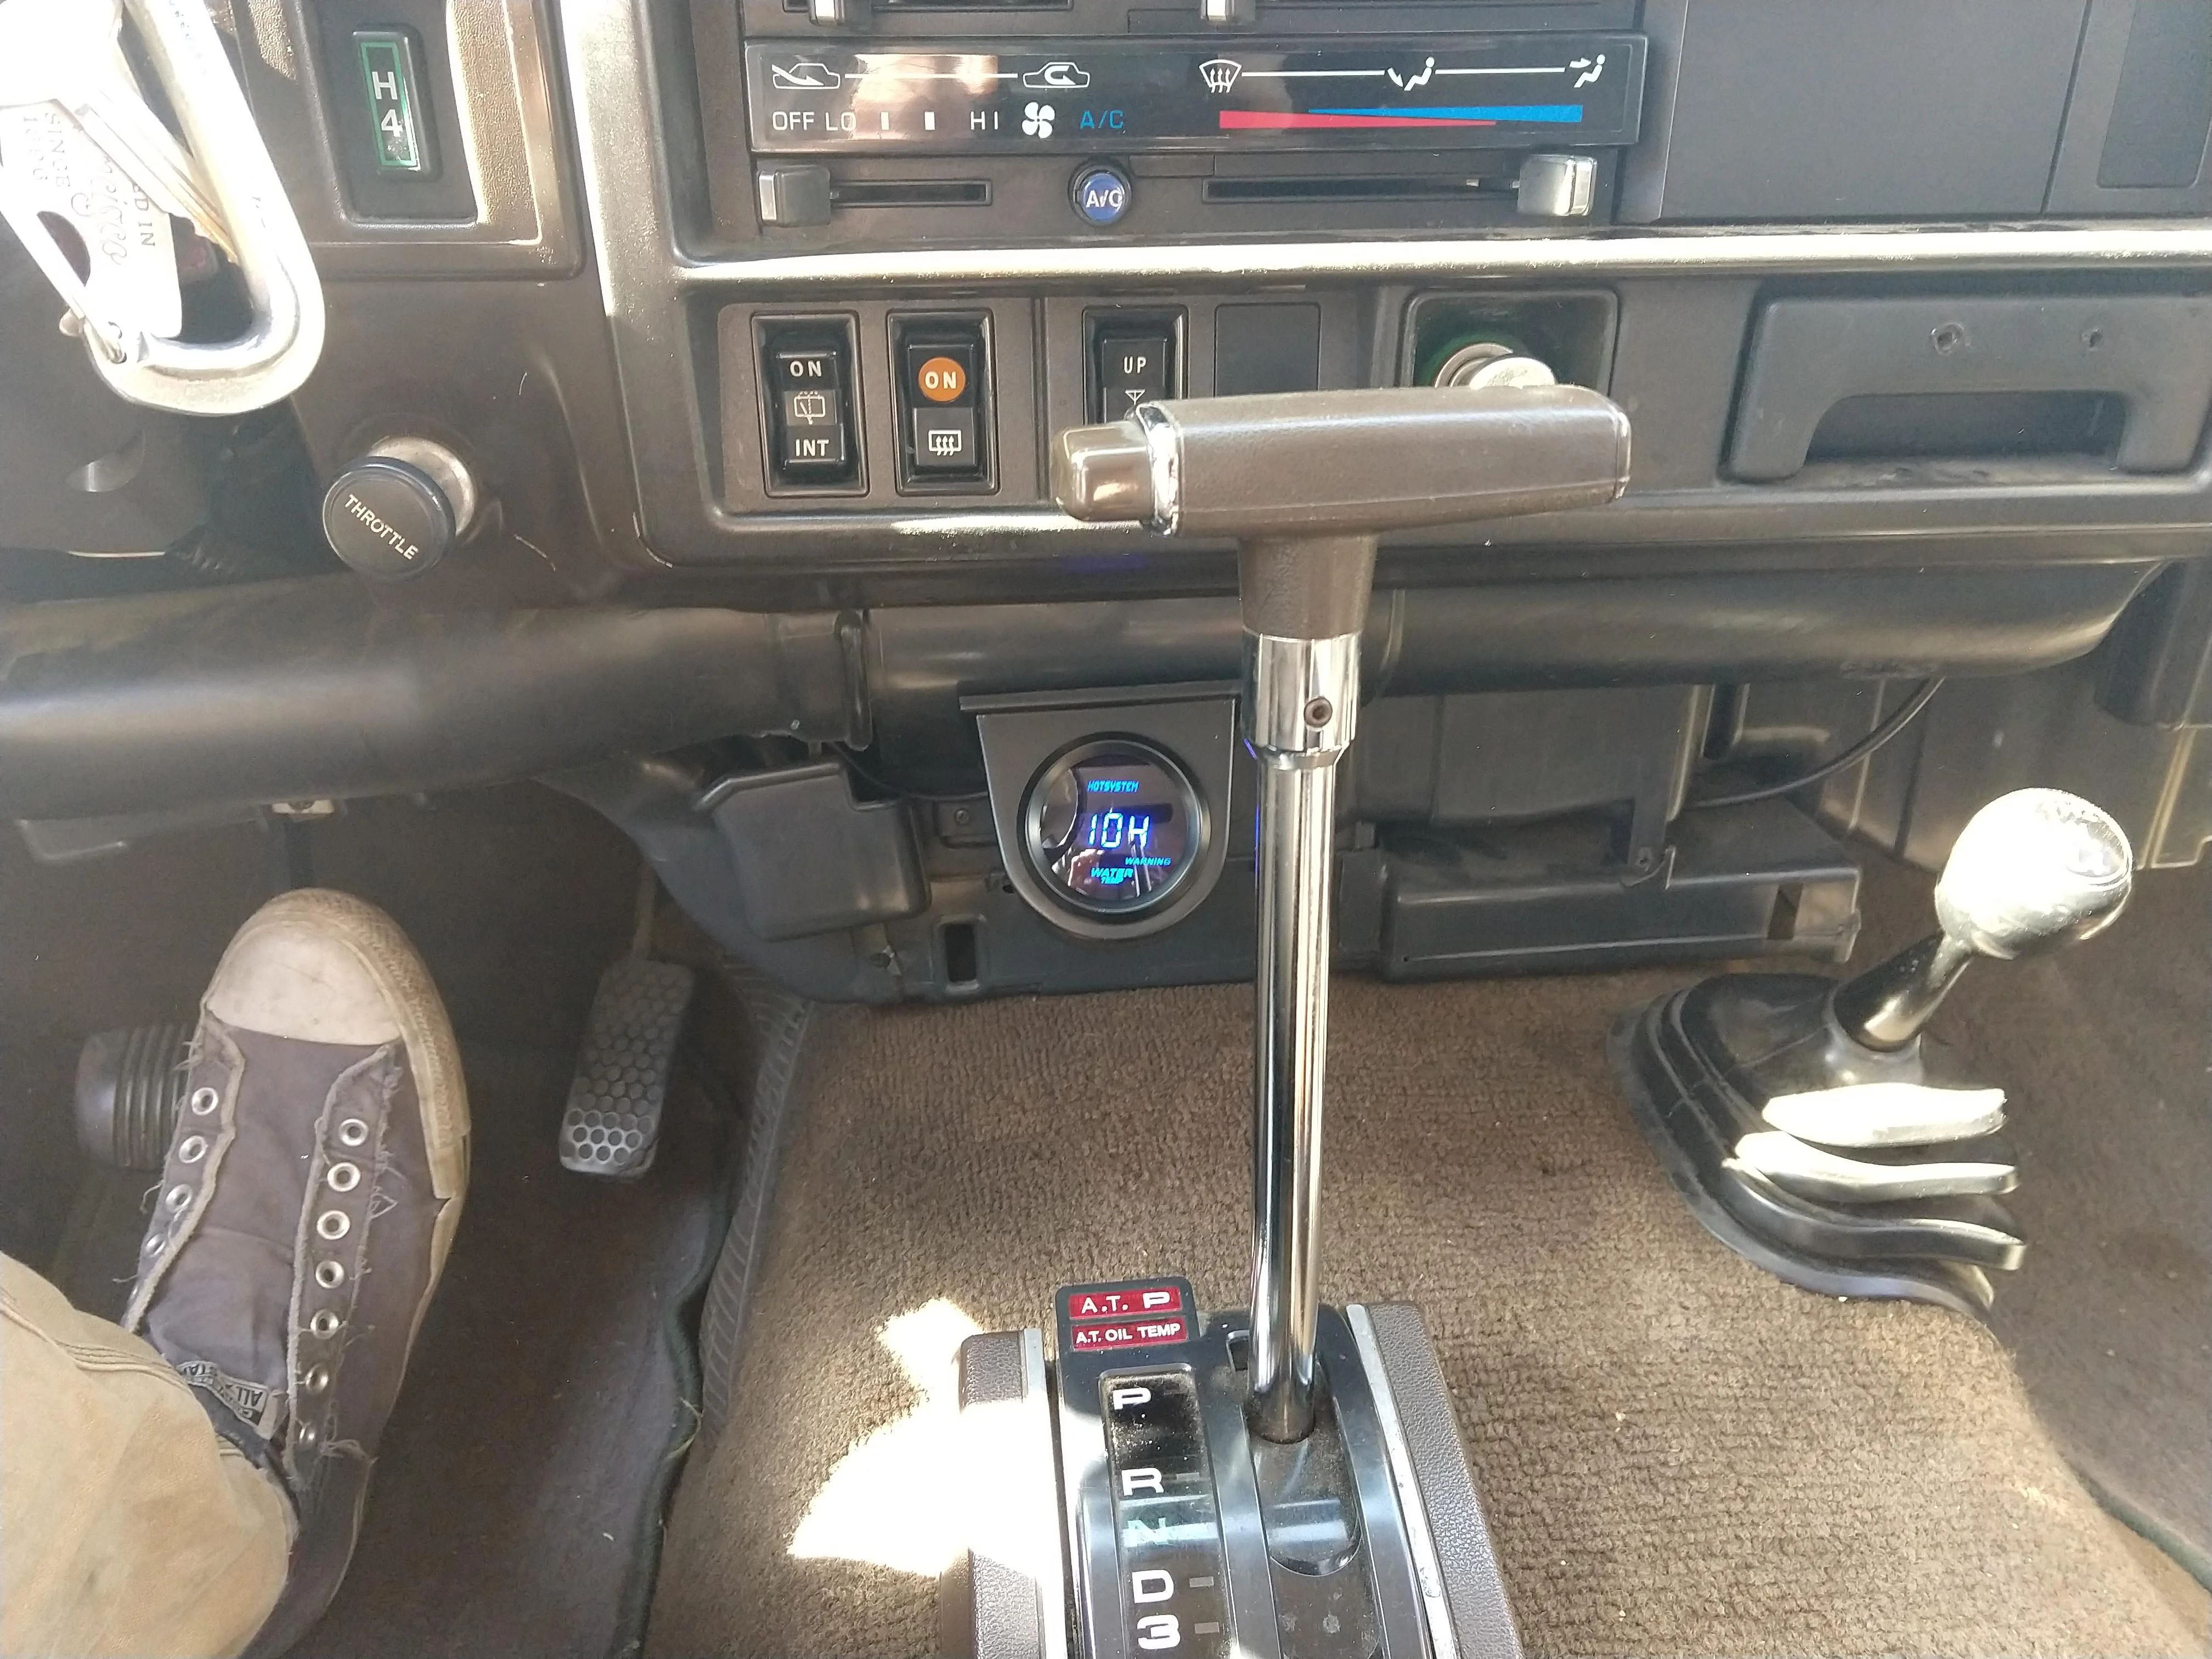
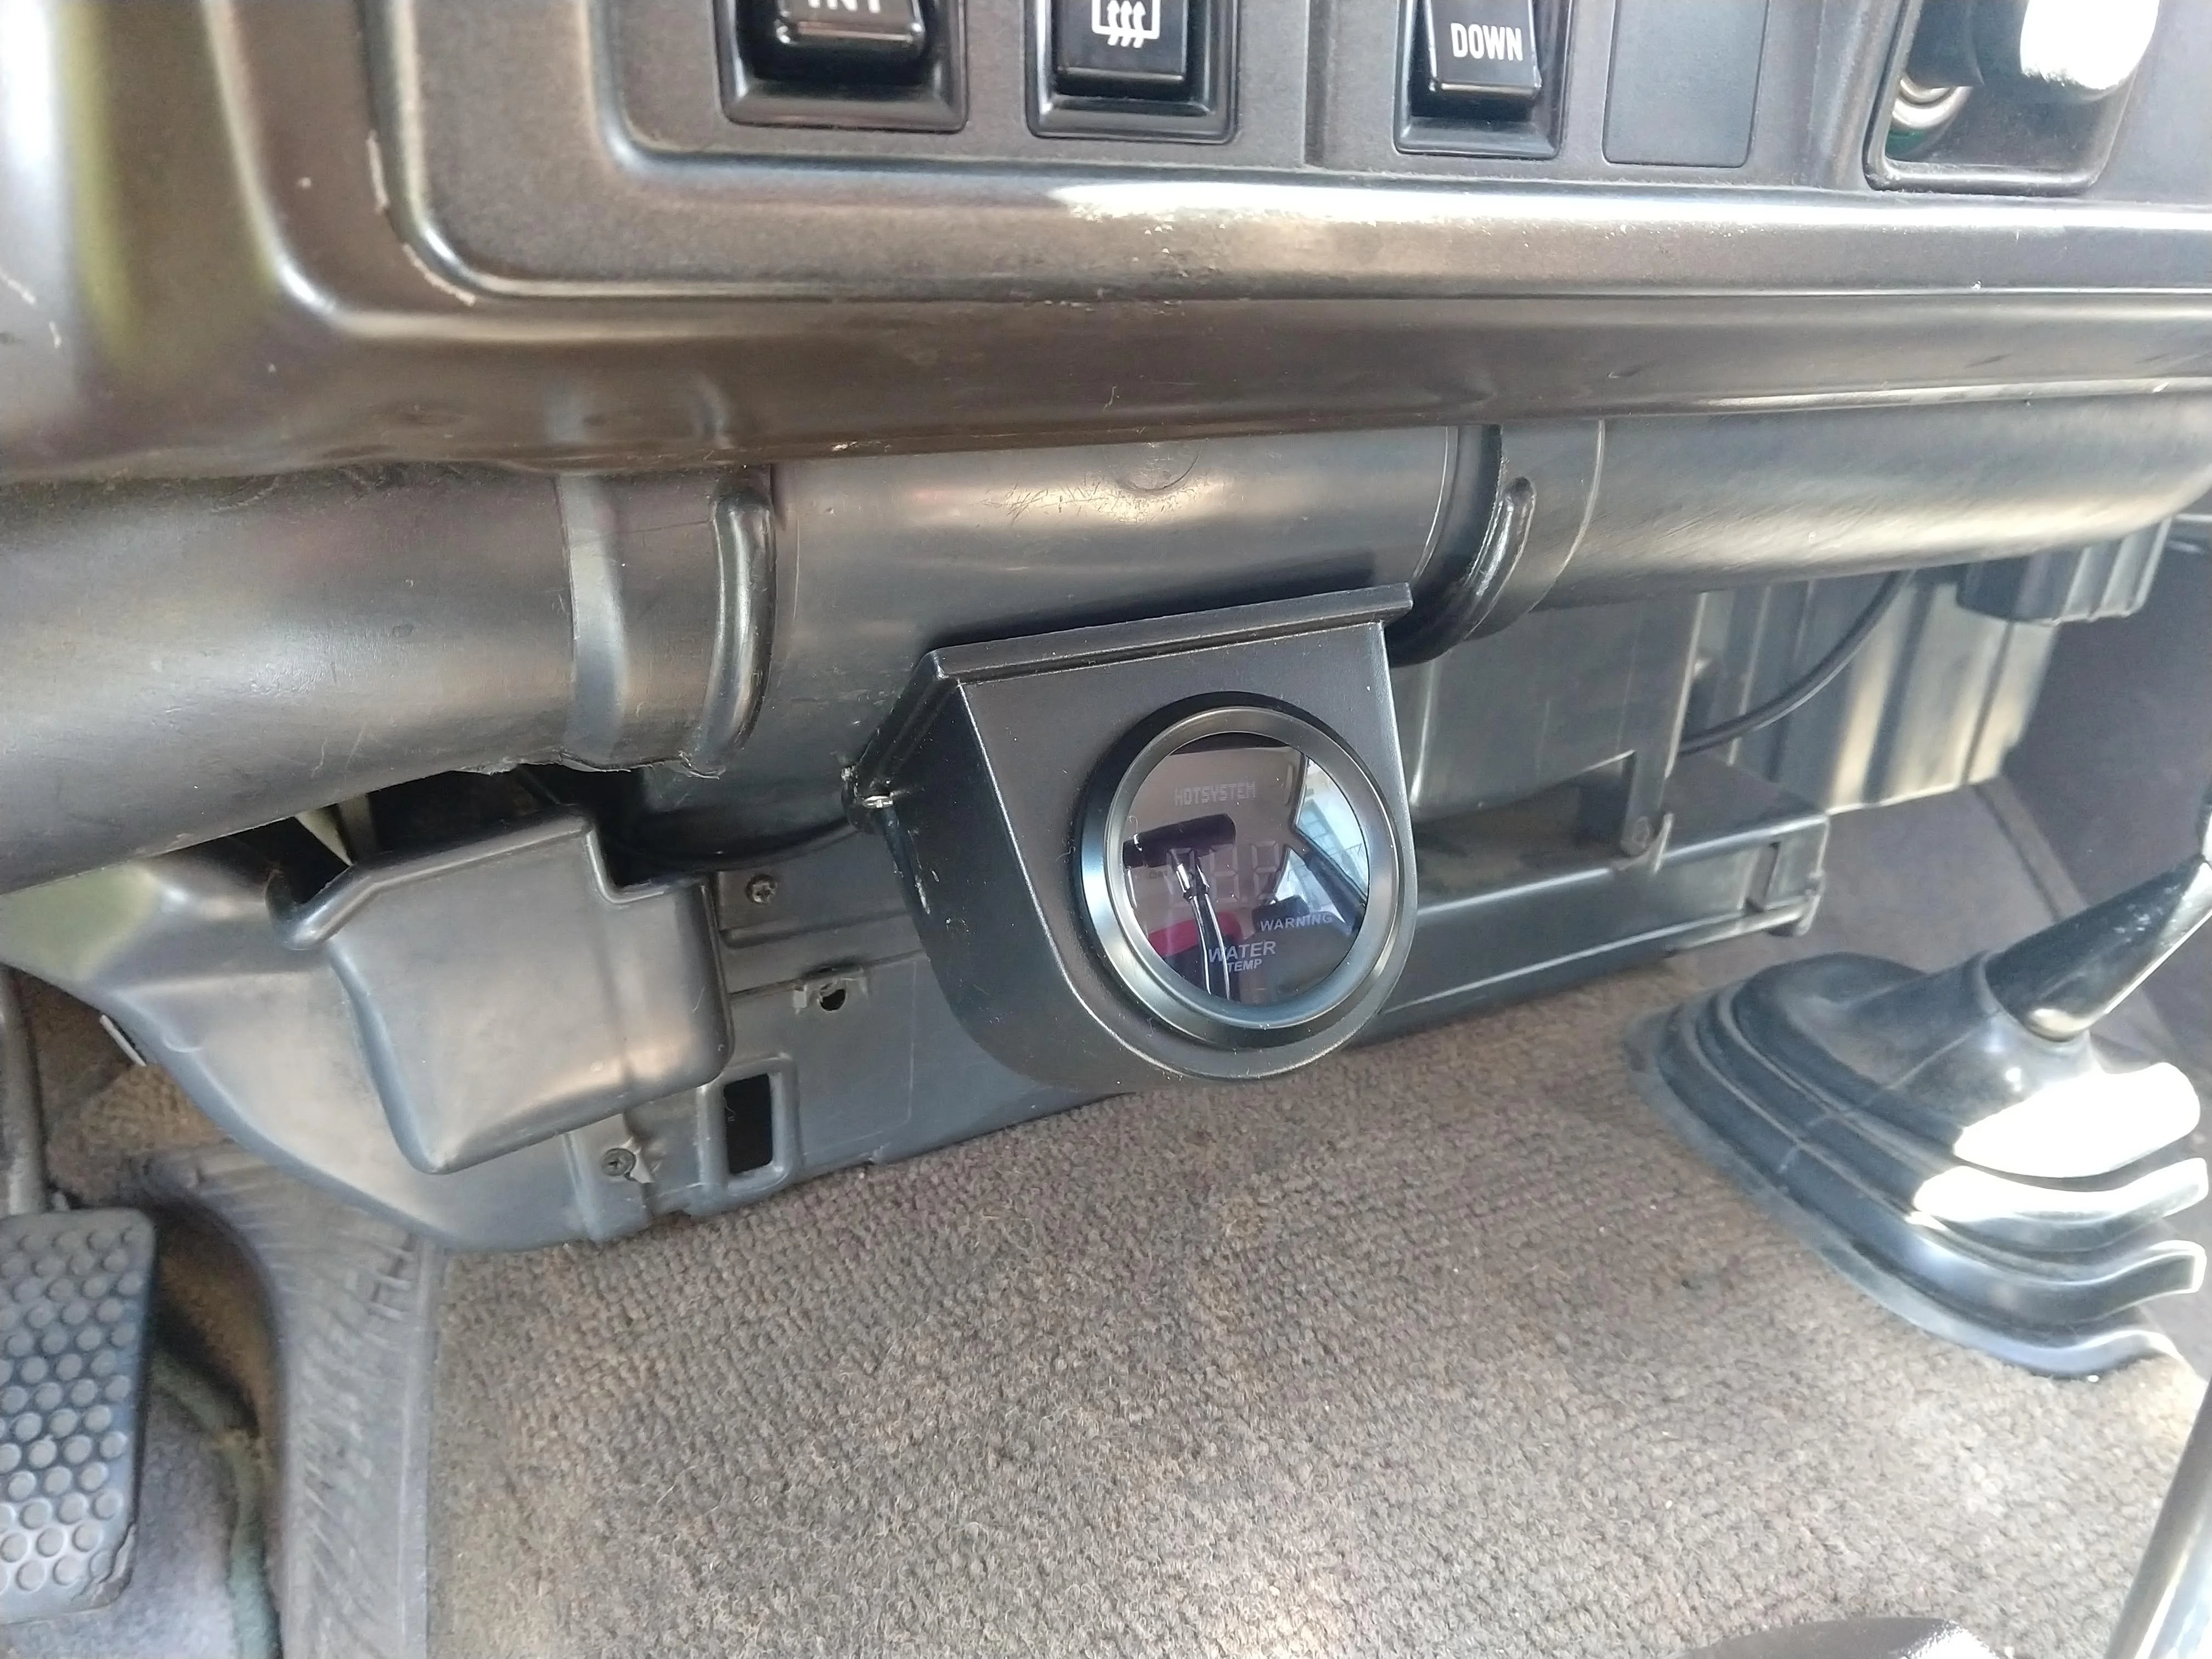
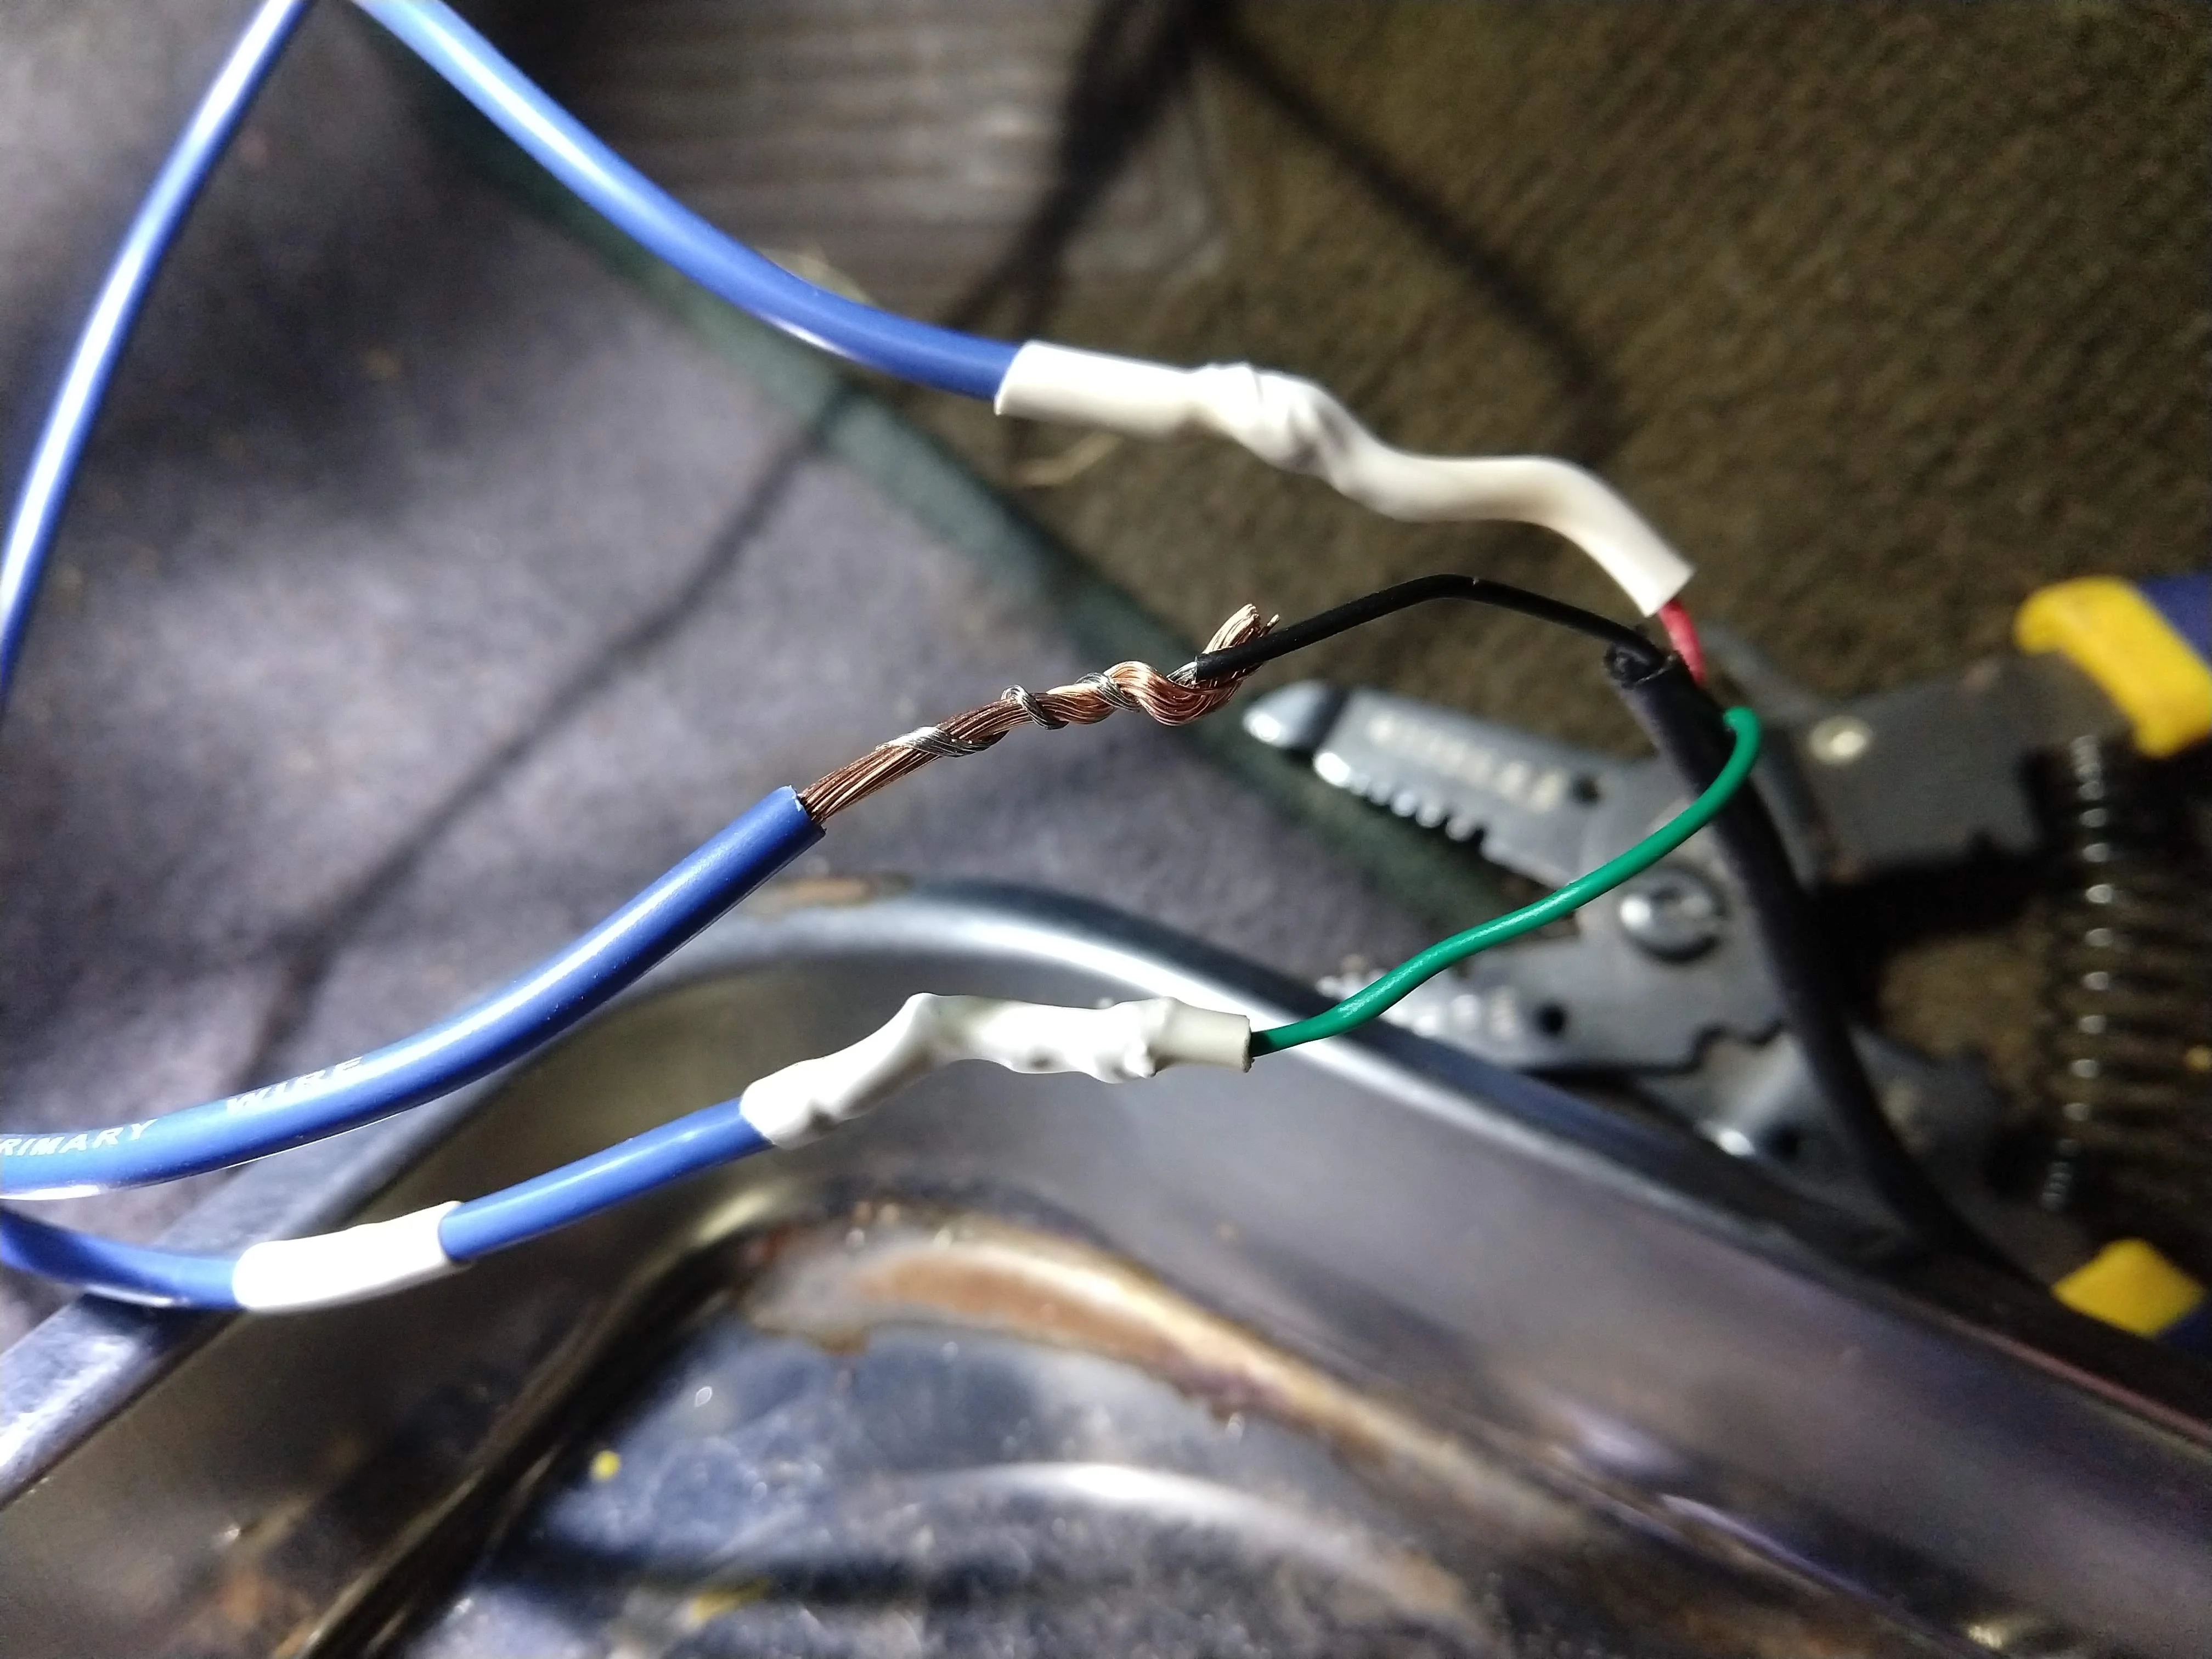
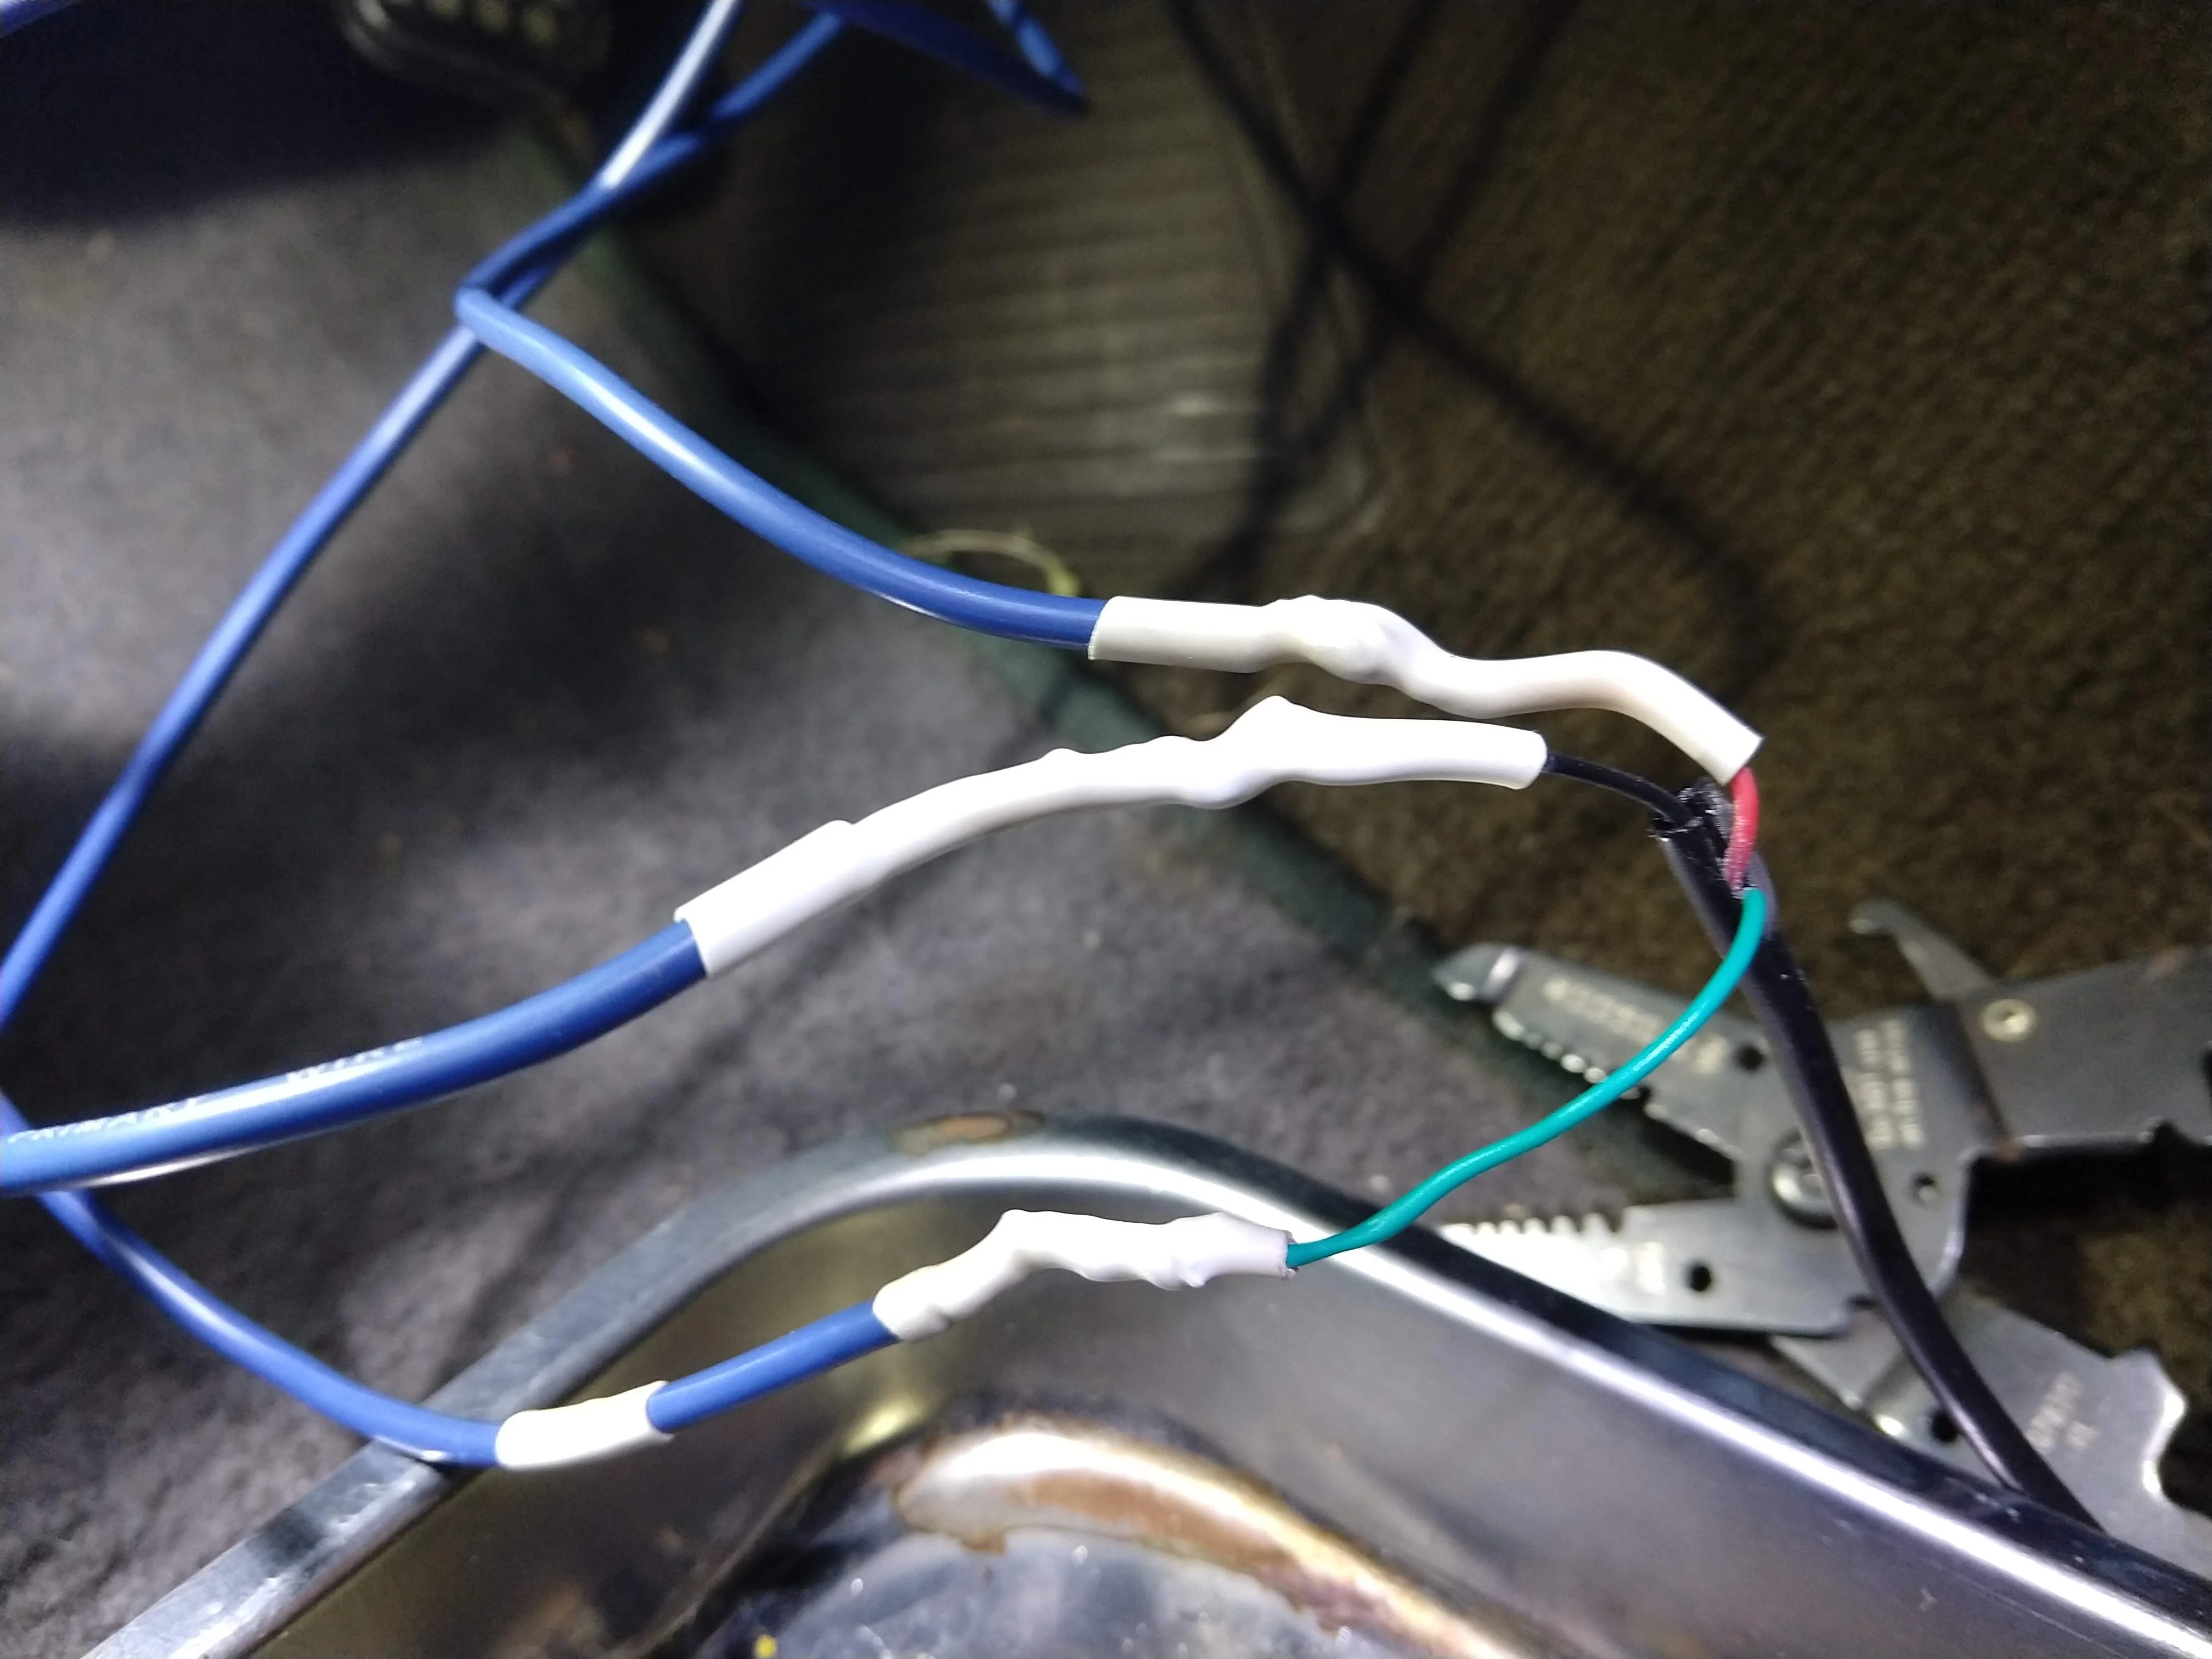
Finished the installation of the temperature gauge and cleaned everything up. Decided to solder the wires (duh - I should have always done this) and heat shrinked. Added some zip ties to make it look purdy under the dash. And mounted the gauge under the main dashboard bezel.
I think it looks pretty sweet.
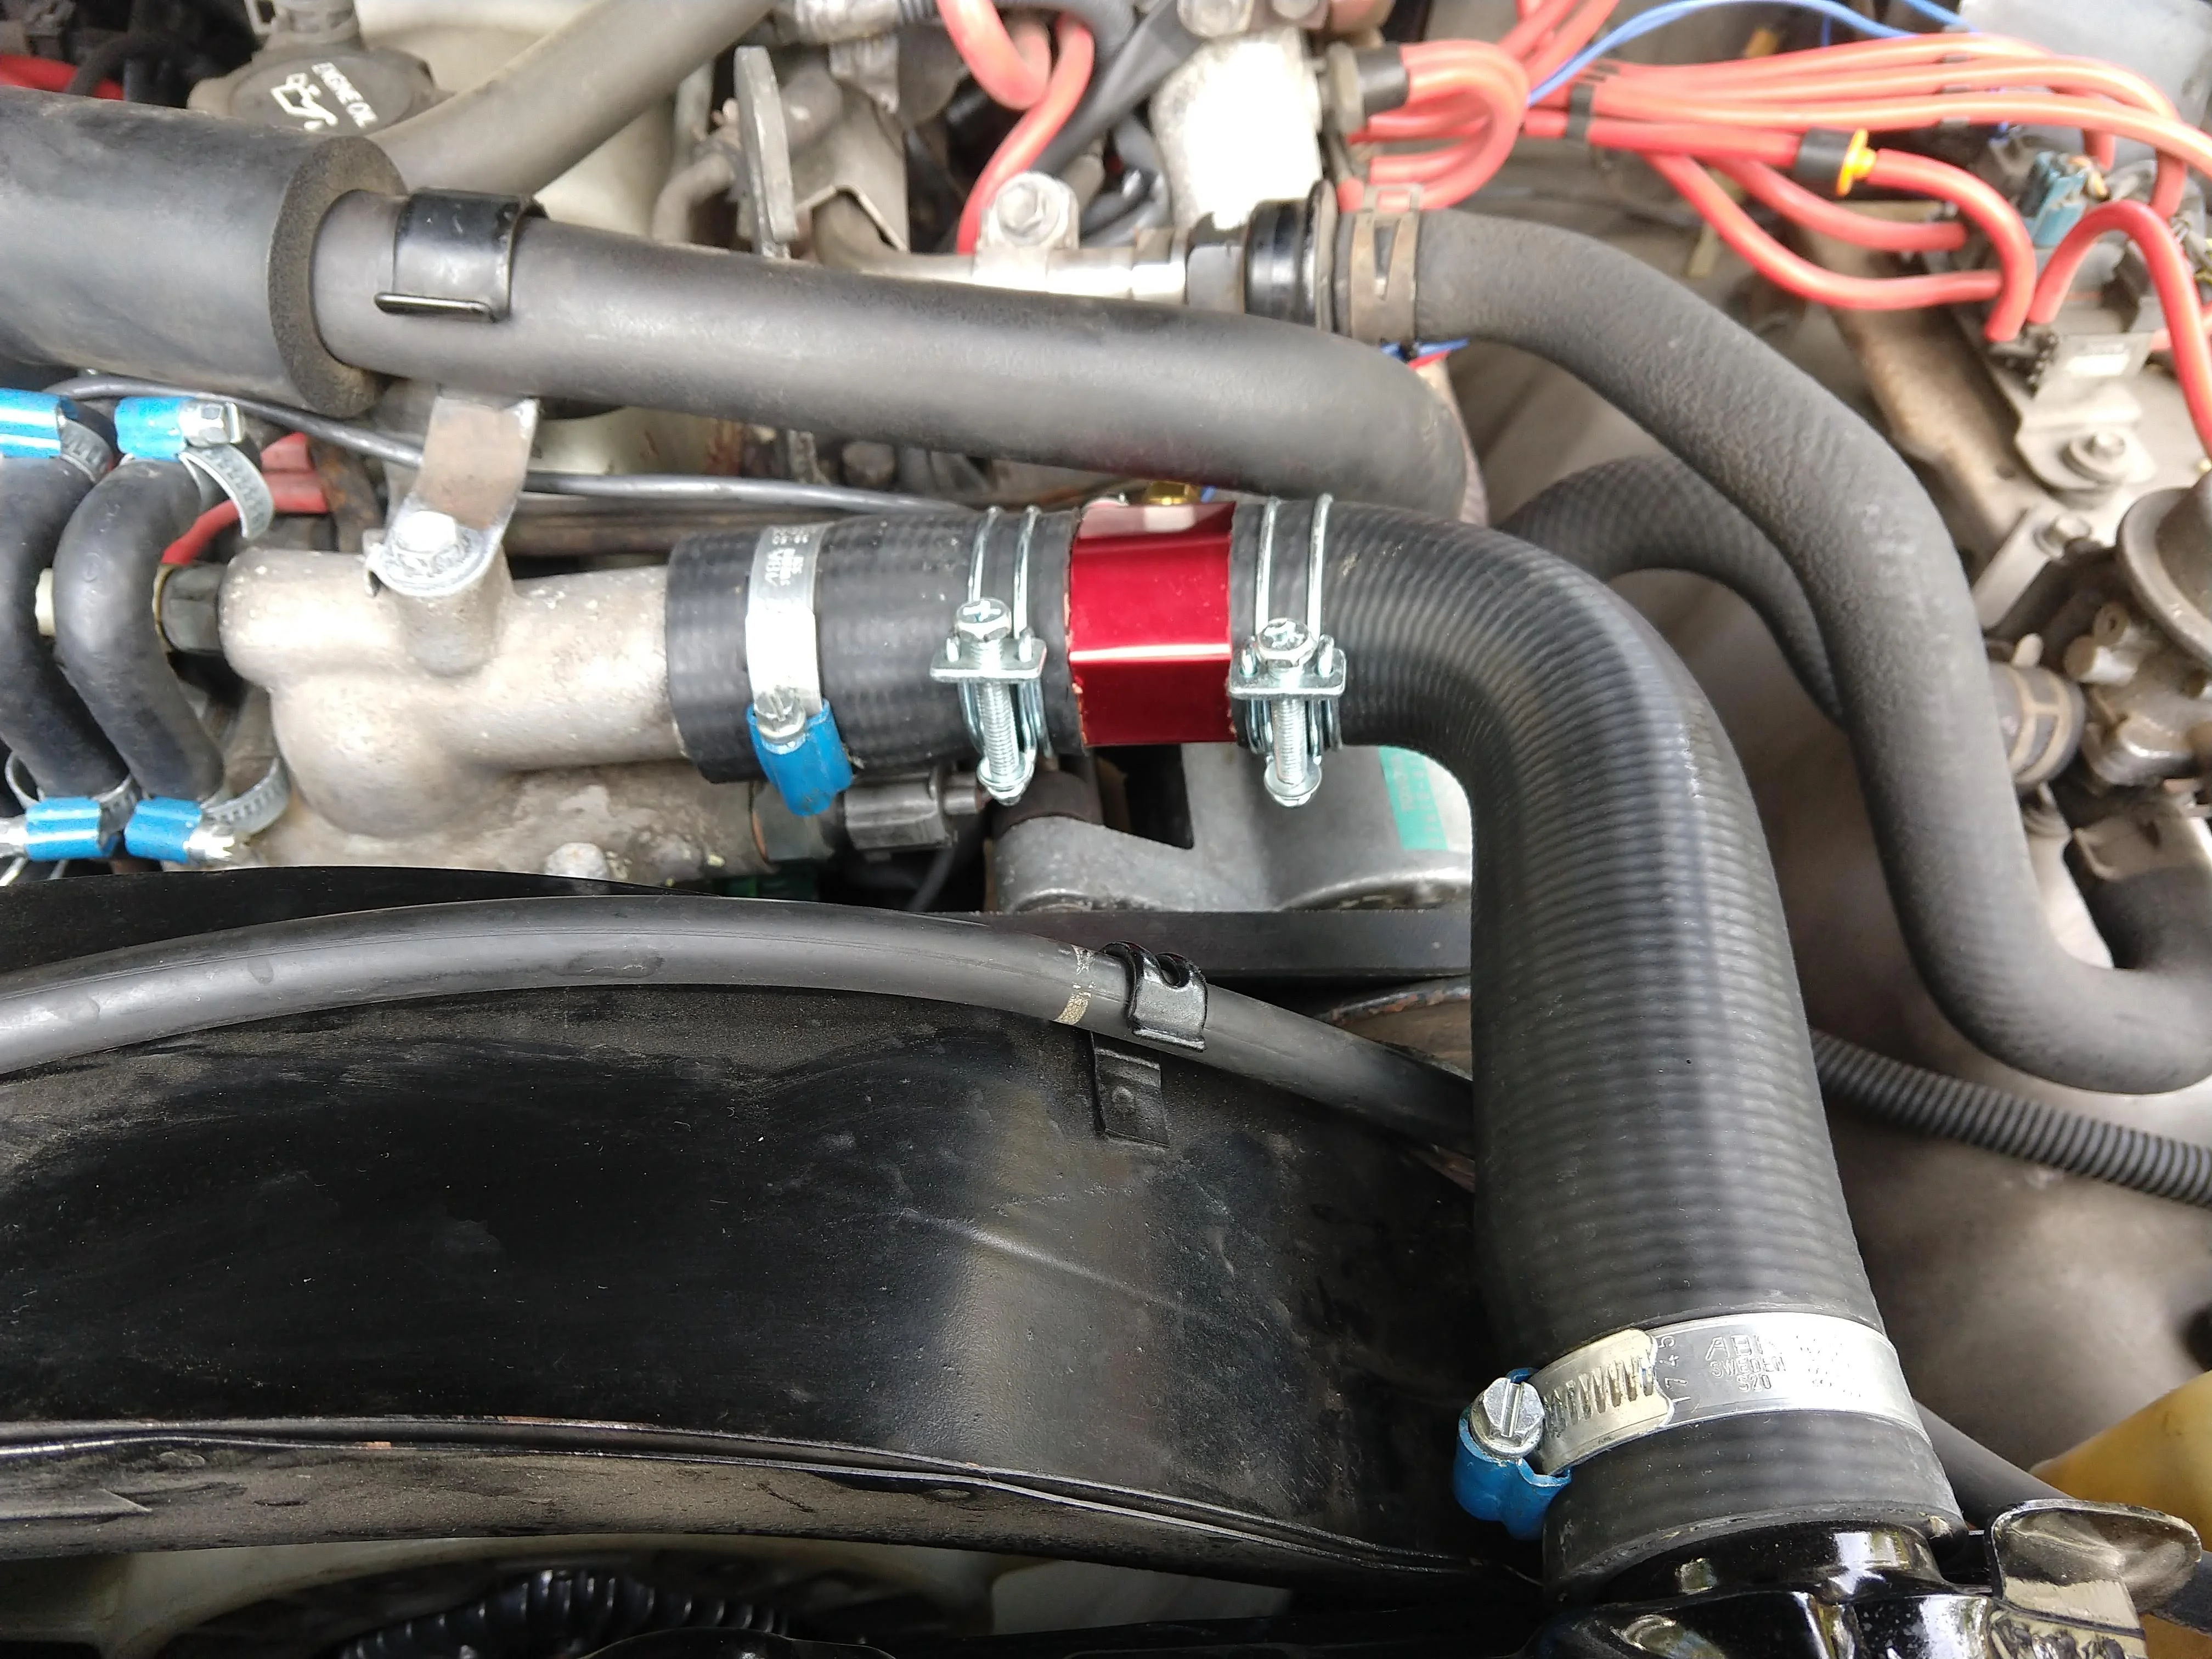
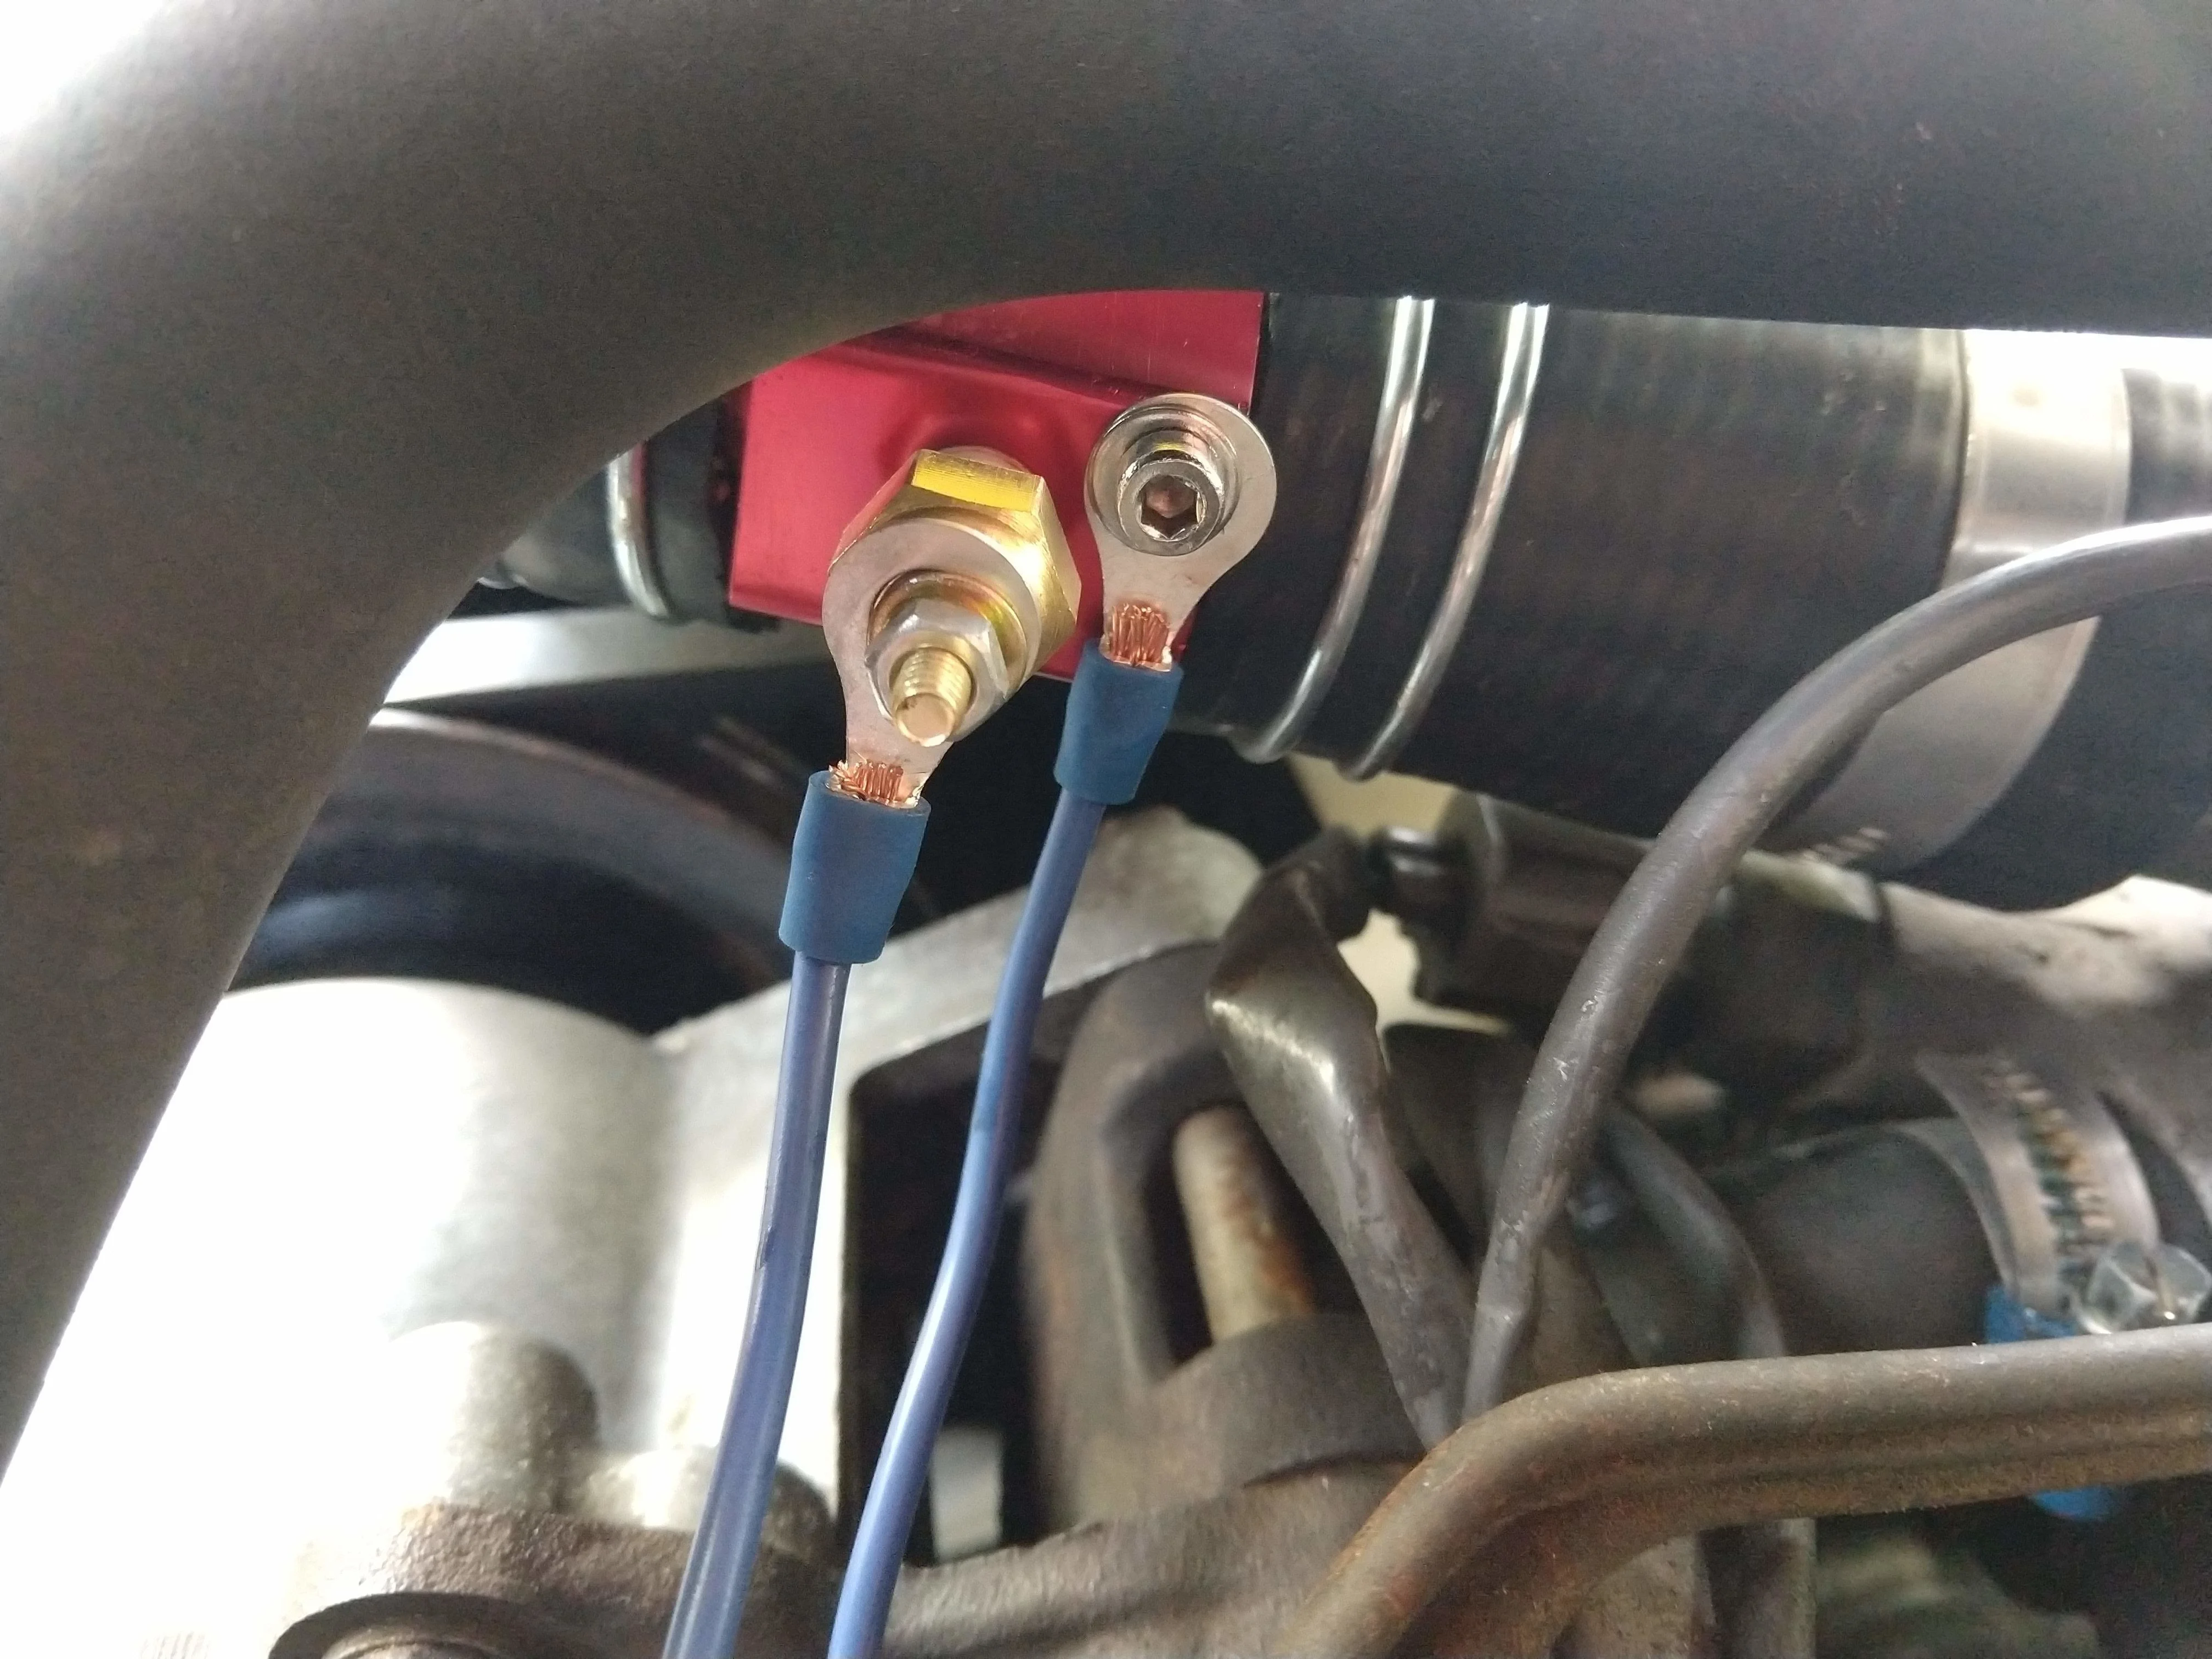
I've had a few small leaks with where I added the in-line adapter to the thermostat to upper radiator hose. But I am getting those kinks fixed by adjusting the tightness of the hose clamps and their placement on the hose. There might be a slight leak coming out of where I mounted the temperature sensor. I added teflon during the install, but it might require a little more teflon.
On another note, I installed the Wits End Fire Extinguisher on my driver's seat mount. It was a pretty painless install, the only issue I encountered is that I think I stripped the threads on one of the 12 mm bolts while re-installing.
I had to buy an aftermarket fire extinguisher holder to hold the extinguisher.
All in $85 for the mount, $10 for the holder off Amazon and $25 for the extinguisher. Peace of mind for $120.
great info, i'm in process of swapping out my heater core and potentially dealing with the foam issues in the duct work and temp doors and also may swap out the evap core and expansion valve too. I hate to swap over to R134a but it may be just something I had to do.
great info, i'm in process of swapping out my heater core and potentially dealing with the foam issues in the duct work and temp doors and also may swap out the evap core and expansion valve too. I hate to swap over to R134a but it may be just something I had to do.
Thanks @Elbert - you don't HAVE to swap to r134. You can still find shops that will support it and can equally find r12 on Craigslist/eBay, so it is not a hard set rule. I decided that it would be easier in the long-haul to maintain r134, however, I think the choice is yours.
Final shots of the aftermarket water temperature gauge installation.
Its been about two weeks now and I am feeling pretty good about it. I haven't gotten to any point where the mechanical gauge got into the red zone, so I haven't yet been able to compare temperatures between the two. Also, don't have an IR gun, so I don't have a third method for analyzing temperatures.
Its pretty cool to see when the thermostat opens up. I have a 180 degree T-stat so it takes about 3-4 minutes with the engine running before the digital gauge gets any reading.
Still have a very minor wetting around the upper radiator hose and the in-line water temperature gauge insert. I've cranked down on the clamps but don't want them to break. I guess its a small enough leak that I can deal with it ( about 1-2 drops after I am done driving around).
great info, i'm in process of swapping out my heater core and potentially dealing with the foam issues in the duct work and temp doors and also may swap out the evap core and expansion valve too. I hate to swap over to R134a but it may be just something I had to do.
Elbert, I just re did my entire AC system and I stayed with R12. Just have to search your area for the local AC Guru. Typically they go around and service the local mechanic shops. I paid quite a bit extra to stay R12 as it’s like liquid gold but also people really practice the art of ripoffery well in these parts...
Elbert, I just re did my entire AC system and I stayed with R12. Just have to search your area for the local AC Guru. Typically they go around and service the local mechanic shops. I paid quite a bit extra to stay R12 as it’s like liquid gold but also people really practice the art of ripoffery well in these parts...
I'm debating on if I mess with the evap core & expansion valve now, I know it makes a lot of sense to do that now. I may look into sources for R12. I think I have 3 cans or maybe 4 from a few years ago when I acquired some. I know R12 is out there...but its somewhat of a black market item nowdays. I'll have to check and see what I have....then make some inquires. If I can source R12 then likely I'll do the new evap core and expansion valve now...along with the heater core. I'm not a big fan of converting to R134a unless I have no other viable choice.
Remember you can remove the A/C box without touching the heater box. Just have to remove the lower ducts and glove box.
In case you decide to tackle that part later. I would still refresh the flap foam either way.
R12 is $25-35/can on Craiglist in Colorado, and I added one can of R12 to my long-neglected AC system and that amount completely filled it, and the center vent temps went from 65F to 42F. Several years later, it's still full and cooling well.
Its been a while, but I am happy to report that the Cruiser is alive and well. I've also been fairly occupied over the last number of months for a number of reasons.
1. We have some new additions/subtractions to the family.
A. My daughter was born and is now 3 months old
B. Bought ANOTHER Land Cruiser - a 99' 100-Series
C. Sold the Prius ( to buy the LC)
2. After lots of back and forth, it was decided that the truck needs to be painted blue and the interior should be grey.
A. Damn, gotta get rid of all the rust
B. Have to learn how to do body work and welding
C. Have to source a ton of hard to find FJ62 grey/blue interior parts
D. Need to find a painter that is reasonably priced
3. I want to keep this truck working and chugging along
A. Decided that if I want to go to Oceano Dunes SVRA for the Annual Turf n Surf November 1st that it would be good to rebuild the knuckles (never done this before)
B. Would like to get the galley plug fix done (have the parts, but been too preoccupied )
C. Maybe its time to think about rebuilding the transmission - it definitely has a nice clunk going into 2nd gear.
So life is GREAT, truck is GREAT and I am excited for my many adventures to come with the 62!
The hardest part was finding the time to get into this project. I've been wanting to do it since I first bought the truck in the winter of 2018. But I think I over thought it way too much. I was able to rebuild a steering gearbox, so a knuckle rebuild should not be too impossible!
Sourcing parts and peering into the depths of areas I've never thought about before were also two areas I used to hold me back.
Here is what I decided to do before finally pulling the trigger.
1. It would have been reasonable for me to send this to Mudrak and have Gary / Jeff do the work. They are excellent mechanics and have done this job countless times before. Mudrak or Valley Hybrids would have done this right the first time without breaking things like me and would have made it look great.
2. Alas, I like the personal satisfaction of doing work on my truck, but balancing this against two small children is a herculean task. It wouldn't be possible without the eternal support of my significant other!!
3. I had maxxed out my PTO at work and had to take time off and time was approaching for the Turf N Surf, so I decided enough was enough.
Materials:
5 gallons of 80w-90 gear oil from Napa Auto Supply - $78
4 - 1lb cans of Valvoline SynPower Synthetic Automotive Grease - $25
4 cans of brake cleaner -
200 roll of paper towels
Lots of cardboard
2 oil containers
1 Brass Drift
2-3 hammers
Fish Scale
Flare Wrench Set
Bearing Race and Seal Driver Set
Punches
Picks
Wire brushes
50 nitrile gloves - 1 box
Parts
Knuckle Kit - cruiser corp
Front Wheel Bearing Kit - cruiser corp
OEM brake lines - Toyota
OEM Caliper to Brake hard line - Toyota
OEM bolts - various - Toyota
(Brakes and rotors were recently replaced 3k miles ago)
My driveway is on a slope, so its always been hard to get work done. I opted to buy 6" tall ramps from Harbor Freight for $45 to help level things out. Seems to work just fine. Mind you, I do not have a garage or other place to do this. so I work with what I have. I have 6 ton jack stands and a 3 ton floor jack. Tires underneath for redundancy.
First thing I found when I pulled off the locking hubs were that there were no gaskets on either Drivers or Passengers side hubs. Cool beans. Also one of the bolts had been sheared off. Will replace with OEM bolts.
I also drained the existing gear oil before getting too deep into the work. There was definitely a ton of much and some metal shavings attached to the magnet. Yummy!!
My driveway is on a slope, so its always been hard to get work done. I opted to buy 6" tall ramps from Harbor Freight for $45 to help level things out. Seems to work just fine. Mind you, I do not have a garage or other place to do this. so I work with what I have. I have 6 ton jack stands and a 3 ton floor jack. Tires underneath for redundancy.
Just a safety nerd note, the loose tires where they are ain't gonna stop anything. They should be double stacked under the middle of the front bumper/crossmember. They won't be in your way.
This was probably the first part that I messed up on. I had bought a set of flare wrenches to take off the hard brake line that attaches directly to the caliper.
Taking off the hubs was relatively easy. Having the brass drift to get the cone washer out made the process go fairly fast.
However, when I went to take the dust shield off, I did not realize that I had to disconnect the brake line. I hadn't anticipated this or seen it mentioned in the FSM.
At first I didn't know about the C-clip, so I tried to twist the brake line a few times to get it off. Probably mangled it. But because of this I decided that it made sense to replace the brake line altogether. This led to me purchasing OEM brake lines for the whole truck. Its oh too easy to throw more parts at a project with the "while I am in there mentality". While I wait on these parts, I am cleaning stuff up.
The brake pads were changed last year in March along with new OEM Rotors. I could go down the rabbit hole of rebuilding the calipers and painting them but frankly I don't have the time or the patience right now. Maybe later. Maybe I'll even do one of these Tundra upgrades. Who knows. Time will tell.
Once I got the spindle off, I dove into pulling the birfields/axle and slamming on the studs with my good ole' brass drift and brass hammer. It took more persuasion and patience than I would like to admit. This was the hardest part for me of deconstructing the front axle.
Taking out the old leaky oil seal and the top and bottom races was a piece of cake.
It started to feel like a mid-Victory by the time I got to the shiny knuckle stage of the project. However, as I am at it today, I am in the midst of cleaning up a bunch of gunk before I dive into reassembly.