My Build Thread...Well, Try to Build Thread...97 FZJ80 (1 Viewer)

This site may earn a commission from merchant affiliate
links, including eBay, Amazon, Skimlinks, and others.

Joined
Mar 2, 2018
Threads
9
Messages
104
Location
Minneapolis, MN
Let's see...always wanted a Land Cruiser. Mechanically it is sound. But she's needed some good old fashion money thrown at her to get her to Good overall, excluding the disaster of an interior. Here's a list of most work done to date (with any part numbers or links to products used that hopefully helps someone along the way), though this build thread (initially) will be a bit more focused on my complete overhaul of the interior as I convert my truck from the OEM Gray to my version on Tan...if you have any questions about anything I've listed below (which isn't everything), feel free to ask:

  • Front Brakes and Rotors: repack bearings as well (stealership performed - was driving it home to MN from CA where it was located and the fronts were down to 2mm, so wasn't in a position to postpone)...rears were done by PO in January, dealer confirmed they were newer
  • Weatherstrips: front and rear driver side doors ( 67862-60073 and 67872-60043)
  • Hood Struts: found these on Parts Geek and they are strong and quality and affordable (Right and Left)
  • Service Diffs: Front, T-Case, and Rear drained and filled with Valvoline High Performance 80W-90 Gear Oil...new plug gaskets ordered as well (Kit from Toyota)
  • Air Filter (17801-61030)
  • Washer Pump and Rear Diverter Valve (85330-60130 and 85321-60050): front fluid was very weak and rear wouldn't work at all...currently redoing interior and will replace entire line from rear fluid during as replacing diverter helped a bit, but inspecting line with interior out it is filled with dried crud in various spots so just going to swap it out for a new line from hardware store or something
  • Distributor O-Ring (90099-14118): this baby was leaking nicely...this $1.66 o-ring from Toyota was the best bang for the buck ever...used timing light to verify -3 degrees TDC afterwards...used this thread
  • Greased All Zerks: used Valvoline Semi-Synthetic Grease (part VV279) for both zerks and knuckles top-off
  • Grease Knuckles: knuckles showed zero signs of leaking/breaks in any interior or dust seals; verified grease inside was decent and added to each until it seemed about right from what I've read...didn't take much
  • Oil Change: decided to up the ante a bit and went with Shell Rotella 15W-40 (same stuff I use in my 1974 Honda CB350F1 motorcycle as well)...wanted the heavier weight to help subside (hopefully) any light leaking that may occur from my 21 year old gaskets and seals...but guidance from Shell technicians (called them) was that that "heavy duty diesel engine" oil isn't ILSAC approved and may cause contaminant build-up in the cat converter...so will be switching to Valvoline Fully Synthetic 5W-30 MaxLife this fall...15w was probably a touch too heavy for our subzero MN winters anyway...though I was advised the Rotella oil is great for my old motorcycle due to its higher zinc parts per million (1200 vs 800) than standard gasoline oil, which should help metal-on-metal contact (what they told me, I'm no oil scientist)
  • Seafoam Intake Manifold: did this more as a "why not"...my truck runs and idles great, and I saw no noticeable performance improvement from doing this job (minimal white smoke from exhaust during, unlike the fog storms you see on YouTube)
  • PCV Valve and Hoses (Valve: 12204:35040; Hose 1: 12261-66021; Hose 2: 12262-66021; Grommet/Valve Gasket: 90480-18001; Hose Clips: 90467-20002)...there two PCV hoses - one going into the valve on the head and one coming off the head into the intake...just buy both
  • Rodney Flush Tranny w/ New Filter: my dumbass was able to follow this thread to perform the Rodney...it's so much easier than the posts in that thread make it seem from all the questions...I also replaced the tranny filter at this time and switched to a full rubber pan gasket gasket using a kit from CruiserParts...the gasket was awesome as it avoided the hassle (I read about) of using FIPG and trying to get the pan cover back on the truck without using dowels or trying to thread in a few bolts in corners or whatever...used Valvoline MaxLife Multi-Vehicle fluid
  • Yokohama Geolandar A/T G015 Tires (5): seemed like the best overall value for an overall tire (since we have like 4 choices with these damn wheels)...replaced Michelin Defenders...no noticeable road noise increase...don't worry, I didn't forget about the spare and will rotate in for use during rotations
  • Rear Diff Rebuild: (parts: the one and only @gearinstalls.com )...see my short thread here for my experience...I would mail him my dog to babysit after my experience with his work and service
  • Fuel Pump Sock: (sock: 23217-16490; clip: 23219-03010; pump gasket: 77169-60010)...performed this as my whole interior is currently out of my truck...learned a valuable lesson on "de-pressuring fuel system" before work on it :doh:...I used the pics and guidance from this thread and this site to tackle it...pretty straightforward

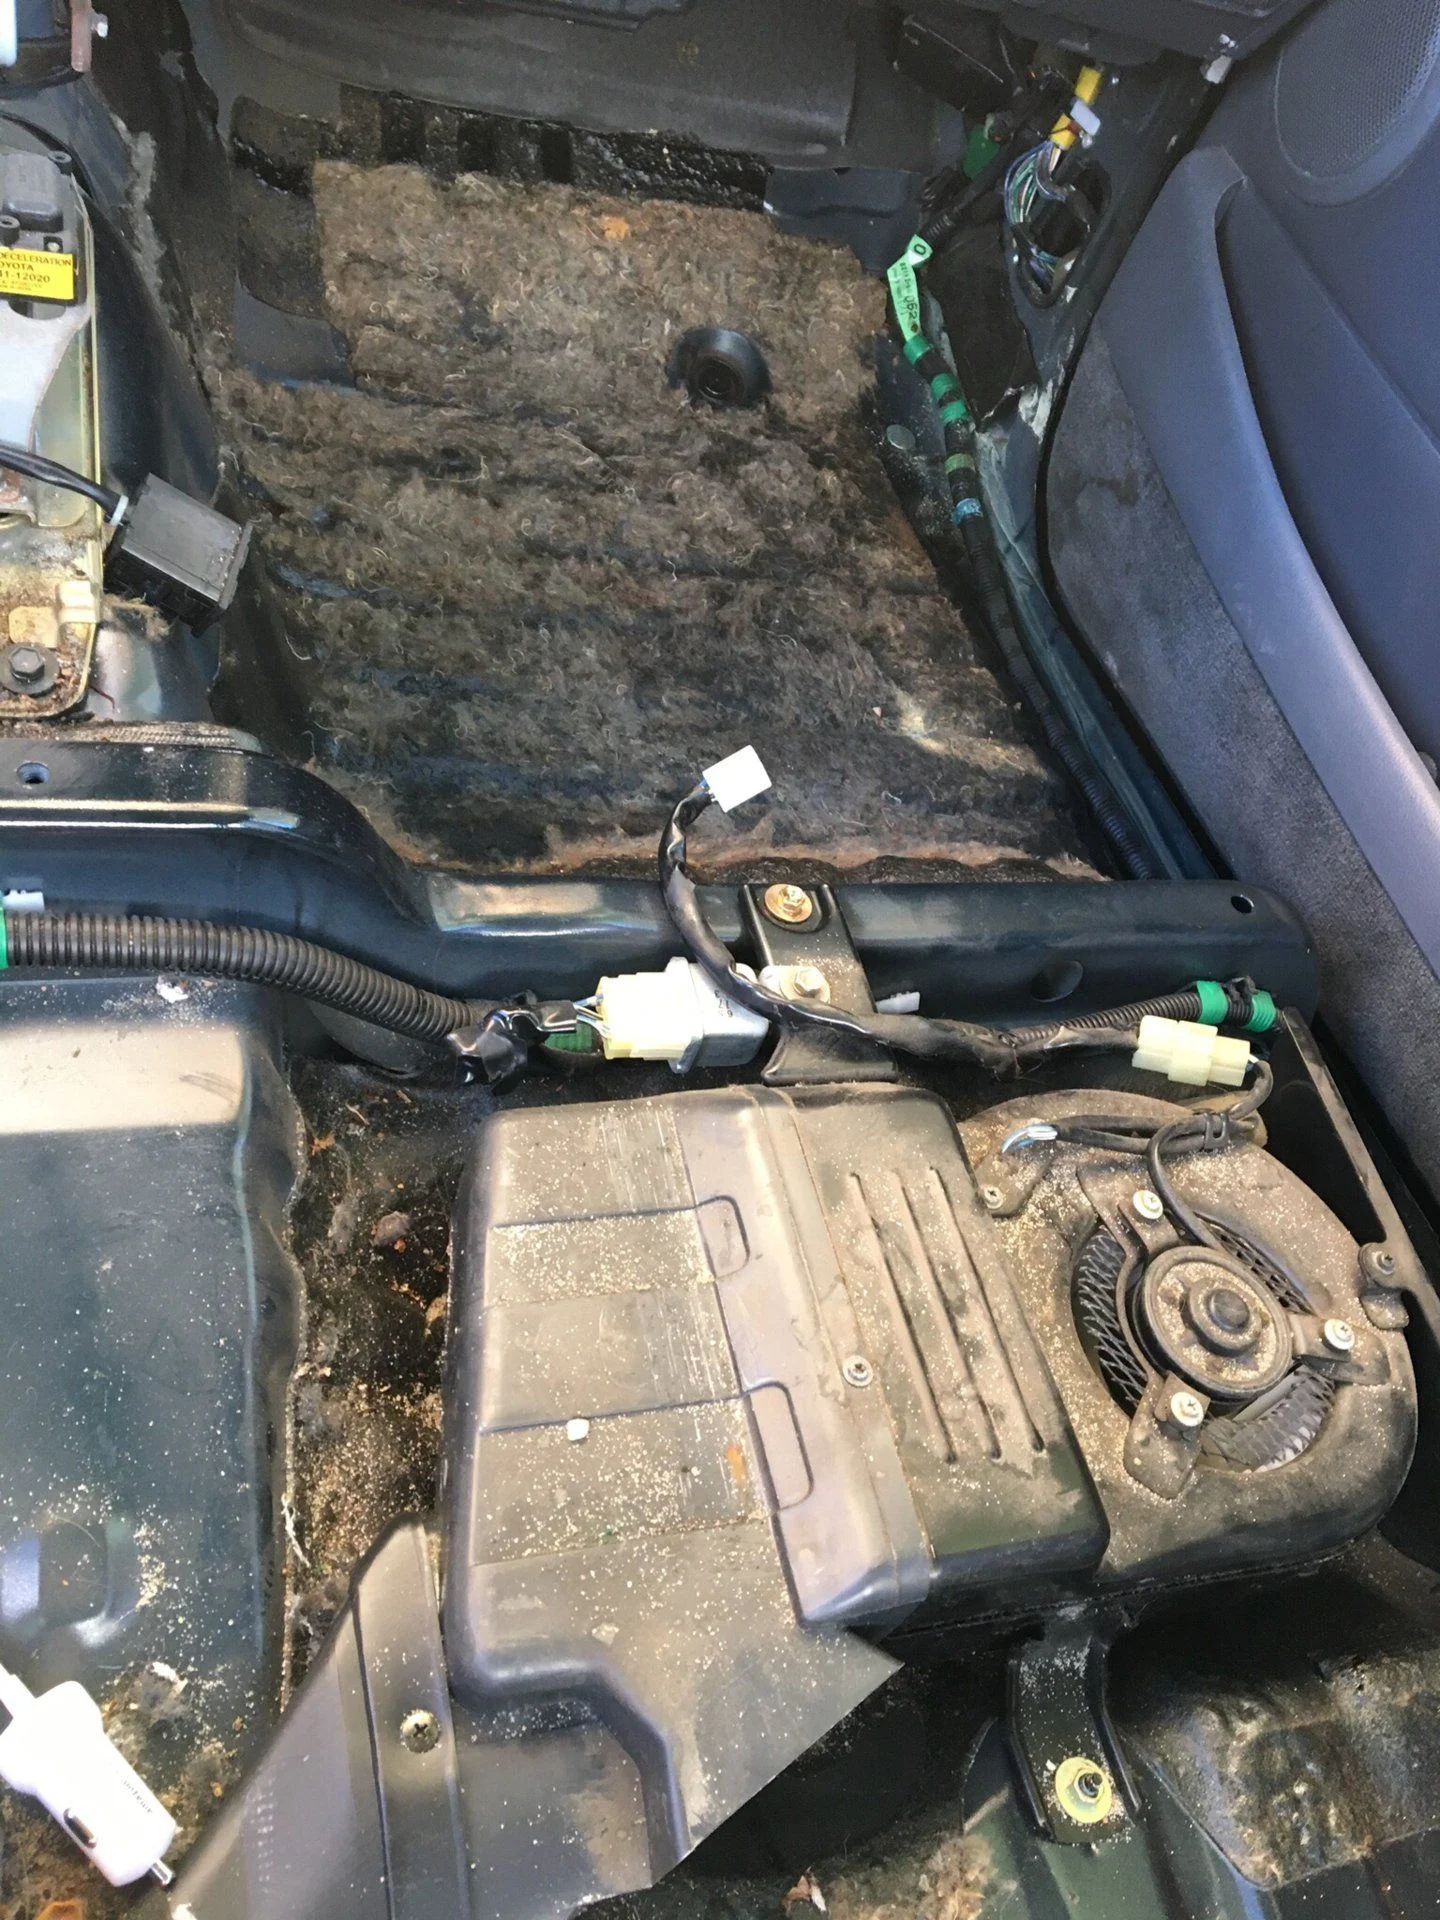
And a "short" list of upcoming work: coolant flush and fill; replace worm gears on front seats; bypass rear heater and remove; bypass PHH pipe w/ full Gates hose up to firewall; etc...

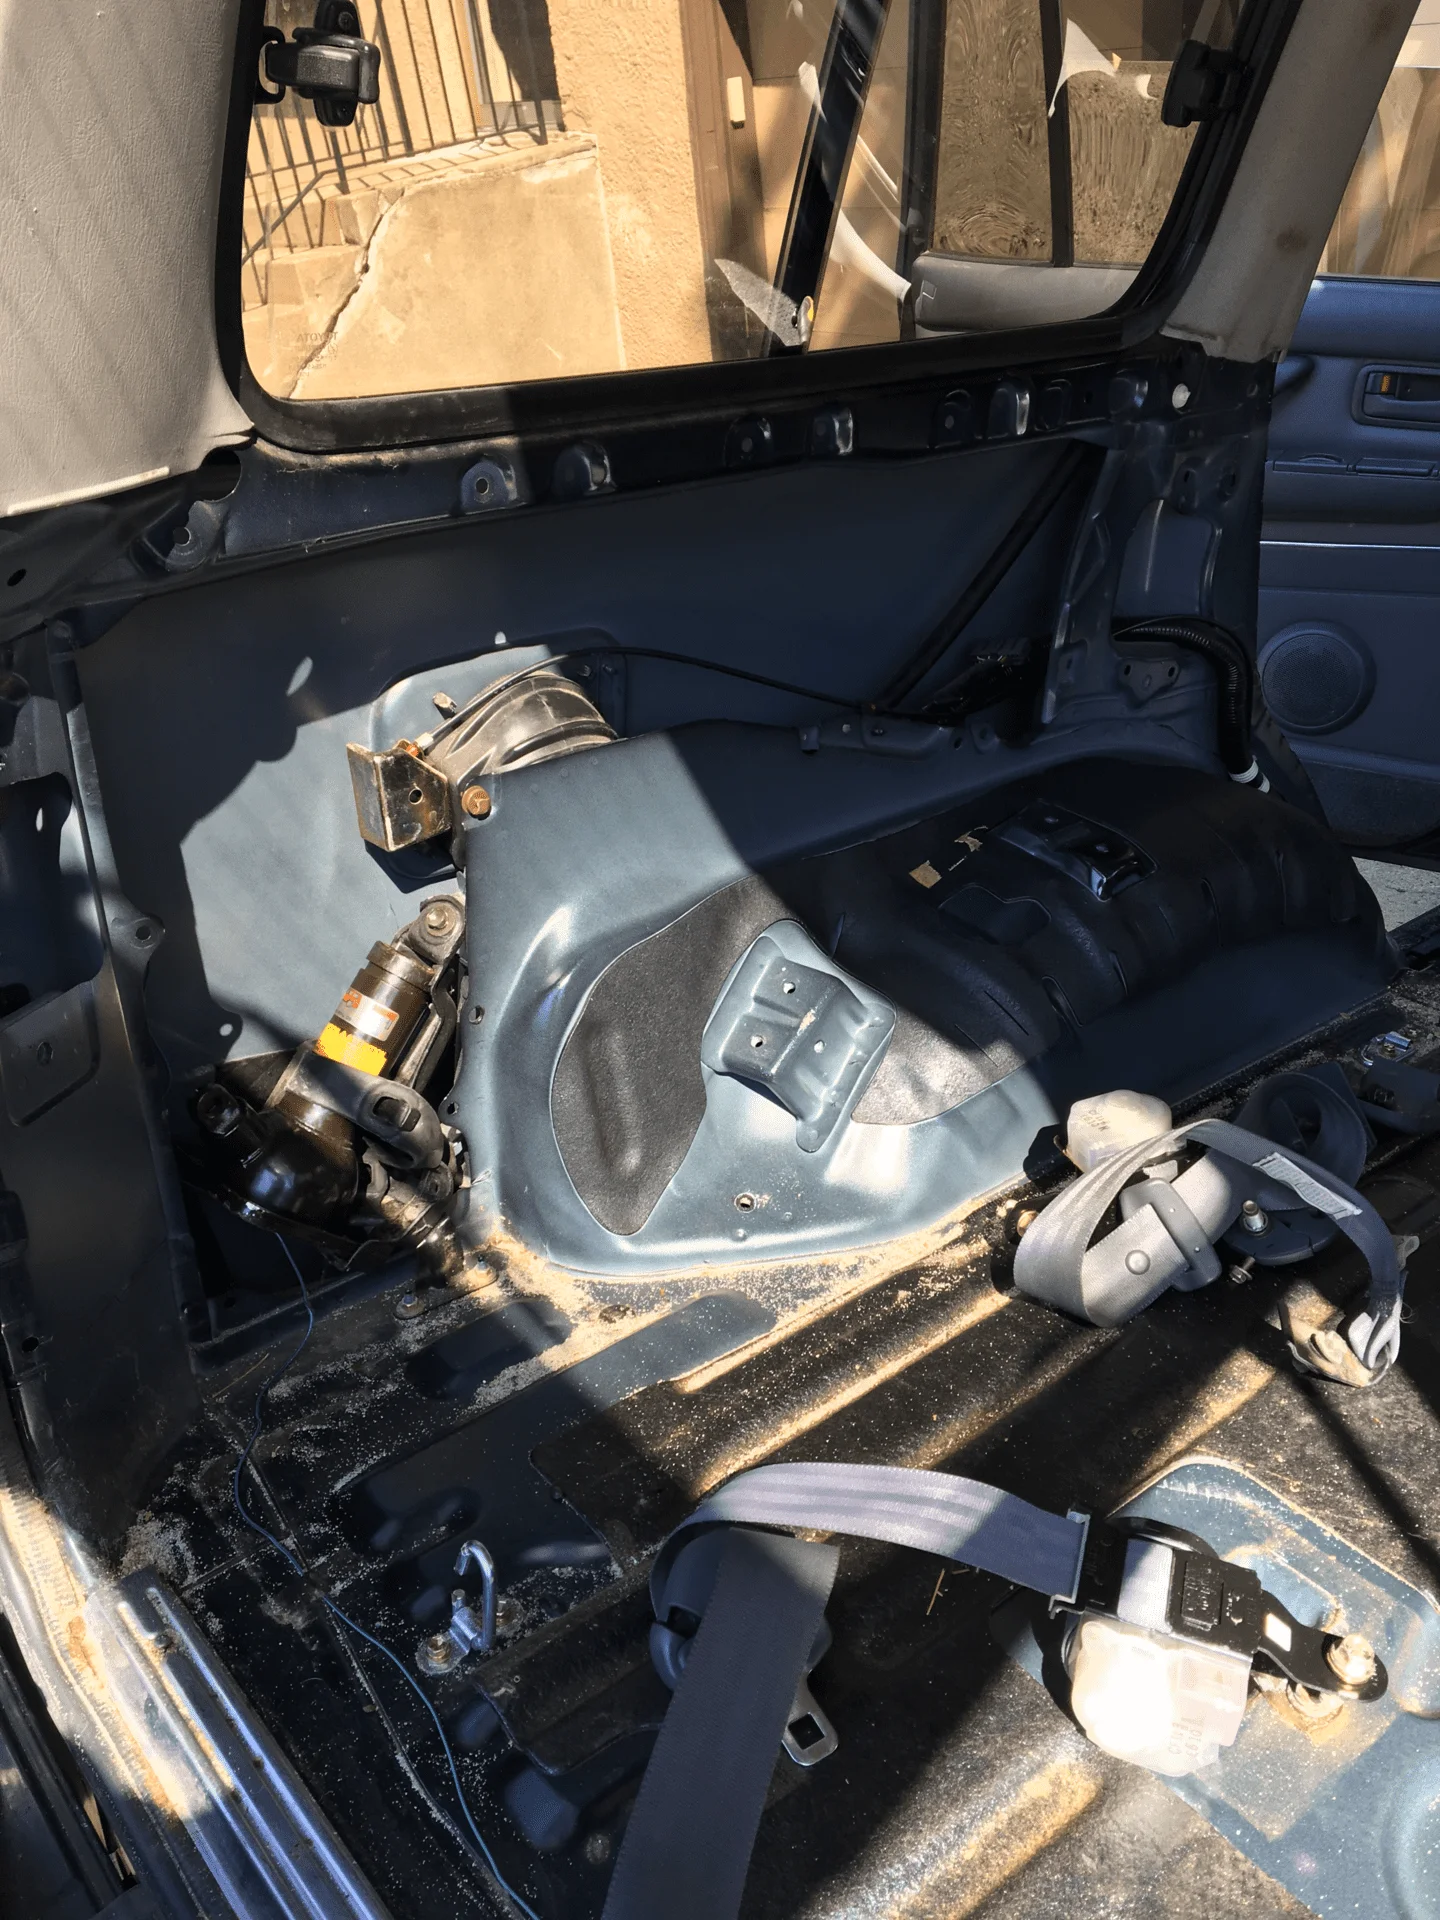
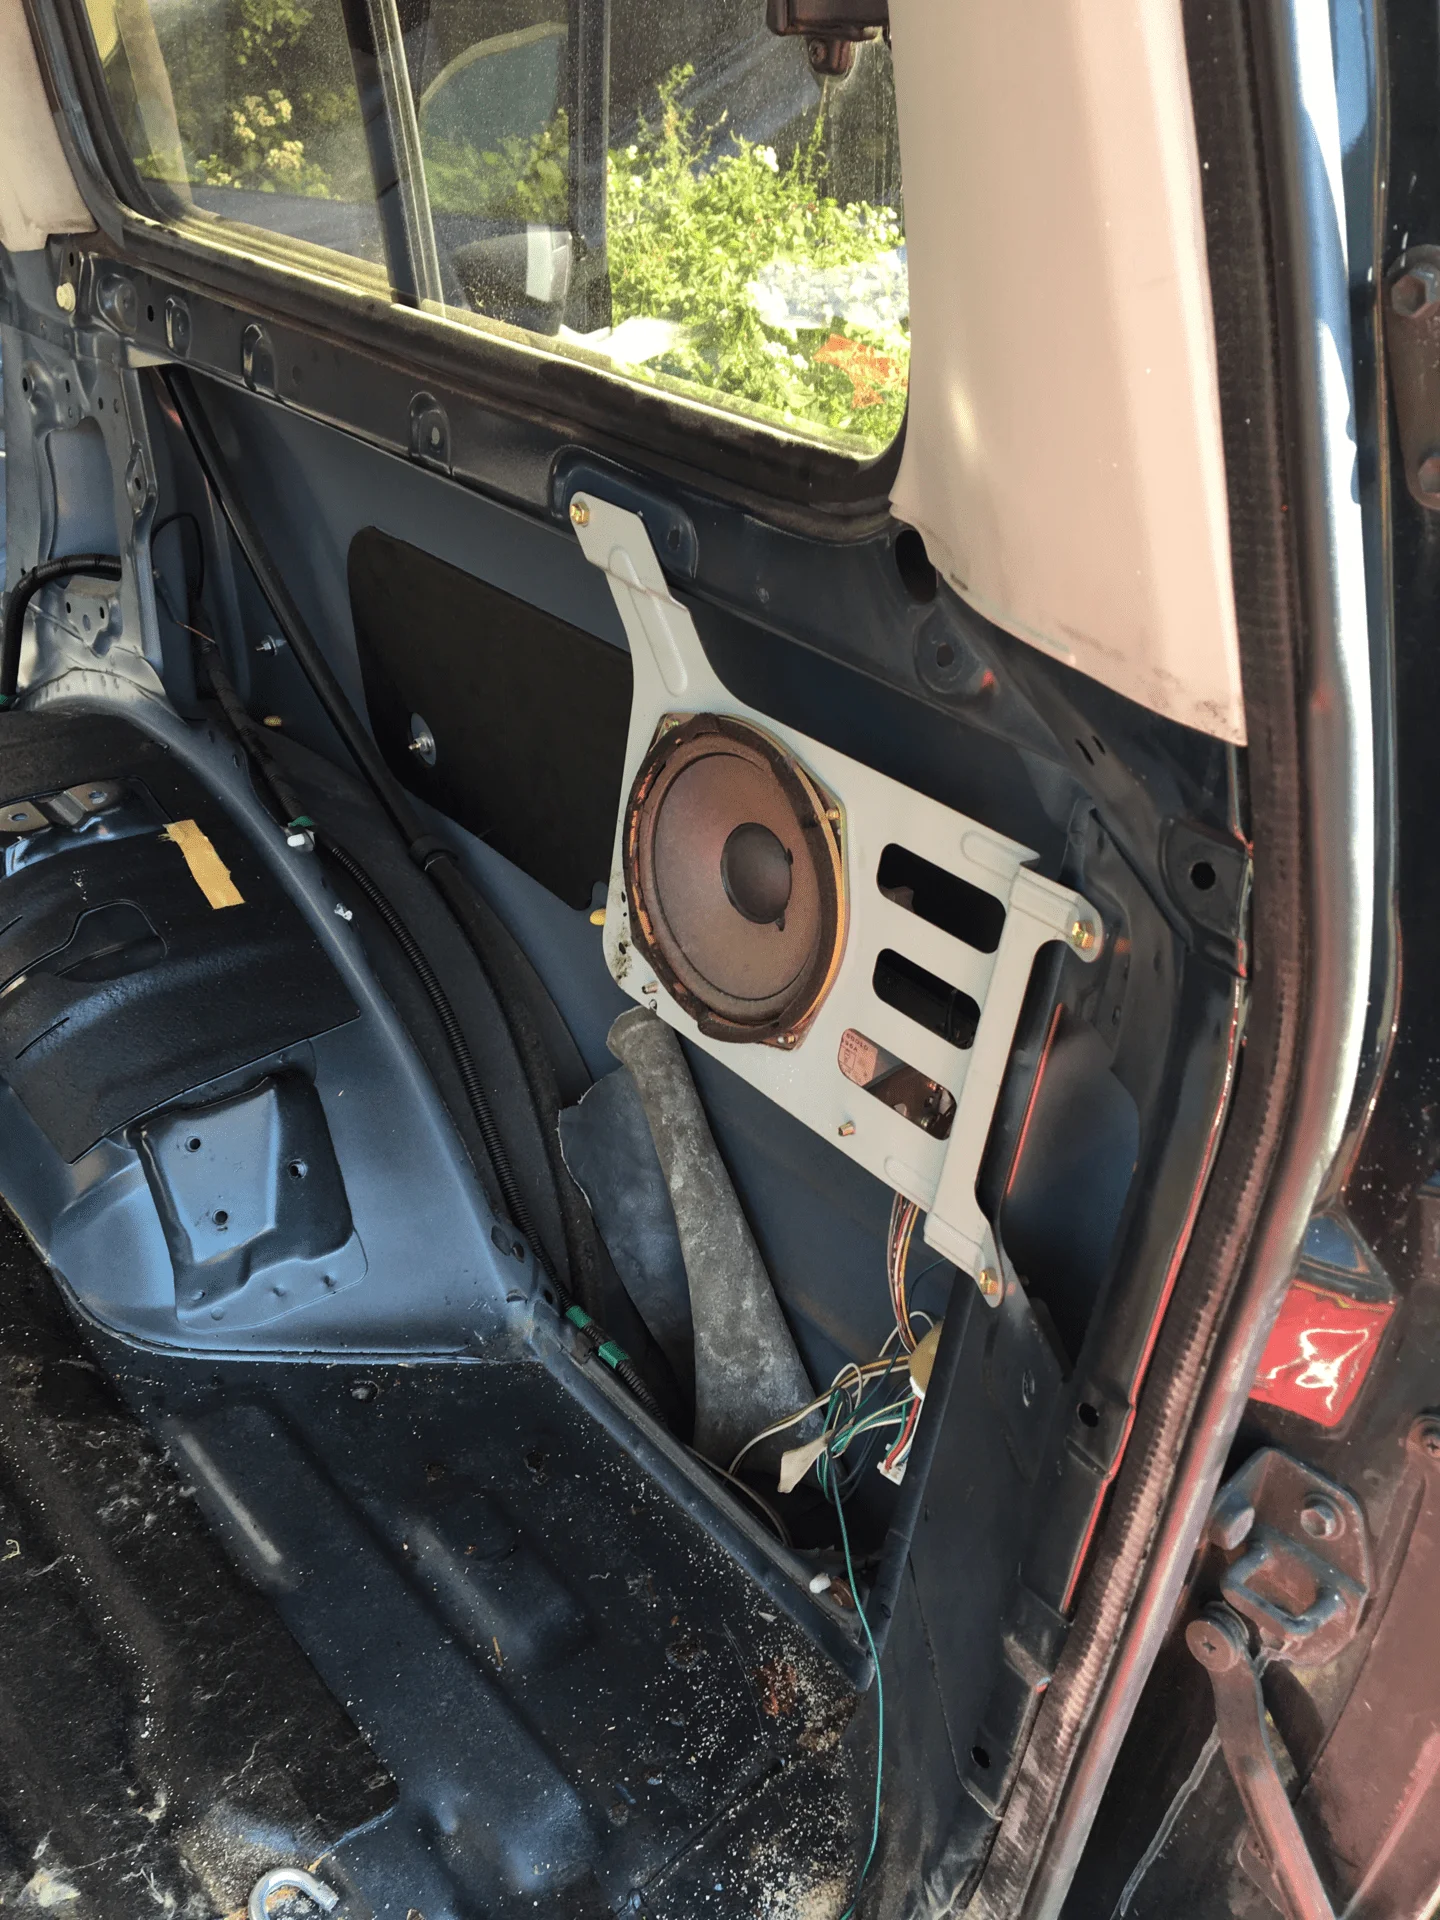
Oh, and completely redo my entire interior including trim, dash, door panels, carpet, seats, headliner, stereo, speakers, and amp...to name a few...I'll be adding pics and progress over the next few weeks as I get thru it to share my experience of taking on a project that is well beyond my comfort zone...also note this is my daily driver, so that should help others trying other such changes to their vehicle - I just remove/add my driver's seat in each time I need to work that area (it's four bolts and a plug, not a hassle).
 
Last edited:
Initial removal of carpet from front to back and getting seats and trim work off...here are pictures of the results...needless to say it was a dirty job in parts, though the cleanliness of all floor pans and the wiring work inside trim pieces was impressive...I even "discovered" the 3rd row compartment on the passenger side - which contained my factory-sealed receiver hitch and rubber cap...also found the factory carabiners that aren't cut thru the carpet from the factory apparently...that factory sub looks like it's seen 21 years of action, my gosh...and dont judge me on the shifter console muck, it's not from me...as you can see from the pics below, lots of factory sound dampener (i.e. dynamat) used throughout...and the sound proof fiber backing under the carpet mostly comes up with the carpet, though you'll have to scrape all remnants off to get it cleaned perfectly...anway, I'll post more content with specifics as I go on the overhaul, these are get things started

 
And a look at what the new "tan" trim will look like after it's all said and done...I just don't like the OEM gray look, too dark and drab for me. I'll add a post or two on the "how I did it" later on in the thread.

b column color change.jpeg
 
Last edited:
As you can see, I was able to "scrape" off all the old sound proofing fabric that's under the carpet. I just used a rough old piece of leather, but I'd say rough sponge would work fine too. I wouldn't suggest anything to hard (plastic or metal paint scrapers) as getting the fabric off the dampener seems like it's much easier using a tool that is some malleable...I just scraped with one hand with the shop vac hose in the other as I went...took no time at all to get it all off.
itDeItWHhuvdJ5q6Jgij0YUwImkDfjuHfEJhznFqnXvO11ftbT84GtqcF9FP6UcEhvpEE0wtLO_o7g6vu6pmCbSVbHiIBIM-8wyih-dI99fNGe3_lz3IiL6yVoT7fTCBtWcOY1nRL-5wmMHptz5k4gG9EHmKrwhutOvreUIFkcxNHeY-Yct8YDtM03_vkFRMnKK3D1PgRjt4AagZSgElZxcpdFrFV-KenwpVQeeQ8zQdXheUTbUCVzbJY3Ll_VHHhZRhGtnHMFeNvsEbWQZTpyhpY4Nu6uVmKoZJacrOYekY1dTKiZSztxEFnxx_b5zv_Tfth7Qg-xpEX9owKJcPXghv-ILhk0wATBH4F_nlGdNrVnRF3gYGl1ULDCwHDiWFbpR5O9PbLNEONKBAHZNlBcwI-cTwk5idqkkzrCLB8WIKl_pQ9i7UT1KL03oV1ALY2-NafHGP-2vSOYM0lcR4GTfvqpEBa9zwbEQkt91i43pKtNPu9KSBK7k4T2XesoD_QPKjBzwDre6rHjC5yCY5aPFUZX1DEaM5xdecB9mCFBX_LZgF0JfjCnyCd8EETlqYLA0C78Wkntk_83pLusZqv--7rSZGCSnM5xKkCvruSollTp3x2woy2_gG=w653-h869-no

W5JuefMWHyGHf05l6GSBhXjgHPdWaDSyxu_cZynfr5oWxIwOCrBPg-LPqz2dEVWvTx3RPFBHXoG_LB-9di32kUKZ5JpMHCSLUluk6cVwPQHFvCHZ736m8ko4XE6OE5EeskPgYQPO-pnrX4m6Nk_rtEglLbqc0FSTHKrdkw33kneAVWb82RVPe6XYJv1wIZawyat5CzyGZt-U4dAVExIrnA8VgIPIc53dsAvr0Qr8vOlfsrS2NTdeyWdrURTHaveHWrgBCLk_SeLLsr9g3t7sYT5armp-xJsb4fl7RaOoVe9Jg3sM6-n0-80SMLxedauxm7eS_L6thPJuU_Ldo8aRkSUmuS8asPxmL6lrGjG5TJtF_95AlY_cNEDy58eEiiC_LySTaUDKVFG3GOOsgQAWOE50LMIi8bSXZ8OzcWp2HOTnxnOnQX2QL_eChfmnZGCgW2ycPjhJPJ6Bd3QX72zHtxM9cMzOEhbIw8bpVBy2HQpsJpYmdKbjpCRQMDTdKjWgtDEriEq3LncH-72sf4CYO2uoRAnu95GEBZpI-3We2DVfhyEc5bgrn6zGrHE0Y4l0GGMwq3-SNvHEAQxYwLvYFRk6UHrmK5UL2sJtjjmFWRjCJNQHlaKYZY-L=w653-h869-no
 
Here is a picture of the rear roof area with the headliner down...there is one of the tiny speakers...you can also see the same sound proofing fabric used under the carpet was applied to the roof at the factory...i'm just going to leave that be, no need to replace...you can also see the back left corner drain line for the sunroof circled in red for anyone wanting to see one (more on those to come)...

upload_2018-10-2_16-14-11.png
 
When it came time to remove my front area carpet, I noticed the passenger foot well area was soaked...I assumed it was a weatherstripping issue, being a novice and all...so I put the garden hose to the roof and watched to see if I could re-create water getting it (I knew it wasn't coolant or anything)...I eventually got it to become visible dripping from the bottom edge of the gray interior weatherstripping trim that ends near the footwell...so again, thought it was the weatherstripping...I found a temp solution: pull the floorpan drainage plug/grommet in the corner and let any water that gets in drain out (which worked great)...I then remembered to check the sunroof drains - sure enough, my was clogged with a little dirt in the sunroof panel (open you sunroof, stand up inside your car, look down at sunroof in the corners, can't miss it)...so I cleaned both front sides with some alcohol and wipes and Q tips, then tested each drain line for any clogs or leaks (both were perfect and easy to remove and put back in place)...reattached, and no more water in floorpan :cheers::cheers:


Front passenger side drain line...easy to remove and clean corner drain w/ Q tip while standing up in car thru open sunroof:
j5UNUcxjZTcMp8eqOAzK_hTRQFzMAEfrFCht3Gd_Fx-AfcNaDr0PaTFGcZsoIJDHJ4bxbKqSmQZQq5mfiUqjgXxRG4qXT6MPYPHs2_jBG0zDMPlukQjyZ2ZvexRshrYZIlUUlDiOFKdJ6DKDgpfBC2s99S3yX6eNyJPIL-muowBVkFEBM2E1y5wyzXTqsdEp14zh-5HPIoFrClsY2U-gfdC7ZLO5faweVarn5pB1MrXg7scQ3IGchcOIhLKJ-jUFfQei5Bo2RNrpwx6vljsYcvAxnrP3LVzIENO5G4MQG7LcGvfrqG_DZl6ujFTsj6IMxf6JAmF2UICPqwGIzrzIE_rOJHRFSFBcOa-ovQApOCWgzmbMmd0jb3v1Z5DRQPNyifpqYfMjzuF85QsM7pjY6ddJPzMKKMNneg-4aBA9ux5ArnamcWBakf14eL3ES8utR5Gp9nExnNhjyEonJNjybftAfnhtjeQVkSJ5Q2QWU-7ZJuizBG5MF0shQYK7R3ntcEoXiiwwA_pEMQj_v733rxBxX1V0u6Ik-FAu5JrUMcU1Kg70AIfUAEkoNqqSL4keJ1IbOMABjmjb9jaJE4FaJeMA78xDU4-01G8ZQ7zVBOmb576Aa3wY713t=w653-h869-no


The end of the front drain lines can be found in the A column in the footwell in that circled access hole...it just ends in there and drains out into the great unknown:
upload_2018-10-2_16-30-12.png


Drainage hole I unplugged to drain water (and prevent it from re-pooling) while diagnosing cause for a few days...these are located strategically throughout the floorpan on the truck...so if you have sopping wet carpets somewhere, pull a nearby plug until you know how to fix it:
upload_2018-10-2_16-33-20.png
 
Shined some light on a lot of mysteries for me. Thanks. Since you're in MN and in case you didn't know it (or maybe I'm the only one that didn't) I understand those 2 white plugs just aft of the shift console are seat heater plugs for the OEM seat heater switches (while you're in there).
 
...I understand those 2 white plugs just aft of the shift console are seat heater plugs for the OEM seat heater switches (while you're in there).

Yeah, I recently learned that myself. And the third is apparently (?) for a console fridge option not available in the US...or so I’ve read on here.
 
Why are the shifter consoles hot after 15+ minutes of driving? The culprit is mostly the hole under that sensor device bracket (that tube going under the sensor is why the opening exists). It is open underneath (I can see the road whizzing by while driving) and air gets forced up thru the hole. Well, that air is blowing right by the engine, exhaust, and tranny so it picks up plenty of heat. While cruising, it forces enough hot air thru to the point it feels like a dash vent blowing on the second to highest fan setting. And it is nearly as hot of air as when the heater is running fully warmed up.

While the surrounding metal support plate covering everything gets warm to the touch, I believe the radiant heat from that plate is less the culprit than the steady stream of hot air pouring in thru that hole. I am going to patch/cover it the best I can with a piece of the under carpet heat/insulation pad I bought. I'll add that update when done, just wanted to pass on a little knowledge I picked up today while driving...for reference, it's about 64 today here in MN, so the hot air coming up wasn't just hot summer air, it's heated-by-the-engine-bay air...which means in the winters up here it's probably not an issue, but above 50 degrees I'd say the issue starts (meaning the air can get heated hot enough) and I can only imagine 90+ day air getting heated more and pouring in.

upload_2018-10-3_12-21-19.png
 
Last edited:
There is a rubber shifter boot thing under there.
Remove that metal plate and replace it. It tears wide open where the lever moves back and forth.
Try #
33555-60071
Boot shift lever
 
Last edited:
@Tedward That shift lever boot appears to be for the actual low/hi gear shifter (bottom left of pic). The hole I’m referring to is over by the area of part starting 33508 (which is the passenger of the trans console)...which on this explosion diagram doesn’t show any boot/cover going under the sensor bracket where the tube enters it. Seems like the opening is a “by design” unless this diagram is missing a part.
791140_3312_0001.png
 
Try looking at a thread titled
Torn Boot
Started by member 82much

Just looked myself and there are some good pics.
The trans gear selector has linkage that goes to your problem area. It's just a little rectangle hole in the boot on the passenger. The transfer case gear selector has a much larger hole directly under the handle. Easy to see what I'm poorly describing in that ththread.

I replaced that boot and it stopped the hot air coming in. 82 much took it a step further and added insulation. Wish I'd thought of that.
 
Last edited:
Ah yeah that’s a great post. I never would have thought that the hi/lo shift boot/grommet would also have a chunk specifically designed for that square. Genius. Thank you very much @Tedward for guiding me to the light.
 
Slowly moving along here, today I performed the Rear Heater Bypass for the engine bay hoses. This pain in the ass job is a pain in the ass. The hoses cobbled together by the heater valve are a mess to remove even with long angled pick pliers, longer arms than I have (basically sat in the engine bay for an hour), and plenty of swearing. To perform this job, I followed these posts, and still felt like I wanted a bit more visual guidance, so I'm adding a few photos that I hope help someone else out:
For the Heater Valve hose portion, I used the pre-shaped hose from @LandCruiserPhil which worked great. For the hose on the passenger side I just used standard 5/8" heater hose. There are several hose connections that use cotter pins instead of, well, squeeze clamps. That was a first, and they are feisty and often in spots where just ripping them out isn't either doable or advisable.

These are the sections from a wider angle. The one on the left/passenger side running straight out of the firewall is so much easier than the one in the middle to remove. So start there, just to feel encouraged.
upload_2018-10-17_17-34-50.png


Closer view of the left/passenger side contraption. Tips"
  1. I cut the hose in half here with a utility knife. Breaking these things apart is the only way I could remove them with some sanity. About half a cup of fluid drained out, so I laid a large wad of shop towels under the cut and squeezed the hose until it stopped dripping.
  2. This bottom connection gets killed in the bypass.
  3. This top connection is retained in the bypass. Still remove the hose on there, but that's where your new hose will connect into and then it will follow the path down to the "1" mark and connect there as a single straight-ish hose.
upload_2018-10-17_17-37-8.png


Here it is complete (well, passenger hose bypass). You can see the open connection that is now unused (marked as "2" above). When I began removing/cutting the Heater Valve hose setup, some minimal fluid came out of that open connection, so another rag spot to consider (stopped once the built up pressure was released). You can cap that connection with something like this guy. But keep in mind the unused plugs/ports seem to be smaller, so it might need 5/16" and not 5/8". Don't forget a hose clamp for the cap as well. ;) Also, put on the this bypass hose last. You will want the extra space for the removal of the Heater Valve nonsense coming up, and then you might as well put the Heater Valve bypass hose on before this straight shot.

upload_2018-10-17_17-43-9.png


Moving on to the middle/Heater Valve hose jungle, this is where you should take a break. Play with your dog. Kiss your lady. Remember that life is good.

OK. Moving on. Again, remove whatever sections you can remove most easily. It's not going to come off as one nice piece.

The device to the right of the "A' with the the arrow pointing left is your Heater Valve (aka Control Valve) and is part 87240-60170 for 95-97 (99% on those years, I'm a '97). It is made of plastic. Not a bad time to consider replacing it...I get to replace mine now:

A: This hose clamp is a cotter pin clamp. It was all but welded into the hose and when I was able to remove that straight hose chunk it took off a small piece of the Heater Valve connection plug as well (minor, but I'm going to replace it anyway). I was able to attach the bypass hose clean and clamp it down as 90% of the plug was still there and had no cracks, but a heads up that the valve is plastic and it's plugs can crack/chip/break.

B: This firewall connection is re-used in the bypass.

C: This bottom connection is not used as part of the bypass - another connection to cap when done. This piece was the worst to remove. Getting at the two clamps on it (one squeeze, one cotter) was a huge pain. I had to use from long angler pliers with c-clamp ends to rip apart the hose enough to loosen it.

D: Minor, but this is a capped end. Doesn't feed down to anything, just stops here.


upload_2018-10-17_17-49-36.png


And here it is all done with the special bypass hose pre-formed for the turns. The unused connection open as part of the bypass, marked as "C" above, is shown in the square. Cap it.
upload_2018-10-17_18-7-40.png
 
Last edited:
Capped off the week with a PHH bypass using Gates Green Stripe 5/8" heater hose (tricky stuff to track down due to varying item numbers due to how its sold wholesale to each shop - all based on total length of roll, long story). I should say I never should have done this task. It was a huge hassle, and mine was in good shape. But oh well, now it's done.

For ordering the Gates Green Stripe, I came across a goofy auto parts thing. As this hose is sold by Gates to auto parts shops in varying bulk lengths (300, 100, 50...maybe more), they are sold as different item numbers to consumers by these shops because they don't code them in as the same product. So, when I called O'Reilly and Napa to order in 10 feet (more uses for it than the PHH bypass), I gave them the 300 foot item number, not knowing it mattered - I just wanted 10 feet of ANY Gates Green Stripe 5/8" heater hose, I didn't care what roll it came off. They each struggled to find it anywhere in their networks, with O'Reilly saying they had it but would need to charge me freight...well I did some digging on their site and found 3 different product listings for the same f-ing hose. Then I noticed the "length" in the details (pic below). I then called back O'Reilly, gave them the part number for the "50 foot" hose and, sure enough, they had it readily available...so, maybe that helps someone avoid the hassle of tracking this hose made of gold down.
upload_2018-10-20_10-39-28.png


Here's a couple links to help show this problem:
300 foot roll - part 28447 @ O'Reilly
50 foot roll - part 28441 @ O'Reilly

I used these posts to guide me in doing the PHH removal and bypass:
PHH & metal tube replaced using re-routed silicone hose
Pesky Heater Hose Repair

I ended up routing my Gates hose on a longer loop than the stock pipe simply for flow purposes (following the "rerouted" post above by @darnold87 ) - I didn't want any unnecessary hard 90 degree turns (like the can pipe perform). Even so, I still used the heat wrap I bought in case I did run it very close to the engine block. Now, the only exposure the bare hose gets is at the ends - just like stock.

Heat Wrap used (I bought the 1" version, 3/4" was largest for sale when I went back to site today for link):
https://www.amazon.com/gp/product/B075M9ZSLJ/ref=oh_aui_detailpage_o02_s01?ie=UTF8&th=1

Tools used to complete this job plus the rear heater bypass:
TEKTON 10 in. Long Reach 90-Degree Bent Nose Pliers-34406 - The Home Depot
TEKTON 10-1/2 in. Long Reach Hose Ring Pliers-34435 - The Home Depot

For the PHH, even these long reaching small space tools weren't all I needed. You will likely want an adjustable locking wrench/pliers (longest and skinniest you can find) to assist as the PHH is connected to the stock pipe using a cotter pin clamp, but a second clamp connect the 4" PHH hose to the engine bay is a squeeze clamp and a huge pain to not only get at but reset once you're finished. I would also say a 45 degreen angle bent hose pliers is better than the 90 as you are always at an odd angle during this procedure. While mine were 10", I say if you can find 14"+ you'll be a happy camper. My forearms are sore and scraped tender this day after.

I did a full coolant (I used Zerex Asian Red) flush and fill after (it was due). It took some time to relieve air in the system after this week of hose work, but she's running happy with nice hot air now, and I'll keep an eye on her levels this next week.

Oh, as a full disclaimer: I am still trying to remove the stock pipe I bypassed. It is bolted to the engine in two spots using a 12mm bolt and one spot is deep and tricky. But it's just an empty pipe in there hurting nothing until I get a longer 12mm wrench solution.

The finished product. You can see the fully wrapped hose looping around. The green arrow points to where the end/PHH engine connection is located. You can't see the actual engine connection from up top, but its only about 10-12 inches below the upper heater valve connection it plugs into. I was thinking it would be lower...

upload_2018-10-20_10-26-27.png
 
Also performed an oil change yesterday to get back to 5W-30 after Shell technical support advised me to stop using 15W40 heavy duty diesel oil (ask if you want to know why, something to do with lead or iron levels, I'd have to dig up the email). Well, now my system is 100% Valvoline, sort of by accident (tranny, oil, coolant - I mean, they use Zerex in their Valvoline lines anyway - gear oil, knuckle and zirk grease).

For my rig, I used:
Valvoline Full Synthetic High Mileage with MaxLife™ Technology SAE 5W-30 Motor Oil - Easy Pour 5 Quart - this easy pour was no joke, I didn't even need a funnel
Royal Purple 341777 Extended Life Oil Filter - 10-2835 - engine bay needed some color anyway ;)

Getting the filter off wasn't a pretty job my first time I did an oil change on this rig. It had a Toyota OEM on it, but it was cranked tight when PO had it done (or it had just been on for a while). I haven't dug into the forums for a "trick" yet. So I just used an oil filter pliers and grab it head on with a jaw on the top and bottom (I couldn't grab it from any side to get the jaws to wrap around it due the cramped space its in). Squeezed hard (I dented the end of the filter) and cranked it over bit by bit. My first filter came off easier this time around - no destruction required.
 
I've used Rotella 15W40 diesel oil for year and years. What's wrong with using it?
 
@Cruzerman here is what Shell’s technical support emailed me me after I said I was using their 15w40 oil in my rig (as well as my ‘74 Honda motorcycle) and wanted their feedback on if it was good to use:

“There is some concern using a diesel oil in a gasoline engine with a catalytic converter. The byproduct of a diesel engine oil in a gasoline engine can clog a catalytic converter. Using higher viscosities may cause extra stress and use more fuel, it’s is always best to use a viscosity that meets the OEM requirement. We do offer higher mileage engine oils in the correct viscosities that can help to condition older worn seals. For your older air-cooled motorcycle the 1200ppm of ZDDP in Rotella T5 may be a very good alternative to most API rated gasoline engine oils. The higher zinc in Rotella offers better protection to any metal to metal contact than todays’ API SN rated oils that would only have about 800 ppm of zinc.”

So, not overly “bad”, they just didn’t recommend it and figured that going back to 5w30 (especially in my winters in MN, plus no known seal/gasket leaks) would work for me.
 
Some updated photos of the interior coming back together. I'll post a more thorough summary update once everything is complete, including parts/products used. But it has come out as good as I've hoped for the color change. I sprayed the dash with everything covered except the windshield, which I then replaced the next day thru insurance as it had a crack anyway, and that was so much easier than taking it off (the upper dash, that is - I removed all the lower dash trim pieces and painted them outside the car, along with every other trim piece).

The steering wheel will be one of the last pieces converted to tan/brown. But things are going back in (finally). As you can see here I placed the amp under the passenger seat (removed rear heater after going hose bypass to create the extra room).

You can also see in the far left that I've even had the seat belts re-webbed to tan. They needed fresh belts anyway, as they were stiff and wouldn't retract very easily. Now they zip back smooth and fast.

7Y-G_Rb1oifsdptqo0rVMw5sOt5yh3LSASu2LJBb9uW3DwxHFBZahS-HvX0MLDcBG-IIs8r1Y5c-U7Tnh96hsavXBlUaDaQHD1Xadn8tosarOtAYBYAQ0_9XUVNv_ZEpf6NMZMHycKk5Wfnxbg1F42IQmcAoKoGcr0qMtvRuBqbo5Le7hy7EWmDi1KQLQL458nzj6TLimMOWDHKzt91CPRQVuGiONpnSiyTy0c0CUogKRn_xJuKcGM2cbjxPRktGMTQPFOlVf-bouidHLOO9SHJp3LEYmQRG-7x7Mk90ZkJ_pjkAmEvSiSqL_dE8dk4azkHmSmePWFNearFnmcrs_2TlvDw5fgmNPHuZDQvWei8h03lsXyqw1_fdlwkT58tYF1xsGaOazWmZguTi6fGSbq_boQh48Gt7x0R6qz7HGunHJ2u5Xg9G3NHlYuQsYKJ-VGA0aymFczdYPlKRFuV0uKAIEATrmxyXErIvf0fSpnvyeU9ysZLPT6xoYnv7eR2rOPo0VYkYcwwUWejRdh-us_1V0YkGy5hHhsmyO2MDjF20-nTH4tmVPUBHW6VEL6WSYRgl5Ohm6ZmLthqeMY6rUjLlE9-WcbDV0M0tB5To4rpVSX94DBnsLaZlw8gS8_y7zfI30QGIZ390pmoRCA=w653-h869-no


Here is a "daylight" view of the dash and console updated. Again, I'll post more expansive pics later, just wanted to get an update out as I've been bogged down lately getting everything finished up. You can see a hint of the new seats from Lseat.com. Their kit worked great and the new Tan color goes well with the brown/tan choices I made with the trim/dash and carpet colors...at least I think.

That Sony head unit installed like a breeze. It came with bracket bolt holes specifically for Toyota and the factory head unit's brackets bolted to it perfectly.

h_bKiX08stusfpATTjcna3-U_RlQD91uRhexRE5jat7d6JKfK7NFtd3ouH1gjDmryr7qU7QsLaA6U2O_xLewws-KIdNhdY5hdlKs_k1w5NgVfuvAtAjPy0BO4SSAX4tUzroqCIOfxrLLNcXxSE9BDEm_hUUn0IvU6zPd4sDJzyVeKGymQ0GbzLuxBdBwG41vF3Xi0wwwTYtWxgn5JKxIslgNugPMTafLcfHR3ZigzA4VLkFMYp8TVrKZgQ6vpIYsE-uQIUfberVL-3iQP3251KGK_gLsQ2gsFUp7M_h5u4RHUNemsMPPzHQUJRu6StdPpfLG99mw75B_UYh5drcziCH73MMSJQXtBt2N2jLOKIx_WA_CAtI9Ol1Mwusdr-tTgpCXrudFDerDOSJfe_l_o1GSJyOhgUEXt-_qaYvMdUIGCCvbFRDuEmsVMwEpOL1gR6QRm7gLc7-et_WsfLgegj6A4sE95p3jRWP9jBScSX-MYqarbEn4wcVFH9KZ9PbJnZ8fDUx73fyRQopkQfKkSZWfpGaAiGwpwYFUTvHRuQ3md1xQSQydRTmVpdSktxq67WofCTkV_AnQjDmE8iv0RuCeLeWpJlR_ihd_3oWGBPdRePmAmW_JjozoZld-6SK193dczDuMVJ1mYg8L7g=w653-h869-no
 

Users who are viewing this thread

Back
Top Bottom