
How is this installed?This works much better.
Georg @ Valley Hybrids, Cruiser Brothers & Long Range America
View attachment 2610545
Navigation
Install the app
How to install the app on iOS
Follow along with the video below to see how to install our site as a web app on your home screen.
Note: This feature may not be available in some browsers.
More options
Style variation
You are using an out of date browser. It may not display this or other websites correctly.
You should upgrade or use an alternative browser.
You should upgrade or use an alternative browser.
Member Builds and Stories
This site may earn a commission from merchant affiliate
links, including eBay, Amazon, Skimlinks, and others.
Axles/Diffs
View all 7 threadmarks
Recent threadmarks
Manual Hubs New Parts Rear Axle Rear Axle Rear Axle Front Axle Front Axle and Brakes
Steering
View all 2 threadmarks
Recent threadmarks
Gearbox Replacement Pump Rebuild and Steering Refurbishment
- Thread starter
- #442
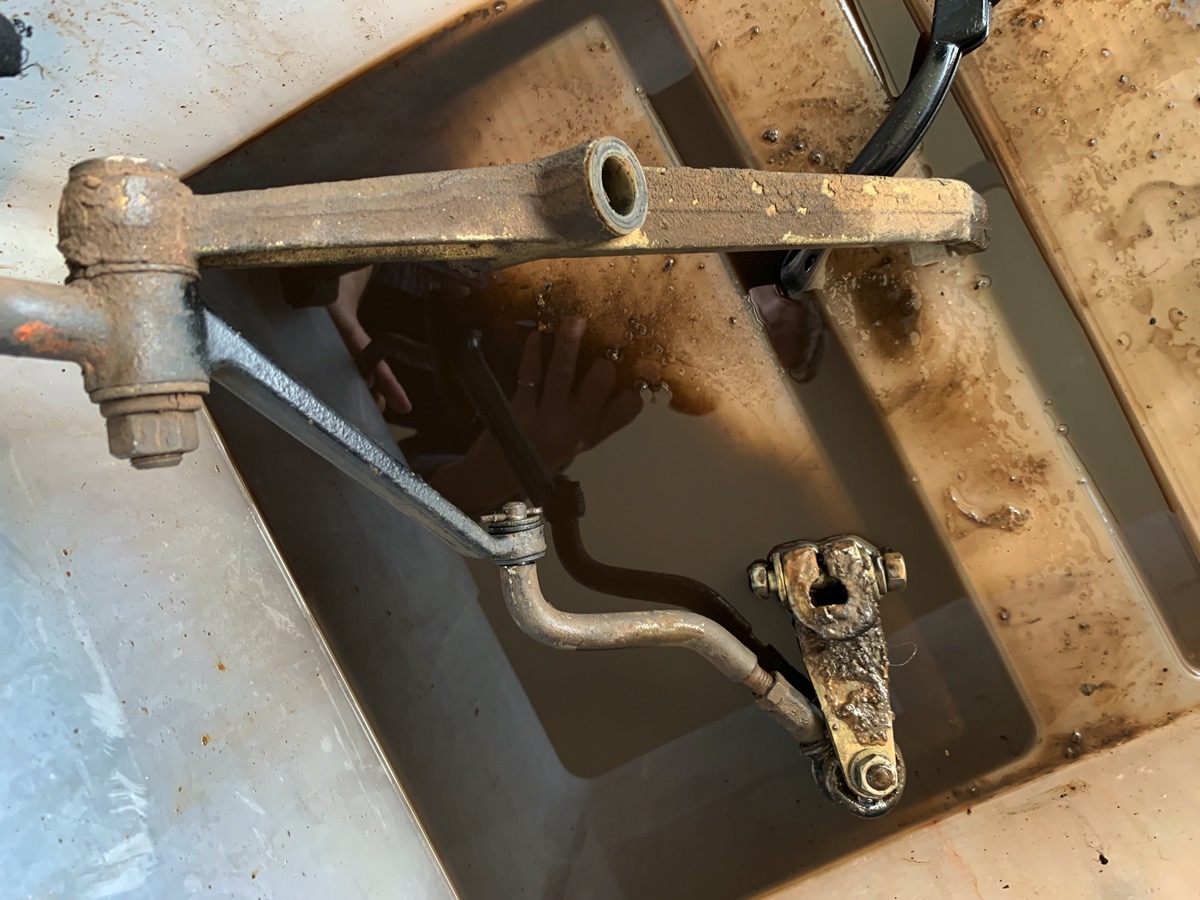
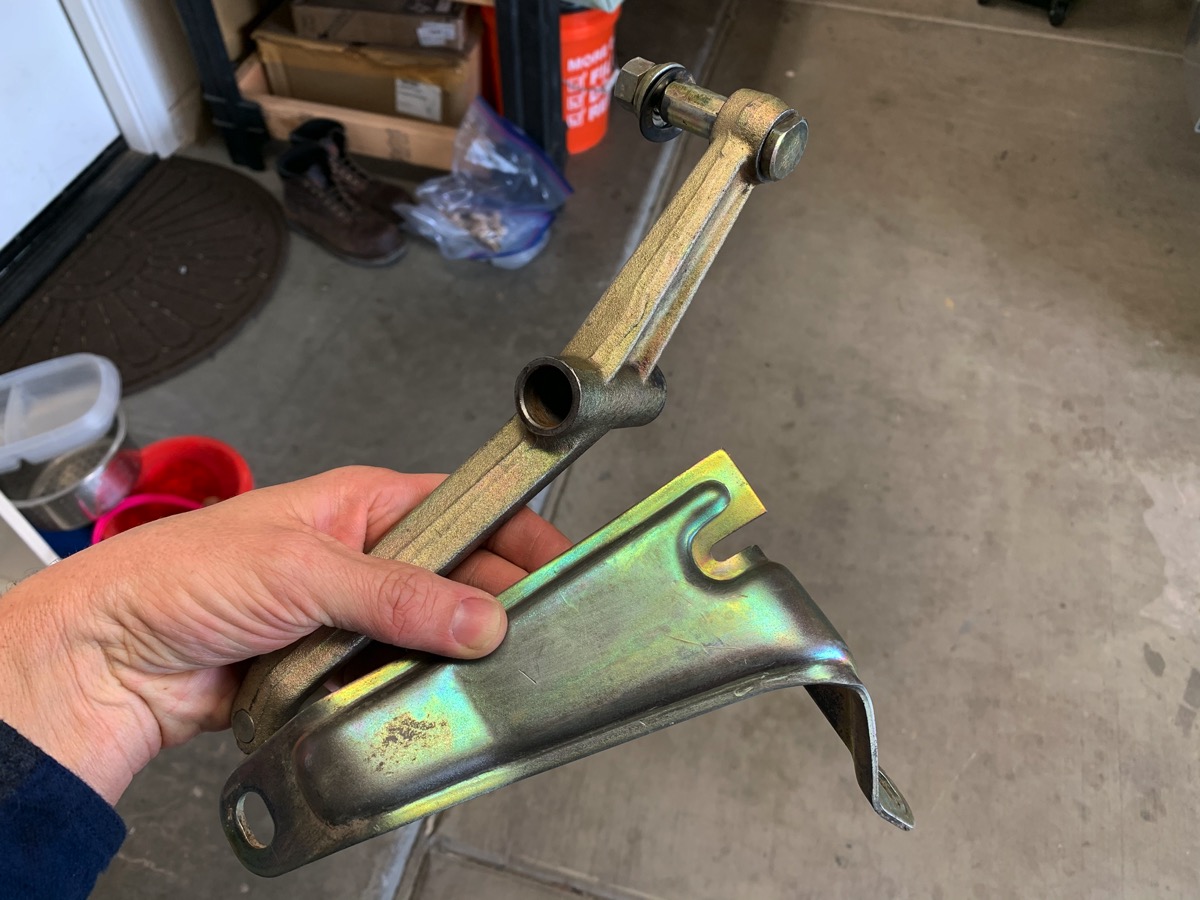
It looks like it would press in just as the stock one seems to be. Stock one doesn't appear threaded.How is this installed?
Transfer Case Support/Skidplate
- Thread starter
- #443
After giving myself permission NOT to restore things and pretty them up, I went ahead and decided to paint some things.
I set up a paint area in my side yard area and busted out the HVLP and Blitz Black. The crossmember, skid plate, and clutch service cover were well-prepped for paint by the high-temp pressure washing. A wipe down with lacquer thinner and they were good to go...
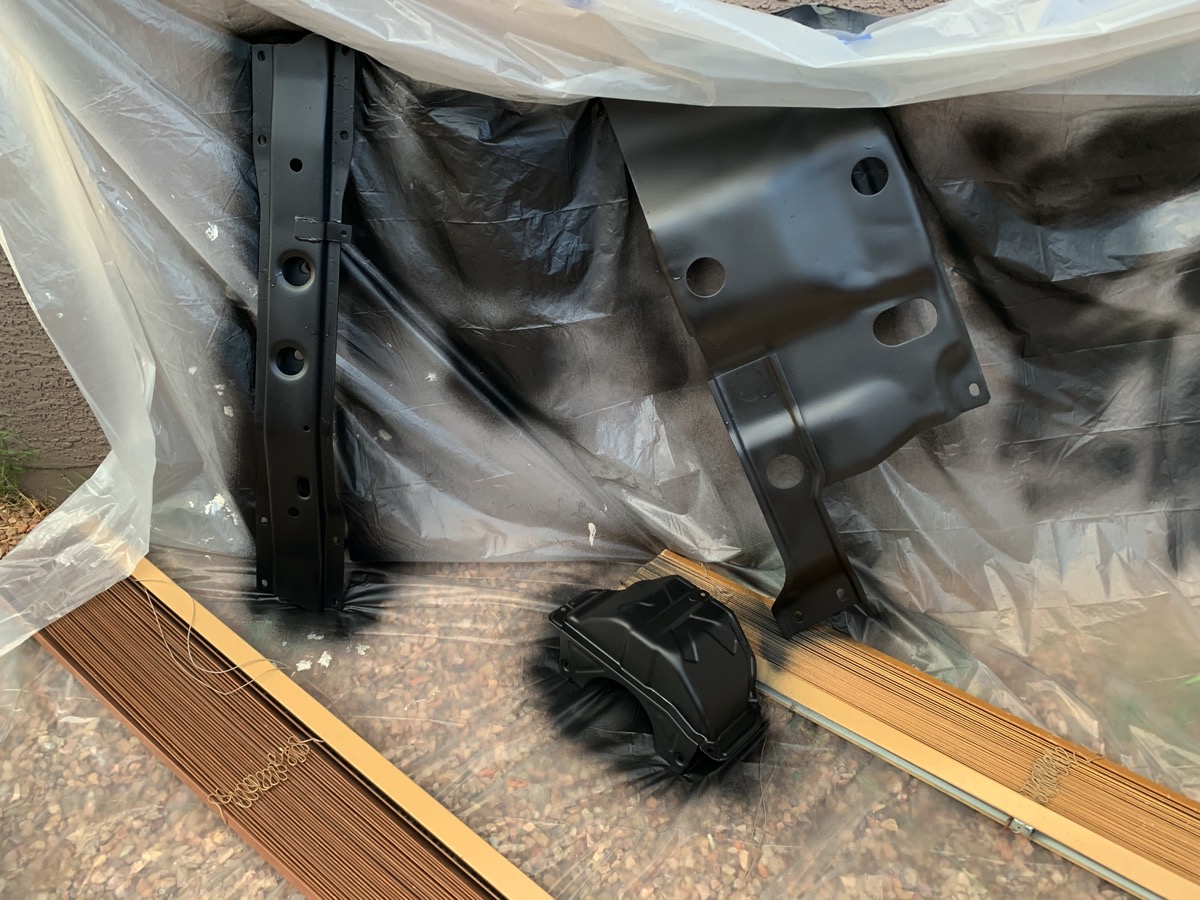
This was my first time shooting with an HVLP paint gun. A bit of a learning curve. A few runs on the skid plate and crossmember.
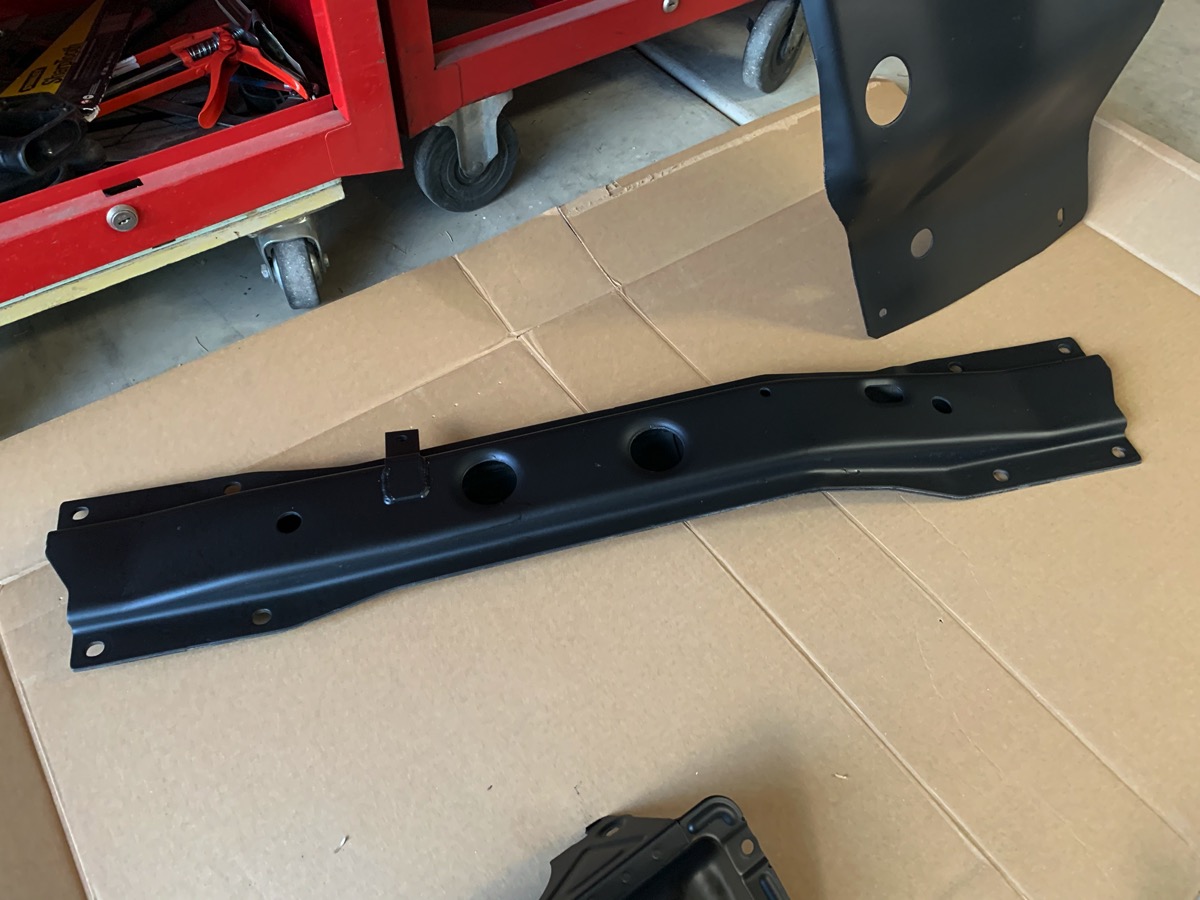
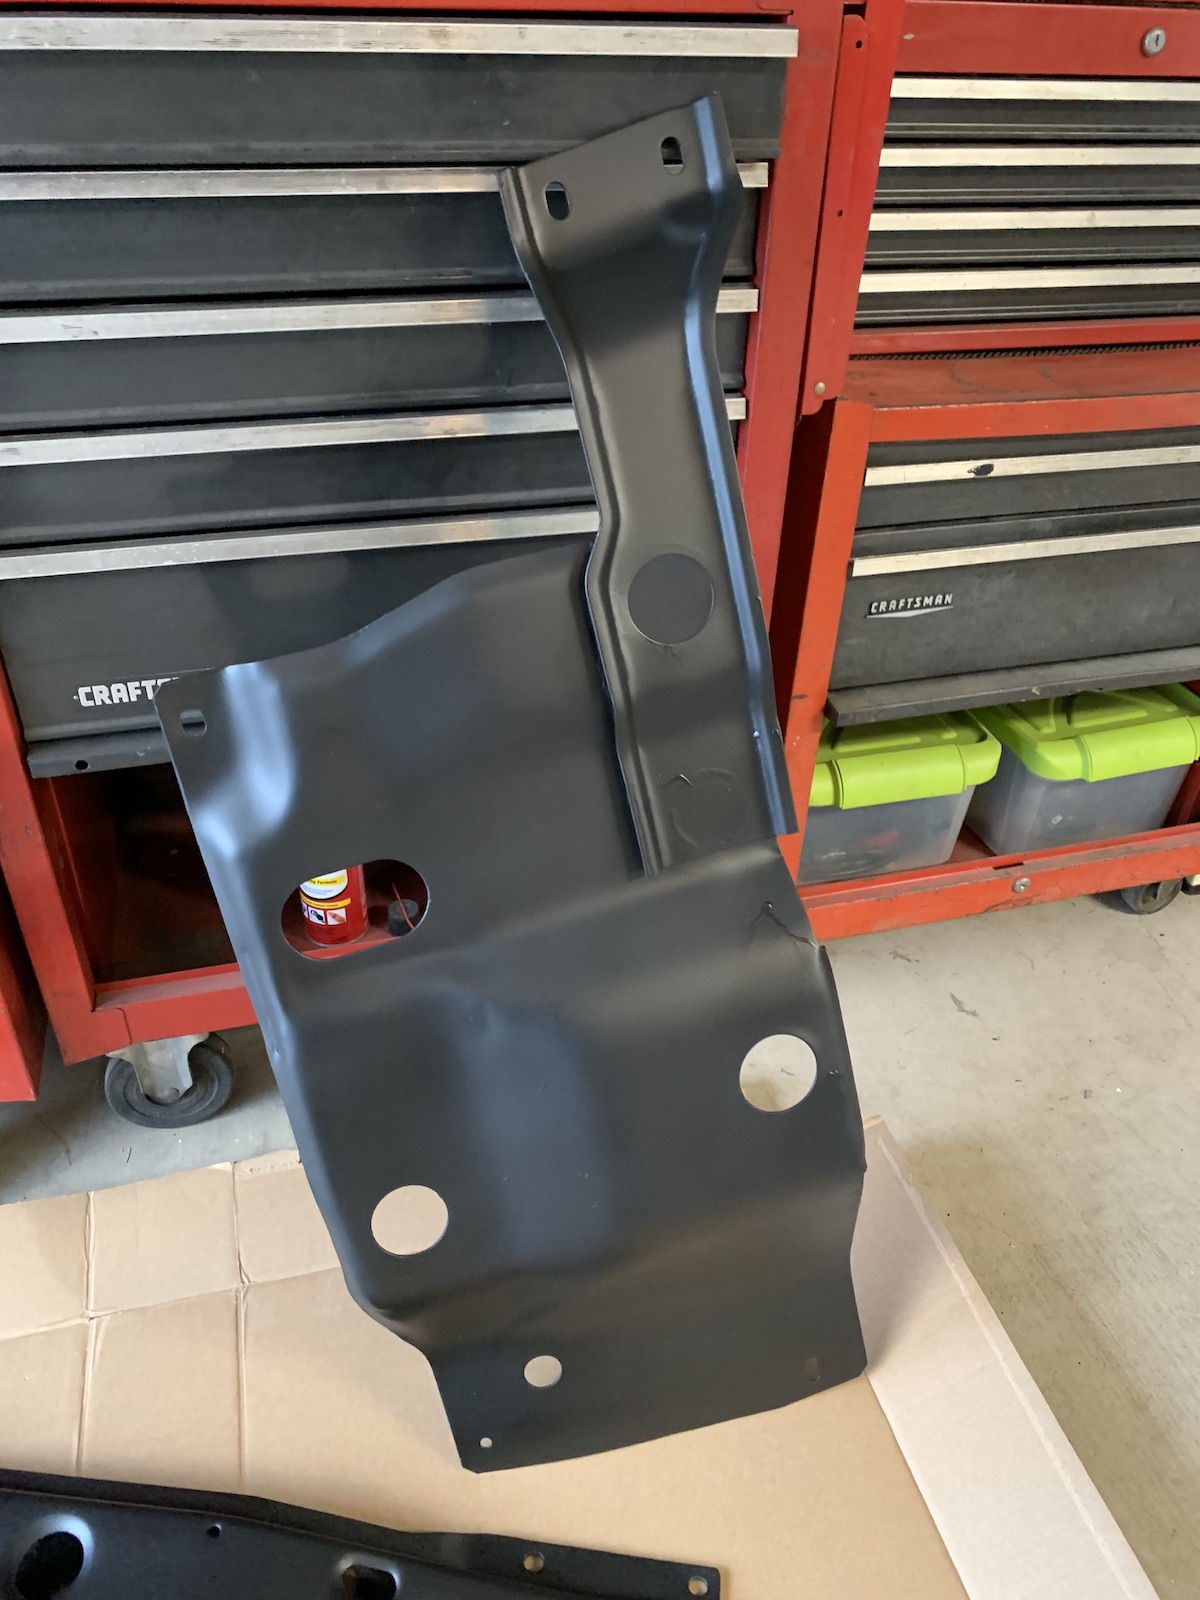
But nailed it on the service cover.
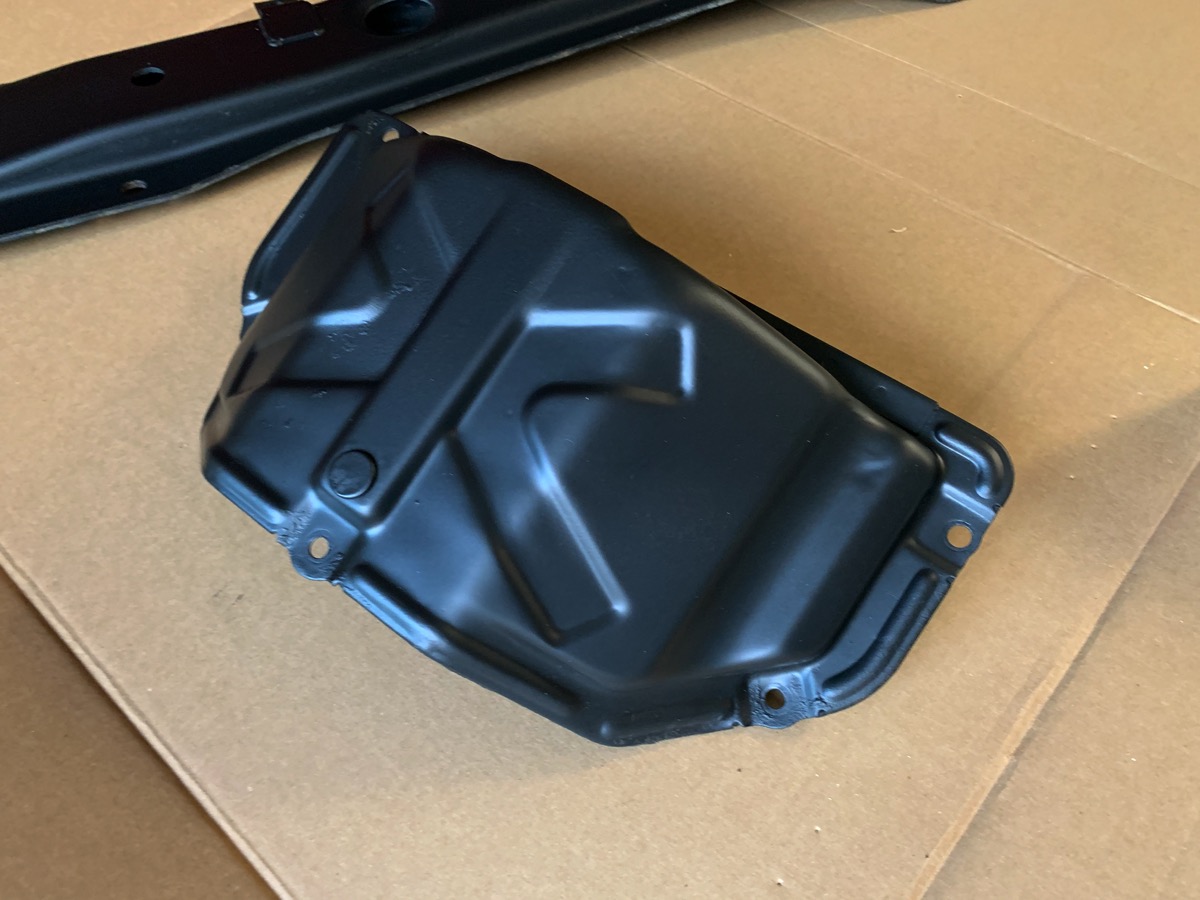
Did this with a cheapo gun from Harbor Freight that got decent reviews on the net. Perfect setup for quick/easy stuff like this... and yielded better results than spray paint.

I set up a paint area in my side yard area and busted out the HVLP and Blitz Black. The crossmember, skid plate, and clutch service cover were well-prepped for paint by the high-temp pressure washing. A wipe down with lacquer thinner and they were good to go...
This was my first time shooting with an HVLP paint gun. A bit of a learning curve. A few runs on the skid plate and crossmember.
But nailed it on the service cover.
Did this with a cheapo gun from Harbor Freight that got decent reviews on the net. Perfect setup for quick/easy stuff like this... and yielded better results than spray paint.
After giving myself permission NOT to restore things and pretty them up, I went ahead and decided to paint some things.
I set up a paint area in my side yard area and busted out the HVLP and Blitz Black. The crossmember, skid plate, and clutch service cover were well-prepped for paint by the high-temp pressure washing. A wipe down with lacquer thinner and they were good to go...
This was my first time shooting with an HVLP paint gun. A bit of a learning curve. A few runs on the skid plate and crossmember.
But nailed it on the service cover.
Did this with a cheapo gun from Harbor Freight that got decent reviews on the net. Perfect setup for quick/easy stuff like this... and yielded better results than spray paint.
If someone sees you wearing gloves like that you may end up scrubbing the bathroom.
")
- Thread starter
- #446
Will Van
GOLD Star
Nice job on the paint work. Looks great!After giving myself permission NOT to restore things and pretty them up, I went ahead and decided to paint some things.
I set up a paint area in my side yard area and busted out the HVLP and Blitz Black. The crossmember, skid plate, and clutch service cover were well-prepped for paint by the high-temp pressure washing. A wipe down with lacquer thinner and they were good to go...
This was my first time shooting with an HVLP paint gun. A bit of a learning curve. A few runs on the skid plate and crossmember.
But nailed it on the service cover.
Did this with a cheapo gun from Harbor Freight that got decent reviews on the net. Perfect setup for quick/easy stuff like this... and yielded better results than spray paint.
Georg is the best.
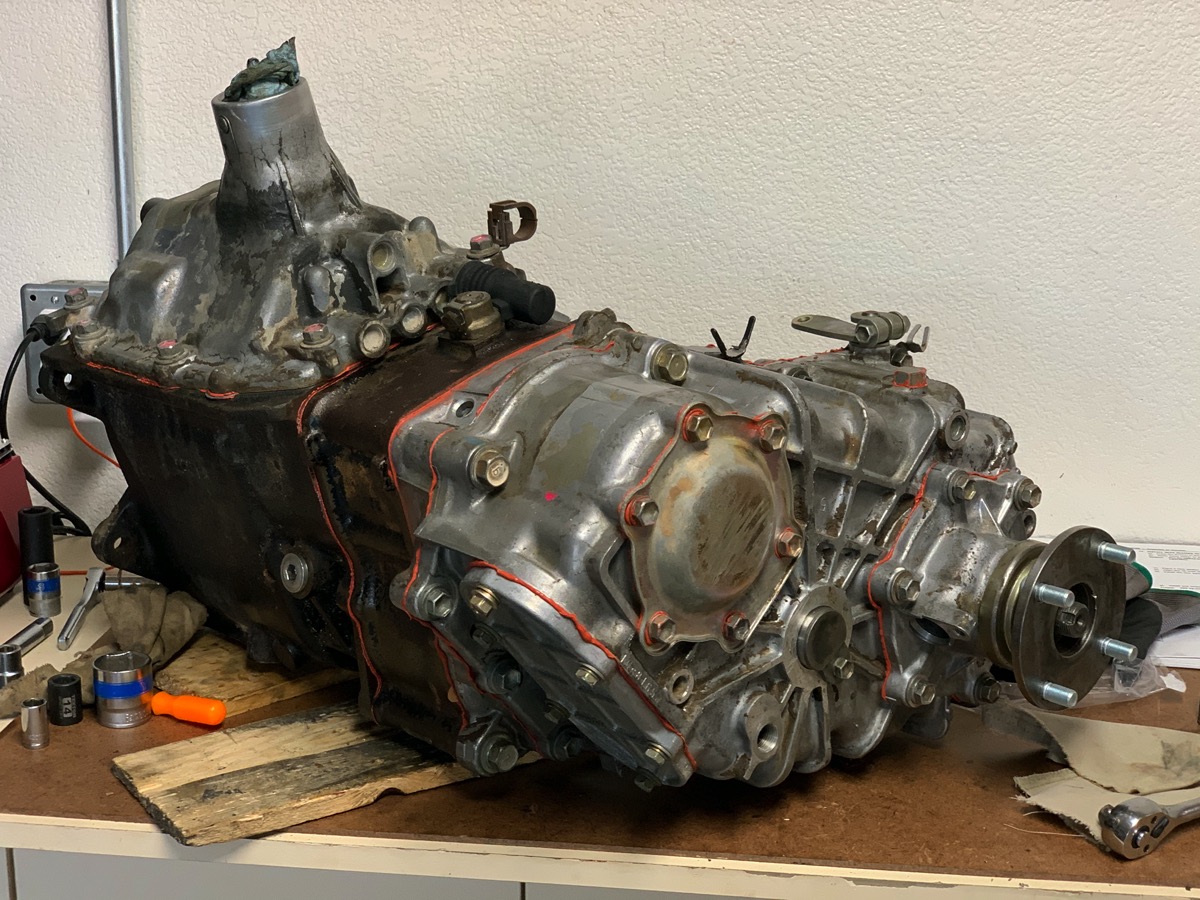
Transfer Case Rebuild
- Thread starter
- #448
Spent the weekend cleaning some final pieces and commencing with the rebuild. The spacers arrived from @orangefj45 this weekend and I only had to remove the bearing race three time to dial in the preload. It definitely needed shimming. Well on the way to buttoning things up...
The state of the shift linkage to start with...
I'm always amazed how well-preserved parts are on this truck once you clean off the years of oil-encrusted fesh-fesh.
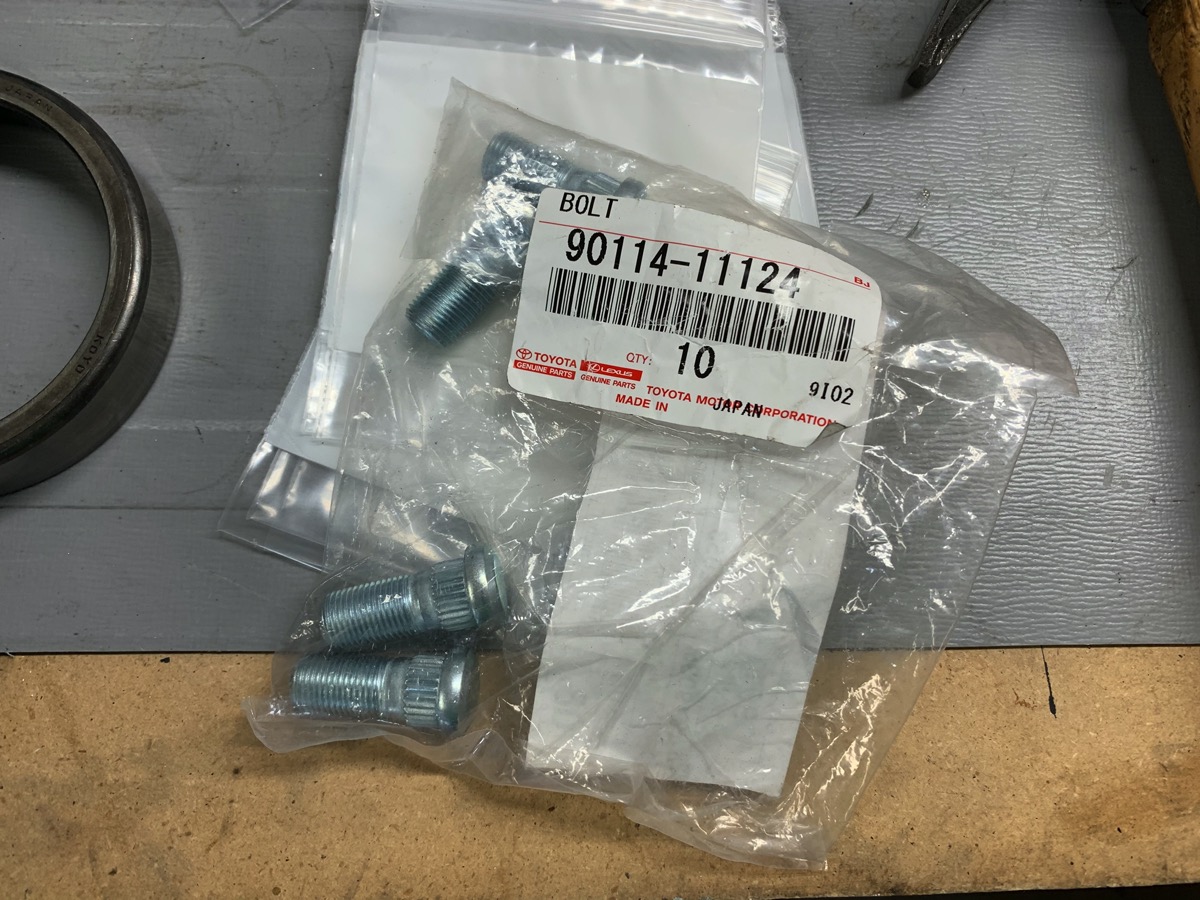
Grabbed new studs for the rear flange.
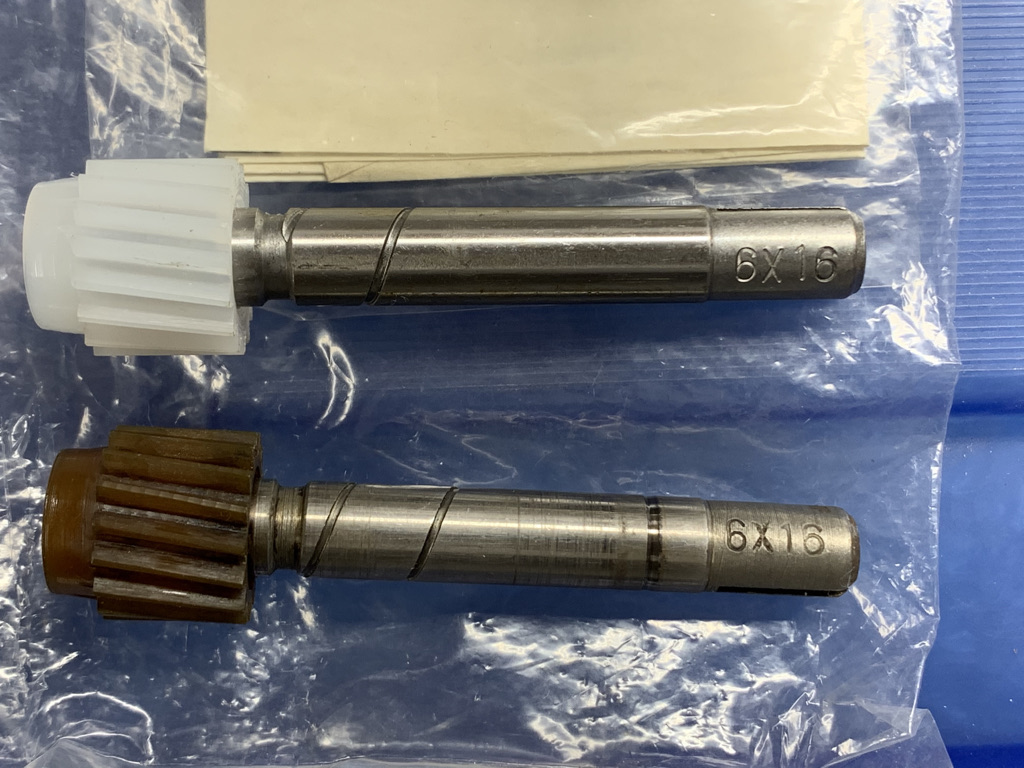
And I'm replacing the speedometer driven gear... the old one has a pretty deep groove in it from the old oil seal.
Progress...
The state of the shift linkage to start with...
I'm always amazed how well-preserved parts are on this truck once you clean off the years of oil-encrusted fesh-fesh.
Grabbed new studs for the rear flange.
And I'm replacing the speedometer driven gear... the old one has a pretty deep groove in it from the old oil seal.
Progress...
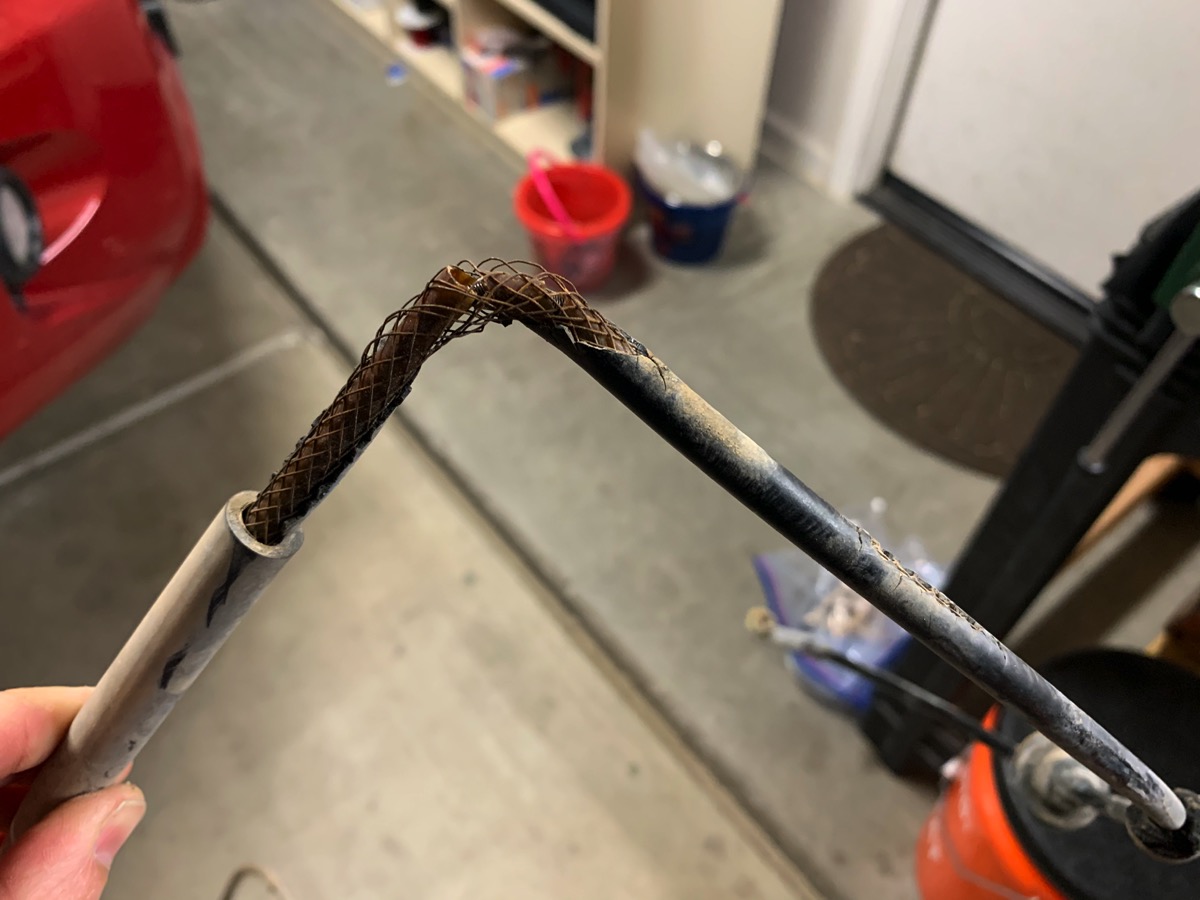
Heads up.... the shaft that this attaches to WILL fall into the case where you can’t grab it without a strong magnet. When you reassemble everything put a flag of tape on that bare shaft so it doesn’t fall and have a strong magnet on hand in the event that it slips while you’re installing the linkage.

- Thread starter
- #450
I very nearly learned this the hard way...but caught a break managed to get it all situated.Heads up.... the shaft that this attaches to WILL fall into the case where you can’t grab it without a strong magnet. When you reassemble everything put a flag of tape on that bare shaft so it doesn’t fall and have a strong magnet on hand in the event that it slips while you’re installing the linkage.View attachment 2615094
I have no idea what it is. I don't own a 70 series by the way but do have 2 80 series. I found it when unpacking after a camping trip.
View attachment 2399485
that right there is a BMW socket bushing,,, (european cig lighter plug)
- Thread starter
- #452
Someone solved the mystery!that right there is a BMW socket bushing,,, (european cig lighter plug)
And now that you mention it, I've seen one of those on some of the lighter adapters for equipment over the Middle East. Not sure why I didn't spot that before...
- Thread starter
- #453
Never did reply to this!enjoying the thread Honger,,,,
Maybe I missed it, but where are getting your oem parts? Local toyota dealer?
I try to get my parts from Riverview Toyota here in the Phoenix area... they have a discount for Copper State Cruiser members. The kid I've been working with there, Cody, really puts in the effort on hard to find parts. He's pushing for some foreign-market parts for me now using my import documents. I prefer to have a local guy I can lean on if I find someone dependable and helpful. When that doesn't work I'll use Partsouq.
Also, I actually snagged a bunch of OEM parts while I still lived in the Middle East before I moved back. I knew a lot of stuff I was going to need to do to the Troopy even then, so I built up a nice stash. Prices are amazing over there, availability is next day, and I was flush with expat paychecks at the time. =)
Dash Rehab
- Thread starter
- #454
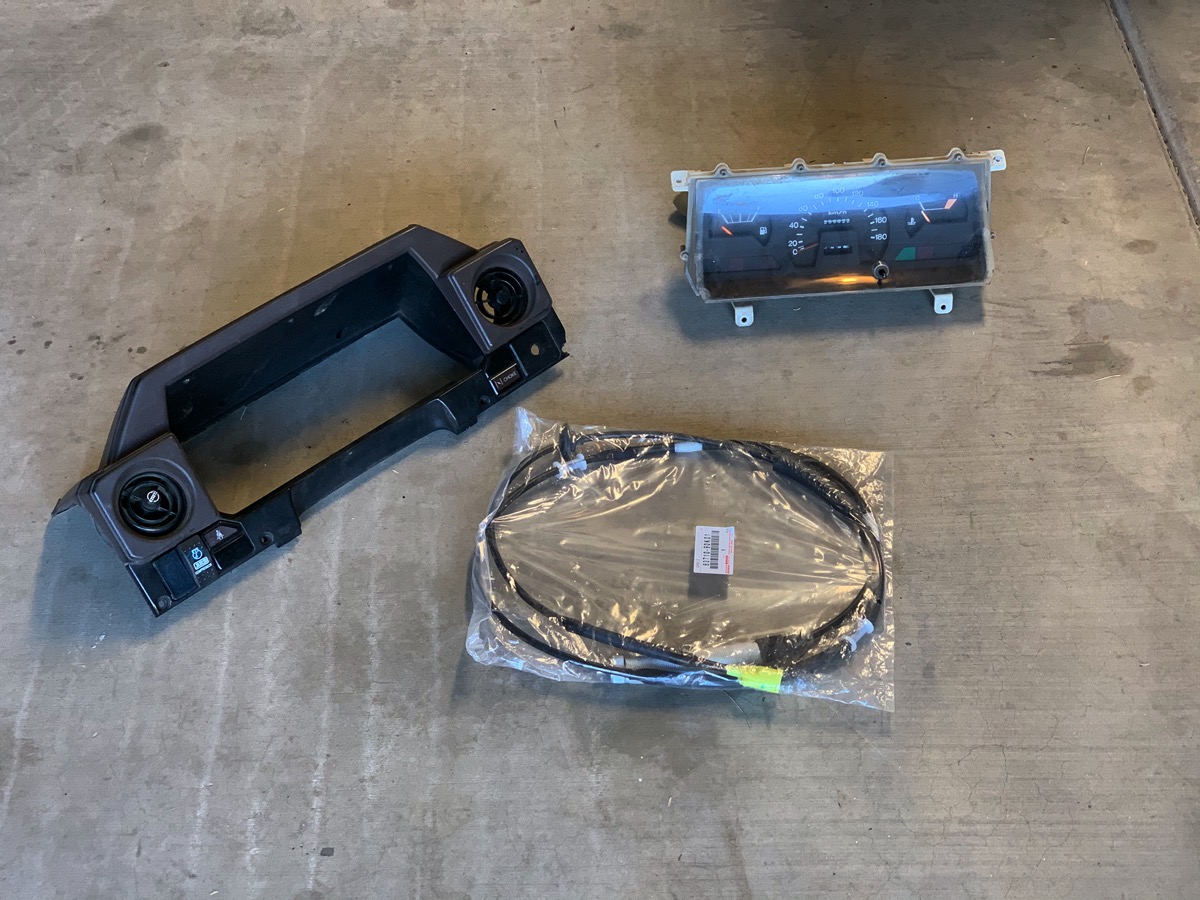
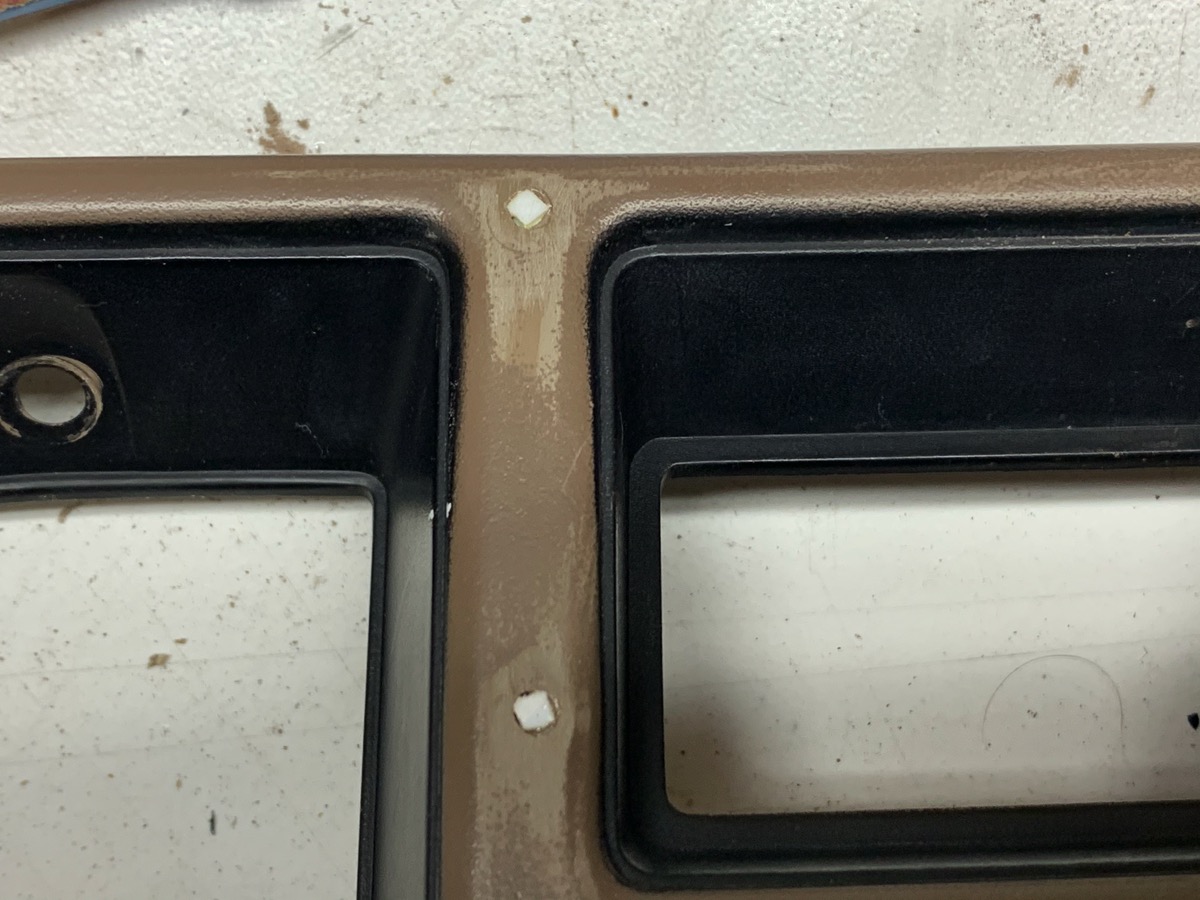
As with so many projects, this one has some scope creep. There's a "while I'm in this deep" mentality that takes over. For example, my speedo cable has been acting up in the last year, and this seems a great time to replace it.
Upon removal, the source of my problems was apparent.
So, away we go with a cluster removal. (The new speedo cable is one of those parts I had hoarded while living in the Middle East.) I'll clean up the cluster surround and repaint it.
And while I'm at it, the center bezel has quite a few cosmetic blemishes I can sand out and repaint as well.

There's plenty of fesh-fesh to clean out as well.
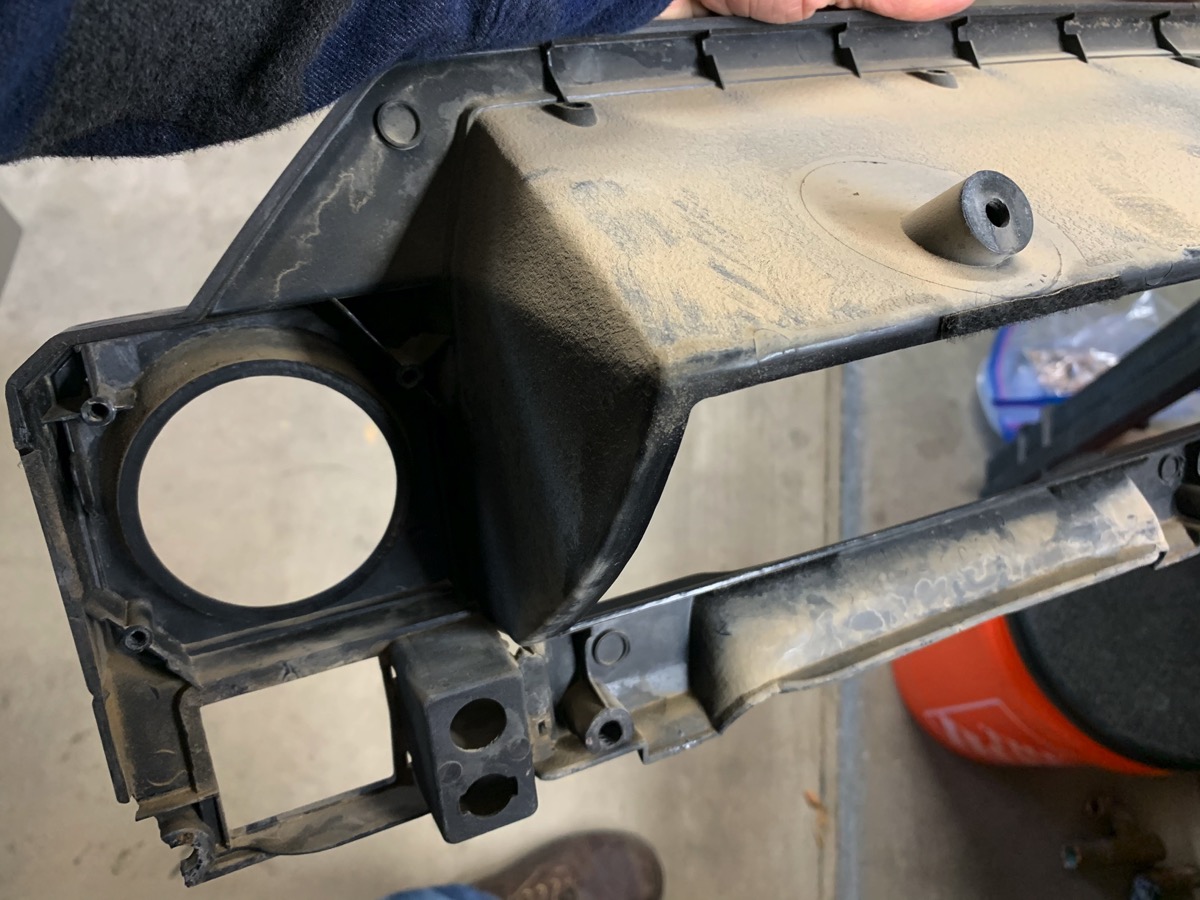
And my styrene modeling supplies have come in handy for patching holes in the ABS bezels.
Upon removal, the source of my problems was apparent.
So, away we go with a cluster removal. (The new speedo cable is one of those parts I had hoarded while living in the Middle East.) I'll clean up the cluster surround and repaint it.
And while I'm at it, the center bezel has quite a few cosmetic blemishes I can sand out and repaint as well.
There's plenty of fesh-fesh to clean out as well.
And my styrene modeling supplies have come in handy for patching holes in the ABS bezels.
- Thread starter
- #456
Yeah, I looked at buying new dash pieces... but it wasn't going to be cheap. And getting all of them one color was going to be hard which meant some sort of painting/refinishing anyway. The ABS is remarkably non-brittle still, so I figured I'd just fix and refinish what I have.Nice to see the dash stuff, mine are roached and i'll either need replacement or try my hand at repairs
So you've got a Troopy now? Pics? =)

- Thread starter
- #459
There's several of us with Omani Troopies around here... @c2dfj45 (he lucked out with a 1FZ) and @MES have also pulled theirs from there. What they don't have in rust they usually make up with dodgy wiring and a well-dented rear floor area.Not yet, it's coming, its your twin actually, 3f from Oman. That's part of the reason I'm enjoying your thread.
You forgot the finest ingredient in an Omani Troopy...
FESH FESH!
Axles/Diffs
View all 7 threadmarks
Recent threadmarks
Manual Hubs New Parts Rear Axle Rear Axle Rear Axle Front Axle Front Axle and Brakes
Steering
View all 2 threadmarks