Navigation
Install the app
How to install the app on iOS
Follow along with the video below to see how to install our site as a web app on your home screen.
Note: This feature may not be available in some browsers.
More options
Style variation
You are using an out of date browser. It may not display this or other websites correctly.
You should upgrade or use an alternative browser.
You should upgrade or use an alternative browser.
What have you done to your Land Cruiser this week? (21 Viewers)
- Thread starter IH8MUD
- Start date
This site may earn a commission from merchant affiliate
links, including eBay, Amazon, Skimlinks, and others.
More options
Who Replied?- Joined
- Mar 1, 2006
- Threads
- 134
- Messages
- 671
- Location
- Charlotte, NC
- Website
- www.mattison-consulting.com
Muffed this up!
Sent from my carport.
Been there.
Did my first oil change on the '40. Little piffed that only 3-4 quarts came out and I put 7 or 8 in it...%$#@ previous owner....
But I did get to drive it since I bought it! - JP
But I did get to drive it since I bought it! - JP
bj40green
Tssss, tssss
Well, I got her sanded with 100,220 and 500 and laid down rattle can primer and paint. Wimbledon white by duplicolor(their cans suck by the way) drip and nozzle clogs. I am happy but as many people say, a rattle can can't keep a "wetline" on a surface that big. This should work for now until I can shoot it with a real paint gun.
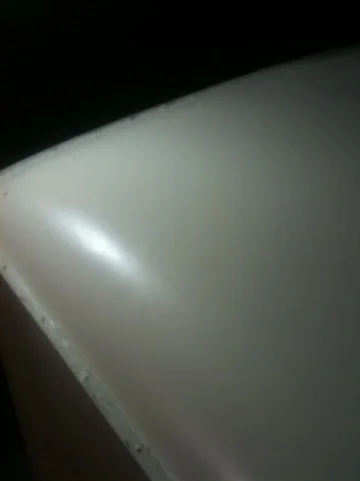
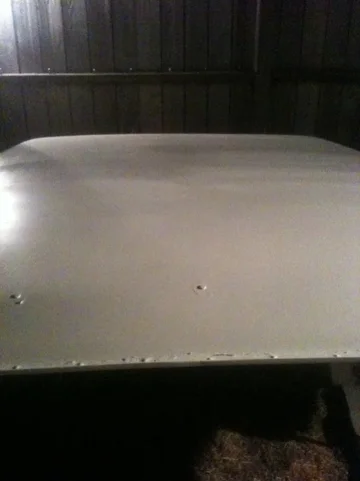


You need to use 1000 grit and wet sand. It will shine. That is what I am using on my cowl. The clear coat is coming off.
I don't have any clearcoat on it. I have never wet sanded. Quick explanation would be awesome!! Will I need to paint it again?
Thank you!
Thank you!
I started working on this project in July. I am not looking to restore by any means but I wanted stop rust and keep the bed looking good. I did the rear half this summer and maybe the front half in the winter if I can find a garage to store her in. First I wire wheeled and sanded the rear tub and painted Chassis Saver from Magnet Paints.
Before
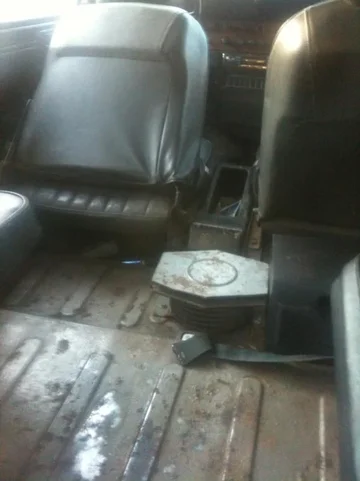
After/scuffed in prep for liner.
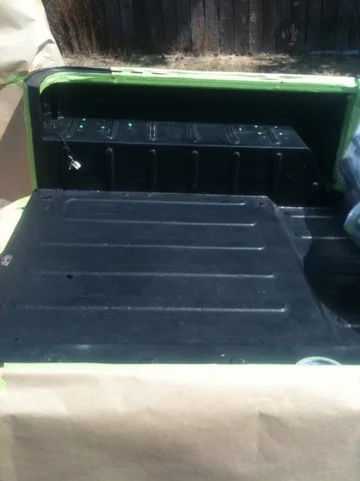
Because of finances I had to wait for a month and a half to get the Monstaliner. I ended up going with the jeep spice because I didn't want black and it was the closest to olive 653. I scuffed the chassis saver with 220 grit sandpaper and sprayed with a schutz gun I purchased from magnetman. The rear tub took 2 quarts by spraying, I messed up on the first coat and was lightly spraying instead of laying down a good first coat. My suggestion, take your time and lay down a solid first coat. I very happy with the outcome and help from magnetman with all my questions and mixing up quarts for me.
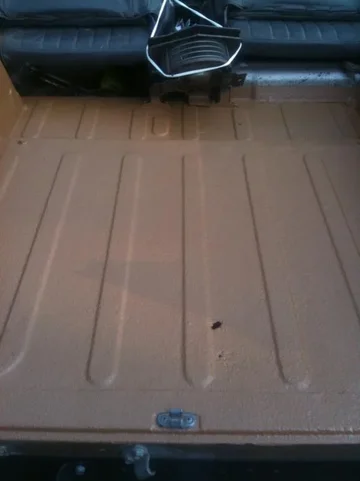


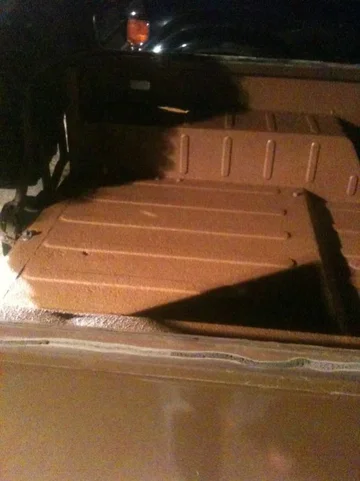


Before

After/scuffed in prep for liner.

Because of finances I had to wait for a month and a half to get the Monstaliner. I ended up going with the jeep spice because I didn't want black and it was the closest to olive 653. I scuffed the chassis saver with 220 grit sandpaper and sprayed with a schutz gun I purchased from magnetman. The rear tub took 2 quarts by spraying, I messed up on the first coat and was lightly spraying instead of laying down a good first coat. My suggestion, take your time and lay down a solid first coat. I very happy with the outcome and help from magnetman with all my questions and mixing up quarts for me.


You buy the wet sand paper and get the hose and turn it on at a heavy trickle. Then you just go at it sanding away while the water is running. 1000 grit will feel like rubbing paper on it and will seem that nothing is happening but it is actually sanding. The water keeps the paper clean and kills the heat caused by friction.
Then go to the 2000 grit. I am not a fan of clear coat.
Then go to the 2000 grit. I am not a fan of clear coat.
I don't have any clearcoat on it. I have never wet sanded. Quick explanation would be awesome!! Will I need to paint it again?
Thank you!
Reinstalled the new fuel tank. The factory installed liner was coming apart and clogging the fuel system. Cleaned up a few other parts while there. Hopefully will have her running this week!!!
MicahMan
TLCA 20925
Well unbolted my torque bar ( ripped the front mount off) time to reinforce the front mount...just replaced the short side axle shaft last month...
And put my new sticker on ....


And put my new sticker on ....
I'm not sure how to post a pic so I stuck this pic from my album on there. finally put on my new used rims and tires on my 79. I know that it's sacrilegious to put some rims on that aren't stock steelies, but I couldn't pass up the deal. 2" offset and the tires don't hit anything.
Massive long list
I should have taken photos since I started but here is the last over the past few months (much to my little ladies dismay )
)
1) Complete re wire of the whole FJ
2) Rebuilt the Hazards, Wiper and Heater Blower switches
3) Tore the Heater apart, complete rebuild, including new foam, sand back and repaint in gloss black (plastics included)
4) Stripped sagging headliner and wire brushed roof ready for new install (Cruiser Corps)
5) Removed 60mm (2.5inch body lift), re welded firewall to put steering column back in original position
6) Stripped, cut back and repainted plastics that fit the windshield (direct air onto windscreen)
7) Replaced Rag Joint
8) Replaced Fuel sender with Autometer one
9) Replaced old hand brake shoes with new ones (btw getting the handbrake cable back in place to activate the shoes was the single hardest thing I've ever done )
)
10) Re cut and moved the Radiator to account for lower body (doesn't bang on the hood now)
11) Replaced speedo cable with autometer 5291 (for electric sender)
12) Fitted sound insulation to footwells, middle section of the rear and doors (the stuff they use for car audio
13) Fitted sound deadner throughout the FJ (rear, middle, under seats, footwells) in addition to sound insulation
14) Replaced key switch
15) Repaired leaking rear window seals
16) Installed internal lights - Can't work out where to put door jam switches through!
17) Replaced door locks and ambulance door lock (and handle)
18) Replaced 1/4 driver side rubber (the other side is left but SOOO hard)
19) Replaced Battery Cables
20) Changed Plugs, oil and coolant
I've got skin of just about every finger, dirt in places you can't imagine and still quite a few things left.....
a) Install Radio and speakers
b) Install Carpets over the cables
c) My battery is inside the cabin (351 cleveland under the hood), need to install battery box
d) Install headliner
f) Install custom gauges (all Autometer and panel from trailcandy)
e) Rebuild knuckles
g) Replace exhaust (was between frame and body when the lift was in place)
h) Replace Tie Rod ends
I) Get Registration, drive and smile!
I should have taken photos since I started but here is the last over the past few months (much to my little ladies dismay
1) Complete re wire of the whole FJ
2) Rebuilt the Hazards, Wiper and Heater Blower switches
3) Tore the Heater apart, complete rebuild, including new foam, sand back and repaint in gloss black (plastics included)
4) Stripped sagging headliner and wire brushed roof ready for new install (Cruiser Corps)
5) Removed 60mm (2.5inch body lift), re welded firewall to put steering column back in original position
6) Stripped, cut back and repainted plastics that fit the windshield (direct air onto windscreen)
7) Replaced Rag Joint
8) Replaced Fuel sender with Autometer one
9) Replaced old hand brake shoes with new ones (btw getting the handbrake cable back in place to activate the shoes was the single hardest thing I've ever done
 )
)10) Re cut and moved the Radiator to account for lower body (doesn't bang on the hood now)
11) Replaced speedo cable with autometer 5291 (for electric sender)
12) Fitted sound insulation to footwells, middle section of the rear and doors (the stuff they use for car audio
13) Fitted sound deadner throughout the FJ (rear, middle, under seats, footwells) in addition to sound insulation
14) Replaced key switch
15) Repaired leaking rear window seals
16) Installed internal lights - Can't work out where to put door jam switches through!
17) Replaced door locks and ambulance door lock (and handle)
18) Replaced 1/4 driver side rubber (the other side is left but SOOO hard)
19) Replaced Battery Cables
20) Changed Plugs, oil and coolant
I've got skin of just about every finger, dirt in places you can't imagine and still quite a few things left.....
a) Install Radio and speakers
b) Install Carpets over the cables
c) My battery is inside the cabin (351 cleveland under the hood), need to install battery box
d) Install headliner
f) Install custom gauges (all Autometer and panel from trailcandy)
e) Rebuild knuckles
g) Replace exhaust (was between frame and body when the lift was in place)
h) Replace Tie Rod ends
I) Get Registration, drive and smile!

78fj40mg
TLCA #23510
I should have taken photos since I started but here is the last over the past few months (much to my little ladies dismay)
1) Complete re wire of the whole FJ
2) Rebuilt the Hazards, Wiper and Heater Blower switches
3) Tore the Heater apart, complete rebuild, including new foam, sand back and repaint in gloss black (plastics included)
4) Stripped sagging headliner and wire brushed roof ready for new install (Cruiser Corps)
5) Removed 60mm (2.5inch body lift), re welded firewall to put steering column back in original position
6) Stripped, cut back and repainted plastics that fit the windshield (direct air onto windscreen)
7) Replaced Rag Joint
8) Replaced Fuel sender with Autometer one
9) Replaced old hand brake shoes with new ones (btw getting the handbrake cable back in place to activate the shoes was the single hardest thing I've ever done)
10) Re cut and moved the Radiator to account for lower body (doesn't bang on the hood now)
11) Replaced speedo cable with autometer 5291 (for electric sender)
12) Fitted sound insulation to footwells, middle section of the rear and doors (the stuff they use for car audio
13) Fitted sound deadner throughout the FJ (rear, middle, under seats, footwells) in addition to sound insulation
14) Replaced key switch
15) Repaired leaking rear window seals
16) Installed internal lights - Can't work out where to put door jam switches through!
17) Replaced door locks and ambulance door lock (and handle)
18) Replaced 1/4 driver side rubber (the other side is left but SOOO hard)
19) Replaced Battery Cables
20) Changed Plugs, oil and coolant
I've got skin of just about every finger, dirt in places you can't imagine and still quite a few things left.....
a) Install Radio and speakers
b) Install Carpets over the cables
c) My battery is inside the cabin (351 cleveland under the hood), need to install battery box
d) Install headliner
f) Install custom gauges (all Autometer and panel from trailcandy)
e) Rebuild knuckles
g) Replace exhaust (was between frame and body when the lift was in place)
h) Replace Tie Rod ends
I) Get Registration, drive and smile!
Can/will you post some pics? Cheers!

Yes
I will take some pics of what it looks like now with the work left, you'll be able to see how much neater the inside is and quite a few wires hanging about that will get hidden once I've done the last few electric bits (audio install and some gounding wires for the internal lights back to the headlight switch).
I didn't take any before/ after pics as I was so intent on getting it done, I just didn't slow down but if anyone has questions on what I've done so far I can take pics of that and explain it as best I can.
Not bad for a guy who sits in an office and works in Investment Banking, lots of sweat and tears have gone into this and when its done and something happens ill know how to fix it and what I need. My tool box has gone from a couple of screw drivers to just about everything you can imagine (not to mention my ebay feedback from all the stuff I've bought).
Cheers!

Rebuilt the Holley. Flushed out the fuel lines now onto timing to see if I can get this heap to start!
Sold my 1970 FJ40 RHD in Florida to a Collector TLC guy..have now 17 Cruisers...but welcome to me my 1994 FZJ80 locked and loaded here in Puerto Rico, so my 1976 now can have a well deserved vacations ,waiting for more mods and repairs.
https://forum.ih8mud.com/80-series-tech/609399-noob-alert-my-1994-some-mods.html
Wushu, what kind of roof rack do you have! Do you like it and where did you get it from? I'm in the market for one myself. Thanks
Similar threads
- Replies
- 306
- Views
- 30K


 over 3 days

