OK, so a buddy and I removed our flares and Durabaked my LC and Herculined his 00' Tundra.
I am starting this post for a few reasons:
1) I need some advice on how to fix my edges where I removed the tape.
2) I am not sure if everyone understands how much work this actually is.
3)There should be a thread in the FAQ where everyone can add there experiences, show off there before & afters, and give techniques old & new.
4) I'm sure you brilliant minds out there will come up with more.
OK so onto my situation. I guess I didn't do enough research into doing this job and may have been half a short of doing a great job, I also probably didn't do enough prep work on the body, used the right tape or combination of tapes to get the job done right.
So my problem started when I was removing the tape after my fourth coat of Durabak wich seemed to dry very quickly on an unusually hot San Diego day (90° aprox). The first fender and door came off great then the Durabak started pulling off as I removed the tape. As I got around to the tail gate it just started going to HE!! where I had to pull iwth one hand and cut with an exacto knife with the other hand. The last side I did saw practically no sun all day but still hardened quickly and made removal difficult. So now I have edges on the door sill and on the tail gate where I can pull the lining away from the body. This is where more prep work near the tape would have been a GR8 idea. But after seeing my buddy the day before remove tape from his Herculiner job with no problem I wasn't worried and figured mine would go just as smoothly. So to fix these problems I am thinking of cutting back at the door sills so it doesnt wrap over or using what Durabak I have left over to finish off the sill, after really good prep work. I am also considering finding a good clear sealant that I could put on the edges where the paint meats the rough stuff.
As for points 2 and 3 I will get into those a bit later since my lunch break is over but I will say that this is a HUGE JOB and all threads I saw started off with look what I did this weeked, well guess what it was ALL weekend. As it is I spent over 2 days doing mine and probably could have done prepone weekend and laying it down the other weekend.
And as for 3 Romer I am not saying this thread should be inserted into the FAQ but lets see where it goes and maybe someone who has done an excelent job with this and has body shop experience could do a write-up.
Now for the pics and it is really hard to keep this thread short and sweet, trust me I have been thinking about it since Monday.
Before Without Flares (LUV it without flares)

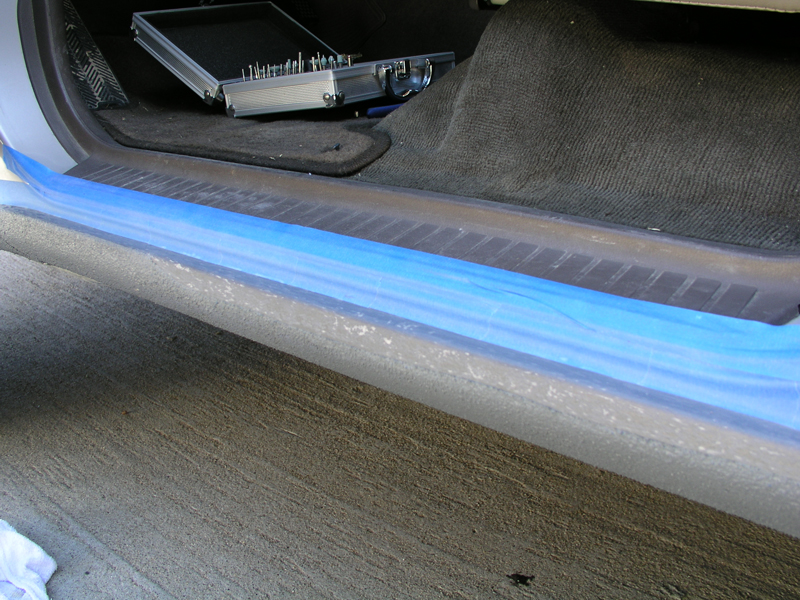
After 4 coats and tape finally removed

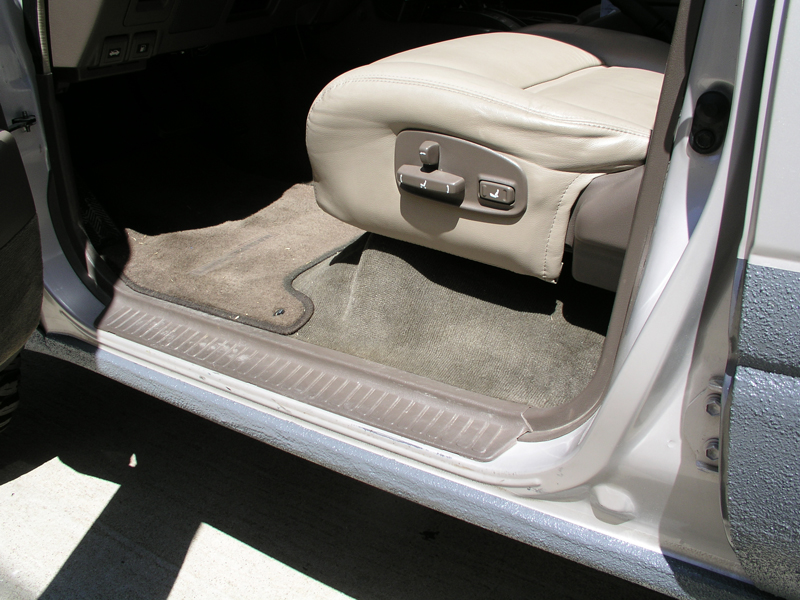
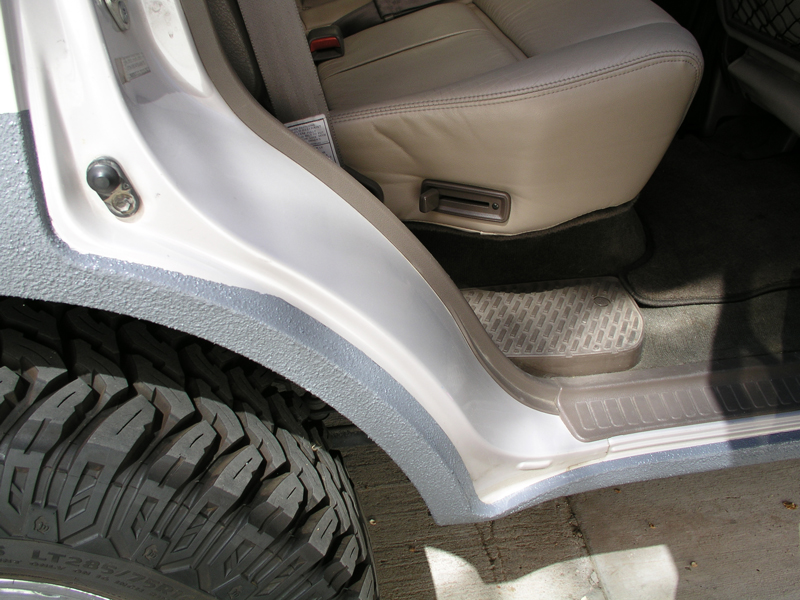
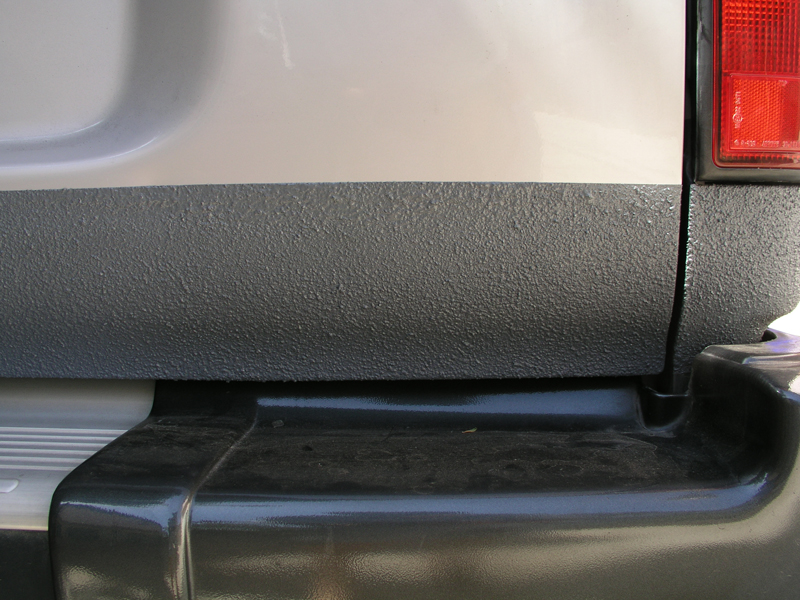
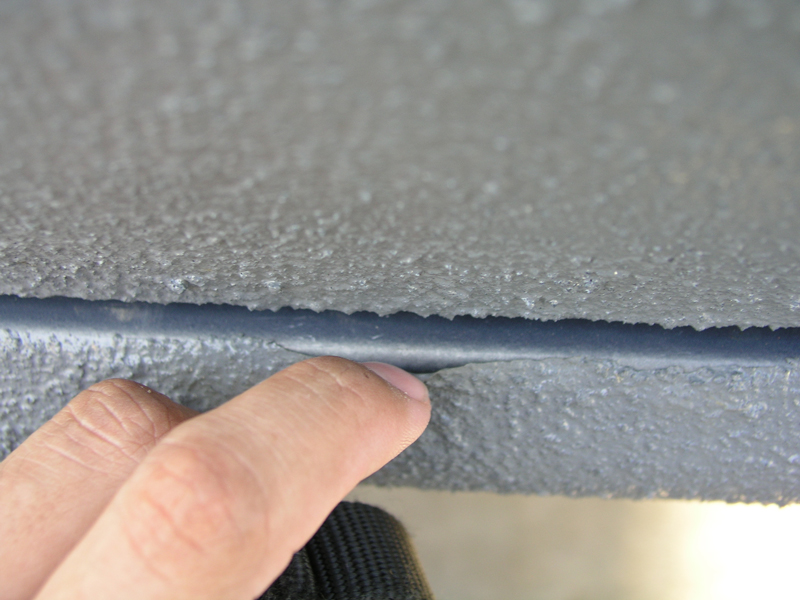
Here is the door sill where my foot steps when getting out of the truck.
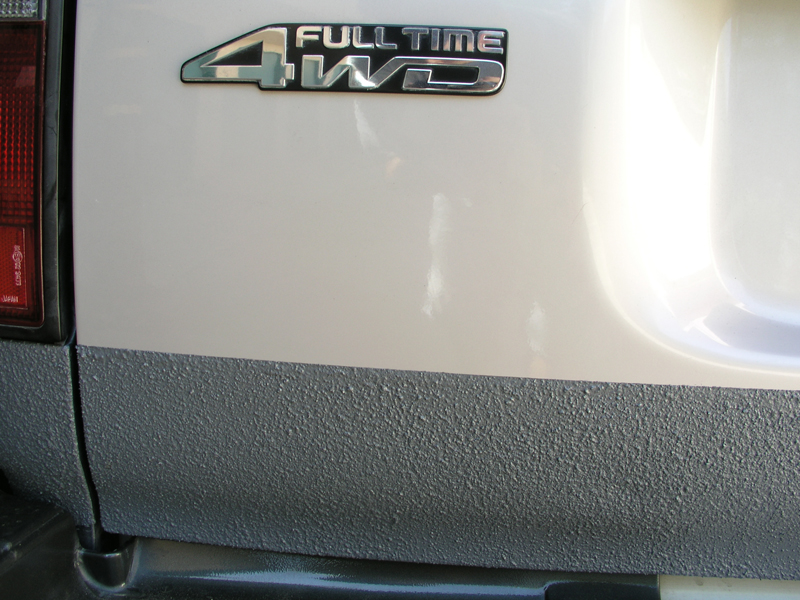
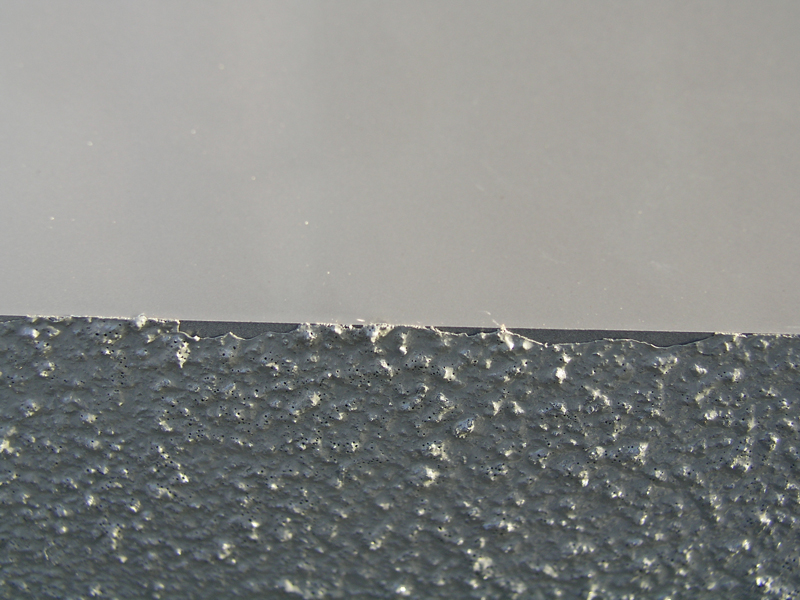
And a close-up of where the tail gate just went to HE!!
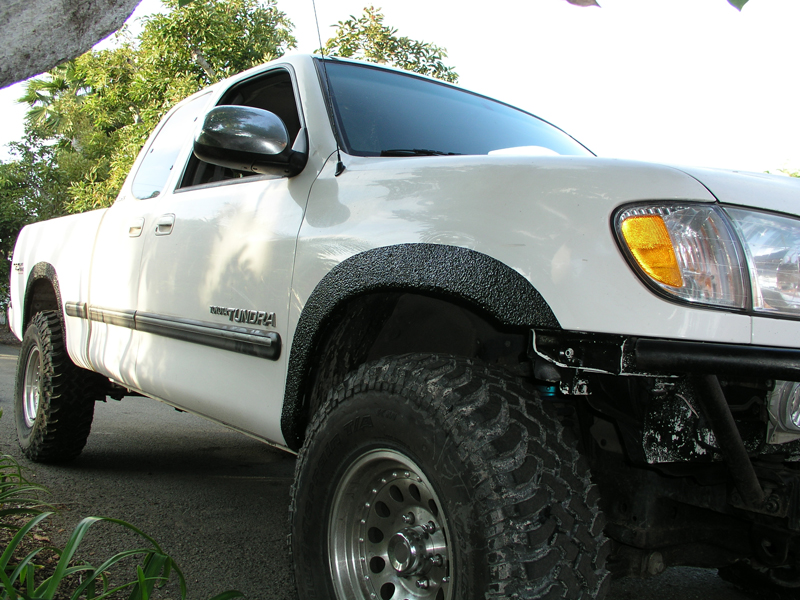
Oh and in case any of you have a Tundra here is how my buddies turned out.
I am starting this post for a few reasons:
1) I need some advice on how to fix my edges where I removed the tape.
2) I am not sure if everyone understands how much work this actually is.
3)There should be a thread in the FAQ where everyone can add there experiences, show off there before & afters, and give techniques old & new.
4) I'm sure you brilliant minds out there will come up with more.
OK so onto my situation. I guess I didn't do enough research into doing this job and may have been half a
short of doing a great job, I also probably didn't do enough prep work on the body, used the right tape or combination of tapes to get the job done right.So my problem started when I was removing the tape after my fourth coat of Durabak wich seemed to dry very quickly on an unusually hot San Diego day (90° aprox). The first fender and door came off great then the Durabak started pulling off as I removed the tape. As I got around to the tail gate it just started going to HE!! where I had to pull iwth one hand and cut with an exacto knife with the other hand. The last side I did saw practically no sun all day but still hardened quickly and made removal difficult. So now I have edges on the door sill and on the tail gate where I can pull the lining away from the body. This is where more prep work near the tape would have been a GR8 idea.
But after seeing my buddy the day before remove tape from his Herculiner job with no problem I wasn't worried and figured mine would go just as smoothly. So to fix these problems I am thinking of cutting back at the door sills so it doesnt wrap over or using what Durabak I have left over to finish off the sill, after really good prep work. I am also considering finding a good clear sealant that I could put on the edges where the paint meats the rough stuff.As for points 2 and 3 I will get into those a bit later since my lunch break is over but I will say that this is a HUGE JOB and all threads I saw started off with look what I did this weeked, well guess what it was ALL weekend. As it is I spent over 2 days doing mine and probably could have done prepone weekend and laying it down the other weekend.
And as for 3 Romer I am not saying this thread should be inserted into the FAQ but lets see where it goes and maybe someone who has done an excelent job with this and has body shop experience could do a write-up.
Now for the pics and it is really hard to keep this thread short and sweet, trust me I have been thinking about it since Monday.
Before Without Flares (LUV it without flares)
After 4 coats and tape finally removed
Here is the door sill where my foot steps when getting out of the truck.
And a close-up of where the tail gate just went to HE!!
Oh and in case any of you have a Tundra here is how my buddies turned out.
Last edited: