
Navigation
Install the app
How to install the app on iOS
Follow along with the video below to see how to install our site as a web app on your home screen.
Note: This feature may not be available in some browsers.
More options
Style variation
You are using an out of date browser. It may not display this or other websites correctly.
You should upgrade or use an alternative browser.
You should upgrade or use an alternative browser.
Build Cummins R2.8 H151 Swap into 1993 FZJ80
- Thread starter PurpleFJ62
- Start date
Member Builds and Stories
This site may earn a commission from merchant affiliate
links, including eBay, Amazon, Skimlinks, and others.

Here are some pics to give an idea of what the entire beast looks like assembled. I wonder how many people in the world have something like this in their barn?


Thats it for today, i'm beat.
I wish I had a barn. Outstanding work!
Thanks for the tip! If you will willing to remove it can you actually drill spot welds to make the end product look factory? I am a bit OCD about things.
On a side note, I have not began to cover the wiring aspect of things at this point but that slick H151/t-case harness is no longer available from Japan 4x4. Looks like I am going to have to make my own.
I'll attach some pics, you shouldn't have to break any spot welds and the end result looks completely factory. A standard diesel fill nozzle at any fueling station will fit right into it when you're done.
Wow very cool!!! Saw some video of 2.8 LC80 getting to 60mph in about 11.5 seconds which is about the same as stock but probably twice the MPG!
Very curious to see the performance of the final product, too bad that’s going to a real tough setup to smog in CA if not impossible.
Very curious to see the performance of the final product, too bad that’s going to a real tough setup to smog in CA if not impossible.
- Joined
- Jul 22, 2012
- Threads
- 639
- Messages
- 17,563
- Location
- Winter Park, Florida
- Website
- www.cruisermatts.com
Now THATs how you start a build thread... actuall completed progress, not just talk.
Sick work.
Sick work.
I’m running my breathers up to firewall. I’m going to connect the CDL, transfer case, and NV4500 into one kinda like it was with auto except instead of ending in dipstick tube they will go up high as possible on fire wall.
Nice build!
Nice build!
- Thread starter
- #48
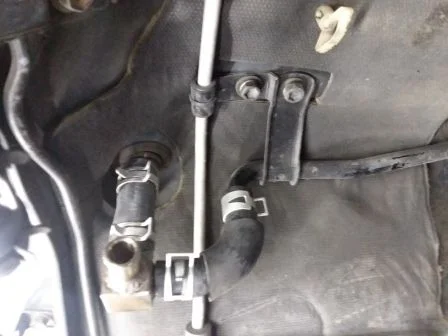
Not much of an update for you guys, I did manage to get the heater hoses fixed up. I put new rubber and clamps on the heater core lines since it would be very hard to do when the engine is installed. Also that funny black pipe thing was leeking slowly on my 1FZ, got a new one cheap from toyota parts deal.
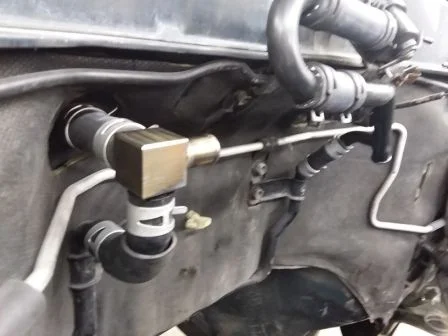
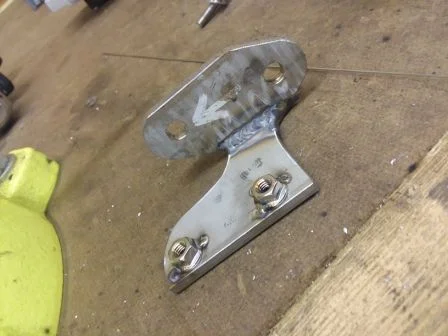
The R2.8 has a little different routing for its heater lines, I made this little stainless fitting because I could not find an T-fitting that had outlets in all three coordinate directions, but this will work very well with the R2.8 I think.
Be careful with these hoses, the curved ones dont seem to be available seperatly, they are part of the rear heater hose assembly. Maybe a master could chime in on this, I had to reuse the 90 degree hose.
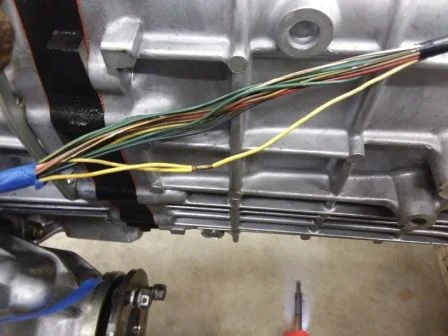
I also began working on my trans/t-case harness. Toyota does splices and wraps them in blue tape, I dident feel like working hard yesterday so I put some solder on them.
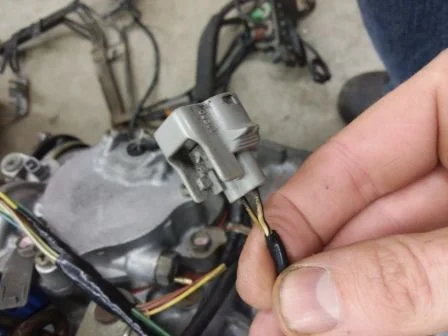
I broke a connector on the harness a few months ago so I need to fix that. I just learned that if you put 90980 in front of the number on the connector body you magically get the Toyota part number, how helpful!
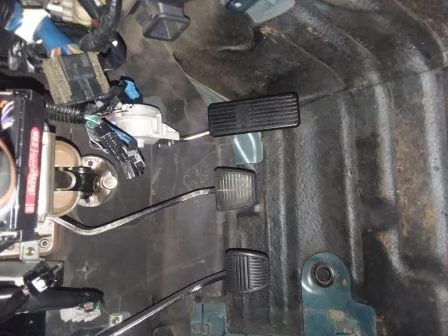
Also got the throttle pedal installed, I hope the placement is good. I dont have seats installed at the moment so I could not sit in it and test. I ditched the cummins bracket, it does not work with an 80 series.
I had to drill the threads out of the pedal assembly so the bolts could be installed from the left instead of the right because I could not fit my hands in such tight space.
Finished product
The R2.8 has a little different routing for its heater lines, I made this little stainless fitting because I could not find an T-fitting that had outlets in all three coordinate directions, but this will work very well with the R2.8 I think.
Be careful with these hoses, the curved ones dont seem to be available seperatly, they are part of the rear heater hose assembly. Maybe a master could chime in on this, I had to reuse the 90 degree hose.

I also began working on my trans/t-case harness. Toyota does splices and wraps them in blue tape, I dident feel like working hard yesterday so I put some solder on them.
I broke a connector on the harness a few months ago so I need to fix that. I just learned that if you put 90980 in front of the number on the connector body you magically get the Toyota part number, how helpful!
Also got the throttle pedal installed, I hope the placement is good. I dont have seats installed at the moment so I could not sit in it and test. I ditched the cummins bracket, it does not work with an 80 series.
I had to drill the threads out of the pedal assembly so the bolts could be installed from the left instead of the right because I could not fit my hands in such tight space.
Finished product
- Thread starter
- #49
I hate it when I click on an interesting thread only to find BS. I have tried to buck that trend.Now THATs how you start a build thread... actuall completed progress, not just talk.
Sick work.
Looking good, I am excited at the thought of another turbo diesel landcruiser running around here.
Using a 1" drill and you can open up for the diesel filler, I have ,my 6BT running stock fuel lines , doing a nice job. I never have enough time to do all these nice pictures and write ups
- Thread starter
- #52
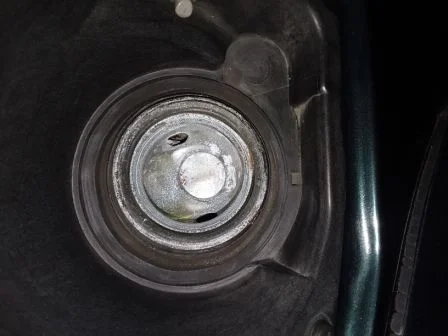
In an effort to take advantage of all my free time this holiday season I am making an effort to get at least one thing done on the Cruiser everyday. Today was time to modify the fuel tank filler pipe.
According to my research the stock HDJ80 one is NLA, so I suppose you could get one out of a junk yard next time you find your self on holiday abroad, or you can just modify the stock one. Little did I know that you need to undo the body mounts to get the POS out, i'm not going to open that can of worms.
Others on here suggested using a drill of some kind. I followed their advice. First I disconnected the tank and put a plastic bag in place to catch metal filings.
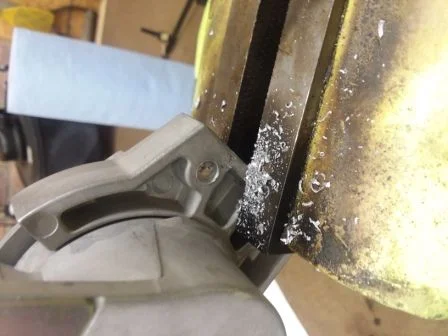
Then I found a hole saw that fit in the filler neck
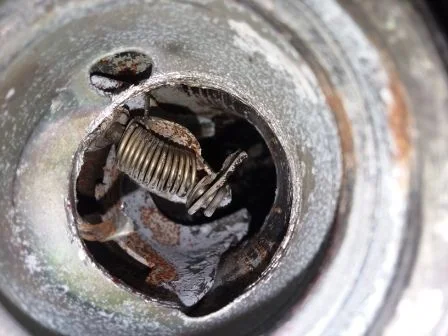
I punched through the plate and was left with this mess.
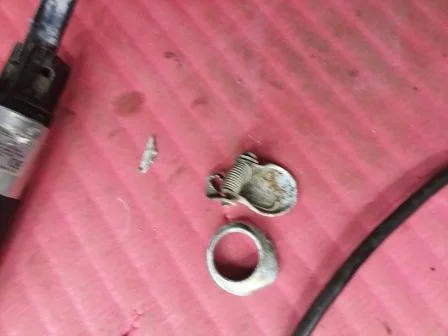
I got a small air powered saw in there to trim the small pieces. Then yanked them out with needle nose pliers.
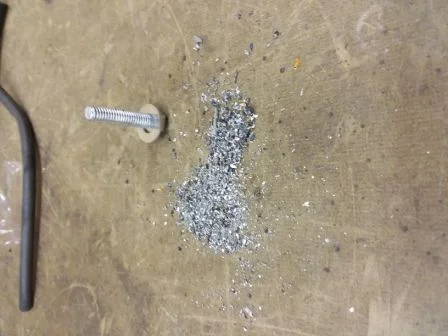
The bag served its purpose well
Here is the finished product, I can live with it. Took all of 20 minutes and no body mount removal was necessary. At my vehicles age something would have broke then my OCD would kick in resulting in more delays.
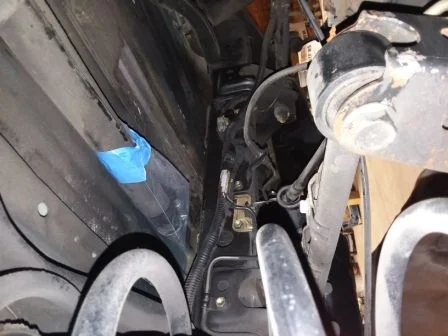
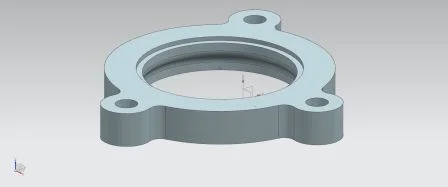
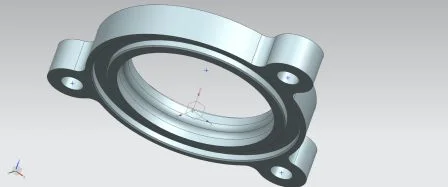
I'm happy to cross another thing off of the list. There are still some problems that need to be delt with. While i'm waiting for those stupid little electrical connectors i'm trying to solve the problem of the coolant pump outlet. The cummins r2.8 outlet is very close to the steering box, I dont really want to alter the factory geometry so a work around is necessary. Im trying to reverse engineer some parts that can easily be made and connected by some 0.065 wall 1 7/8 stainless tubing. This size is closest to the dimensions of the outlet, and many tubing options exist.
For the engine side I cooked up this little part. This accepts the factory cummins o-ring.
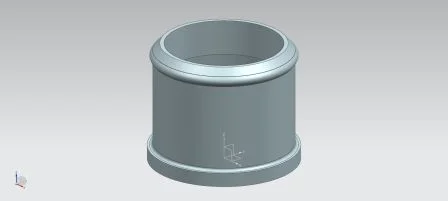
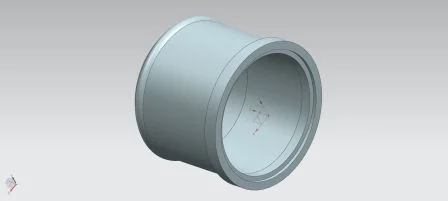
On the other side this part will be used for the rubber hose connection. Nothing to fancy, just a place for a hose clamp. I put a nice little locating step in it for the tubing, seems to help a bit with the welding.
According to my research the stock HDJ80 one is NLA, so I suppose you could get one out of a junk yard next time you find your self on holiday abroad, or you can just modify the stock one. Little did I know that you need to undo the body mounts to get the POS out, i'm not going to open that can of worms.
Others on here suggested using a drill of some kind. I followed their advice. First I disconnected the tank and put a plastic bag in place to catch metal filings.
Then I found a hole saw that fit in the filler neck
I punched through the plate and was left with this mess.
I got a small air powered saw in there to trim the small pieces. Then yanked them out with needle nose pliers.
The bag served its purpose well

Here is the finished product, I can live with it. Took all of 20 minutes and no body mount removal was necessary. At my vehicles age something would have broke then my OCD would kick in resulting in more delays.

I'm happy to cross another thing off of the list. There are still some problems that need to be delt with. While i'm waiting for those stupid little electrical connectors i'm trying to solve the problem of the coolant pump outlet. The cummins r2.8 outlet is very close to the steering box, I dont really want to alter the factory geometry so a work around is necessary. Im trying to reverse engineer some parts that can easily be made and connected by some 0.065 wall 1 7/8 stainless tubing. This size is closest to the dimensions of the outlet, and many tubing options exist.
For the engine side I cooked up this little part. This accepts the factory cummins o-ring.
On the other side this part will be used for the rubber hose connection. Nothing to fancy, just a place for a hose clamp. I put a nice little locating step in it for the tubing, seems to help a bit with the welding.

- Thread starter
- #53
going to watch this.. . have 151 in 80 already. very limited on electronics being GCC spec 92 FZJ carb'd. live in south, so no smog checks.
Do you think that the availability of kit to do this swap would be a help for people that are importing lhd fzj80s from central america? I obviously wanted a turbo diesel 80 series, that was the motivation for this project, however i really did not want rhd, i figured my wife would crash it.
Just stumbled across this post - incredible work!
The adapter and t-case mount - aluminum? composite? other?
The adapter and t-case mount - aluminum? composite? other?
- Thread starter
- #55
Just stumbled across this post - incredible work!
The adapter and t-case mount - aluminum? composite? other?
All done in 6061 Alum., thank you for the comments! Those parts pictured above for the new coolant outlet will be out of 304 stainless because I cannot weld aluminum very good and dont have free time to practice right now.
- Thread starter
- #56
I guess now would be a good time to tell the story of modifying my A442F harness to work with the H151 trans. You will discover when you pull your land cruiser apart that basically there are 3 connectors that go between the main engine harness and the sub harness for the AT and T-case. I am designing my wiring system so that only one will be necessary.
First, a copy of the factory diagrams for your right are in order, check ebay, thats where I found this gem. It has been very useful in the project.
To get an idea of the differences between the 1FZ A442F truck and a diesel H151 truck a copy of the foreign market diagrams is very valuable. I had a harder time finding this one, check ebay but search globally.
I started with this
And needed something light this
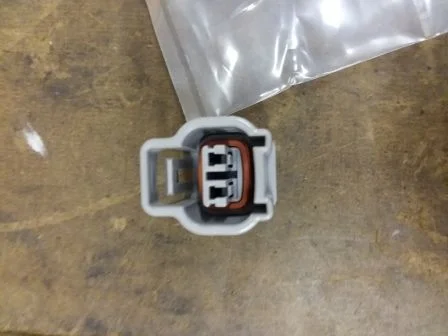
I found the exact connector on ebay, turns out its the same for some Toyota or Lexus car with a stick and a 2JZ engine, so no problem getting your hands on one of these.
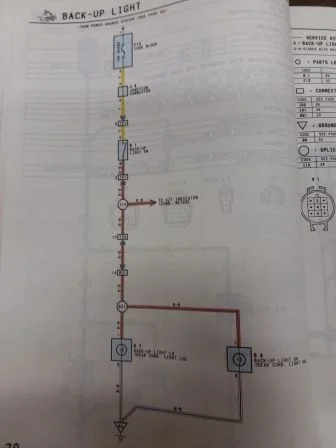
It even came with the pins and seals to complete the job. It does require a splice to get power from the yellow wire I believe. I am surprised there is no relay for the back-up lights but I guess this is the way it is supposed to be.
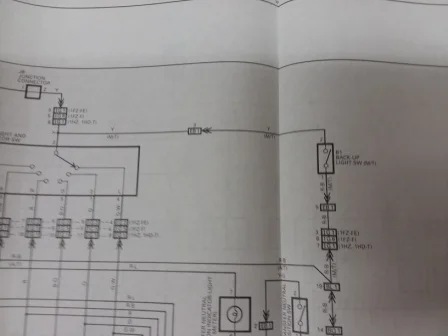
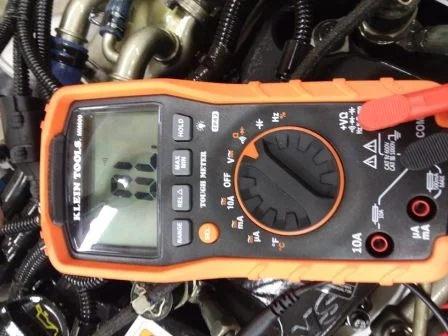
You can verify operation by looking your VOM between pins 3 and 5 I believe in the EC1 connector, that would be the 12 pin connector between your engine and trans harness. When not in neutral you should get and open circuit
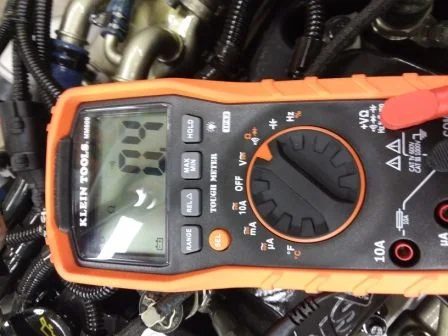
and when in reverse you should get a very low resistance value, something like this
I hope the details are helpful for others, if they are boring you guys please let me know and ill just stick to the cool stuff from now on.
Happy New Year!
First, a copy of the factory diagrams for your right are in order, check ebay, thats where I found this gem. It has been very useful in the project.
To get an idea of the differences between the 1FZ A442F truck and a diesel H151 truck a copy of the foreign market diagrams is very valuable. I had a harder time finding this one, check ebay but search globally.
I started with this
And needed something light this
I found the exact connector on ebay, turns out its the same for some Toyota or Lexus car with a stick and a 2JZ engine, so no problem getting your hands on one of these.

It even came with the pins and seals to complete the job. It does require a splice to get power from the yellow wire I believe. I am surprised there is no relay for the back-up lights but I guess this is the way it is supposed to be.
You can verify operation by looking your VOM between pins 3 and 5 I believe in the EC1 connector, that would be the 12 pin connector between your engine and trans harness. When not in neutral you should get and open circuit
and when in reverse you should get a very low resistance value, something like this
I hope the details are helpful for others, if they are boring you guys please let me know and ill just stick to the cool stuff from now on.
Happy New Year!
All done in 6061 Alum., thank you for the comments!
I was thinking aluminum, but with the matte finish and the advances they're making I wasn't sure if it was a composite material.
I look forward to watching the progress here!
Awesome work! Very impressive!
Incredible work and craftsmanship. This is truly inspiring.
- Thread starter
- #60
Now perhaps someone with some diesel swap experience can chime in. I dont seem to have space for the massive cummins fuel filter assembly. Until proven otherwise I am going to assume that Cummins does not have a shorter filter for me to use. Does anyone have experience with racor filters?
I am thinking that a small racor assembly could be bolted to the old 1fz evap canister bracket.
Any ideas?
I am thinking that a small racor assembly could be bolted to the old 1fz evap canister bracket.
Any ideas?