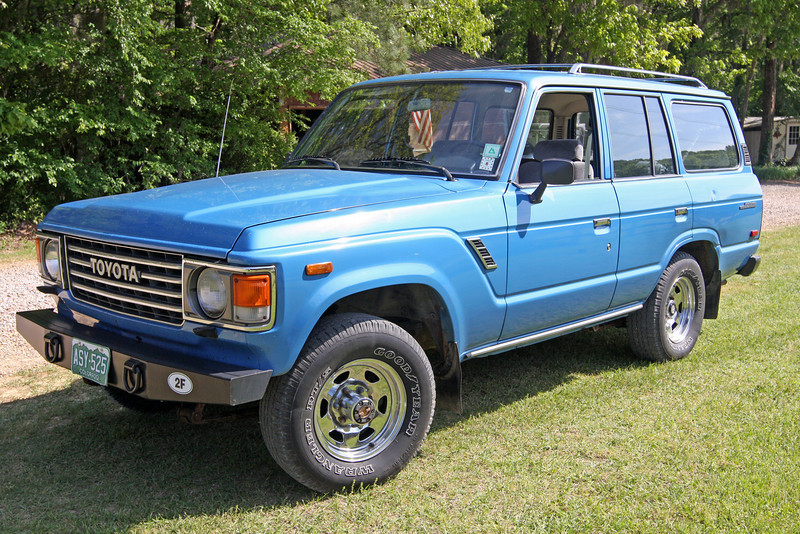
Builds 1985 FJ60 Gets a Holley Sniper EFI Setup (10 Viewers)

This site may earn a commission from merchant affiliate
links, including eBay, Amazon, Skimlinks, and others.

Thanks,
I decided to modify the carb insulator to work with the adapter. This will raise it up slightly and still give me the oppertunity to have some sort of heat shield for the exhaust manifold.

Absolutely if you do not have one of the original thicker Downey adapters absolutely use the carb insulator to get the right height to clear intake. I would still recommend using new OEM gaskets. The gaskets that was caked to my insulator was shot when I pulled it off.
 
I used this one. I bought several.


1973229
 
OK I got the mounting sorted out. Figured out the vacuum lines and other fittings from various posts.

BUT I am stuck on the Charcoal canister. I converted to a GM canister based on this post.

Basically combine the Tank and Vent Control Valve (VCV) lines together and do not change the purge.

1974408


Based on your picture, here you are missing the VSV


1974412


So the question: is it OK to remove, It use to go to the carb. It is the last piece to the puzzle.


1974419
 
I know my linkage road was 10 3/4" from tip to tip. I robbed the factory pedal mount and threaded it to one side. Then used a universal pivot mount on the other side to adapt to the Sniper. Straight shot and easy.

So I measured mine tonight. 12" point to point. This is without the ends.
With, it should be right around 10 3/4 so your numbers are right.

The peddle did not move at all. Seems the hand throttle kept it in place. Plus my spring is new so all is good there.
 
OK I got the mounting sorted out. Figured out the vacuum lines and other fittings from various posts.

BUT I am stuck on the Charcoal canister. I converted to a GM canister based on this post.

Basically combine the Tank and Vent Control Valve (VCV) lines together and do not change the purge.

View attachment 1974408


Based on your picture, here you are missing the VSV


View attachment 1974412


So the question: is it OK to remove, It use to go to the carb. It is the last piece to the puzzle.


View attachment 1974419

I only have one vaccun line coming from the Sniper. All the VSVs went away. From there my charcoal canister in and out are ran directly to the hard lines. It’s then vented on the vacuum port on sniper from hard line on the drivers side.
 
So I measured mine tonight. 12" point to point. This is without the ends.
With, it should be right around 10 3/4 so your numbers are right.

The peddle did not move at all. Seems the hand throttle kept it in place. Plus my spring is new so all is good there.
Awesome! I bet having the hand throttle installed already helped with pedal drop. Can’t wait to see it finished.
 
Just saw this on Facebook. Looks like redline cruisers is getting into the sniper game! Should make this conversion even easier.

E49E9BC3-9895-4E17-82EA-820C7D7C93CF.webp


62498351-23AC-4A42-BFD6-0B80AEB62A41.webp
 
I'm getting ready to start running my fuel and vacuum lines. I would love to see a line drawing of a setup using a frame mounted fuel pump and the stock charcoal canister keeping whatever vac lines to the stock distributor are advantageous.... Anyone?
 
I'm getting ready to start running my fuel and vacuum lines. I would love to see a line drawing of a setup using a frame mounted fuel pump and the stock charcoal canister keeping whatever vac lines to the stock distributor are advantageous.... Anyone?

@wngrog has a good write up on frame mounted fuel pump when he installed his AFI. For stock distributor you only need one vacuum line coming from ported vacuum on sniper to inside vac port on distributor. If you have Jimc tunes distributor it’s the outside port. If your keeping stock charcoal canister you should be able to get rid of vsv and run straight to the hard lines, then vent in either your carb insulator tube or your vacuum or other port on sniper. Cap you larger return hard line on drivers side.


Last edited:
Good tip on the Dizzy, I just got mine back from Jim. What are you at for timing?

I am using @FJ60Cam GM fuel filter setup to reduce the amount of hoses to the engine bay.
I will be capping the return since it is done off the filter and only using the feed.
That with the removal of all of the VSV’s and most vacuum hoses will make the engine bay clean.

I also have a non us air cleaner that I am installing.

All in all I should be almost done this weekend, I am waiting for a few small parts to arrive so by then end of the week is the plan.
 
As for the Redline setup. I can tell you all factory air cleaners are not the same so that adapter may be perfect on one truck and not on another. Check that with them. I had to mix and match and dremel and glue my Mr Gasket adapter set

Also, this baseplate is clean they have and I’m no expert on this being prone to heat as a Cruiser carb is, but I like using the heat deflector shield on the 2F intake.

This would be my go-to setup using a non heat shield intake from an F motor.

I may be just over cautious there.
I didn’t use the insulator and can’t say I’ve noticed any issues, but I agree it isn’t a bad thing. I had to take a file to my Mr. Gasket adapter as well.
 
Good tip on the Dizzy, I just got mine back from Jim. What are you at for timing?

I am using @FJ60Cam GM fuel filter setup to reduce the amount of hoses to the engine bay.
I will be capping the return since it is done off the filter and only using the feed.
That with the removal of all of the VSV’s and most vacuum hoses will make the engine bay clean.

I also have a non us air cleaner that I am installing.

All in all I should be almost done this weekend, I am waiting for a few small parts to arrive so by then end of the week is the plan.
I think mine settled in around 12 degrees. I want to say @FJ60Cam has pushed them higher.
 
So, @wngrog has my 4x4 labs rear bumper at his place and I decided to get to work in removing the rear bumper, cross member, and rivers. After a bunch of Kroil oil the rear bumper was off! With the 4x4 labs you have to cut out the cross member. So, I got to work. It was a lot of saw and grinder work. After several hours it was off. Now, my next project will be the 14 stupid Toyota rivets I have to grind out. Rust convert everything after grinding and seal it up nice and tight. Then eventually I’ll get this bumper installed!

0B399202-4538-49CF-907C-79E658673763.webp


22ADE5F8-5547-49BB-8012-8E92366B2787.webp


C16314BE-85D3-4C90-805D-2AA34658C894.webp


97F75AF2-990E-43E5-9C5A-25A857A0821E.webp


154F26A2-0C9B-4774-8355-25B3A9F6DD11.webp
 
Some more shots.

EB9B4CFF-892F-456F-8FB4-FCE15E1F3D1D.webp


70707D08-A08B-4553-931E-12A9CF08E533.webp


A2FFADD5-FDC0-4B44-9886-35F34AED6778.webp
 
Plasma cutter will make short work of the rivets... as will an Ox/Ace torch... (of course exercise caution in all cases when working near the fuel tank and lines)
I don’t have a plasma cutter, wish I did! I do have a torch. How do you normally get them off? Get them super hot and hit with a grinder, chisel, air hammer?
 

Users who are viewing this thread

Back
Top Bottom