Builds 1968 FJ40 Build Page "the rocky road"

This site may earn a commission from merchant affiliate
links, including eBay, Amazon, Skimlinks, and others.

huminajumina said:
Well today was another set back, I went to the garage again to tune the carb up since it was giving me a fit all day, and I decided to tighten my wheel bearings first, of course they were bad, so I pulled everything apart and hopefully I will have new bearings by tomorrow...while everything is apart I decided to clean up my Warn hubs

Also I put it on the lift and the passenger side rear was leaking brake fluid so I bought some wheel cylinder rebuild kits, we'll see what it looks like when I pull the drum again tomorrow...

Also this got me thinking, if I am redoing my bearings and plan on upgrading to a disc front axle/knuckles in the near future (I hope really near future) can I just swap these newly installed race/bearings/hubs into the new disc brake axle ????

Wheel bearings are COMPLETELY different.

On sizing the shocks, calculate how many inches of up travel you have until tires hit sheet metal. Subtract one inch to determine appropriate bump stop length(allowance for body roll), add one inch over collapsed shock length to determine static shock length(allowance for 'dynamic' driving conditions)

Best

Mark
 
shocks and bearings...

Thanks, man I appreciate it, I'll have to do some shock measuring. Yea I know the warns are different, I just figured I'd as about the bearings, but now I see to different Part Numbers for pre '76 and '76 and up....Maybe I can source a disc axle a little quicker than I'd previously hoped to.....
Wheel bearings are COMPLETELY different.

On sizing the shocks, calculate how many inches of up travel you have until tires hit sheet metal. Subtract one inch to determine appropriate bump stop length(allowance for body roll), add one inch over collapsed shock length to determine static shock length(allowance for 'dynamic' driving conditions)

Best

Mark
 
Well, "the Rocky Road" is definitely appropriate... 2 steps forward and 1 step back.... So I said I tried to clean up the shocks and found out the rear shocks are the wrong side, I said I had to tighten the hub bearings and then realized I had bad passenger side bearings..... Well on top of that my brakes have never been reallly strong, and when the FJ40 was on the lift the brakes broke, and I had a fluid leak from the right rear drum.... :mad::doh::bang::censor:

...So I tried to tackle most of that this week...

Here is one of the hubs back together and striped of all of the chipped nasty paint...
8721155431_7a4bcf6c0d_z.jpg

I cleaned both up and re packed them with some nice high-temp bearing grease instead of the white lithium grease that was in there... I also cleaned up the passenger side bearings and took most of the burrs out of the races and bearings.... put new inner seals in both sides, tapped the races back in and re assembled. I torqued, pre-loaded, re torqued and all and now I think I am good for a little while.... it was definitely smooth and way better than it was(passenger side)

Then I rebuilt my leaky wheel cylinder on the passenger side rear drum, and what I found was a relief, the cups and boots looked great, the cylinder was just full of nasty stuff and needed cleaned.... so I wiped everything down....
8721156111_14f3cb017f_z.jpg

Then I honed the cylinder and smoothed it out, and ran the outside through the wire wheel to clean the excess junk out...
8722276440_e0f15d66aa_z.jpg

After I reassembled it I was confident that it would work just fine...
With all the wheels and tires on and the brakes back together I bleed everything in prep for my favorite part of the day...
8722276196_da70a0d28e_z.jpg

And that was the installation of the 80-series Master Cylinder I purchased for just under $50 (new Aftermarket)
8722275862_742aac0282_z.jpg

And after a short amount of time spent bleeding the brakes again and of course the bench bleed of the new M/C ....... I HAVE THE BEST BRAKES I HAVE HAD SO FAR!!!!! :clap::cheers::grinpimp::D

-when I got the cruiser I put a new manual single circuit M/C on and all new shoes and drums..it was ok....:mad:
-when I purchased the hard top, I pickedup a '72ish Booster and dual circuit M/C and used the JT adapter.... I purchased a rebuilt M/C and the brakes were still pretty weak...:bang::bang::bang:
-now I can lock up all 4 drums in the gravel driveway pretty easy...I plan on rebuilding all of the other Wheel Cylinders now, and I should be set...:steer::clap::hillbilly:
 
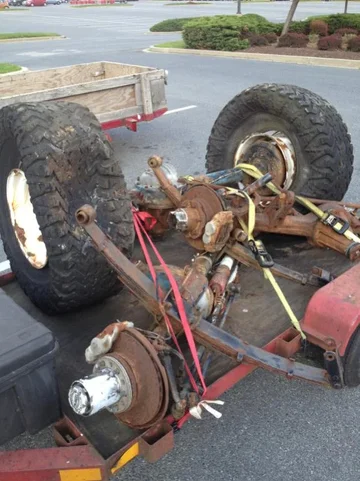
Well the 'Ol quadrajet finally started acting normal on the commute to work this morning, & the brakes felt nice. Here's a few shots of the disc front axle & all the other junk I picked up, hopefully I can clean everything up & get rid of what I don't need...

These dry rotted 39's may be a problem to get rid of, but the 15" wagon wheels should clean up nice...
image-2242966059.webp


Stopped for a few beers...
image-1535651161.webp
image-2242966059.webp
image-1535651161.webp
 
Do you have your 40 in Martinsburg today? Mine is sitting at the VA hospital today! Felt good to drive around in it today.
 
Aw man! I was parked right down the road all day! I got my inspection taken care of at lunch, then drove right by the VA on 9 headed to Harpers Ferry! The new master cylinder is nice, I'll be driving a lot more now that I'm up & running!
 
The not confusing part....
8745350649_e5515f0534_z.jpg

The slanty out of focus underexposed iphone while driving picture.....yea I went to college for Contemporary Photography......
8746473134_237a83b02f_z.jpg


Now the "I'm Confused Part" :mad::doh::meh:

Well, I pulled everything off of the Axle that I brought home the other day....I am not 100% sure what year it is, but judging by the rotors and steering arms I 'd say it is an early disc axle, but that is just my best guess......

8745350167_189e7c4de4_z.jpg


I have been talking to a few people and reading all the forums, and the more I do the more difficult my decisions get.....
PLEASE ANSWER THESE QUESTIONS IF YOU CAN!!!
1. I have a 1968 FJ40 with coarse splines at the hubs do I have ball-in-claw and coarse inner spline axles? I am assuming yes ( I know how to find out, but I'd prefer not to tear into it yet)
2. My donor axle (complete disc to disc) has Spring-over perches welded on, I am going to cut them off with the cut-off wheel and grind down extra weld bead, is this a problem or worth the hassle???
3. Using this complete (I assume 76-77ish) donor axle complete, knuckles, diff, housing, and all will be worth the time or should I try to slide the innards into my '68 housing and attempt to figure out the bushing/seal issues????

I think that is it for questions, but please offer any extra info that you have.
if I am using this donor axle complete, then I will just re install the shims back as they were, but if I need to cross parts over to my housing then I will have to borrow an alignment tool, I am curious as to how well I can remove these SOA perches, the PO of this axle wasn't a bad welder ( I want to remove them because one is slightly crooked and they will limit my axle travel and "its just not correct to leave them"[I think]).

I have most of an axle rebuild kit, all new bearings, scrapers, seals, gaskets, just nothing for the newer style warn hubs and the seal the spindle rides agains( the one that bolts one (in my picture top left-of-center-ish, by the rotors) anyone know where I can get those individually? SOR has a warn "rebuild kit" for $25

Any help would be appreciated, I know the info is all here on IH8MUD somwhere, I will keep searching the threads when I have down time at work.....
 
Disc conversion

After tearing the axle apart I decided not to wait, and went ahead and ordered the rest of the parts. I decided not to cut the SOA perches off just incase I decide to do anything with them (I won't,but they don't really take that much travel away)
Here are some more pieces...
8761069370_4283000bf0_z.jpg

Pulled the diff to check gear ratios and such, it looked ok, I'll have to check my drum diff to see how good it looks later...
8759937107_a0c5da06b8_z.jpg

8759935789_cf498f772c_z.jpg

Here is the old Drum axle finally out after a lot of sweat!!!!
8761056858_ec2b17bb78_z.jpg

Here is after a little assembly
8761055388_826e60fb02_z.jpg

8761053880_de8873b785_z.jpg

8761051822_044749613e_z.jpg

8759927061_650fec4e39_z.jpg


I have all the brake lines made up now I just need new brake hoses, and I will need to do something about the Yoke, I new the bolts got bigger on the newer driveshafts, but I heard that the pinions had the same spline count, that is false, I am assuming that the older coarse spline axles had coarse pinions as well, and the newer stuff has fine spline.... so there is that, guess its back to the driveshaft shop.....
I think someone said early and later driveshafts have different U-joints also so I can't just swap the bottoms out....meh...:bang:
 
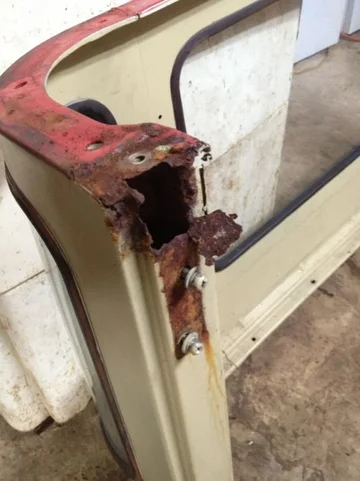
Yup, like I said, I just want to get it on the road again and drive it, well then I started this axle swap, now, I pulled the hard top off and it is ready for a make over, every bolt that was in the rain gutter snapped off, and the corners above the corner windows have a decent amount of rust...theres no going back now.....

Here's a pic from some cruising I was doing yesterday, unfortunately now I keeps trying to rain all day...

8924871023_c6e4de6bed_c.jpg


Also, this is kinda cool, thanks IH8MUD!!!
8924917473_185fc306db.jpg
 
Driveshaft

Well, after a little work I finally got the cruiser back together, I was able to go through the other axles and fine a fine spline flange from a mini-truck that I could drill to the old pattern and use my driveshaft since i just got them lengthened...
So now I have 4wd back and went for a little evening stroll...
8943552108_c7ae03c3d5.jpg

8942930531_9131ff6c55_n.jpg

8943553802_9521fcdfe8_n.jpg
8942932407_a0756da3bb_n.jpg


Now I just have to figure out where to start with this hardtop!!!!!
KPR_7308.webp
KPR_7311.webp
KPR_7325.webp
 
You have any pics of how bad that top is? I kind of like my 40 with the top on, it looks a little more distinguished. Looks too much like a jeep with the top off. Although it is a little more fun topless.
 
image-882085194.webp
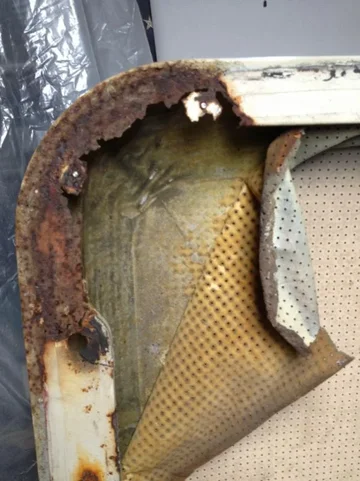
Here is what I found when I removed the hardtop


image-3745950906.webp
Plenty of nasty stuff & rust


image-2442775463.webp
The corners will need a little body work too


image-2270961847.webp
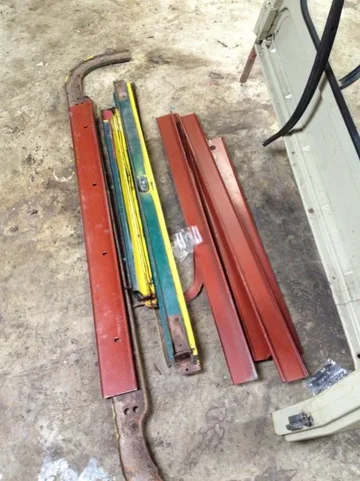
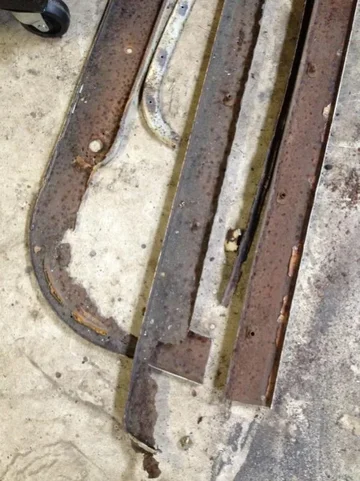
Here are the gutters after I removed them from the fiber glass


image-3240529026.webp
I set everything out too check how it fit, I still don't have any corner pieces though & CCOT wants $190 for the pair
image-882085194.webp
image-3745950906.webp
image-2442775463.webp
image-2270961847.webp
image-3240529026.webp
 
I see you'll get to put your new toy to good use with the top. That is a nice versatile welder.

Yea I think so! Im glad I held out!

I started to make new corner channels last night, im going the easiest route possible. Pictures to follow. I also patched a few fiberglass spots in the top last night.

image-1427412076.webp


image-2657610145.webp
image-1427412076.webp
image-2657610145.webp
 

Users who are viewing this thread

Back
Top Bottom