Builds 1968 FJ40 Build Page "the rocky road" (1 Viewer)

This site may earn a commission from merchant affiliate
links, including eBay, Amazon, Skimlinks, and others.

Joined
Feb 25, 2011
Threads
40
Messages
622
Location
Hedgesville, WV
Website
www.instagram.com
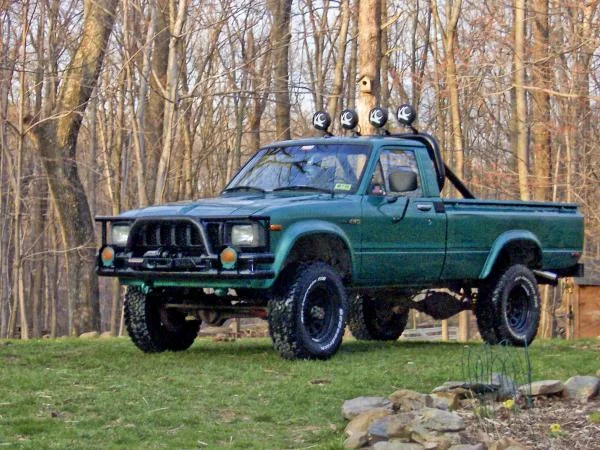
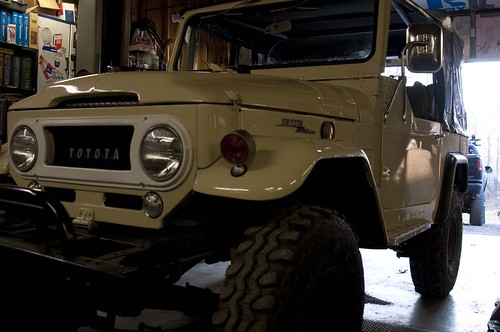
My first vehicle was an '82 Toyota truck with a 20R and 5-speed...so I guess that started my Toyota Appreciation. Here is a somewhat recent picture of my 1968 FJ40 Toyota Landcruiser.
16159530835_d6a747dfe3_b.jpg

I have wanted an FJ40 ever since I was introduced to them while working on the '82 pickup in high school. When I purchased this one, I was really excited to find one in relatively decent condition, and somewhat original. I wanted to keep it all original, and repair all the original Toyota parts. I Think the '76 is a perfect year for me (considering all the features); however, I like the look of the older FJ40s and I like the fact that this one seemed to be in good condition as far as metal (body and frame) went. Several factors have influenced me to make the modifications and decisions that I have over the past few years. Over all, I am very happy with the readability and reliability that I currently have.

From The Begining::cheers:

I never started a build page when I first joined the thread....as with anything it got put off.... So here we go:
After crashing my '05 Subaru Wrx STi and realizing I needed another project, I finally decided I wanted an FJ40 and I knew with all the rust on my old '82 toyota pickup truck I wanted to make sure the frame wouldn't rust in half after I bought it. I got in a hurry and over payed for a 1968 FJ40 in Tennessee.
I made the purchase in Febuary of 2011 and it has been a non-stop project since then...
full

It came with:
3-speed on the floor/ vaccum shift
a bad brake master cylinder
33x10.50 TSL's on steelies
half doors only
Bestop Soft top, no hard top
a stubby winch bumper they sell at man-a-fre
a kaymar rear bumper that was nice but had no tire carrier and was wired wrong (trying to convert to 3 color lights)
I flat towed the FJ40 home because it was in no condition to be driven, they brakes were all messed up and it would have been cold with half doors:


Here is what it originally looked like:

So I quickly started searching for a hard top and full doors. I also got a new single circuit master cylinder but then just switched it out with a dual circuit when I picked one up with the hard top!

Then I drove it around a little bit....
I bought all the original toyota lights, park lights, turnsignals, taillights....
Rusty and I were constantly driving back and forth to get parts and get to the garage to work on the Cruiser...


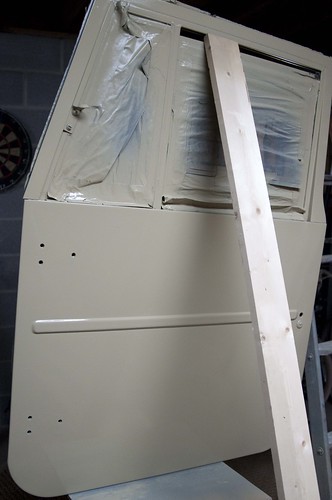
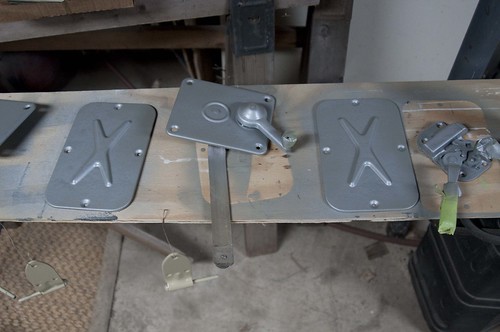
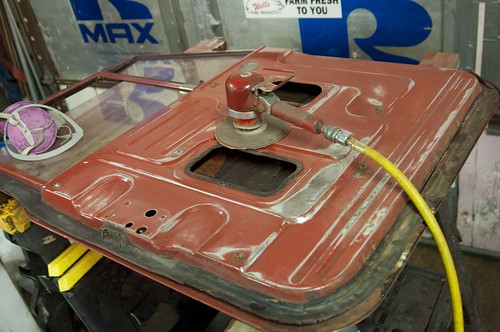
I started to work on the doors right off the bat... it was cold out by now....


My gas tank was also leaking, one of those options you pay extra for at time of purchase....so I patched it up....
Also the speedo and fuel gauge worked but no odometer or temp or oil press....so I began to work on that....
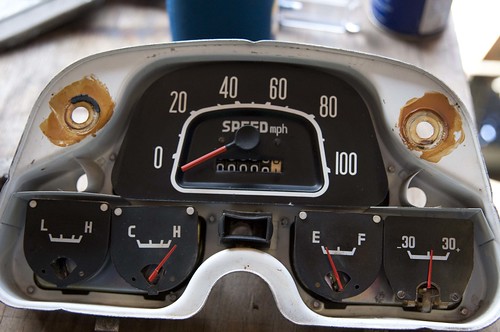
The odometer was super crusty.......


So the story continues...... I shall add more posts in a bit!!!
16133659246_52e020265f_b.jpg
 
Last edited:
nuts and bolts

I added power brakes and a dual circuit master cylinder with a adapter from JT, it was just 1/4" steel so I figured I couldn't go wrong. I re plumbed some lines and had brakes in no time!

8478307867_68634616bb.jpg


When I purchased all the lights, I put the original round taillights in and the tag light and reverse light all at the same time.... even though my reverse switch didn't work...:whoops:
8478308019_b6e1f47054.jpg


Purchased bumperettes too.... I wanted to go kinda stock~ish....

I was able to locate a pretty rad WV tag and shortly after, my dad found this one that is actually a '68 antique tag..... I love it!!!!
8478271909_3fc1bfe0a1.jpg


later I put time into getting the hard top prepped...it had been fixed and painted before and wasn't in the best of shape.... I had to locate a new hatch because this one was jacked up..... so I took the glass out of this and all the hard ware and added it to a better hatch I got off ebay....
8478328385_1e345dd8fa.jpg

8479419492_8b3bbb1931.jpg

Its like a 10:1 ratio of work to beer..... :cheers::cheers::cheers::beer::beer::clap::steer:
8479419734_43e5720ab9.jpg

8479419782_f042372ddf.jpg

8479419772_28eb17bb8e.jpg

I got a NAPA paint code that took a little research and turns out didn't match my existing paint like I thought....however, it is an official toyota paint code...I'll have to look it up but I think toyota 732 or something????
8478328795_6d682c9e94.jpg

464 Beige..... I was way off.......

I was so happy to finally have a hard top and full doors, everything was starting to come together now!!!!

I shot a wedding to make extra cash what little profit I had after overhead went into getting new seats. I was able to find free square tubing at dads house, so I was able to weld up a frame, then just mounted the sliders as low as I could go....
8478328799_18b13f4b08.jpg

Huh, theres coffee and gatorade in this pic, this must have been before I cracked open a beer
8479419866_00ff6975df.jpg
8478328891_24688dfff8.jpg
 
improvements

The seats finally came in and I was done building the frame....glad I chose to build it after all, for a while I was considering buying a kit from someone....

8478328999_5c3237b273.jpg
I got the smittybuilt lockable center console... I love it it has cup holders and a CD player mounted in its own little compartment.... fit was perfect....
8479419970_91d49a525d.jpg

Much better than what I had before...
8478308541_1115a2a989.jpg


One of my friends at work bad a jeep and his girlfriend totaled it by hitting a light pole in the Walmart parking lot.... I got a great deal on some 33x12.50-15's so I bought the mickey thompson classic II's I had always wanted and got my friend to mount them up for super cheap.....
8479362302_34bafac9e1.jpg

I got 5 so I had one for a spare, but I had to locate an older model factory tire carrier that wasn't 15billion dollars.....
8478273903_5916fbbc3e.jpg
a buddy gave me a free BFG all terrain 33x10.50 for the spare....it fit perfect.

I also painted the bumperettes and the diamond plating black so it didn't look as bad....with the two-tone going on because of my miss-matched paint I tried to keep all the colors choices to a minimum....

So then what happens when you finally get a hard top and full doors and you work on all the painting and prep, and get a hatch that works..... you take it all back off and go to the beach....
8479403010_6b290d1d3d.jpg


Also at some point I got some cheap stock looking mirrors to bolt on, but they are bolted to the winsheild hinges and you can't really see anything, and they never stop moving b/c they are cheap so I'll have to work on that!!
 
Engine work...bleh

And then it happened....my old F135 engine started to make a crazy hissing sound and had a misfire...I looked into it and noticed a lot of blow by and oil spraying out of everything.... so instead of spend money on this older engine, why not locate a newer 2F that I could get more parts for and more power out of...
The 2F on the ride home after a long day of checking it out then pulling it!!! Can't wait to clean everything up and clear out some of the emissions stuff that is still half bolted on:
8482393218_815d676f07_b.jpg


8479556112_aa9c6d2cbe.jpg
Heres the original engine finally out....
8478464411_e750ea63ac.jpg
Heres the new engine I picked up from FJ40MATT, we listened to it run and then pulled it out.....I only had to drive to NJ for this one.... it was from a '76 so I figured it would be good enough!!!
8479556368_4c364a6ec3.jpg

8479556572_a5ef917cdd.jpg
8478464807_566f7b823e.jpg
I put in a new rear main seal and removed all of the remaining smog stuff since the air pump had long been disconnected and several parts were missing..
8479555196_ec5fbc3720.jpg

Almost in....this involved a lot of adjusting and adapting things...
8479555722_0856843367.jpg
The clutch looked fine!
I also went with my original 1F dizzy since I had de smogged stuff and it was an aftermarket nice one with electronic ignition instead of points, and I could get rid of all the '76 igniterbox and diodes that somehow stopped working in theh short time it took to get it home.... Matt and I just listened to this engine run, how did the damn ignition stop working....I work on Avionics I am pretty meticulous when it comes to hooking up wiring and checking everything for correct polarity before adding voltage...
8478331989_e7c504462f.jpg


And then after much work, boom, it is in, and it is starting to look like an FJ40 again!! you can see all the oil on my firewall that the old engine was spitting out....I later took her to the car-wash and cleaned everything else off...
8478331211_124af618b3.jpg

8478332287_11722e301d.jpg
There were fitment issues when it came to the power-brake/dual circuit mod and the '76 double barrel carb... I eventually took a few extra brackets off and the vacuum secondary diaphragm as well as the throttle breaker or whatever that other thing was called (its been a while)....


Ok enough clogging up the forums for today, I will post more pictures and work here in a little bit...... :flipoff2::beer::clap::D:eek::doh::doh:
 
Last edited:
After putting all this work into this thing, all I wanted to do was drive it...but everytime I would find something new to dive into!!!
8479359854_485ec97853.jpg

I think this was after the 2F started to have major issues and I needed to start doing more work...... It soon developed a hard knock from the lower end, I dropped the main caps and gauged the bearings, they looked rough and needed replaced, but there wasn't a huge gap... I put a new oil pump in because I couldn't get that one to prime again, and I had to buy a $200 brand new oil pan because I brazed the rusted one on it 3 times and oil kept seeping out of a new hole every time....

Here is a shot just after I got the wheels and tires mounted up, and I was still waiting on a tire carrier.... I had also just painted the diamond plate covers because I hate them, but now that they are black I like them.....I found rhino liner under them, so there was no quick fix there....the sheet metal seems pretty solid tho
8482286078_1209b69d28.jpg

8481195105_939887c6f0.jpg


I wish I took some pictures of this tire carrier, it was rusted pretty bad and the lower hinge was frozen so when they took it off, they actually wrapped the hinge around and bent it all up, it took a while with the torch and puller to get evertyhing situated...then I spray bombed it black...the tire hides its pitted metal anyway...
8482286124_73ee9bc83b.jpg


I tried to reletter all of my knobs and painted the speedo, ashtray, and glovebox door...I still need to take all of it off and paint the dash, but my windshield knobs are siezed up....
8482286176_c8230024c2.jpg
I have done alot of work to this dash, back lighting, new lightswitch, wired the wipers, wired the heater switch, new ignition switch, wired up the temp sender, replaced a speedo cable, and the obvious rebuilt the odometer... everything I look at is a birdsnest of wires from the preivous owner....

Oh hey Kevin, you have to work this weekend, I hope you're not mad we told you at the last minute possible....Driving the cruiser in was the only thing keeping me from loosing my $H1T, and I think that was b/c I have cupholders in my Smittybuilt box for coffee.....lots of coffee......
8482286206_74e0af54e0.jpg

This lil cluster used to be in my old '82 pickup, so I took out the clock and added a 4K tach to it so I could keep an eye on everything....
8482285806_646f52c014.jpg
I still need to hide the wiring a little bit, maybe get some more loom to put around them
More topless beach pictures!!!!
8482285726_a278dc915e_b.jpg

8481195001_54fc29f5ec_b.jpg


And all that brings it just about to the point where the engine took a crap and I stopped driving it again....its been so long, I am super pumped to get this gal back together....
 
So then after the previously described engine issues, I let it set in the driveway while I visualized me throwing money into a burn barrel and then eating ramen noodles...

I finally built up the courage to drive it over to the shop and pull the engine, so I could look how bad it was....
8481194939_d8c89b9032_b.jpg
8482285908_13f61a69d0_b.jpg

...and then just before I got the lower end apart to finally see what all that knocking and wear and tear was about, I did what I do best, and gave up....

8482285984_d07f612a8f_b.jpg


picture.php

picture.php


just taking apart everything to this point I found out I needed both manifolds, I knew I really needed a new carb + adapters, and a few valve guides looked like they could be replaced, then just pricing parts I was getting overwhelmed... Ryan said he may have some parts laying around from his 2F build so I may have had a crank if I needed it, but I didn't even bother to look any further....I'd still have wanted to get a 4-speed and then either make the driveline fit or buy all of it, or go with an adapter to my 3-speed transfer case, after I spent all that money I would start to be happy, so I just did nothing for the better part of a year.......

So that brings me to where I am today.....
8480048213_003dd8538a_b.jpg

I pulled the trans and transfer the other day after taking measurments for fitment....
8480047951_22e272329f_b.jpg

I bought an NV4500 and I had to find a shifter so I did a little research and got that
8480047643_733bda801c.jpg

I measured the NV4500 and checked it out.... I bought a rebuild one off ebay from a transmission shop up north, they seemed pretty cool, we'll see how it goes, it is a 92-93 model so it should have the lower 1st and reverse.... Senor Aguas is selling me his used Advance Adapter kit so I can save a little money, I am trying to source all the adapters and parts and trying to save a little money.....
8481136322_09aacecd16.jpg

Then I measured my J30 3-Speed
8481136642_18f9fe60c4.jpg

Using my WV measurement system it is about the size of my foot.....that means the trans is 1 foot long..... look at the measuring tape, I'm pretty acurate with that thng.....
8482382348_4237fac98d_b.jpg

Someone needs a carwash..... :frown::frown::frown:
8481291197_af2c08467d_b.jpg

I am going to take the transfer off soon and clean it up real good before I start taking it apart... i want to put a case saver on it also, since a SBC will have a little more power, I don't want to break it....
I am trying to locate enough stuff to change my transfer over to manual shift and use a twin stick kit, I don't need it, everything works fine, buti'd like it and now is probably the best time to fit it all in there....
 
Long road ahead Kevin, I look forward to getting out and wheeling when you're back on the road. Subscribed
 
window trim

One day back on December 5th 2011 I put all the new window seals in my doors and it was awesome.... I just came across these pix, so I figured I would update it!!!!

After looking up and down the forums I went with the spector kits, they seemed pretty nice when I was installing them.... and they still seem to be doing well today, even though I am not driving the 40 anywhere...
8486345448_27c531af96_z.jpg

8485252897_fef8b2c858_z.jpg

8485253001_65e6ba52e4_z.jpg


When I got these doors with the hardtop everyhting had been sitting in a barn for a while, so I had to take a screwdriver to get all the crap out of the way, just to roll one window up, so after hearing the glass rattle for about a year, I pulled the trigger on the window trim kit from spector and I must say it is nice.... I have also put a drivers side window regulator in and replaced all the door handles and locks also....nothing has been easy, hahaha....
 
more work

So I have been trying to do little things to get ready for all of the work to come. I pulled the trans and transfer a week ago and I wanted to clean it up...

8494398794_84b4c53ed0_b.jpg

This is after about 20 minutes of brushing off grease/dirt with parts cleaner and a brush....

8493298253_964974e534_b.jpg

and this is after the carwash(numerous soaps, soaking and pressure sprays) as well as brake cleaner (chlorinated of course) super clean purple spray, a brass wire brush, a wood chisel, and other such abrasive, scraping methods were used.... total cleaning time 1.5 hours at this point...WTF.... I also let it soak in the super clean for the drive home and over nite....

8493298023_b1e81c719b_z.jpg

8494399028_6146b976dc.jpg

I also waited it out with this guy...:beer::cheers::whoops:
8493297747_f59967cf88_c.jpg

Plenty of parts still hanging out in the basement and the shop waiting a new home...just waiting on a lil landcruiser funds to roll in....

8493299373_f549515292_c.jpg

Helping with projects around my parents house while I could be doing a little landcruiser fixing....

8494399696_5a3e844aa1_c.jpg

Also if you are wondering why I ditched the 2F that I was so excited to buy, this isn't the reason...... but #3 wasn't as great as this one....


meh
 
transmission and transfer action

Not too much wrench turning going on this week, but a lot of buy sell buy sell!!! trying to clear out my basement and the shop to make room and funds for the FJ40 work to come.

Picked up a 3speed trans and transfer with mechanical shift linkage so I can put a twin stick kit on my transfer!!!! ..haven't even gotten my transfercase clean yet, and here is more mud and grease to work on...
8509131538_cb7a34f611_c.jpg


Also if anyone happens to scroll over my build thread and has any ideas/alternatives/better product suggestions for my 92/93 freshly rebuilt NV4500, I am open to all solutions....Advance Adapters says 3rd gear makes noise and 5th is kinda hard to get in, I am sure a lil gear oil/trans fluid won't fix this but, anybody have any luck with anything?
8508024083_7c93c941b0_c.jpg


hopefully more and or better updates in the very near future...
 
Very nice Landcruiser mate. VERY nice.
 
Thanks guys! Very excited to be getting this project back in the road, and hey, if I didn't have to work on it, I wouldn't have all the excitement when I talk about it!

Also, just found out that the SBC engine is not a 305 HO, it is a 92-95ish 350 w/ 4-bolt mains converted from TBI to carb, out of a truck I believe. What great news! Can't wait to put it on the engine stand & start cleaning it up
 
So I noticed that the shifter on the new mechanical linkage transfer case was frozen and that it was in such bad condition, so I decided to remove the housing with the mode shaft and shift fork to check it out..... it was nasty, and seized
8512064714_5e4c90a95b_c.jpg


I was finally able to wire brush and clear it with a scribe, soak it in WD-40 and get it to move with a few light taps with a hammer.....I decided to take it apart, and when I got it apart I cleaned it thoroughly and ordered a boot, o-ring, gasket, and oil seal from SOR as well as the transfer to trans gasket all for about $25 when I do the twin-stick install it comes with a new mode shaft, so no need to clean it up any more!
8510952643_730c018db1_c.jpg


I tried to clean my transfercase up some more,but it didn't help looks like I'll need to really spend some time on it tomorrow...
 
My 200th post on the forums!!!

All of my posts are extra long and blah blah, but that is because I drink beer.... this one will be kinda long, but I really didn't do anything...hahaha its my 200th post though, is that anything to be proud of?? meh...

So I am still cleaning this transfercase...totally envy these guys right now:
How to Clean a DIRTY Transmission and Transfer Case
We have some good cleaners on here.... I tried the oven cleaner method, and it is pretty awesome!! my aerosol ran out of propellant but still has cleaner in it I may stab the can and use the rest...Before.....
8513885809_16f7be19c1.jpg
It's fume free and MAX cleaner, lolol....works like a champ tho! The Parts cleaner is pretty bad ass too! I thought I was out of solvent but I forgot the other container was untouched!! scheweeT!!!
8513885549_db9a451142.jpg
and here is an after shot, still plenty to do, but I am still pretty happy with the progress, and the fact that I am working out of my basement everynight!!!!
8514997546_92fb2e6609.jpg
8514997312_3f1b03c7bc.jpg
Also I took a few items off and soaked them in the parts cleaner to get all the gunk off, now I have primed them, and tomorrow I will stop and get some hi-temp hi-gloss black paint for the parking brake parts....
8514997088_b8c546d8f1.jpg
Then there was much rejoicing, Yayyyyy!!!!!
8514996924_75c977e507.jpg


8513884321_5660bd9d7d.jpg
buy this stuff, fund my landcruiser rebuild........
and last but not least, my centerforce pressure plate and clutch disc showed up today, literally minutes after I ordered them from summit, ok maybe like 1 day but still H*& F*&@ing S@#! I ordered this stuff at 12:01 yesterday.... I could get used to this........ Also, you'll notice, it pays to wear safety glasses at the parts washer, especially if you are a crazy scrubber like me!!!
8513884083_e9db7c238a.jpg
.........12:01!!!!!!!!!!!!
 
Last edited:

Users who are viewing this thread

Back
Top Bottom