Toyotasaurus - '79 FJ45 Troopy Project

This site may earn a commission from merchant affiliate
links, including eBay, Amazon, Skimlinks, and others.

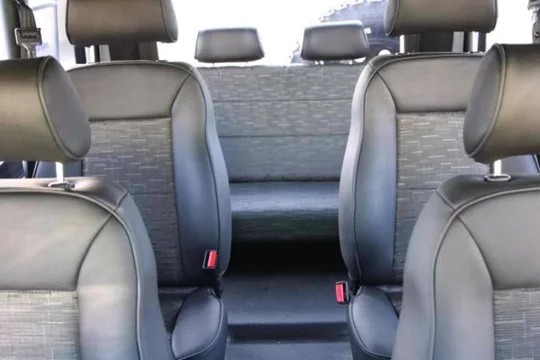
Also, on the 4 seater idea, my dad has a 1981/2 Ford Bronco which he has converted to a styleside ute, so he doesnt need the rear bench seat. it will fit in the back of Rex, but only on top of the wheel arches. so I'll have to make a box steel base for it and sit it on there.

I'm sure there are build threads on such things, but does anyone have any ideas on this sort of seating configuration? apart from using the classic fj40 rear 2 seater etc.
 
Last edited:
You mean a bench seat configuration? Usually guys go for seats that fit between the wheel wells to keep the added weight lower in the truck.

You could also put a couple of short buckets in the back. ICON has some inspiring pics.
 
Like this.

ForumRunner_20120514_085753.webp
 
You mean a bench seat configuration? Usually guys go for seats that fit between the wheel wells to keep the added weight lower in the truck.

You could also put a couple of short buckets in the back. ICON has some inspiring pics.

Ah yeah true, and i guess also the headrooom once it's sitting up on the guards. a fold and tumble configuration will be perfect, and as jfz80 has linked me to some awesome info, I will be looking for some single fold and tumble seats, much like the jeep ones. they look effective enough :D

Subscribed:popcorn:
:D the thread will be a slow mover, but hopeully you'll enjoy it as much as me!

Scrumpy--

If you havent checked out this thread you should. Sounds like you guys have similar intended uses and he has one heck of a finished product.

Start from the beginning but here is where he mounted some sidekick seats as second row side by sides

https://forum.ih8mud.com/fj45-owner...-top-restoration-super-mod-3.html#post6282347

awesome info mate, cheers! from checking that out I found the "FAQ rear seat options" thread and scrounged around through that and found some perfect seats, and mounting options etc. thanks so much!
 
Seeing the first exterior pictures, I thought it looked alright despite having enough steel hanging on the front end to build a bridge out of.... Then I saw the interior. Ooohhahahahahahaha!!! It's like Larry the Cable Guy and Snooki had an interior design field day! XD. Good luck with it. It's a cool rig.

---"Wait Master, it might be dangerous.....You go first."--

Yeah haha it seems like they had some sort of sick fetish for camouflage that's for sure. They could've gone for a snow camo style and it might've been ok... sort of.

I can't wait to get rid of it, and get Rex back to a Cruiser Beige XD
 
Not much to happen on this current break. I may just clean up the bull and scrub bars so I can put them on my shorty, and do a little bit of prep work.

I also just got an fj40 body and chassis only from a guy for a bottle of jack. picking it up tomorrow. going to be a donor for panels etc. Alcohol: the Universal Currency :D

pics to follow tomorrow
 
well it has been slow going due to work commitments, but I have finally picked up the donor shorty. it is pretty rusted out on major panels, but the floor and wheel arches are in decent condition to be used to patch up the troopy. must be around a 74 model or so, since it had the fuel tank under the driver seat right? and the fuel cover has the hinge at the bottom, rather than the side on the 79 and 82 etc.

I will most likely use:
Floor/bed
wheel arches
front bumper from stock (needs a bit of bending back etc.
the guards that sit between the front guards and the bonnet
the windows and glass etc.
and keep the heater unit, pedals and any other little bits and pieces i can salvage

not bad for a $56.35 1L bottle of jack (was $57 but found 65 cents :D )

also i found a bonnet on ebay, couldnt see much from the photos on there, bid $1 and got it! it seems to be off a 68 - 72 since it is a split hood. still has the chrome decal centre thing on it. it is a bit pitted and probably won't use it. not sure how well it will go down with 40 series enthusiasts having a split bonnet on a 79 troopy :P

In 1 week, i will be having 2 weeks off, and this will be dedicated to getting the troopy up to scratch. I'm sure i can achieve enough in that time :)

Pics

the bonnet
http://img440.imageshack.us/img440/5660/20120604154322.jpg

the donor shorty


http://img254.imageshack.us/img254/7293/20120615154248.jpg
 
Last edited:
Hey Scrumpy you could probably ell that split bonnet. Not sure how much but you might make some coin back.
 
Hey Scrumpy you could probably ell that split bonnet. Not sure how much but you might make some coin back.

yeah true mate, but I gotta find someone in Aus who would want it if they were rebuilding an original early model cruiser. unless you want it :D the metal is pretty pitted anyways. will need extensive work on it to bring it back to near new
 
the inside
20120412144353.jpg

Cool thread Scrumpy! Damn, the PO's interior work is, um , different. Cow print, leopard print and camo?! :lol: I'd be ripping all that crud out first! :D

Working away has it's bad points, but at least when your home you can hopefully get a few un-interrupted days in working on the troopy.

Got any more pics of little red?
 
Cool thread Scrumpy! ****, the PO's interior work is, um , different. Cow print, leopard print and camo?! :lol: I'd be ripping all that crud out first! :D

Working away has it's bad points, but at least when your home you can hopefully get a few un-interrupted days in working on the troopy.

Got any more pics of little red?

yeah well the cow and leopard print is off, but the camo stays until i take the top off it once i register it as the wagon. although, if i start with the top off now then go to register it as my final product earlier in the thread, will it be harder to get? I'd much prefer to do everything at once. I ask only cause you're on the coast too :D

I don't have too many pics of Little Red, I must take some more. She's starting to get a bit sad now, and I really need to get stuck into it to tidy it up, but I may end up selling it to someone who can at least give it some undying TLC to bring her back to brand new. It's my daily driver, so I cant really have it off the road for long :(

Here's a pic when we were camping up Double Island. just roll the swag out, and I'm all set :D


and here's one from today which i took of the both of them. had to swap some cars around, so I took some time to line them up together :D


you don't need a spare roof, early 40 chassis or anything like that do you? I got some spares there :P
 
with the 40 i got for a bottle of jack, I've stripped everything I need off it, and ended up with:

Spare windows/sides
Wheel Arches
Rear bed/floor pan
part of the front floor where the fuel tank sat
the windscreen and surround
wiper motor and blades
original fuel lines that run along the inside of the chassis
spare dash buttons/levers/switches
heater outlet, unit and fan and pipework
clutch, brake and accelerator pedals
half bent original front bumper, and plates that sit on top of th chassis to mount it
bottom door frames
the doors themselves aren't too bad
vinyl cover for doors
windows in doors and all mechanisms still working smoothly
mirrors and sun visors
and some other bits and pieces

so for a bottle of jack I've done pretty well I think :D

And i must thank Coca Cola for making such an acidic product. after trying to use Bolt Off and other products, soaking the bolts/nuts in coke definitely loosened alot of those that were seized/rusted. the windscreen hinge screws jumped out 1mm after an overnight soaking/pouring of coke. will buy some more next time for sure :D

pics prior to windscreen coming off


This is going to be fun to watch!

-Daniel

Sent from deep in the mountains of Honduras using only sticks and rocks.
 
Well it's about time I had a little update in my progress.

Finally have a bit of time off work, so I'm trying to do/achieve something each day off work: cut here, remove here, wire buff there etc.

So after a couple of days I have the back barn doors off, tow bar off, and have cut the rusted support bar across the rear sill, including the rear sill and the corners. pics will explain a bit better.

Doors/Rear bar off. and to explain a little about why the bar has been pushed in: the handbrake does not work whilst on a hill. luckily some palm trees were able to stop it ;)


Exposing some of the rust parts


And so far after cutting


Will be using 4" x 2" box steel to replace that Rear sill support bar, and will most likely use dads old 80 series wheel carrier, and weld something off the 4 x 2, instead of the old carrier setup. Will also most likely make my own drop tailgate out some smaller box steel to use instead of the barn doors, as the bottom of the barn doors are fairly rusted out, but may be useful to someone else.

Have also started to wire buff the wheel arches, but the grinder s*** itself, so i'll be able to get back into it tomorrow
 
Bit of an Update

Around halfway through remaking the back body support for the bed/tub area. Have to get some 2x1 gal tube for some uprights on either side at the wheel arches for a bit of support once we cut out the rusted out panels. That will hopefully be done in the next few days and pics will follow.

So anyways, what do you do when you have an F250 that is being parted out? Well you cut the Front Bumper to suit the cruiser! (cruiser purists are going to hate this :D)
http://img443.imageshack.us/img443/6685/20120803105113.jpg
A bit of tidying up to do on it before it's finished properly. Hangs out around an 1 1/2 " - 2" over the guards, so i will end up getting fibreglass flares eventually. Thoughts?

Also have removed the light surround and the Hood Side 'Sub Assembly' Panels, and im starting to prep them with rust proof and get them ready for paint (eventually). One of the Hood Side panels was a bit rusted out, but one from my JD parts cruiser was in good condition, so I'm using that.
http://img707.imageshack.us/img707/8372/20120807111756.jpg
Looks like a mess, i know :D

And I'll just say how impressed i am about these Poly Strip discs are. chewed the paint off so well. going to have to stock up on some more for the rest of the body :D
http://img560.imageshack.us/img560/6016/20120807130432.jpg

Will most likely have some more pics for tomorrow, or the next day once the light surround is prepped and painted too. and also finish painting that front bumper :)
 
subscribed because I want to see where this goes. What color are you kicking around?

Siberian camo?:bounce:

Haha thanks man. My original idea was to go with Canary Yellow, but that's a bit too 'flamboyant'. So I believe i'm going to go for 464 Beige in the original Landcruiser colors, and with the Bed/Floor will be either Black or Biege Raptor Liner or whichever liner i can get her in Aus. I figure the black would get too hot and sticky in our Summer, so biege would be the smarter choice there.

I must admit Siberian Camo does look awesome, but i think this Toyotasaurus has had enough of camo :flipoff2:
 

Users who are viewing this thread

Back
Top Bottom