Builds Bean! The Adventure Continues (1987 FJ60) (5 Viewers)

This site may earn a commission from merchant affiliate
links, including eBay, Amazon, Skimlinks, and others.

Oh I also flushed my brake system yesterday!
I did this about two years ago, so the fluid isn't terrible...but it's good to do this every other year to get the water out of the system and improve the braking quality.

I ended up using the Motul 5.1 fluid. This is compatible with DOT3 and DOT4, so any little bit of leftover fluid from the the flush won't have any compatibility issues.

The bottle on the left is after a bit of flushing. The middle bottle is how clean it was at the end. The bottle on the right is brand new fluid for comparison.

IMG_0133.JPG


As you can see, the fluid is now a lot cleaner!

Also - shout out to my wife for pumping the brakes for an hour straight yesterday! I don't have a power bleeder! :doh:
 
Finished up the knuckle rebuild, steering linkage and brakes last week. So far, I'm really impressed with the handling of the Bean. The steering seems tighter and more responsive.

IMG_0186.JPG


IMG_0189.JPG


IMG_0182.JPG


It was a little exciting bedding in the new brakes...I'm not used to going from 55mph to 5mph with very aggressive braking (8 times in a row) 😱
I didn't feel any pulling and the Bean seems to stop a little better than before. I read that if your brakes aren't bed properly, you can have skipping on the rotor that will resemble a warped rotor. I wonder if my previous rotor wasn't warped, but had an uneven deposit of brake material from improper or no bedding?
Either way, new OEM rotors and pads on all four corners should have me stopping a little better!

On a separate note, I was impressed with the new brake fluid - I only had very slight brake fade on my very last aggressive stop. This was after 7 stops where I was on the verge of locking the tires on this heavy beast...the brakes were HOT!

I also performed a garage toe adjustment. I used a few long levels clamped to the rotors and measured in front of and behind the rotors at a set distance to find my toe measurement. I read that 1/16" - 1/8" toe-in is where these trucks with larger tires drive best, so that's where I set it. I'm just under 1/8" of toe-in.

IMG_E0191.JPG


So far, it seems to be driving well and I don't think I'll need to bring it to an alignment shop.

Last but not least, we threw the tent up on the top with the mini-ex last night. That was a little stressful. I wouldn't have been able to do it without my dad and brother guiding the rack mounts into the gutter rails. I threw down some PPF under the rack mounts to hopefully protect the paint from damage. I hope it works!

IMG_9099.JPG


IMG_9103.JPG


The Bean as it stands now -

IMG_0193.JPG


Hoping to get out for some camping this weekend - the weather is looking decent for pretty much the first time this spring!

:cheers:
 
We had a great night out camping in the Olympics this weekend. The weather was awesome for the very first time this spring!

On the way up to our spot we ran into a giant black bear cruising the old logging roads. He took off super fast once he spotted us.
096CA4CD-A05A-4AB0-91E8-1EB029C08E1A.jpeg


We headed out to our go-to camping spot. I have been going to this spot since I could drive.
IMG_0316.JPG


It's grown up a lot since then, but the views are still amazing. You can see hills and valleys, trees, mountains, the Puget Sound and even the lights of Seattle.
IMG_0218.JPG


IMG_0223.JPG


IMG_0266.JPG


IMG_0261.JPG


Seattle!
IMG_0270.JPG


The morning greeted us with some warm sunshine. One of the things we really love about the AluCab RTT is that the canvas is thick and the tent stays dark inside even in the bright morning sun...but only if the windows are closed - which they were because it was in the low 30s overnight!

The morning view from the tent:
IMG_0281.JPG


Looks like the surrounding area was socked in with some morning fog!
IMG_0288.JPG


All in all it was a great mini adventure and fun to get out for the first small trip of the year! We feel really fortunate that this is basically our backyard!
IMG_0304.JPG
 
During our outing I noticed two things:

1. The steering stabilizer is hitting the new drag link during a specific flex of the suspension.
2. I am getting a really bad tire rubbing against the inside of the front fender...it makes a terrible noise!

Some slight rubbing from the stabilizer:
IMG_0296.JPG


IMG_E0310.JPG


Myself under the truck making sure everything was tight...it was.
IMG_9132.JPG


I'm actually not sure why this is happening. I've checked everything and looks to be the same as before I did the front end work on the truck. I ended up taking the steering stabilizer off and grinding the taper down a little on the mounting stud so it would suck into the bracket a little further. I also ground the end of the mounting stud about 1/8" back to give it a little more room. I think the combination of these things has fixed the issue.


As for the tire rubbing, I don't remember it being this bad...but maybe I just didn't pay attention as much because the paint was old and beat up. @NookShneer has the same tire size and rim offset as the Bean and he told me that he does not have rubbing in this particular spot. We discovered that he has a heavier front leaf pack than I do, so I'm going to be getting an extra leaf for the front to see if that helps.
IMG_0314.JPG


IMG_0315.JPG


I may just buy new spring packs for the front because I think mine are pretty well worn. I have guesstimated that they have nearly 120K miles on them at this point. I'm still trying to decide...but the more I think about it, the more I think new springs would be the best option. I hate wasting money, but at 120K miles (and a chunk of them off-road), the springs could probably stand to be replaced...?

The other option is downsizing the tire, but I really like this tire size and I really like that they are Load Range E. I'll have to do some research to see if they make a smaller tire that would fit my ideal requirements. That option is also a lot more money!
 
During our outing I noticed two things:

1. The steering stabilizer is hitting the new drag link during a specific flex of the suspension.
2. I am getting a really bad tire rubbing against the inside of the front fender...it makes a terrible noise!

Some slight rubbing from the stabilizer:
View attachment 3016937

View attachment 3016938

Myself under the truck making sure everything was tight...it was.
View attachment 3016936

I'm actually not sure why this is happening. I've checked everything and looks to be the same as before I did the front end work on the truck. I ended up taking the steering stabilizer off and grinding the taper down a little on the mounting stud so it would suck into the bracket a little further. I also ground the end of the mounting stud about 1/8" back to give it a little more room. I think the combination of these things has fixed the issue.


As for the tire rubbing, I don't remember it being this bad...but maybe I just didn't pay attention as much because the paint was old and beat up. @NookShneer has the same tire size and rim offset as the Bean and he told me that he does not have rubbing in this particular spot. We discovered that he has a heavier front leaf pack than I do, so I'm going to be getting an extra leaf for the front to see if that helps.
View attachment 3016939

View attachment 3016940

I may just buy new spring packs for the front because I think mine are pretty well worn. I have guesstimated that they have nearly 120K miles on them at this point. I'm still trying to decide...but the more I think about it, the more I think new springs would be the best option. I hate wasting money, but at 120K miles (and a chunk of them off-road), the springs could probably stand to be replaced...?

The other option is downsizing the tire, but I really like this tire size and I really like that they are Load Range E. I'll have to do some research to see if they make a smaller tire that would fit my ideal requirements. That option is also a lot more money!
1. New springs
2. Slightly longer front shackle
3. Minimal Body lift

That would be my approach in that order. I’m betting that the spring pack is pretty knackered after 120k!
 
1. New springs
2. Slightly longer front shackle
3. Minimal Body lift

That would be my approach in that order. I’m betting that the spring pack is pretty knackered after 120k!

I don't think I can convince my wife to put much more money into this rig at this point (and rightly so!)...I'm really hoping the new springs will resolve the issue and I wont have to resort to new shackles or the dreaded body lift! :worms:

🤞🤞
 
I don't think I can convince my wife to put much more money into this rig at this point (and rightly so!)...I'm really hoping the new springs will resolve the issue and I wont have to resort to new shackles or the dreaded body lift! :worms:

🤞🤞

I have some shackles you can try out should you need to, hopefully it doesn’t come to that!
 
Things are moving fast with these springs! I actually picked up a set of CS005F springs from Torfab today. It worked out perfectly because they had them in stock and I was already in Seattle for a dentist appointment.
These are one step heavier than what is currently on the Bean, but more importantly they will be replacing springs that are very worn. I hope this resolves the tire rubbing issue...or at least significantly reduces it!

64D0A21C-FAF3-4E4D-9F82-6CC043AC6B8F.jpeg


I would love to get them installed for our potential camping trip this weekend, but I kind of doubt I will be able to find the time in the next few evenings.

Thanks again @torfab! It's always a pleasure to pop by the shop and catch-up! I love hearing about all the cool builds and projects you guys have in the works. One of these days I'll actually be driving the Bean when I stop in! 😅
:cheers:
 
Springs are on!

274FF8FC-3AE2-4CFC-9F0A-DA39F44AA8E3.jpeg


I ended up with about 3/4” more height on each side.
F197F61E-7FD0-4CC9-9859-1D68B9E3B148.jpeg


Unfortunately, I’m still getting tire rub in the same place, but it’s not happening quite as easily. I tested the tire rub with the old springs on an old dirt hill and it was really easy to make them rub. With the new springs, I had to drive onto an additional rock to get the rubbing.

6FD08D6A-CFAF-4BEB-85D7-4CF7A32852CF.jpeg


88359DF3-3419-490D-AF8A-D3919A343649.jpeg


As you can see in the picture above, the tire rubs really bad on that bolt in the wheel-well, so I switched it out with a button-head. It will still rub, but I'm hoping it will be less noticeable.

8292B79C-DA18-4A6A-B465-A2B2DE5E18C7.jpeg


Like with my last set of springs, I ended up tacking the inner metal sleeve into the spring eye to prevent movement. The sleeve moved a ton in my last set of springs, which made a lot of noise and would throw my alignment off. When I finally tacked them into place, it made a world of difference. I'm sure these new springs/sleeves would have been fine, but I figured it was worth it while they were out and accessible.

A67622D0-53C3-499B-8E74-F43349798A89.jpeg
74A84A69-EB01-4FBC-8F13-B555F1586C1B.jpeg
A8513AF5-C5F0-4ABF-8A90-C43A1A048673.jpeg


I needed to get longer center pins for when I added my 3degree caster shims to the new leaf pack, but I didn't want to wait for new ones. I was able to find a bolt at the hardware store that was a perfect fit! The head is within 1/2mm of the actual center pins. I actually did this same thing on my rear leaf packs and it has been working great.

432CB03E-1FDD-4DC9-8D86-4A7902386A22.jpeg


The last little hiccup I ran into was my u-bolts are slightly too short. The nuts are super long, so they are fine for the short term, but I will be ordering some new ones from 4Plus that will fit my U-bolt flip kit.

55A8DDFB-BEEE-48CE-86C3-627FDB3940C6.jpeg


I am surprised that the ride feels so good with these stiffer springs. It’s firmer than with the old springs, but in a good way. I did notice that on the road I could feel the axle move a bit more with the undulation of the road. It felt a tad more darty, so I may need to check my toe alignment again. I could also hear a slight popping with sharp turning. I know this can happen with OME springs, but I'm crossing my fingers that it will go away with more use.

Though I'm still getting a little ture rubbing, I'm pretty happy with the overall outcome. I think we'll be fine for 95% of the obsticals we get into... and for the other 5% we'll just deal with the rubbing for now. When our tires wear out, I might consider finding a slightly smaller set.
 
During our outing I noticed two things:

1. The steering stabilizer is hitting the new drag link during a specific flex of the suspension.
2. I am getting a really bad tire rubbing against the inside of the front fender...it makes a terrible noise!

Some slight rubbing from the stabilizer:
View attachment 3016937

View attachment 3016938

Myself under the truck making sure everything was tight...it was.
View attachment 3016936

I'm actually not sure why this is happening. I've checked everything and looks to be the same as before I did the front end work on the truck. I ended up taking the steering stabilizer off and grinding the taper down a little on the mounting stud so it would suck into the bracket a little further. I also ground the end of the mounting stud about 1/8" back to give it a little more room. I think the combination of these things has fixed the issue.


As for the tire rubbing, I don't remember it being this bad...but maybe I just didn't pay attention as much because the paint was old and beat up. @NookShneer has the same tire size and rim offset as the Bean and he told me that he does not have rubbing in this particular spot. We discovered that he has a heavier front leaf pack than I do, so I'm going to be getting an extra leaf for the front to see if that helps.
View attachment 3016939

View attachment 3016940

I may just buy new spring packs for the front because I think mine are pretty well worn. I have guesstimated that they have nearly 120K miles on them at this point. I'm still trying to decide...but the more I think about it, the more I think new springs would be the best option. I hate wasting money, but at 120K miles (and a chunk of them off-road), the springs could probably stand to be replaced...?

The other option is downsizing the tire, but I really like this tire size and I really like that they are Load Range E. I'll have to do some research to see if they make a smaller tire that would fit my ideal requirements. That option is also a lot more money!
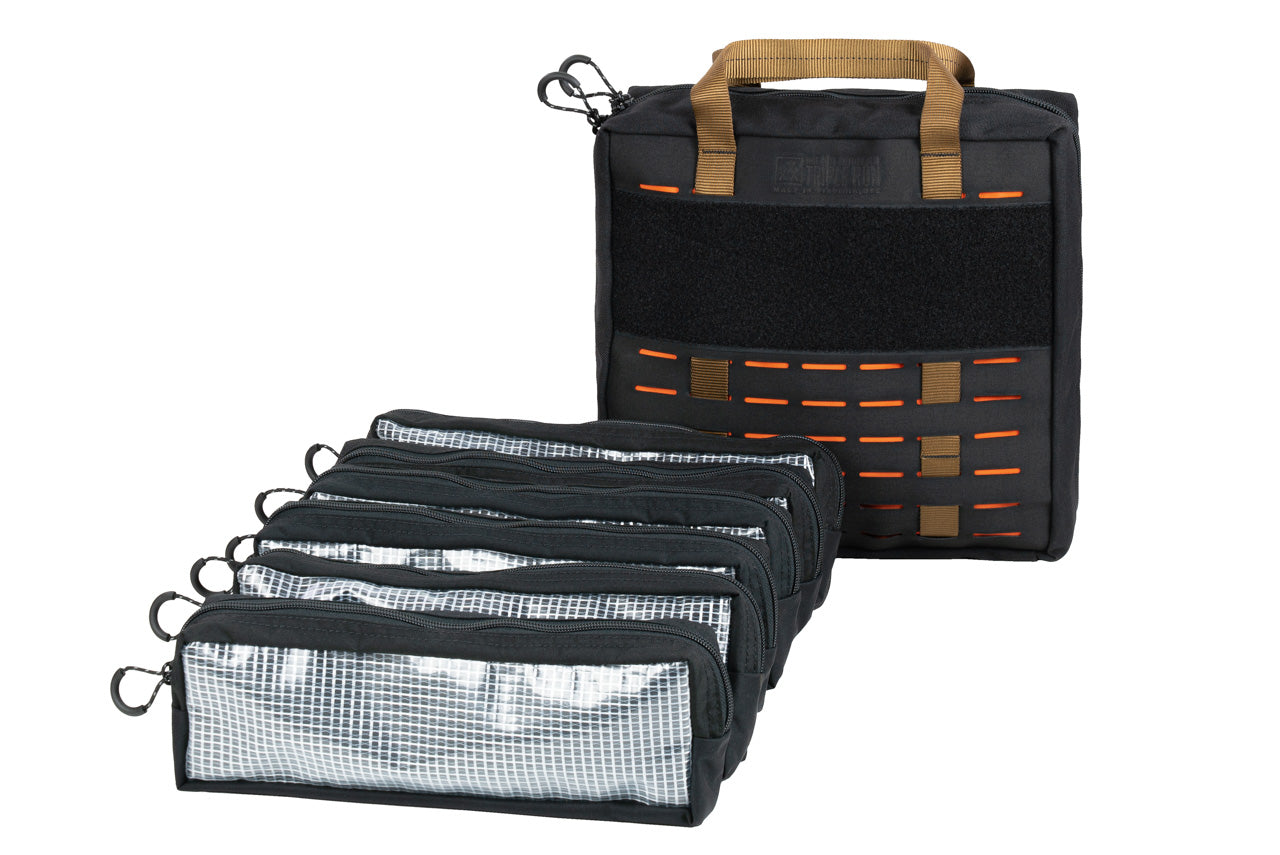
What is that tool bag you are sporting there?
 
What is that tool bag you are sporting there?
That’s from Blue Ridge Overland. I’ve had that for a few years now. It holds almost all of my tools and is super durable. It’s a very quality bag and is still in great shape.

Looks like the bag has been updated a little and the price reflects that…as with most things nowadays, it used to be cheaper.

 
Part 3 of 3

With the foam complete, all that was left was to put the evaporator in the evaporator box and get everything installed back up under the dash.

I found it odd that the new evaporator and pressure switch came with red o-rings. I guess I should have mentioned this earlier, but my system was converted to R-134a by the PO, but compatible o-rings were not installed. I know that green o-rings are good with R-134a, but I have no idea about the red ones....I would imagine that they would be fine, but I replaced them with the green ones just to be sure. Remember to always add a splash of oil (PAG-46 or ND-8) to the o-rings during installation.

Evaporator and pressure switch o-rings:
View attachment 2876162View attachment 2876163

O-ring Kit:
View attachment 2876165


Expansion valve and Thermister:
View attachment 2876164View attachment 2876168

I opted for the OEM expansion valve because some of the others I had seen had a slightly differed bulb design. I know others that have used them without issue, but I figured I would spend the extra money for the exact fit.
The thermister was only a few bucks and was not needed. I ended up replacing it because I had a brand new one, but the old one looked to be in perfect condition. I bought these components before I tore into the system.

Here is the evaporator with components attached. Pretty!!
View attachment 2876166

I added some foam around the expansion valve bulb to match how it was from the factory.
View attachment 2876170

View attachment 2876171

Sending out a big thanks from the 70s fam [and a previous 60 owner] for this info - which I used to confirm correct expansion valve for use in my BJ73, and installation.
 
Earlier this week I had some time to recharge the AC system in the Bean. Not a hard task, but as I read in another MUD thread - there is a lot of "dread factor". If you've never done this before, it feels a bit high stakes and scary. Its also a little tougher when you have a system that isn't perfectly stock. I am running R134a and using a compressor that fits an LS style motor, so its tricky to know exactly how much refrigerant to add to the system. You really just have to get the weight in the ballpark and fine tune it with the pressures and vent temps.

I read a few Toyota publications including the FSM & R134a TSB but they seem to have different information. The R134a conversion TSB says that 800g of refrigerant should be added for a proper charge. The TSB also says that R134a charge should be less than the R12 charge. Sources on the internet indicate that typically an R134a charge is somewhere between 85-90% less than an R12 charge. BUT, the FJ60 FSM and Land Cruiser refrigeration manual both say that the R12 charge should be 650g - 750g. 90% of 750g is 675g...so that would indicate that the R134a charge should be between 585g and 675g (NOT 800g).

Which is correct?
I'm starting to think that maybe Toyota made a mistake in the TSB and wrote down numbers that were 90% greater than the R12 values, not 90% less.
Not sure on that by any means, but I do find the contradicting information interesting and confusing.

Refrigeration Manual (same charge numbers as in the FJ60 FSM):
IMG_E0434.JPG


I should also note that I grabbed these first two images from a MUD AC thread (HERE)
Thanks @fjgdk for posting them!

IMG_E0433.JPG


From the R134a Conversion Toyota Service Bulletin (TSB):
27F73CE5-6653-4C7C-B4A6-449351DA6AA3.jpeg


73E48650-9A01-4B3F-881A-69595D5A6966.jpeg


So with that information, I decided to add 2 12oz (340 gram) cans of R134a and see how my pressures looked.

But first, I needed to pull a vacuum on the system. I still had the system full of dry nitrogen from my pressure testing a few months ago and it was still holding the same pressure. I am confident I have no leaks. I was able to release the nitrogen and pull a strong vacuum on the system. My brother has a really accurate digital gauge that I hooked up and after 45minutes, I was pulling 29.9"HG. I ran out of time and let this sit overnight. The next afternoon, I was still holding a strong vacuum. I was slightly less, but not much. The difference was most likely due to a small collapse of the hoses...I don't think they are designed to hold a vacuum for long periods of time.
Anyways, the next day I pulled a vacuum on the system for another 25 minutes and started adding refrigerant.

IMG_0411.JPG


IMG_0417.JPG


All three cans I had purchased had the exact same weight. When I subtracted the weight of the can, they were all perfectly 12oz.

I connected the first can, placed it in a bath of 100F water and bled the charge line. I had the fan on max with the AC on and after about a minute, the compressor kicked on and started to do its thing. This helped pull refrigerant from the can. After 2 cans my pressures were still a little low, so I started on the 3rd can. I added about 40 grams from the 3rd can and let it sit for a while.

My pressures were 25-30psi on the low side and 185-195psi on the high side. This may seem a little low, but the outside air temperature was only about 68F. I am pretty happy with how its operating at the moment, but I think I'll hook the gauges up when it gets a bit warmer outside and see where I'm sitting. I may be slightly undercharged.


IMG_0422.JPG

The picture above is before I added the 40grams from the 3rd can.

The vent temps were in the mid to high 40's when the truck was idling at 650rpm and in the high 30s to low 40s when at 1100rpm. My truck does not have the AC idle-up connected, so it sits at its normal idle when the AC is on. The V8 doesn't seem to care much. You can feel it stumble slightly when the AC compressor kicks on at idle, but its not super noticable.

At Idle:
IMG_0426.JPG


At 1100RPM:
IMG_0421.JPG


Looks like the condensate drain is working!
IMG_0420.JPG


My best guess is that I added about 620 grams to the system. That takes into account just a little loss from bleeding the lines and a small amount of refrigerant trapped in the gauge/manifold set. I have a feeling I'll end up going back in and adding a little more when I can monitor the system with higher outside temperatures...I just really didn't want to overcharge it and have to get it evacuated.

620 grams is within the range of 85% - 90% of the original R12 charge amounts, so I might be fine where I am. I'm happy with the performance so far.
 
Last edited:
New U-bolts installed.

Thanks @lcwizard for the quick packaging and shipping on these, I really appreciate it!
IMG_0432.JPG


I gave them a quick coat of black paint.
IMG_0435.JPG


Super quick and easy install. I trimmed about an inch off of each bolt so they were a little shorter.
IMG_E0436.JPG


Happy with the results!

I did take the front shocks off for better access and noticed that the lower shock bushing is larger than the 5/8" pin mount on the 4Plus flip kit. I think someone was supposed to replace the shock bushings with 5/8" diameter ones and never did. New shocks are on the list at some point, but I still need to convince my wife that they're "necessary"...that being said, they kind of are necessary because these ones are very worn out. I'd like to go with a set of Bilstein shocks (Part#: 33-230368). Hopefully I'll be able to get a set before summer is over.

I also noticed that my front sway bar bushings are pretty hammered, so I may pick up some of those too. Neither of these are urgent items by any means, but It's always something with these old trucks!
 
Well that didn't take long! I sold a few items to some local cruiserheads and was able to convince my wife to let me buy some Bilsteins for the front of the truck.
Here's the rub - I think I bought the wrong size :crybaby:.

I bought the 33-230368 and they are about 2" longer (compressed and extended) than the OMEs that are currently on there. I found the part number on this thread and it looks like a few people are running this size with a 2" OME lift. I'm surprised they haven't bent them by over-compressing them...unless I am missing something.

I want to run the stiffer valving (360/80). Here is a table of my options:

Shock ValvingOverall TravelCompression Extension
Old Man Emu - Nitro???9.1"14.1"23.2"
Bilstein 33-230368360/8010.4"16.3"26.4"
Bilstein 33-230412360/809.2"15.2"24.4"
Bilstein 33-230450360/808.56"14.32"22.88"

I'm not sure which to go with. I like the 230412, but with the extra 1" of compressed length, I'm afraid I might bottom out the shock before hitting the bump-stop. On the other hand, the 230450 has less travel and about a half inch less extension and I don't think you can use these shocks as limiters. Not sure which to go with.

Any suggestions?

Here are a few pictures of the OME and 33-230368. You can see how long they are. I should have done more of my own research before pulling the trigger. :doh:

Extended:
2A40DBE2-2A03-4557-8129-B89CA0FBA223.jpeg


D28F7E82-FC54-4269-8893-D19C5F3B56D1.jpeg


Compressed:
C28E44C4-EFC8-4FC6-96DA-C8414CC5E1E7.jpeg


8A83842A-0963-43B0-A382-5BC06F27F83F.jpeg
 
Last edited:
I found the reason why the Bilstein 33-230368 shocks seem to work for so many people, but not me…I am running the 4+ U-bolt flip kit. I didn’t realize that the flip kit also relocates the lower shock mount by a few inches. I should be good to go if I order the shorter shocks (33-230450). These are just slightly shorter than the OME shocks that are currently on there.

I’ll be exchanging the shocks this week.

Here’s the difference in the shock mounts:

2A788C4B-ADD9-4B4F-8B69-B39F9F74BC38.jpeg
 

Users who are viewing this thread

  • Back
    Top Bottom