Builds Moonshine - A Build Thread (1 Viewer)

This site may earn a commission from merchant affiliate
links, including eBay, Amazon, Skimlinks, and others.

Buddy of mine @SFROMAN and I set Sunday the 14th as our painting day. He's doing a lot of body work on his mini truck, and we often wheel together. Go check his build out.

With that date in mind, it's been balls-out on Moonshine.

Elected to remove the rear seat bottom brackets on the inside, and stiffeners on the outside, as they hide rust and I wont' ever have rear seats in this truck again.

1591968976469.webp


1591968995725.webp


1591969008668.webp


Junk.

1591969021000.webp
 
PS rear wheel well needed much the same treatment as the DS in terms of rot repair, but it wasn't quite as bad.

1591969089514.webp


1591969096012.webp


1591969104743.webp


1591969113182.webp


1591969123399.webp
 
PS raingutter needed more rot correction than the DS. Apologies for the crappy pics, this is the dark side of the shop.

1591969231328.webp


1591969259579.webp


Took the raingutter off, repaired that rot, treated the surface rust, then welded it back on.

1591969295744.webp


1591969304122.webp
 
With the raingutter done, that was the end of the rot repair. Man am I happy to have that behind me.

All that was left was to strip the body and fix some dents, so that's what I did.

The bedliner was a ginormous pain in the balls to remove. It comes off with a heavy coating of chemical stripper, but comes off in sheets big enough that the stripper doesn't always get the paint underneath, requiring two applications. The bedliner and paint come off pretty easily with paint eater discs, but they disintegrate really quickly, and can't do inside contours pretty much at all. All of this learning meant a multi-step approach was used for removing the bedliner and underlying paint layers:

1. Wire wheel the contour areas
2. Paint eat the large flat areas
3. Apply chemical paint stripper to clean up what's left
4. Scrape off the stripper and pulled paint
5. Wire wheel the whole truck once more to clean up the stubborn remains

Just elbow grease from there on out.

1591969768975.webp


1591969777722.webp


1591969786662.webp


1591969798154.webp


1591969807045.webp
 
After all of those stripping steps, this is the result.

1591970139848.webp


1591970150024.webp
 
Finally, I spent some time straightening out the caved in PS rear quarter. It's wavy, but it's pretty straight now. Really hard to see in this dark corner, but I'm happy with how this came out.

1591970264764.webp


1591970272014.webp


1591970282110.webp


With that, I'm ready for final prep, masking, and epoxy primer. Hot DAMN does that feel good to say.

More to come.
 
Between Thursday when I finished stripping the body, and Saturday, the body developed surface rust all over the place. I went back and sanded the whole body again, while cleaning, and touched up a few spots I missed. Also shaved the rear quarter badges, and the windshield squirter holes in the firewall.

Finally, I coated every square inch of the truck in ospho to prevent further rust.

1592258973109.webp


1592258980784.webp


1592258989423.webp
 
The next morning, my buddy @SFROMAN and I rolled the truck out of the garage into the sunlight so we could do final prep. This included sanding every square inch of the truck for a final time, masking, thorough cleaning, and finally spraying. Started about 10am, truck was painted by 4:30pm.

1592259143790.webp


1592259160454.webp


1592259168410.webp


1592259182920.webp
 
We did a bit more bodywork, popping out dents and whatnot, then sprayed. Spraying outside, so we got some trash in the paint on the roof, but iiwii. I'll come up with a better solution for that when we get to the color.

1592259220234.webp


1592259231923.webp


1592259240528.webp


Next up: electrical and interior planning. After that: sliders and a rear bumper.
 
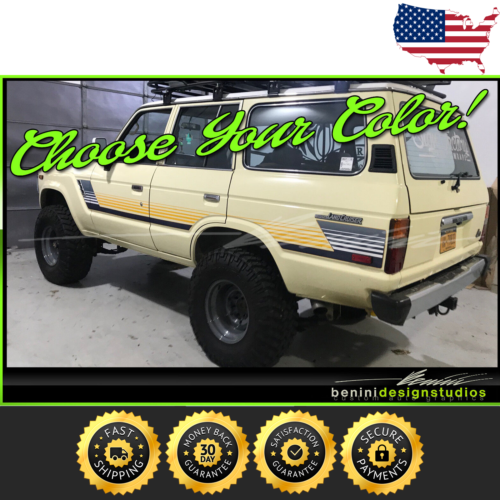
Saving these decals here:


No. Long story short, had to to take a break for a week and a half to do family stuff. Going to knock out a number things before i get to paint:

Harness thinning/rewire
Front inner fender repair
Air conditioning
Refinish floor w/sound deadening
Sliders
Rear Bumper
Half Doors
A bunch of little things, like windshield washer bottle/jets and a new fuel pickup
IF I have time/patience for it, compound turbos

After all that, I'll swing back and get to final bodywork and paint. Don't want to do all of that around fresh paint, for fear of damaging it.
 
Finally started with the wiring. Realized that to get done what I wanted, I had to take the dash all the way apart, so apart it came.

1594129949335.webp


1594129960215.webp


Unloomed the whole thing to start trimming out wires. Pulled out the rear glass defog, rear heater, rear windscreen wiper, cig lighter, rheostat, emissions computer and associated wiring, OEM engine sensors and harnesses, and finally pulled out the OEM radio wiring. Repinned one connector at the gauge cluster to reduce the number of connectors for the cluster from 5 down to three, which cleans up that whole area quite a bit.

1594130291430.webp


After a quick function test, verifying the stuff I kept was still working, I started adding circuits. Winch contactor and solenoid control, fan controller control and motor wiring, overhead console and light bar wiring. Moved the fusible link to the center to come out towards my new battery location, and moved some of the engine related wires to their new home. So far I'm here, which looks a bit of a mess, but it's getting there.

1594130493007.webp


Huge thanks to @J Mack for talking me though my battery plan, and for getting me on the lithium bandwagon. I've got some CNC work to do over the next week for new switch locations and mounts for the batteries/water tank, then when all the gear I ordered shows up, it's time for more wiring!

1594130684583.webp
 
Planning out some new switch panels as part of my rewiring project. Any suggestions on this layout, or what to add/plan for?

Top one goes to the left of the steering wheel, bottom one is a modified HVAC bezel setup.

1594308993158.webp
 

Users who are viewing this thread

Back
Top Bottom