Navigation
Install the app
How to install the app on iOS
Follow along with the video below to see how to install our site as a web app on your home screen.
Note: This feature may not be available in some browsers.
More options
Style variation
You are using an out of date browser. It may not display this or other websites correctly.
You should upgrade or use an alternative browser.
You should upgrade or use an alternative browser.
Mike's 1978 FJ40 Build (23 Viewers)
- Thread starter 78fj40mg
- Start date
This site may earn a commission from merchant affiliate
links, including eBay, Amazon, Skimlinks, and others.
More options
Who Replied?I guess you've been there done that?
Except for all that extra cleanin' and paintin'. Yours will be showroom ready. Mine's gonna be carport ready.
Nice job!
On the inner snap ring, I found that a correct sized hose clamp (just on the edge) not too tight but enough to compress the snap ring works really well for installation of shaft.
On the inner snap ring, I found that a correct sized hose clamp (just on the edge) not too tight but enough to compress the snap ring works really well for installation of shaft.
fj401978
Skip
Mike, you have done an awesome job...I am SOOO jealous! I will be going over your posts and pics when I tackle mine, thank you for the extra trouble of your excellent documenting!
Your rebuild is a great inspiration!
Skip
Your rebuild is a great inspiration!
Skip
78fj40mg
TLCA #23510
- Thread starter
- #386
Nice job!
On the inner snap ring, I found that a correct sized hose clamp (just on the edge) not too tight but enough to compress the snap ring works really well for installation of shaft.
Thanks for the great idea!
 I'll try your method when I do the passenger knuckle rebuild.
78fj40mg
TLCA #23510
- Thread starter
- #387
Mike, you have done an awesome job...I am SOOO jealous! I will be going over your posts and pics when I tackle mine, thank you for the extra trouble of your excellent documenting!
Your rebuild is a great inspiration! Skip
Hey thanks Skip! I appreciate your enthusiasm and kind words.
I would have taken more pics but unfortunately it was a greasy job and wasn't able to pick up the iPhone at will for each step of the rebuild to snap additional pics. When I tackled this rebuild my goal was to do one side at a time so I would have one intact knuckle for reference during reassembly and sure enough I used the reference on more than one occasion.
When you are ready to rebuild yours let me know as I'll be happy to help you and discuss any issues by phone or email.
78fj40mg
TLCA #23510
- Thread starter
- #388
Installed the locking hub housing and gasket, temporarily used a 10mm bolt to pull/push the axle to properly seat the snap ring in place.
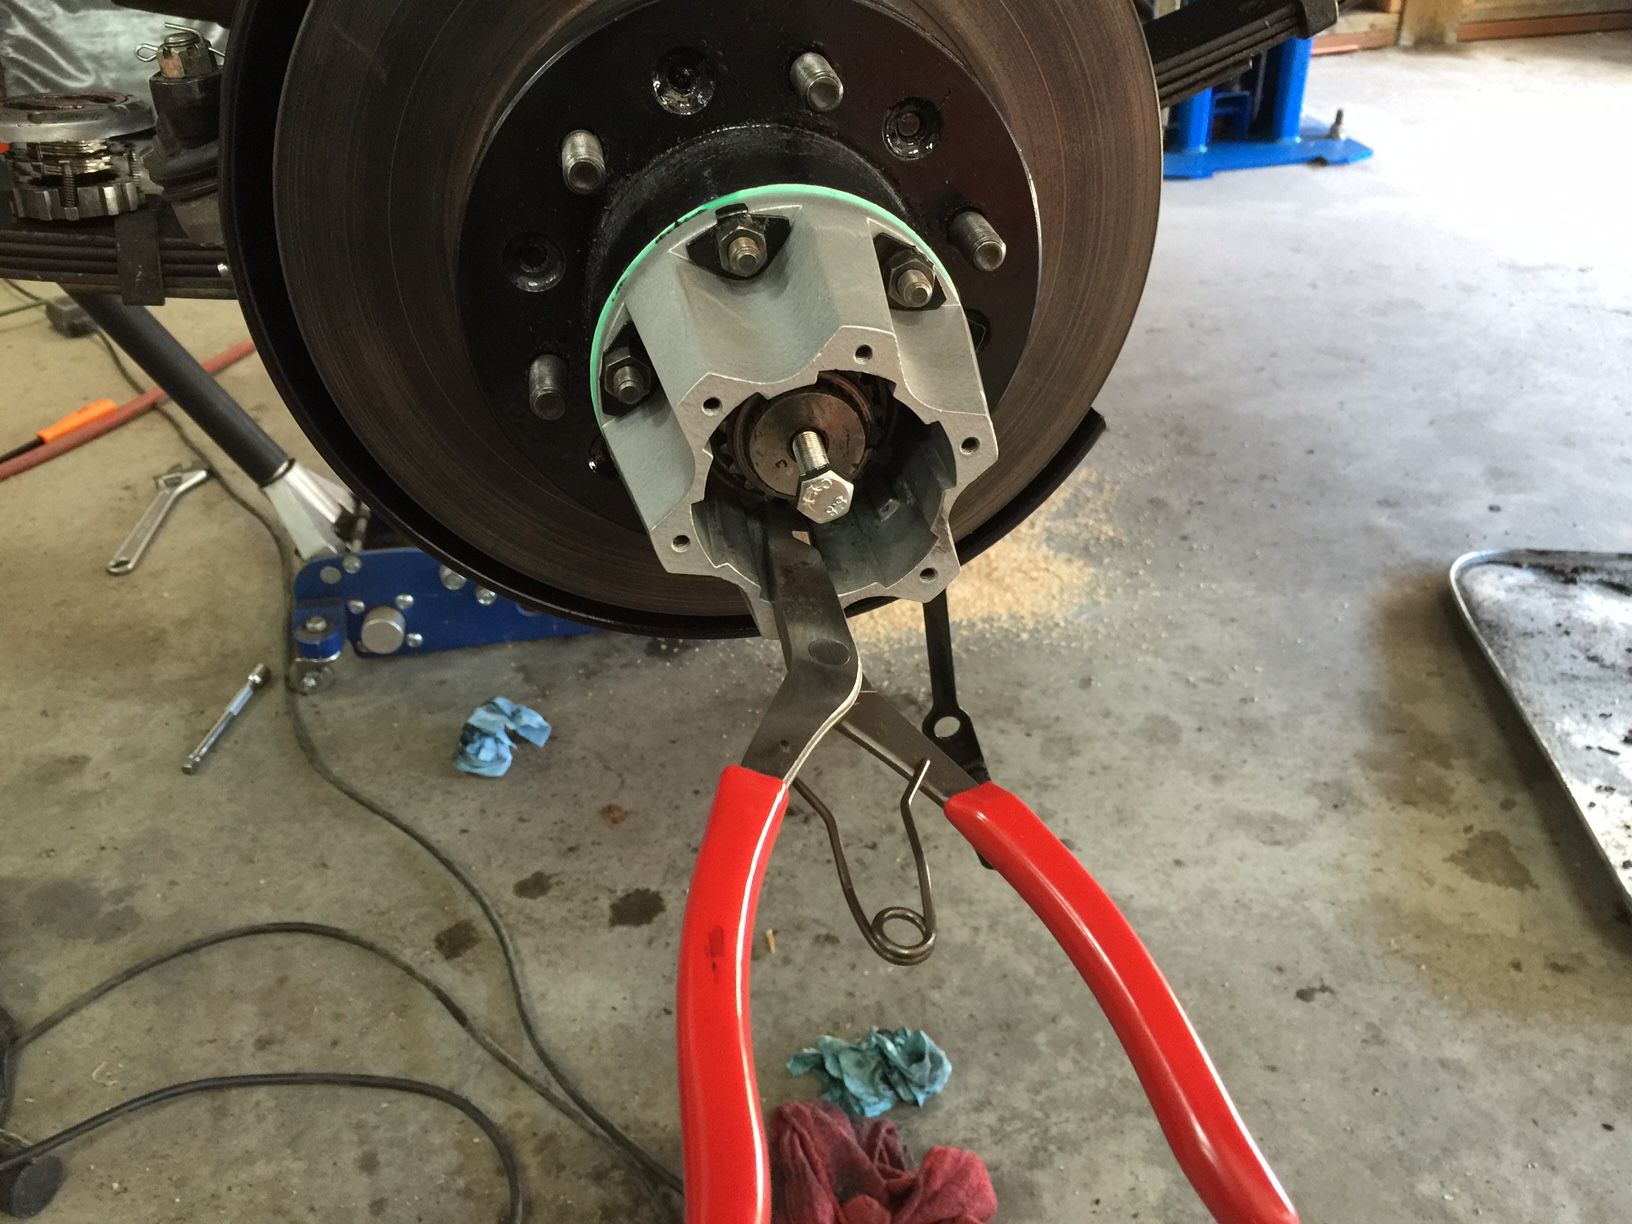
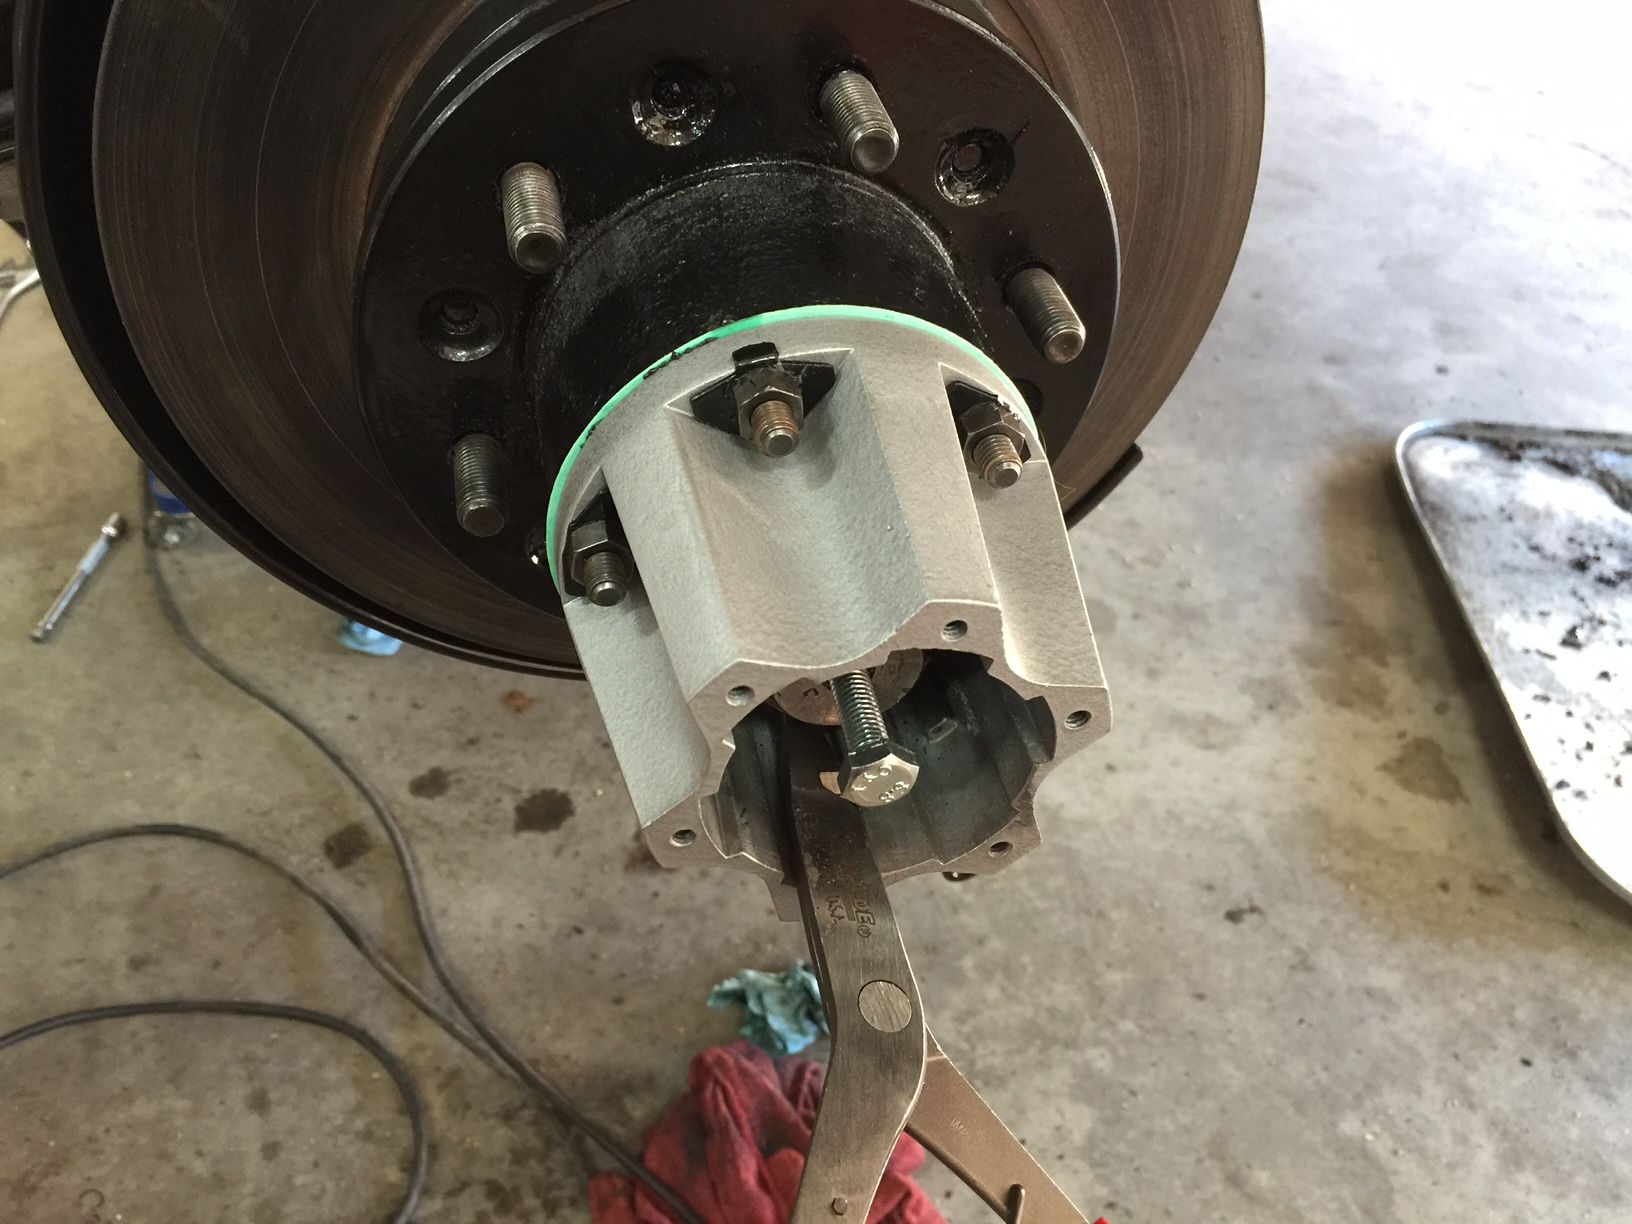
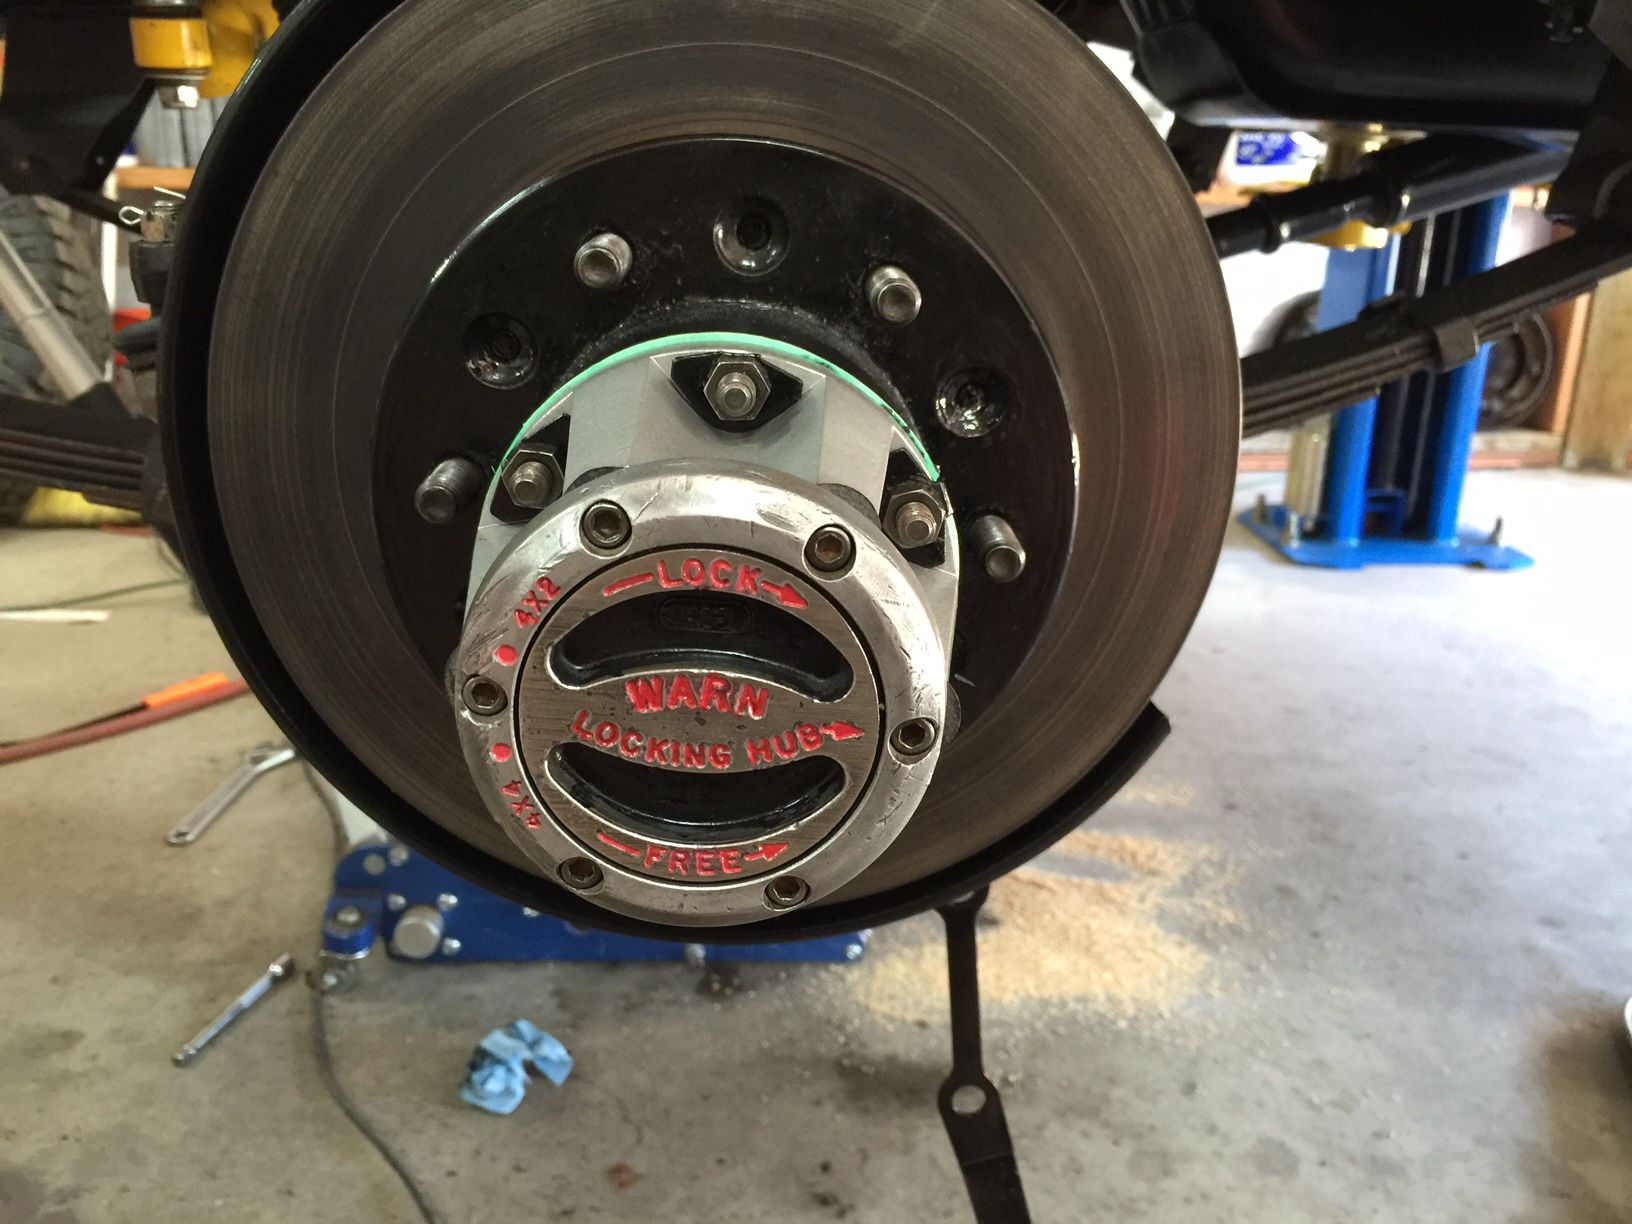
Removed 10mm bolt and installed the locking hub mechanism with anew star gasket.
Also used oil based red paint to accentuate the instructional lettering.
Removed 10mm bolt and installed the locking hub mechanism with anew star gasket.
Also used oil based red paint to accentuate the instructional lettering.
Last edited:
78fj40mg
TLCA #23510
- Thread starter
- #389
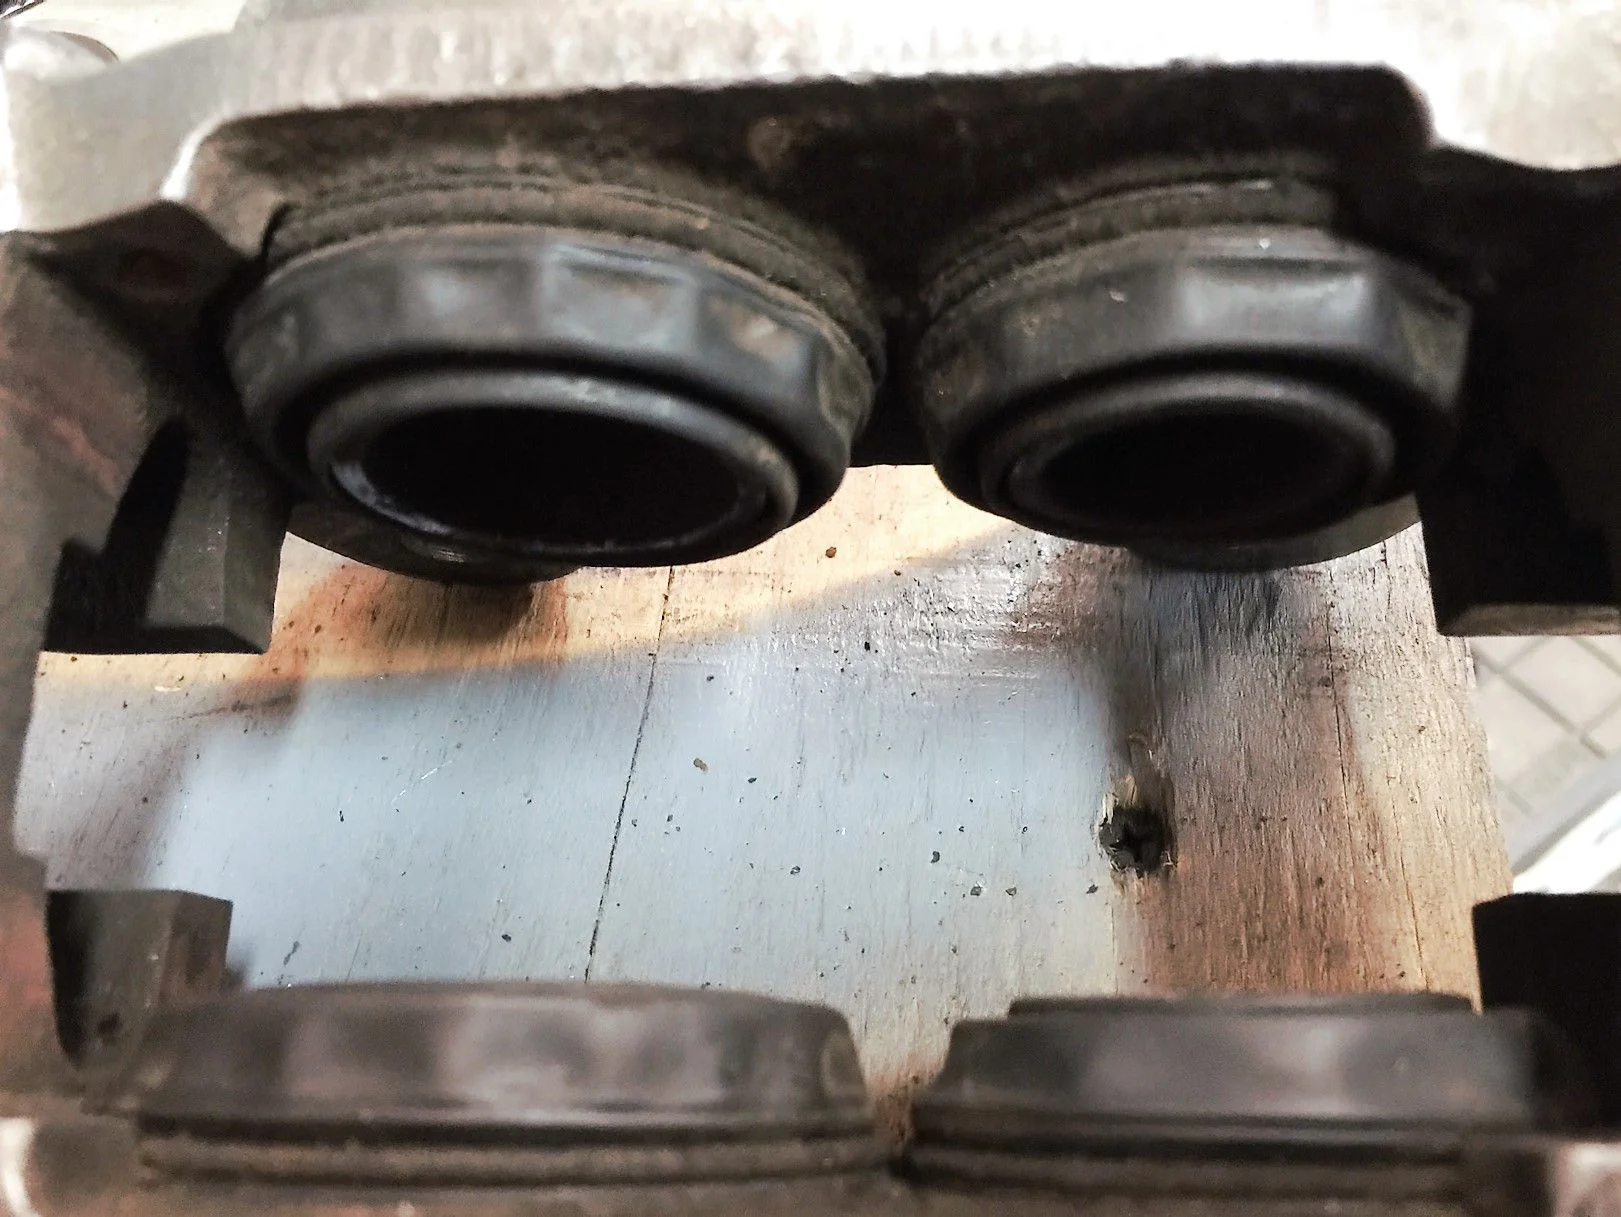
The brake caliper dust boots are toast, they are not tight around the pistons and prone to water/debris infiltration, will have to remove the boots and determine the extent of damage and/or if any corrosion is present. If there's any corrosion present I will either rebuild the calipers or just replace them. Any recommendations?
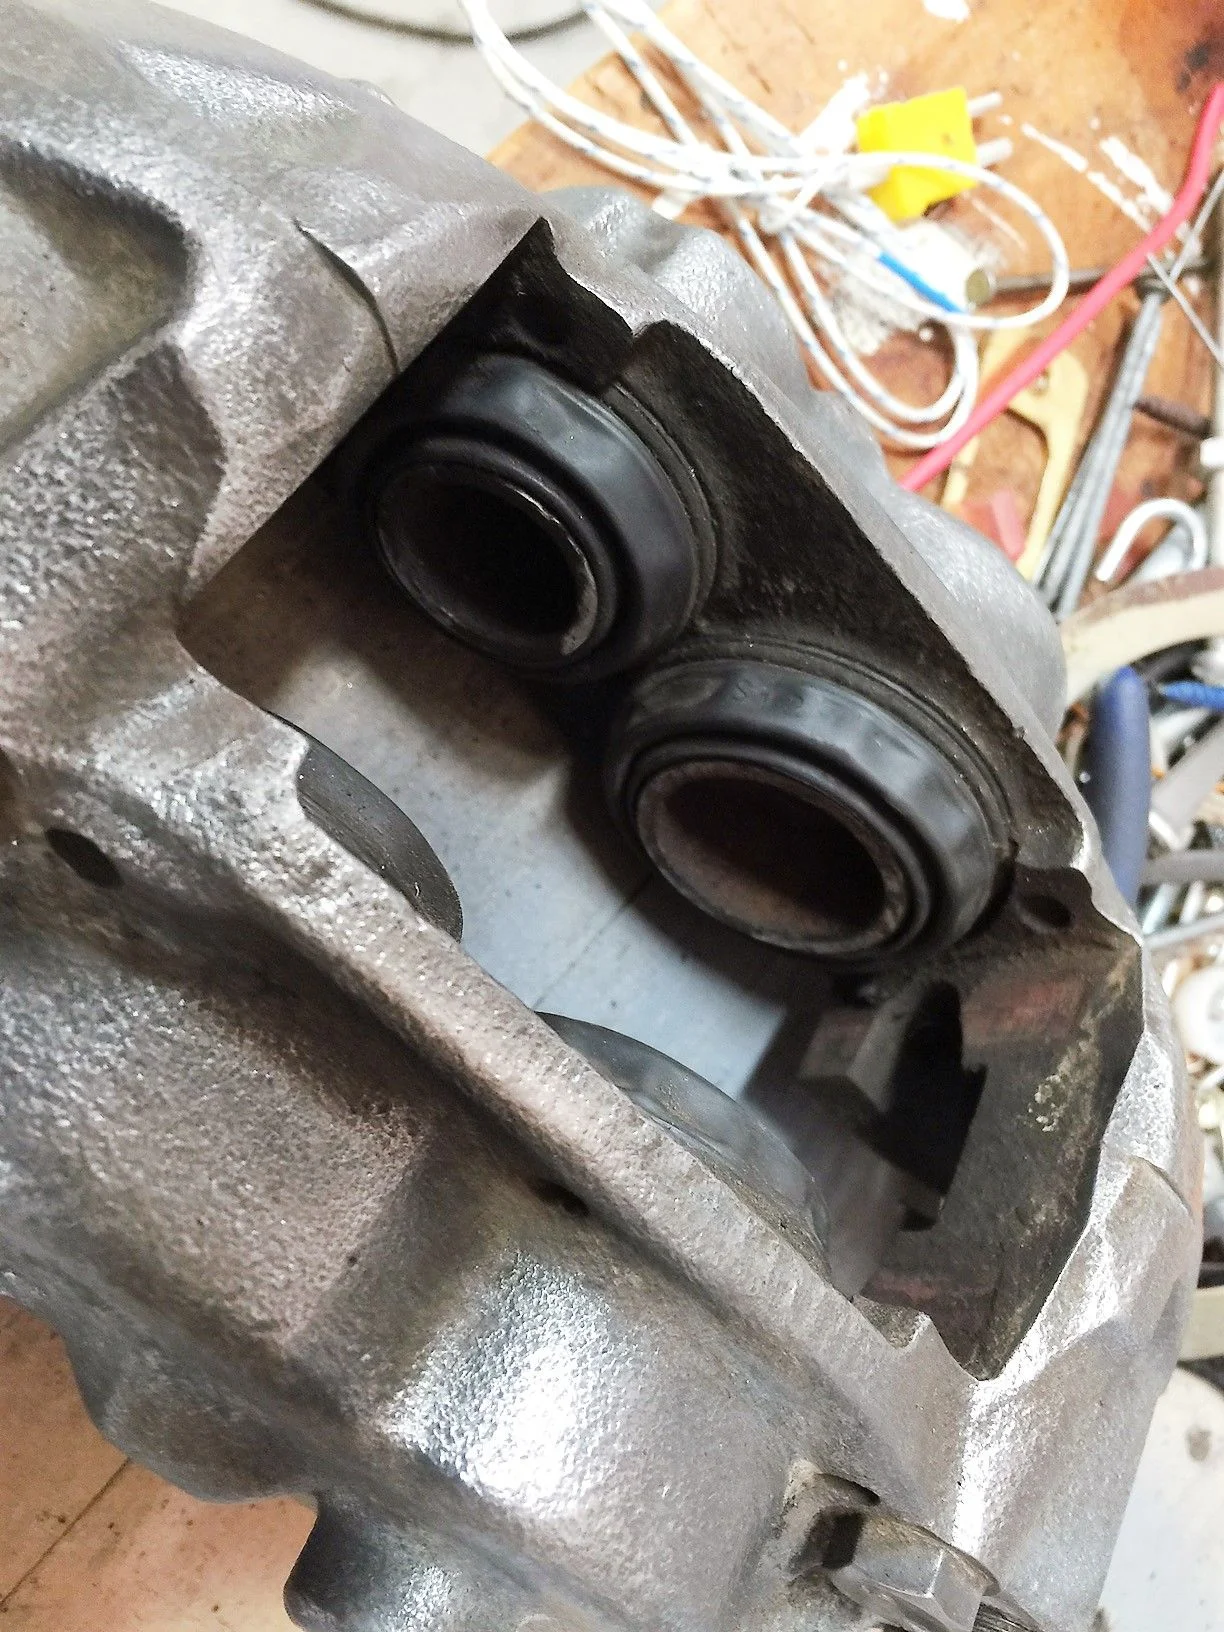
The dust boots are really fubar!!
The dust boots are really fubar!!
Last edited:
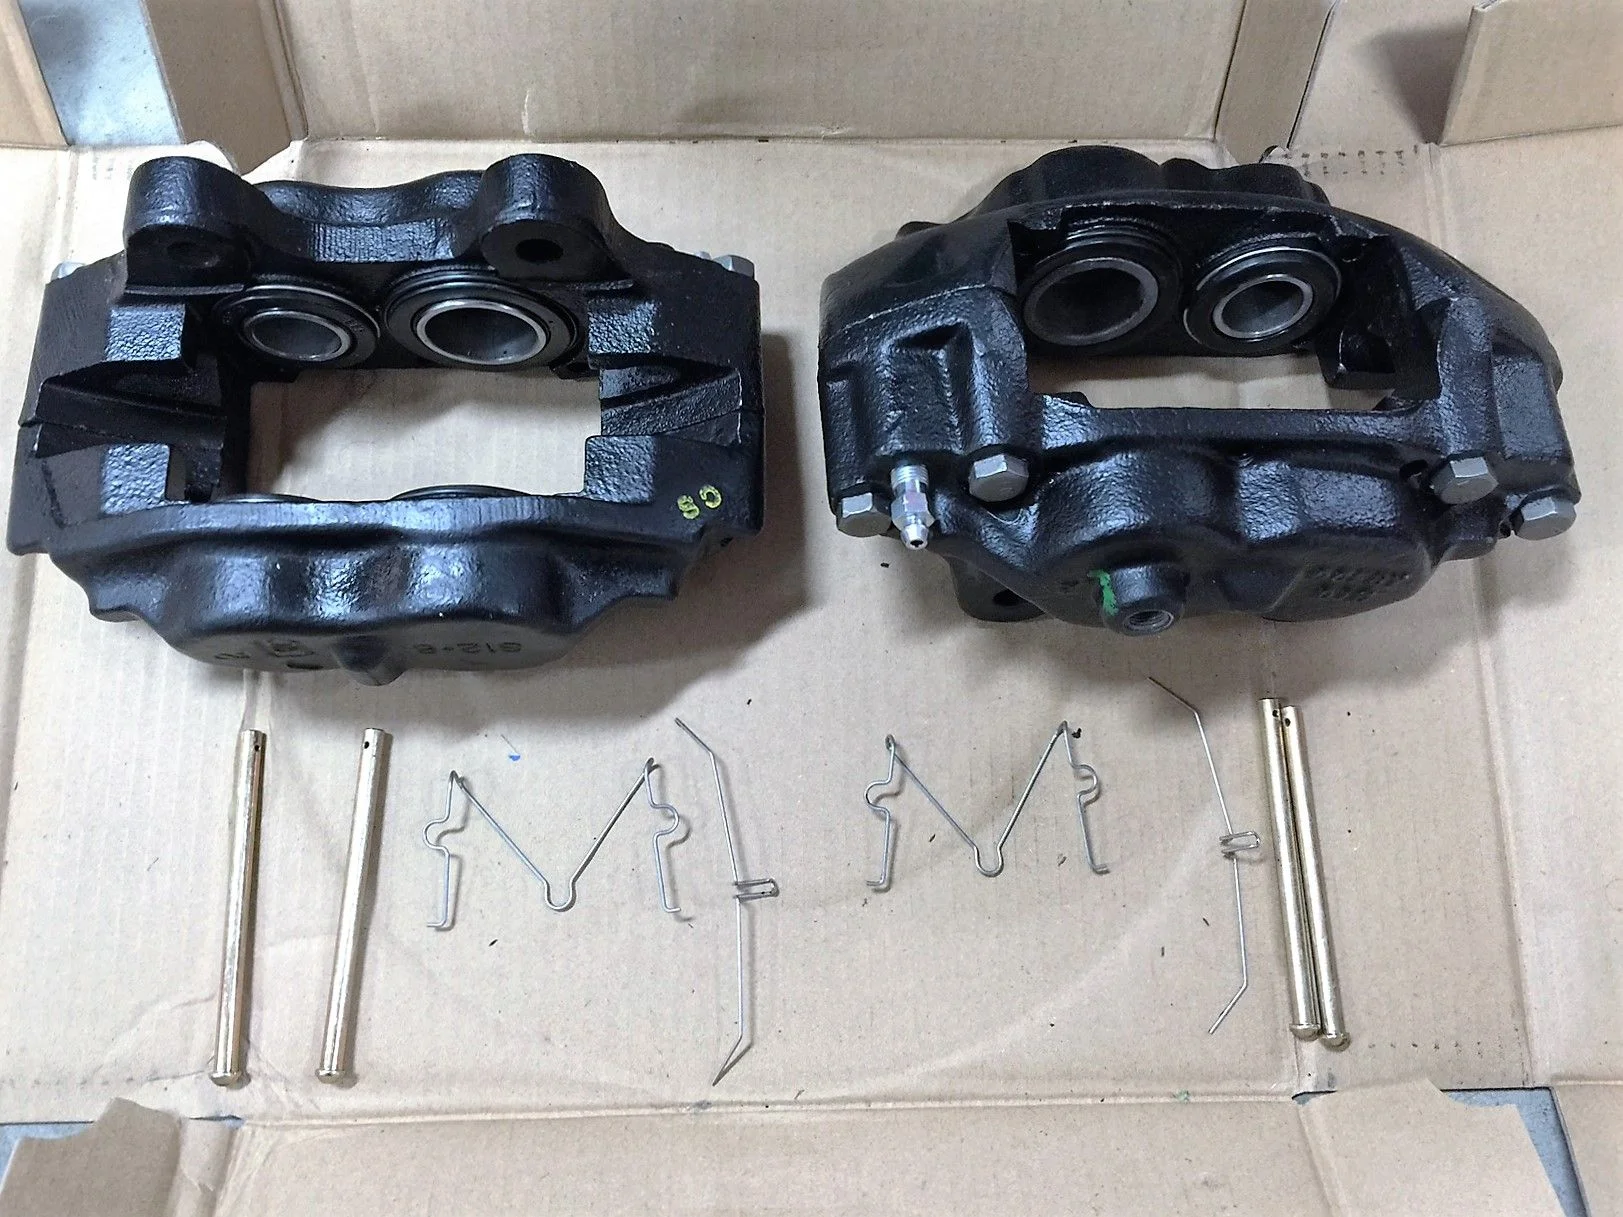
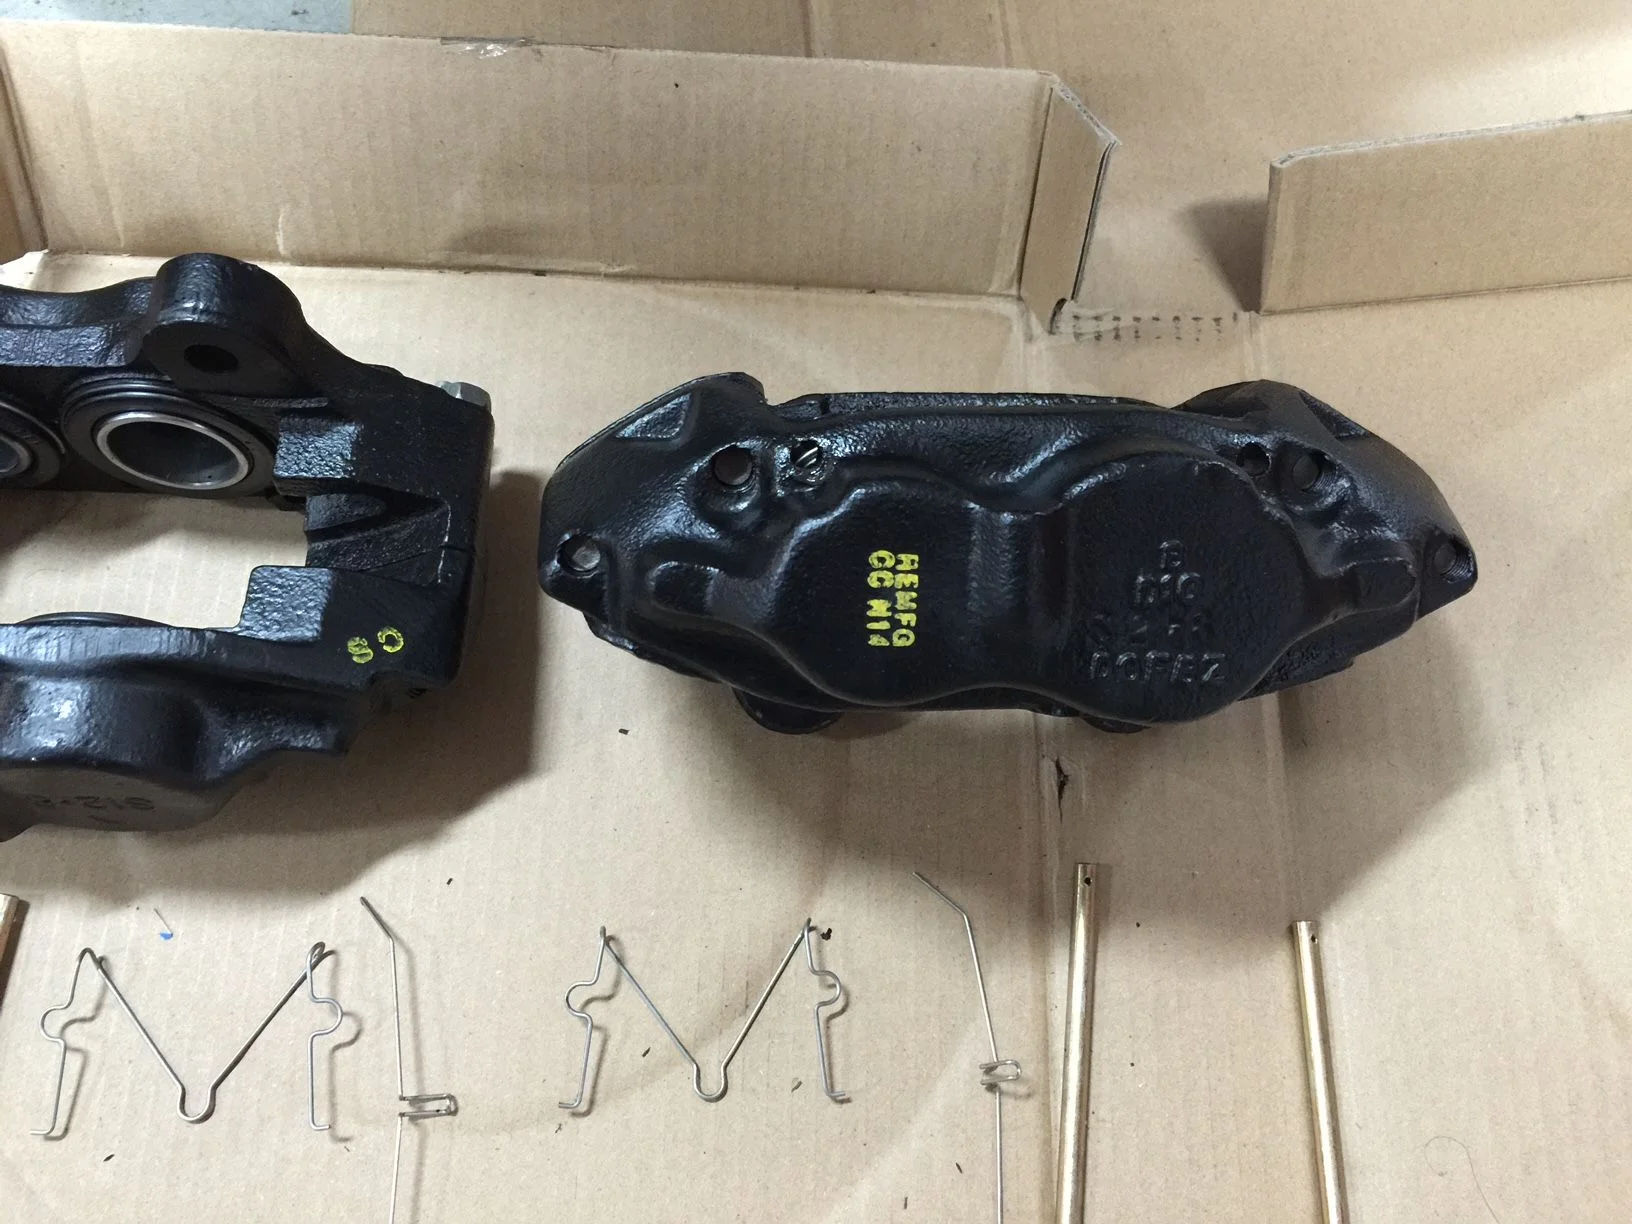
Remanufactured calipers from Toyota are available for about $50 per side.
-Geoff
-Geoff
Red is a sharp touch, Mike! You're going all out! Awesome!Installed the locking hub housing and gasket, temporarily used a 10mm bolt to pull/push the axle to properly seat the snap ring in place.
Removed 10mm bolt and installed the locking hub mechanism with anew star gasket.
Also used oil based red paint to accentuate the instructional lettering.
I really like the look of the red paint. I painted mine last night, but stuck with black. I didn't even think about red. Nice touch.
Is the black retainer/washer under the mounting nut (in your picture) still available? I have looked at several kits that come with washers and lock washers, but I haven't seen any of those retainers. Like yours, several of my tabs are broken. Thanks for all your pictures. I am several steps behind you, and learning a lot.
Is the black retainer/washer under the mounting nut (in your picture) still available? I have looked at several kits that come with washers and lock washers, but I haven't seen any of those retainers. Like yours, several of my tabs are broken. Thanks for all your pictures. I am several steps behind you, and learning a lot.
78fj40mg
TLCA #23510
- Thread starter
- #394
I really like the look of the red paint. I painted mine last night, but stuck with black. I didn't even think about red. Nice touch.
Is the black retainer/washer under the mounting nut (in your picture) still available? I have looked at several kits that come with washers and lock washers, but I haven't seen any of those retainers. Like yours, several of my tabs are broken. Thanks for all your pictures. I am several steps behind you, and learning a lot.
@emac I'm not sure if they still carry those washers, I cleaned and painted mine to look new again.
How about some pics of what you're doing?
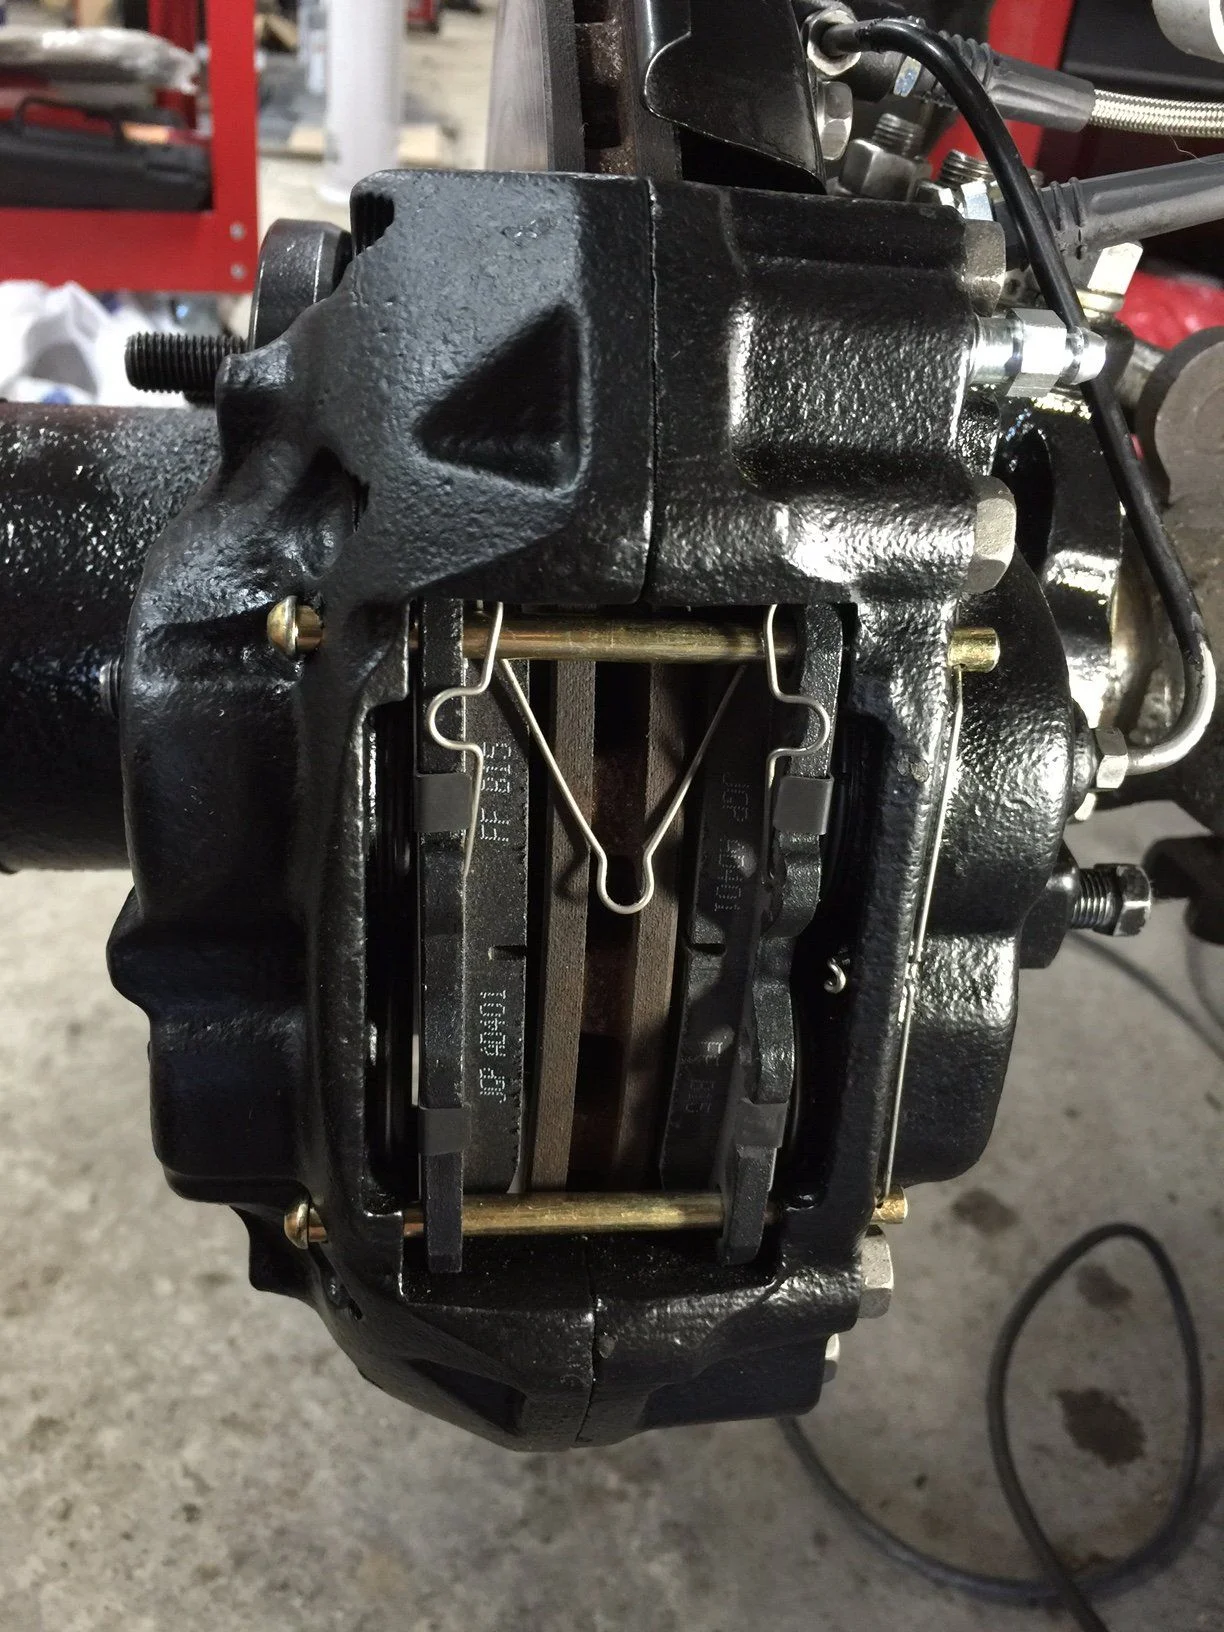
How are your brake tubes that screw into the calipers? When I did this job, the calipers were super easy, but both brake tubes had small cracks at the flared end and started leaking.
78fj40mg
TLCA #23510
- Thread starter
- #398
How are your brake tubes that screw into the calipers? When I did this job, the calipers were super easy, but both brake tubes had small cracks at the flared end and started leaking.
I'll have to look at them tomorrow as I didn't pay much attention to them today.
@emac I'm not sure if they still carry those washers, I cleaned and painted mine to look new again.
How about some pics of what you're doing?
Mike,
Not trying to hijack but I was wondering if you or others might be able to steer me right. I bought Warn rebuild kit #7309. My gaskets are black and It doesn't seem to have the small inside O ring, and has a large O ring that I haven't figured out where it will go. I haven't completely disassembled them, but my initial thought it that it is wrong. What kit did you buy? Pic attached of my style hub and the kit.
Similar threads
Users who are viewing this thread
Total: 24 (members: 0, guests: 24)