Builds Just had to treat myself for Halloween... 65 SWB (1 Viewer)

This site may earn a commission from merchant affiliate
links, including eBay, Amazon, Skimlinks, and others.

Hey Dom,

Nice progress!!!! You had texted me about my booster and master combo., I went with a 72 FJ40 single diaphragm booster and a master from a 94 Celica Supra. Worked great in the 45, but my 40 with 37's I find I need something bigger.
 
I'd love to see a pic. I've got a good idea of what I need and am contemplating just moving the firewall brace over to accommodate an FJ60 booster or similar...

https://forum.ih8mud.com/threads/moving-firewall-brace-1965.806331/


Am also interested in how people extended the pushrod.


Pretty sure that I had enough adjustment in the pushrod, so I did not have to adapt it.

I will try to take pics of it installed and get you a dimension of the depth. That was the biggest trick.

I have been playing with the carb float this week and it is really nice to have that booster and master as far away as possible.

k
 
I had to cut the firewall brace on mine. I mimiced the factory angle of the brace below the booster so it looked factory. It took some welding and grinding but it turned out nice.
 
I'd like to eventually move the brace over like this job Proffit's did. For now a spacer will do until the 135 comes out for a larger power plant.


image.jpg


image.jpg
 
Well... not much has been happening on the 45 in the past few months, but... the site that hosts all my pics changed a bit and all the URL's were wrong. So the benefit of nice big pictures hosted on another website is great, but once it goes bad it's bad. I've spent hours re-linking just this thread alone. I have quite a few other threads to redo but that will have to be some other time.


As for the 45 I did finally go pick up the seat belts I had my upholstery buddy re-web. Here's what I started with:

IMG_3106.jpg


They're out of an early 70's FJ40 and the lengths were a little off and the webbing was tired so I measured what sizes I wanted them to be and had them re-webbed custom lengths.

This is how they came back with the correct length webbing:

IMG_4276.jpg


So I popped the covers off:

IMG_4277.jpg


Cleaned them all up and sanded the covers:

IMG_4278.jpg


Then primed them and used a black satin finish:

IMG_4281.jpg


IMG_4282.jpg


The only thing I didn't do that I considered (and still might do) is have them remove these old tags and sew them on the new belts:

IMG_4279.jpg


I mentioned to Shane that he might want to consider scanning these, digitally cleaning them up and making reproduction cloth with the correct date stamp for whatever people here might want. Not sure if there's much demand and it is a bit overkill but that's never stopped anyone here before.

I'm going to bolt these in tomorrow. I had the drivers side lengthened a bit and made the passenger side long enough to fit a middle passenger in a pinch.

:beer:
So when you say you "popped the covers off" exactly how did you do that? Mine are in need of the same cleanup you did.
 
I looked at these seat belts today. I recall prying the black cover piece up and away from the chrome body. I've attached a few crappy cell phone pics to show where. I think you may need a metal screwdriver or putty knife instead of the plastic trim tool shown in the pics.

You can see where the small black edge will pry away from the slots and pop off.

At least that's how I remember it!


image.jpg


image.jpg
 
So time has been hard to come by to work on cruisers now that we have a small humanoid running around. Which means even less time to post up on MUD... but I realized it's been over a year since I completed a 4 wheel disc brake conversion using a Geo Metro booster so I had better find some time to get it online. I had uploaded photos a few months back and had organized most of the part #'s etc. in a word file to make it easier once I did try to tackle it.


So here goes...
 
Last edited:
*Disclaimer: I'm going off of poor notes and a bad memory from 18-24 months ago...


I was trying to determine the best way to get good braking on the 45 so I would be comfortable driving the little one around town without a single circuit brake master. I had purchased a dual circuit from Mark years ago but really didn't want to add it because I had hoped to eventually go to discs. My main concern on how to get what I wanted was to figure out how not to hack up the firewall. I have a 4runner booster on my 40 but that would not work due to it's size. I looked at moving the brace over as noted in the pics previously posted but that was a s*** ton of work.


So after searching and reading and searching and reading I decided on trying out the Geo Metro booster with a custom spacer.

I found a post on a Geo Metro booster install that would work as a template for my bracket...


Geo Metro booster install


Here are the parts I put together for the conversion:


•69+ front axle from Rob (Calstyl2) delivered by Brett (cruiserbrett).

•FJ62 disc axle (purchased from a Mud member a few years before and sitting at my buddies shop).

•Oem Toyota front (rebuilt) calipers (47730-60021-84) and (47750-60021-84) pads and springs.

•Knuckle rebuild kit from Kurt.

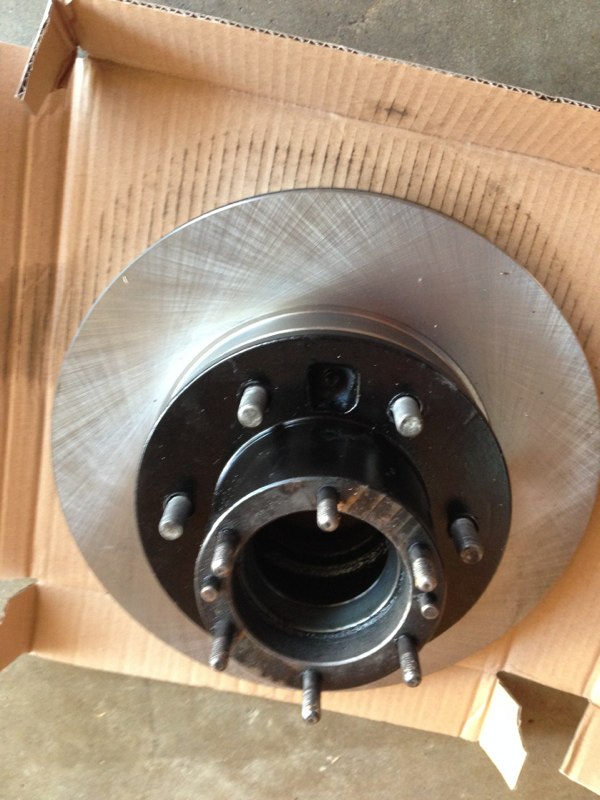
•FJ60 front rotors from Rock Auto.

•New OEM Toyota steel wheels (originals were riveted).

•Geo Metro Booster (1995-2000 from junkyard).

•1/2 x 1/2 to 3/8 tee for vacuum line to booster (for the transfer vacuum hose).

•Hard Brake lines- 25 feet of 3/16 brake tubing.

•10mm brake T’s from random Toyotas at junkyard

•Front caliper Brake hoses: Here are a bunch of numbers I found online but I don't remember what I used. Sorry. When I find a receipt I'll post up. Come to think of it maybe I used a Toyota part?

WAGNER BH96831

AUTOSPECIALTY HB-56303

CARQUEST SP5922

CENTRIC 150.44303

DORMAN H38162

NAPA 38162


•Brake proportioning valve from 949 racing with Mazda fittings.

•Front hose from frame: flexible brake hoses (75 FJ40 rears).

Beck arnley 073-1540


•Steering arm bushings for Fj60 steering arms to fj40 tre's.

•male tube nuts (Brakequip BQ4511 x 21).

•10mm plugs.

•Two 3-way tube T's (BQ91A??) I didn't like the circular style of these.


-For Rear Discs:

•Brackets and rotors from poser.

•GM Calipers and pads from Napa (no core).

•Kept rear flexible 10mm to 9mm hose and oem breather fitting on rear axle.

•Tombstone tabs and rear hoses from Poser.

•Lug nuts (longer) for rear (Dorman 610-265) 12-1.5 44mm length. 14.31 knurl (pressed in at machine shop).

•OEM lug nuts.


Things I had to do:

•Breakdown and clean up 60 series knuckles/brakes.

•Breakdown and clean/rebuild 69+ axle with 60 series parts.

•Build adapter for booster thanks to Pat (landcruisnman) based on Akeyzoo's design.

•Moved oil canister forward with custom bracket.

•Fabricated brake proportioning valve bracket.

•Built all new brake lines with 10mm fittings (except the passenger side frame line which I used 10mm on one and 9mm at end).

•Pedal rod extension- custom made to fit the booster spacer using 10x1.25 threaded bar and fabricated union nut 10x1.25


Brake line making tools-

•Tubing bending pliers

•Tubing straightener BrakeQuip Brake and Clutch Hose Products, Tools and Manufacturing Systems This was a waste of money and could have been done without it.

•Brake flaring tool- Eastwood (Professional Brake Tubing Flaring Tool - Brake Flaring Tool - Brake Tube Flaring) Thanks Steve (Poser) for recommending this in another thread.
 
Last edited:
I won't bore you with all the details of the axle tear downs as it's covered in many other threads but I will try to describe the other items that made this conversion somewhat unique. Sorry for the crappy cell phone pics...


Here's the 69+ axle that would be cleaned up, stripped, and rebuilt with FJ62 knuckles and disc brakes:


IMG_4882.jpg


A few random tear down pics:

IMG_4890.jpg


This axle had seen better days but actually was very serviceable with some major cleanup:

IMG_4888.jpg


IMG_4916.jpg


Here's the donor FJ62 axle:


IMG_4919.jpg


The rotors and calipers were shot on this axle. I decided to order new rotors and was lucky enough that Cabe Toyota (big time cruiser and MUD supporters) would accept these as cores!

IMG_4937.jpg


IMG_4968.jpg


Many attempts at separating the axles were unsuccessful...


IMG_4972.jpg


I had always been able to separate these using PVC but not this time. I went through 4 pieces of this stuff before I drove over to Noah's (1973Guppie) and he separated them with a metal pipe...

IMG_4986.jpg


IMG_4982.jpg


After a ton of time with a wire wheel using compressed air and several fresh coats of paint the donor axle was looking good:


IMG_4975.jpg


Knuckles cleaned up:


IMG_4981.jpg


Backing plates:


IMG_4973.jpg
 
Last edited:
Once I had removed the old ball and claw axle and the new axle was cleaned up and installed it was time to rebuild it with the disc parts. This was pretty straightforward and I don't recall it being any different from the mini-truck swap I did on the 40 fifteen years ago....


Birf fitting after axle housing grind...


IMG_5063.jpg


Knuckle install...


IMG_5064.jpg


Rotor and hub...

IMG_5061.jpg


Retainer and backing plate...


IMG_5065.jpg


Hub and rotor installed...

IMG_5067.jpg
 
The Geo Metro boosters I had read about being used in cruisers were from '95-'00. So I went down to my local dismantler and pulled one out of a 1999...


IMG_4978.jpg


In the car...


IMG_4980.jpg


Donor...

IMG_4983.jpg


After having the booster in hand it was time to fab up a spacer that matched the firewall bolt pattern, was deep enough to clear the firewall brace, matched the booster bolt pattern and allowed the pushrod to be centered on the pedal...

IMG_5241.jpg


IMG_5242.jpg


Once I had all the measurements I mocked up a cardboard prototype and took it to one of Pat's fabrication buddies. Here's the first draft that came back...

IMG_5486.jpg


IMG_5487.jpg


After a couple of final adjustments it was ready to go...


IMG_5525.jpg


IMG_5526.jpg
 
With the booster in place I determined there were a few unforeseen things that would need to be addressed.

1. The booster interfered with the original oil canister type filter so that would need to be moved.
2. The pushrod was extremely short and would have to be significantly extended.
3. I needed a good place to mount the proportioning valve.


The oil canister adjustment was pretty simple although not quite as clean as I would have liked. I basically unbolted the bracket and moved it far enough forward to clear the booster and master and added a couple of bolts to re-position the oil canister...


Mount:

IMG_5246.jpg


Re-positioned:

IMG_5258.jpg


Fabbed Mount:

IMG_5259.jpg


Test fitting the new location:

IMG_5303.jpg


The next issue was the pushrod length. The pushrod measurements proved that a much longer rod would need to be fabricated to connect the boosters 10x1.25 rod to the stock FJ45 10x1.25 connecting fork....

IMG_5244.jpg


I searched high and low for a proper 10x1.25 union nut and I am convinced that they either do not exist or have to be purchased in quantities of 100. So I decided to make my own. I purchased a long grade 8 equivalent 10x1.25 bolt and nuts to match along with a sleeve...

IMG_5304.jpg


Put them all together...


IMG_5305.jpg


Then welded them up, added the sleeve and welded that as well and painted them...


IMG_5306.jpg


Then I cut the bolt head off, cleaned that up and had my custom pushrod...


IMG_5308.jpg


IMG_5316.jpg


The last item on this list was placing the proportioning valve. I decided on a spot close to the booster and wanted to use existing bolts so I fabbed a stainless bracket that mouted to the clutch master mounting holes...

IMG_5317.jpg


IMG_5318.jpg


I was definitely making progress.
 
Last edited:

Users who are viewing this thread

Back
Top Bottom