Builds Ikarus' HDJ81 Aussie-Style Build (5 Viewers)

This site may earn a commission from merchant affiliate
links, including eBay, Amazon, Skimlinks, and others.

Haha dude I wish I had the money to fully embrace my inner watch nerd. But yeah, this one is actually serial number 89 from a few years back. I did some work for Matt when he was starting Ares. He's a big cruiserhead himself, I believe he has a 60 series and maybe another.
That's pretty cool, love to see those connections. If you ever want to nerd out on Seikos... let me know :)
 
Ah yeah.

If you can't find it on Amayama or Megazip you could hit up Dave at Japan4x4:
stedman@japan4x4.com

And worst case if you really want to redo it, on mine at least, the numbers/letters look like a sticker. Might be able to peel it off and have a graphic designer make a new sticker
Yeah, all I really need is the cover with the indicator holes in it. The indicator holes in mine are, well….really coming apart.
 
Great to know, thanks for sharing.

So why did you have to keep the VSV for the pressure sensor and oil fumes?

Is the constant glow light the only downside to removing everything?
Hey brother! Loving the progress on the build. Any chance you ever found an answer on this one? Just got my PDI installed as well and have the constant glow light. Found some fixes on the FZJ side of things but unsure if those work for us
 
Hey brother! Loving the progress on the build. Any chance you ever found an answer on this one? Just got my PDI installed as well and have the constant glow light. Found some fixes on the FZJ side of things but unsure if those work for us
Hey I did a deep dive into it last month but haven't done anything more than some research. @HJ61alex was helpful and provided some links to a forum in France -


You'd have to register but there's some good info in there.

Screen Shot 2023-08-17 at 7.48.49 AM.png


Screen Shot 2023-08-17 at 7.48.58 AM.png


There's a Russian forum where they discuss which wires to cut - you can kind of understand when you translate it through Chrome but it's difficult.


Beyond that, I was thinking about just removing the bulb in the cluster. Let me know what you find
 
Reinstalled shifter assembly and got a new parking brake boot:

QJxpif3.jpg


Continued on my intercooler fitment journey. Not too bad for an angle grinder. It helps that no one will be able to see it hidden behind the bumper.

3ifjhci.jpg


om4FxRT.jpg


When I finally get it, I'll clean it up and paint it. Still not quite there though. Driver's side is good, passenger side is rubbing on the IC piping and AC dryer line.

kI2Rvqp.jpg


IVGxvkR.jpg


Cleaned up the wiper motor. I lost the nut that holds the arm, but luckily the ACSD assembly that I removed just happened to have an identical nut.

cXm13Oj.jpg


Finished up the carpet refurbish, looking good there.

GREIERe.jpg


i7zTquS.jpg


d7gQOtO.jpg


I think my next upholstery project down the road will be the headliner.

I spent some time in a laser/CNC shop last week and it got me thinking about the rear heater delete. I know I can just use some tape but...

HBXqlSz.png


Went a little too far down that rabbit hole, scaled it back.

PyT1r4j.png


I think this should work great. I'll report back when I get it installed.

lc3YyQ3.jpg
 
Last edited:
Working on cleaning up the remnants of the Japanese wiring. Looks like someone tapped into the reverse light. I pulled the wire a while back but today I got rid of the EZ tap.

rGMulA7.jpg


nMHKGIw.jpg


S1C19JK.jpg

All cleaned up:

bIIVmmu.jpg


In preparation for a stereo install, I wanted to verify that the factory amp was bypassed. It was unplugged already, and the connectors were wrapped up in this foam, along with a long coiled up purple wire that taps into a connector going into the emissions ECU.

9bdaBCA.jpg


X285ynj.jpg


Google translate is only slightly helpful

hlCO5v6.jpg


W9IC1ou.jpg


sMex6bW.jpg

9IZ3bpv.jpg


So I'm guessing some previous stereo needed a VSS signal and I'll just pull this out. I'll double check the EWD but I believe they tapped into a ground to ground it out like you do with the parking brake wire on a stereo. You'd think they could find a better ground location than chopping into the emissions ECU...

Just a little bit of hokey wiring going to the cigarette lighter and then we should be golden.

wz8Vpx6.jpg


@Dirty Koala stopped by and helped me pull the hood so I can get the cowl cleaned up. It was so easy, I should have done it a month ago when I was working on coolant hoses and the valve cover.

Jk6sml1.jpg
 
I ended up choosing function over form and went with a Sony CarPlay head unit instead of a Blaupunkt/period correct deck. This one just got discontinued but has a capacitive screen. The new version is identical but just adds an HDMI port, which I don't need.

I would have liked a volume knob but those are few and far between these days. This at least has physical volume buttons.

UH4TA0j.jpg


OEM brackets go right on -

1kwEqyV.jpg


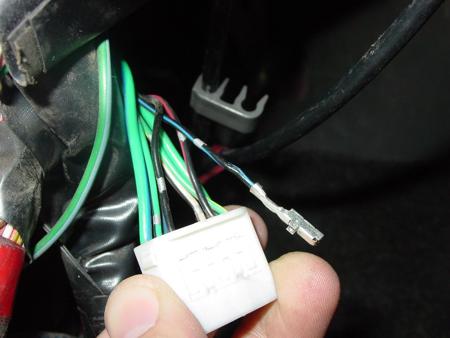
Picked up the Metra 70-1761 harness that bypasses the factory amp. From here it's a simple job of lining up the colors and connecting the wires.

ay3PPkf.jpg


I left the power antenna and backup camera wires disconnected. For the green parking brake wire I'll cut that down and add a ring connector to ground it to the chassis.

X2uL3gS.jpg


Rcl75H7.jpg


This unit has wired CarPlay so I added a USB charger/CarPlay pass through combo charger in place of the cigarette lighter:

MjF1Ov0.jpg


HrQRZEs.jpg


akni0hi.jpg


I also added a CDL switch as you can see in the upper right hand corner of that last pic. I did the "Pin 7 Mod" as well.

The ABS module on the HDJ81 is on the right side of the car, next to the accelerator pedal. I know this is well documented on Mud for LHD FZJ80s but here are a few pics.

I followed the Slee directions here:

Remove the silver ABS module/bracket up above the accelerator pedal:

diqtWJL.jpg


FM7glhE.jpg


Once it's moved out of the way you have access to the Transmission Relay with the plug we'll be modifying.

18GKRXV.jpg


GQoasL2.jpg


Pull pin 7, the black wire with a blue stripe.

JsGwYvG.jpg


Taped up and good to go. Reassemble.

HS2f9rD.jpg
 
I also installed the boost sensor that I got from Lutz Auto. I used rivnuts on the cowl/bulkhead next to the heater valve. I tried to replicate the way that the heater valve is mounted with metal washer - rubber washer - heater valve - rubber washer - metal washer.

uSd8YUt.jpg


iiVPzcK.jpg


NcnQx3s.jpg


Started working on wiring up the boost gauge. I staggered these crimp connectors since I'll be running the 3 wires through a braided sleeve and want to avoid one big lump where all the connectors are.

AvEN47E.jpg
 
May i ask, what was the part number for that good looking future-proof (usb-c) cigarette lighter usb port ? I will purchase the same for my hdj ! My old usb adapter is slowly charging !

This unit has wired CarPlay so I added a USB charger/CarPlay pass through combo charger in place of the cigarette lighter:


HS2f9rD.jpg
 
Dang @ikarus this will be a damn near new truck!
I half expect one morning to wake up and see you start posting about left hand drive conversion!!
 
This thread is great on so many levels. Great pictures and I especially like your methodical approach to maintenance.
Thanks man!

Dang @ikarus this will be a damn near new truck!
I half expect one morning to wake up and see you start posting about left hand drive conversion!!
Haha nah the weather's cooling down for camping and I gotta get this thing running again!!
 
Any idea on the part number for the radio mounts?
They came with the cruiser but I believe they are:

Radio Bracket no. 1: 8621160050
Radio Bracket no. 2: 8621260050
 
Ring terminals showed up so I finished the Sony harness.

VCxZoEi.jpg


I grounded the parking brake here:

9t8ZLCV.jpg


pC8gcOO.jpg


Haven't function checked it yet but it's in.. went to go connect the batteries and realized I needed to re-route the trans cooler lines.

I originally had both lines running through the large hole behind the headlight. I checked fitment on headlights, turn signals and grille but forgot about the battery box. I changed them to this setup - lower line running underneath the IC pipe and the upper running over it. It all fits under the battery box now.

WyUjrkj.jpg


The stock battery mounts are tearing the sides of the battery trays so I installed the battery kit from Land Cruiser Products. It's a great setup, except it doesn't quite work with my batteries. The battery strap hits the vents on top. I need to figure out if I can drill some holes slightly to the left to try to center the strap but I haven't figured out how yet.

Ma4fBfs.jpg


FKuJMOS.jpg


I'm considering DIYing a hybrid reinforced OEM battery box with additional metal plate underneath that this battery tie down can hook into. I like the sealed off design but not the fiberglass mounting system.

Back to the stock setup for now until I come up with a solution.

XiDzPin.jpg


Worked on the boost and EGT sensors.

diI3Nwq.jpg


Ran the boost wiring through some Techflex woven sleeve with heat shrink on the end -

g8dU2cg.jpg


PCUPFTS.jpg


Cut off one of the nibs on this firewall grommet and ran the wiring through with the end of a zip tie and some electrical tape.


ObPEitP.jpg


5zAVoso.jpg


Ul0MUt2.jpg


And ran it up to the clock location where the multigauge will install.

8aZhW5J.jpg


Finished:

RCw93Nl.jpg
 
Ran to the junkyard to pick up a rust free hatch off an 80 out of Nevada -

4W6y3xY.jpg


I'll try a fix on my current hatch rust and see how long it lasts. This can be a long term project for me to learn how to do bodywork and paint.

Worked on the @Lutz Auto Multi Gauge. It sits in the OEM clock location:

nstQ3v0.jpg


k2RebZ5.jpg


TApj7Sm.jpg


JfOx5TQ.jpg


yeRl00K.jpg


To center the screen and get it to fit just right you need to file off a little plastic on either side of the screen:

cniYsIR.jpg


1Tnm3qk.jpg


I made a custom startup screen:

JIjQ2Fx.jpg


Rad setup. I'm excited to get it installed and working. I initially wanted analog gauges to be able to see the needles move vs a digital display but the more I looked into gauge pods and mounts I decided I'd rather have a clean minimal setup like this. For now I'm only wiring up EGT and boost but it supports oil pressure and trans temp as well.

iz5xsqC.jpg
 
nice work. The Lutz gauge is interesting. Off to check it out . . .
Yeah it's cool - obviously I gotta get it running and driving to really see how it does but it's good so far.


The functionality is pretty minimal for HDJs as all you can do is add exterior sensors/gauges but I believe OBD2 80s can do more.
 
Yeah it's cool - obviously I gotta get it running and driving to really see how it does but it's good so far.


The functionality is pretty minimal for HDJs as all you can do is add exterior sensors/gauges but I believe OBD2 80s can do more.
mine is an OBD1 1fz-fe, so would have limited functionality for me too
 

Users who are viewing this thread

Back
Top Bottom