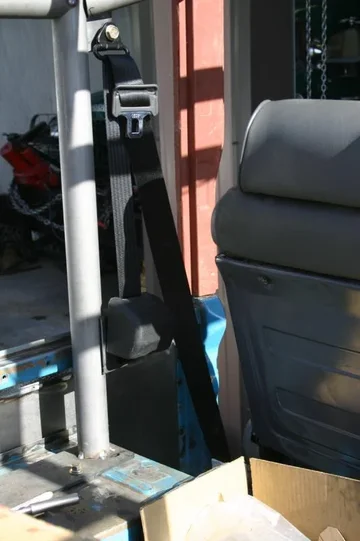
Builds Here we go (FJ-40 getting a 3B/Turbo/H55f)... (3 Viewers)

This site may earn a commission from merchant affiliate
links, including eBay, Amazon, Skimlinks, and others.

I'm Queen of the Mall

Gentlemen,
I'm lovin the cup holders on the front of my Tuffy b/t the seats console.
There's nothing like havin a cold one or a good cup of coffee on a long adventure.
Carryin cups and spillin is for suckas!
 
Wow it looks like you have a ton of work to do before you get close to being done, can I suggest you should just scrap the project and send me all the good parts? lol Just kidding!!! You are kicking :censor: and its looking pretty good. I feel fortunate with my find, nothing to bad (that I have found). Cheers! :beer:
 
Where does the time go....

First things first: I got the correct flanges from Kurt and put the one on the front. Predictably, when I order the right parts they fit.
driveshaft.jpg

I also ordered a bunch of 3/8" fuel line supplies. Stainless hard line, and a ridiculous amount of Viton flex line. Of course, I somehow ordered thinner wall hard line than I anticipated, and it just didn't want to do anything without kinking. Even in my tubing bender it kinked (I've never seen that before). But, I managed to bend up a section without kinks to run from the Racor fuel filter back to the fuel tank. Here's the best picture I have of it. It sits more flush with the body, this is just lowered to show the bends.
fuel line.jpg

The fuel tank has a vent (return?) and a pickup. The one I am pointing at with the yellow dot is the pickup. This is what the fuel line will be plumbed to.
fuel line 2.jpg

Which begs the question: what should I do about the other line? Just cap it off? Or should I run it to the plastic vapor catchment thing by the fuel neck? I think that's what it does, it's black and has three little lines that go directly from the tank to it, and they connect to a common manifold. Or should I just delete the whole thing? Diesel fumes don't worry me near as much as gasoline, so I'm not real sure what sort of evaporative/expansion hoobajoob I should keep.
driveshaft.jpg
fuel line.jpg
fuel line 2.jpg
 
I also tied the truck's harness into the battery, using new fusible links and generally cleaning it up. Instead of going straight to the post on the battery, I ran a heavy cable (4GA) from the battery terminal to the thermal circuit breaker (150Amp), and I ran the truck's "battery" connections to that. That means that the battery terminals have one OO (2/O) Gauge cable, and one 4GA cable connected to them. That's it. I hate having a rats nest coming off a battery terminal. Nothing too fancy, so no pictures of that.

But, with the truck's harness completely tied into the battery, I was able to test a lot more things....

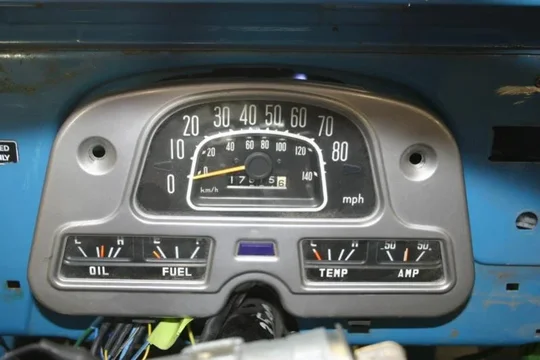
The stock gauges work perfectly (at least the oil pressure and water temp). See how those needles aren't parked? It's the little things...
gauges 1.jpg
gauges 2.jpg

I also tested all the other systems I could, like the headlights (my headlight harness works perfectly, BTW).

With the help of Dad we went ahead and did a rough alignment of the steering, and I tightened up the steering links. That's not sexy, so no pictures. But I did take a picture of one of my pet peeves: cotter pins. As a certified airplane mechanic (not my job, but I have an A&P) there are TWO correct ways to secure a cotter pin. Among them is NOT "a Y shape." You can bend the pin back horizontally on both sides of the castle nut, and the pin should extend at least halfway around on each side. Or you can bend the pins vertically. The top pin goes completely over the top of the bolt, and the bottom pin is trimmed so that it can't gouge anything, and can sit perpendicular to the cotter pin hole in the bolt.

Here's the "vertical pin" method. I like this best, myself. You have now been ranted at. ;)
cotter pin.jpg

It's dinner time, but I'll post more after I fill my belly.

Dan
gauges 1.jpg
gauges 2.jpg
cotter pin.jpg
 
With my belly now full of rice and beans, and some wicked tasty chocolate cookies, I've got a couple more pics to show...

With most of my day consumed by wiring, I decided I needed to do something "big." So I trimmed and rough fitted more of the MetalTech Cage.

Now, I haven't notched tube for quite a while. Probably when I was in college (dear Lord I'm getting old, that's 10 years ago), so I am happy to report that I guessed good. I just eyeballed the notches and went to town with the plasma cutter.
mt cage 1.jpg

Dad's admiring his toy...
mt cage 2.jpg

And here's how close the cage is to the dash. I obviously want to hug the dash as close as I possibly can, so I think this is good. I should probably test fit the dash pad before I get too crazy, huh? But how's this strike you guys?
mt cage 3.jpg

That's it for today. Tomorrow I hope to finish the wiring (have to change the main fuse box, wire the glow plugs, wire the water detector, and reroute the starter wire from the right side to the left side). I'll also probably tack up the rest of the cage, and I need to bleed the fuel system. I hooked up my fuel system, filled the bowl of the Racor filter with fuel (by sucking on a hose until I saw fuel in there), started the engine and it ran dry. For some reason the fuel doesn't seem to flow through the Racor. I thought I bled it correctly, but obviously I didn't. So I guess I get to bleed the injectors and fuel filter on the 3B tomorrow.

Dan
mt cage 1.jpg
mt cage 2.jpg
mt cage 3.jpg
 
Thanks for the cotter pin lesson... I have been (up to this point), one who bends the the tails wrong! Never again...
 
Thanks for the cotter pin lesson... I have been (up to this point), one who bends the the tails wrong! Never again...

No problem. On our airplanes there's a nut and cotter pin on the windshield wipers that I can see from my seat. It drives me NUTS to look at improperly secured cotter pins.

That, and I have threatened to take pictures of the "right" ways for a while, so since I had the camera handy today...

Dan
 
So today I mostly worked on the cage.

The pictures are pretty self explanatory, so I'll mostly let them do the talking...
mt cage 1.jpg

Plenty of room for a foot on the clutch pedal...
mt cage 2.jpg

now, this reinforcing bar I think I need to shorten, because if I sit up super high then I can hit my head on it (I'm about 6 foot). I think I'll just make it a "steeper" angle and thus move the forward edge back about an inch to make a little more headroom. What say you?
mt cage 3.jpg
mt cage 1.jpg
mt cage 2.jpg
mt cage 3.jpg
 
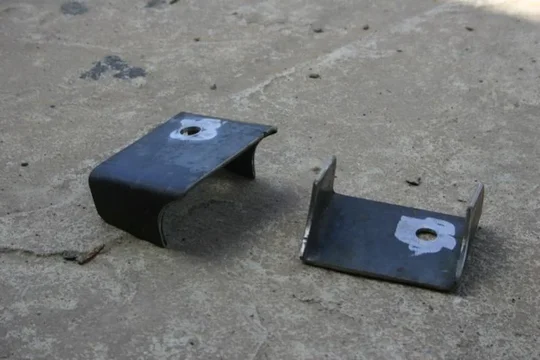
I also made a mount for the CB in between the spreader bars in the overhead. Like I always do, I welded on captive nuts. I hate sheet metal screws or having to use two hands just to take a bolt off. ;)
mt cage 4.jpg
mt cage 5.jpg

I will make a similar bracket for a 2M HAM radio too, just forward and "underneath" the CB.

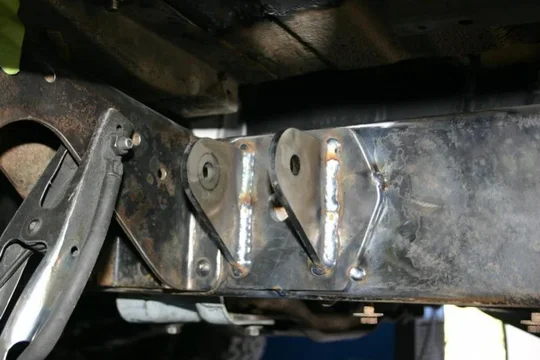
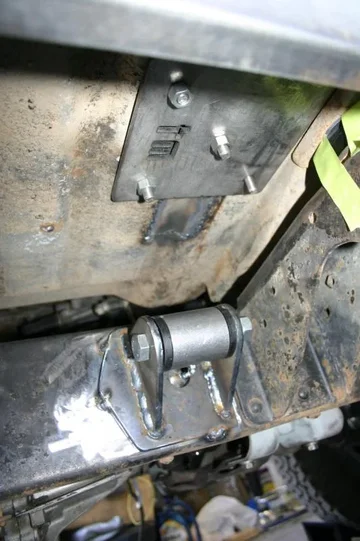
And here's how this will tie into the frame:
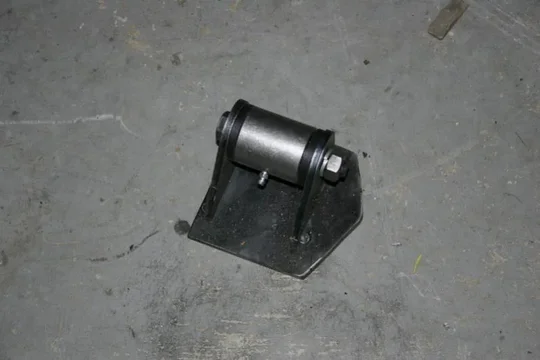
mt cage 6.jpg

These will be welded onto the frame, and then a bar will run from the plates under the body down to these bushing/bolt combinations. That way vibrations from the frame are isolated from the body, and the arms are removeable.

So, aside from that I just did some odds and ends. Mostly I bled the fuel system after getting air into it yesterday when I hooked up my fuel lines without a tight hose. And of course after that was done....

I know I said I'd probably do this. And I did. Front driveshaft? Check. Steering? Check. Working clutch? Check. Brakes? Not so much. But our shop is in a little bowl almost so it's possible to do this without getting TOO scary...

YouTube - Driving the 40, sort of...

And after I had proven to myself that it could be done (and I turned the truck around just because I could) Mom was up unloading some metal and discussing a little welding project for me, so I had to show her too, and she took a video of the same little maneuver from outside the truck. Also, I honked the horns. ;)
YouTube - Turning the 40 around

I'm waiting on brake parts from Toyota before I can get the front brakes working (I need new pins and retaining springs), but when those get here next week--I think I will at least take it around our little private driveway a little.

Tomorrow I'm working on that little welding project for Mom (building a rack for a solar system), and hopefully finishing up the wiring on the 40. I got distracted by the cage today.

Dan
mt cage 4.jpg
mt cage 5.jpg
mt cage 6.jpg
 
"what say you" you ask.
and i say
don't stick steel next to your nogg'n or you WILL regret it. no matter what padding you wrap it with.
 
Figure out a plate on top or other gusset design, like posted your noggin will turn to mush if it hits a bar padded or not.
 
Yeah, looking at the Metal Tech web site it looks like they must supply that tube SUPER long, and it definitely needs to be trimmed down a lot more so we don't hit out heads on it.

Well, I'll do that today then. Easy enough.

Dan
 
Must be on the road been awhile since the last post

I am on the road. Work seriously cramps my cruiser style sometimes...

But I am weak. I had to take it for a short spin, brakes or not.

YouTube - Taking the 40 for a spin...

Man it drives nicely! I really, really need to get it done. The brake parts finally arrived yesterday, according to my phone message.

Dan
Dude, that is one sweet screamer of a motor! I'd say I'm jealous, but this has nothing to do with jelly...
 
Well I've got a few days to work on the 40...

First off, I ground the frame clean and tacked on the frame mount bushings for the cage. Tomorrow I'll actually tie these mounts into the plate you can see in the second picture (which itself is bolted to the actual cage.
cage tie 1.jpg
cage tie 2.jpg

Then I got around to refitting that head-knocking bar. I like the new location a lot better (it's only about 2 inches closer to the B pillar, but it's really hard to hit my head on it now). So with that done, it was time to start mounting the seatbelts...

Starting with the brackets for the inertial reels on the bottom...
seatbelt 1.jpg
cage tie 1.jpg
cage tie 2.jpg
seatbelt 1.jpg
 
Here's the backside of the lower bracket (and the bracket tacked into place).
seatbelt 2.jpg

And then a shot of both upper and lower mounts tacked into place. The upper bracket also doubles as a small gussett for the bar I moved earlier...
seatbelt 3.jpg

And here's the seatbelt installed. Works great. It should, it's in the same place as it was on the OEM roll bar.
seatbelt 4.jpg
seatbelt 2.jpg
seatbelt 3.jpg
seatbelt 4.jpg
 
Last pics for today...

I also added a mount for a HAM radio in the overhead area. I doubt Dad will ever use this, but I do want the ability to mount my FT-8800R up there should I decide to take Dad's 40 out for a spin. This keeps both radios out of the way, but easily accessible. And the 2M is within eyeshot (for those of you not familiar, it's very handy to be able to see the 2M sometimes).
ham 1.jpg
ham 2.jpg

So far, so good. I'm also helping a friend (source3) put the engine we pulled out of Dad's 40 into his '73 FJ-40, so I'm a bit busy.

Tomorrow my goal is to get the frame ties for the cage trimmed and at least tacked up, and them maybe I'll start cutting into the bed to fix the last of the rust in the body. I've also got to figure out what's wrong with the wiring of the rear ARB locker solenoid, so hopefully I can get to that tomorrow too.

Dan
ham 1.jpg
ham 2.jpg
 

Users who are viewing this thread

Back
Top Bottom