Builds I need to practice my diesel swap skills. So I will. (FJ-60 getting a 12HT) (1 Viewer)

This site may earn a commission from merchant affiliate
links, including eBay, Amazon, Skimlinks, and others.

DanS HJ-45

SILVER Star
Joined
Apr 26, 2007
Threads
89
Messages
4,974
Location
Dumont, CO
It's been a while since I swapped the 3B into the 40, so I got bored. Also, I'll be dealing with the Guzzler (see sig line) someday soon enough, so it seems like I really should practice on another 60 first, right?

Well, it just so happens that my father has an FJ-60. So far we've put OME suspension under it, an H55f, and the obligatory ARB bumper, sliders (Redline), and a rear bumper (get the kits here on MUD). And generally made it pretty nice, as nice as a gas engine'd cruiser can be. But, it's got issues passing emissions, so that gas lump needs to go!

Here's some pics of it a year or two ago in Moab (Elephant Hill).
60 before 1.jpg

60 before 2.jpg

60 before 3.jpg


Here's most of Dad's stable of cruisers as it is. Missing from this pic is his low mileage FZJ-80.
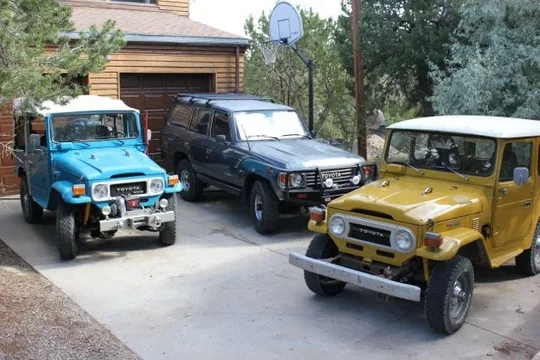
60 before 4.jpg

60 before 1.jpg


60 before 2.jpg


60 before 3.jpg


60 before 4.jpg
 
Last edited:
But, replace the 2F with what?

Dad's Blue-J 40 has a 3B with a turbo on it.

I have a 2LT-E, and a couple 1HZs lying around....

But what's this?
half cut 1.jpg
half cut 2.jpg
half cut 3.jpg

12V HJ-61 Half cut.

But does it run, you ask?


Yes. Yes it does.

half cut 1.jpg


half cut 2.jpg


half cut 3.jpg
 
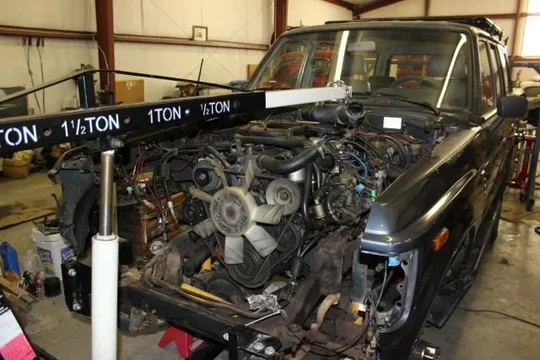
So, without much further ado, we started removing the 2F (which is going to a good home in an '84 FJ-40)

side by side 1.jpg

side by side 2.jpg

side by side 3.jpg

side by side 4.jpg

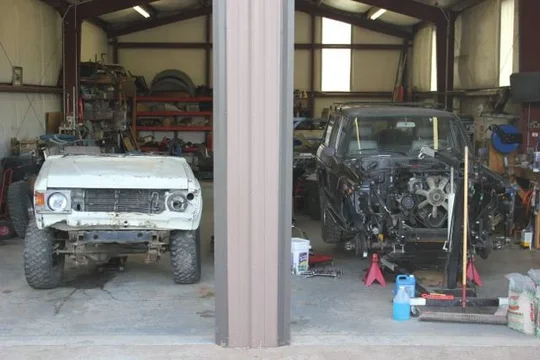
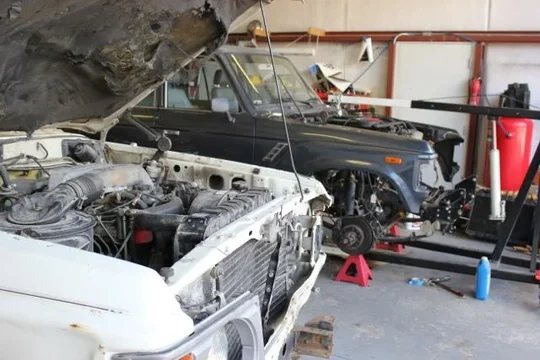
Of course, the best way to do a swap is to set the diesel engine near the gas truck. That way it will get the picture of what it needs to morph into.

side by side 1.jpg


side by side 2.jpg


side by side 3.jpg


side by side 4.jpg
 
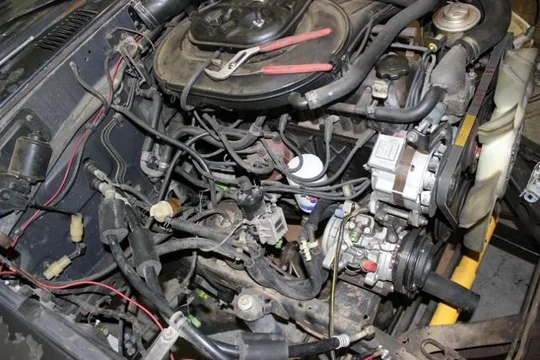
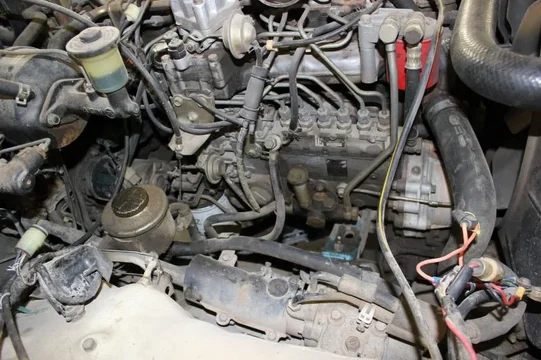
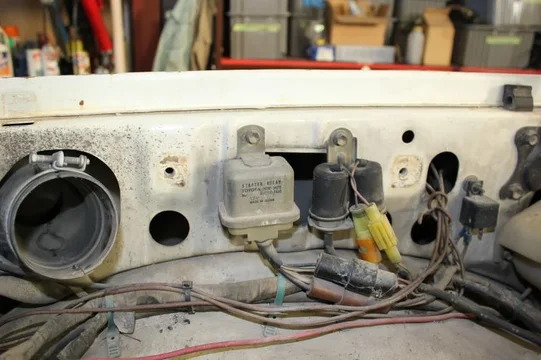
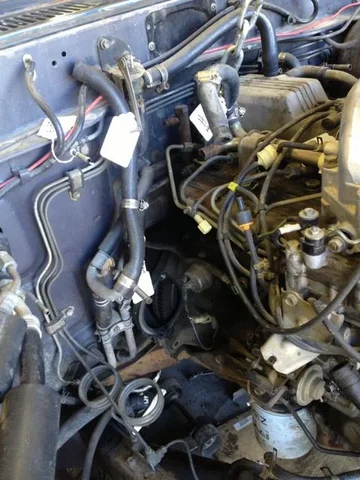
We're pretty meticulous about labeling things as they get unplugged and removed.
eng bay 1.jpg

eng bay 2.jpg

eng bay 3.jpg

That way all that stuff that's labelled "EVAP CAN" or "Carb Fan" we know is useless, and can be discarded soon enough. ;)

eng bay 1.jpg


eng bay 2.jpg


eng bay 3.jpg
 
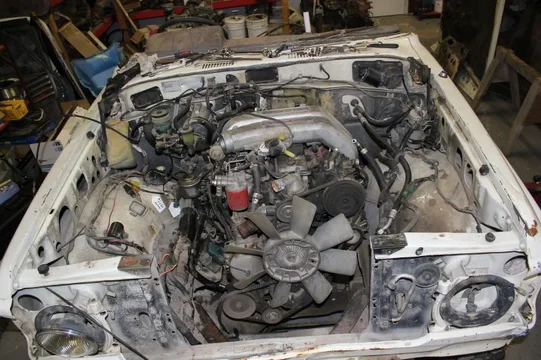
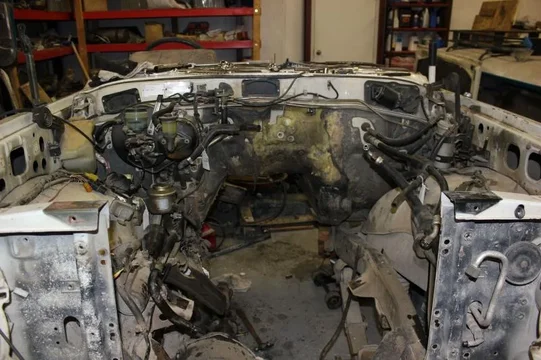
The 2F came out real easily. This truck is pretty darn clean, so not a single bolt has given us trouble or anything. Very much appreciated to have such a nice truck to work with.
engine out 1.jpg

engine out 2.jpg

Then I started cutting out the 2F motor mounts. (I also had to cut it short yesterday because I cut myself while doing so last night)
engine out 3.jpg

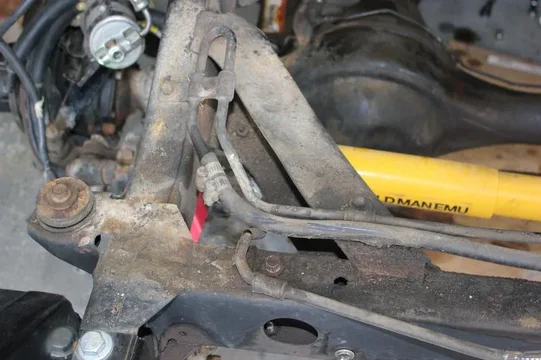
Found that a PO had obviously had some sort of drama with the PS lines. No matter--I'll be replacing all of these anyway.
engine out 4.jpg

So, that's a day or work. Now I'm heading back up to the shop to see how much I can get done this afternoon. My goal is to get the motor mounts out of the truck, get the 12HT ready to pull (if not removed from the half cut), split the engine/transmission so that I can send the flywheel out for resurfacing (and find out if I need to order a new clutch), and start moving the ancillary stuff over to the 60 (like the vacuum reservoir, and see just how much work it would be to put that vacuum boosted clutch master into Dad's 60--sounds super luxurious!)

Dan

engine out 1.jpg


engine out 2.jpg


engine out 3.jpg


engine out 4.jpg
 
Well done! I was fortunate with the 62 coming from high desert to have every bolt come out super clean and without any fights.

Always amazing what a rat's nest of hoses and wires the 2F engine bay can become.

I dig that (Power Wagon?) in the background.

Got plans for the 1HZs? :D
 
Very nice swap and the turbo sound is so cool I might get one of those exhoust whistles to imitate :D

 
Very nice start. That will be on clean 60 once it's done.

And yes, more pics of that power wagon too.
 
I dig that (Power Wagon?) in the background.

Got plans for the 1HZs? :D

Yep. 1 1HZ goes into the Guzzler (my 60). The other 1HZ goes into my 45. Of course, I have 1 complete 1HZ, and two nasty junky ones that I will rebuild into one good one. Not sure which truck gets the rebuilt motor or not. Oh, and obviously turbos for both.

Awesome Dan!

Tell Barry that I wish I could be there to help!!

Parts are on the way!

I've been too busy to text you pics of every geeky moment I'm having ripping into this. You'd be proud of the pace at which I'm working. I am, for this swap, fighting the urge to be me and rebuild every little thing and powder coat it and whatnot.

Very good on the parts! I will have another order probably tomorrow afternoon for you too. ;)

Very nice start. That will be on clean 60 once it's done.

And yes, more pics of that power wagon too.

Thanks.

You guys should have paid more attention to my other threads. That's not even the really nice Power Wagon (but it is absolutely amazing). I'll still try to snap a few more pics of the Dodges tomorrow too. But that depends on if I've got time. ;)


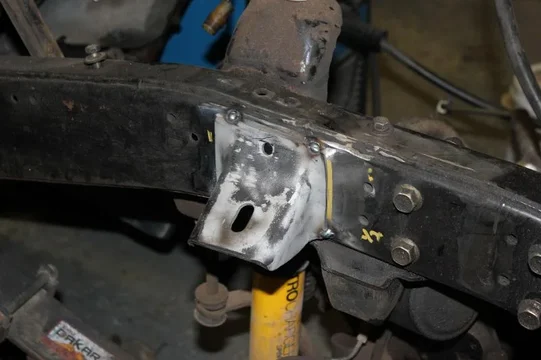
So, today I started by taking the plasma cutter and getting the 2F mounts off of the frame. Anyone want them for anything? I don't know if they are useful to anyone, but if anyone is removing one of those heathen chevy motors, they might be useful.

motor mounts out 1.jpg
motor mounts out 2.jpg

Took no time at all to clean the frame rails up with the flap disc.

Then we got busy prepping the 12HT for removal. The first order of business was to listen to it run again. It starts so easily! And of course, that turbo whine is to die for.

After that, I removed the air cleaner...
air cleaner removed.jpg

And started removing various things attached to the engine. That includes the two pressure sensors mounted to the right fender that you see here. Anyone know what these guys do? I haven't done any troubleshooting at all to figure it out, which I will if nobody knows. I'm guessing they are the pressure sensors for the two boost lights in the tach? One for green (boost) and one for red (over boost)?
right fender.jpg

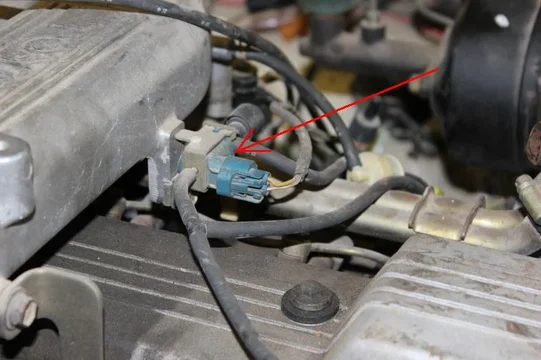
Also this guy. He lives behind the intake crossover pipe, and is connected to intake pressure from what I see, but I'm not clear on his purpose in life.
pressure sensor.jpg

motor mounts out 1.jpg


motor mounts out 2.jpg


air cleaner removed.jpg


right fender.jpg


pressure sensor.jpg
 
Kept separating the engine from the half cut...
removal 1.jpg

And out it came! I only forgot the vacuum lines for the vacuum shift T-case. Who thinks those are cool, anyway?
removal 2.jpg


Here's the engine bay devoid of an engine. In case you were wondering where accessories were located on a stock HJ-61.
removal 3.jpg

removal 4.jpg

And the two engines pretty close to side by side.
removal 5.jpg

removal 1.jpg


removal 2.jpg


removal 3.jpg


removal 4.jpg


removal 5.jpg
 
With the engine bay now open for work, I set upon removing the motor mounts with the plasma cutter.

But before I did that, I took some measurements.
motor mount install 1.jpg

motor mount install 2.jpg

Not pictured are the measurements I took from the motor mount bolt holes to various points on the frame, so that the mounts would end up mounted in the right spot because the weld makes it hard to measure real accurately where exactly the brackets are.

Once I had the motor mounts out, I cleaned them up a bit in the blast cabinet, just to get all the dirt off. I figured if the paint would survive a quick hit with the blast nozzle, it would be scuffed up a bit, and also adhering well enough to leave on there and it will just get pained over. It's very hard for me to let that kind of thing go though. Normally I would have blasted them to bare metal, just because that's what I do.

And once cleaned up, I went ahead and tacked the motor mounts into the positions I had measured.

motor mount install 3.jpg

motor mount install 4.jpg

motor mount install 5.jpg

OK, that's it for the day. Tomorrow the plan is to separate the engines from the transmissions, inspect/document the clutch situation (see if we can reuse the clutch we installed new when we installed the H55f not that long ago), and get the flywheel out for resurfacing. Will also try, once the clutch is out, to mate the engine to the H55f that was in the truck (and is going back in--because it's new--and doesn't have that silly vacuum shift T-case), and then set the engine/tranny combo into the truck to make sure I got the motor mounts correct. If I got it right, I'll finish weld the motor mounts on, and get busy with the other business of the swap...

Dan

motor mount install 1.jpg


motor mount install 2.jpg


motor mount install 3.jpg


motor mount install 4.jpg


motor mount install 5.jpg
 
Hi Dan. You're going great guns there!

Seeing your Dad's new engine run in a half-cut is really cool! And that turbo sounds great!

These two things are indeed pressure switches according to the EPC:
right fender.jpg

Apparently one is set to 100 and the other is set to 800.

So I wonder what metric units those would be if they're activating the boost lights?

And this is the VSV (vacuum switching valve) apparently:

VacuumSwitchValve.jpg

:beer:

right fender.jpg


VacuumSwitchValve.jpg
 
Thanks Tom!

We'll see if I can figure out what purpose they really serve, and thus if we need them. I like simple....

So this morning, with the motor mounts tacked into place, we removed the vacuum shift actuator (to make more room), and test fit the 12HT/Tranny into the 60, just to make sure the motor mounts were located correctly.

Here is the engine sitting in place. It all lines up, sits right--and looks good to me.
motor mount install 6.jpg

motor mount install 7.jpg


Some pics of the clearance behind the engine. It's tight, no doubt, but it fits!
motor mount install 8.jpg

motor mount install 9.jpg

And with that done, the engine was pulled back out, and then I finish welded the mounts in.
motor mount install 10.jpg

After that, we separated the 12HT from it's transmission, and I'm now heading to town to get the flywheel resurfaced so that next week I can probably start bolting things back together.

Question: Do Canadian HJ-60s use an accelerator cable? Or is there a LHD HJ-61 cable available from Toyota by any chance?

Dan

motor mount install 6.jpg


motor mount install 7.jpg


motor mount install 8.jpg


motor mount install 9.jpg


motor mount install 10.jpg
 
Last edited:
Subscribed. Your family has quite the collection.
Your going to love your 1HZ with a turbo.
Especially a gturbo. Take my advice and buy a grunter extreme....
 
Very nice work! That is one of the cleanest 60's I've seen.

If you want a 12HT toyota manual (and lots of other manuals) click 'Teknik' here (in the left column): http://www.toyota4wd.dk/ . The 2H/12HT manual is then on the top left.
 
My HJ60 has a rod from the pedal that goes through the firewall, connecting on a pivot to a rod that goes vertically to a box at the top of the firewall. This box has a 2 ft cable coming out of it that goes to the intake manifold.

IMG_7382.jpg
 
Question: Do Canadian HJ-60s use an accelerator cable? Or is there a LHD HJ-61 cable available from Toyota by any chance?

Dan .. my HJ60 factory LHD uses some sort of mix cable and rods in the accelerator ( controlling butterfly at TB ) setup ..

But good news is we do have 12H-T LHD so Mr. T must have that part .. dunno if still available ..

in this pic you could see at top left corner part of linkage join ..

12H-T-Vregulator.JPG
 
My HJ60 has a rod from the pedal that goes through the firewall, connecting on a pivot to a rod that goes vertically to a box at the top of the firewall. This box has a 2 ft cable coming out of it that goes to the intake manifold.

Dan .. my HJ60 factory LHD uses some sort of mix cable and rods in the accelerator ( controlling butterfly at TB ) setup ..

But good news is we do have 12H-T LHD so Mr. T must have that part .. dunno if still available ..

in this pic you could see at top left corner part of linkage join ..

12H-T-Vregulator.JPG

Thanks guys! I'm guessing that's what the 12HT uses too.

Any pics of the end that attaches to the butterfly/IP? Mine is a ball, similar to the EDIC motor rod, that snaps on and off. I may have to fab something up with a hot rod accelerator pedal cable, but love to stick with Mr. T's designs.

Bad news on the flywheel: it's got cracks. Looks to have been machined recently, but still has cracks. So I'm on the hunt for a replacement flywheel. I think I've got a line on one, but won't know until next week.

OK, back up to the shop!

Dan
 

Users who are viewing this thread

Back
Top Bottom