Hard top side repair. Then drove it to get some fireworks!!


Navigation
Install the app
How to install the app on iOS
Follow along with the video below to see how to install our site as a web app on your home screen.
Note: This feature may not be available in some browsers.
More options
Style variation
You are using an out of date browser. It may not display this or other websites correctly.
You should upgrade or use an alternative browser.
You should upgrade or use an alternative browser.
What have you done to your Land Cruiser this week? (27 Viewers)
- Thread starter IH8MUD
- Start date
This site may earn a commission from merchant affiliate
links, including eBay, Amazon, Skimlinks, and others.
More options
Who Replied?Holset HE221W with 5.5 cm2 exhaust housing.What turbo are you going with?
firemanj92
SILVER Star
For the earlier years a little nip & tuck is needed. No pics of body mounts because I already packed the OEM ones away in a bin. My only grip is the SAE hardware 2 of which were too short for the running boards. I’ve gone thru the truck and removed the few 13mm & 11mm odd ball nuts and bolts.Nice (and practical) trail cover! Cool rims too!
Pics of the other parts (City Racer floor mat and body mounts)?
OEM 15 wheels painted in Rattle in a can Rustoleum "smoke grey" awhile ago.
Last edited:
POPO AGIE
SILVER Star
That is on my list to do to mine.Replaced my door cards…… or one way to clean out your garage is to install all of the parts you bought for your LandCriuser and install them!
View attachment 3047415
View attachment 3047417
View attachment 3047418
View attachment 3047419
View attachment 3047420
View attachment 3047421
View attachment 3047422
View attachment 3047426
something new this way comes 12V and 24V

@POPO AGIE
if you buy your door cards from Mr Toyota they come with the metal clips. You may not need the extras. You’ll need 22 plastic caps.
devo
if you buy your door cards from Mr Toyota they come with the metal clips. You may not need the extras. You’ll need 22 plastic caps.
devo
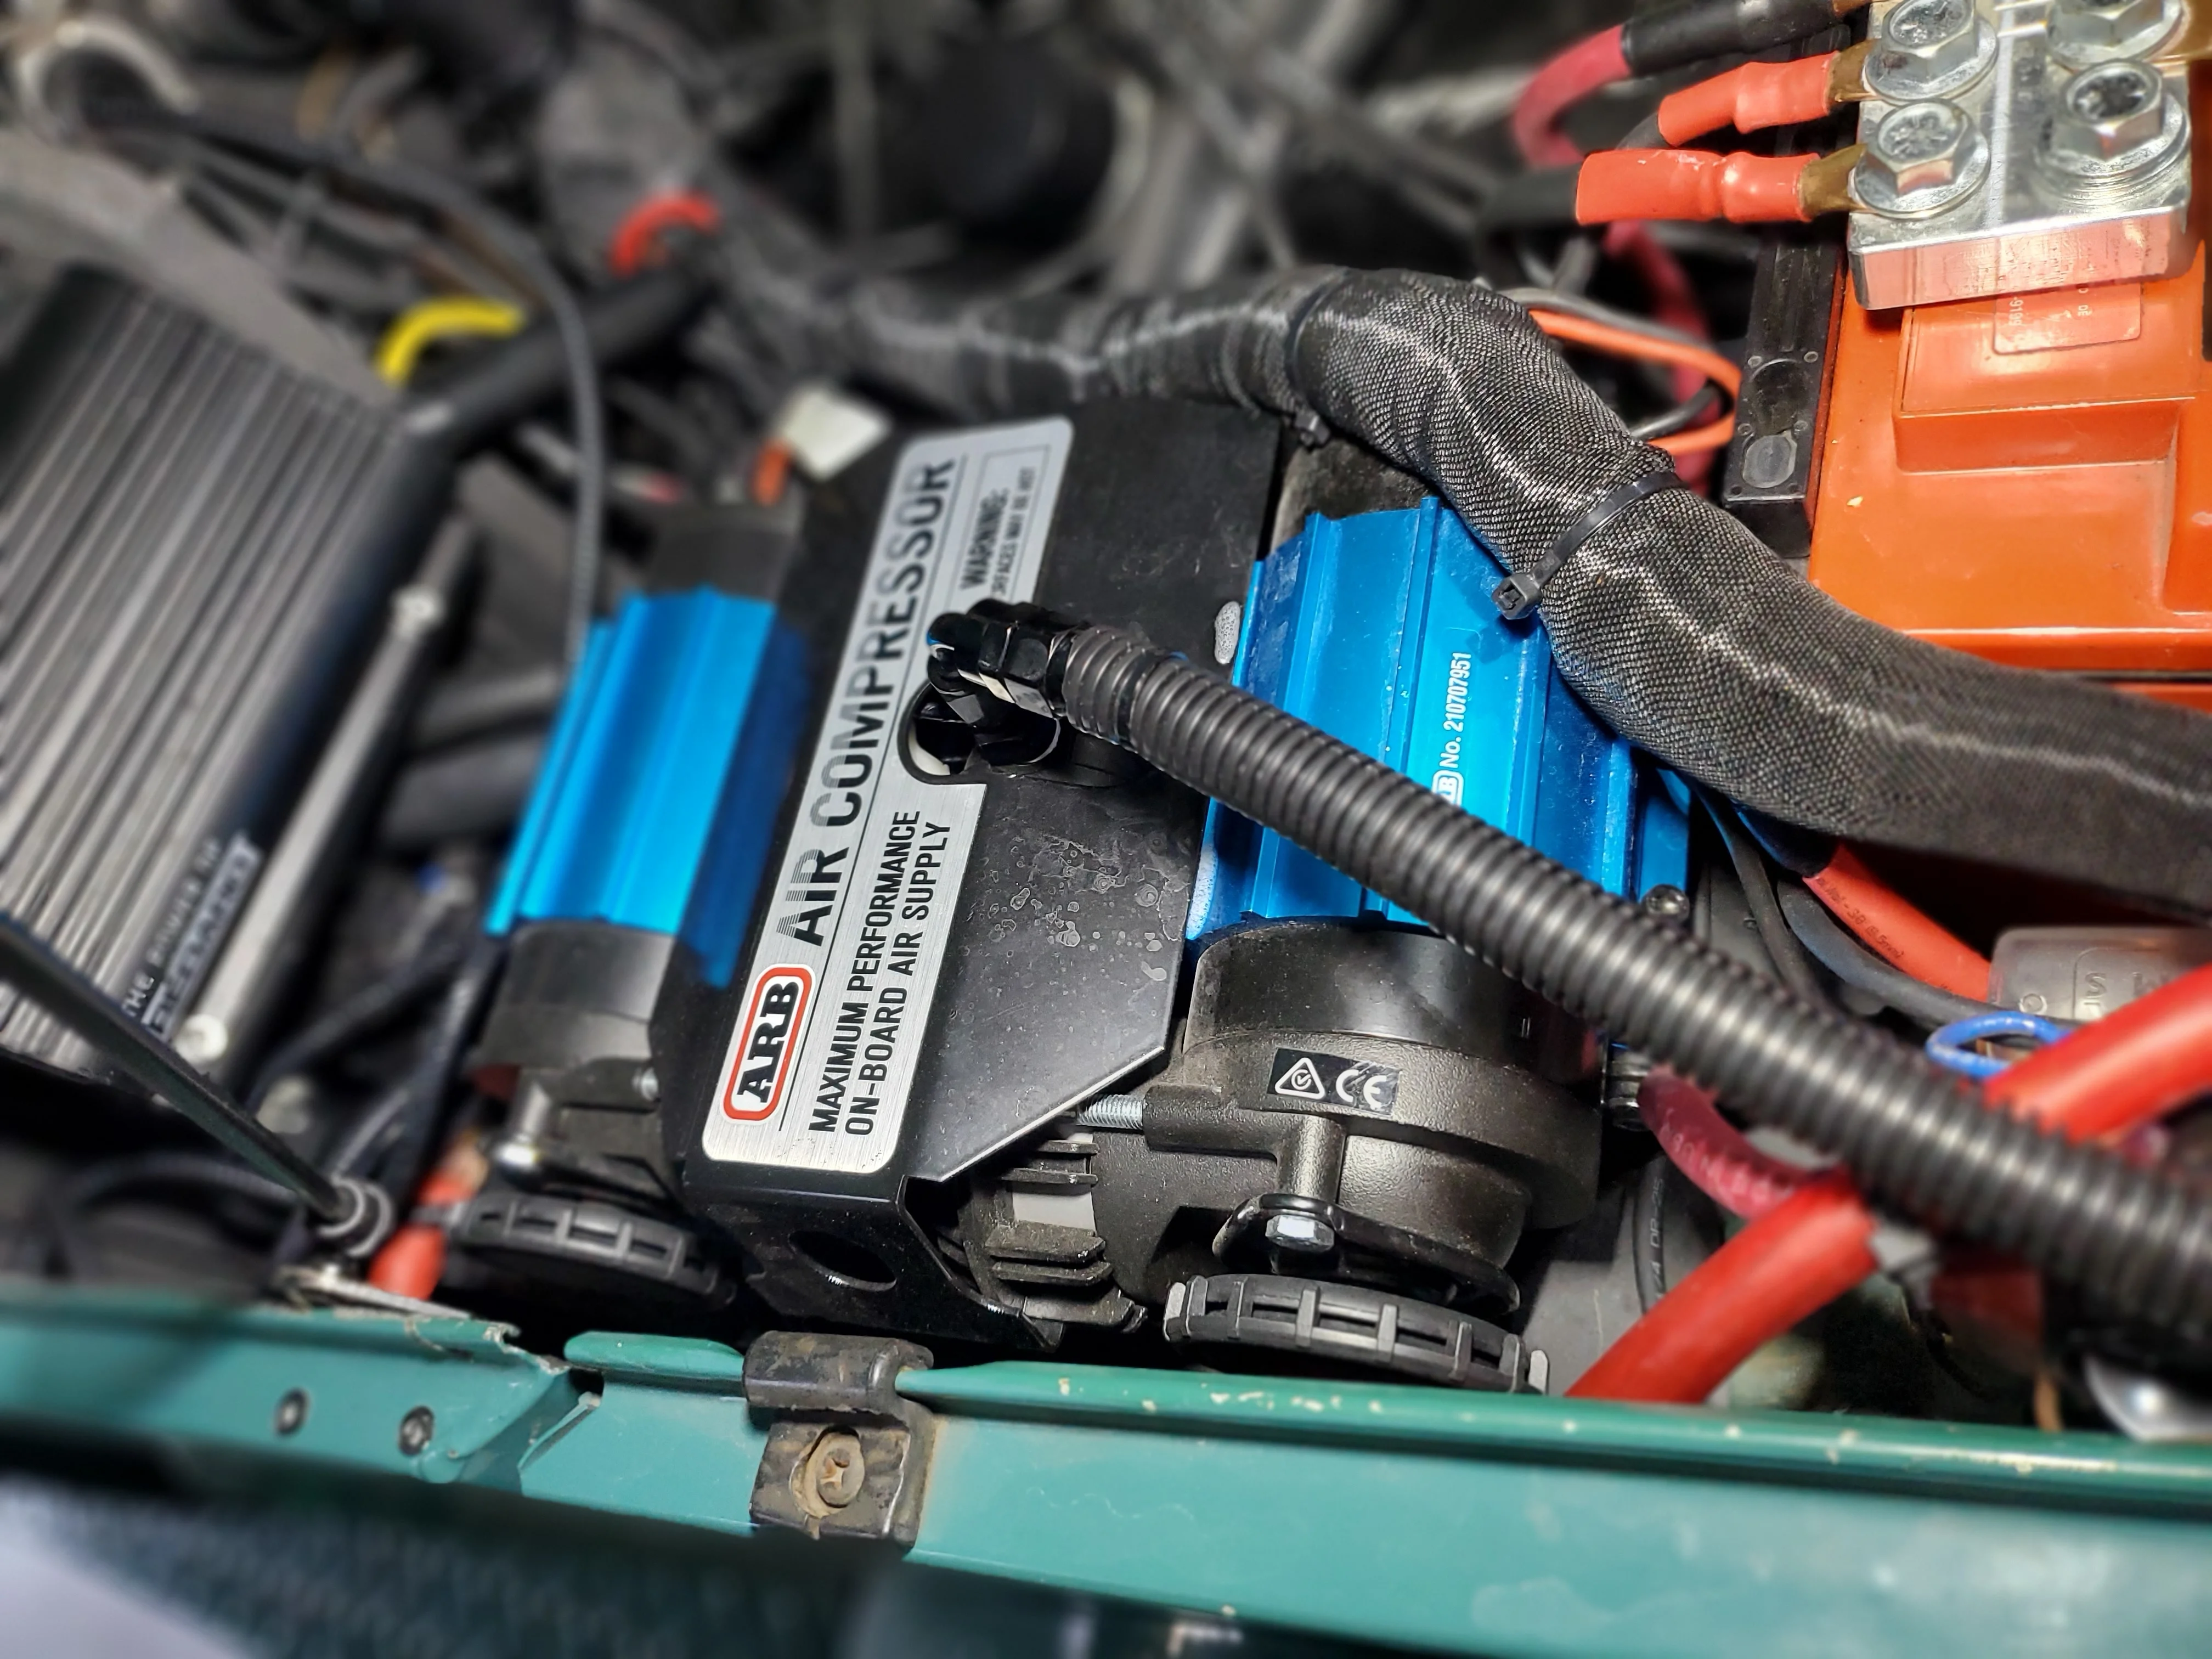
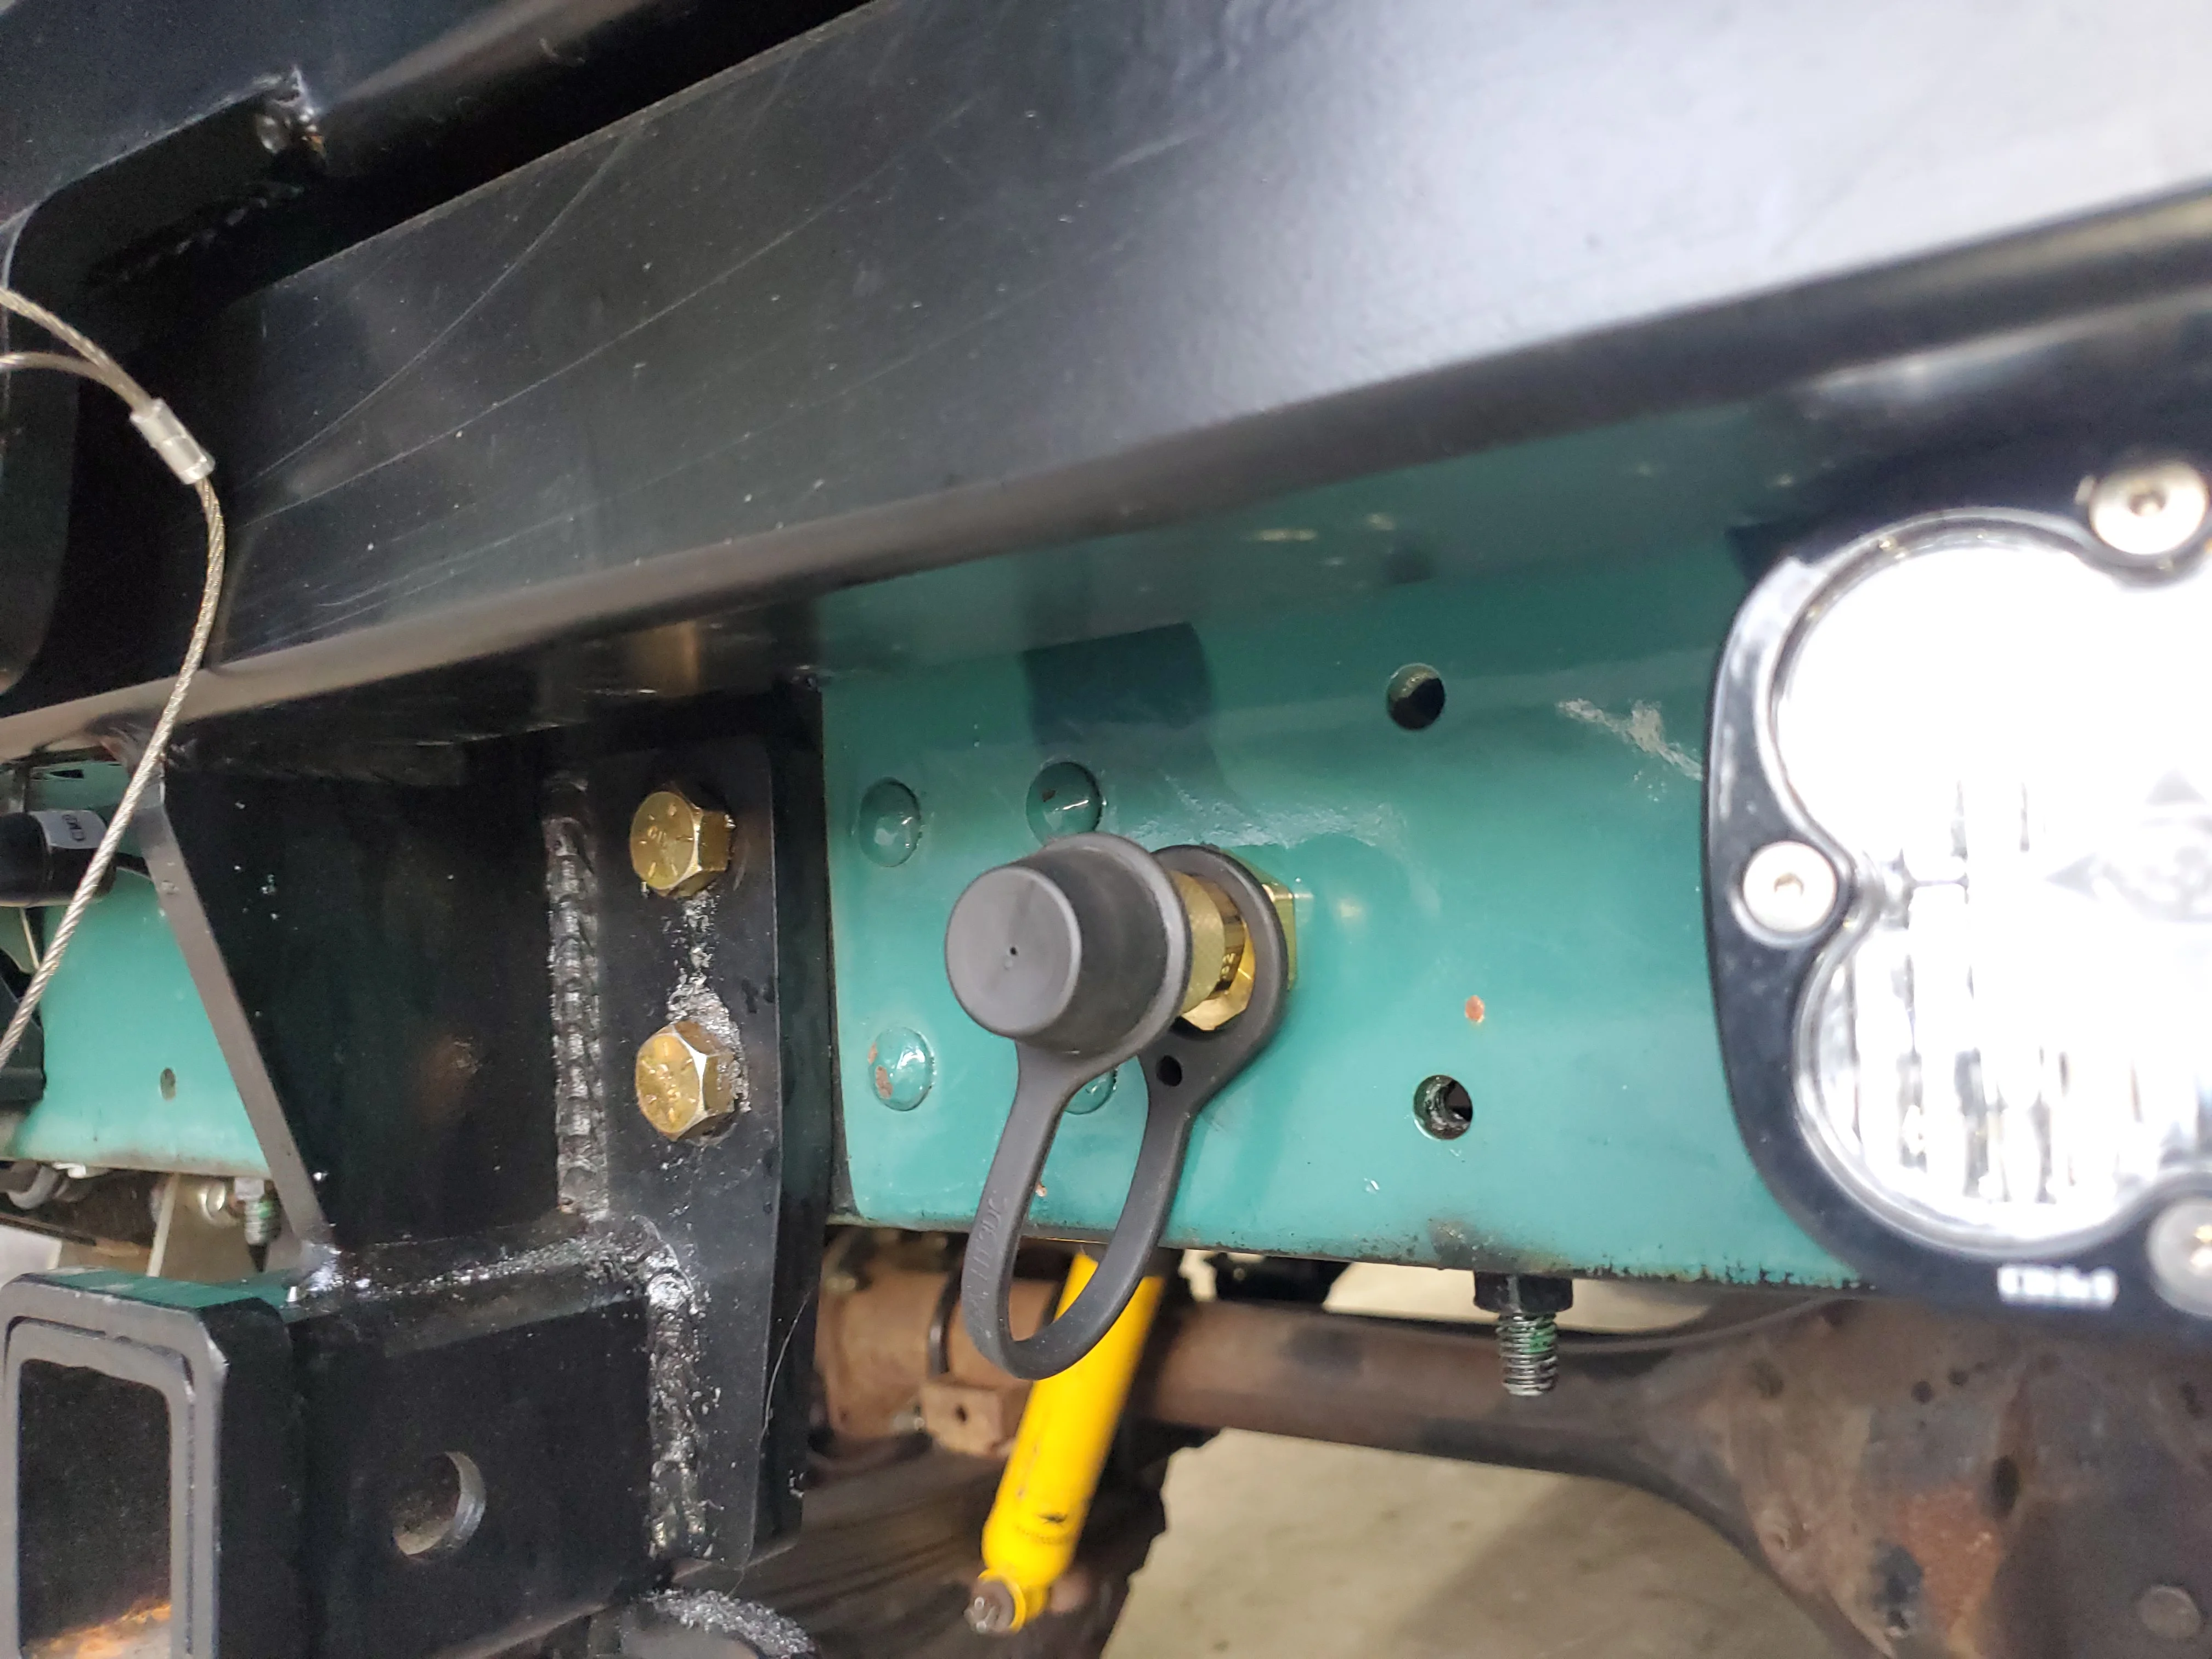
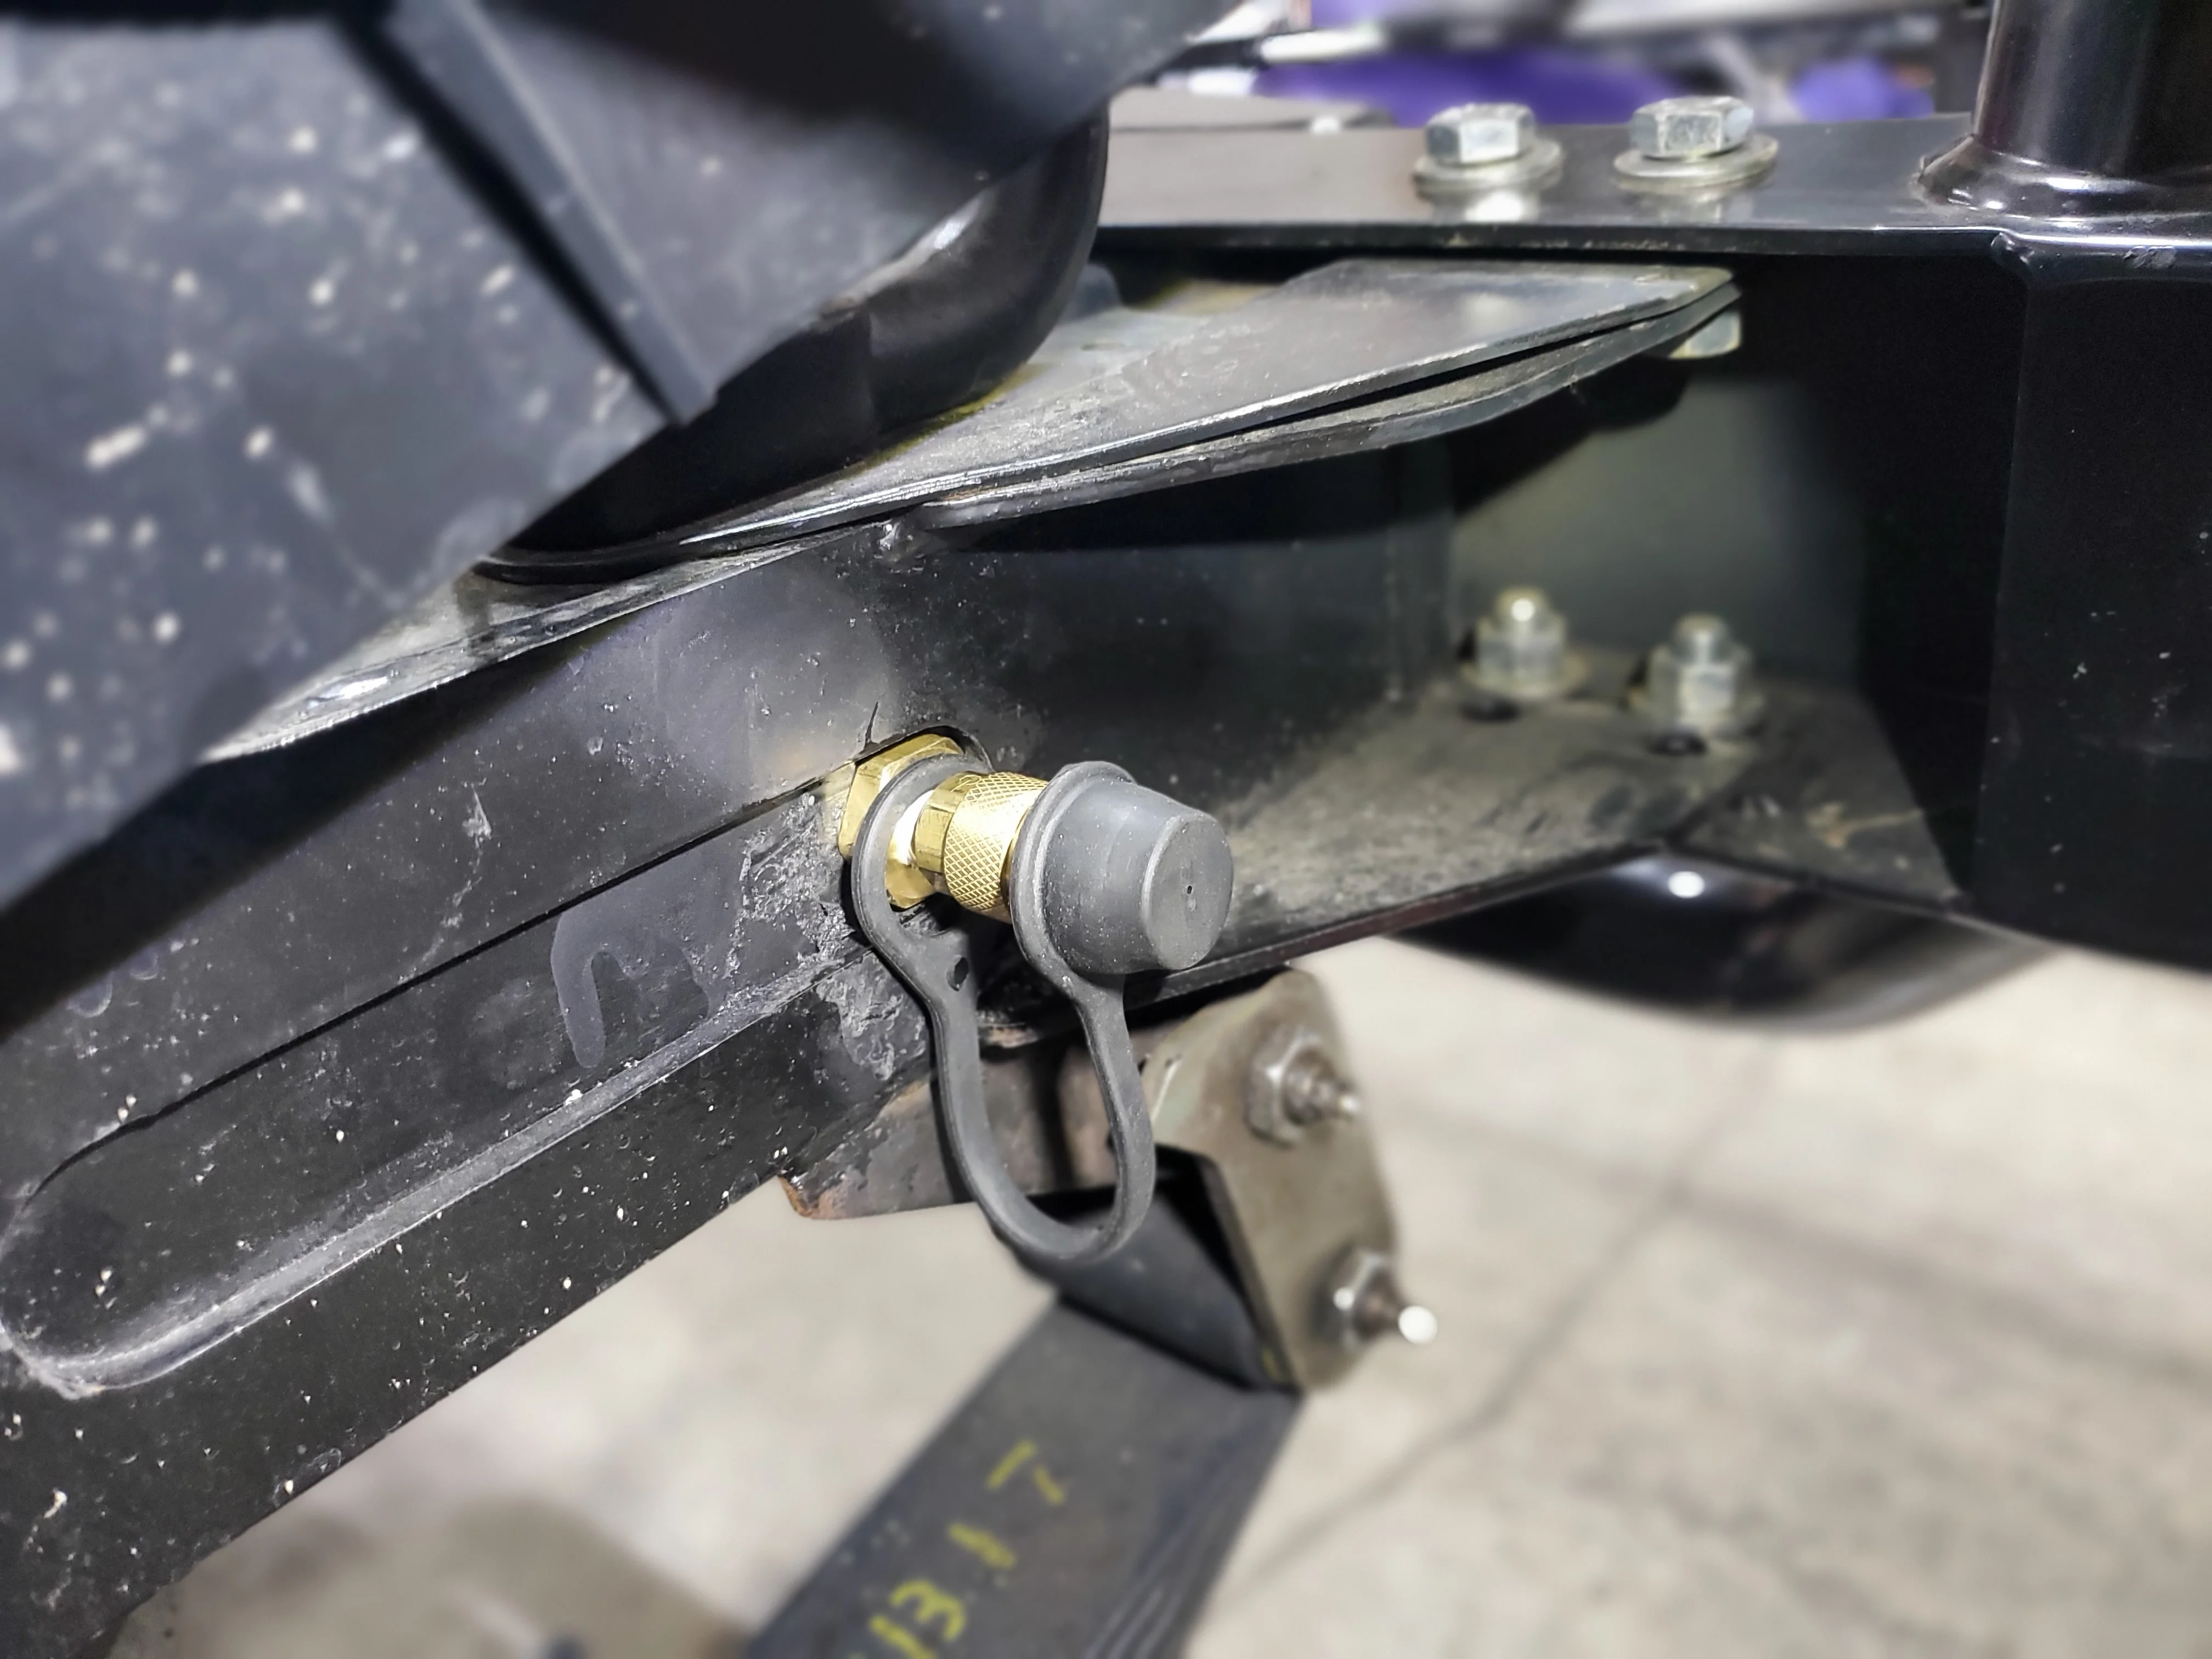
Finished my onboard air install.
Everything starts with ARB twin cylinder air compressor. I built a shelf to mount it on and it turns out I've bolted a lot to this shelf including the fuse for the switch pros, breaker for the stereo amps, relay for the winch/battery switch-over and numerous wire harnesses mounted below.
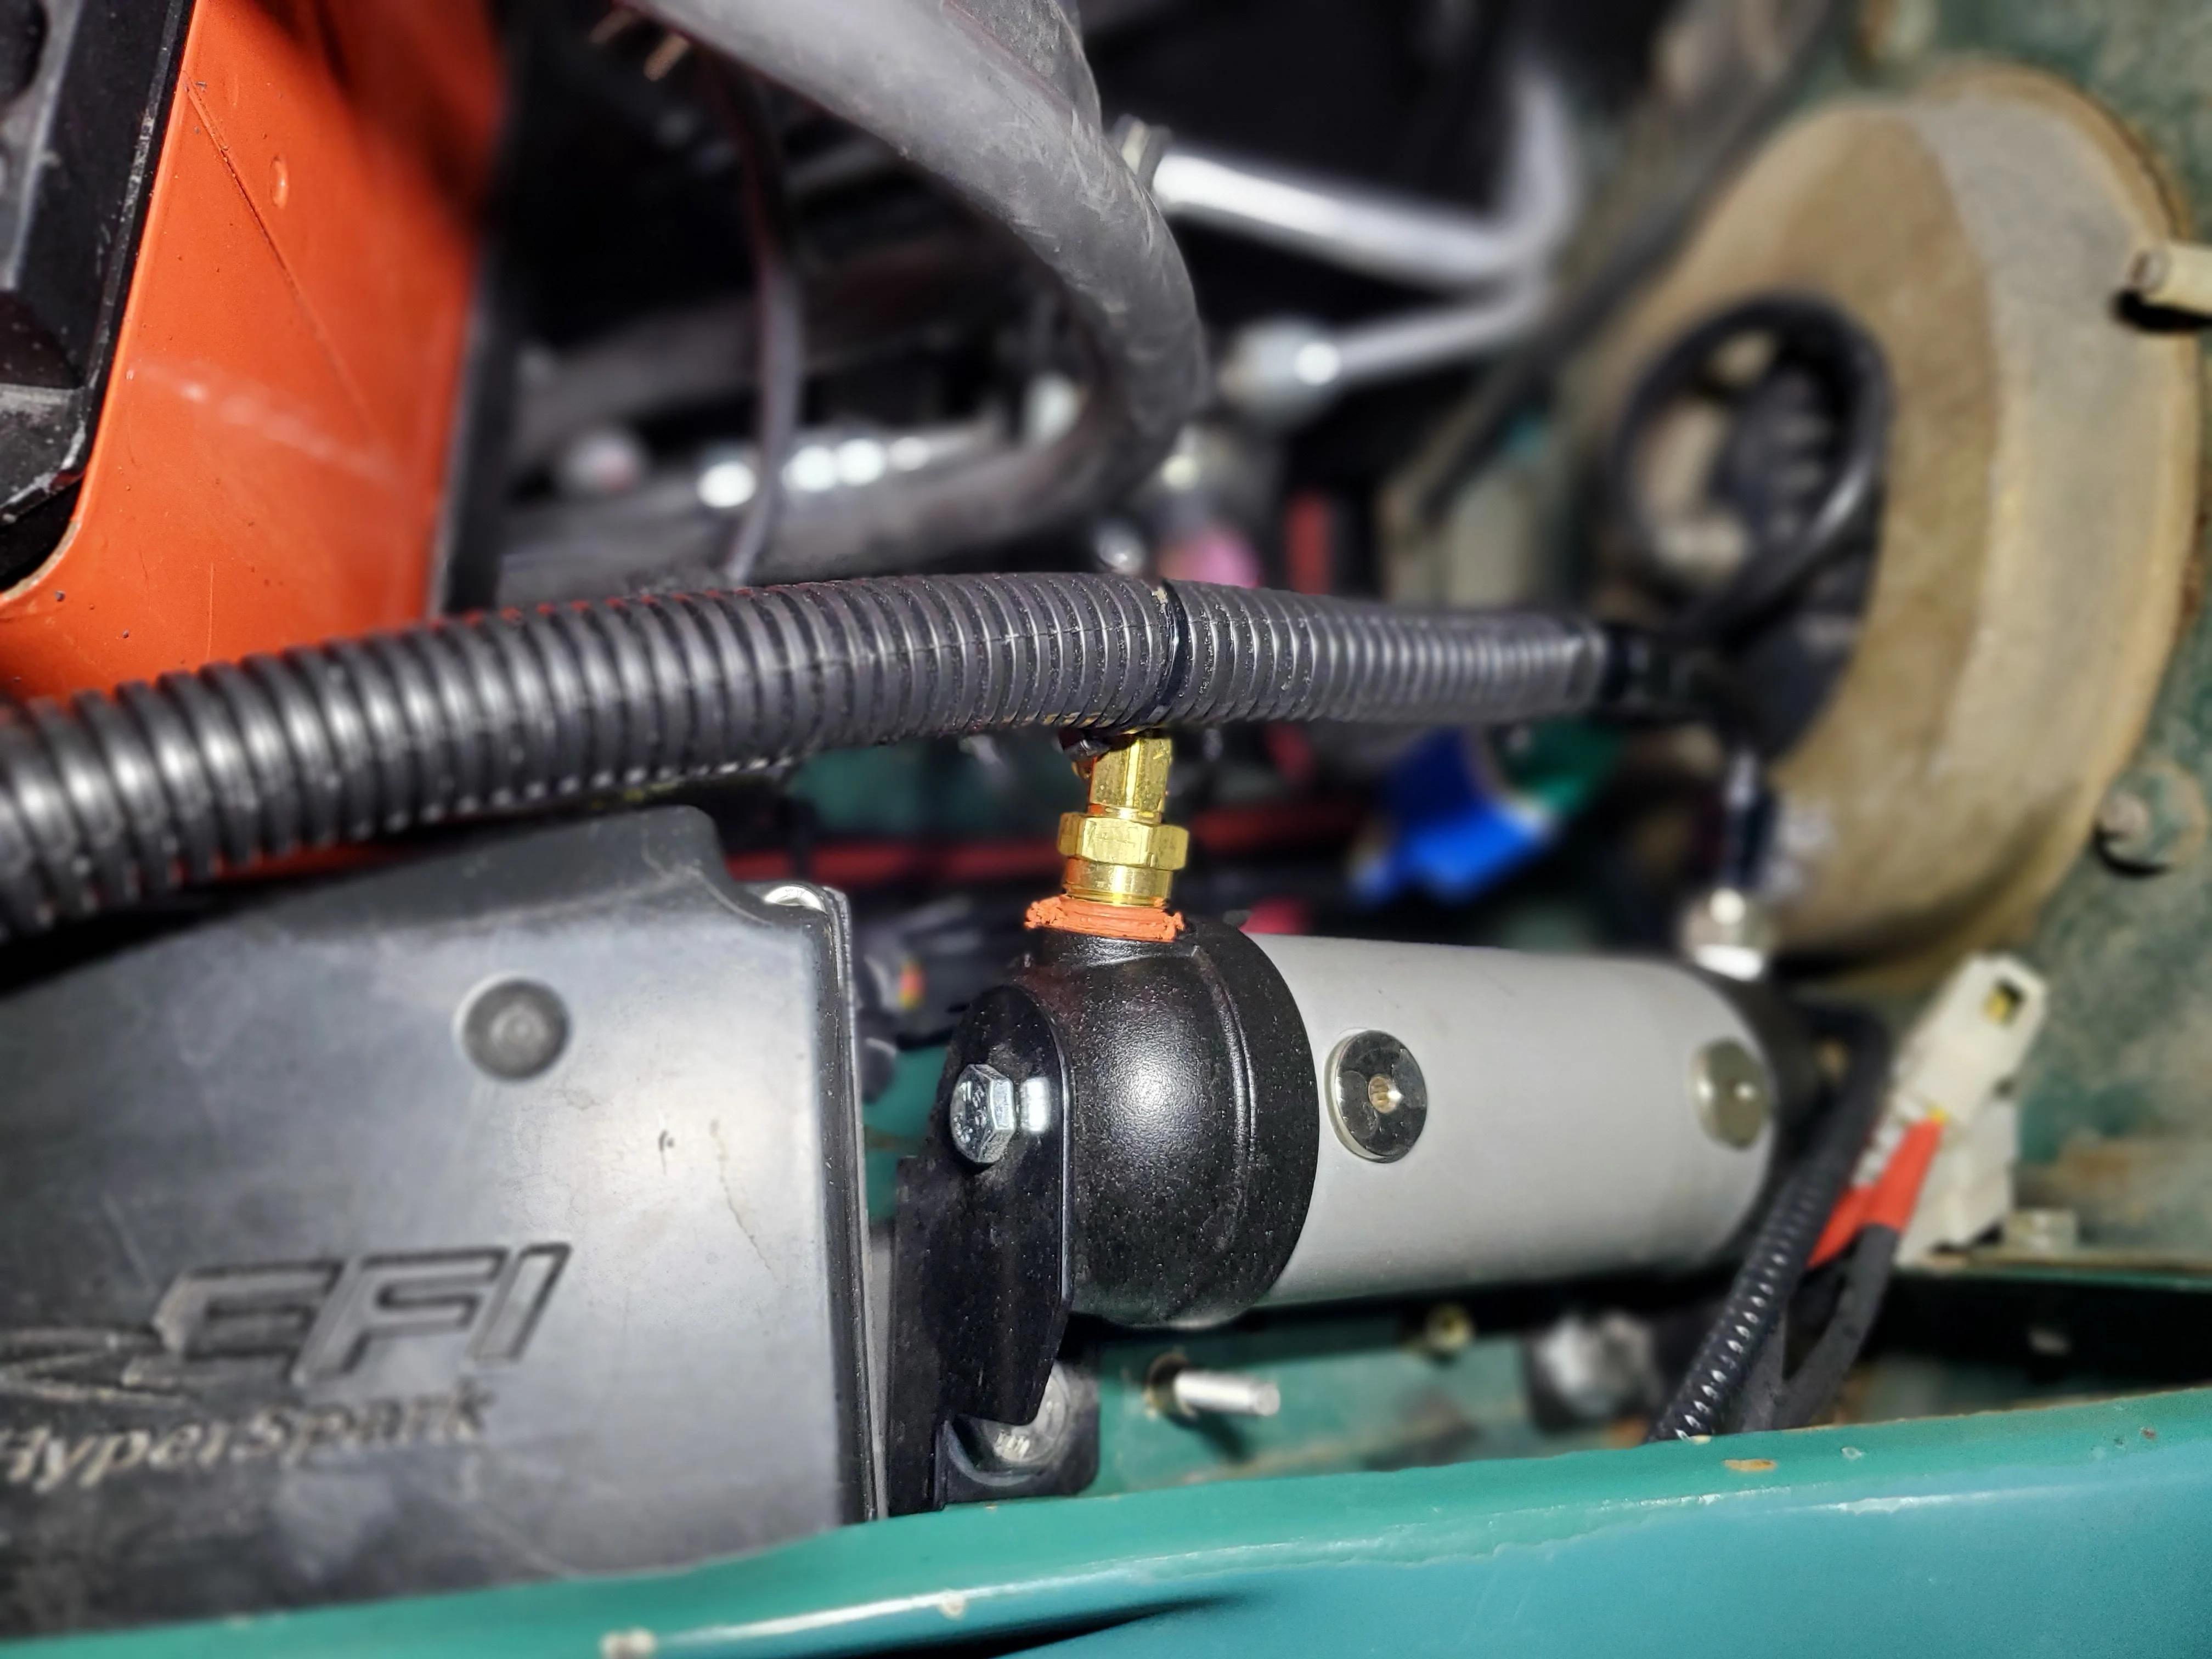
I ran stainless steel 1/4 tube to the air locker manifold. Since it crosses the red-arc battery switch, had to cover with a cheap wire split loom. The manifold is wired up for ARB lockers, just need to buy and install them.
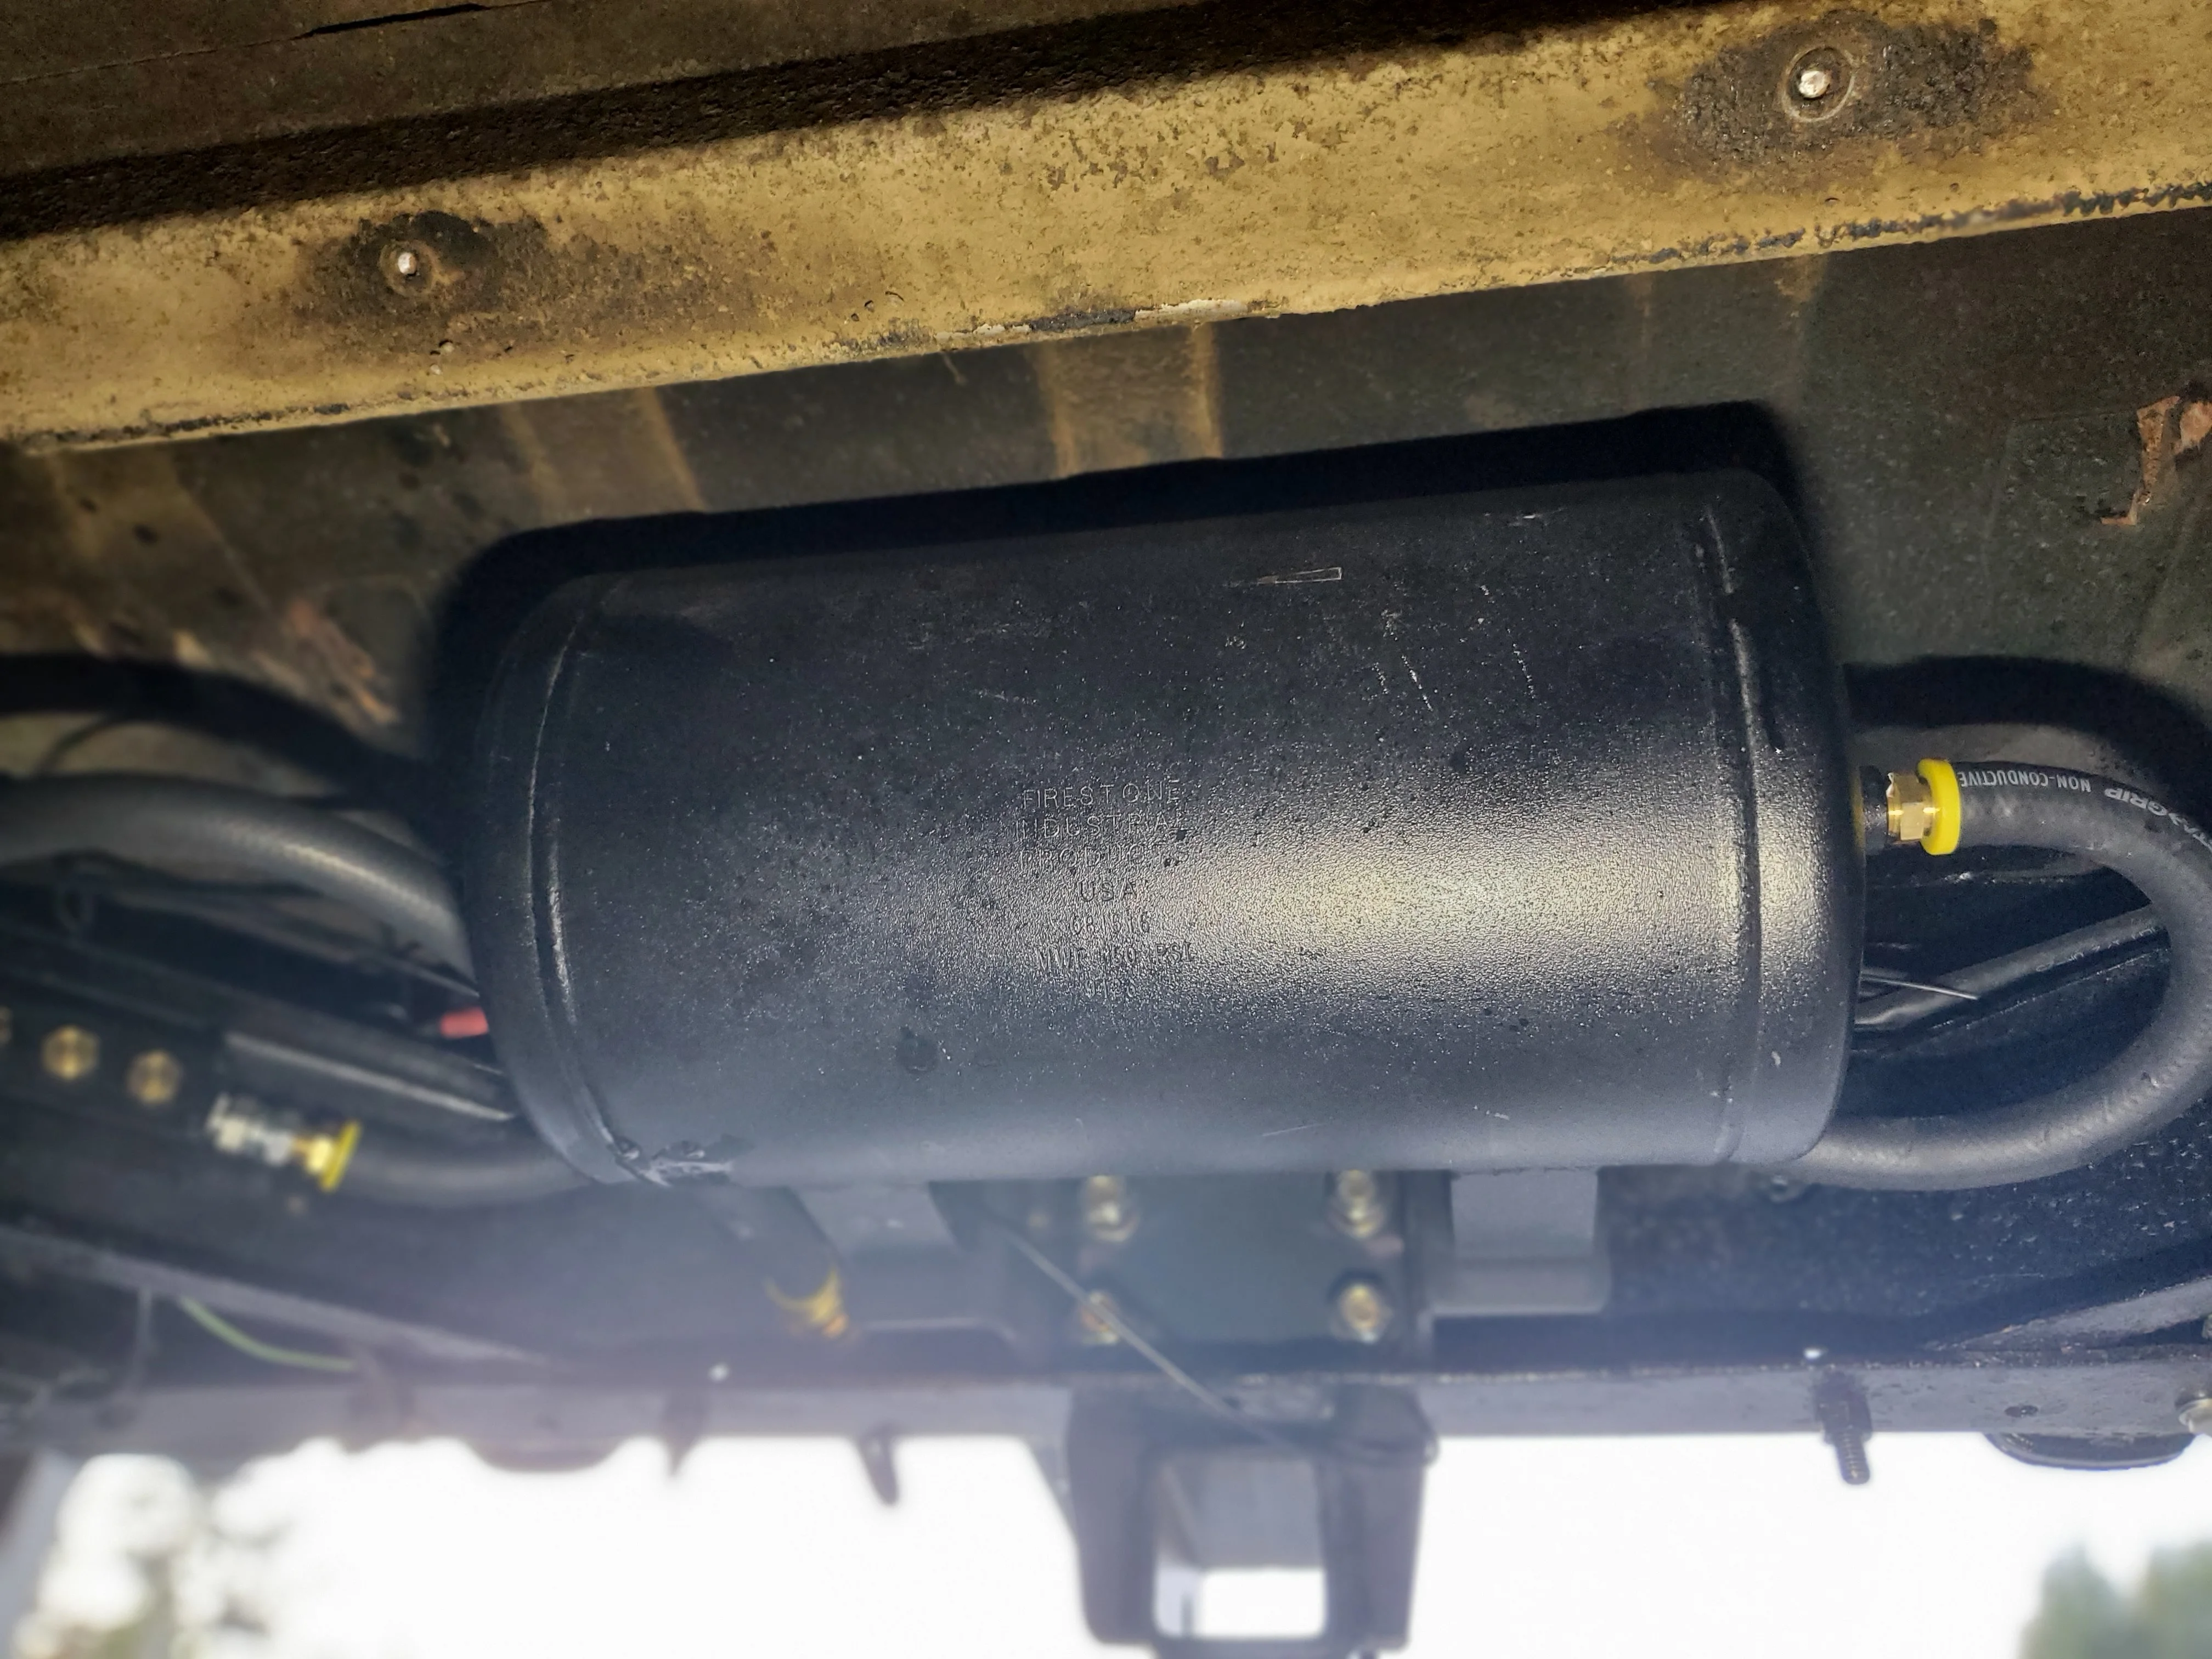
I used DOT air brake line to run air to a rear firestone 2 gallon air tank mounted to the four bolts that hold on the hitch receiver. Overbuilt a 3/16th inch bracket to hold the air tank.
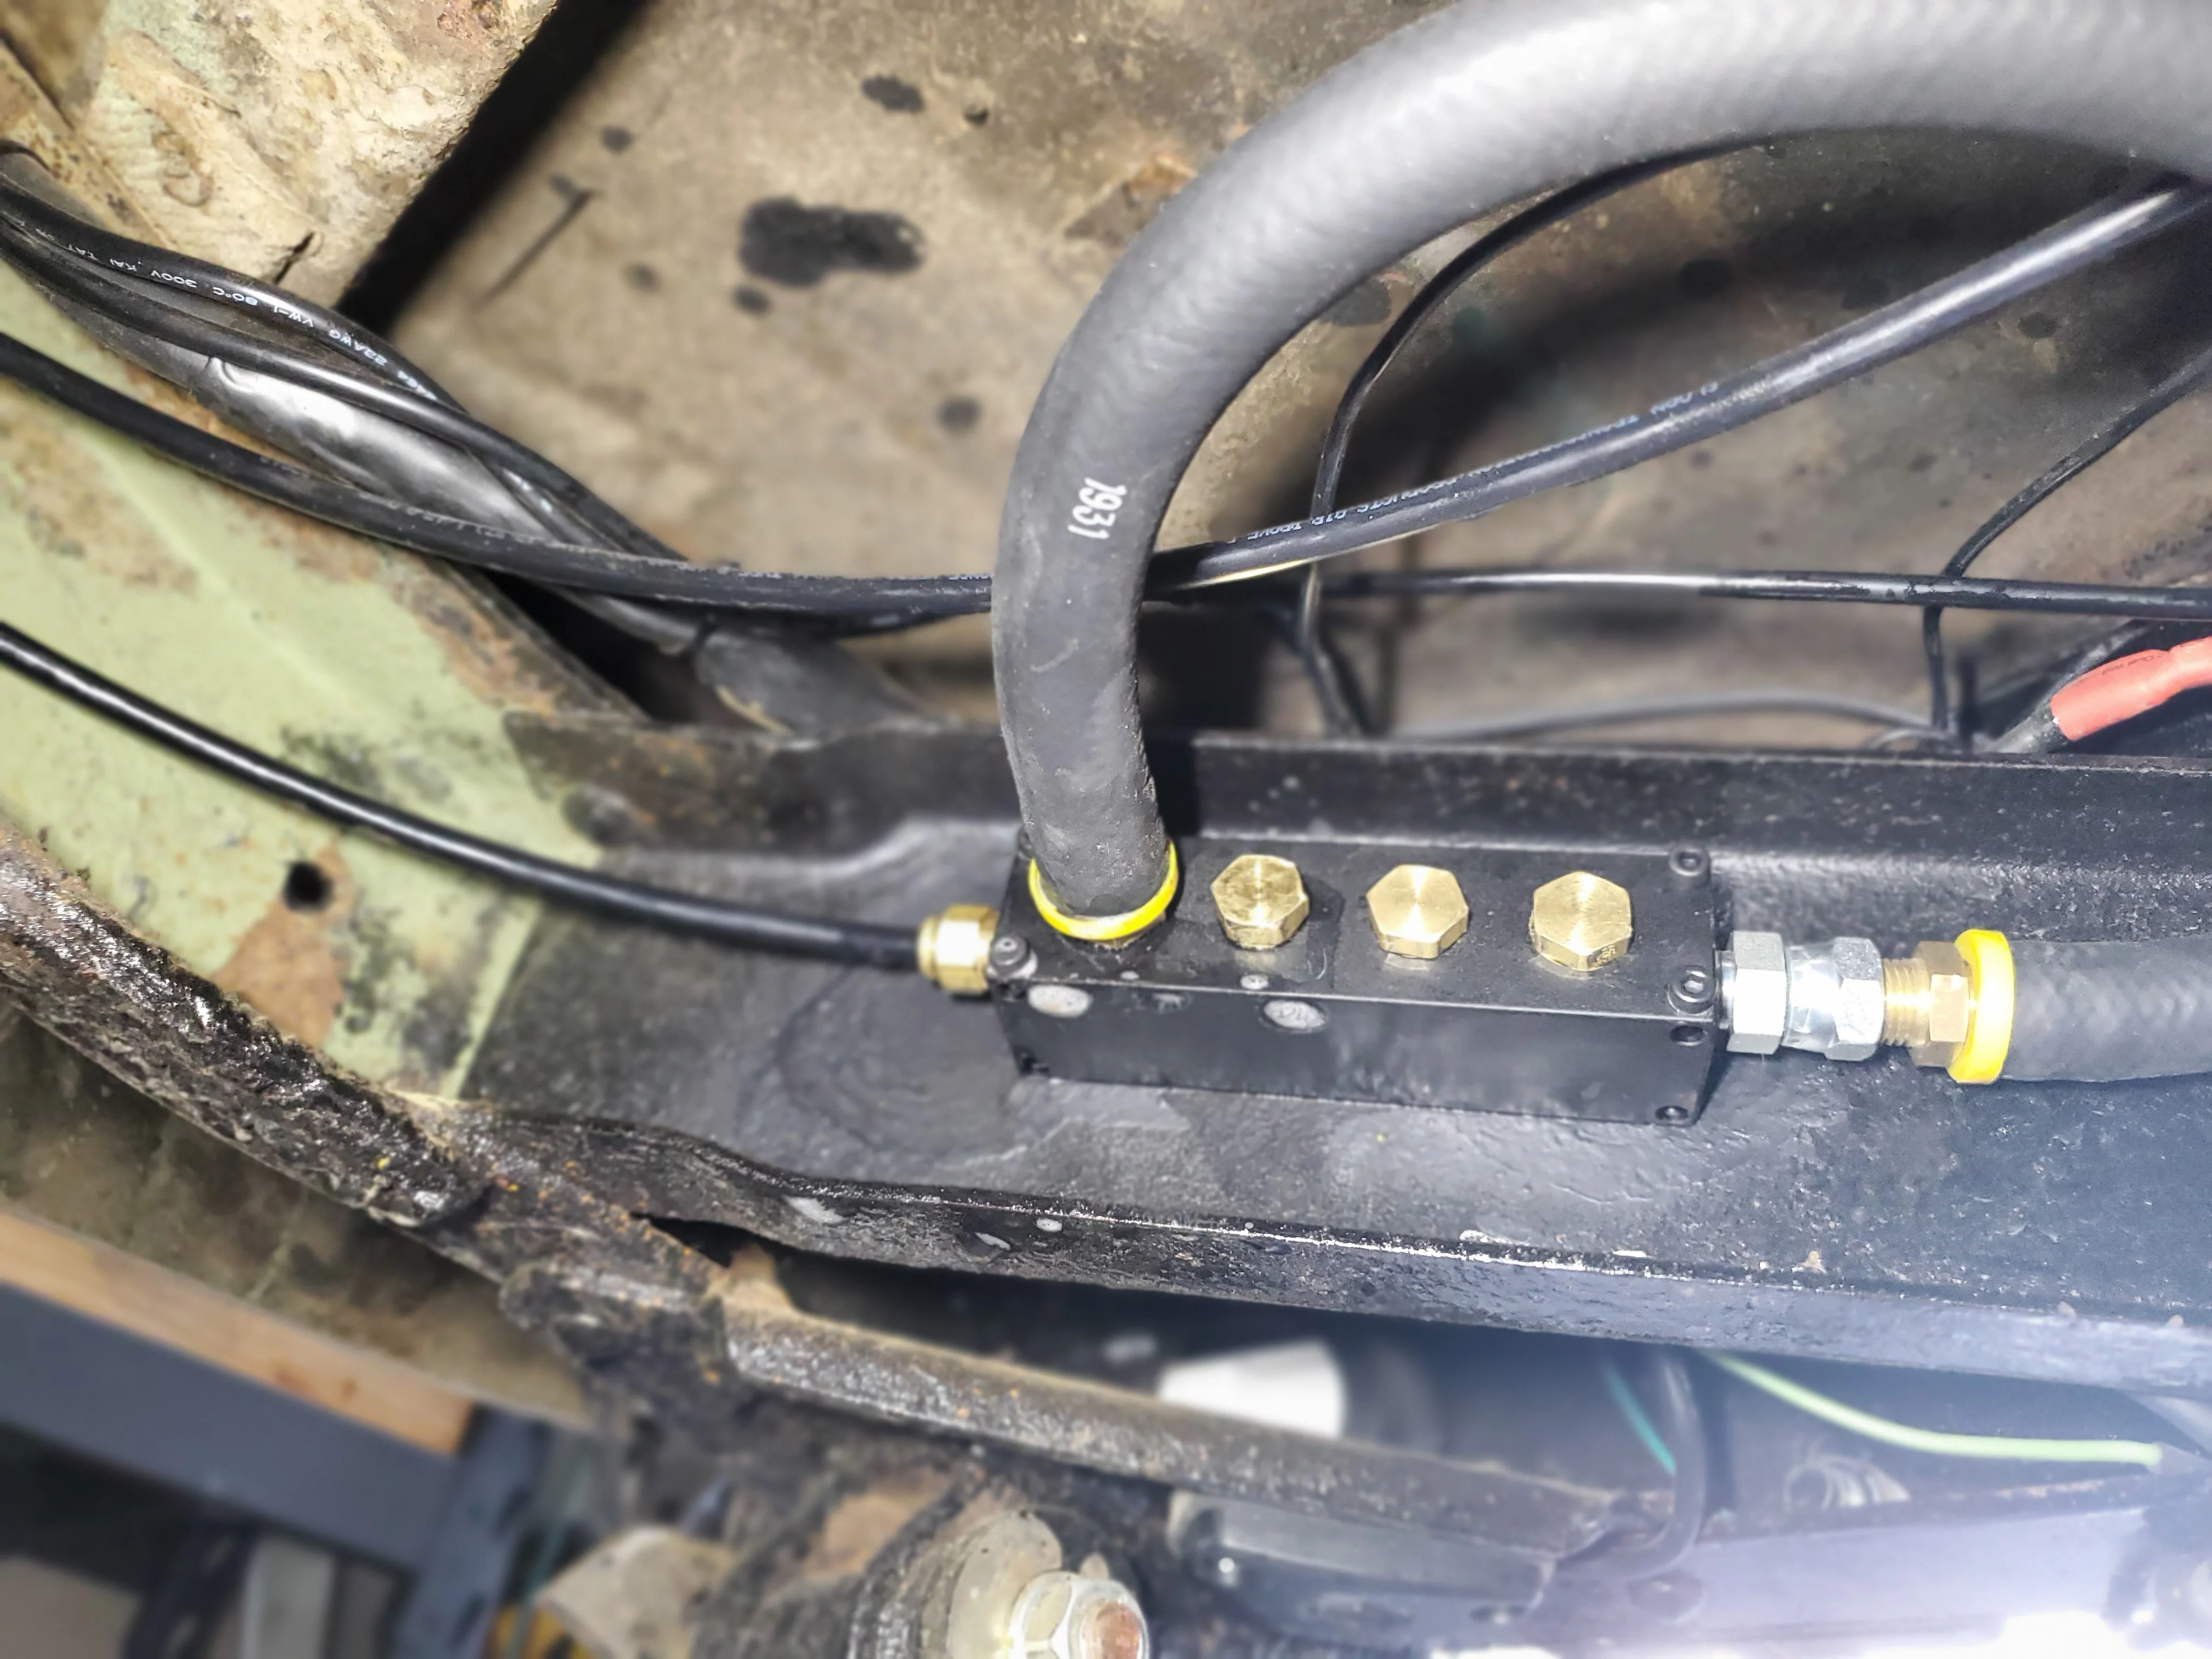
I wanted a large volume of air to seating beads so I ran a much larger tube from the tank to a wits end 6 way manifold and then larger tube to a brass bulkhead fitting in the rear bumper.
On the rear bumper, install a quick disconnect for airing tires, seating beads or air tools.
I then ran a second DOT air brake line back up the frame rail to the front where I came out below the front bib and through the frame rail. Installed another brass bulkhead and quick disconnect. With the smaller line, this is mainly for tires.
The things I liked about this install include, the awesome push connects for the DOT brake line and barbed push connects for the larger tube. I was also impressed with the wits end manifold, it was high quality and came with mounting hardware.
I wasn't happy with the size of the hold I cut in the inside frame rail to fit a 1" socket to tighten the bulkhead connector. Also don't like how high the 90 degree elbow sticks above my air compressor. I might redo that line with the DOT brake line and push connectors.
Everything starts with ARB twin cylinder air compressor. I built a shelf to mount it on and it turns out I've bolted a lot to this shelf including the fuse for the switch pros, breaker for the stereo amps, relay for the winch/battery switch-over and numerous wire harnesses mounted below.
I ran stainless steel 1/4 tube to the air locker manifold. Since it crosses the red-arc battery switch, had to cover with a cheap wire split loom. The manifold is wired up for ARB lockers, just need to buy and install them.
I used DOT air brake line to run air to a rear firestone 2 gallon air tank mounted to the four bolts that hold on the hitch receiver. Overbuilt a 3/16th inch bracket to hold the air tank.
I wanted a large volume of air to seating beads so I ran a much larger tube from the tank to a wits end 6 way manifold and then larger tube to a brass bulkhead fitting in the rear bumper.
On the rear bumper, install a quick disconnect for airing tires, seating beads or air tools.
I then ran a second DOT air brake line back up the frame rail to the front where I came out below the front bib and through the frame rail. Installed another brass bulkhead and quick disconnect. With the smaller line, this is mainly for tires.
The things I liked about this install include, the awesome push connects for the DOT brake line and barbed push connects for the larger tube. I was also impressed with the wits end manifold, it was high quality and came with mounting hardware.
I wasn't happy with the size of the hold I cut in the inside frame rail to fit a 1" socket to tighten the bulkhead connector. Also don't like how high the 90 degree elbow sticks above my air compressor. I might redo that line with the DOT brake line and push connectors.
Last edited:
I’d run your wires under the manifolds…Installed PS, then conquered the rough terrain of our Costco parking lot. Diaper runs couldn’t get any better than this
View attachment 3047055View attachment 3047056
It avoids burnt leads and is much tidier IMHO.
POPO AGIE
SILVER Star
Devo,@POPO AGIE
if you buy your door cards from Mr Toyota they come with the metal clips. You may not need the extras. You’ll need 22 plastic caps.
devo
Thanks for the tip
Here are a couple more…..
i got the butyl tape from Jeff Beezos
and the vapor barriers from @GA Architect
easy and rewarding job . Plus there is a lot of other stuff to tend to once the door card is off.
devo

i got the butyl tape from Jeff Beezos
and the vapor barriers from @GA Architect
easy and rewarding job
. Plus there is a lot of other stuff to tend to once the door card is off.devo
Changed fuel filter, adjusted the throttle cable, and parallel parking in NYC - both drivers had space behind them, so I wasn’t blocking them in!
Tourists were filming the park, so I had to make it!
View attachment 3049321
I regularly do the same with my 21’ long ambulance. A standard space is only 21’ long so I’ve got very good at parallel parking. I’ve had people yell at me saying I hit their car… when I called them on it, they acknowledged I was close… very close.
Changed out the radiator on my '82 FJ43 this weekend. A previous owner must’ve stripped out the radiator bolt and covered it in caulk or something because it was nowhere to be found when I began the flushing process:
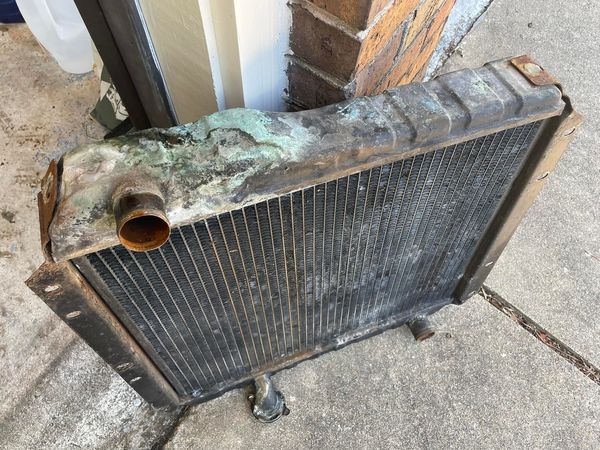
Got an OEM unit installed with a few new hoses and it's running great:
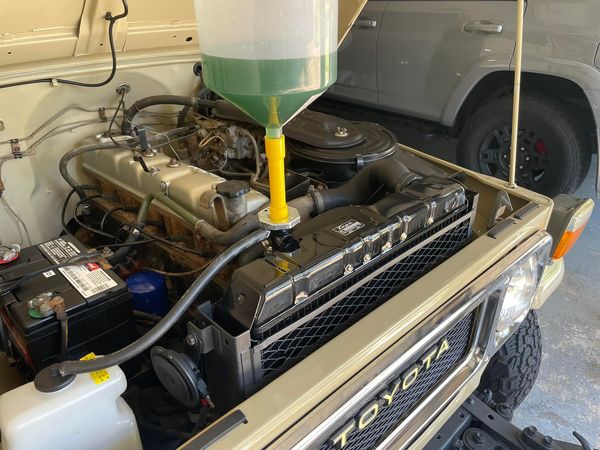
Got an OEM unit installed with a few new hoses and it's running great:
6f40j9
SILVER Star
Struggled with valve adjustment. Got impatient and installed the fan, radiator, hoses, etc.
Thought about it for a couple days, asked around.
Pulled the radiator back out, loosened up the valves and started over.
Spun the rotor 180*, readjusted the valves, and started putting stuff back on.
It’s not going to be ready for the PMC swap meet next weekend but it’s a lot closer than it was 2 days ago.
Hard top side repair. Then drove it to get some fireworks!!
View attachment 3047616
View attachment 3047617
View attachment 3047618
View attachment 3047619
View attachment 3047620
View attachment 3047621
Any more pictures or info on how you’re bending those patches? This is in my future but the complex curves there are intimidating.
Yes the energy suspension body mounts make a noticeable difference!Trail cover from Dirtroad tops aka Anchor Stitch (@Julie2006) .
City Racer floor mat. (@Racer65)
Energy Suspension body mounts. Shout out to Energy Suspension’s Scott for taking care of me. I bought the kit from a non approved vendor, it was missing parts, they warrantied it and replaced those items! I cannot believe what a difference it made the ride. I was doubting other’s testimonies. It really is night and day difference! I just wonder how they compare to Daystar with Metric hardware(?).
(@LOPsCruiser)
View attachment 3047583
Daycare was closed for an extra day after the 4th so I took the day off to watch the kids. My oldest wanted to wash a car, so the 40 got volunteered while the youngest was napping.


