What have you done to your Land Cruiser this week? (31 Viewers)

This site may earn a commission from merchant affiliate
links, including eBay, Amazon, Skimlinks, and others.

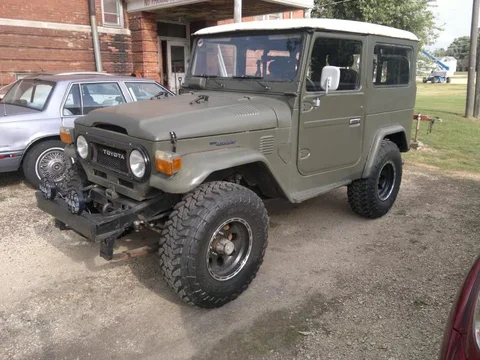
What's the story with the poor "fit" on the LH-side between your hood, bib and side apron?

I noticed the same thing

when my truck got the body lift, Tools found that the battery tray and radiator supports prevented the aprons from lining up with the hood properly - removing both helped align them
 
I noticed the same thing

when my truck got the body lift, Tools found that the battery tray and radiator supports prevented the aprons from lining up with the hood properly - removing both helped align them

yes the hood did not line up after the body lift. I got a h55 on my fj40.
never tryed to fix it. :meh:
 
:lol: my H55 isn't even in yet
 
... and swapping the shotgun broken windshield.

I dunno Matt, I'd be tempted to leave the windshield as-is to discourage suitors/boyfriends. :)

Though a 40 itself can be intimidating to some. I never could get either of my girls to drive a stick, but I've taught a couple of girls (friends of our family) how to drive in my 40, and they're both whopping proud that they can do something that the majority of the boys in their high school cannot.
 
:) Wheeled it!

1238151_10200933075314036_682465582_n_zps0d3da9c0.jpg
 
lostmarbles said:
They took a lengthy 2 weeks to get to me .... but I think that delay was probably caused by the sender omitting their details from the package (which probably made customs take an interest in it because it came stamped with the message "security screened".)

Yeah. The sizable heat output of the old ones sure surprised me because they're not even bright.

When I'm waiting in the vehicle queue for the ferry (which can be up to an hour) at night I often like to get out a book to read. So the new LED bulb will be appreciated.

(New Zealand consists mainly of just two big islands and I'm often travelling between the two. I did a return trip just yesterday for that matter, but without the vehicle for a change...)

:beer:

If yours was an '81 you'd have the hole on both sides. I put one on each side of mine and I can easily read at night.
 
Thanks to Rainman , located a plater in Nashville to do my yellow zinc.
IMG_0089.webp
IMG_0090.webp
 
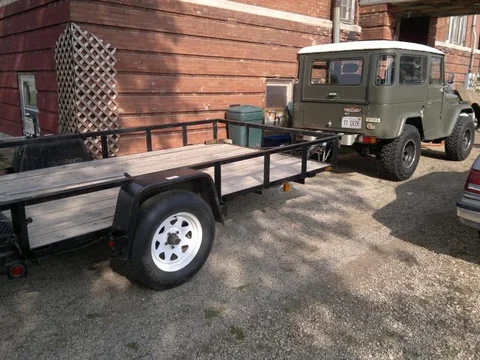
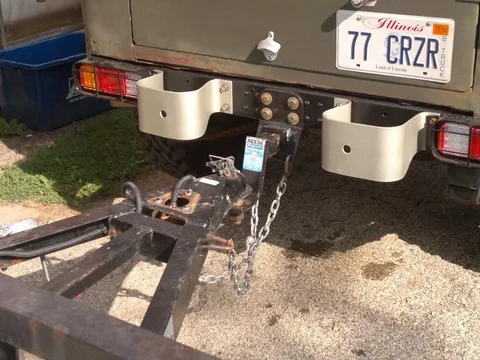
Finished the new Toyo MT's , JTO/Eagle alloys and setting it up for trailer duty on occasion . Need to finish wiring the rear up , brake control/powered trailer convertor , ect .

trailer test.webp

trailer test 2.webp

toyo tires.webp

Trailer was finished last week - braking kits/led's and reverse floods are all done now . Be a lot easier to stop it even unloaded as empty that utility is nearly 1,000lbs . Taco pulls it fine but it even has a bit of braking issues so the trailer got 10" brakes installed , what a difference .
Sarge
trailer test.webp
trailer test 2.webp
toyo tires.webp
 
Bled my rear brakes and adjusted them, now my rear doesn't try to pass me on a hard stop. Also had the ECU code dumped for the 3FE to see what is going on in there.
 
Finally got around to adjusting the fit of my OCD Sunbrella top. Had to overcome a couple of obstacles and still have one to go.

First obstacle was my window channel was nearly touching my DS wiper nut. This made it impossible to get the top on. I ended up cutting a notch into channel and was able to get the top on.

The next obstacle was that my top was fitting a bit short in the back. I ended up cutting about 1/2" off the rear bow and trying my best to get the bows snugged up.

Finally I couldn't get my doors to shut. It turns out it was b/c I was still using the Bestop brackets and they were holding the door frame support too far out for the doors to close. I ended up drilling slots into the bracket to cinch up the space. This solved the problem for the PS door but I still need to adjust the DS door.

After all this, I was happy with the fit of the top and started to measure where I'd mount the footman loops. The last thing that I did was plasti-dip each footman loop. It took me awhile to measure everything out and drill pilot holes to mount the footman loops with self-tapping #10 sheet metal screws. These were a perfect fit for the footman loops. I may choose to replace the screws with bolts in the future, but for now this will do the trick.

Here's the before pic...measure twice, cry once and all that...


And here it is all done...


Now I just need to get myself in line to borrow the traveling grommet tool!:bounce::bounce2:

Also thanks to the guys who offered some advice via PMs.
 
Last edited:
Went from po hack


ForumRunner_20130917_085815.webp


To


ForumRunner_20130917_085957.webp

I have running and brake lights now have to get turn signals back
ForumRunner_20130917_085815.webp
ForumRunner_20130917_085957.webp
 
I finally got it back together.. Metal tech cage and seat cradle and new seats.

Before:

There are pics of the old cage (partially made of chain link fence posts)here: www.outlawdragradial.com/lc13

The metal tech cage is sweet, I highly recommend it. I cut/notched and welded it all by myself, we'll I had the help of a ratchet strap or two... I had it powder coated silver and I think it turned out perfect. :beer:

Sweet cage Drag Racer! I love your '40, the black looks awesome! I would hate to keep it clean :-)
 
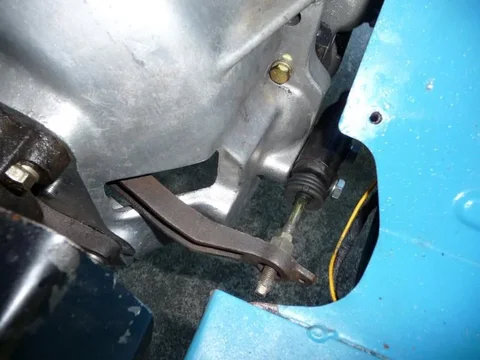
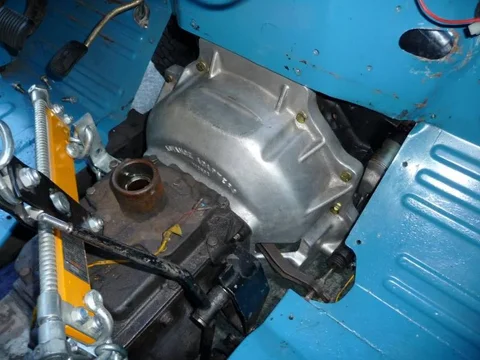
Hate to use the "Finally got around to" line, but I just got the crappy scatter shield conversion bellhousing replaced with the AA unit I've had for more than a year. It was fairly straight forward, but had a few surprises for me. The new bellhousing (AA) was about 3/8" thicker from mounting surface to surface. What I didn't realize when I ordered the AA pilot bearing (#716154) was that it is "extended", and sticks out of the SBC crank by about....you guessed it, 3/8". I also ordered a new pivot ball (#716180) at the same time, and it was about 3/16" shorter than the one coming out. It didn't have a tapped hole in it for a bolt like the old one, but threads protruding, so I had to drill and tap the housing to make it work. I first thought I would have to put a spacer (washer(s)) behind the ball to make up for the different length, but when I test fit everything, it couldn't have been any more perfect. Not only did I not have to shorten the push rod (as per the AA instructions), I didn't even need to adjust it from when I removed it. The slave cyl is now mounted so it is in better alignment with the throwout fork, the pedal play is perfect, and it's like butter. It even has better throw now. The cool thing is that the clutch only had a couple thousand miles on it and didn't need replacing, so it's "apples to apples", and not just new parts feeling tighter.

I did have to modify the AA "propeller" crossmember (sorry, I didn't get pictures) to accommodate the extra thickness of the new bellhousing. I used some 2"x3/8" flat bar (same thickness as the crossmember) to allow me to move the TC back. It also allowed me to push the TC a bit higher in the tunnel and flatten the belly some. As a bonus, lifting the TC also tilted the motor up, and moved it away from the firewall by about 1/2", something that I needed to do anyway. Oh yeah, I also found the backup light wiring tucked into the frame. Woohoo, backup lights! Never had them before...

I did this over the course of about a week, and couldn't be happier with the outcome. Wish I would have done it sooner, but I think the extra research here on MUD (and head scratching) payed off in spades.

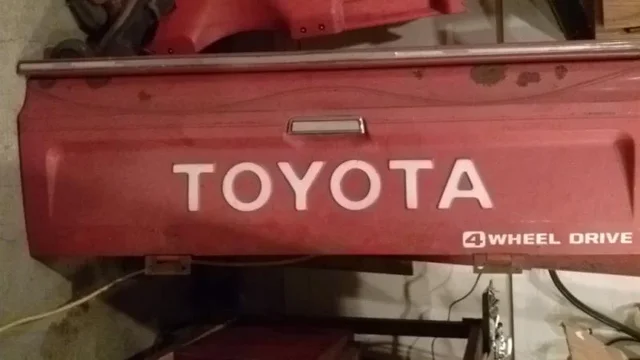
Next up, fab a tailgate out of the '82 mini truck gate I just got, and ramsheads with exhaust inside the frame rails. Not necessarily in that order.

lefty b
Trans installed.webp

Clutch detail.webp

82 Tailgate.webp
Trans installed.webp
Clutch detail.webp
82 Tailgate.webp
 
Finally have the rear end cut out, and new panels in place. Rear sill is mocked up and ready to be adjusted based on tire carrier and mounts. Now on to the driver side floor and rocker, finish the body work, undercoat it and durabak the floor...and its off to paint!
http://kyle-landcruiser.blogspot.com/
 

Users who are viewing this thread

  • Back
    Top Bottom