Looks Good. Thinking of removing your running boards?
Navigation
Install the app
How to install the app on iOS
Follow along with the video below to see how to install our site as a web app on your home screen.
Note: This feature may not be available in some browsers.
More options
Style variation
You are using an out of date browser. It may not display this or other websites correctly.
You should upgrade or use an alternative browser.
You should upgrade or use an alternative browser.
What Did You Do with Your 80 This Weekend? (75 Viewers)
This site may earn a commission from merchant affiliate
links, including eBay, Amazon, Skimlinks, and others.
More options
Who Replied?Box Rocket
SILVER Star
Yes. Factory bolts worked great.Were you able to reuse the factory bolts?
RFB
97 FZJ80 LIFTED SC DUAL BATTERIES,37s
Did the same with @LandCruiserPhil quik dissconnects, works like a champ, quik dissconnects arent so quik but they do dissconnect.Ordered TJM front swaybar to save a few bucks over a month ago but TJM can’t get their act together and ETA is April. I got pissed off and just ordered the whiteline sway bar from amazon and it got here in 3 days! Installed it this morning and wow it sure has very noticeable improvement. Cornering is much nicer and flatter, even with super heavy Arb full length expedition rack(150lbs) old girl feels almost modern like my GX.......ok almost.
View attachment 1890623

I'm tackling my reservoir now, do you have a parts list and counts for the cooler, lines and adapters you installed? I may redo it since all I'm replacing both hoses anyway.$50 for Derale heat sink cooler
$100 for all -6AN hose and fittings/adapters and fluid =)
3 hrs under the car
I'm sorry for your loss......Mine is gone. I pulled the plugs and the front cylinder was full of water, the radiator was empty.
I'm sorry for your loss......
It is reassuring knowing it is in good hands with Camelback Toyota.
Did the same with @LandCruiserPhil quik dissconnects, works like a champ, quik dissconnects arent so quik but they do dissconnect.
Under a minute all day long

Keep in mind its a 60+ guy doing it

Video of disconnecting 48 sec
Video of connecting 44 sec
I’d love some more details on what you did here. Like where did you go over to AN? Did you thread metric to AN adapters into the box and go from there? I loose quite a bit of PS fluid. I have a pump rebuild kit ready to go but want to just do everything at once and I might as well upgrade while I’m doing it.finally got around to replace factory leaky paper clips and lines with a fin aftermarket cooler (thanks Joey for the idea) and -6an fittings and hoses (factory hp lines discontinued)..no more leaks.
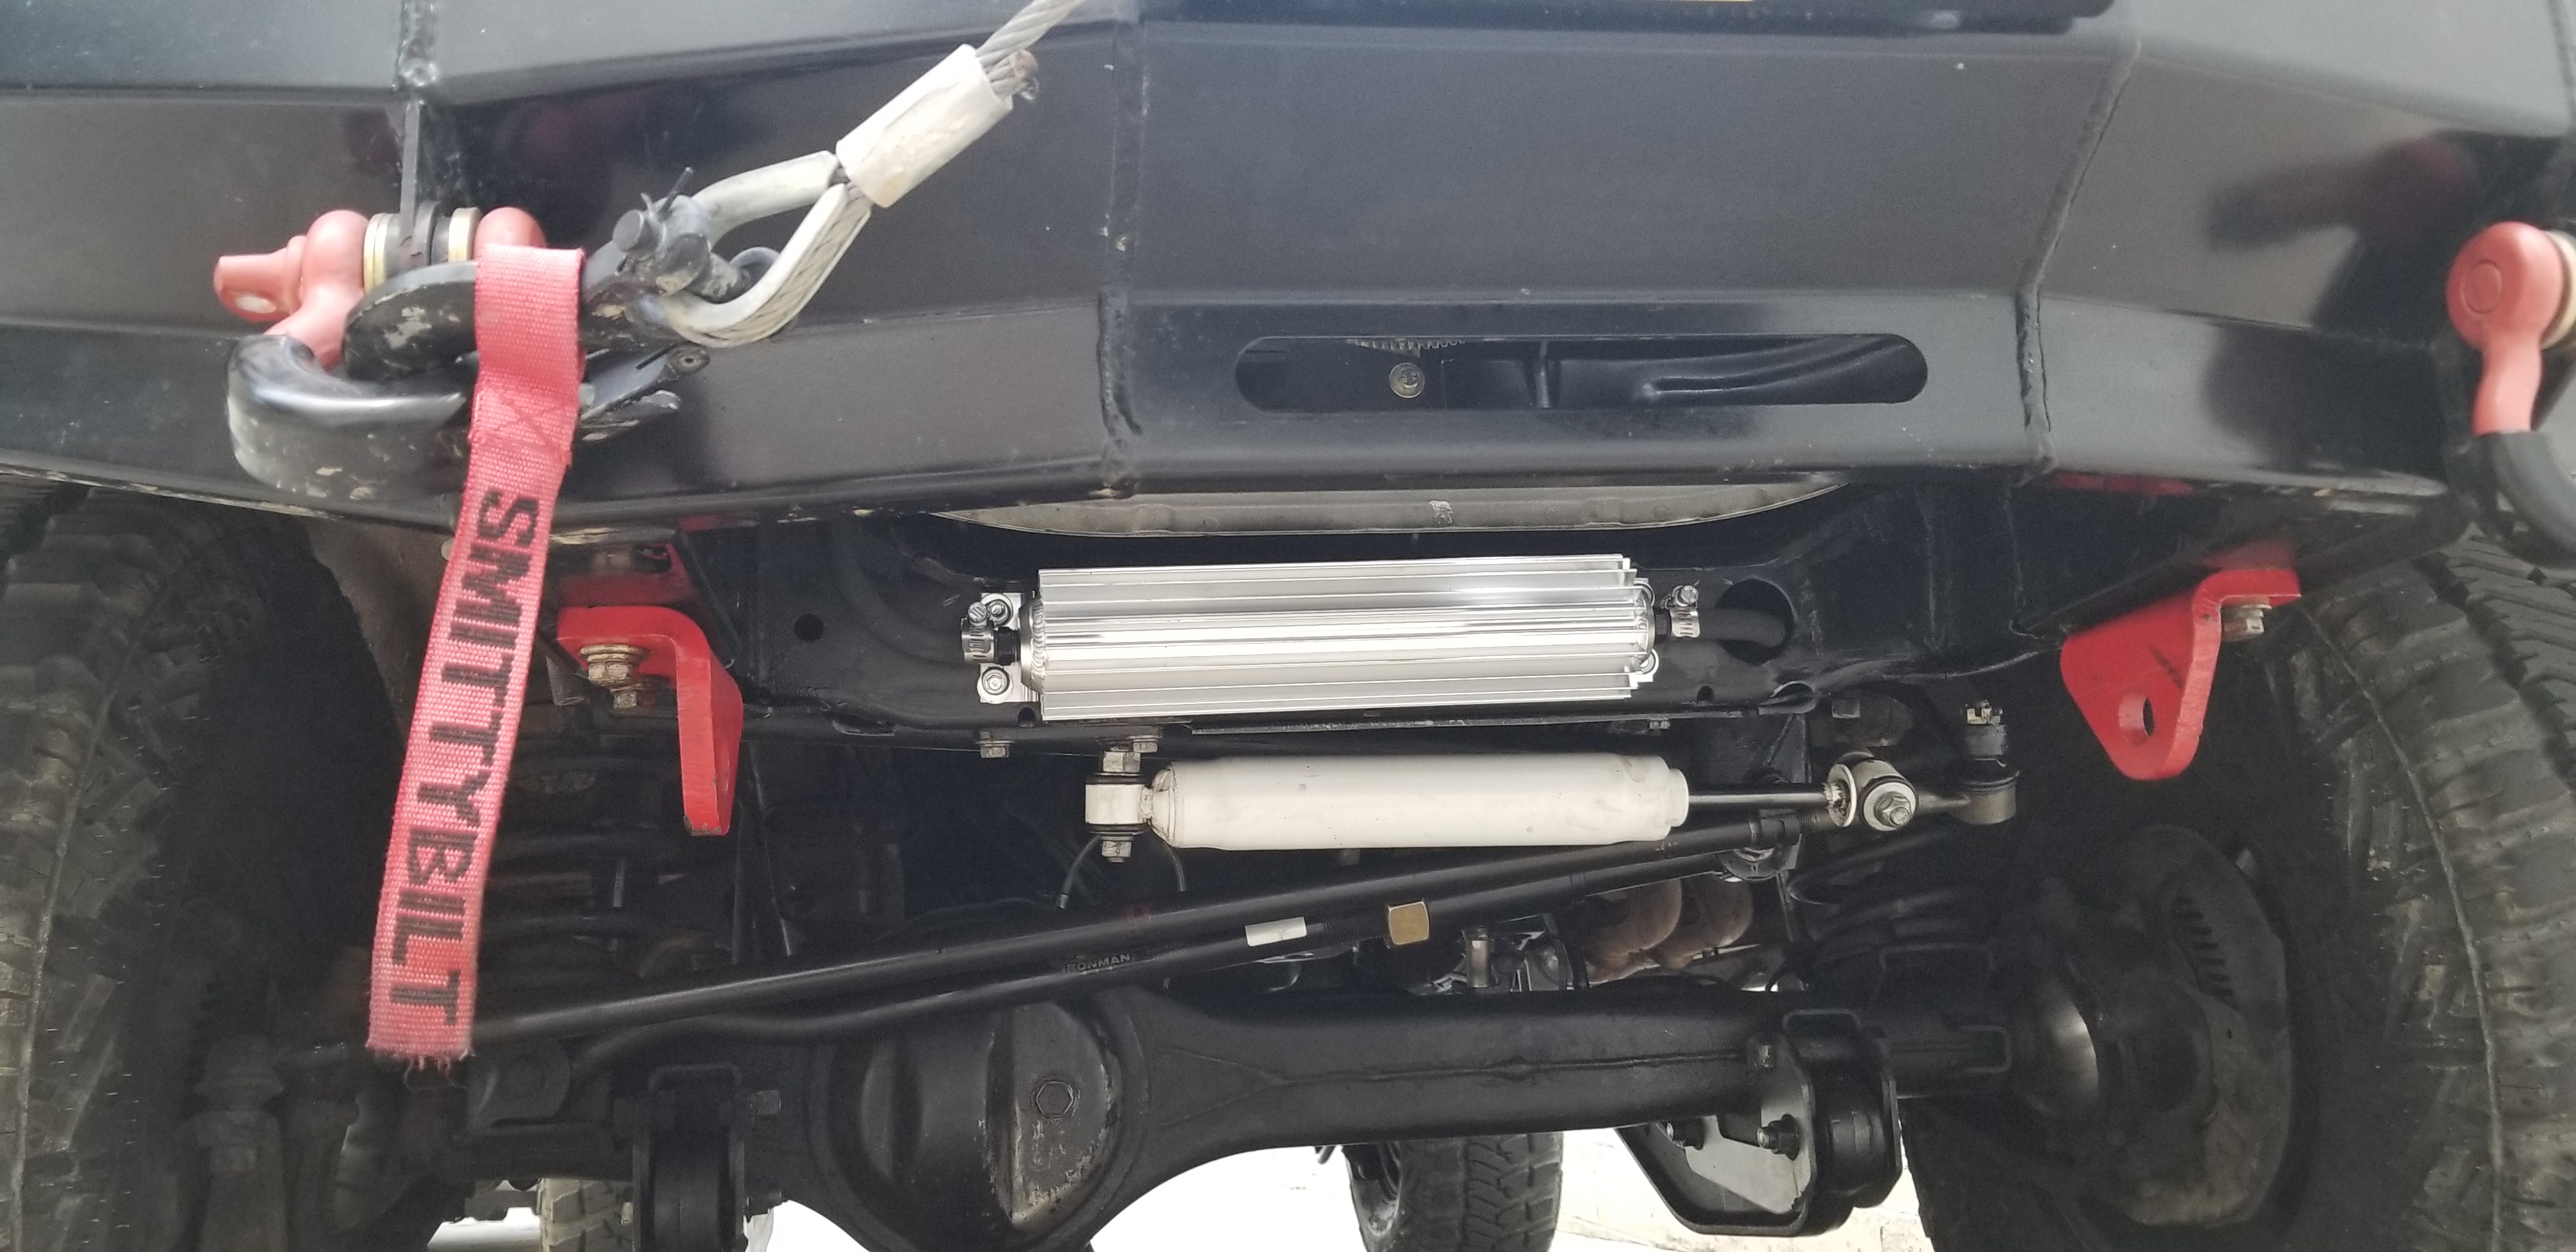
Yes, metric 16mm x 1.5 invert flare adapter on HP side, 17mm x 1.5 on return side. For HP line, i run -6AN high pressure hose with 90 degree HP fittings, on both ends. then push on fittings and hose clamps on cooler and return lines.I’d love some more details on what you did here. Like where did you go over to AN? Did you thread metric to AN adapters into the box and go from there? I loose quite a bit of PS fluid. I have a pump rebuild kit ready to go but want to just do everything at once and I might as well upgrade while I’m doing it.
Cool thanks. Sounds very similar to what I did with an old Audi and it’s factory oil cooler.Yes, metric 16mm x 1.5 invert flare adapter on HP side, 17mm x 1.5 on return side. For HP line, i run -6AN high pressure hose with 90 degree HP fittings, on both ends. then push on fittings and hose clamps on cooler and return lines.
Fuel filter has been sitting on a shelf in my garage for months. The starter was giving me trouble so while I had the starter out I replaced the fuel filter. I changed the oil while I was at it, created extra room to work with the oil filter removed. It wasn’t that bad to change the fuel filter with the starter and oil filter out of the way.

RFB
97 FZJ80 LIFTED SC DUAL BATTERIES,37s
Under a minute all day long
Keep in mind its a 60+ guy doing it
Video of disconnecting 48 sec
Video of connecting 44 sec
Yea try it wiht a whiteline sway bar they arent to fun to deal with
RFB
97 FZJ80 LIFTED SC DUAL BATTERIES,37s
Under a minute all day long
Keep in mind its a 60+ guy doing it
Video of disconnecting 48 sec
Video of connecting 44 sec
and when I did it I forgot to bring a gargare floor lol
Visiting the Albuquerque area the last few days. Did some hiking in Placitas today. On our way back to Las Vegas NV tomorrow morning.


Picked up from the Camelback Toyota where they took a look at the new ride and cleaned it up. I started a list as little gremlins pop up while testing everything. Im excited to see what the MPG going to be. Been driving it just like my gas 80 but it gets there easier and faster
Underside is 100% rust free, rare for an European truck of its age.


Underside is 100% rust free, rare for an European truck of its age.
Brought one home.
2 owner, mostly garage kept, 3x locked, new leather, leaky knuckle and the sunroof works.

2 owner, mostly garage kept, 3x locked, new leather, leaky knuckle and the sunroof works.
Stickers... I mostly just added a few stickers... also gave it a bath...


Saturday was spent doing my front axle relocation to improve tire/firewall clearance. Not a terrible job but maybe a bit slow because of my mostly basic tool set. EHO did not have any of the bracket plates on hand so I made my own from some 3/16 plate I had on hand.
Tools needed:
Angle Grinder with cutoff wheel to cut the plates.
18mm drill bit to drill the plates and frame brackets
22mm, 24mm sockets for the radius arm bolts.
Jackstands.
Hammer/drift to knock bolts out if they don't just slide out.
Antisieze for the bolts
Welder.
Moved the axle 30mm forward (~1.25"). Drove it around town Saturday night, and 200 miles on the highway yesterday. No change in driving behavior (as expected) but an improvement in tire clearance. This is a worth while mod to help fit larger tires (37s or larger) to minimize the amount of fender/flare trimming. There is still a bit of trimming but nothing extreme so far. Still need to do a full stuff flex test but I think I'm just about there with proper 37"tire fitment with the 3" Slinky kit.
Axle relocation by Adam Tolman, on Flickr
Axle relocation by Adam Tolman, on Flickr
Axle relocation by Adam Tolman, on Flickr
Axle relocation by Adam Tolman, on Flickr
Axle relocation by Adam Tolman, on Flickr
Axle relocation by Adam Tolman, on Flickr
Axle relocation by Adam Tolman, on Flickr
It was getting late and I still had a date with my wife so I didn't take additional pics of the welding process and only snapped one pic after it was all buttoned up. Fresh paint makes my welds look worse than they actually were, oh well.
Axle relocation by Adam Tolman, on Flickr
Coils are nice and straight now instead of the slight curve to the rear that you get with stock radius arms on a lifted 80.
Looks great, Do you think the plates are a necessity? The bracket looks fairly stout as it is..
RFB
97 FZJ80 LIFTED SC DUAL BATTERIES,37s
what gears are you running with those tires??Karymscheno hot springs, Kamchatka
View attachment 1889609
View attachment 1889610
View attachment 1889611
View attachment 1889612
View attachment 1889616
Dual battery install with the RedArc SBI12 isolator.
Dual Battery System Isolators | REDARC Electronics


Dual Battery System Isolators | REDARC Electronics