
Just flip over and point it down. It screws right back into the same place only pointing downwards. The screwholes are already on the ODB II port.I used this. Works great!
ARTECKIN Universal OBD II Splitter Extension Y Cable J1962 for GPS Tracking Devices Amazon product ASIN B07B4TRQTH
Navigation
Install the app
How to install the app on iOS
Follow along with the video below to see how to install our site as a web app on your home screen.
Note: This feature may not be available in some browsers.
More options
Style variation
You are using an out of date browser. It may not display this or other websites correctly.
You should upgrade or use an alternative browser.
You should upgrade or use an alternative browser.
What Did You Do with Your 80 This Weekend?
This site may earn a commission from merchant affiliate
links, including eBay, Amazon, Skimlinks, and others.
In your second pic, what exactly are we looking at? Is that the factory mount all cut up and bolted crooked to the frame with another mount welded to it???
Any plans to protect the O2 sensor wiring? That looks pretty eager to get ripped out by some sagebrush or something kicked up by your tire...
I have plans to route mine over the frame too, and haven't decided on a game plan yet. How do you like the sound with the different muffler?
I was wondering who would notice that mount. Looks like crap but surprisingly it’s solid.
My larger complaint is the O2 sensor mount. I was not happy with its placement at all. Sadly the exhaust shop I went to ended up being less then satisfactory. I don’t trust them to fix it so I’ll have to go to someone else and have it moved later.
Overall I like the sound with the muffler. Nice rumble at lower rpms, but does get a bit ricerish at higher rpms.
My old exhaust system was absolutely trashed with multiple exhaust leaks and broken hangers so this is much better overall.
What size are those Coopers? I like the look but my 80 doesn't have flares so I'm wondering if they would look small on it.Got out to Moab and did some social distanced camping and a little wheeling. Blown away with how many people were in Moab it seemed more alive and more relaxed with stuff being open then where I am in Colorado. The weather was perfect it cooled down at night and was 80-85 during the day.
It was my first time using the roof top tent I bought second hand around Christmas time on impulse. I don’t think I’m a overlandy guy but as much as I hate it wheeling due to the high center of gravity it was pretty slick to use with the girlfriend it was cozy and easy. I got to use the 4.88s for the first time since downsizing from the 5.29s. Wayyy happier with the performance on the road even driving over I-70 and vail pass loaded down with the tent and way more crap then we needed to bring I thought it was a lot more comfortable doing 75-80 then with the 5.29s. I didn’t notice a huge difference wheeling either but I’m sure I will when I’m wheeling at high altitude in Colorado. I did Hells Revange and Poison Spider but didn’t get to ballsy with the line choice as I was out there solo. Cruiser killed it gotta love it
View attachment 2312617
View attachment 2312616
View attachment 2312614
View attachment 2312618
View attachment 2312619
Took my 21 month old daughter camping for the first time in the 80.
3" heavy lift installed. Extended brake lines, pan hard relocation bracket from DVS, caster bushings, new tie rod and drag link... and I installed new push rods for the rear hatch and the hood.


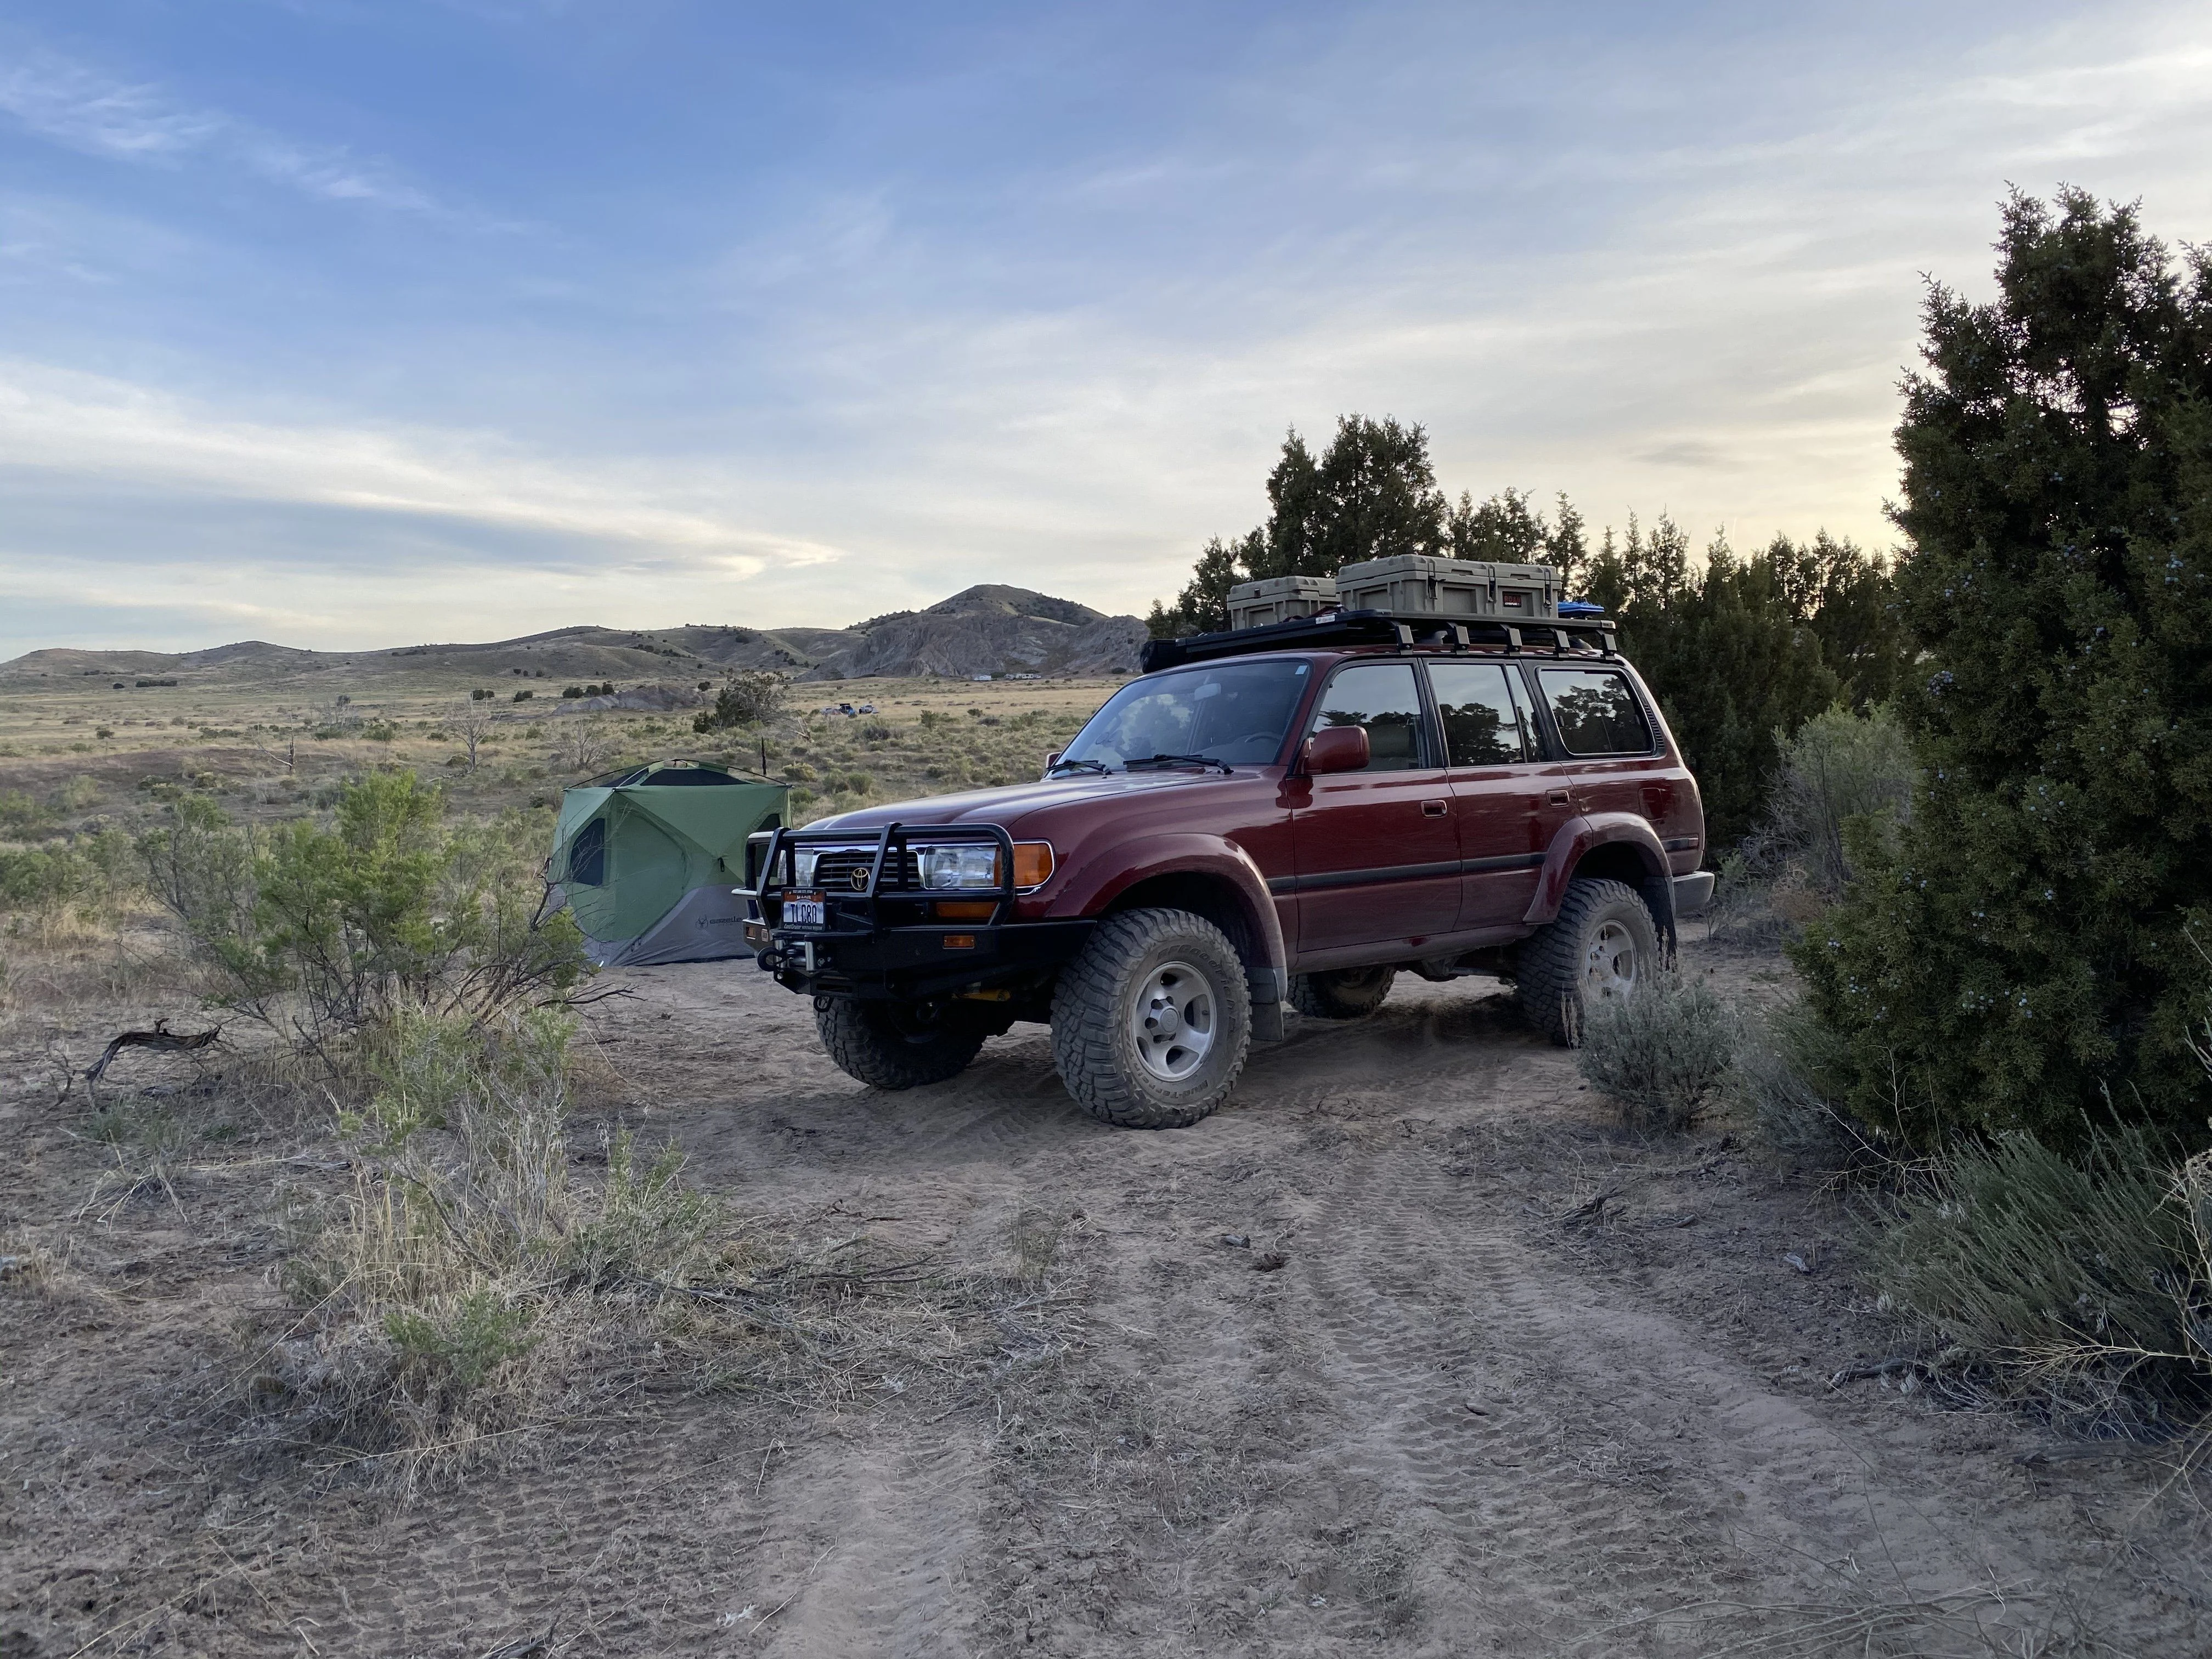
Got out to Moab and did some social distanced camping and a little wheeling. Blown away with how many people were in Moab it seemed more alive and more relaxed with stuff being open then where I am in Colorado. The weather was perfect it cooled down at night and was 80-85 during the day.
It was my first time using the roof top tent I bought second hand around Christmas time on impulse. I don’t think I’m a overlandy guy but as much as I hate it wheeling due to the high center of gravity it was pretty slick to use with the girlfriend it was cozy and easy. I got to use the 4.88s for the first time since downsizing from the 5.29s. Wayyy happier with the performance on the road even driving over I-70 and vail pass loaded down with the tent and way more crap then we needed to bring I thought it was a lot more comfortable doing 75-80 then with the 5.29s. I didn’t notice a huge difference wheeling either but I’m sure I will when I’m wheeling at high altitude in Colorado. I did Hells Revange and Poison Spider but didn’t get to ballsy with the line choice as I was out there solo. Cruiser killed it gotta love it
View attachment 2312617
View attachment 2312616
View attachment 2312614
View attachment 2312618
View attachment 2312619
How do you like those tires? Was planning ST/maxx but on discoverer at3 (Non XLT) now and like how they handle snow.
Curious how they did in the sand/rocks.
After being parked for almost 80 days in a quarantine locked down area, its finally back!


While the frame has no rust, the body has some rust which is unfortunate but not uncommon here in Qatar. (Surrounded by sea from 3 sides. humid half the year + salt air)
The 100 and 200 though seem to suffer much less from body rust with our enivorment. (my 98 100 with more miles has 0 body rust).

Its not impossible to maintain a rust free vehicle here but you can't leave any bare metal exposed or have a clogged car door drain. Chassis rust proofing is definitely needed if going offroad (lots of salt sand/mud in coastal areas) as well as undercarriage power wash if driving near the beach.
While the frame has no rust, the body has some rust which is unfortunate but not uncommon here in Qatar. (Surrounded by sea from 3 sides. humid half the year + salt air)
The 100 and 200 though seem to suffer much less from body rust with our enivorment. (my 98 100 with more miles has 0 body rust).
Its not impossible to maintain a rust free vehicle here but you can't leave any bare metal exposed or have a clogged car door drain. Chassis rust proofing is definitely needed if going offroad (lots of salt sand/mud in coastal areas) as well as undercarriage power wash if driving near the beach.
Last edited:
How do you like those tires? Was planning ST/maxx but on discoverer at3 (Non XLT) now and like how they handle snow.
Curious how they did in the sand/rocks.
I’m a big fan of them. I had the discover at3 previously and I didn’t love them they wore out pretty quick for me and I got a punctured sidewall at one point but the grip was good. I love the XLT I have 23k on these and tread life is still really solid and I think the grip is better then the at3s I had previously and they are stupid quiet. Also the main reason I got them is because they are stupid light I think they were the lightest 37 I could find at the time and through discount tire they have a 60,000 mile warranty through discount. Highly recommend!
What size are those Coopers? I like the look but my 80 doesn't have flares so I'm wondering if they would look small on it.
These are 37s and I’m sitting on a 4 inch lift. I think they are closer to a 36 then a 37 but I like the look of them. Really great all around tire they grip well if I was just running straight trails though I would prolly do something a little more meaty that’s maybe a little more true to a 37 size because I do think these look a little small from some angles even with the flares. The picture I am attaching is a double ledge the I was aired up still at 32 psi. Locked the diffs and it walked right up. Very impressed with the grip from this all terrain.
Any rubbing with the 4" lift? I'm currently on a 2" with 35's and they rub occasionally if the suspension is flexing.These are 37s and I’m sitting on a 4 inch lift. I think they are closer to a 36 then a 37 but I like the look of them. Really great all around tire they grip well if I was just running straight trails though I would prolly do something a little more meaty that’s maybe a little more true to a 37 size because I do think these look a little small from some angles even with the flares. The picture I am attaching is a double ledge the I was aired up still at 32 psi. Locked the diffs and it walked right up. Very impressed with the grip from this all terrain.
View attachment 2314190
View attachment 2314192View attachment 2314191
Love hearing about folks running an AT that's actually good on all terrain. The natural impulse is to go straight to an aggressive MT in a 35 or 37" size but if you want snow/ice performance and good manners getting to the trail it's nice to have an AT instead.
Picked up the license plates for my 80 on Tuesday afternoon, so I decided that Tuesday morning was the perfect time to do a valve tune! It was an amazingly simple process, and I definitely think I'm getting better throttle response and power. I wasn't totally happy with the first tune, one of the valves was still loud after a test drive, but the second time around only took about 25 minutes from start to finish. Note: this is for the 3FE engine!
What you'll need:
-Feeler gauges
-10mm end wrench
-Socket set (10, 12, 14mm. 4-6in extender also helps.)-
-Breaker bar
-Straight screwdriver
-Valve cover gasket (mine looked fine but always a good idea to have a spare in case yours is old and rotted)
-RTV
-I used a paint marker to keep track of the hoses I disconnected
-flashlight
-gloves that will keep you from getting burned while you pull the valve cover off
The 3FE valve clearances are posted on the hood of the vehicle, and in the FSM. Always good to double-verify!


You only need two of the feeler gauges: .014" and .008" for the exhaust and intake, respectively. I recommend getting a set that has a bend towards the bottom rather than the totally flat ones that I have, just because it's easier to get the gauge in there without dropping it!
Make sure your engine is up to operating temperature before doing this. I took my truck for a short drive around the neighborhood, and made sure I knew what wrenches I was going to need and had everything ready to go before I shut off the ignition to start work.
I marked all the hoses with dots so I knew which ones went where when I was done. They're intuitive, but I also know that I would be the one to have a brain fart and swap some by accident.
Killed the engine, pulled the big air intake hose off, loosened the throttle cable bracket, pulled off the hoses attached to the valve cover, and pulled the vacuum lines free that attach to a bracket on the back of the air intake hose, You want as much room as possible towards the firewall so that you can get the valve cover clear of that back bolt stud. Removed the four bolts holding the VC on, and the small gaskets that seal between the cover and the bolts. Removed the head cover, put it somewhere nice and safe (the ground). Then, turn the engine until you're at TDC. I used the power steering pump pulley (17mm) and a breaker bar, but any spot that moves the crank should be good. The window took me a sec to find, it's tucked back on the passenger side of the flywheel (red arrow). Definitely need a flashlight to see back in there. Rotating the crank and watching the flywheel is much easier with two people so you can maintain line of sight.

My flywheel had a bunch of white paint dots on it, but the bb that marks 7 degrees BTDC and the mark of TDC are both imprinted on the flywheel. The bb is one larger mark, and the TDC mark is two smaller marks, radially aligned. If I ever feel super motivated, I'll get some colored paint and mark them better but it's a tight spot to reach and once you know what they look like, they're easy to spot. At TDC, check the rockers on cylinder 1, they should be loose. The rockers on cylinder 6 should be tight. If 6's are loose and 1's are tight, you're at BDC and need to turn the flywheel another full revolution. Again, I found it was easier to have one person turn the engine while another person acts as spotter.
The FSM has a really good writeup and diagram for the actual tuning. I recommend using an end wrench and a slotted screwdriver instead of a socket to do the adjustment so you can control the adjustment at all times.
For example, on the intake of cylinder 5 as marked below, end wrench on the blue arrow, straight screwdriver in the slot by the red arrow.
_LI.webp")
Once at TDC, you'll check the clearances on the following valves: 1ex, 1in, 2in, 3ex, 4in, 5ex. (both valves on cylinder 1, then the front valve on cylinders 2-5). Slide the feeler gauge between the valve stem and the rocker arm. Proper valve clearance should have a slight drag when sliding the gauge between the two. If the clearance is off, loosen the lock nut, adjust the screw, and hold it in place while tightening the lock nut back down with the end wrench.
Once those valves are adjusted, rotate the flywheel 360 deg to BDC, check the other valves: 2ex, 3in, 4ex, 5in, 6in, 6ex (back valves on cylinders 2-5, both valves on cyl 6).
At this point, your valve tune is done, and it's a matter of putting everything back together. Make sure all your hoses went back to the right spots! A little RTV helps keep the gasket in place while you're shoving things around, so highly recommend.
I took Pam for a test drive and still heard a little clatter so I did a second tune after the test drive. So much faster than the first time! I just checked all the valves, even though I was pretty sure it was the exhaust valve on 2, and verified that everything was still hunky dory. Put everything back together, and she sounded good to go!
Still need to adjust the kickdown cable, but after adding 2 more quarts of trans fluid (it barely showed up in the "cool" range even after the dipstick was hot and the engine was running) and getting that adjusted, I'm hoping it will shift more smoothly. 99% of the time, it's totally fine, but sometimes I'll get a false neutral on hard upshifts. Also sometimes get a good clunk at lower speed shifts.
CEL came on during her maiden voyage (do you really own a landy until you've camped in it?), so the O2 sensors are now next on the list.
What you'll need:
-Feeler gauges
-10mm end wrench
-Socket set (10, 12, 14mm. 4-6in extender also helps.)-
-Breaker bar
-Straight screwdriver
-Valve cover gasket (mine looked fine but always a good idea to have a spare in case yours is old and rotted)
-RTV
-I used a paint marker to keep track of the hoses I disconnected
-flashlight
-gloves that will keep you from getting burned while you pull the valve cover off
The 3FE valve clearances are posted on the hood of the vehicle, and in the FSM. Always good to double-verify!
You only need two of the feeler gauges: .014" and .008" for the exhaust and intake, respectively. I recommend getting a set that has a bend towards the bottom rather than the totally flat ones that I have, just because it's easier to get the gauge in there without dropping it!
Make sure your engine is up to operating temperature before doing this. I took my truck for a short drive around the neighborhood, and made sure I knew what wrenches I was going to need and had everything ready to go before I shut off the ignition to start work.
I marked all the hoses with dots so I knew which ones went where when I was done. They're intuitive, but I also know that I would be the one to have a brain fart and swap some by accident.
Killed the engine, pulled the big air intake hose off, loosened the throttle cable bracket, pulled off the hoses attached to the valve cover, and pulled the vacuum lines free that attach to a bracket on the back of the air intake hose, You want as much room as possible towards the firewall so that you can get the valve cover clear of that back bolt stud. Removed the four bolts holding the VC on, and the small gaskets that seal between the cover and the bolts. Removed the head cover, put it somewhere nice and safe (the ground). Then, turn the engine until you're at TDC. I used the power steering pump pulley (17mm) and a breaker bar, but any spot that moves the crank should be good. The window took me a sec to find, it's tucked back on the passenger side of the flywheel (red arrow). Definitely need a flashlight to see back in there. Rotating the crank and watching the flywheel is much easier with two people so you can maintain line of sight.
My flywheel had a bunch of white paint dots on it, but the bb that marks 7 degrees BTDC and the mark of TDC are both imprinted on the flywheel. The bb is one larger mark, and the TDC mark is two smaller marks, radially aligned. If I ever feel super motivated, I'll get some colored paint and mark them better but it's a tight spot to reach and once you know what they look like, they're easy to spot. At TDC, check the rockers on cylinder 1, they should be loose. The rockers on cylinder 6 should be tight. If 6's are loose and 1's are tight, you're at BDC and need to turn the flywheel another full revolution. Again, I found it was easier to have one person turn the engine while another person acts as spotter.
The FSM has a really good writeup and diagram for the actual tuning. I recommend using an end wrench and a slotted screwdriver instead of a socket to do the adjustment so you can control the adjustment at all times.
For example, on the intake of cylinder 5 as marked below, end wrench on the blue arrow, straight screwdriver in the slot by the red arrow.
Once at TDC, you'll check the clearances on the following valves: 1ex, 1in, 2in, 3ex, 4in, 5ex. (both valves on cylinder 1, then the front valve on cylinders 2-5). Slide the feeler gauge between the valve stem and the rocker arm. Proper valve clearance should have a slight drag when sliding the gauge between the two. If the clearance is off, loosen the lock nut, adjust the screw, and hold it in place while tightening the lock nut back down with the end wrench.
Once those valves are adjusted, rotate the flywheel 360 deg to BDC, check the other valves: 2ex, 3in, 4ex, 5in, 6in, 6ex (back valves on cylinders 2-5, both valves on cyl 6).
At this point, your valve tune is done, and it's a matter of putting everything back together. Make sure all your hoses went back to the right spots! A little RTV helps keep the gasket in place while you're shoving things around, so highly recommend.
I took Pam for a test drive and still heard a little clatter so I did a second tune after the test drive. So much faster than the first time! I just checked all the valves, even though I was pretty sure it was the exhaust valve on 2, and verified that everything was still hunky dory. Put everything back together, and she sounded good to go!
Still need to adjust the kickdown cable, but after adding 2 more quarts of trans fluid (it barely showed up in the "cool" range even after the dipstick was hot and the engine was running) and getting that adjusted, I'm hoping it will shift more smoothly. 99% of the time, it's totally fine, but sometimes I'll get a false neutral on hard upshifts. Also sometimes get a good clunk at lower speed shifts.
CEL came on during her maiden voyage (do you really own a landy until you've camped in it?), so the O2 sensors are now next on the list.
Our Sycamore Creek offices were open today.
This pic shows how effective my limb risers are!!

Below: @richardlillard1 poser pic of the week!

Group Poser pic of the Month!

Getting up the hill @Stikboy9480


We had fun today, weather was great, beautiful day to be in an 80!
Zona
This pic shows how effective my limb risers are!!
Below: @richardlillard1 poser pic of the week!
Group Poser pic of the Month!
Getting up the hill @Stikboy9480
We had fun today, weather was great, beautiful day to be in an 80!
Zona
Redgrrr
I have a problem with 40s
The essentials are loaded.

Must have aftermarket springs

Changed out the fusible link. Probably time.

Ordered 95 front brakes. Need to be able to make this beast stop before the ls swap
15mpg! damn you must have installed one these... or added stickers...Drove it! Loving this machine, don’t give a s*** about the 15mpg, It gives me way more smiles


Tornado Air™ — More Power, More Mileage!
Drive 30-60 extra miles or your money back. Order online now!
 www.tornadoair.com
thekitchensink
SILVER Star
Couple weekends ago went up to North GA and drive along some FSR's with the bro, my girlfriend, and her brother.


