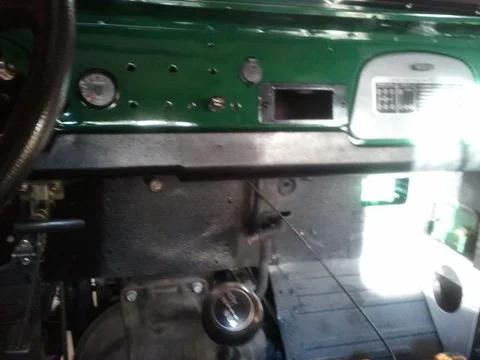
The Great Gazoo from 1972!

This site may earn a commission from merchant affiliate
links, including eBay, Amazon, Skimlinks, and others.

I am also experimenting with varios products to refurbish my weathered dash pads. I will give more details but this is the final product using a couple coats of duplicilor adhesion promotor, then SEM texture coating and then two of duplicolor black vinyl and fabric spray paint.


ForumRunnerImage.webp

Sent from my thing with Woody's junk.

ForumRunnerImage.webp
 
Hugh Heifer said:
I am also experimenting with varios products to refurbish my weathered dash pads. I will give more details but this is the final product using a couple coats of duplicilor adhesion promotor, then SEM texture coating and then two of duplicolor black vinyl and fabric spray paint.

Sent from my thing with Woody's junk.

I was just contemplating this myself. Took pads off roll bar and they are extremely dry and weathered. How much did you spend on materials?
 
I was just contemplating this myself. Took pads off roll bar and they are extremely dry and weathered. How much did you spend on materials?
About $40. The SEM Texture Paint was expensive. I could not get it locally so I had to mail order it. I think with shipping it was $25. The Duplicolor Adhesion Promoter and vinyl paint was $7 each at Advance.

I had done a bunch of reading on this where some guys had used various methods to restore some really badly damaged dashes and had great success. I have one crack in my upper dash pad so I hope to be able to repair that. I bought one of those crappy dash repair kits from Advance. I am told some of the stuff in it is useful but they are not all that.

Initially I just tried to spray the vinyl paint on the pad but it just soaked right in. That is when I tried the three part method. I think it turned out pretty good.

First I cleaned everything with soap and water and a fingernail brush. After it dried really well, I wiped it down with lacquer thinner.

Then I sprayed a coat of the Vinyl Paint that just soaked in. (I plan on just not doing this with the other pads).

So I used this stuf:
http://imageshack.us
Two coats

Then this:
http://imageshack.us
Two coats

And this:
http://imageshack.us
Two coats

According to some other forums the longevity is pretty good. I may be using to blacken the trim parts on the Ford truck seats I plan on using.

And your right Yoop. It might be why I have been having trouble figuring the wiring out...I can't read the schematics through the paint.
 
So here are the results of the lower dash pads...


2012-09-23 16.08.58.webp


2012-09-23 16.09.26.webp


2012-09-23 18.22.11.webp

Pretty pleased.

The day was perfect to do this. About 75 degrees and very dry. The stuff gases fast and dried in just a couple hours. I put some 8/32 nut plates in the bottom of the dash and got the push nuts at Ace that were the perfect size for the pins on the back of the pads.
I hope the stuff holds up. I have heard it does pretty good.

Sent from my thing with Woody's junk.

2012-09-23 16.08.58.webp


2012-09-23 16.09.26.webp


2012-09-23 18.22.11.webp
 
Made some great progress on the wiring. I started to band the loom together. My stupid clock in the shop stopped and I lost track of time. I discovered about four more splices I have to make and then just make the connections for the dash lights and gauges and run the Painless Accessory block wiring for the stereo and a couple other things and the nervous system will be done. :bounce:

Probably just a few more hours. I worked on it for about 9 or 10 hours today.
 
I used the Plasti Dip rubber in a spray can, black of course, to re finish my roll bar pads. I'm really pleased at how well they came out. My pads were in pretty good shape to begin with though. Your truck is really looking good!
 
I used the Plasti Dip rubber in a spray can, black of course, to re finish my roll bar pads. I'm really pleased at how well they came out. My pads were in pretty good shape to begin with though. Your truck is really looking good!
Thanks for the compliment. I might be able to see lights go on by next Sunday. :wrench::wrench:
 
Funny. In your texts the other night you were asking for the top to come off.

Drinking and texting is bad... I need a total ban on technology!


PS I am actually proud of you for getting some work done. Ill take back at least one mean thing I said to you this weekend... just one however.... :p
 
Just a little bump. Today I continued to work on the wiring. It is close though I have run into some questions wiring the contura switches for some off road lights as well as the aux gas tank valve.
I am off Monday so I might actually get to where I need to be to mount the drivers fender. That would call for some pics.

I finished making the front bumper mounts so that is off the list.

I am a little panicked to get this running as I am being transferred to Manila this year.

Posted from a brick.
 
This is a great build!
One thing, though--Why not give in and paint the Gazoo the purple??? I could live with that.
 
This is a great build!
One thing, though--Why not give in and paint the Gazoo the purple??? I could live with that.

Well, since it is already painted, seems a moot point.

Posted from a brick.
 
the headlights look oogley to me - do you have the spacers behind the bezel ?
 
the headlights look oogley to me - do you have the spacers behind the bezel ?

I do. They need to be adjusted obviously. They are kind of cross eye. I will fix that when they light up. Also, the bezel itself is just a bit mis-shapen. I might need to take it off and tweek it just a bit. It was really bent up when I got it.

I also have a black one. Anyone vote for black over white?

Posted from a brick.
 

Users who are viewing this thread

Back
Top Bottom