
Navigation
Install the app
How to install the app on iOS
Follow along with the video below to see how to install our site as a web app on your home screen.
Note: This feature may not be available in some browsers.
More options
Style variation
You are using an out of date browser. It may not display this or other websites correctly.
You should upgrade or use an alternative browser.
You should upgrade or use an alternative browser.
Build Slight Change of Plans--A BJ42 Build
Member Builds and Stories
This site may earn a commission from merchant affiliate
links, including eBay, Amazon, Skimlinks, and others.
- Joined
- Apr 21, 2005
- Threads
- 115
- Messages
- 25,798
interesting ? looks like you have the dash plate from an 83/84 ! Do you have power steering ?
Post up some more interior photos ! split bench seat ? Fuel tank inside or under cab ?
Not sure if the insert dash was addressed in this thread. The insert dash started in 82 on RHD, a year earlier than the LHD. The shape of the transmission inspection cover and transmission boot suggest it's a 82. The K in the model means a four speed. while not listed on the VIN plaque probably a H41. Five speed started with the 83 model (10/82) and would have a M in the model. Few things I've noticed different on later RHD 4X series then our 8/80 FJ40s is they still had the old glove box door. They also didn't have the collapsible steering column.
- Thread starter
- #43
Sorry for the radio silence lately, guys! Basically no updates on the truck, unfortunately. My dad decided to redo the basement over the winter, and that took over nights and weekends from the landcruiser. He's promised that we'll attack the body work with the same vigor as we have the basement come April.
And as to what @Living in the Past was saying, when I originally posted the info on the truck, I was mistaken. it was listed on ebay as a 1980, but the title says it's a 1982. So that would explain the dash insert and other stuff he mentioned.
And as to what @Living in the Past was saying, when I originally posted the info on the truck, I was mistaken. it was listed on ebay as a 1980, but the title says it's a 1982. So that would explain the dash insert and other stuff he mentioned.
- Thread starter
- #44
Okay, first major update for a while! The house projects are done, so the Landcruiser work can commence in earnest!
First, we cut out and patched a bunch of the major rust holes in the floor by the doors. (These are in-progress photos. End results will be much less rough looking)

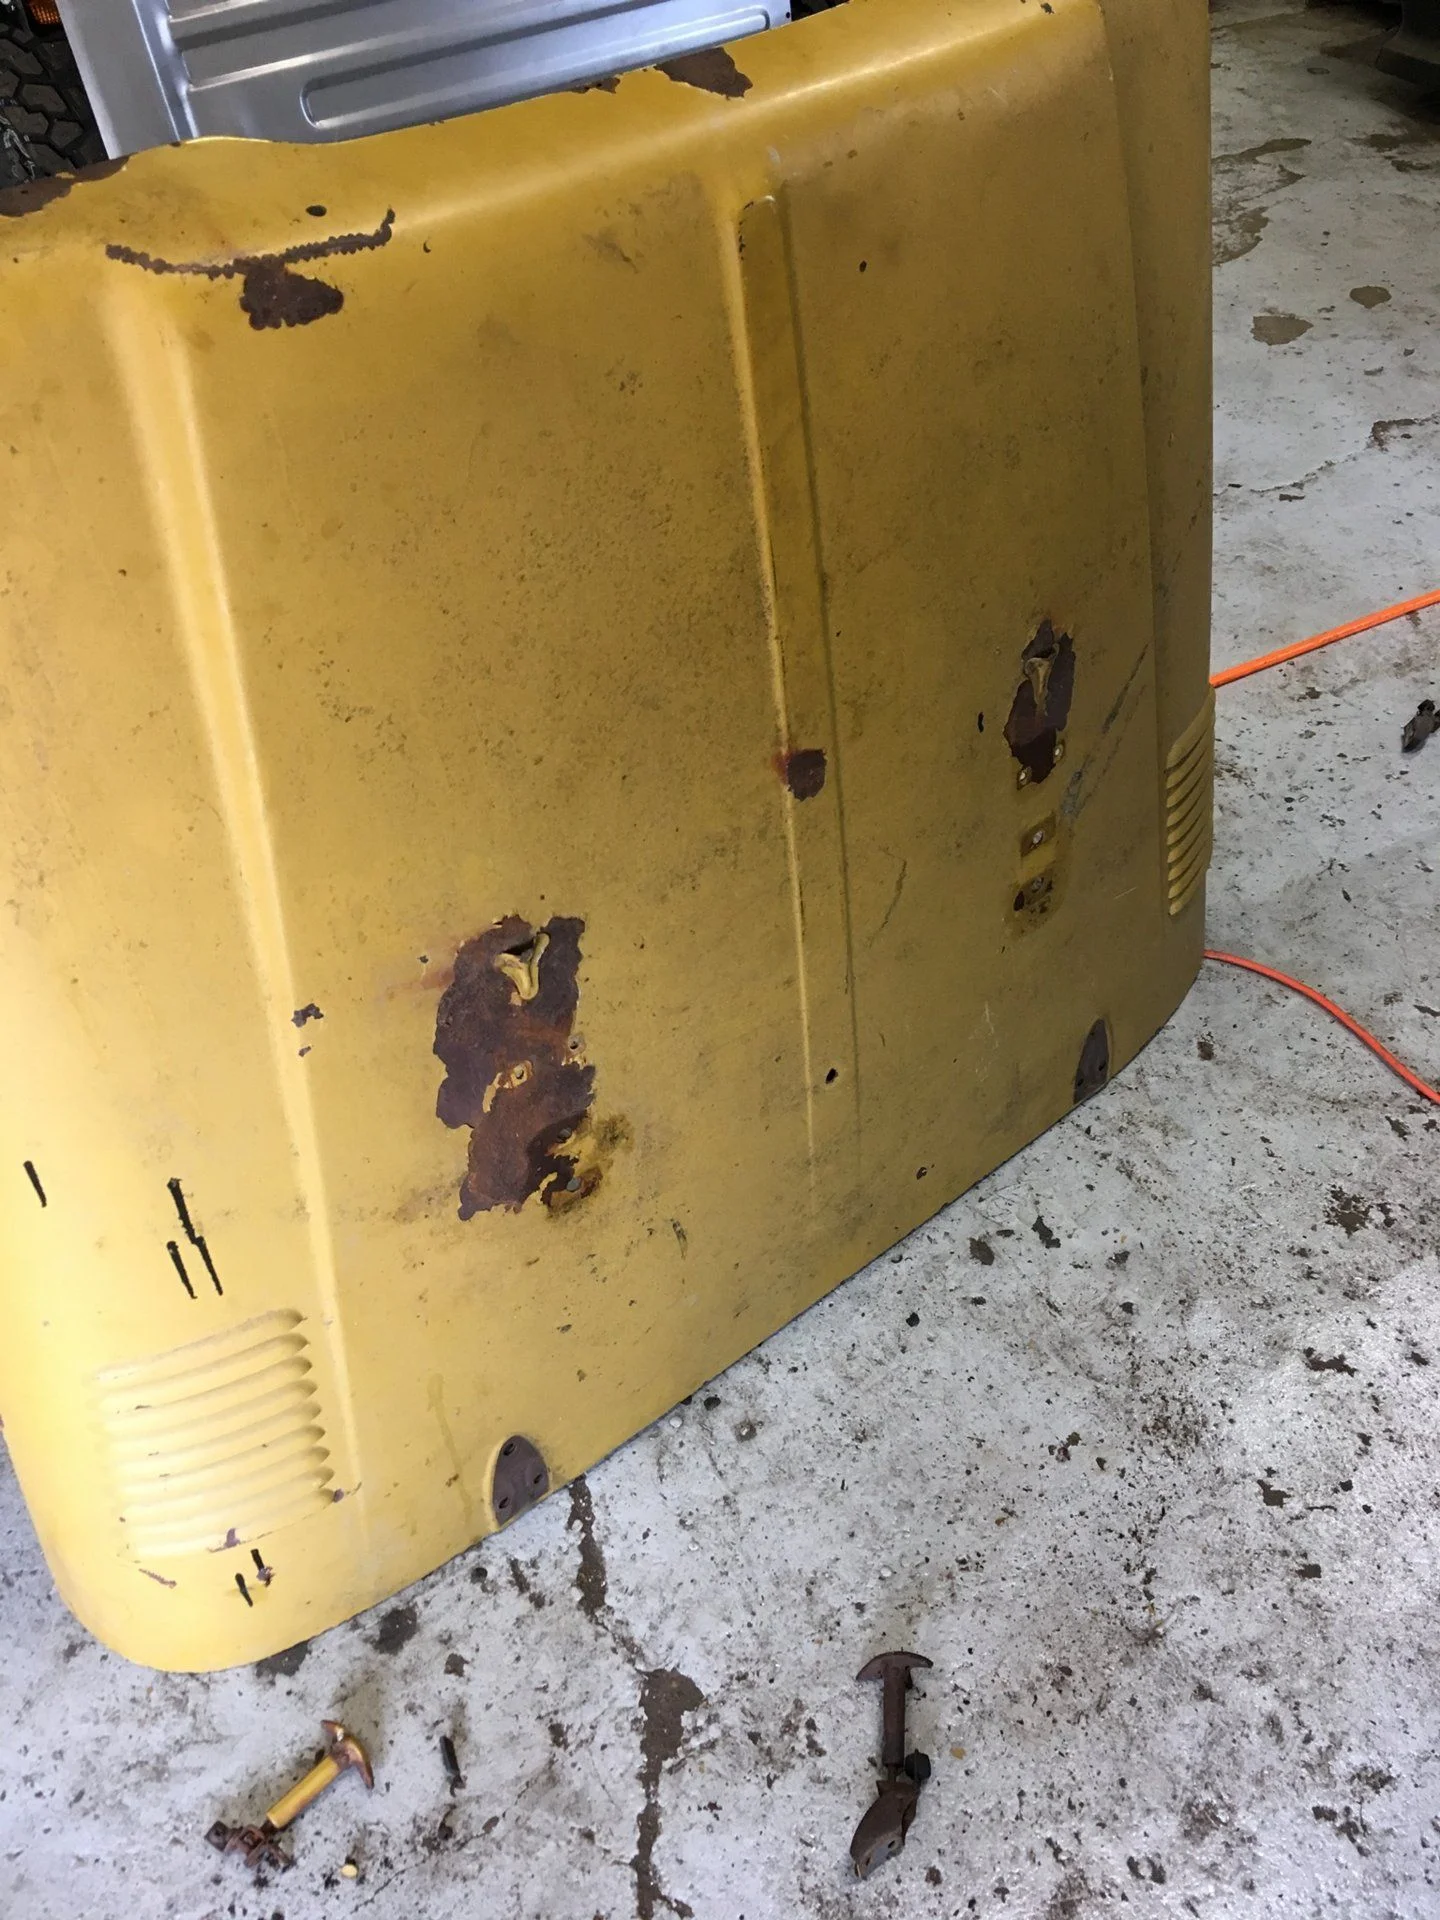
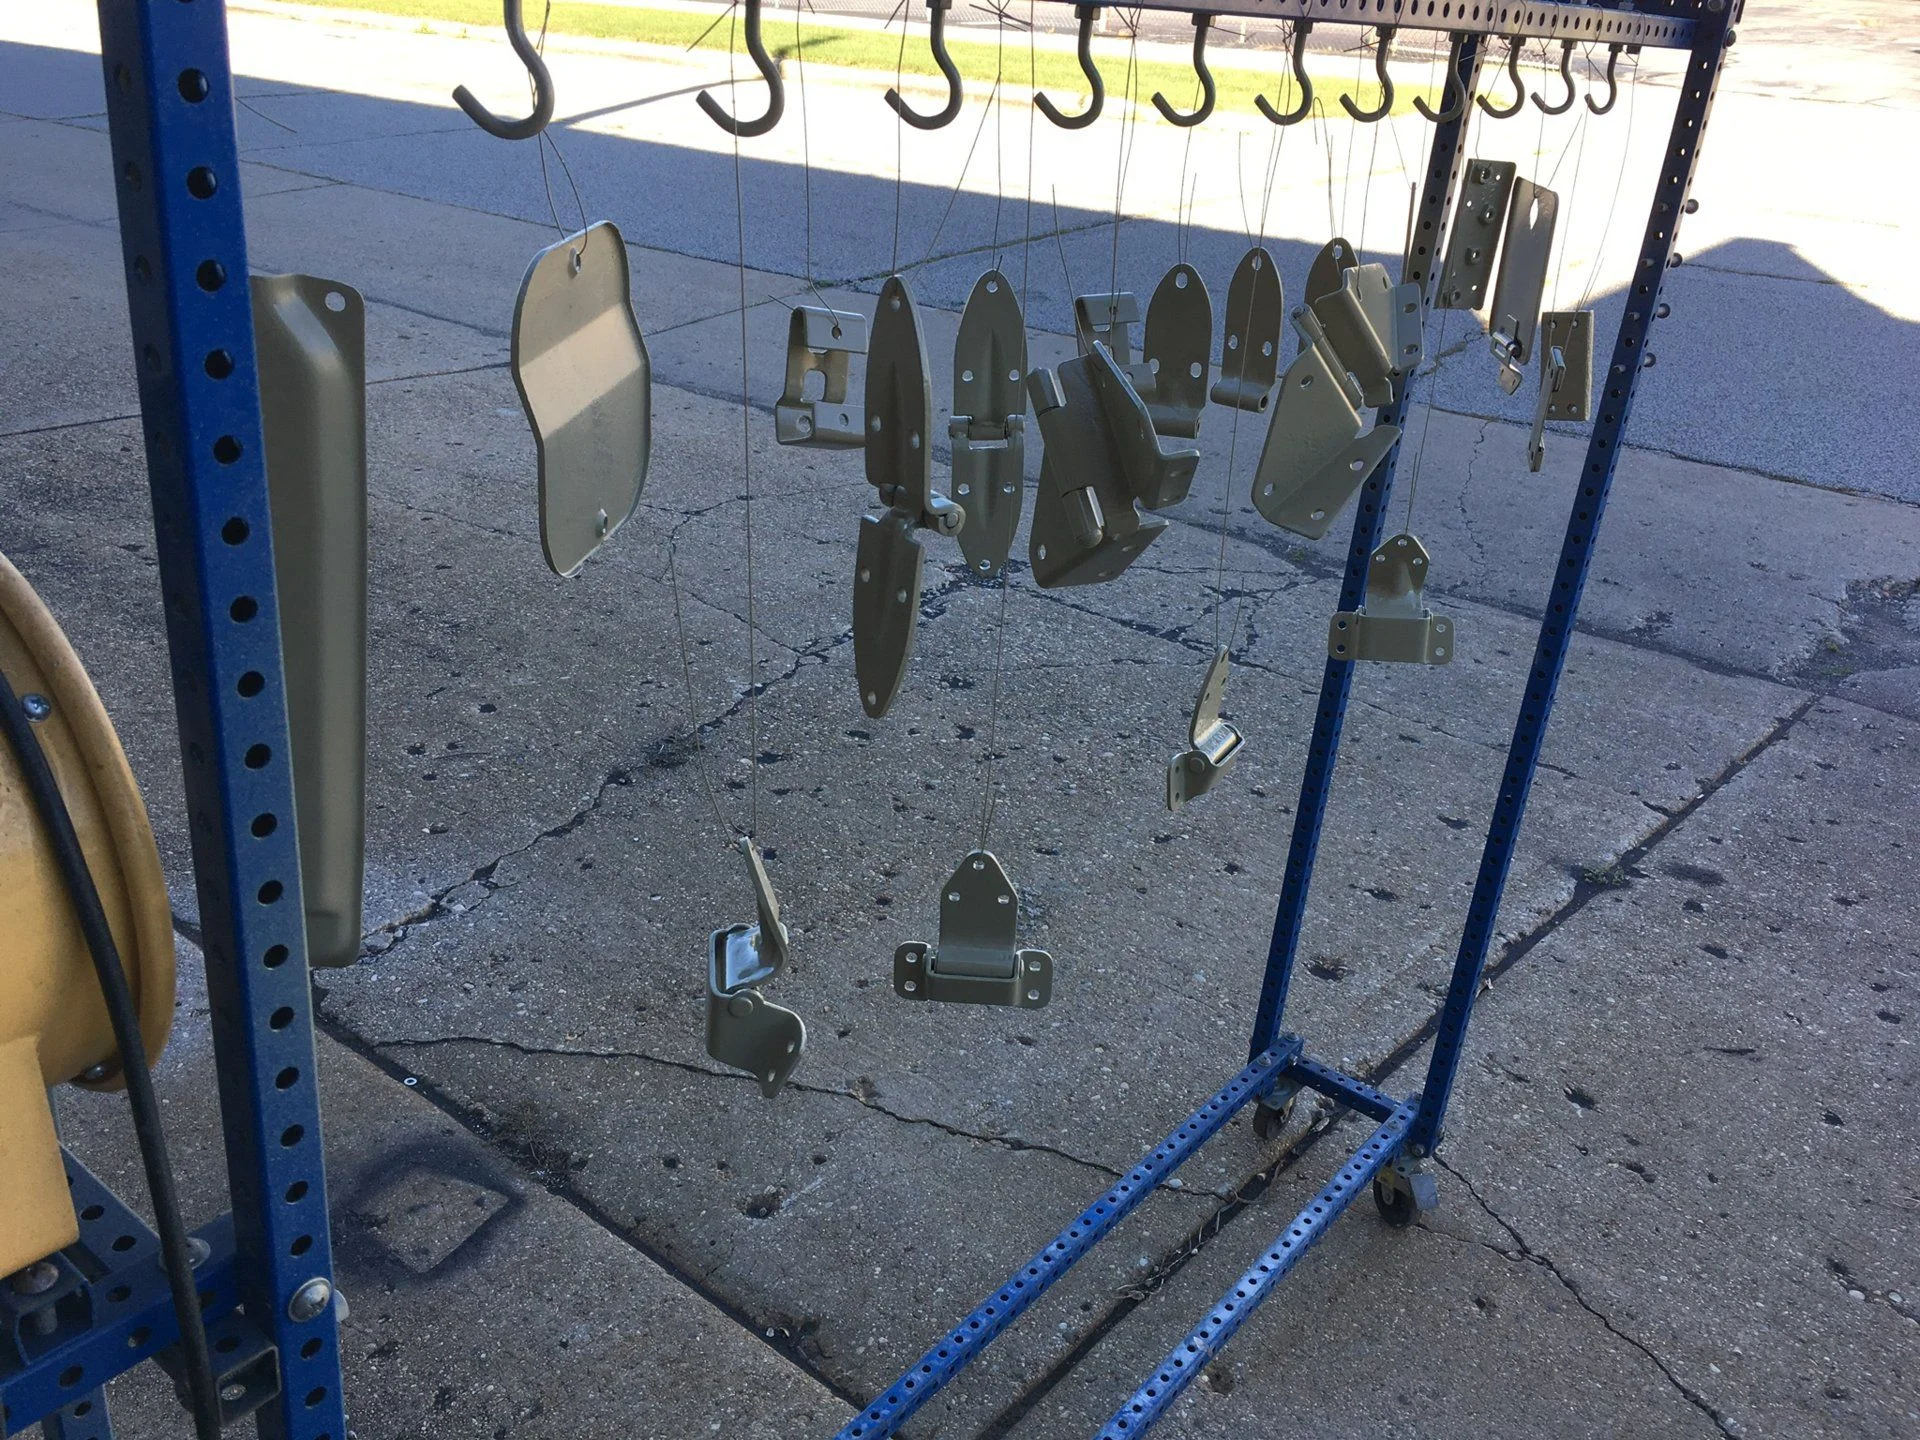
We also stripped some more parts down so they could be sand blasted and repaired, including the extra yellow hood, which was in better shape than the original.
Now the past week or so has been carefully tweaking the tub parts (Because none of them are perfect fits) and using Cleco clips to hold things in place.
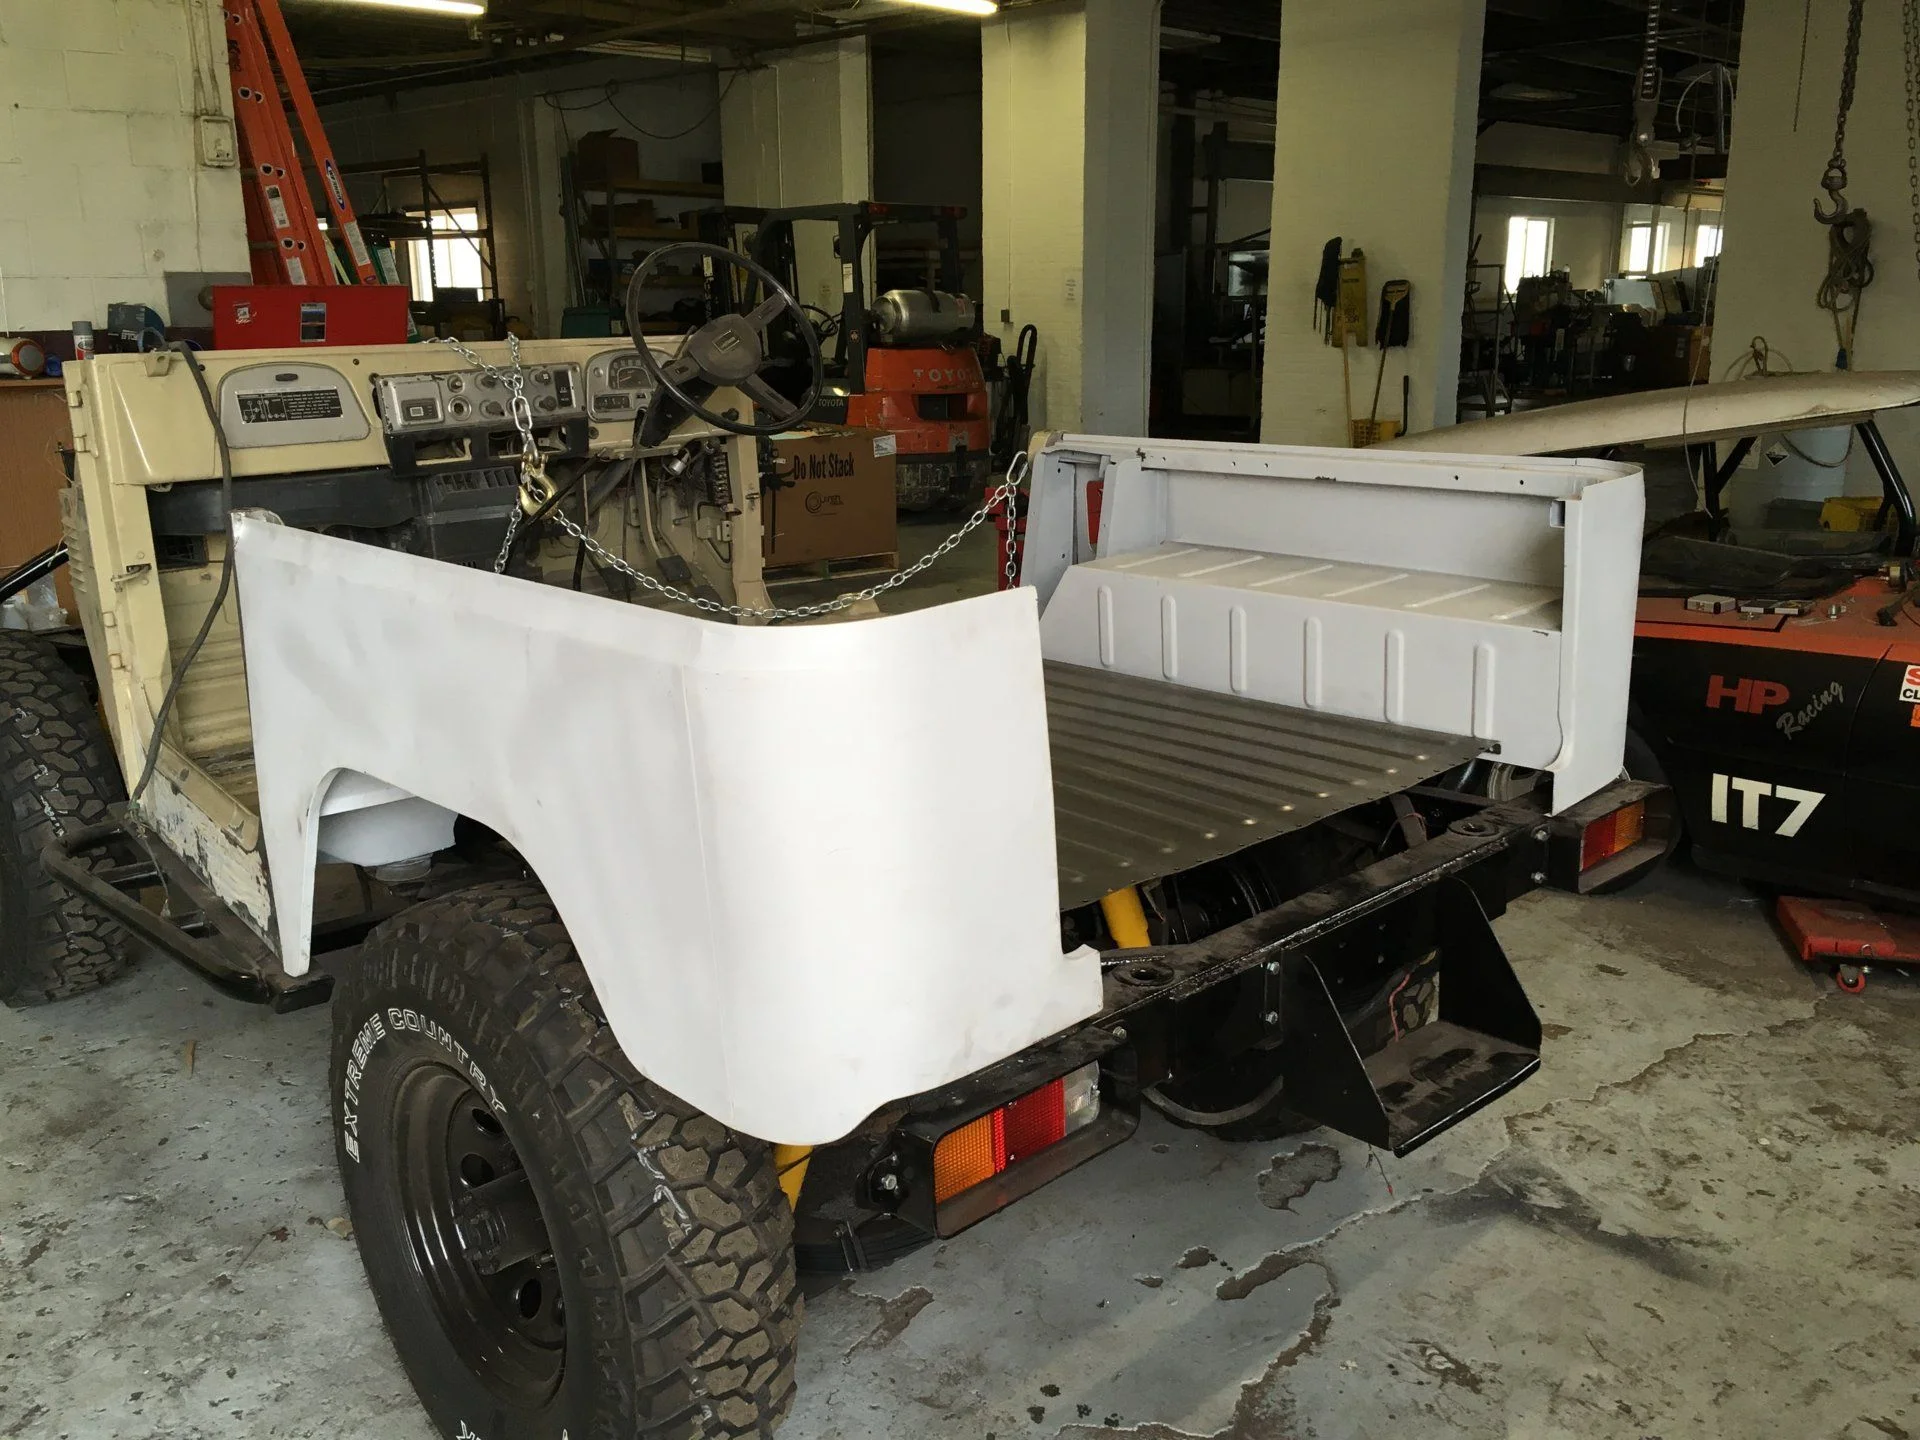
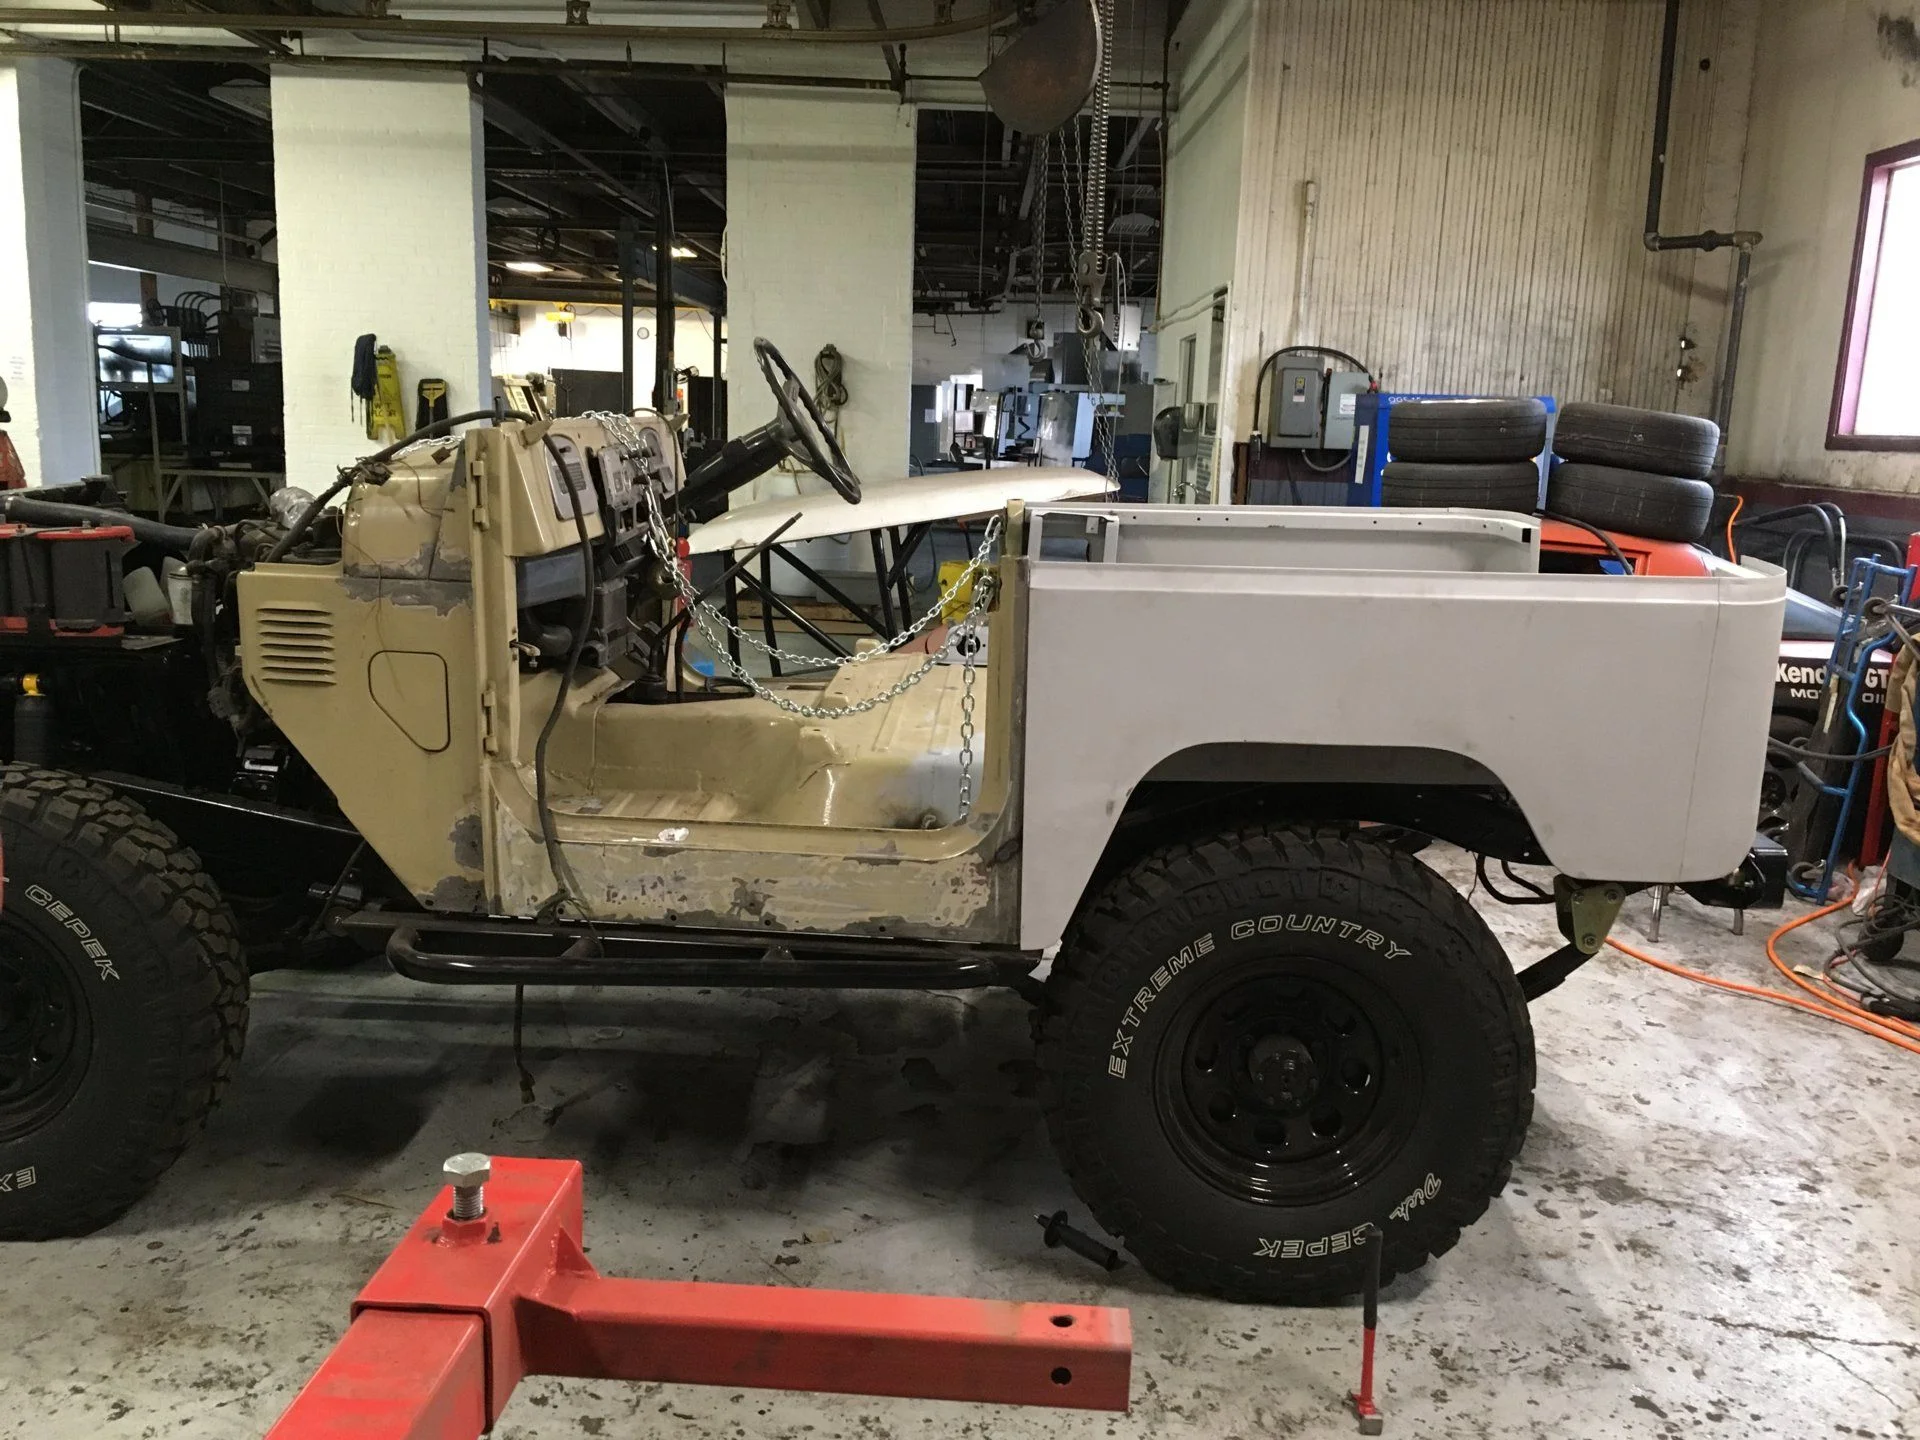
There are kind of a lot of irons in the fire. We need the doors and hard top to be all together in order to make sure the tub is put together correctly, so we're also patching those up at the same time.
So there you have it. A substantive update on the progress of this madness. We should be tacking the tub together in the next couple of weeks, depending on how things have been going.
It's amazing how much we can get done on this thing when we put more than 4 hours a week into it and don't take month-long breaks...
First, we cut out and patched a bunch of the major rust holes in the floor by the doors. (These are in-progress photos. End results will be much less rough looking)
We also stripped some more parts down so they could be sand blasted and repaired, including the extra yellow hood, which was in better shape than the original.
Now the past week or so has been carefully tweaking the tub parts (Because none of them are perfect fits) and using Cleco clips to hold things in place.
There are kind of a lot of irons in the fire. We need the doors and hard top to be all together in order to make sure the tub is put together correctly, so we're also patching those up at the same time.
So there you have it. A substantive update on the progress of this madness. We should be tacking the tub together in the next couple of weeks, depending on how things have been going.
It's amazing how much we can get done on this thing when we put more than 4 hours a week into it and don't take month-long breaks...
- Thread starter
- #45
Well jeez, It's been a while since I updated here. Probably because I've been too busy working on it! Vaguely-chronological photo dump time!
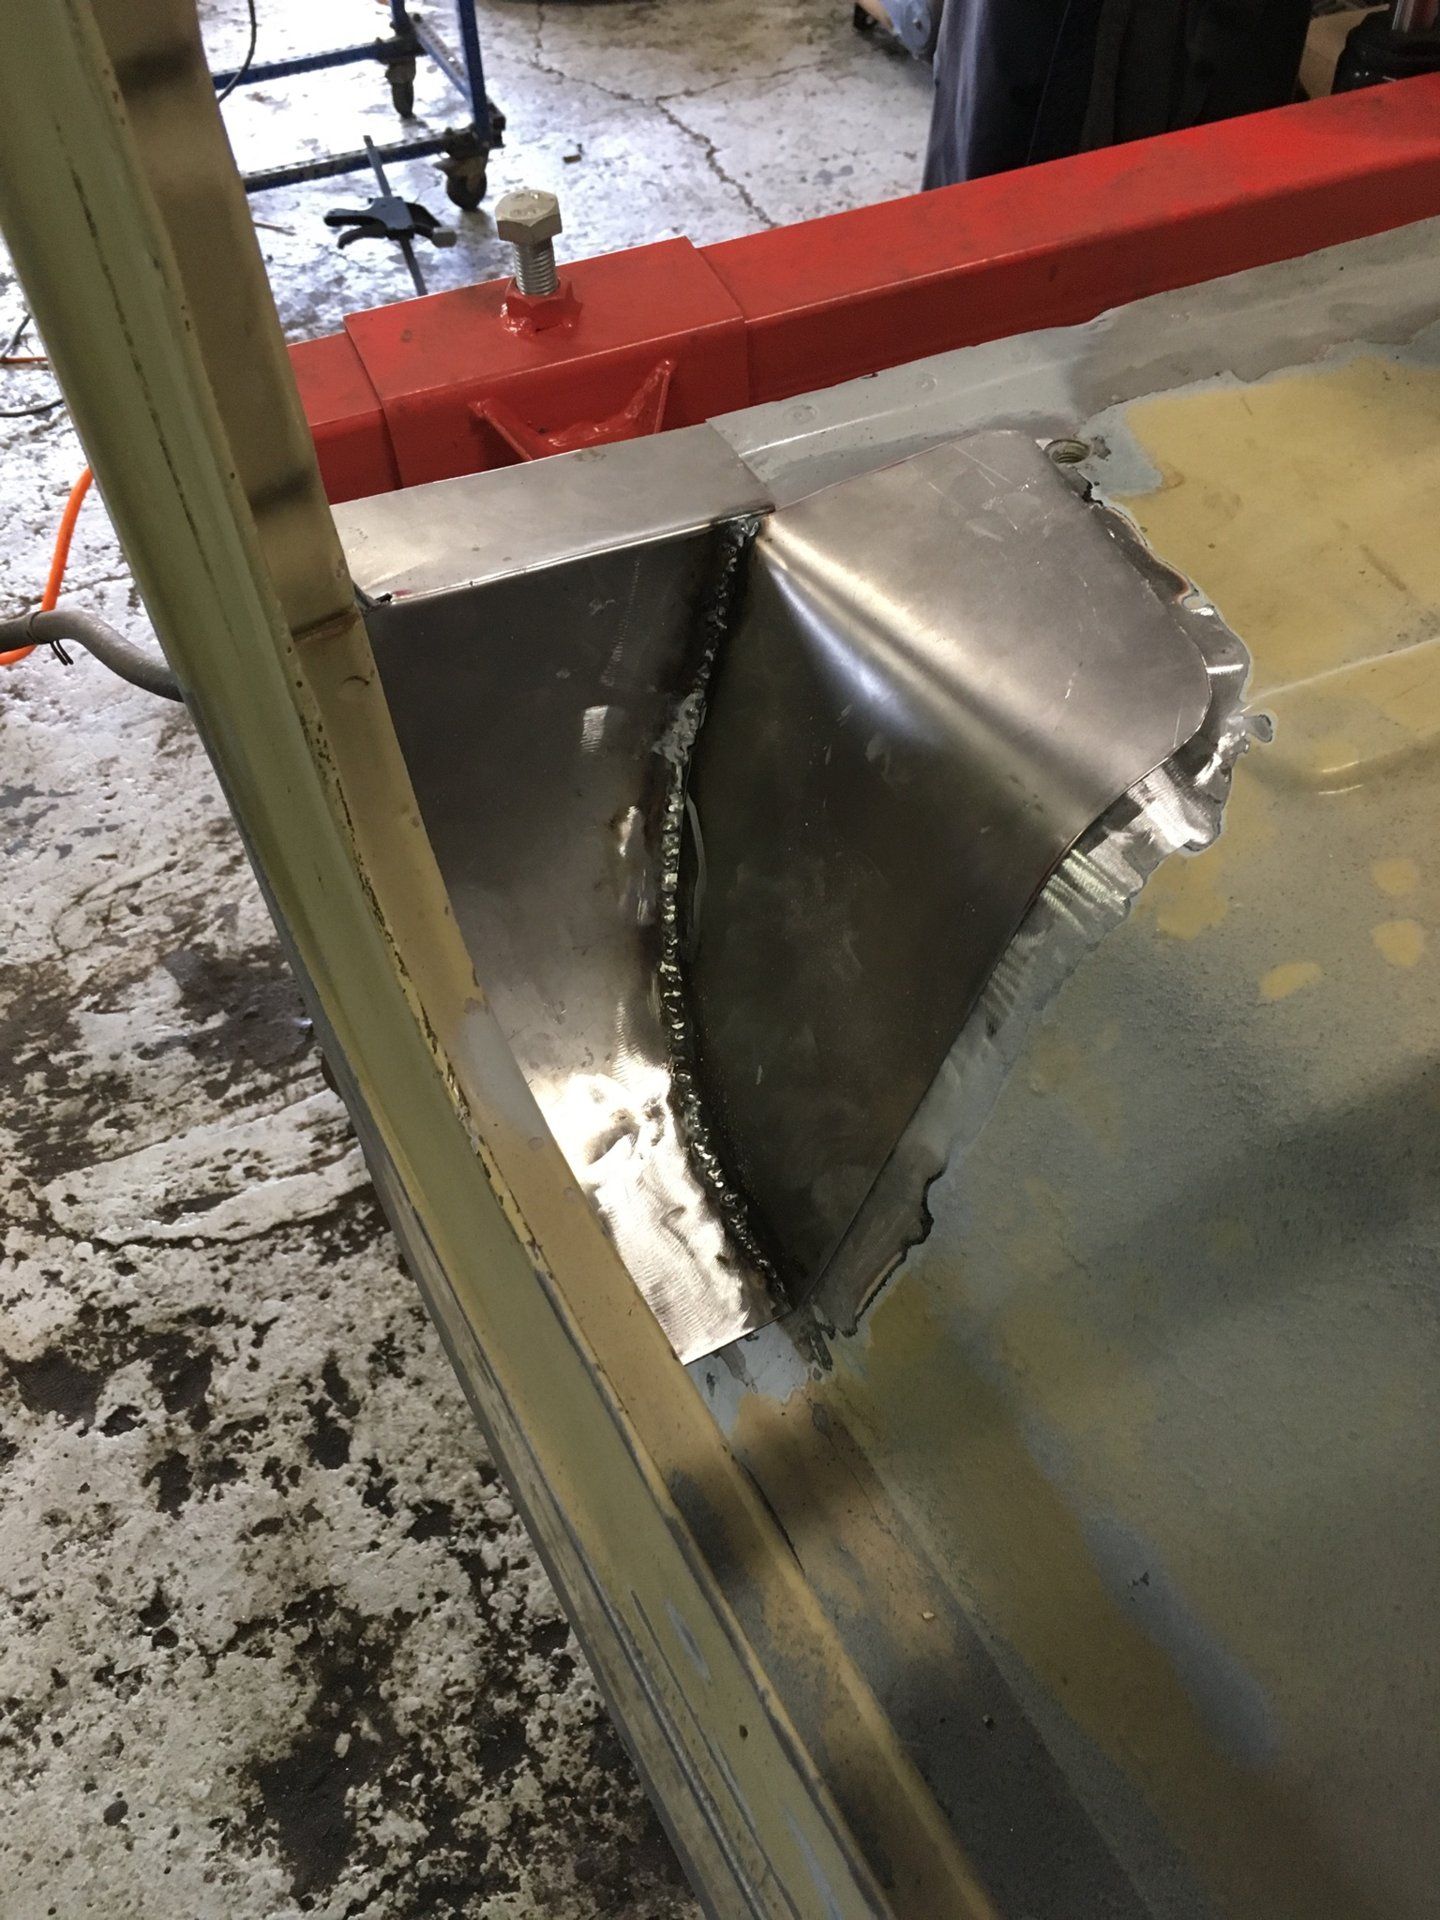
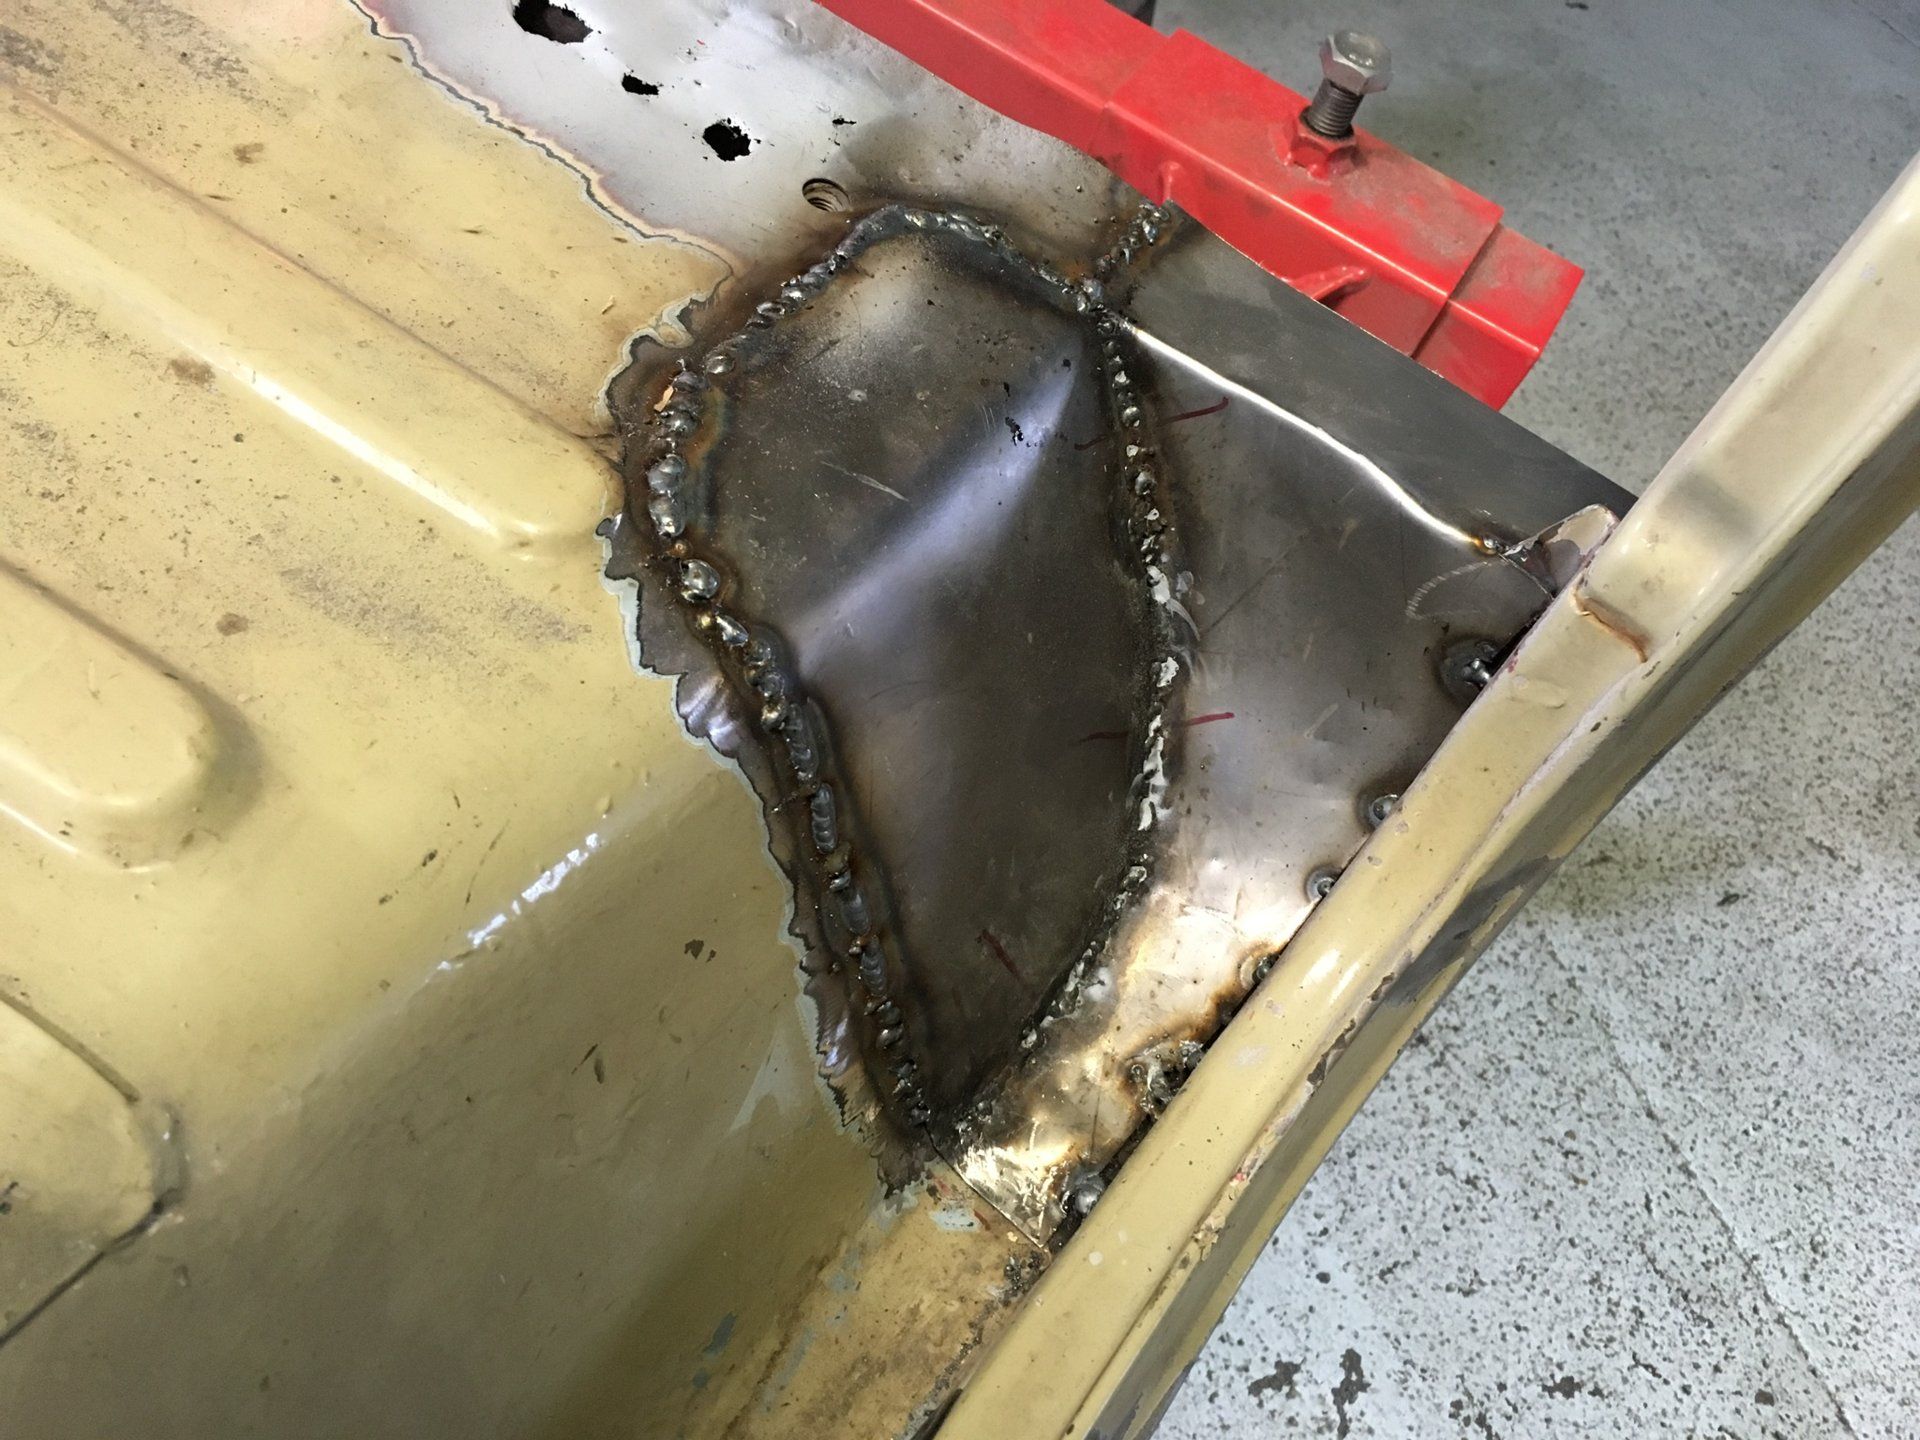
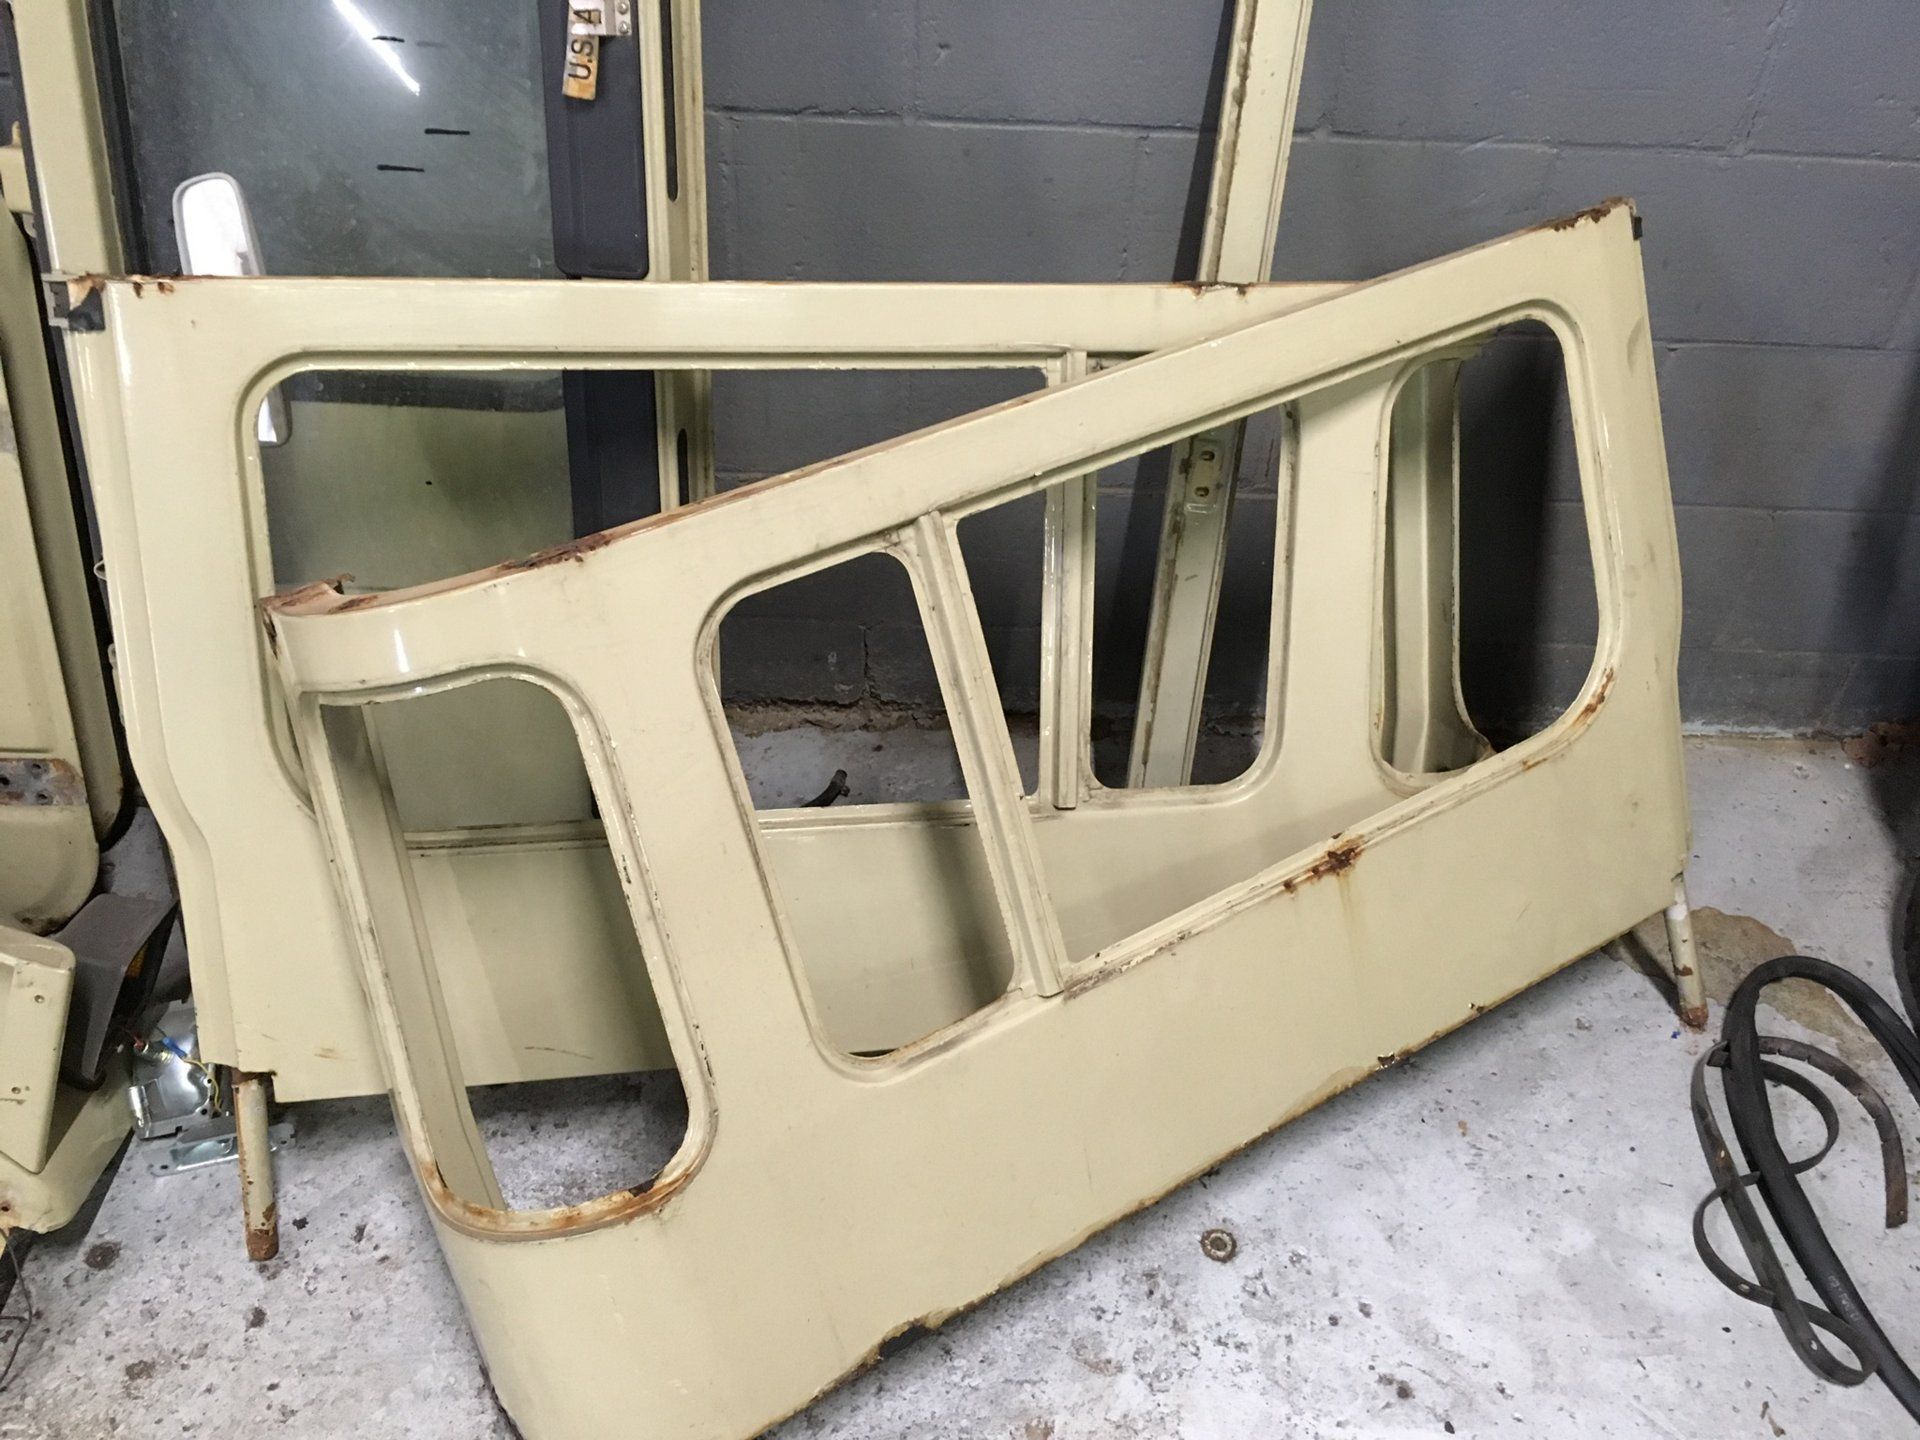
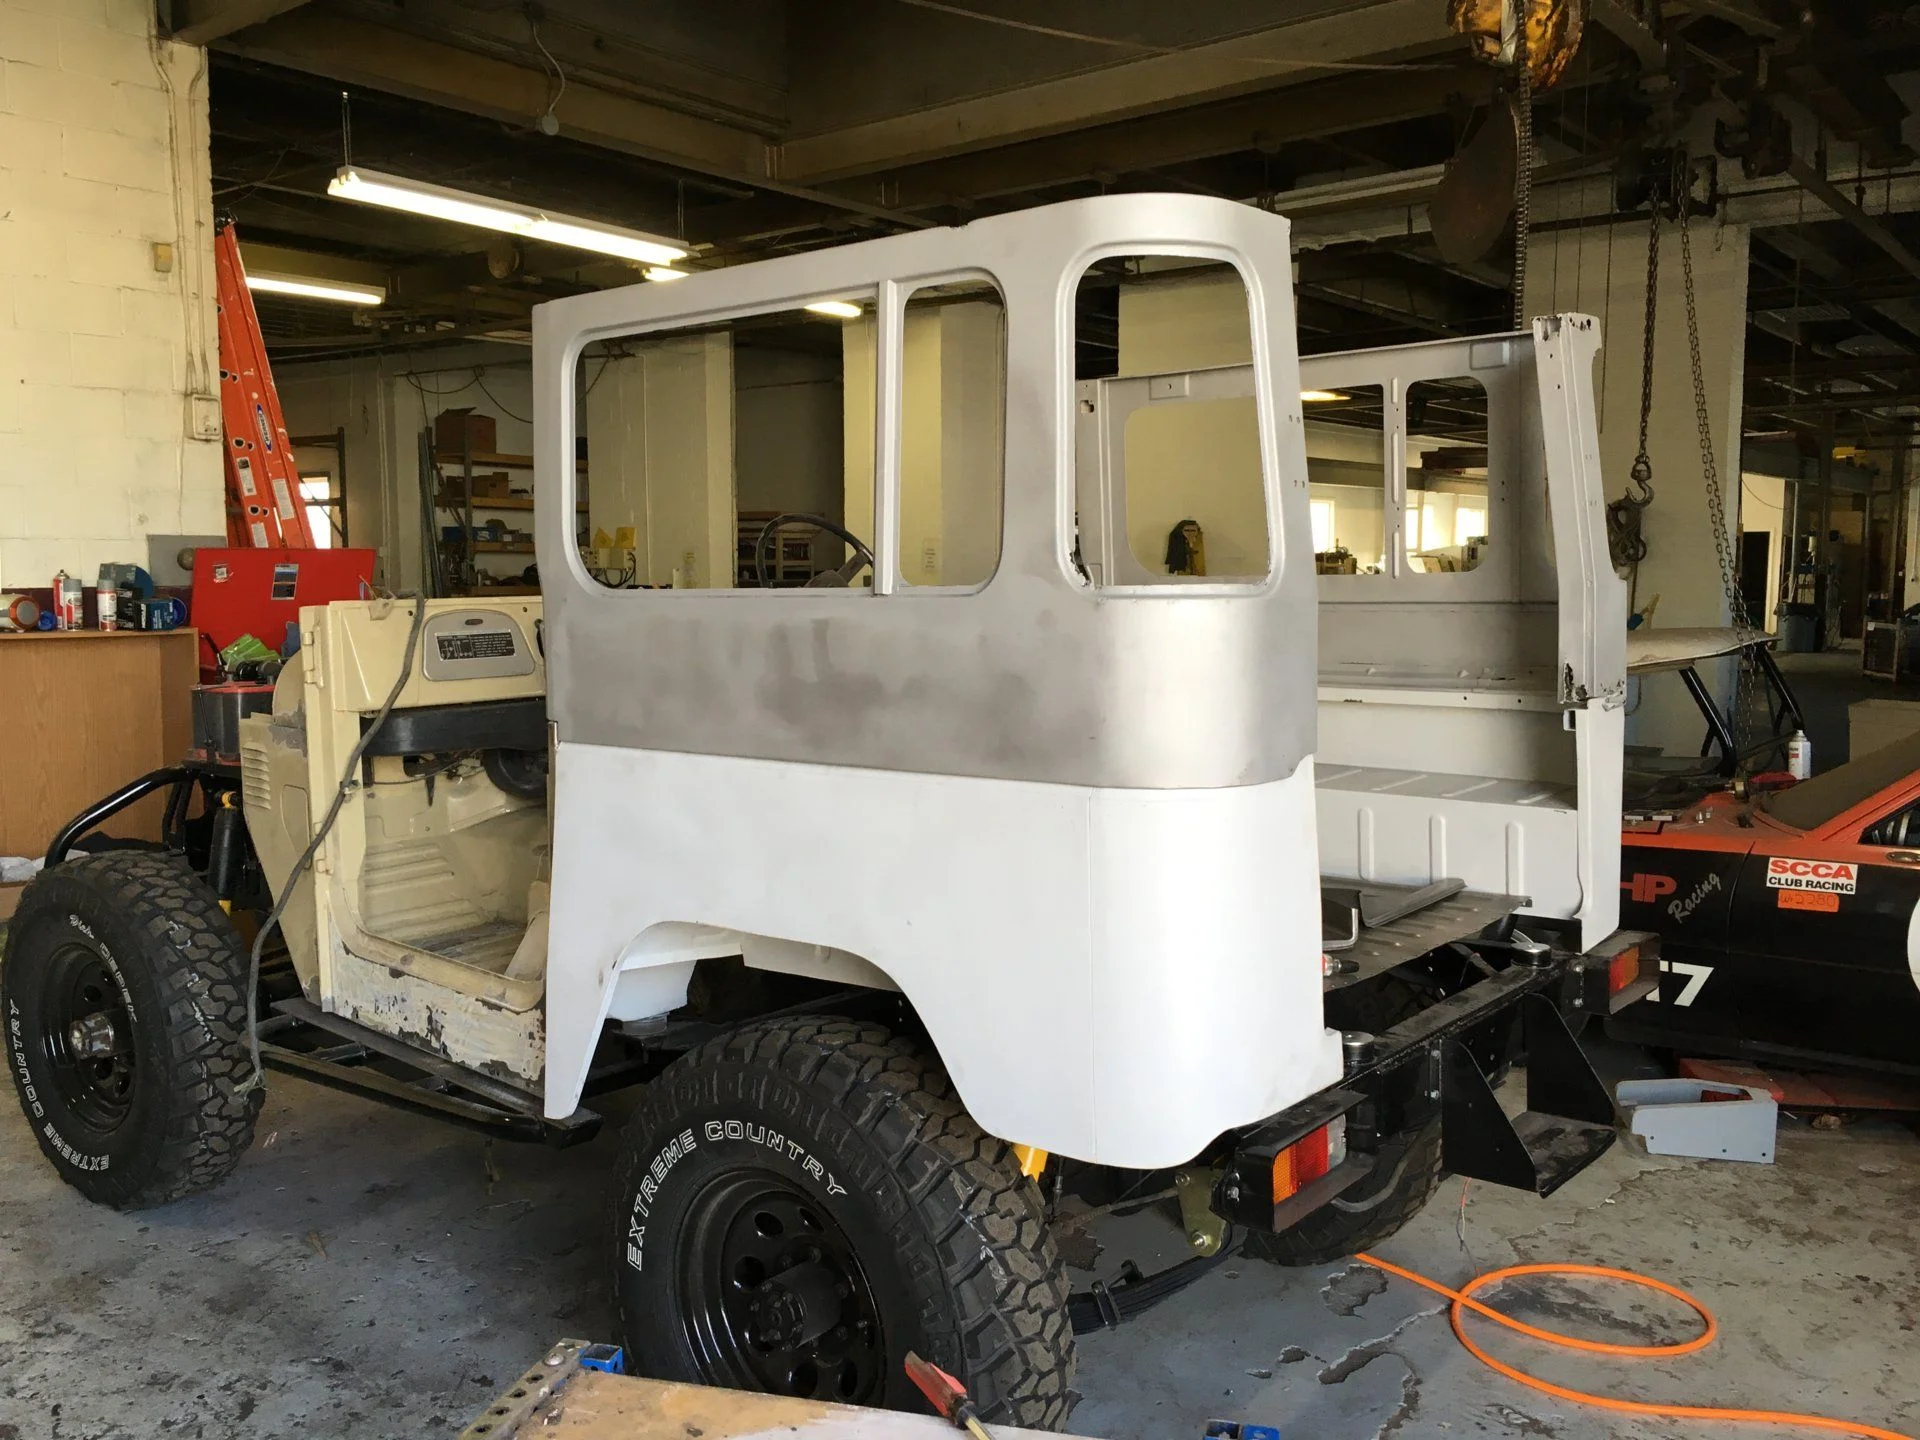
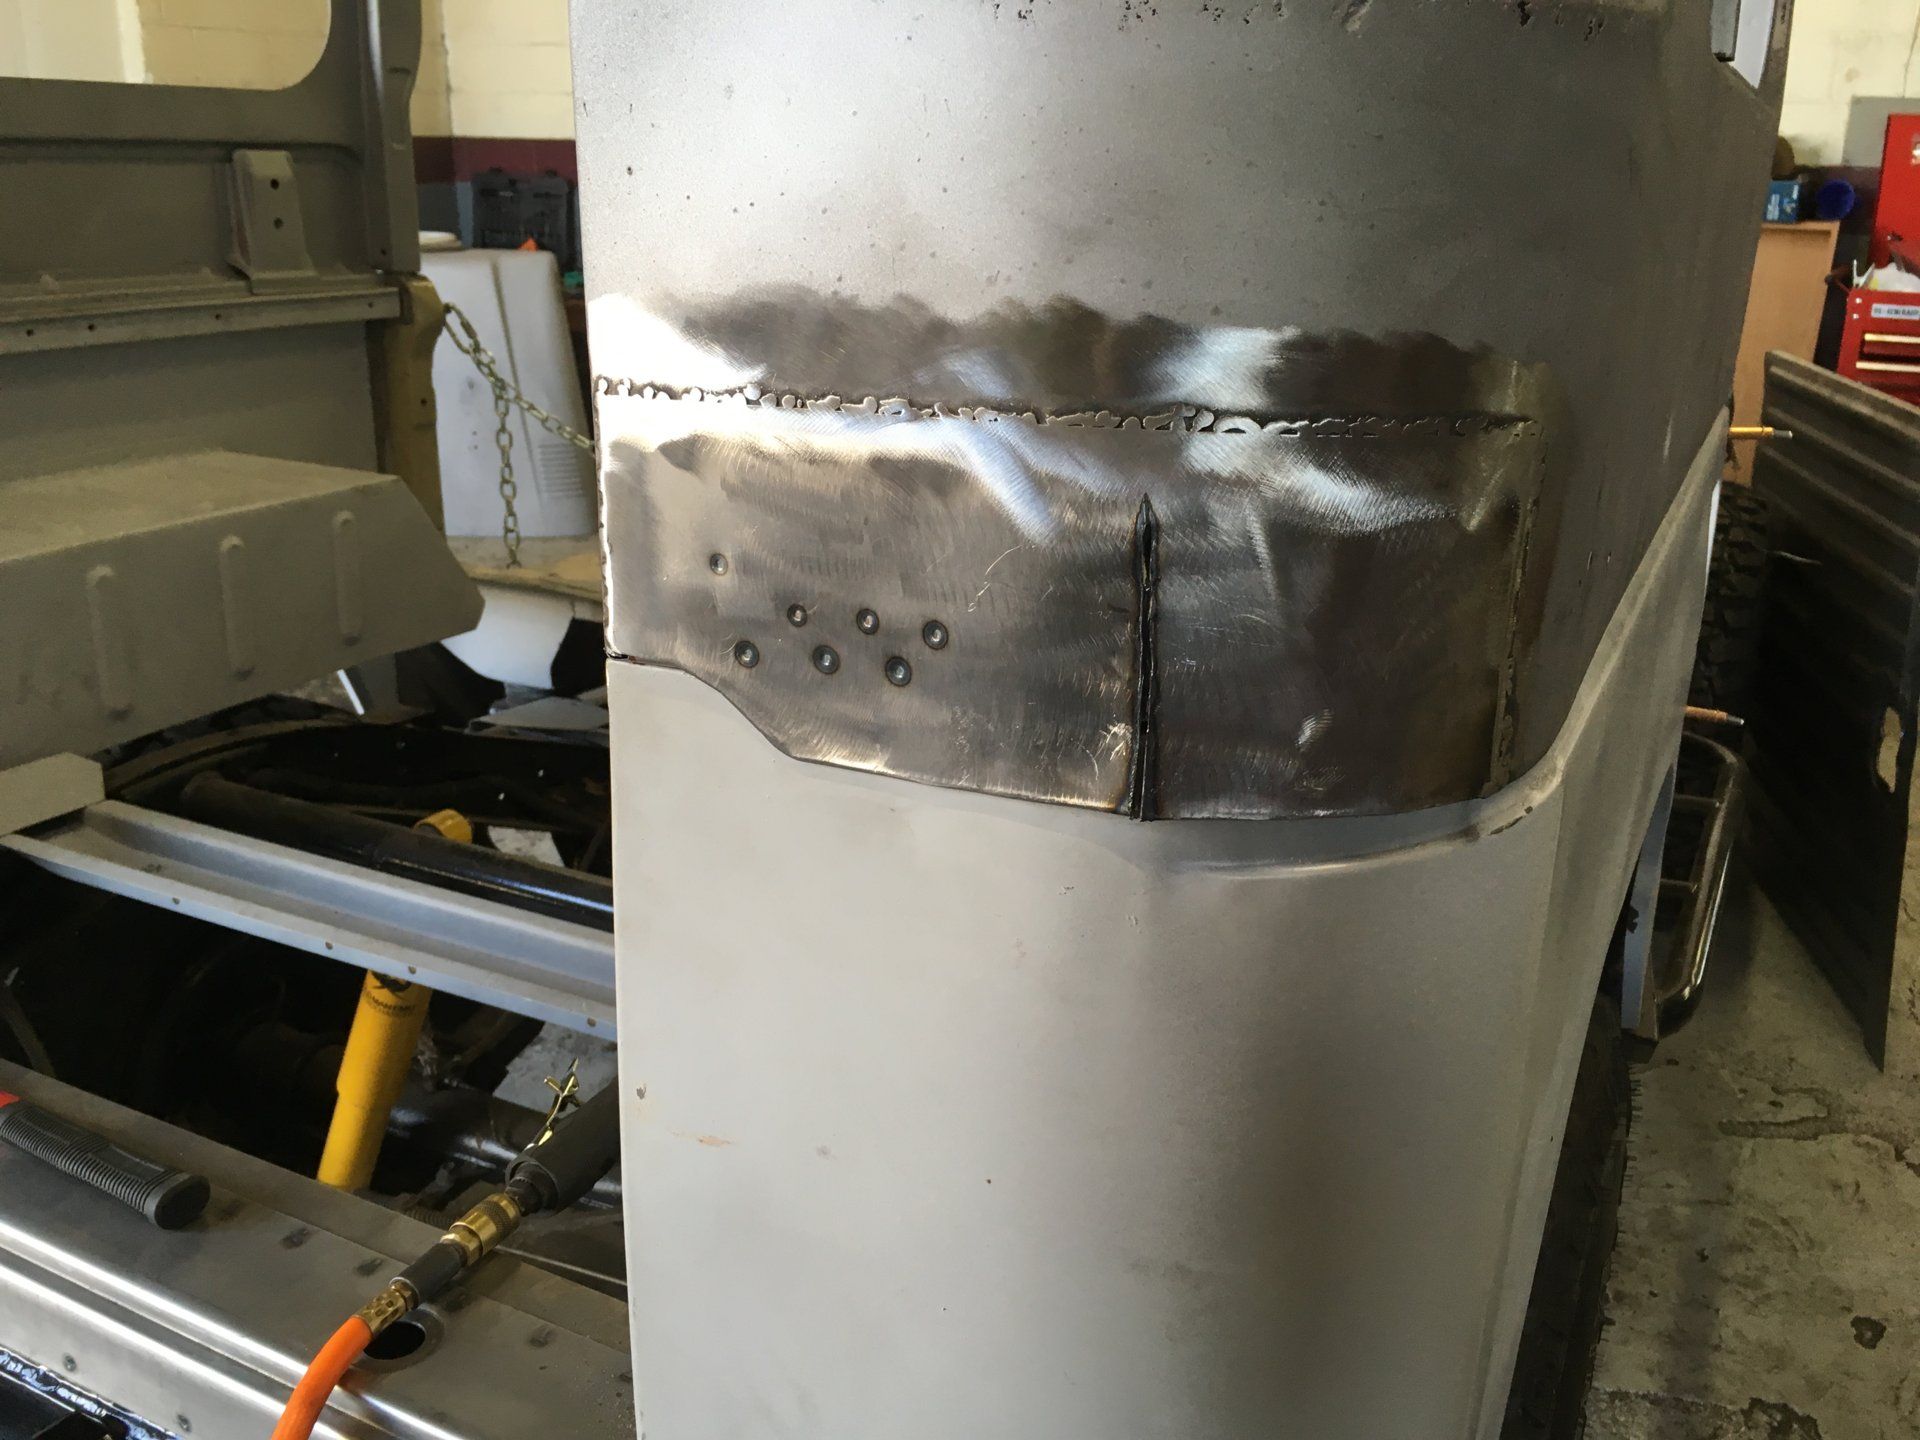
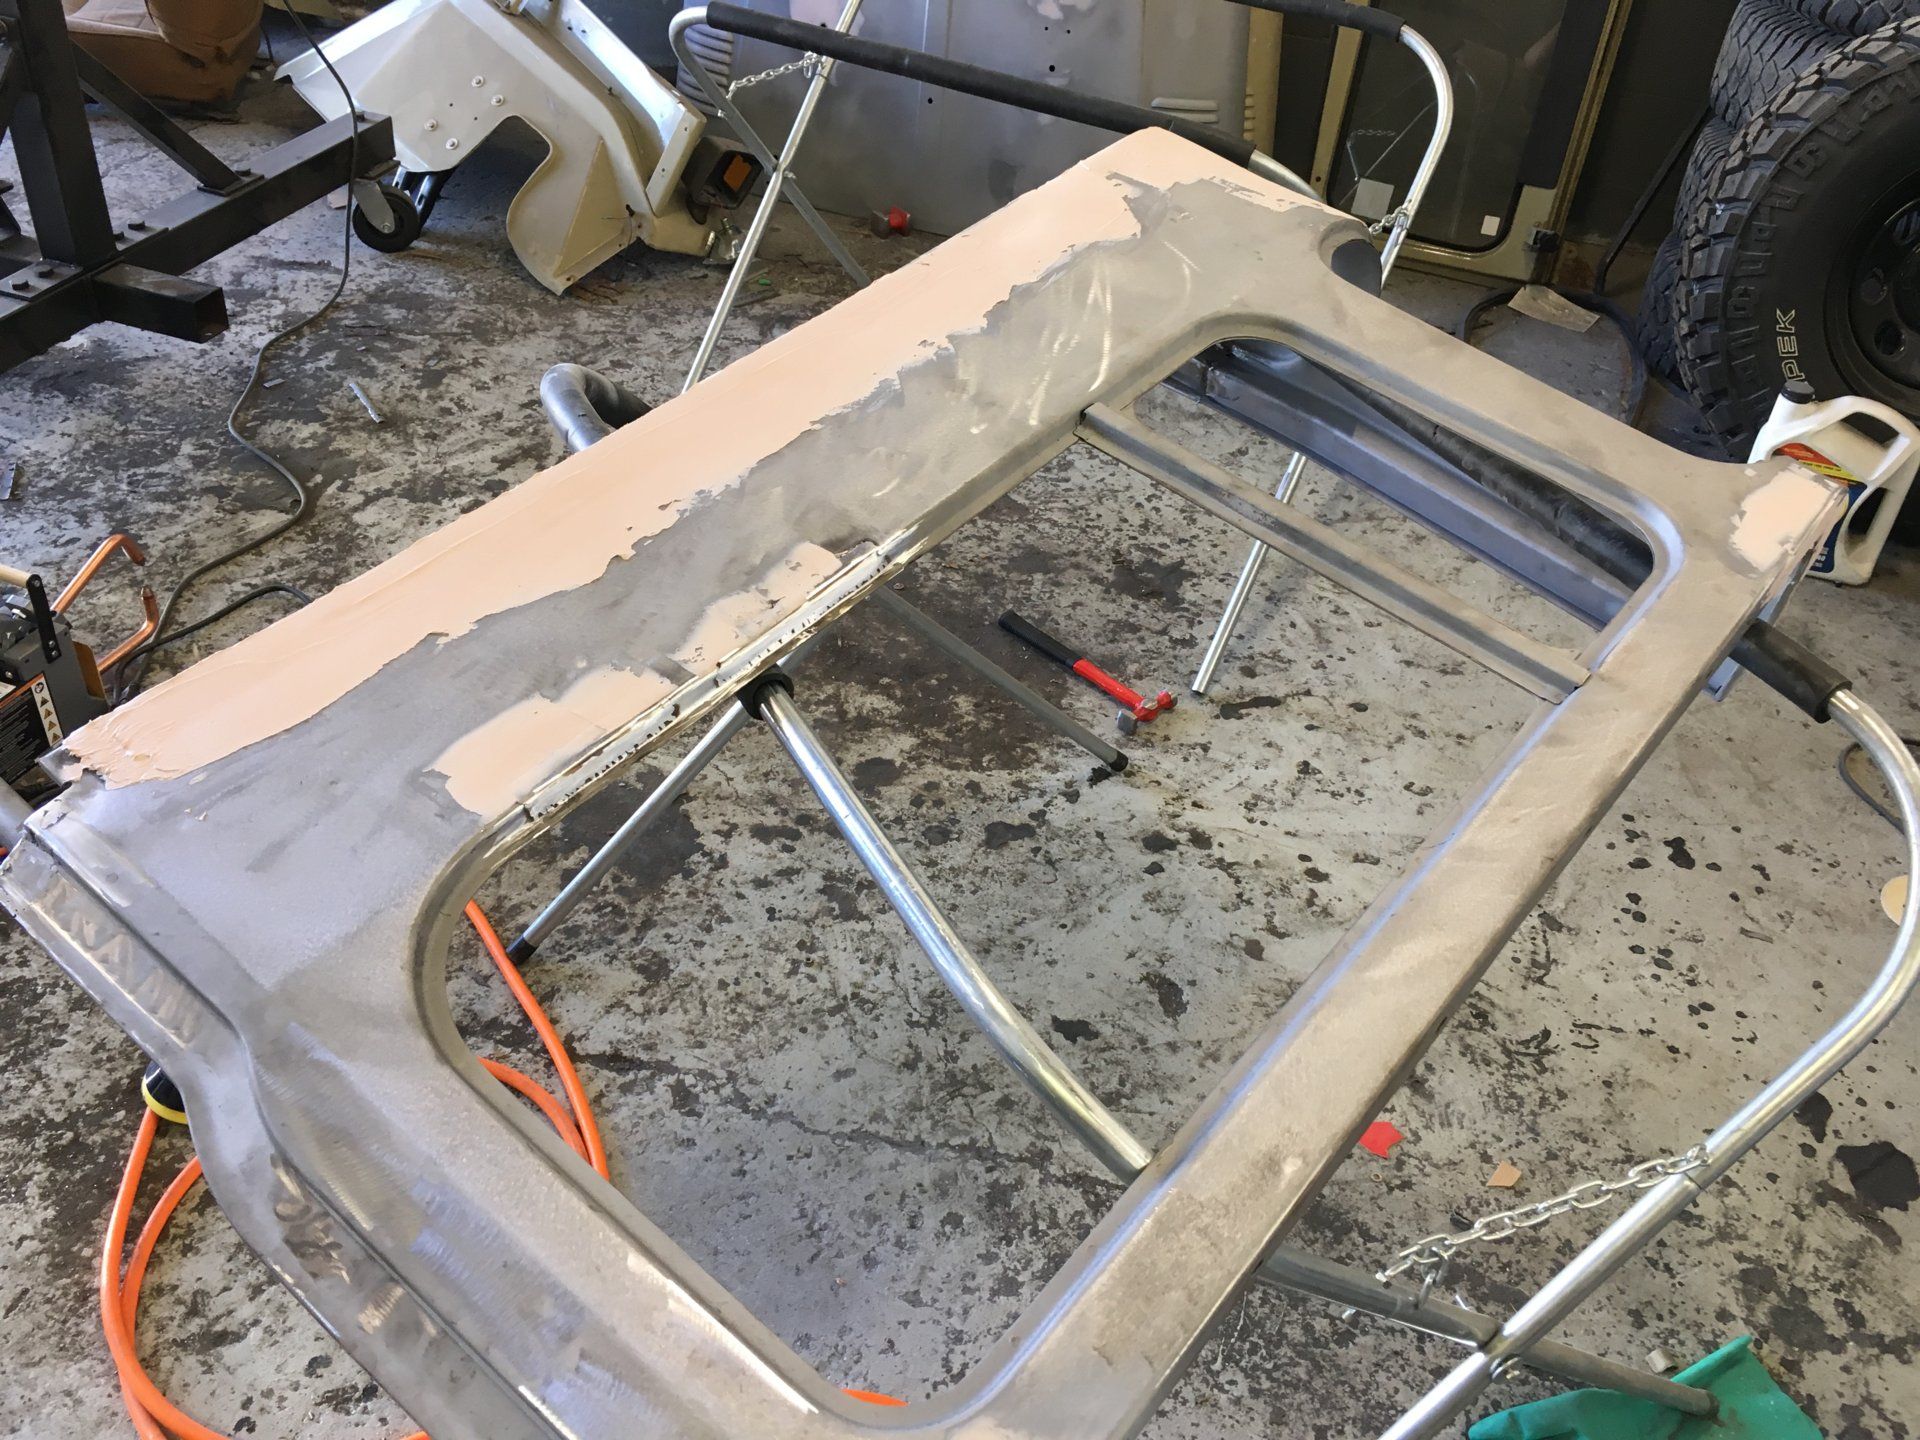
Here's some of the filling work that had to be done to the hard tops along with the welding. Not exactly pretty-looking here, but since nobody sells reproduction sides (And even if they did they'd probably cost a kidney) we worked with what we had. Once you get it in primer it looks a lot more respectable.
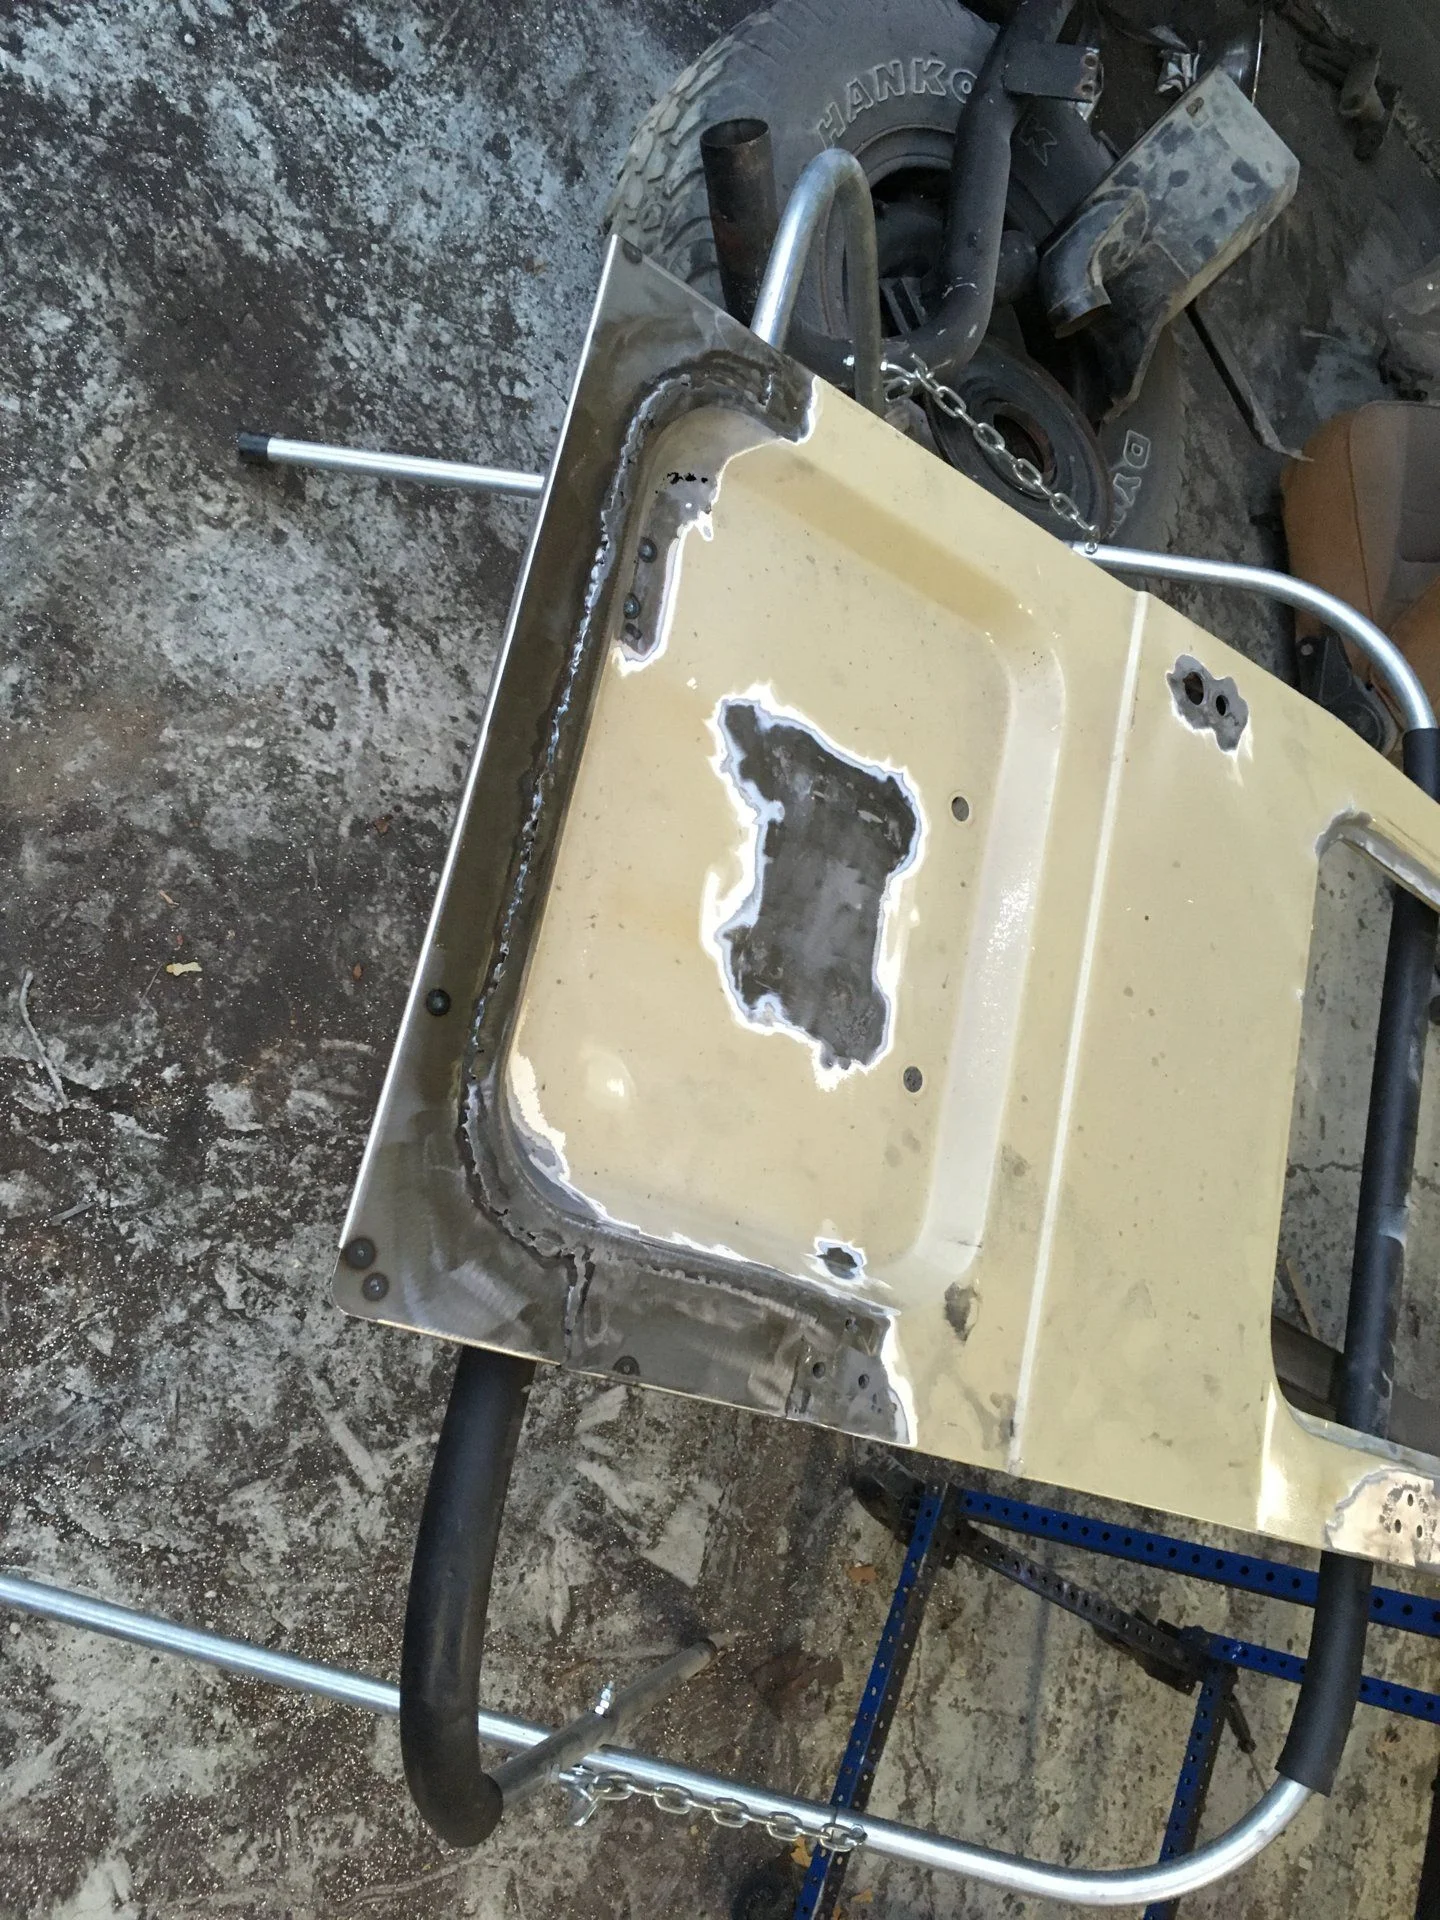
Here's a before shot of the right ambulance door.

And here's the post-operation pic. I removed the license plate mount since the truck will be getting a bumper/basket that would cover the stock plate position anyways.
Next we got the floor of the tub welded together... (And hit with some etching primer)
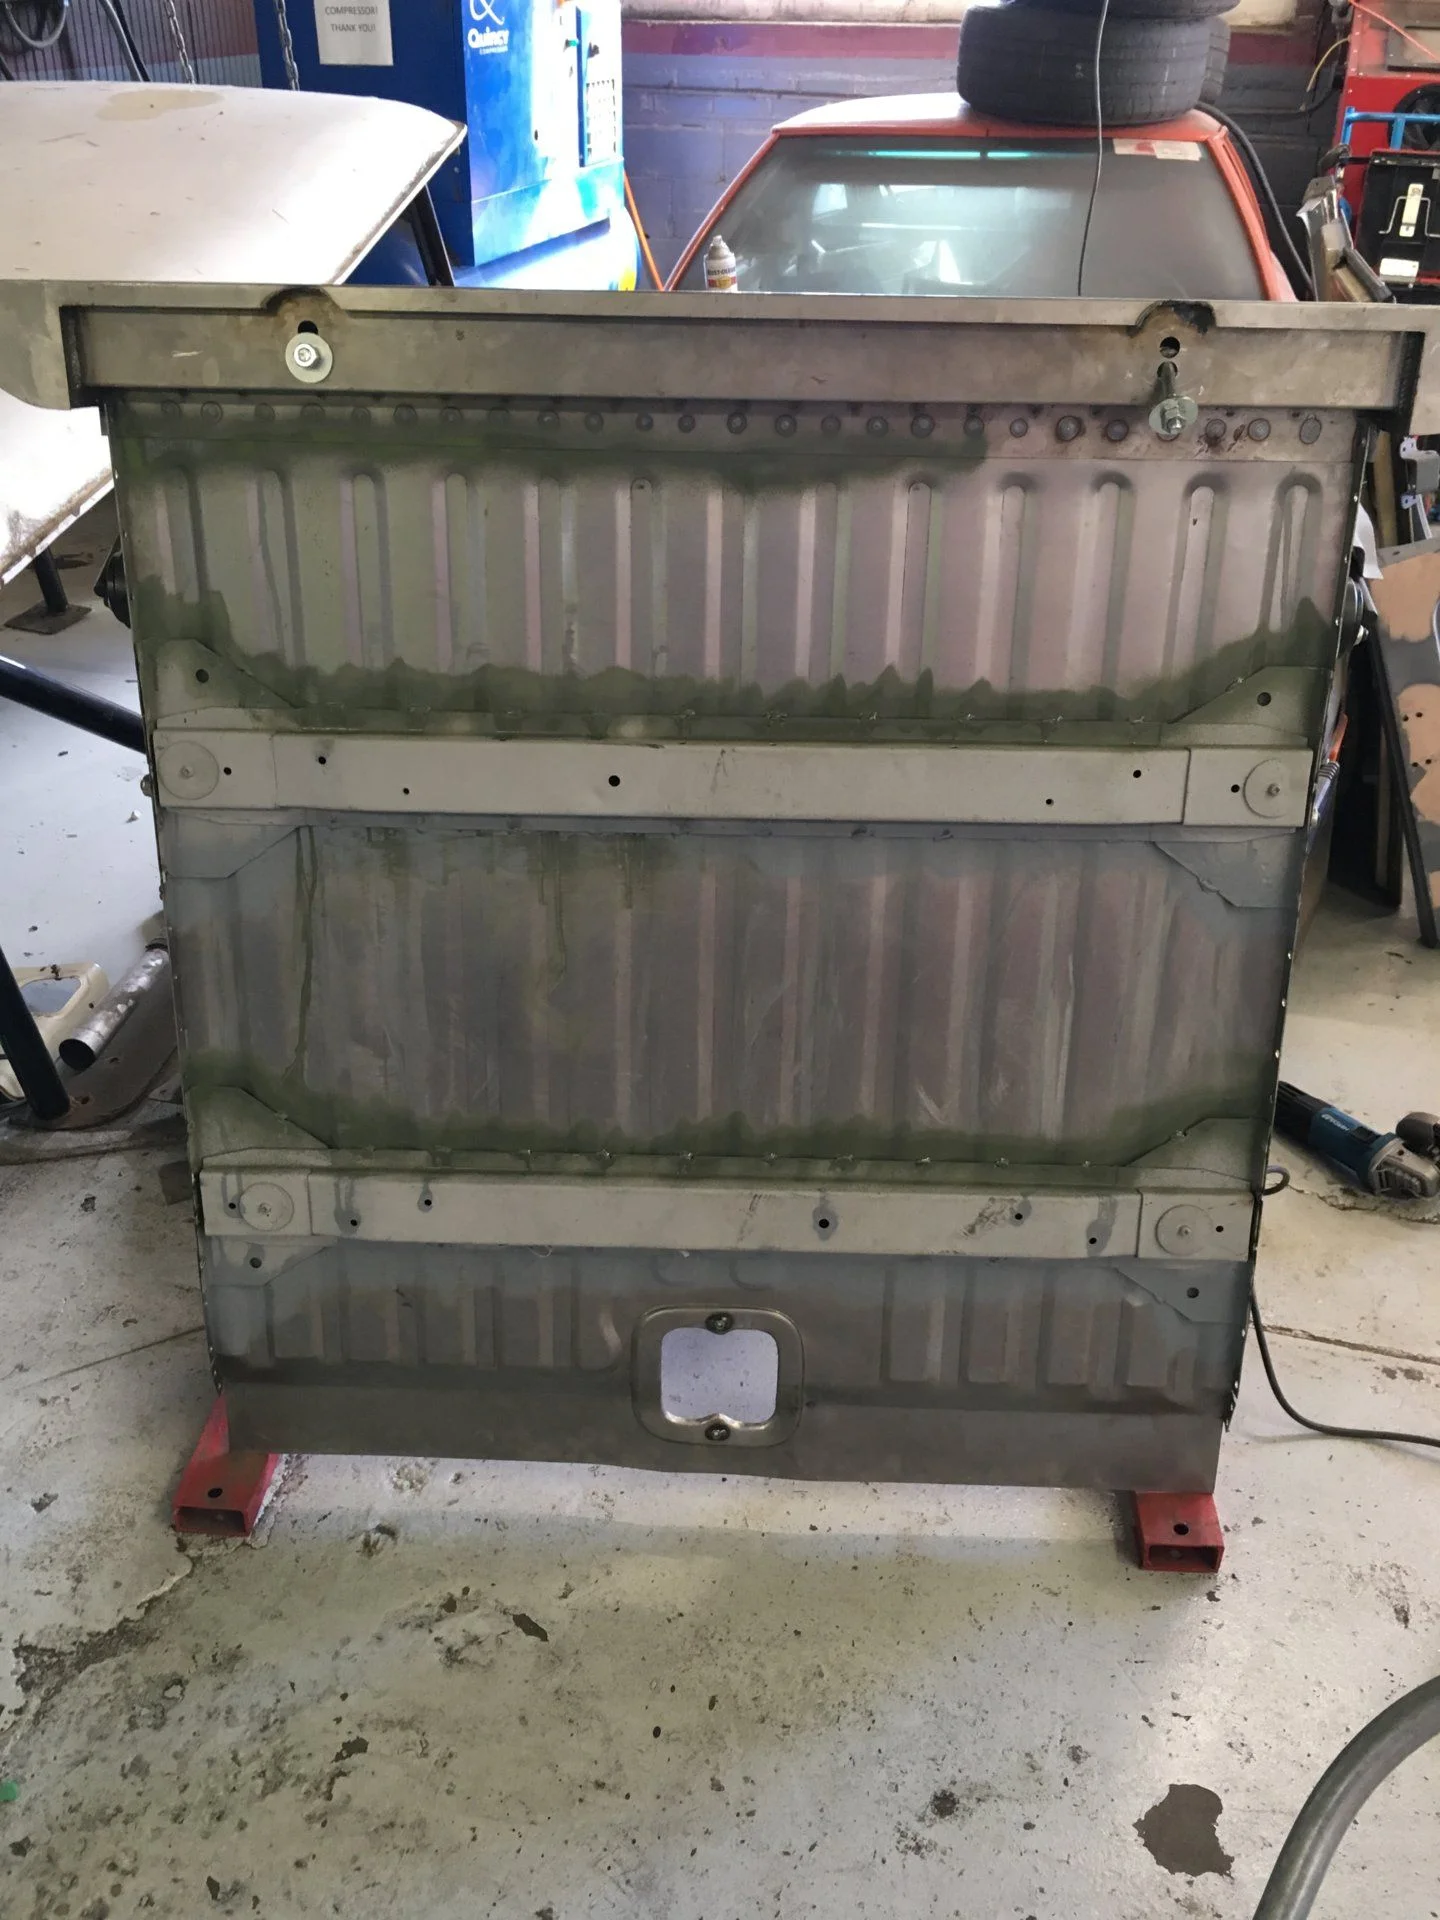
... so we could get the fitment of the rear tub finalized...
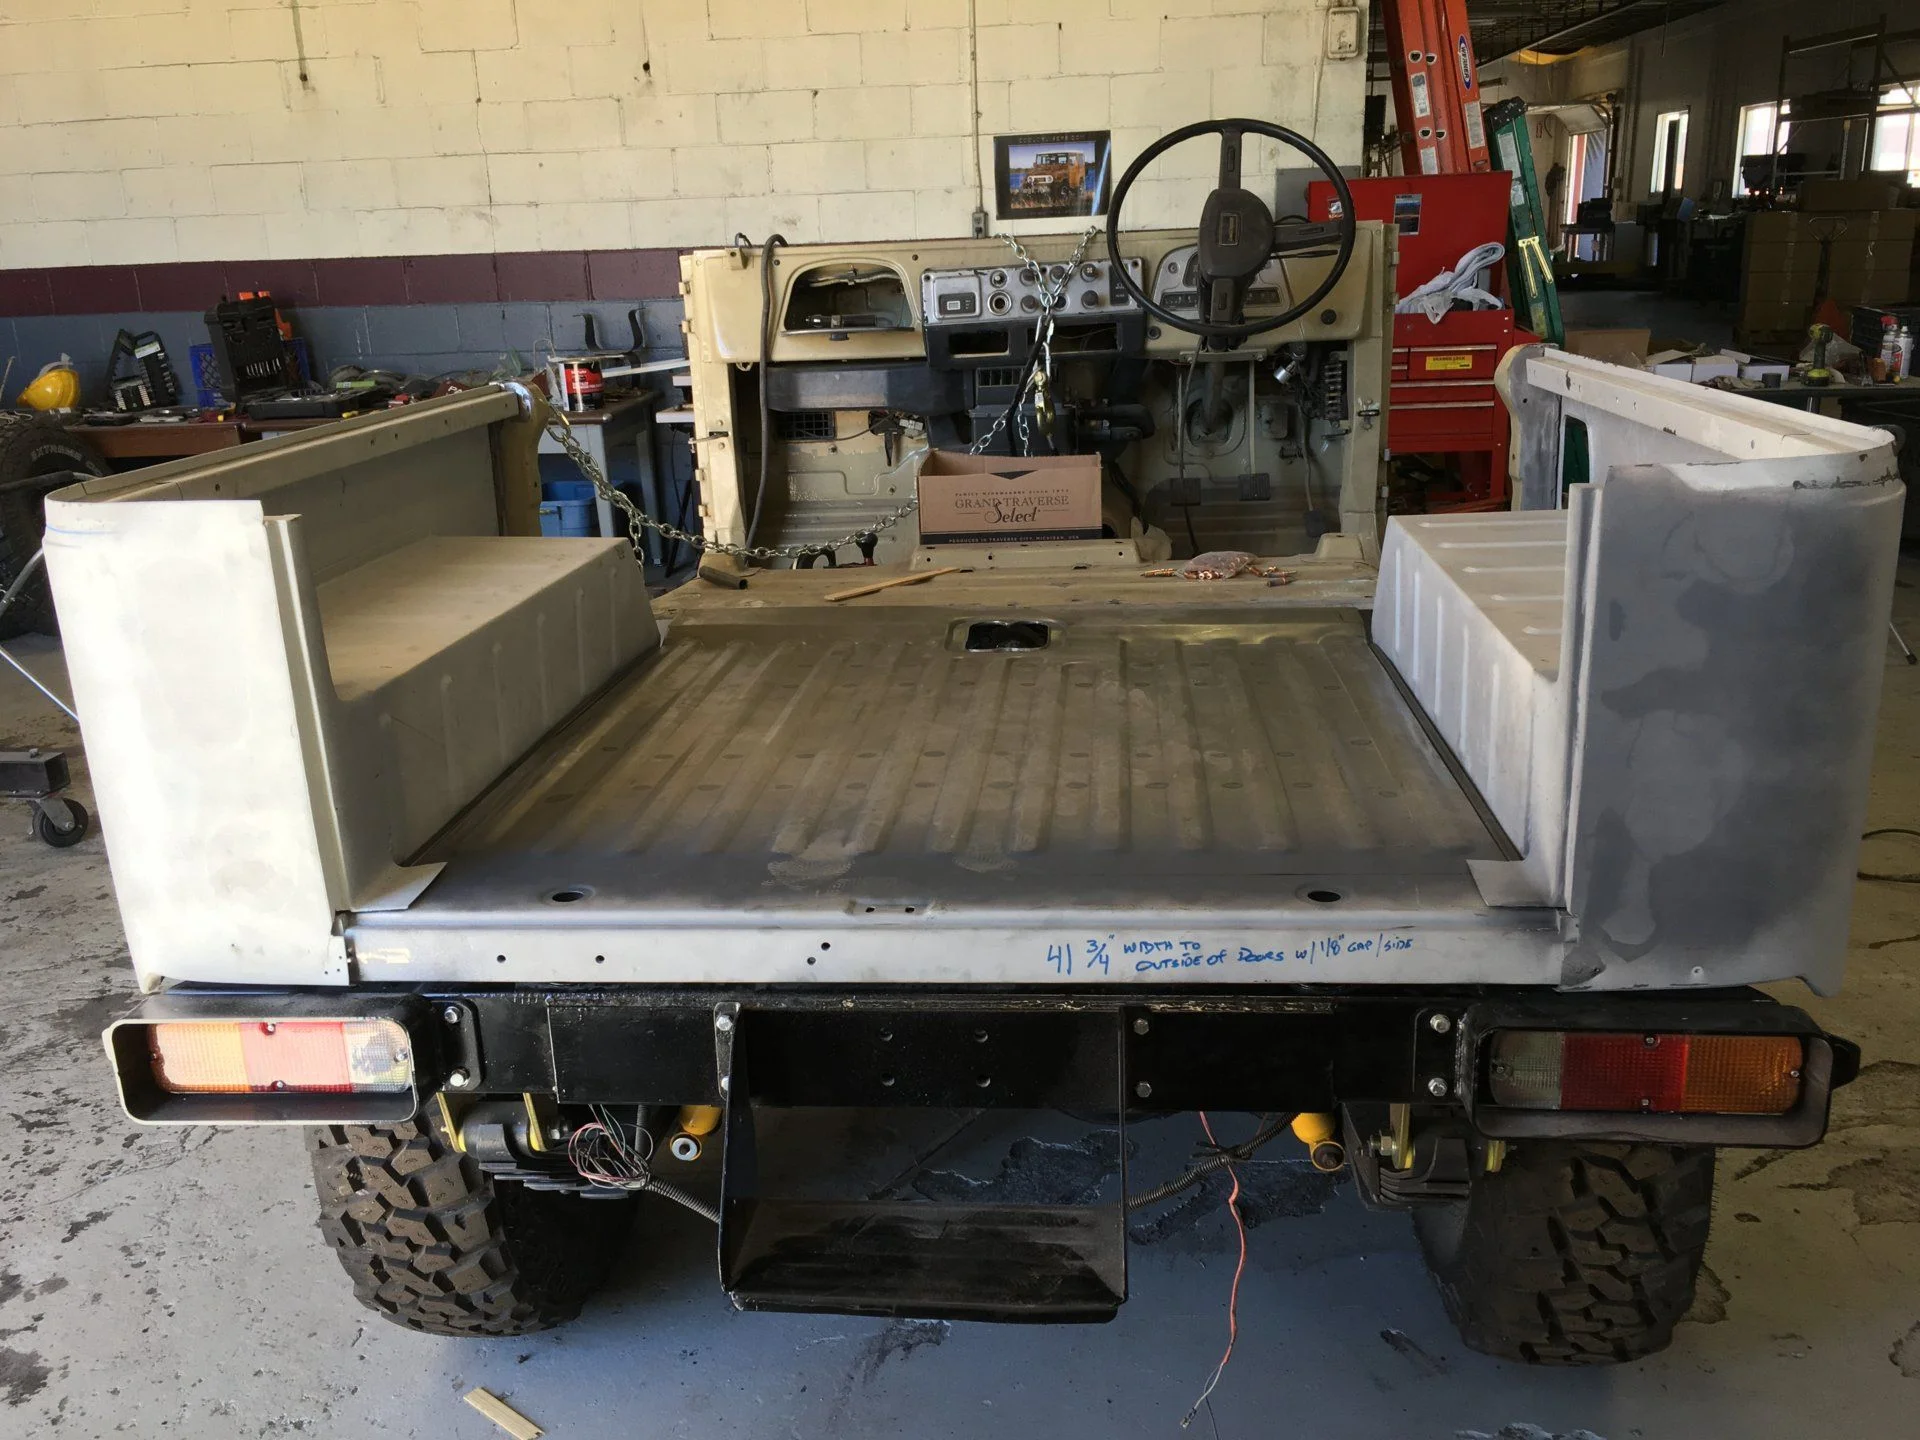
... and get the whole thing officially welded back together!

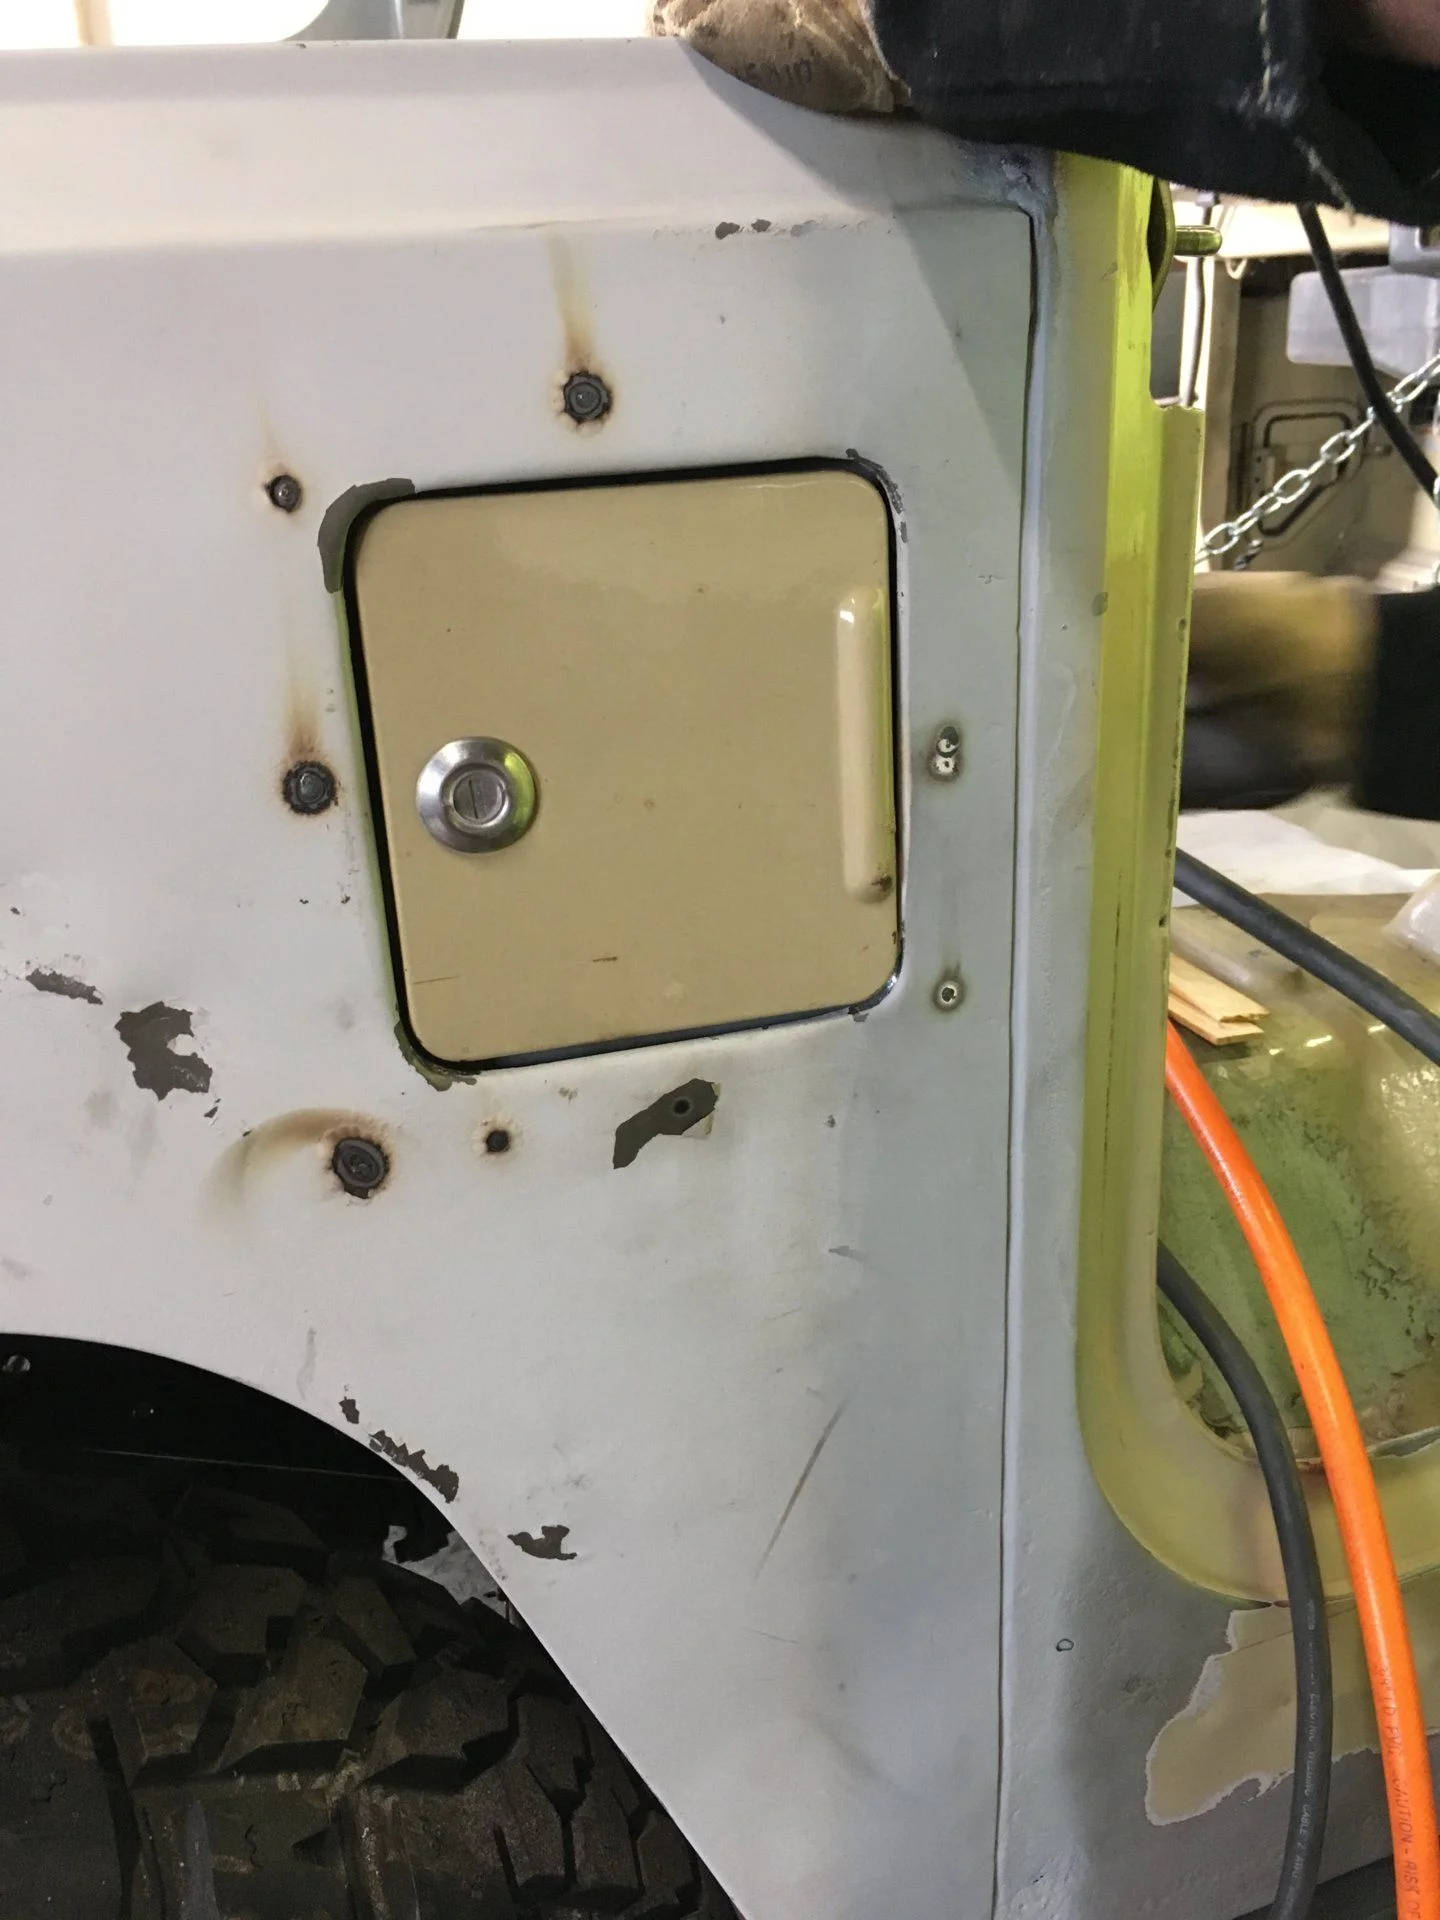
Couldn't forget the fuel filler, could we? Pretty certain I don't have a key to that door, and the latch is broken anyways. Gonna have to replace those with something.
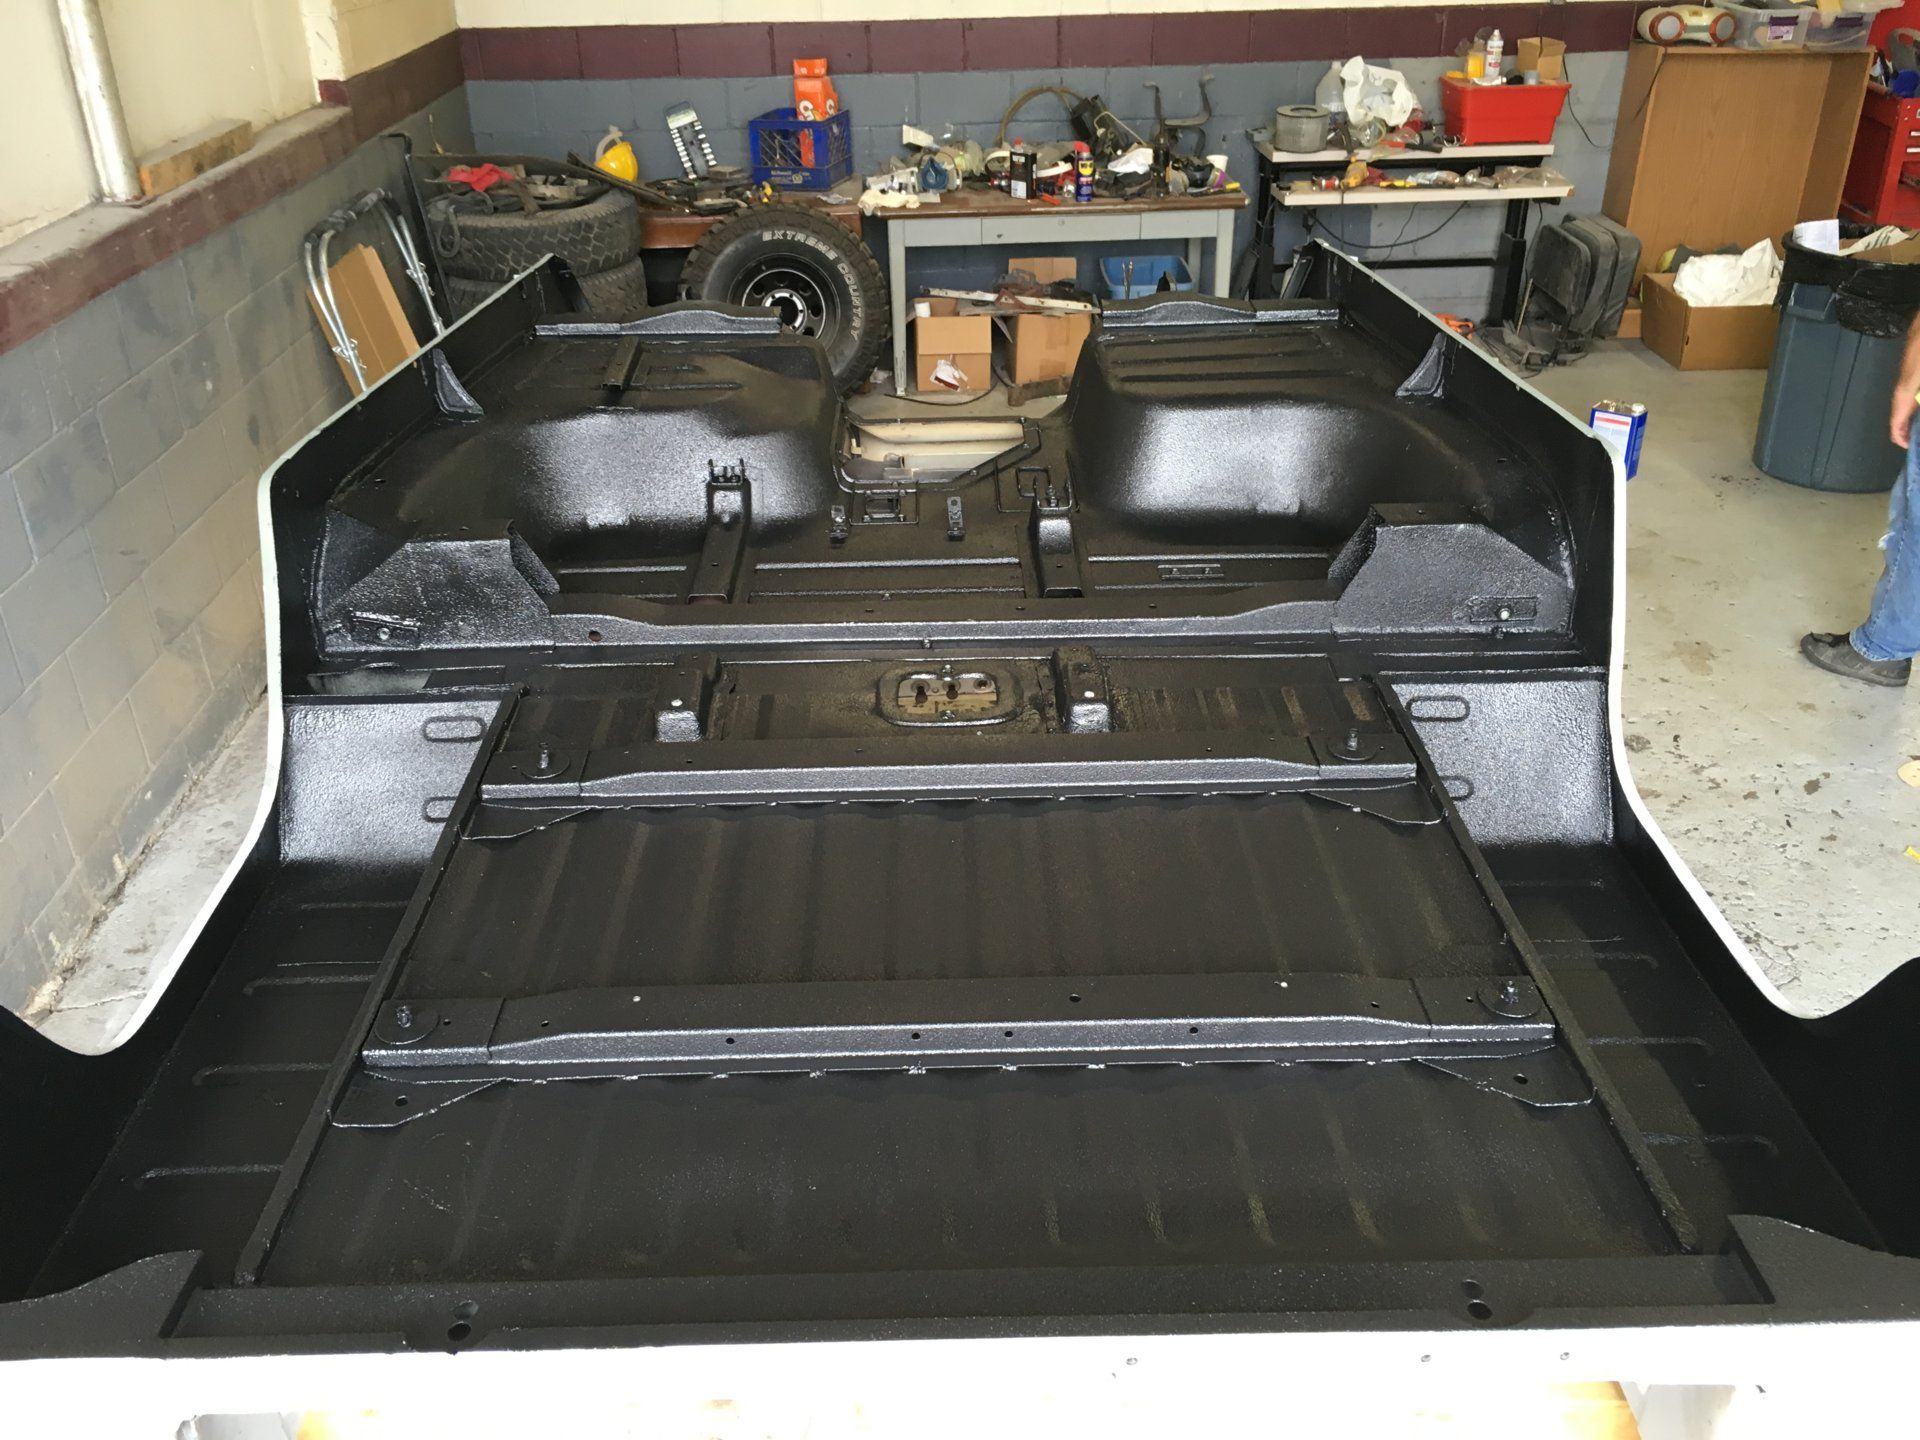
After that came several weeks of welding in small pieces, grinding those welds, then putting bondo in the gaps and divots, then sanding the bondo. That was kind of arduous and not particularly photo-worthy, so there's a month or more of practically no photos. We got through it though, which meant it was time for another huge milestone: undercoat. I decided to go with black bedliner, since it was durable and would essentially disappear under the truck. We got a quote from the local Line-X place and promptly decided to apply it ourselves. Raptor bed liner was the best-reviewed DIY kit we could find, so we picked up a kit. The results?
Pretty dang good.
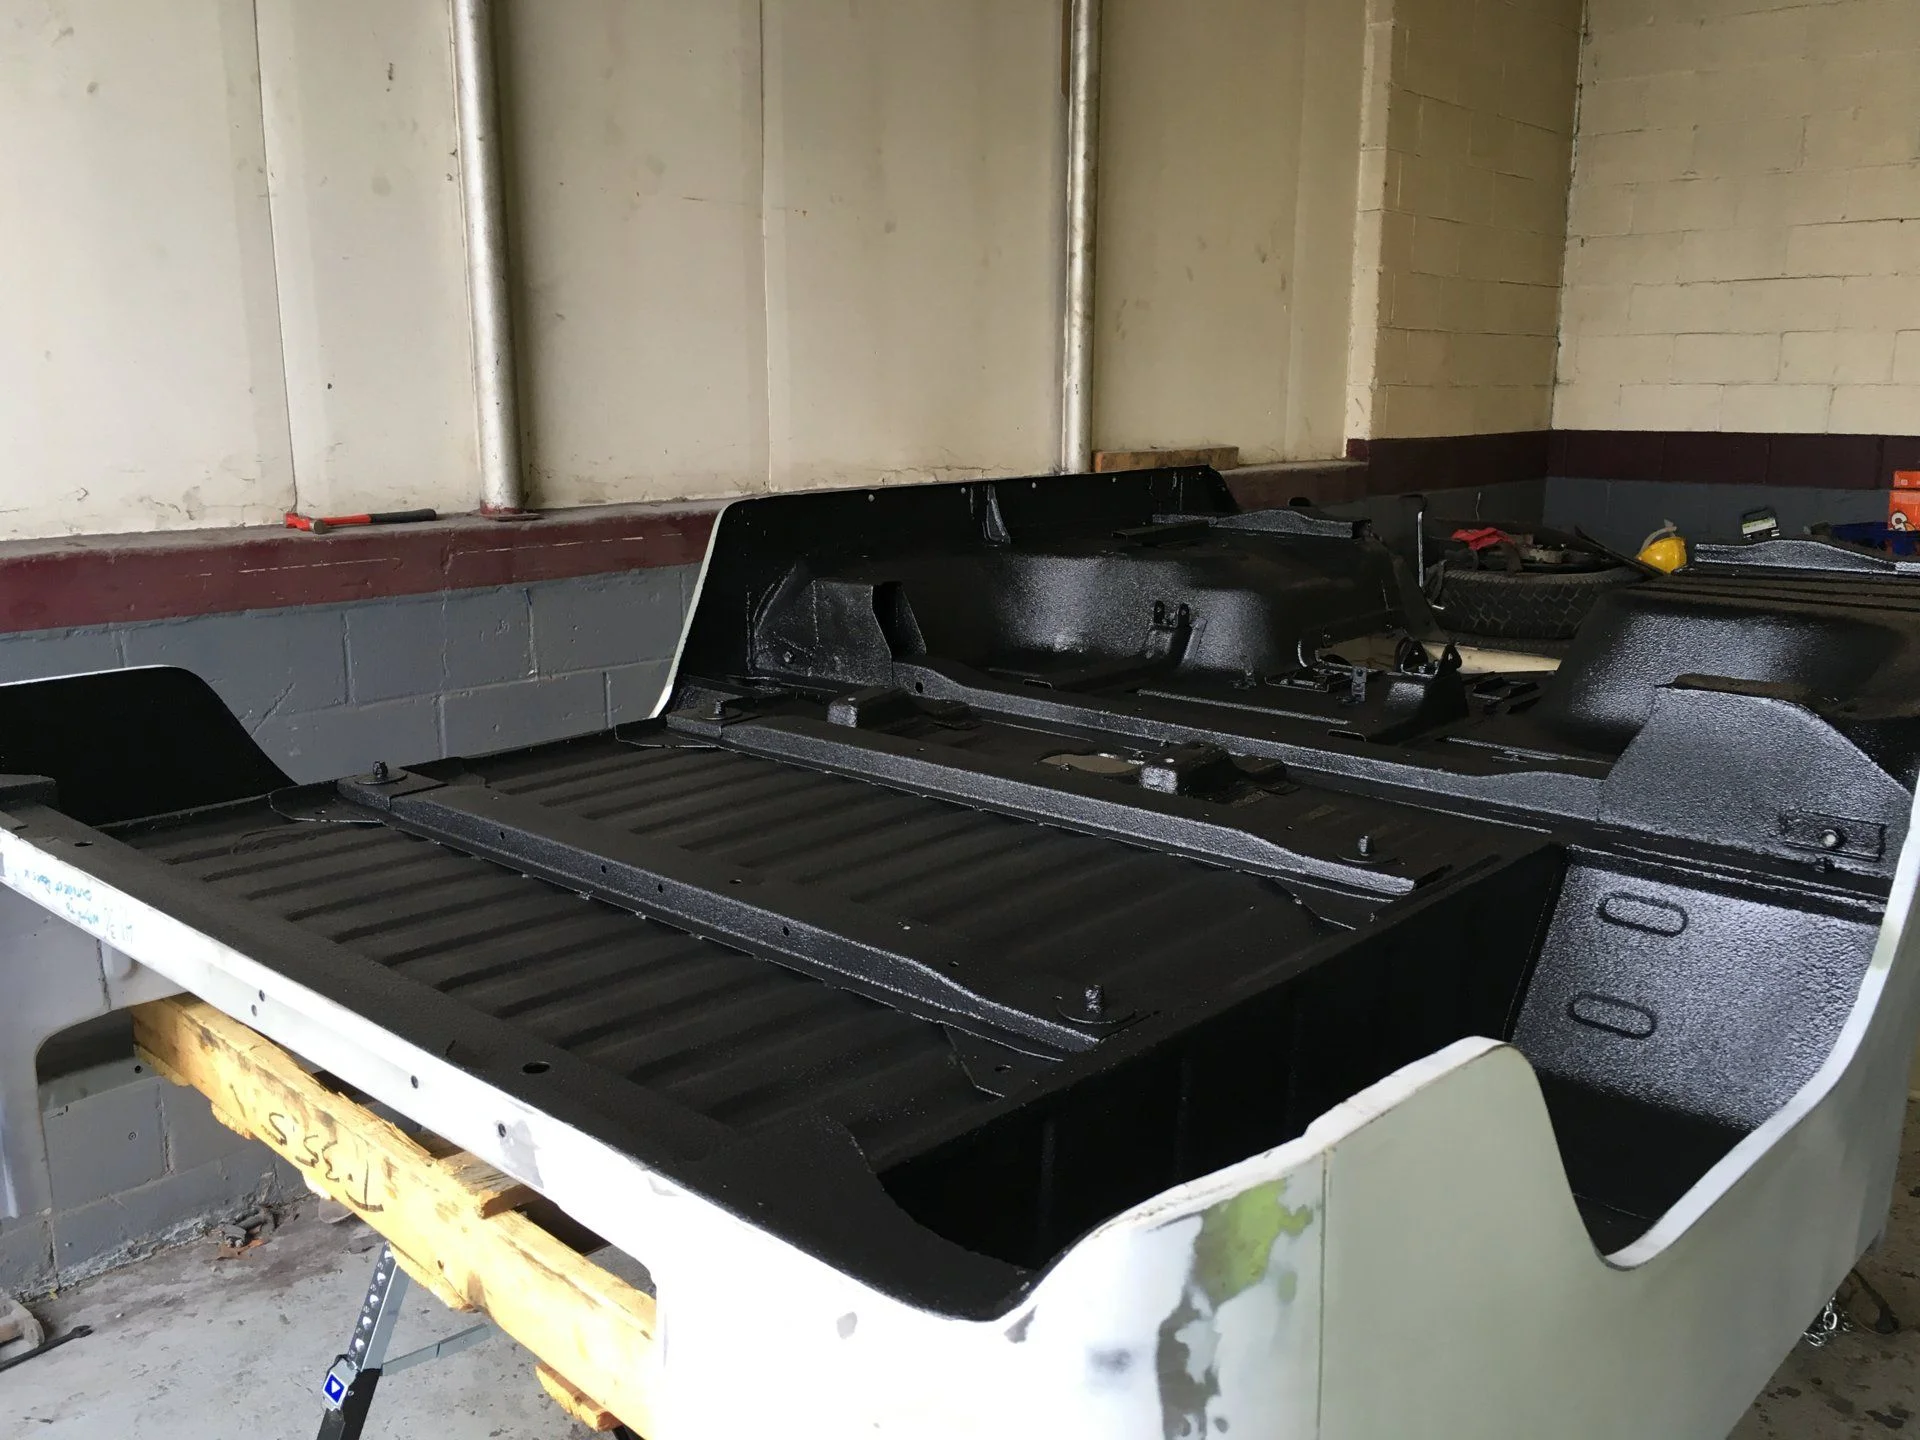
The texture was perfect for what I wanted. Not dirt-trapping rough, not sandpaper gritty, not "basically thick paint" smooth. We used normal masking tape, and threaded bolts into any holes we needed to protect.
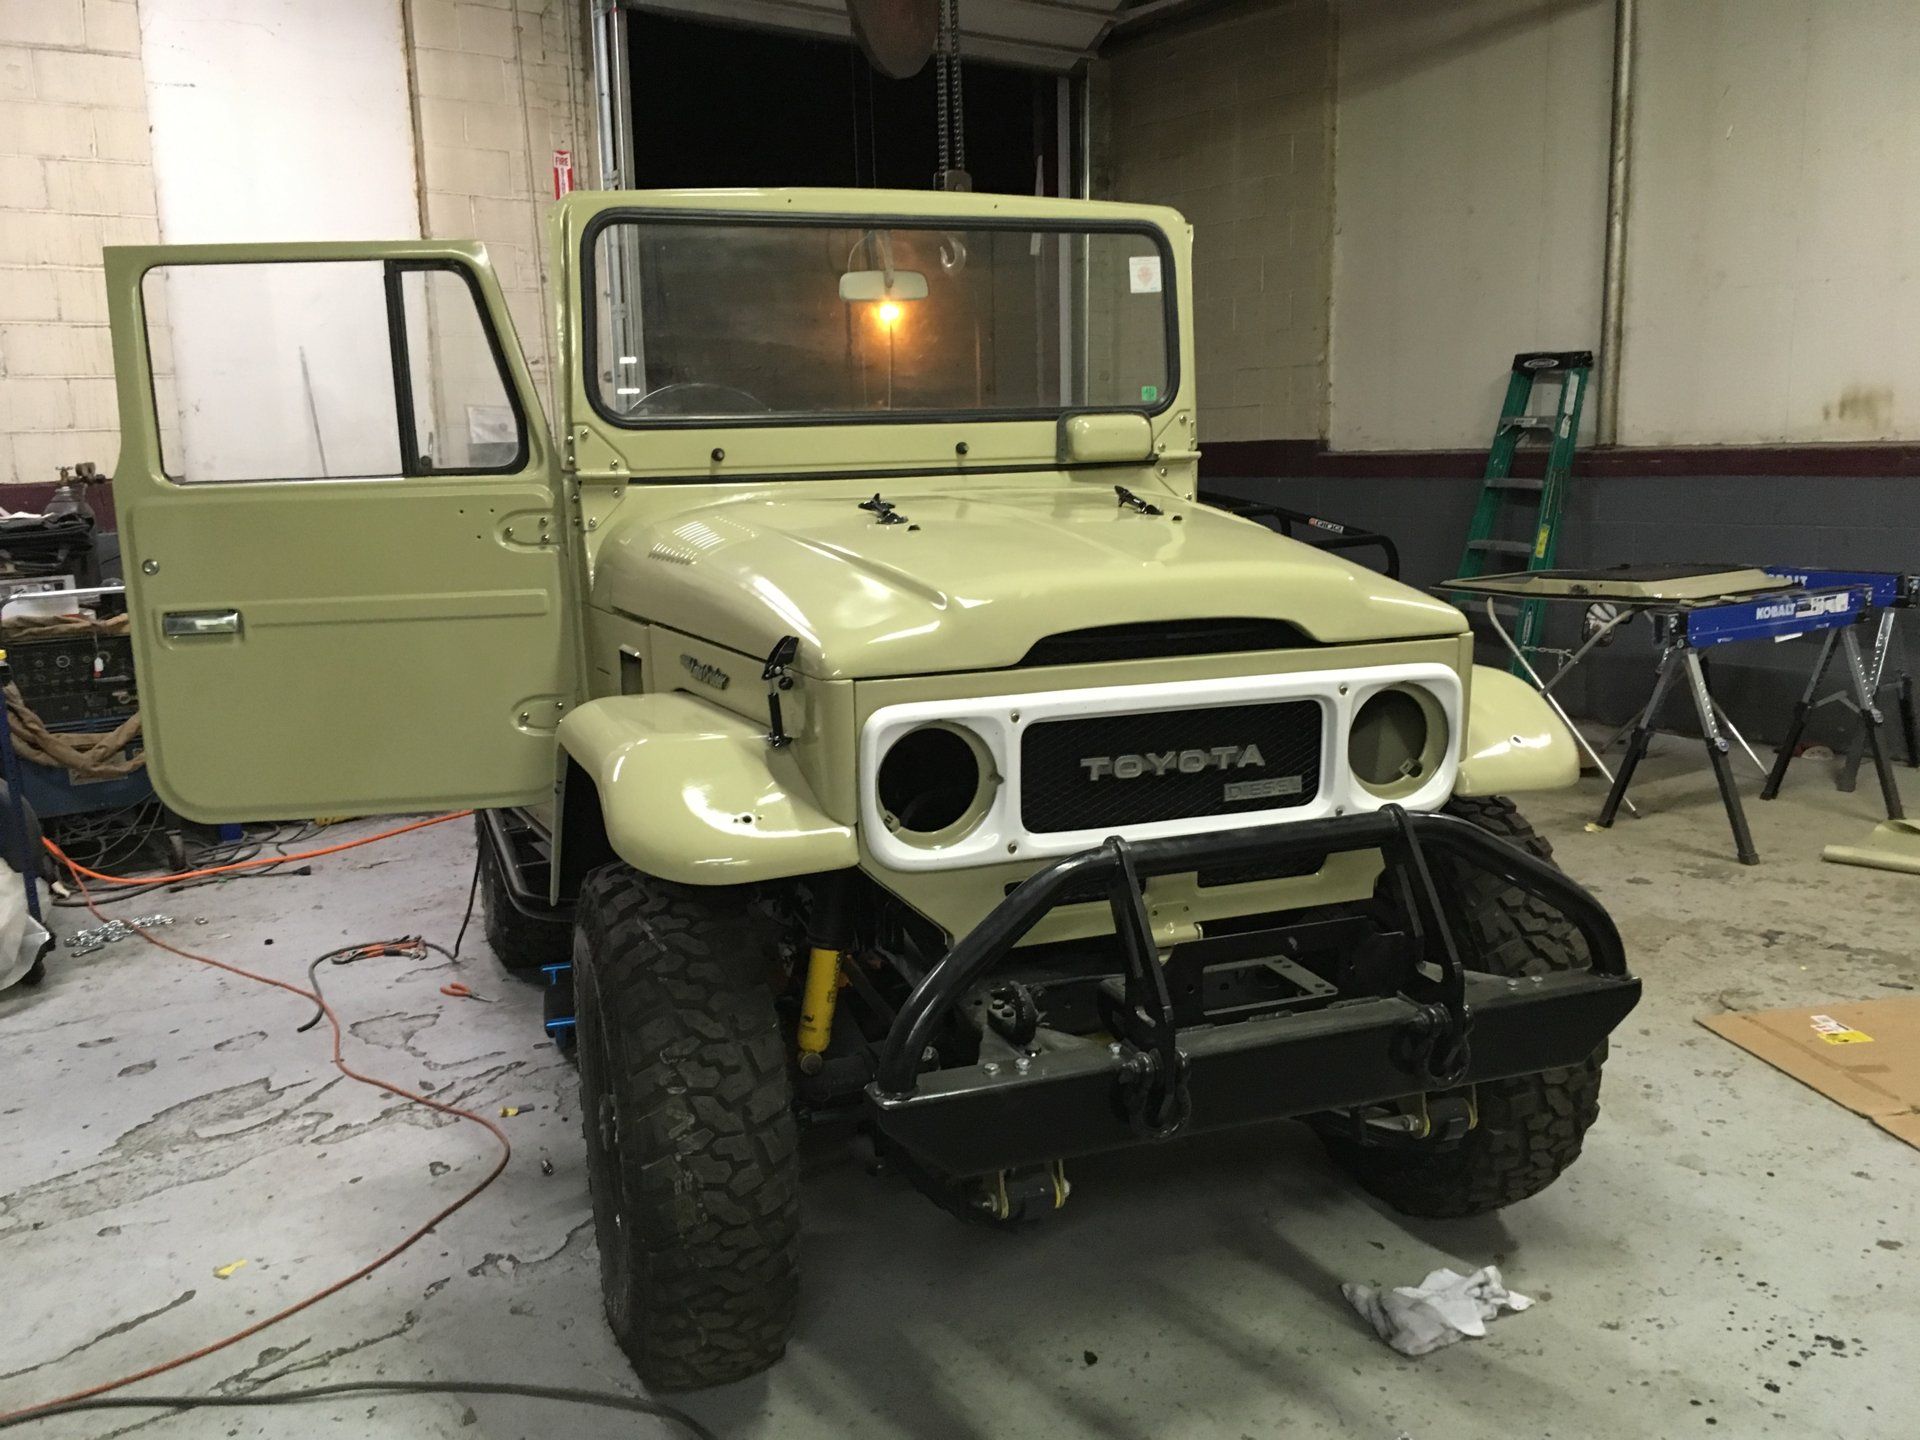
After that came another couple weeks of finalizing the body work. Bondo, "icing", fine sandpaper, the works. We're not trying to do a concourse-worthy restoration here, but it ought to look nice, right? Then, finally, this past Friday, we painted the tub.
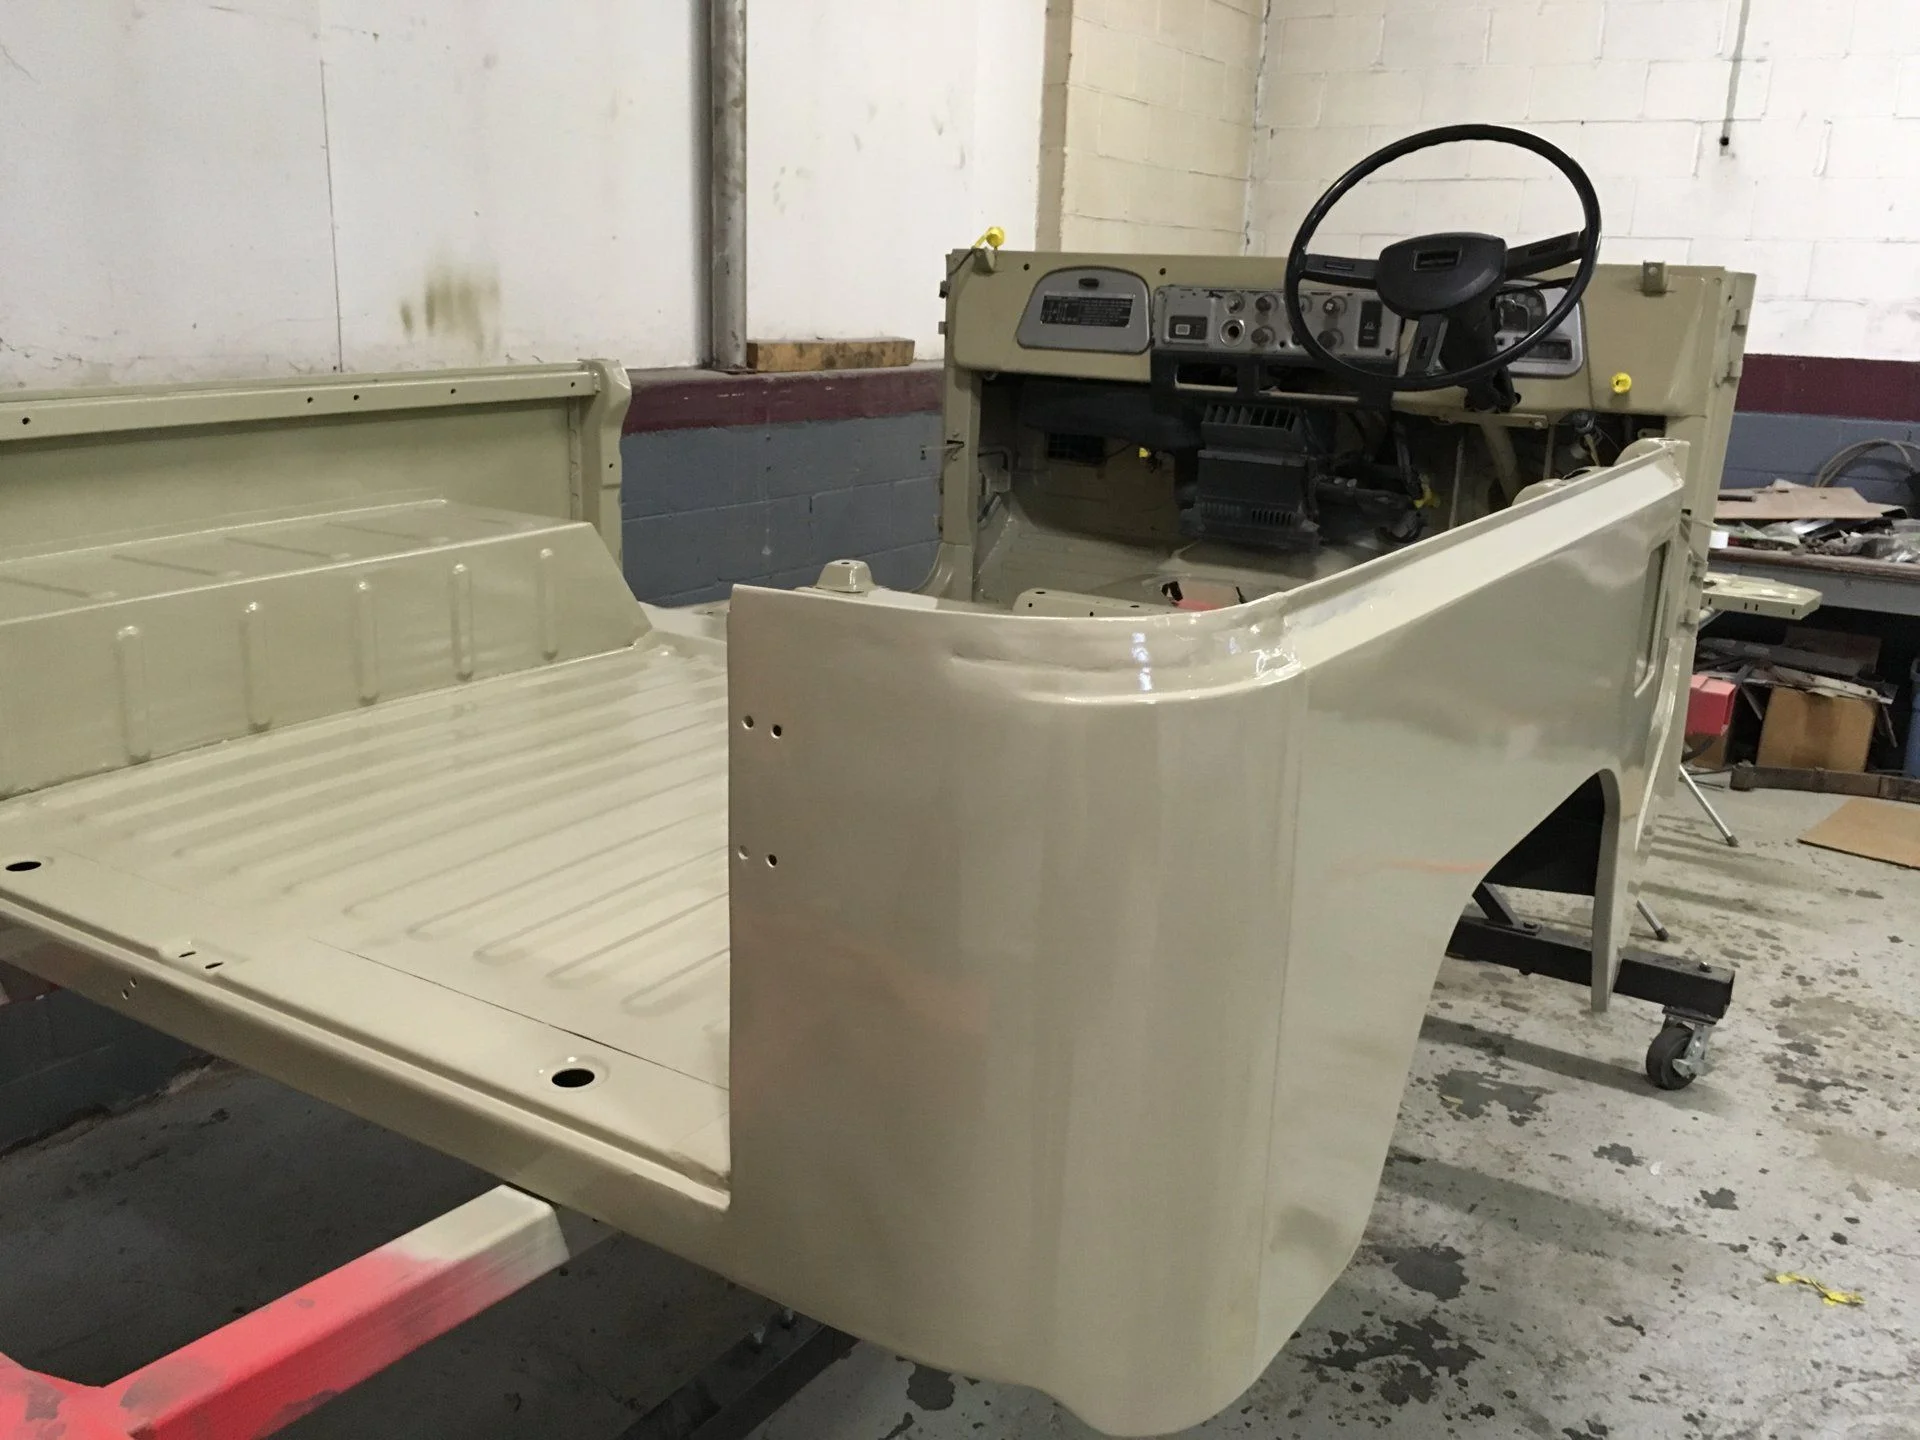
And look nice it does.
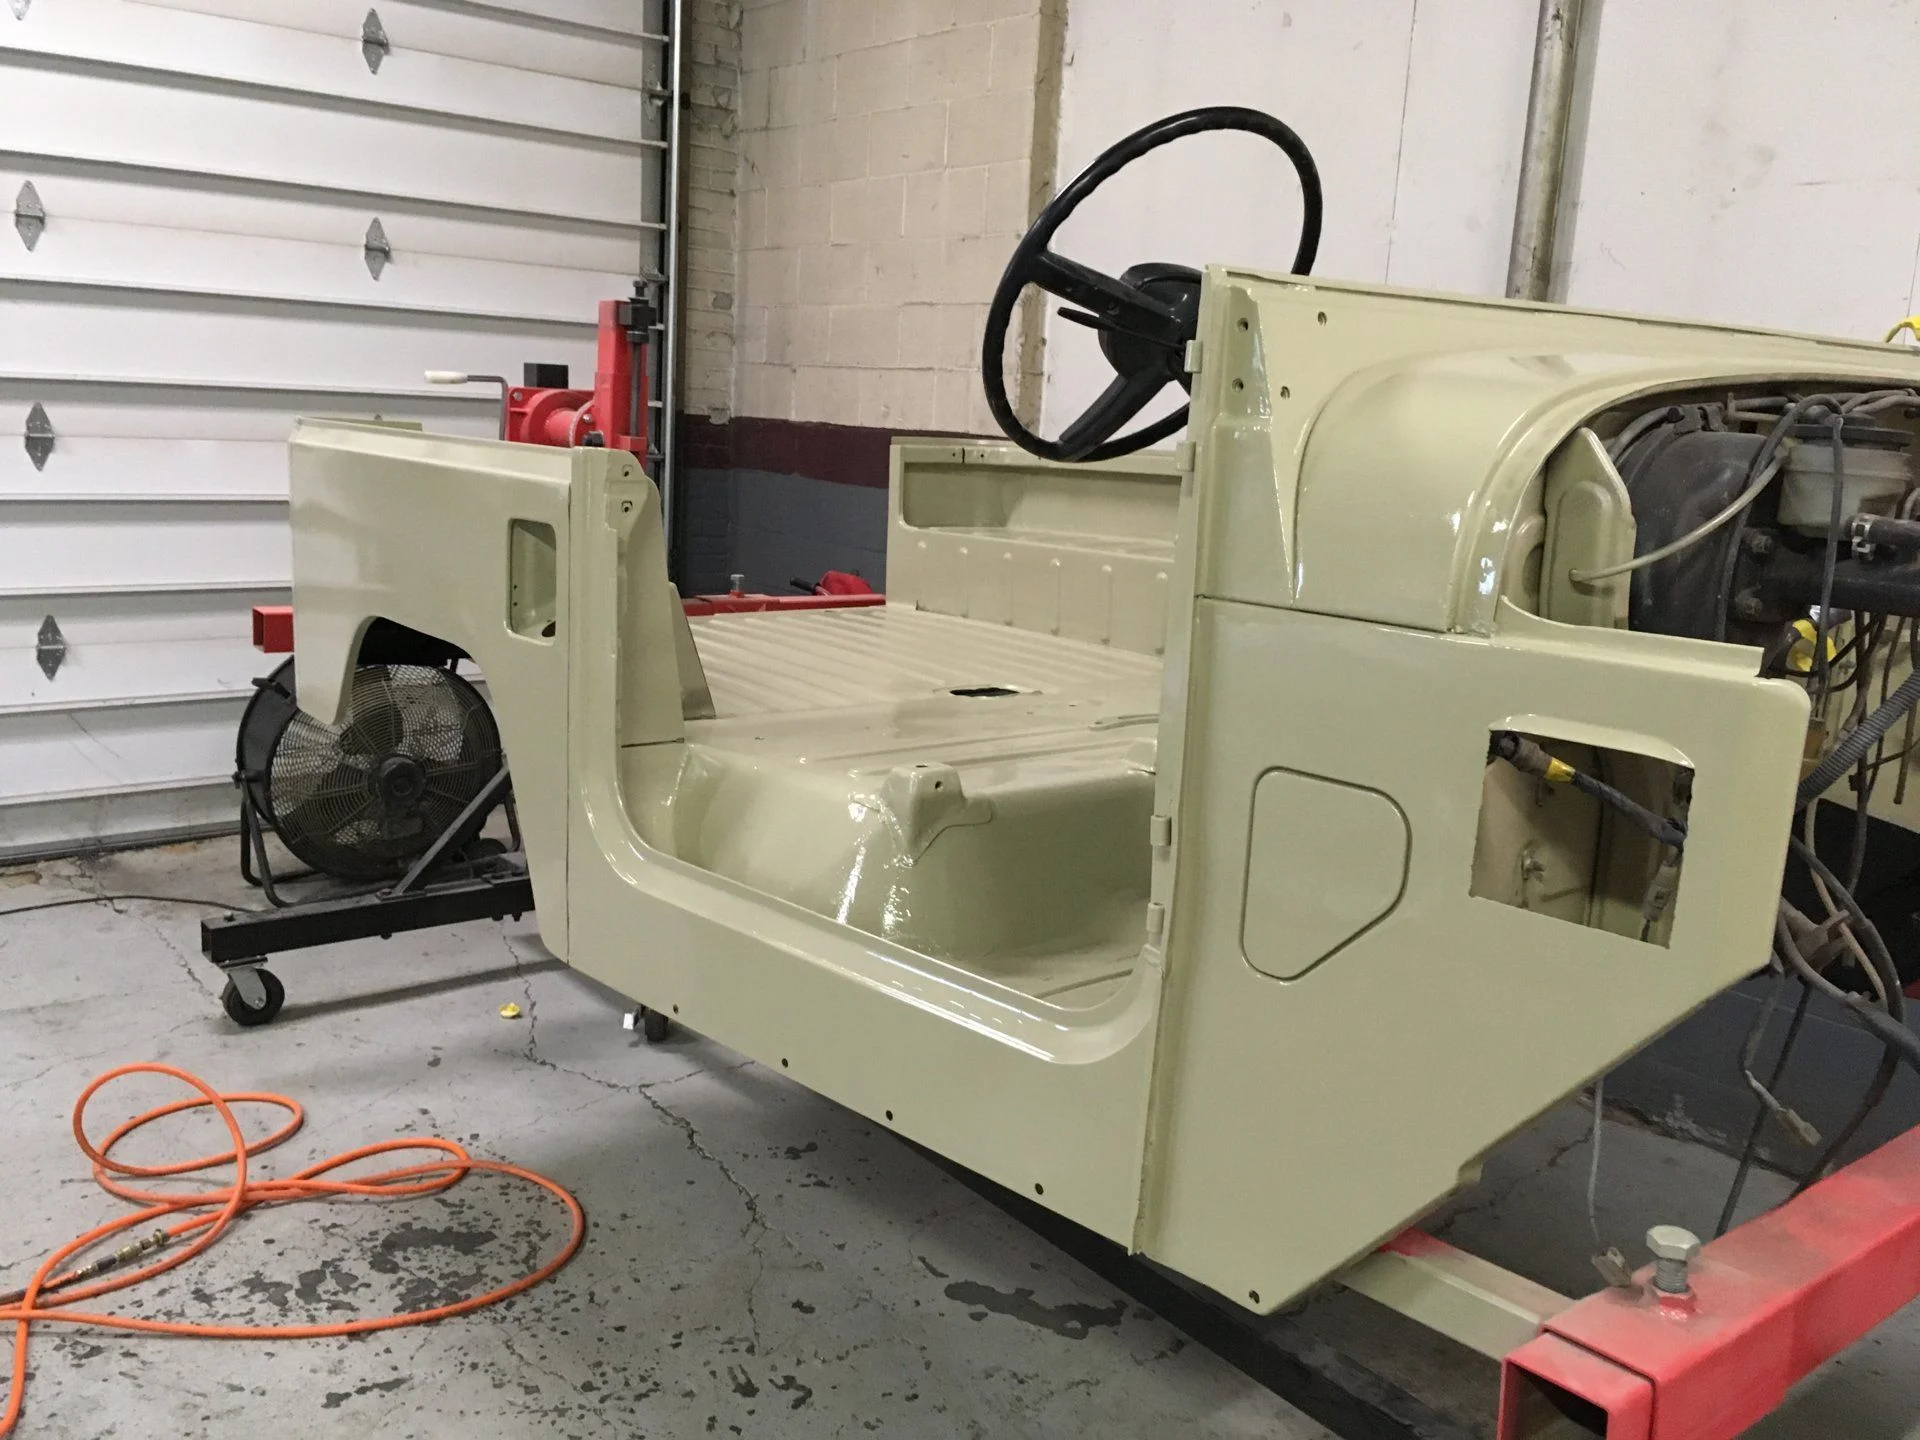
A couple coats of beige enamel are apparently all it takes to get me unbelievably excited.
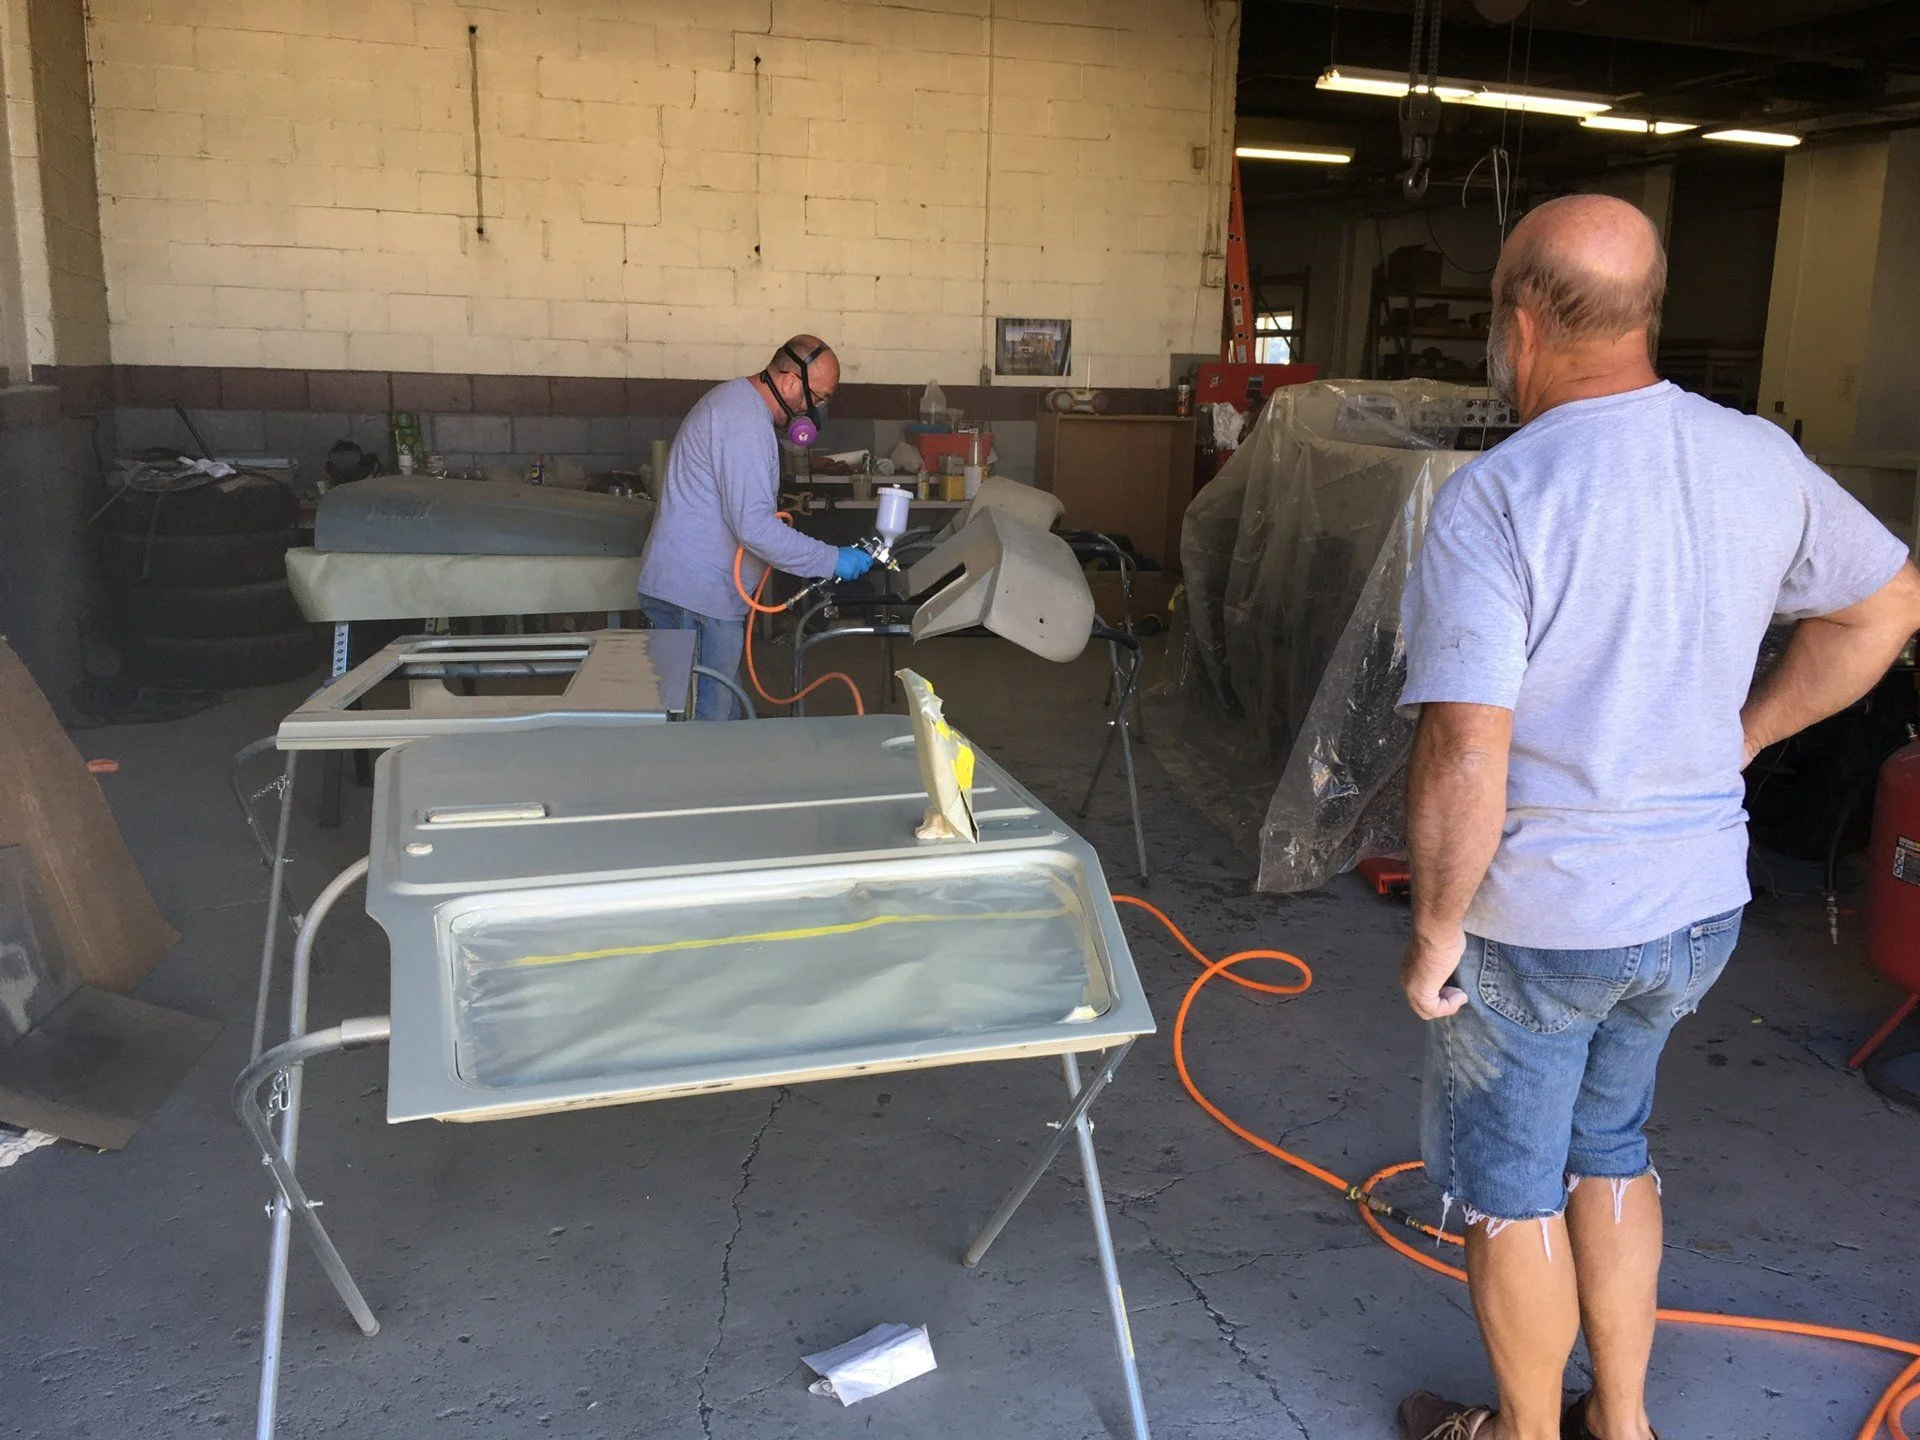
The next step is something of a twofold approach. There's only one paint gun, and my dad's a LOT better at that than me. So he's going to continue painting the other pieces, while I start reassembling the truck. Running boards came in today, and seats are on the way. We're trying desperately to have this thing together enough for me to drive it to Overland Expo East in November. Wish us luck!
Here's some of the filling work that had to be done to the hard tops along with the welding. Not exactly pretty-looking here, but since nobody sells reproduction sides (And even if they did they'd probably cost a kidney) we worked with what we had. Once you get it in primer it looks a lot more respectable.
Here's a before shot of the right ambulance door.
And here's the post-operation pic. I removed the license plate mount since the truck will be getting a bumper/basket that would cover the stock plate position anyways.
Next we got the floor of the tub welded together... (And hit with some etching primer)
... so we could get the fitment of the rear tub finalized...
... and get the whole thing officially welded back together!
Couldn't forget the fuel filler, could we? Pretty certain I don't have a key to that door, and the latch is broken anyways. Gonna have to replace those with something.
After that came several weeks of welding in small pieces, grinding those welds, then putting bondo in the gaps and divots, then sanding the bondo. That was kind of arduous and not particularly photo-worthy, so there's a month or more of practically no photos. We got through it though, which meant it was time for another huge milestone: undercoat. I decided to go with black bedliner, since it was durable and would essentially disappear under the truck. We got a quote from the local Line-X place and promptly decided to apply it ourselves. Raptor bed liner was the best-reviewed DIY kit we could find, so we picked up a kit. The results?
Pretty dang good.
The texture was perfect for what I wanted. Not dirt-trapping rough, not sandpaper gritty, not "basically thick paint" smooth. We used normal masking tape, and threaded bolts into any holes we needed to protect.
After that came another couple weeks of finalizing the body work. Bondo, "icing", fine sandpaper, the works. We're not trying to do a concourse-worthy restoration here, but it ought to look nice, right? Then, finally, this past Friday, we painted the tub.
And look nice it does.
A couple coats of beige enamel are apparently all it takes to get me unbelievably excited.
The next step is something of a twofold approach. There's only one paint gun, and my dad's a LOT better at that than me. So he's going to continue painting the other pieces, while I start reassembling the truck. Running boards came in today, and seats are on the way. We're trying desperately to have this thing together enough for me to drive it to Overland Expo East in November. Wish us luck!
 Nice work
Looks great! Well done. I worked hard on a very similar rig (see signature line) and had to rebuild almost all of the electronics, replacing a crappy V8 with an original 3B. Keep up the good work!
- Thread starter
- #48
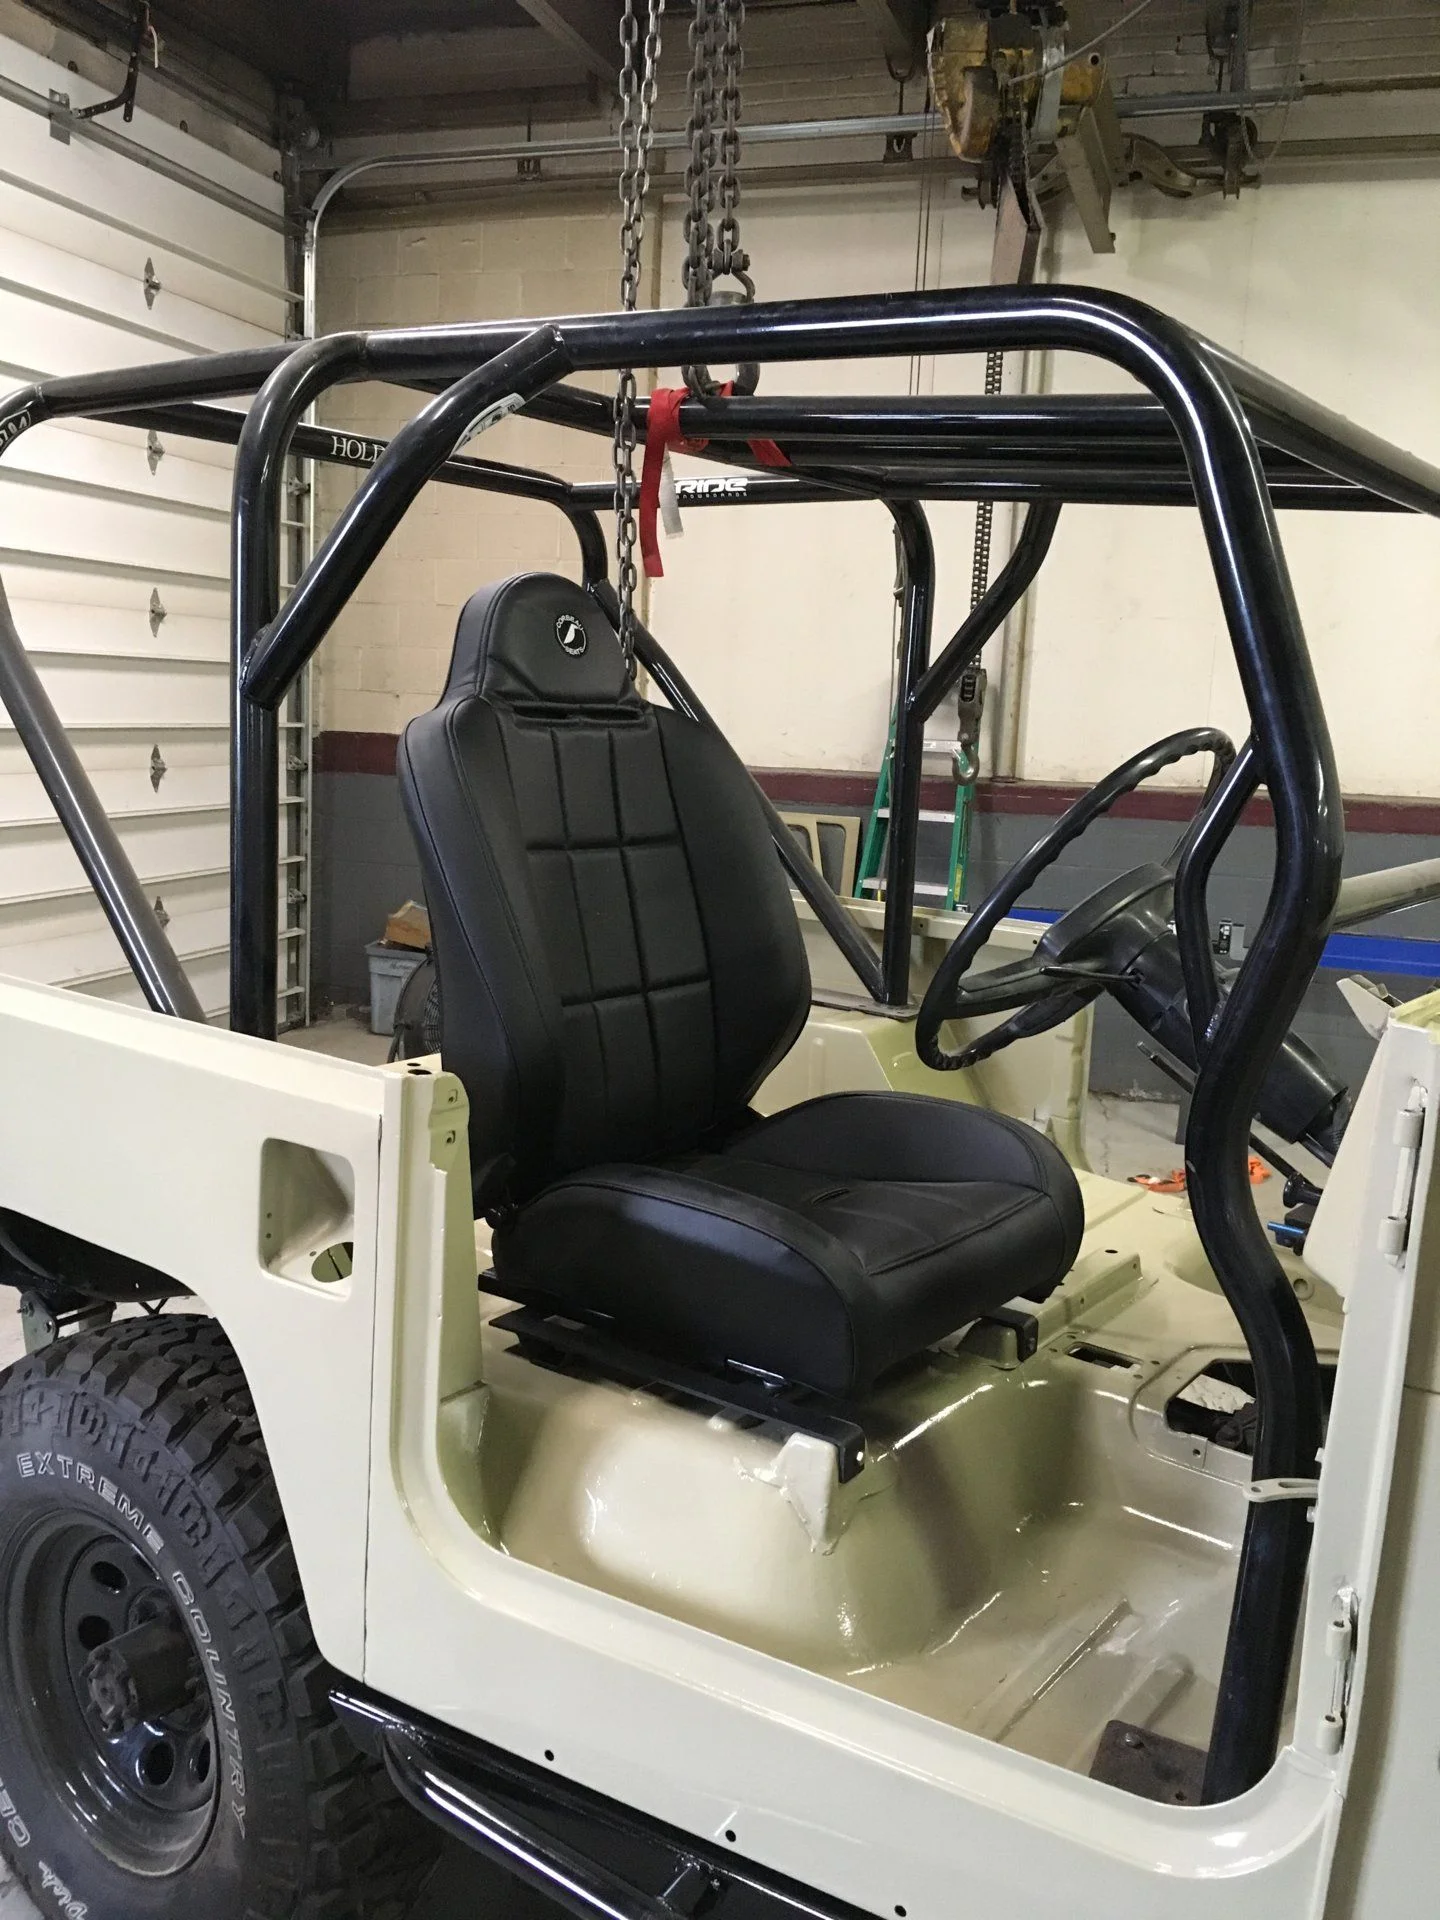
Micro-update: my seats came in today. Corbeau Baja RS in black vinyl. Just sitting in 'em on the floor, they feel pretty nice. They have just the right amount of bolster for me. The lumbar support isn't the best, but overall first impressions are good.
- Thread starter
- #49
Here's another quick update! I worked on the truck for several hours today, so I have three main things to show off.
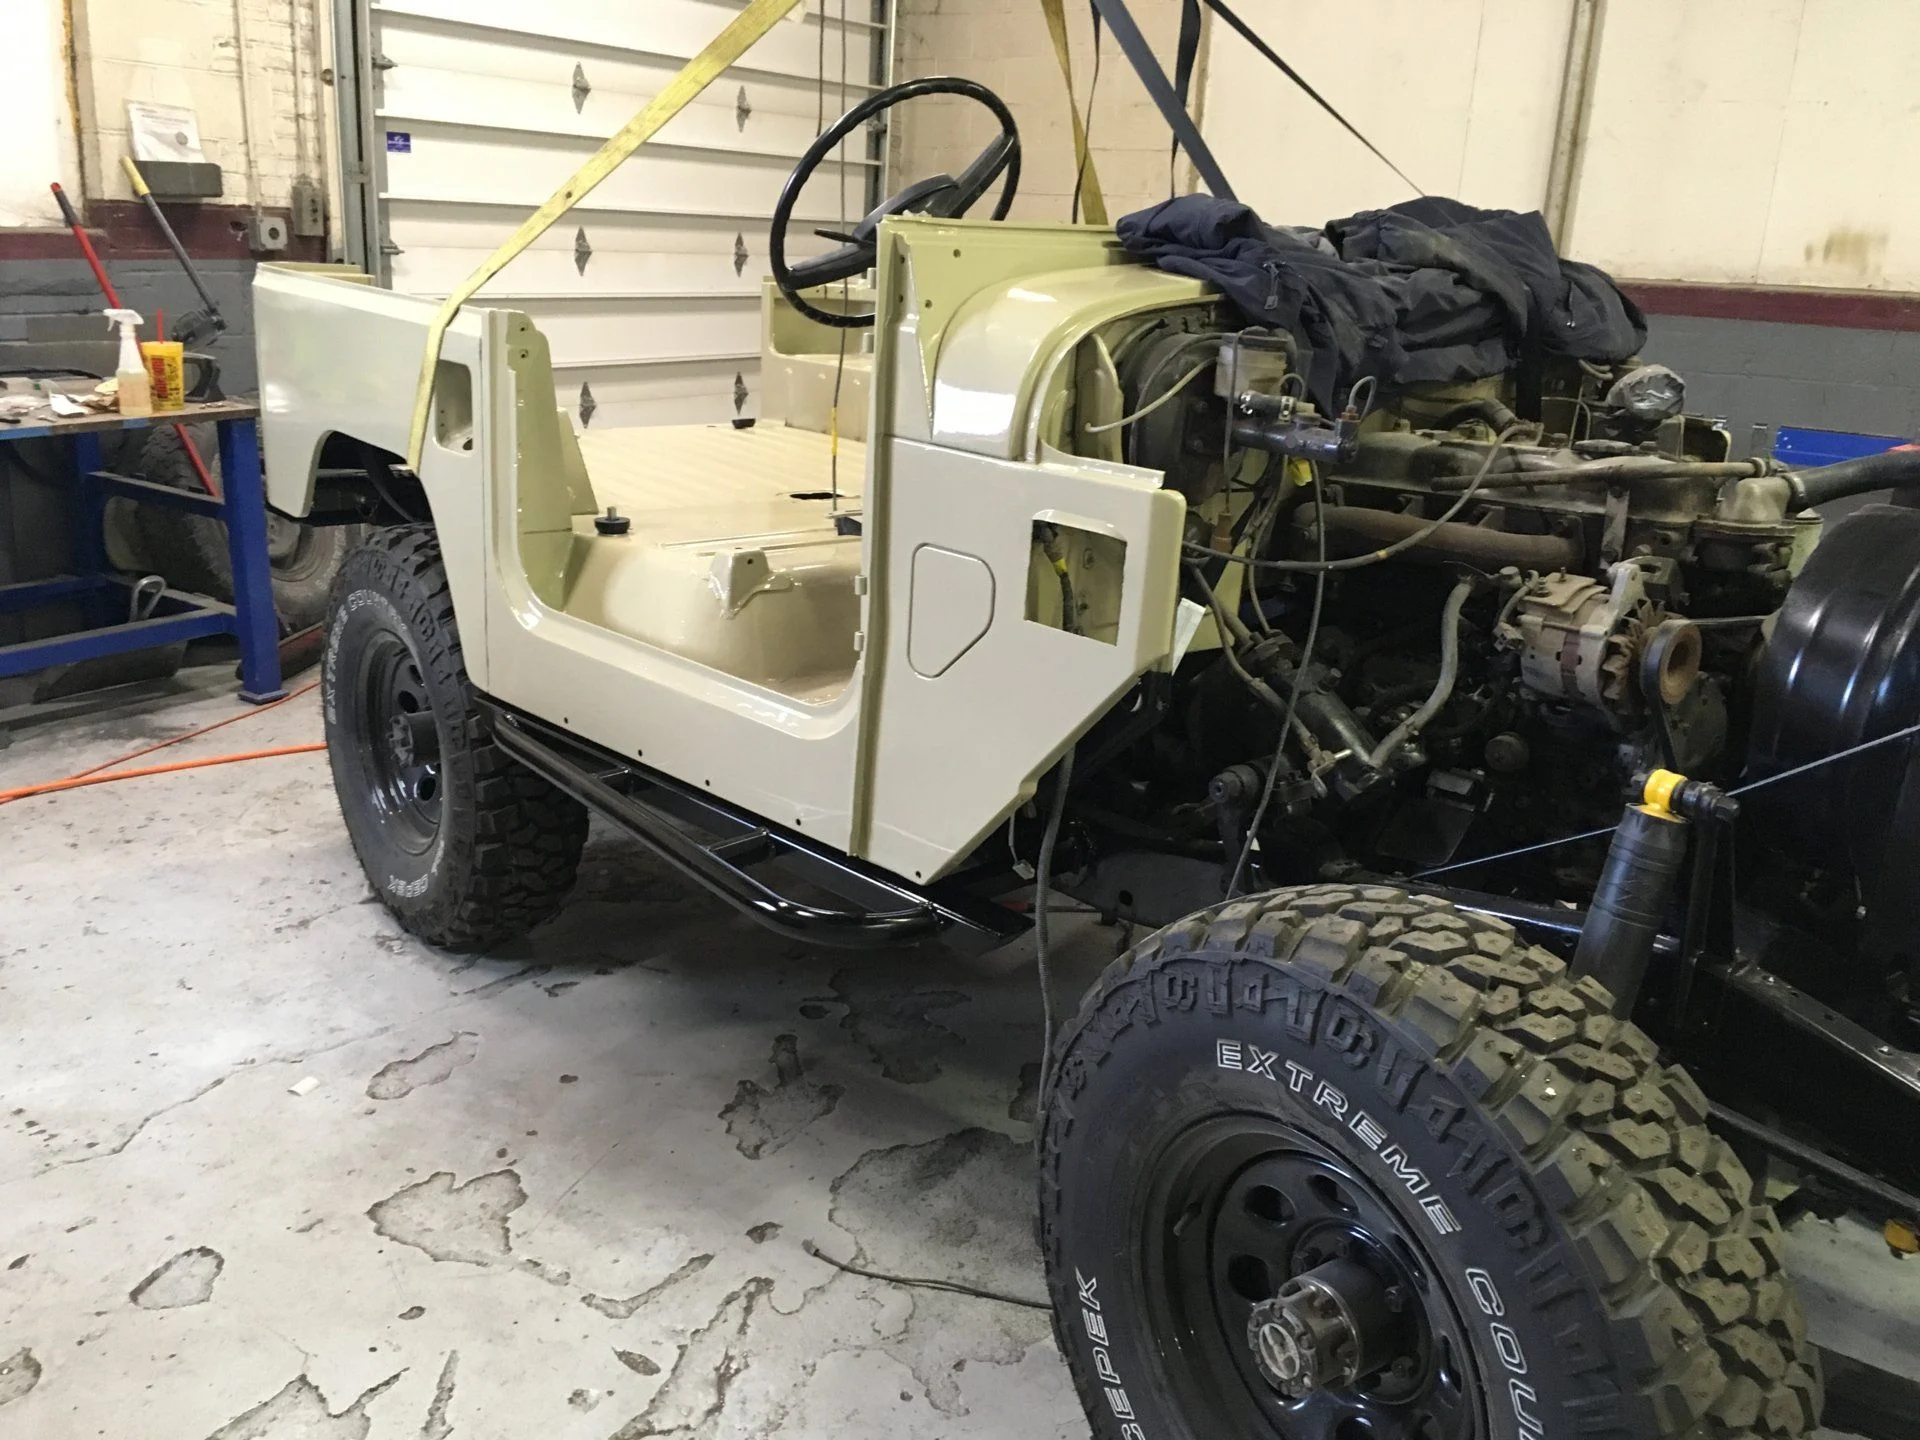
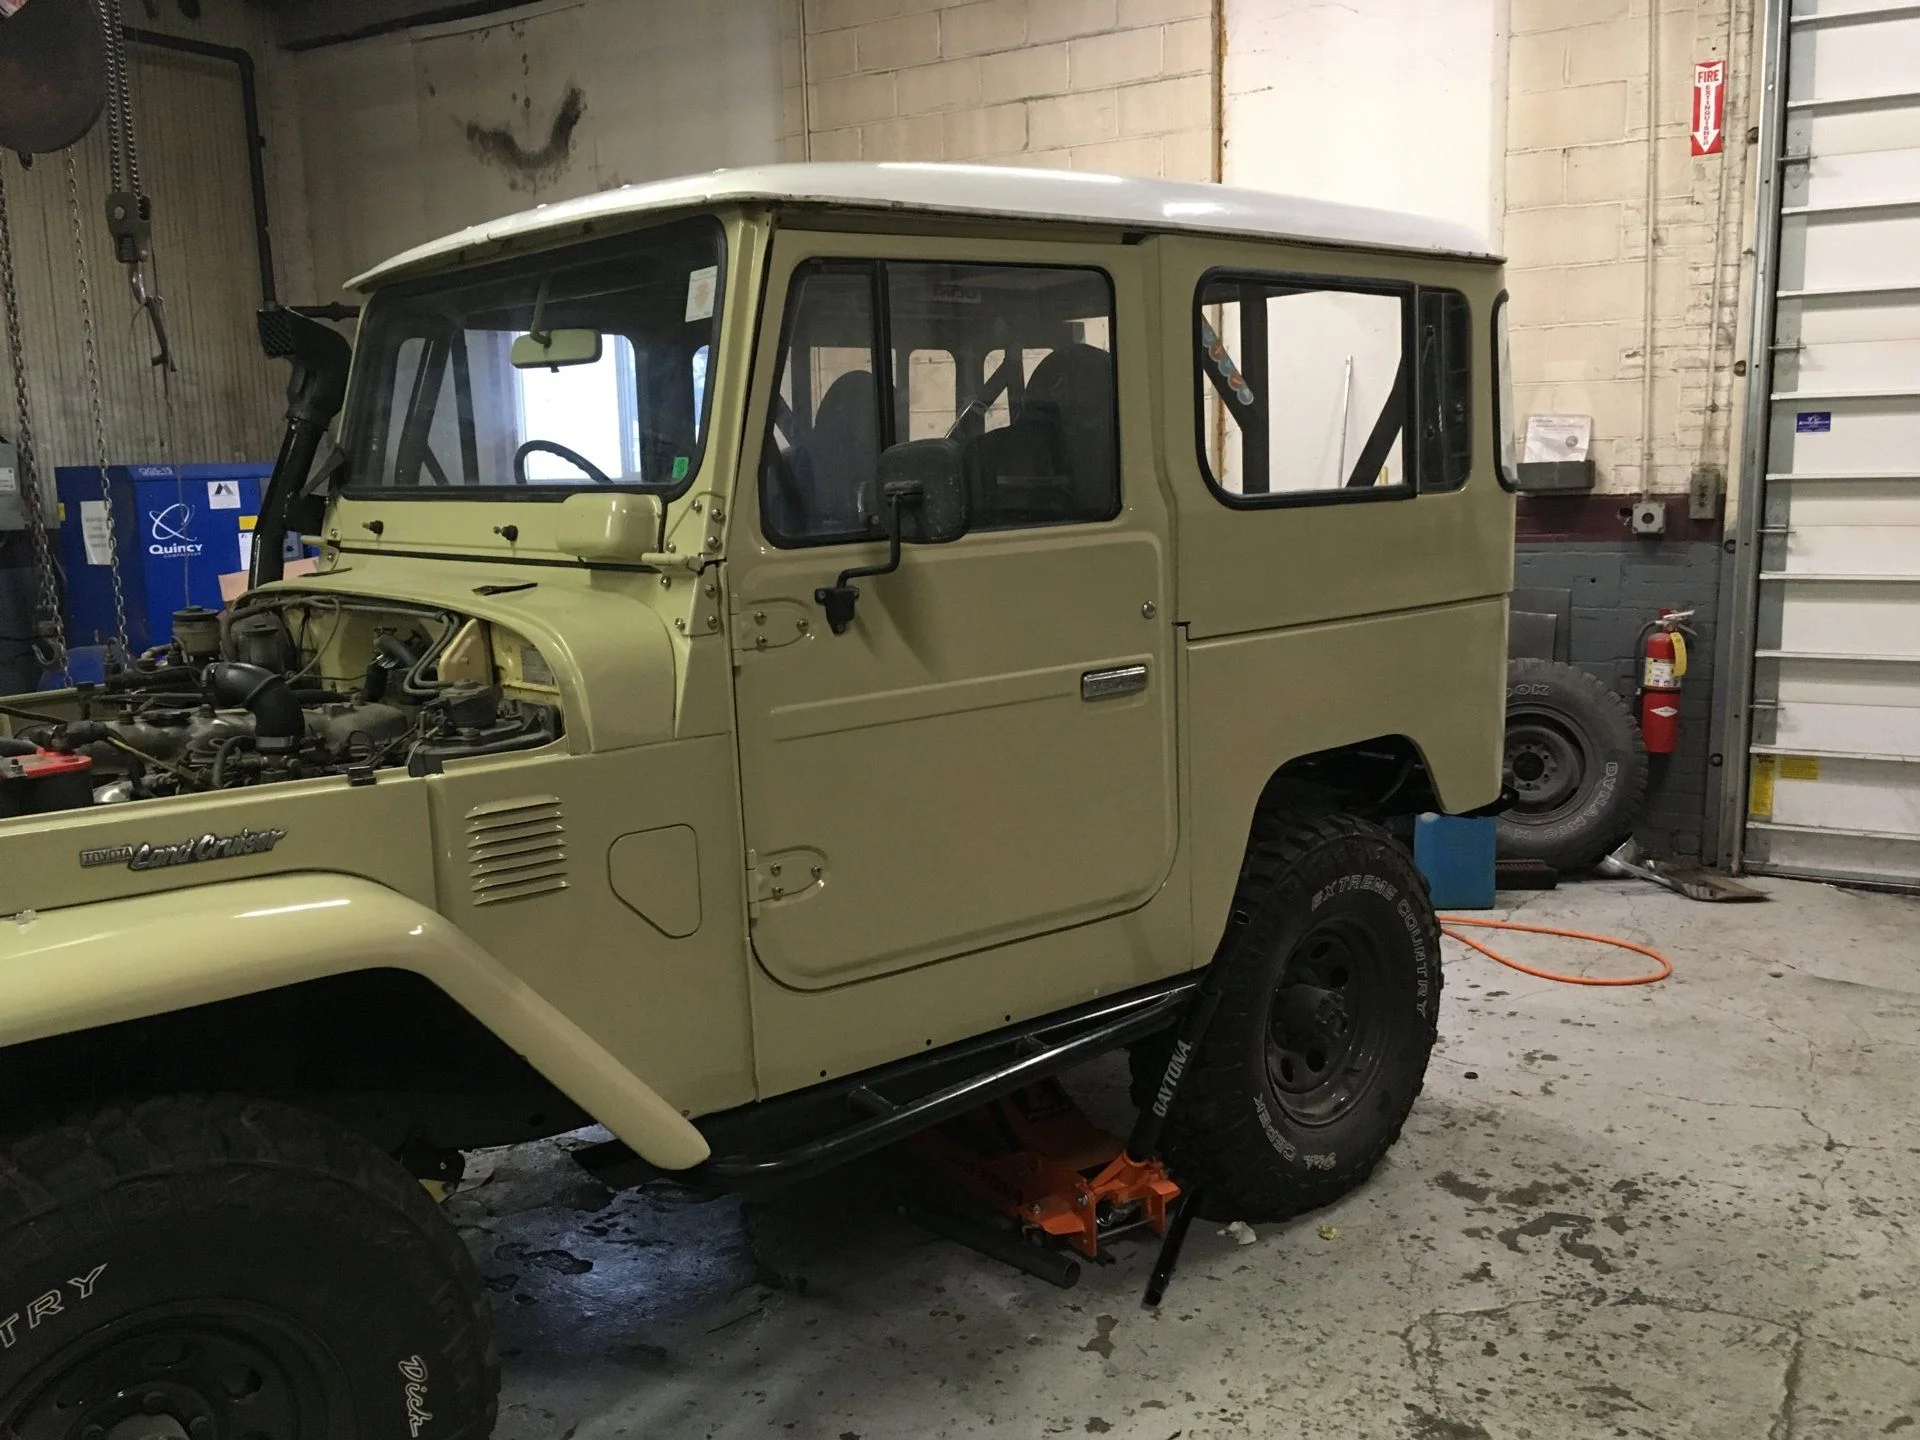
First, we got the tub off the rotisserie and got it fully bolted to the frame.
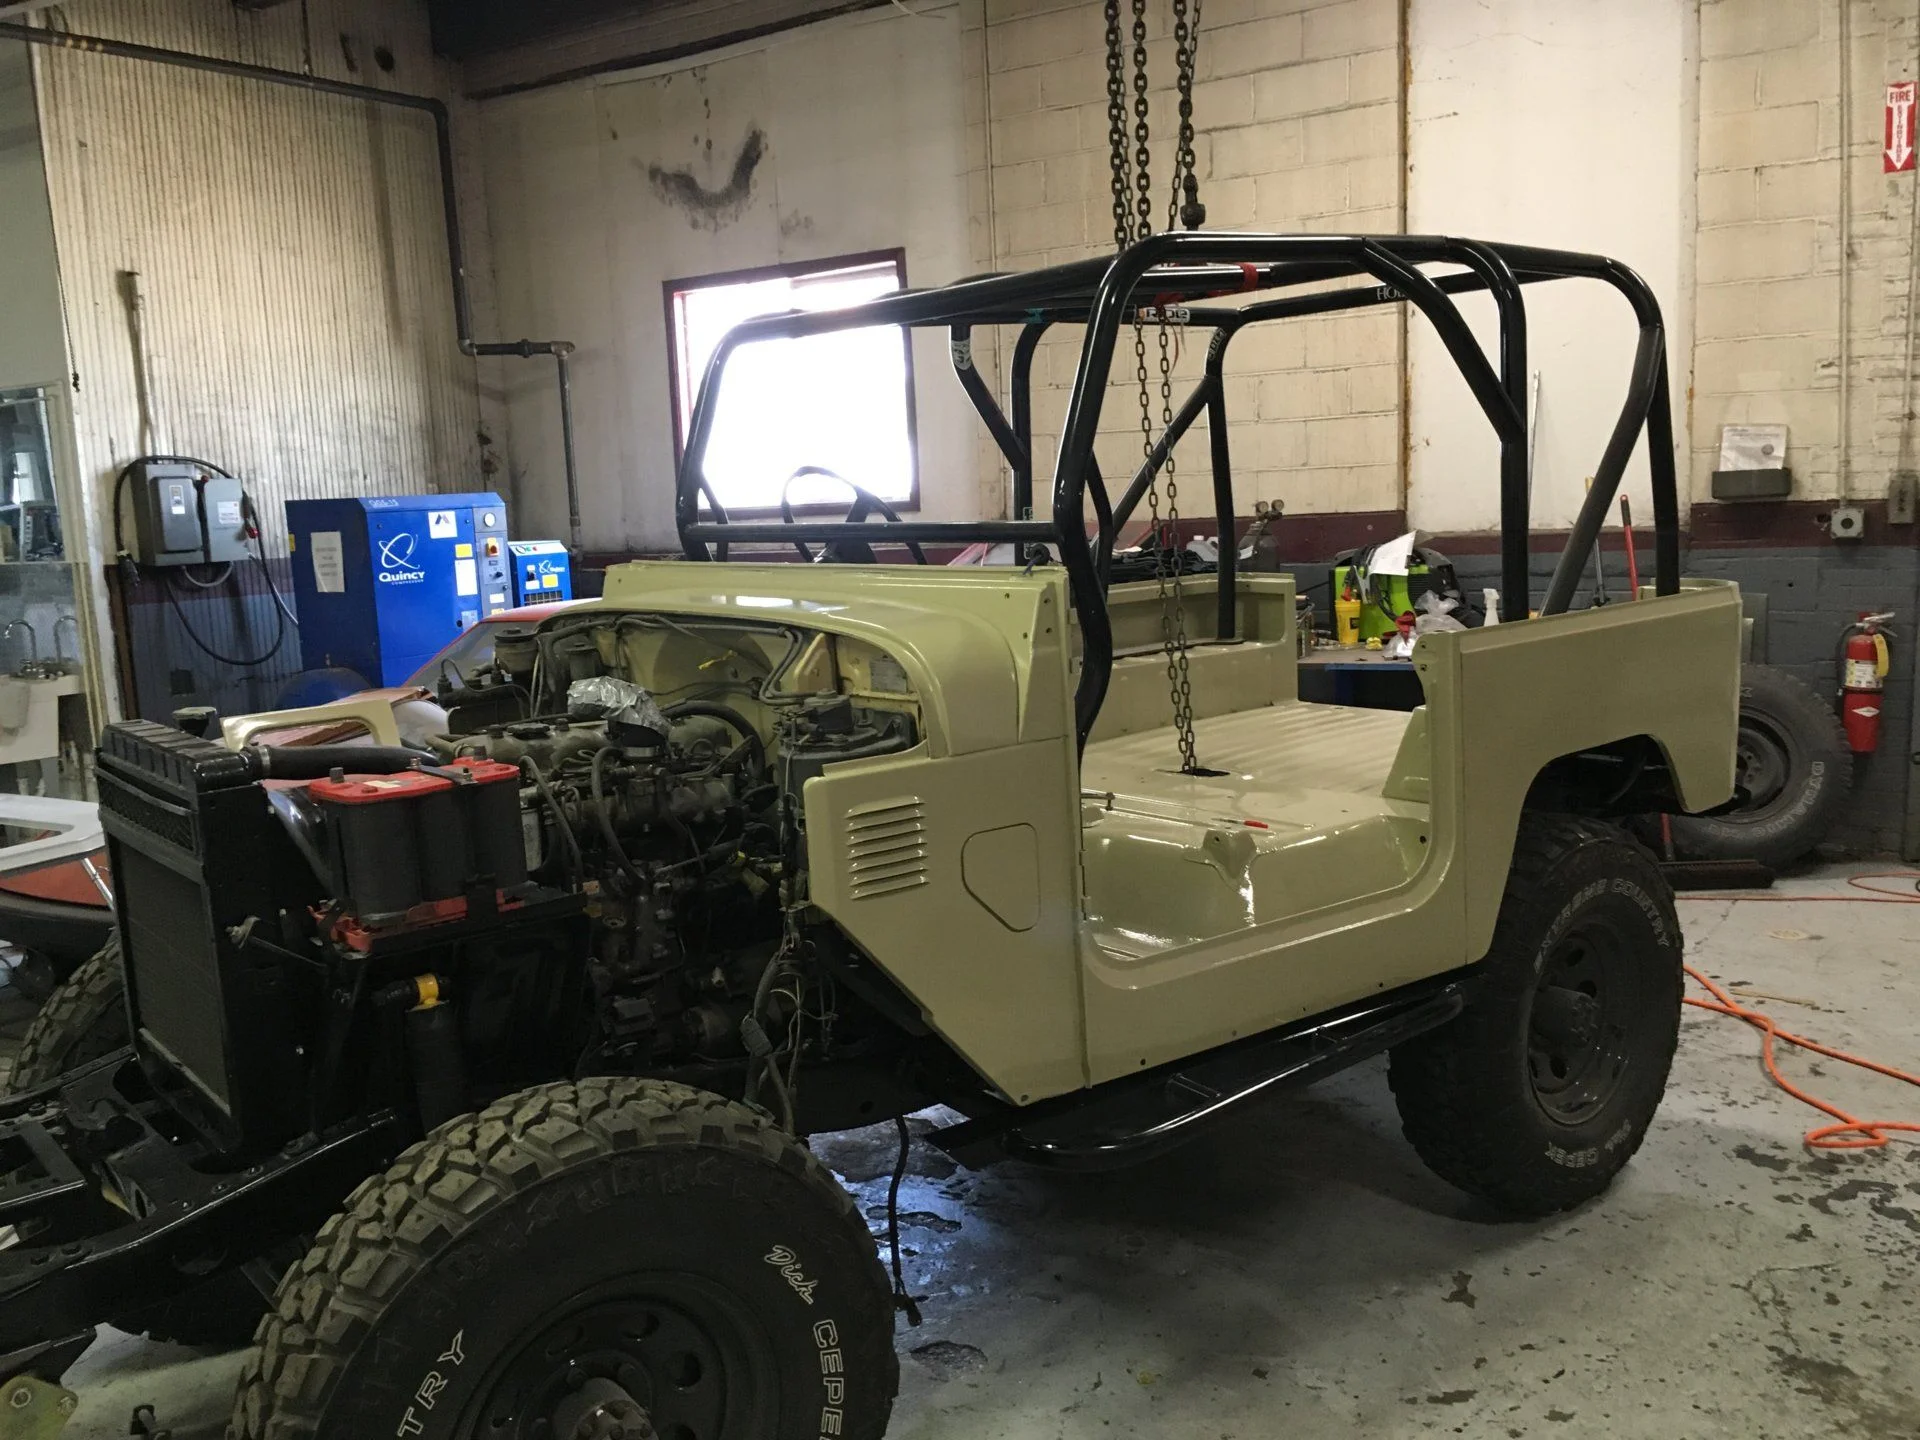
Then we got the roll cage fitted into the tub temporarily so we could redrill the mounting holes for the rear half of the cage.
And while we were at it, we put in the seats and brackets for a test fit.
My only problem with the seats and brackets is that one bolt on each bracket doesn't have a corresponding hole in my tub. I'm assuming it's because my non-US spec truck's original split bench didn't use the same mounting pattern. No biggie. We'll make 'em work.
First, we got the tub off the rotisserie and got it fully bolted to the frame.
Then we got the roll cage fitted into the tub temporarily so we could redrill the mounting holes for the rear half of the cage.
And while we were at it, we put in the seats and brackets for a test fit.
My only problem with the seats and brackets is that one bolt on each bracket doesn't have a corresponding hole in my tub. I'm assuming it's because my non-US spec truck's original split bench didn't use the same mounting pattern. No biggie. We'll make 'em work.
- Thread starter
- #50
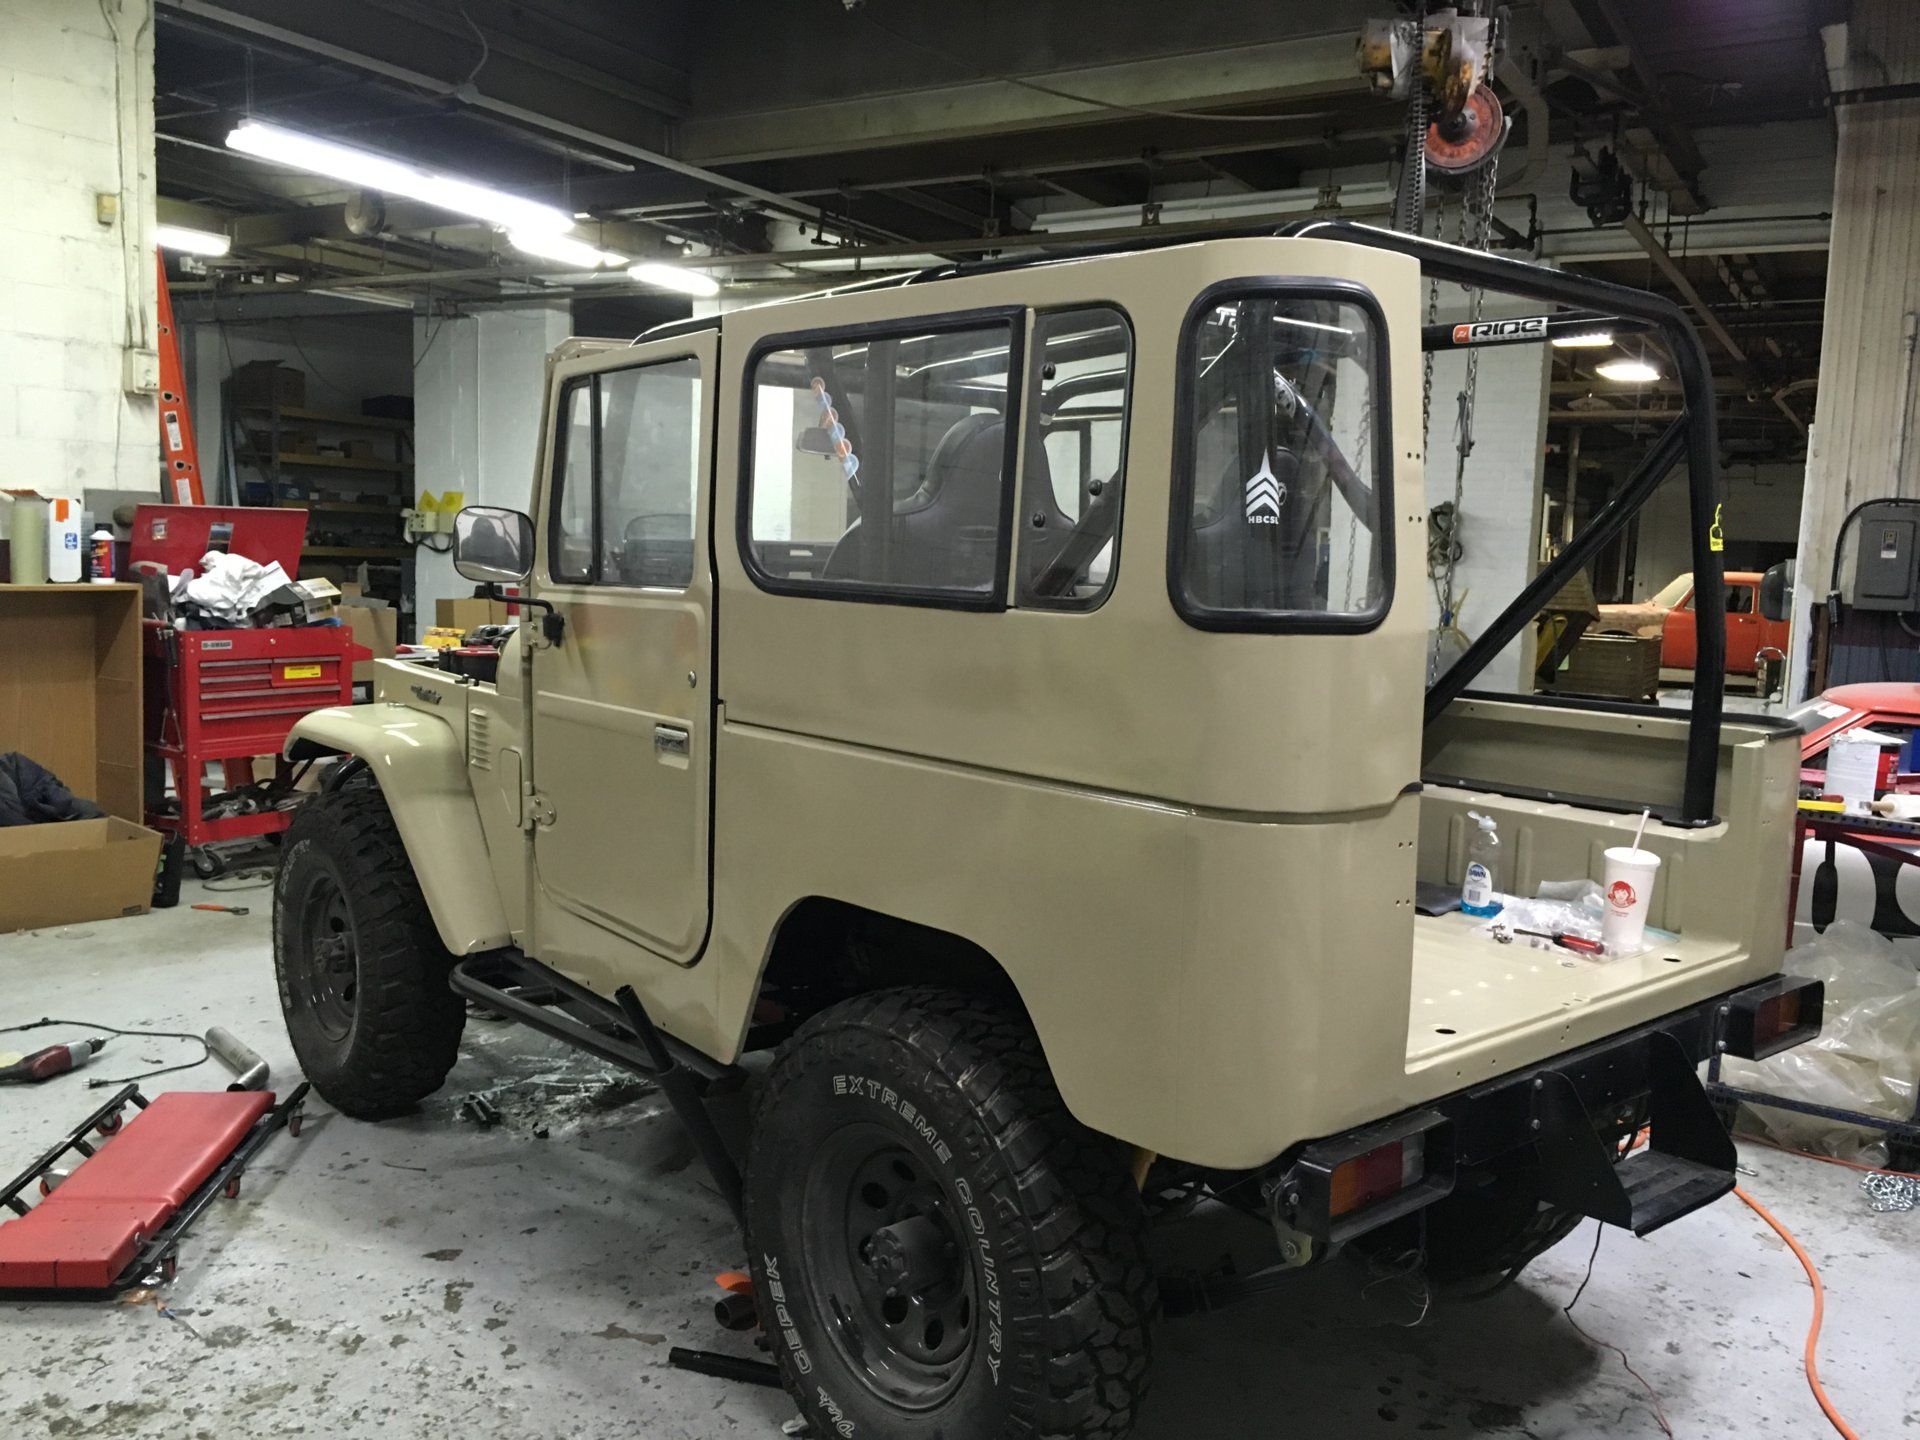
Another pretty exciting update today. For starters, we got a lot of other things painted Saturday.
Here's Dad painting, and bonus Uncle. (I get my hair from the other side of the family, thank god.)
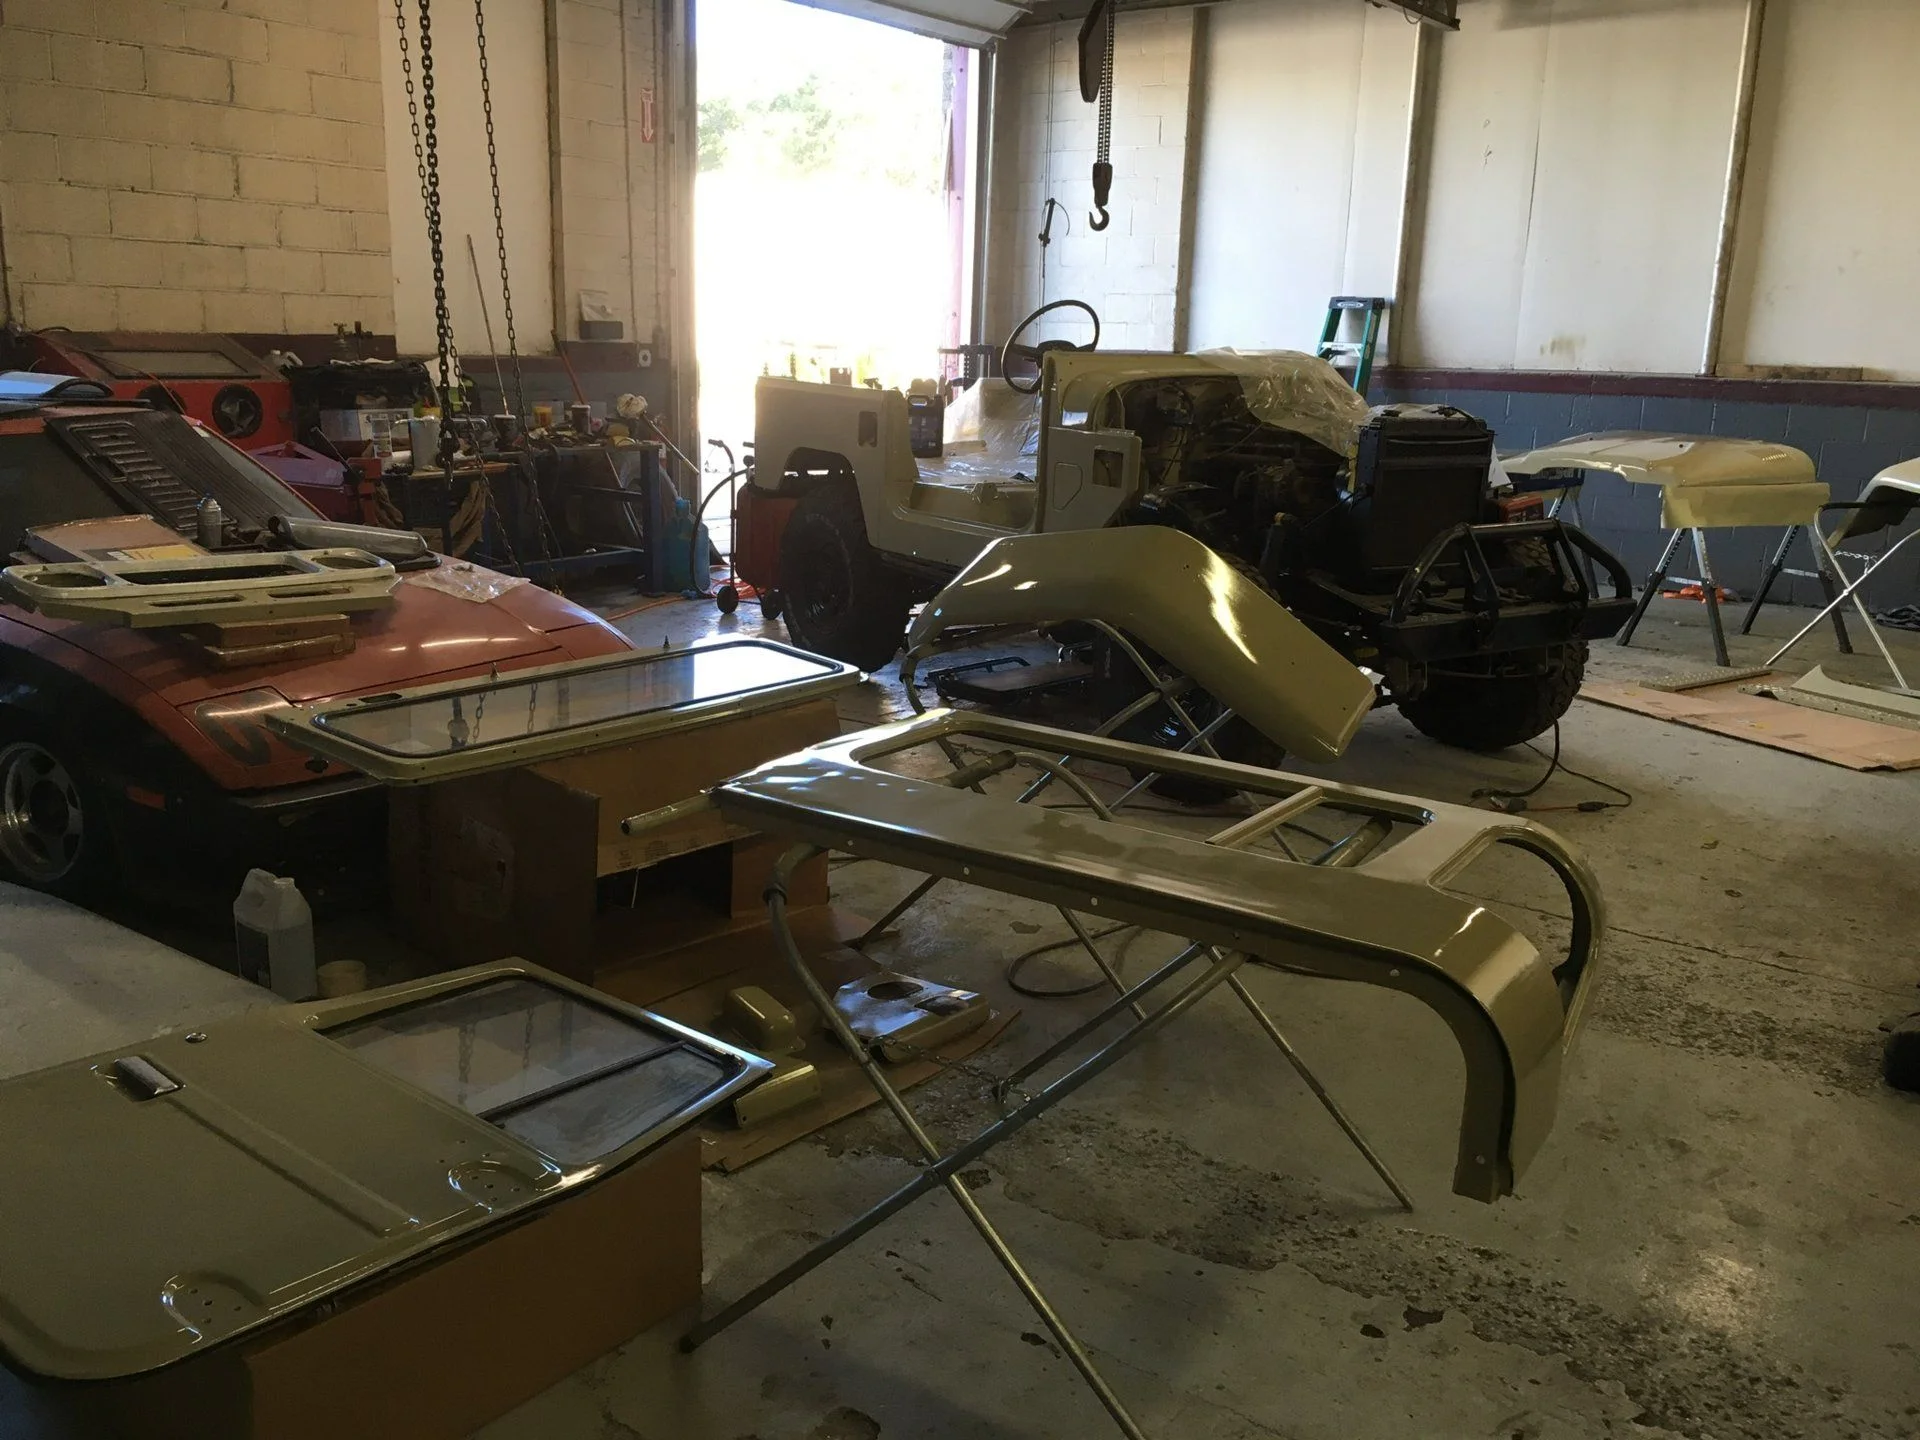
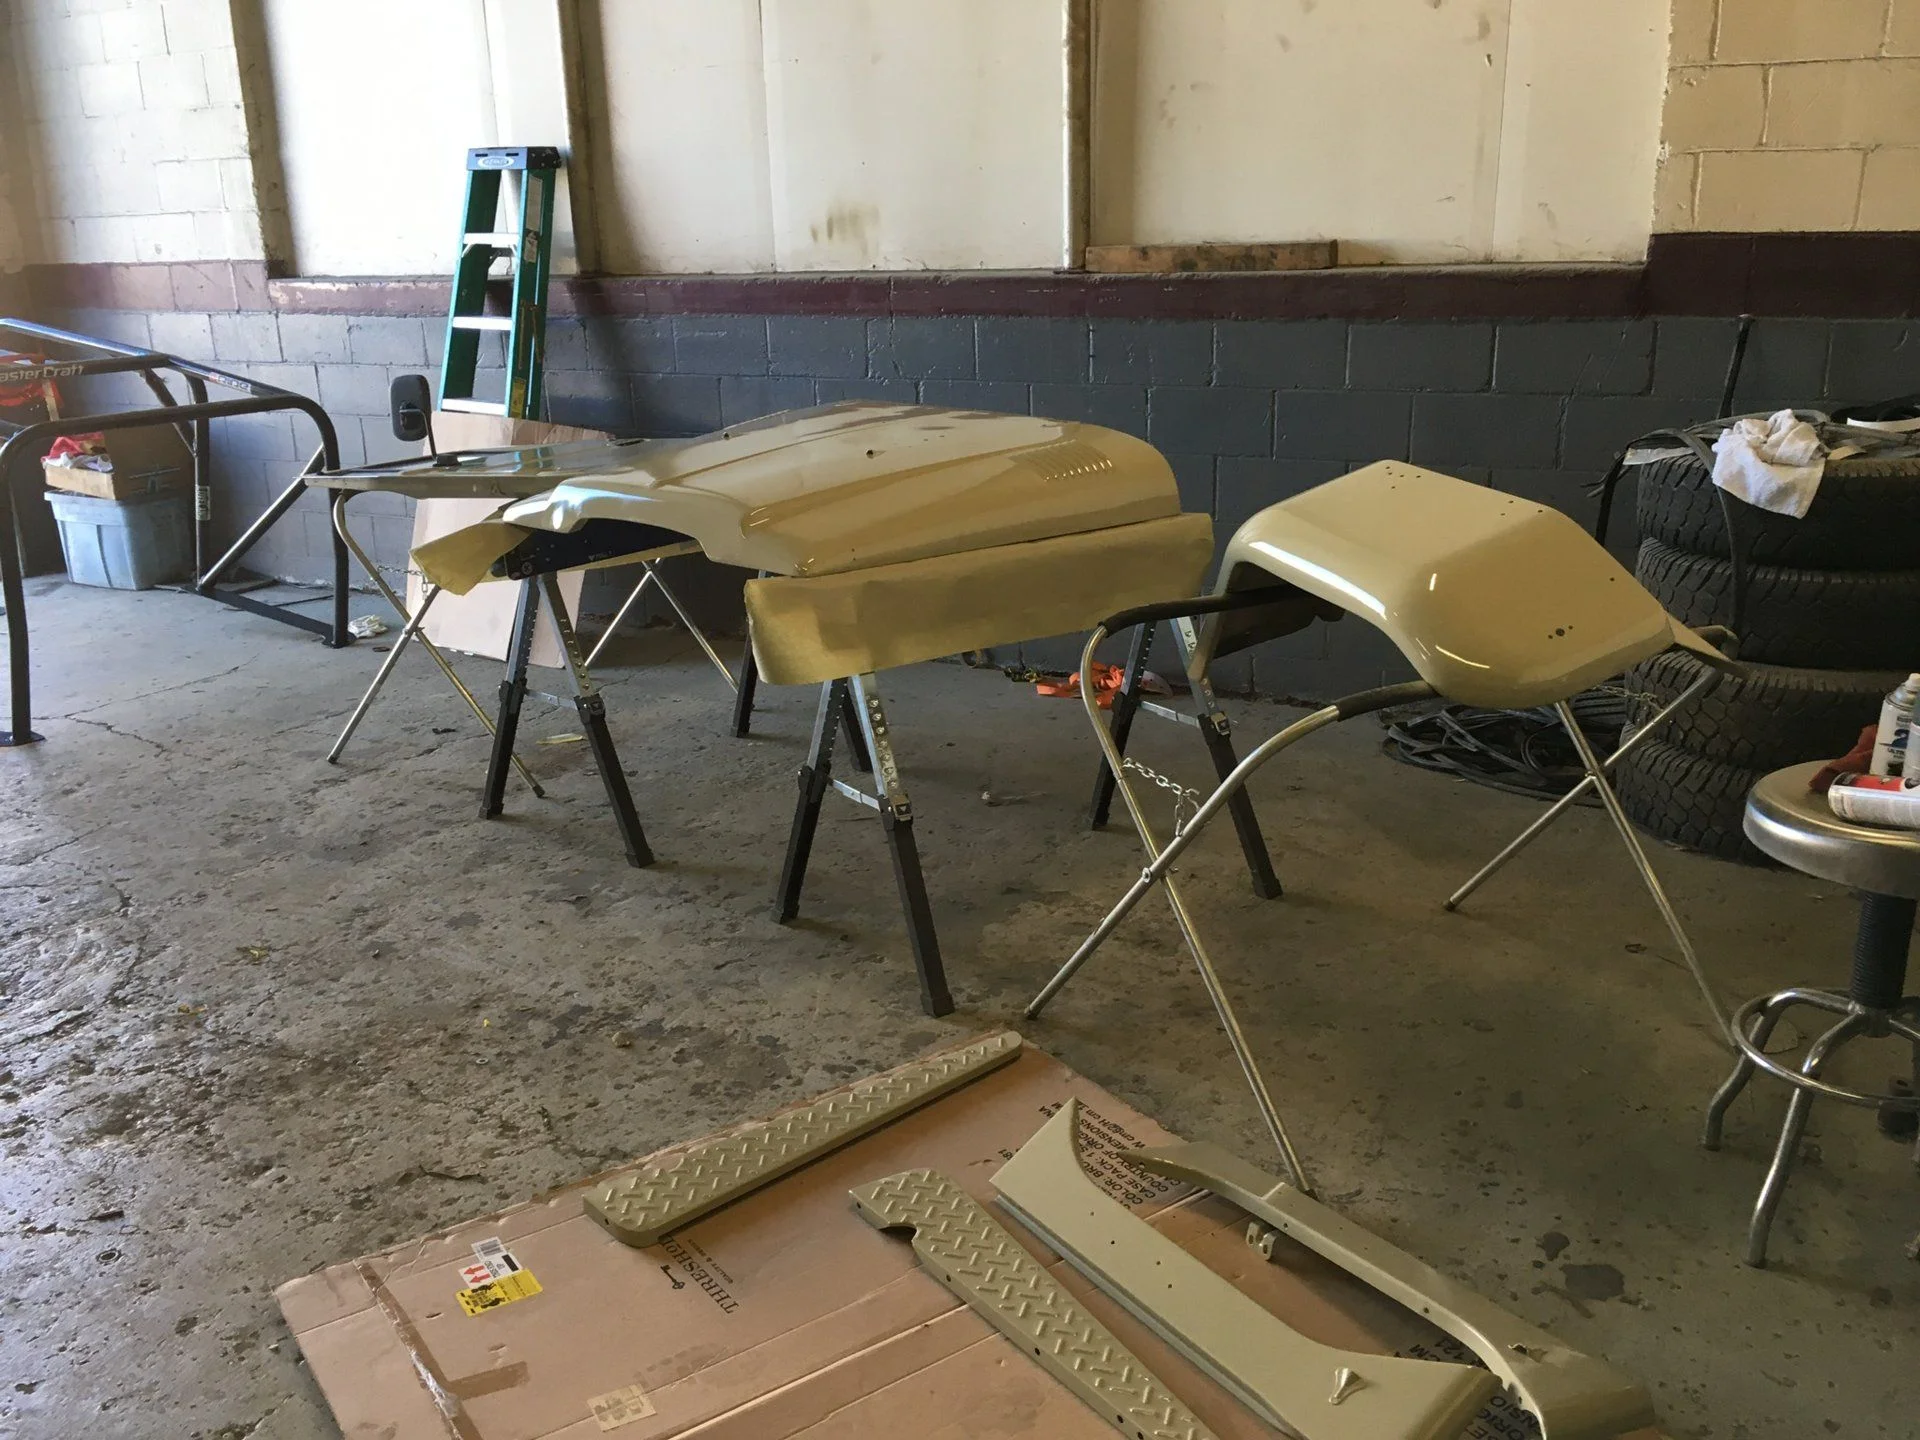
Then tonight we did a bunch of reassembly. The kind that actually makes this thing look like a vehicle! Here's part-way through the evening.
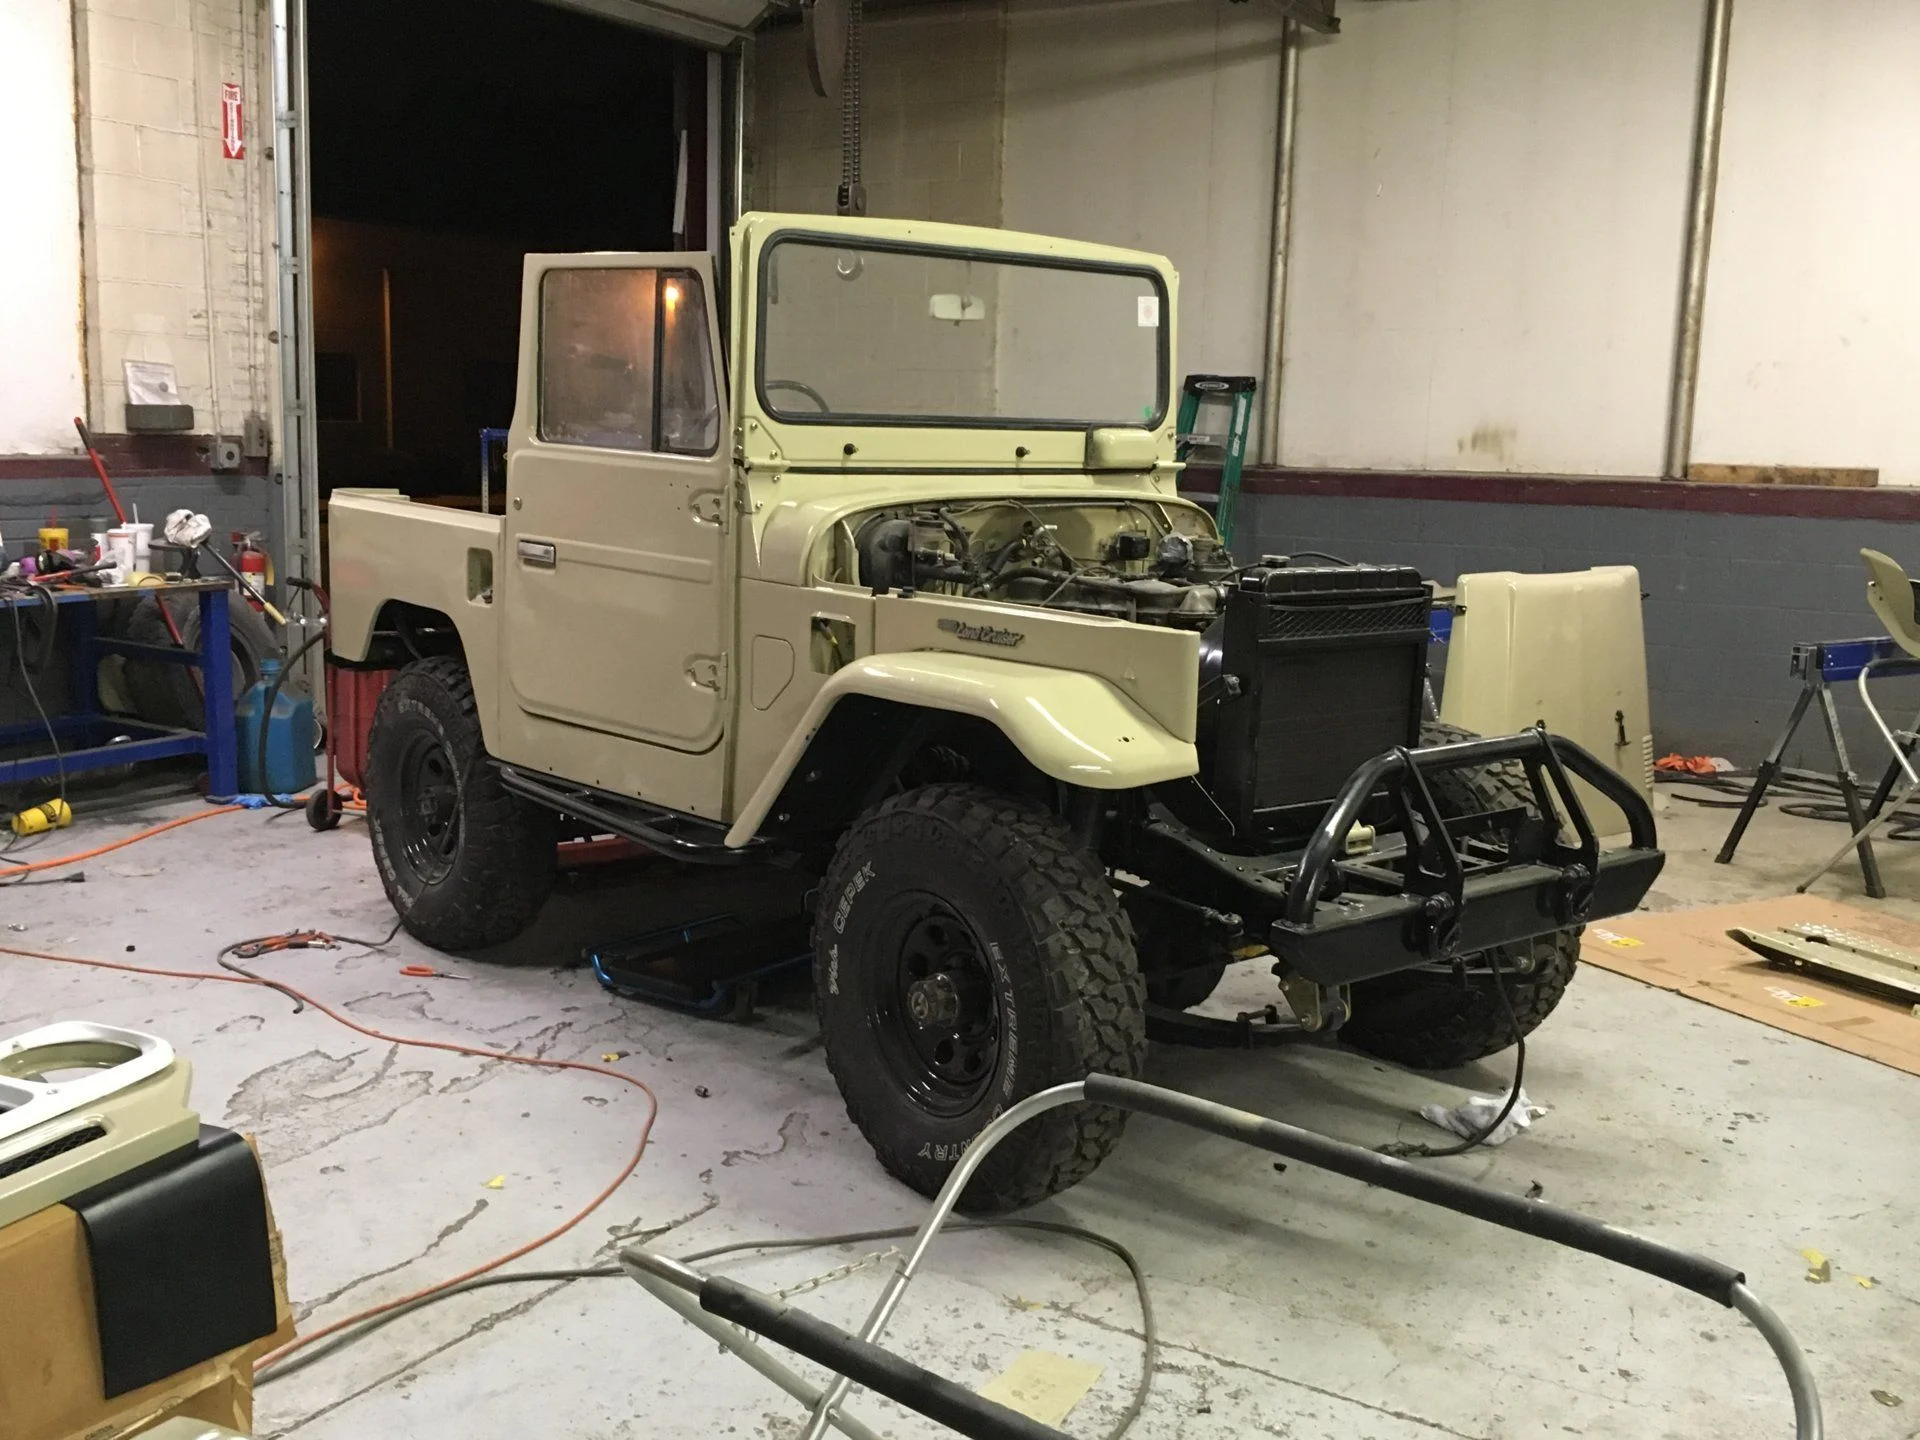
And Finally, here's where we got to by the end of the night. There's still some fit-up to take care of, but she's close to being together!

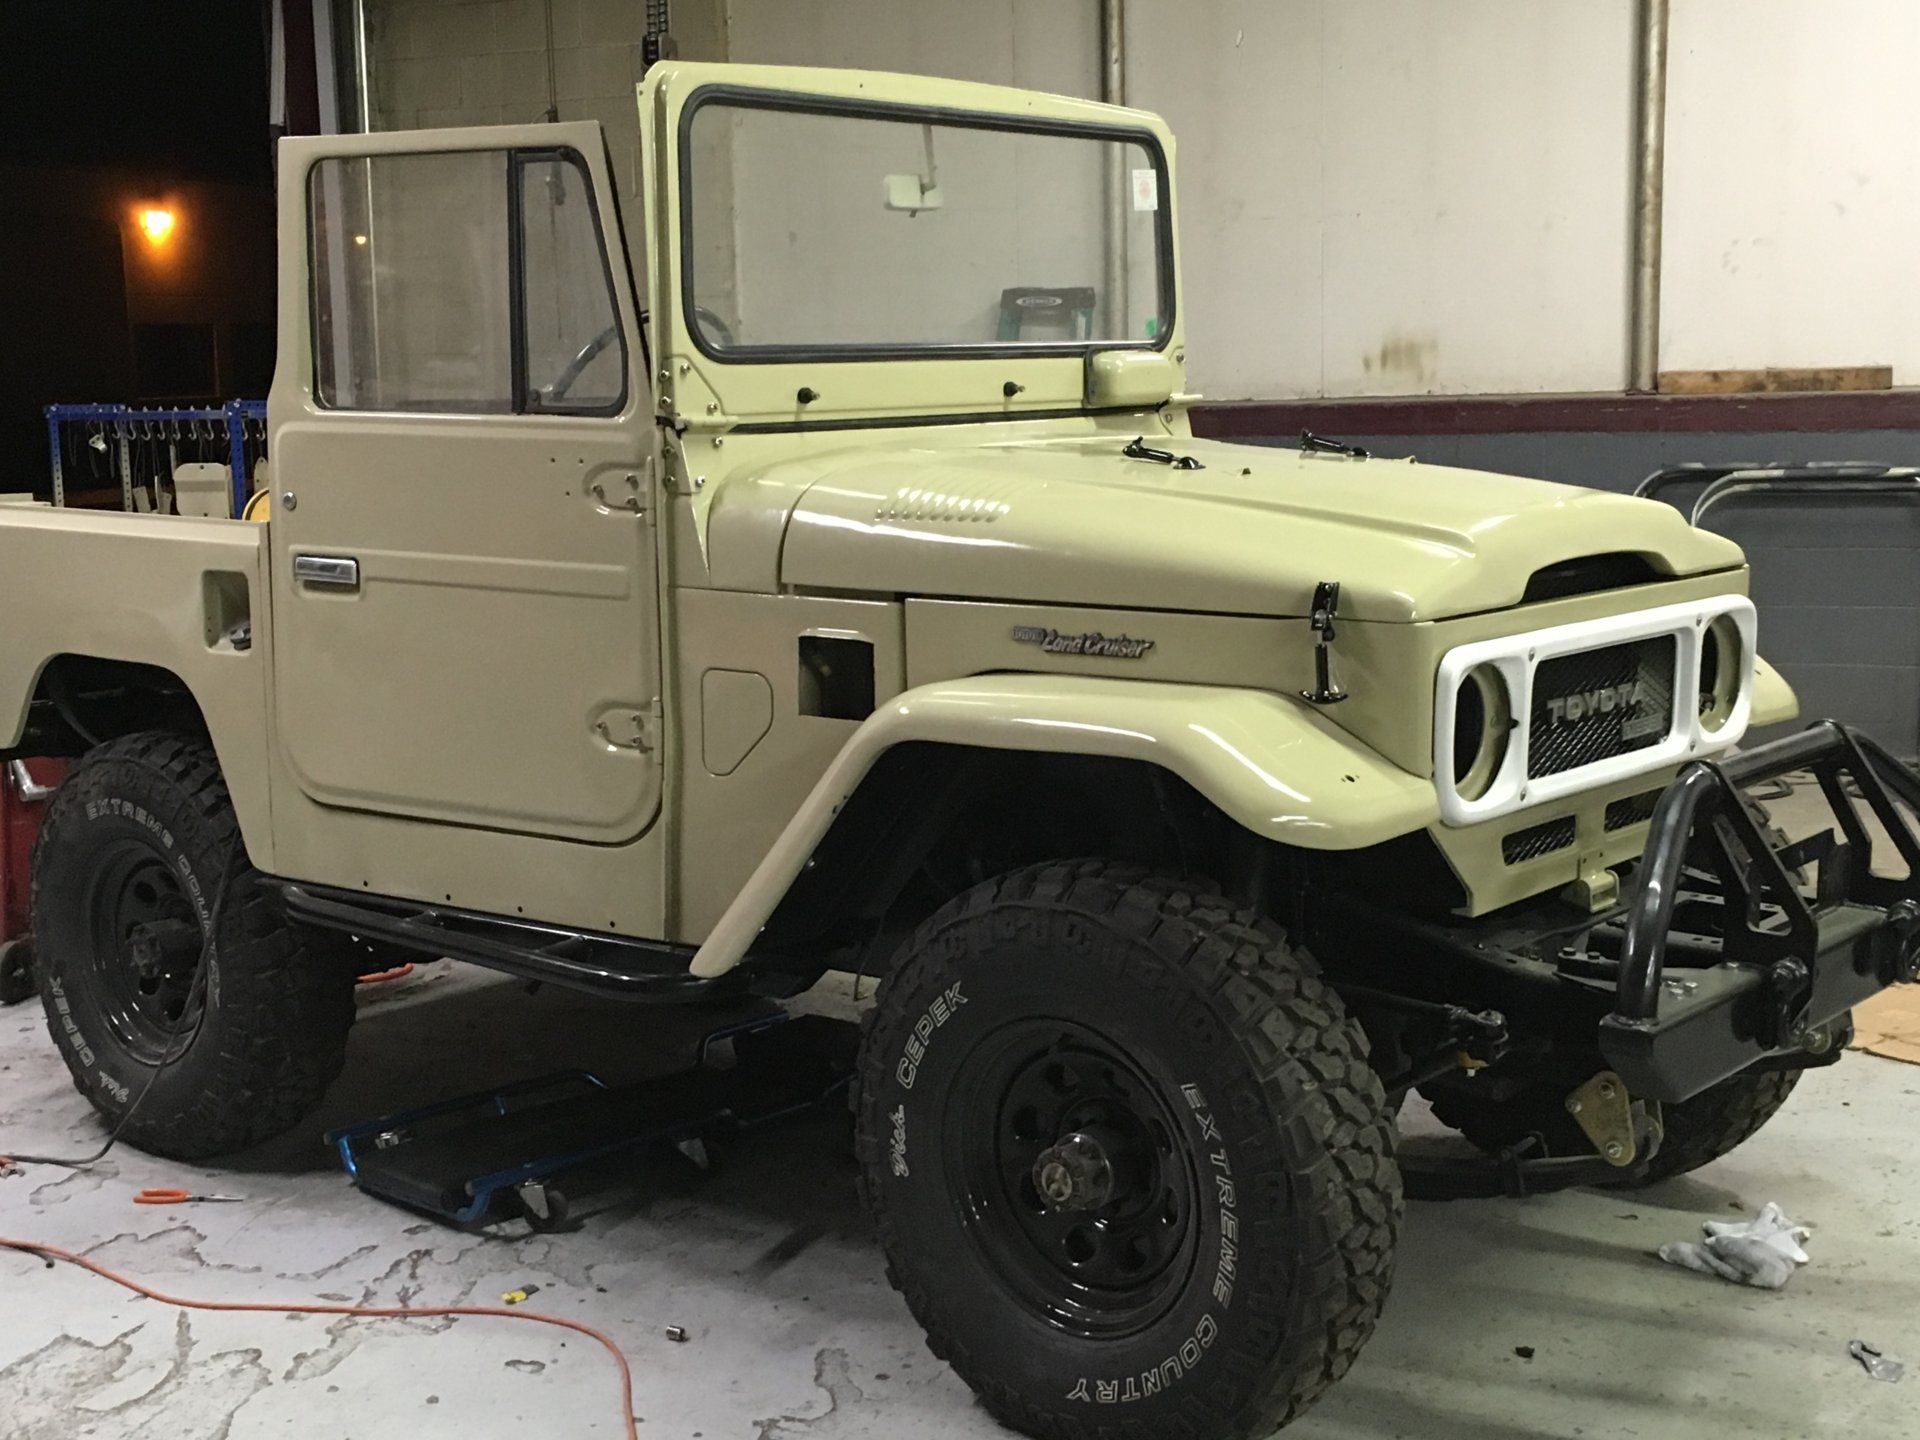
This truck has been in pieces for almost 2 years. It's so crazy to feel like it's within striking distance of driving again!
Here's Dad painting, and bonus Uncle. (I get my hair from the other side of the family, thank god.)
Then tonight we did a bunch of reassembly. The kind that actually makes this thing look like a vehicle! Here's part-way through the evening.
And Finally, here's where we got to by the end of the night. There's still some fit-up to take care of, but she's close to being together!
This truck has been in pieces for almost 2 years. It's so crazy to feel like it's within striking distance of driving again!
looks awesome! well done
- Thread starter
- #52
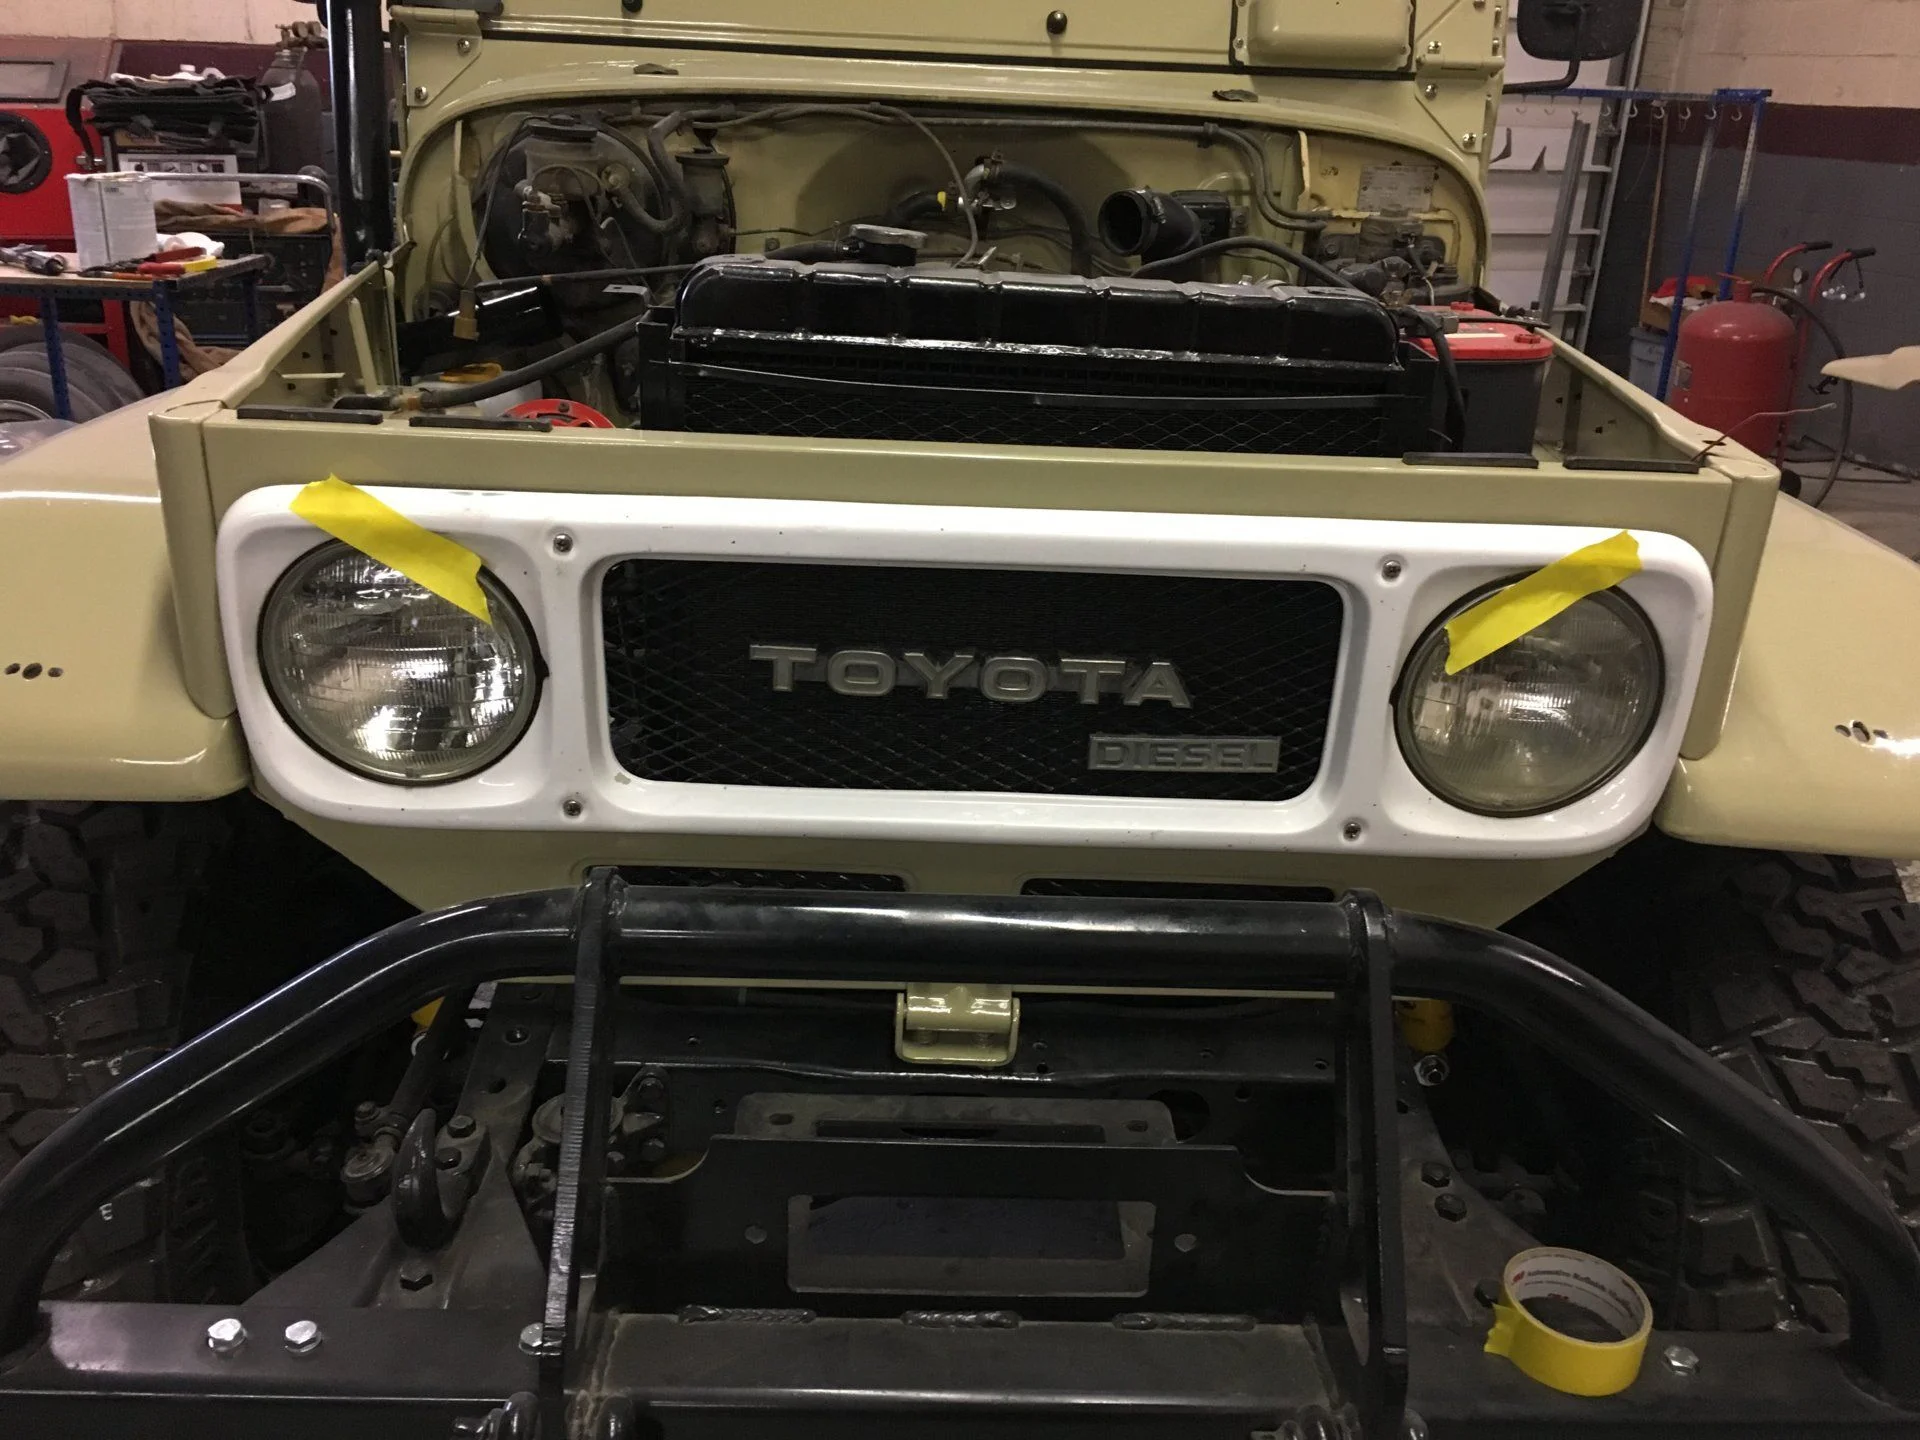
Okay, busy couple of weeks! We got the snorkel on, headlights in, roll cage bolted, Seats installed, and the fuel tank NOT installed. The fuel tank is a thorn in our sides. We tried to rehabilitate the blinkers, but they're so rough that I just ordered new ones.
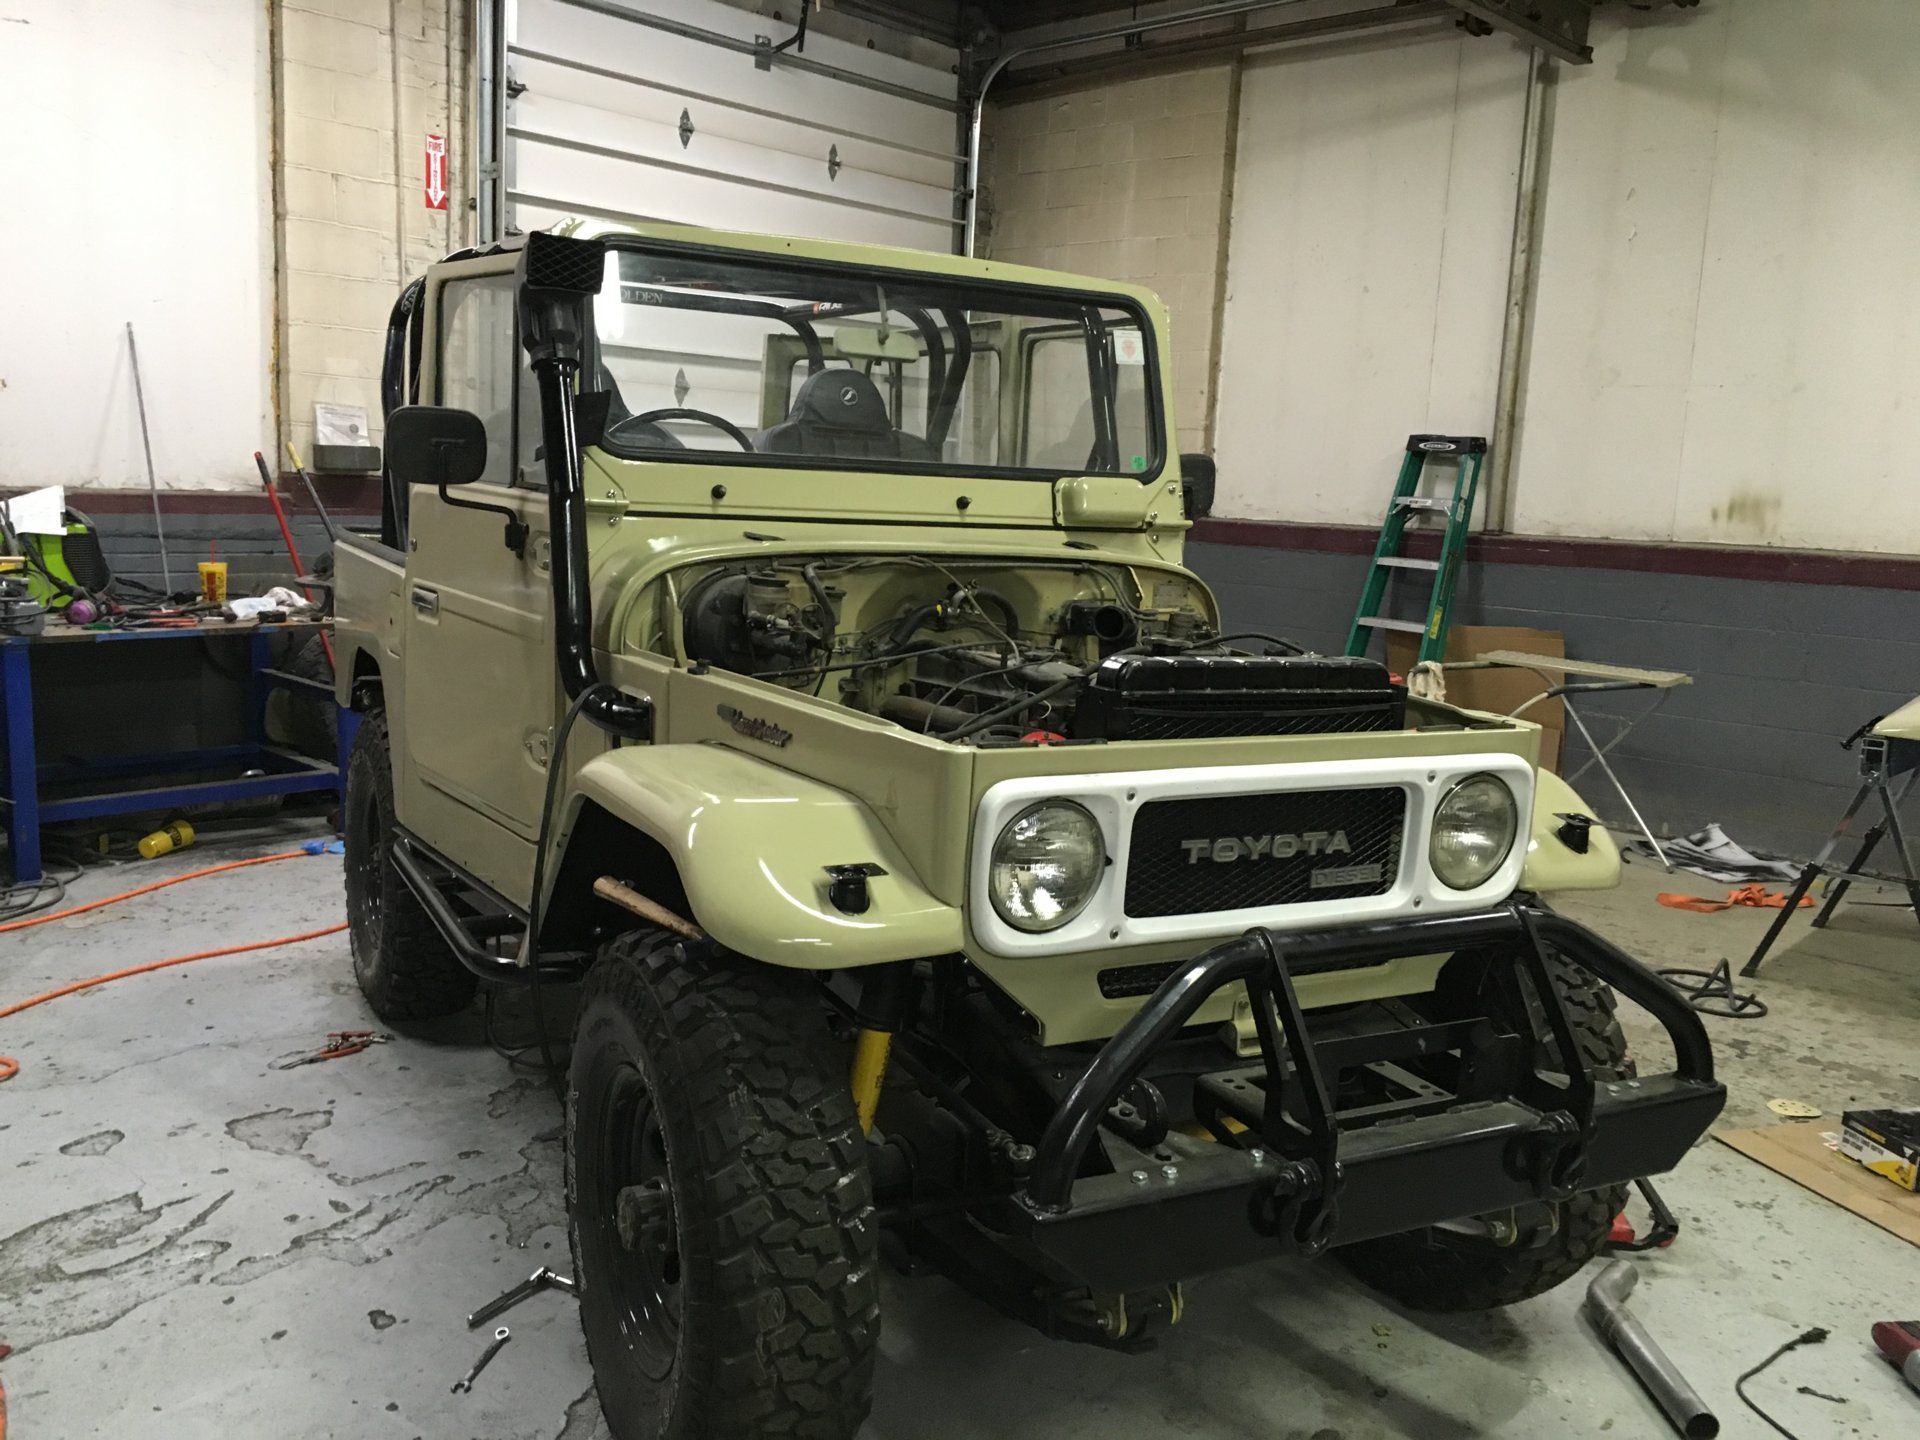
I installed some very important stickers on the roll cage. (Not the Ride Snowboards one. That came pre-installed)
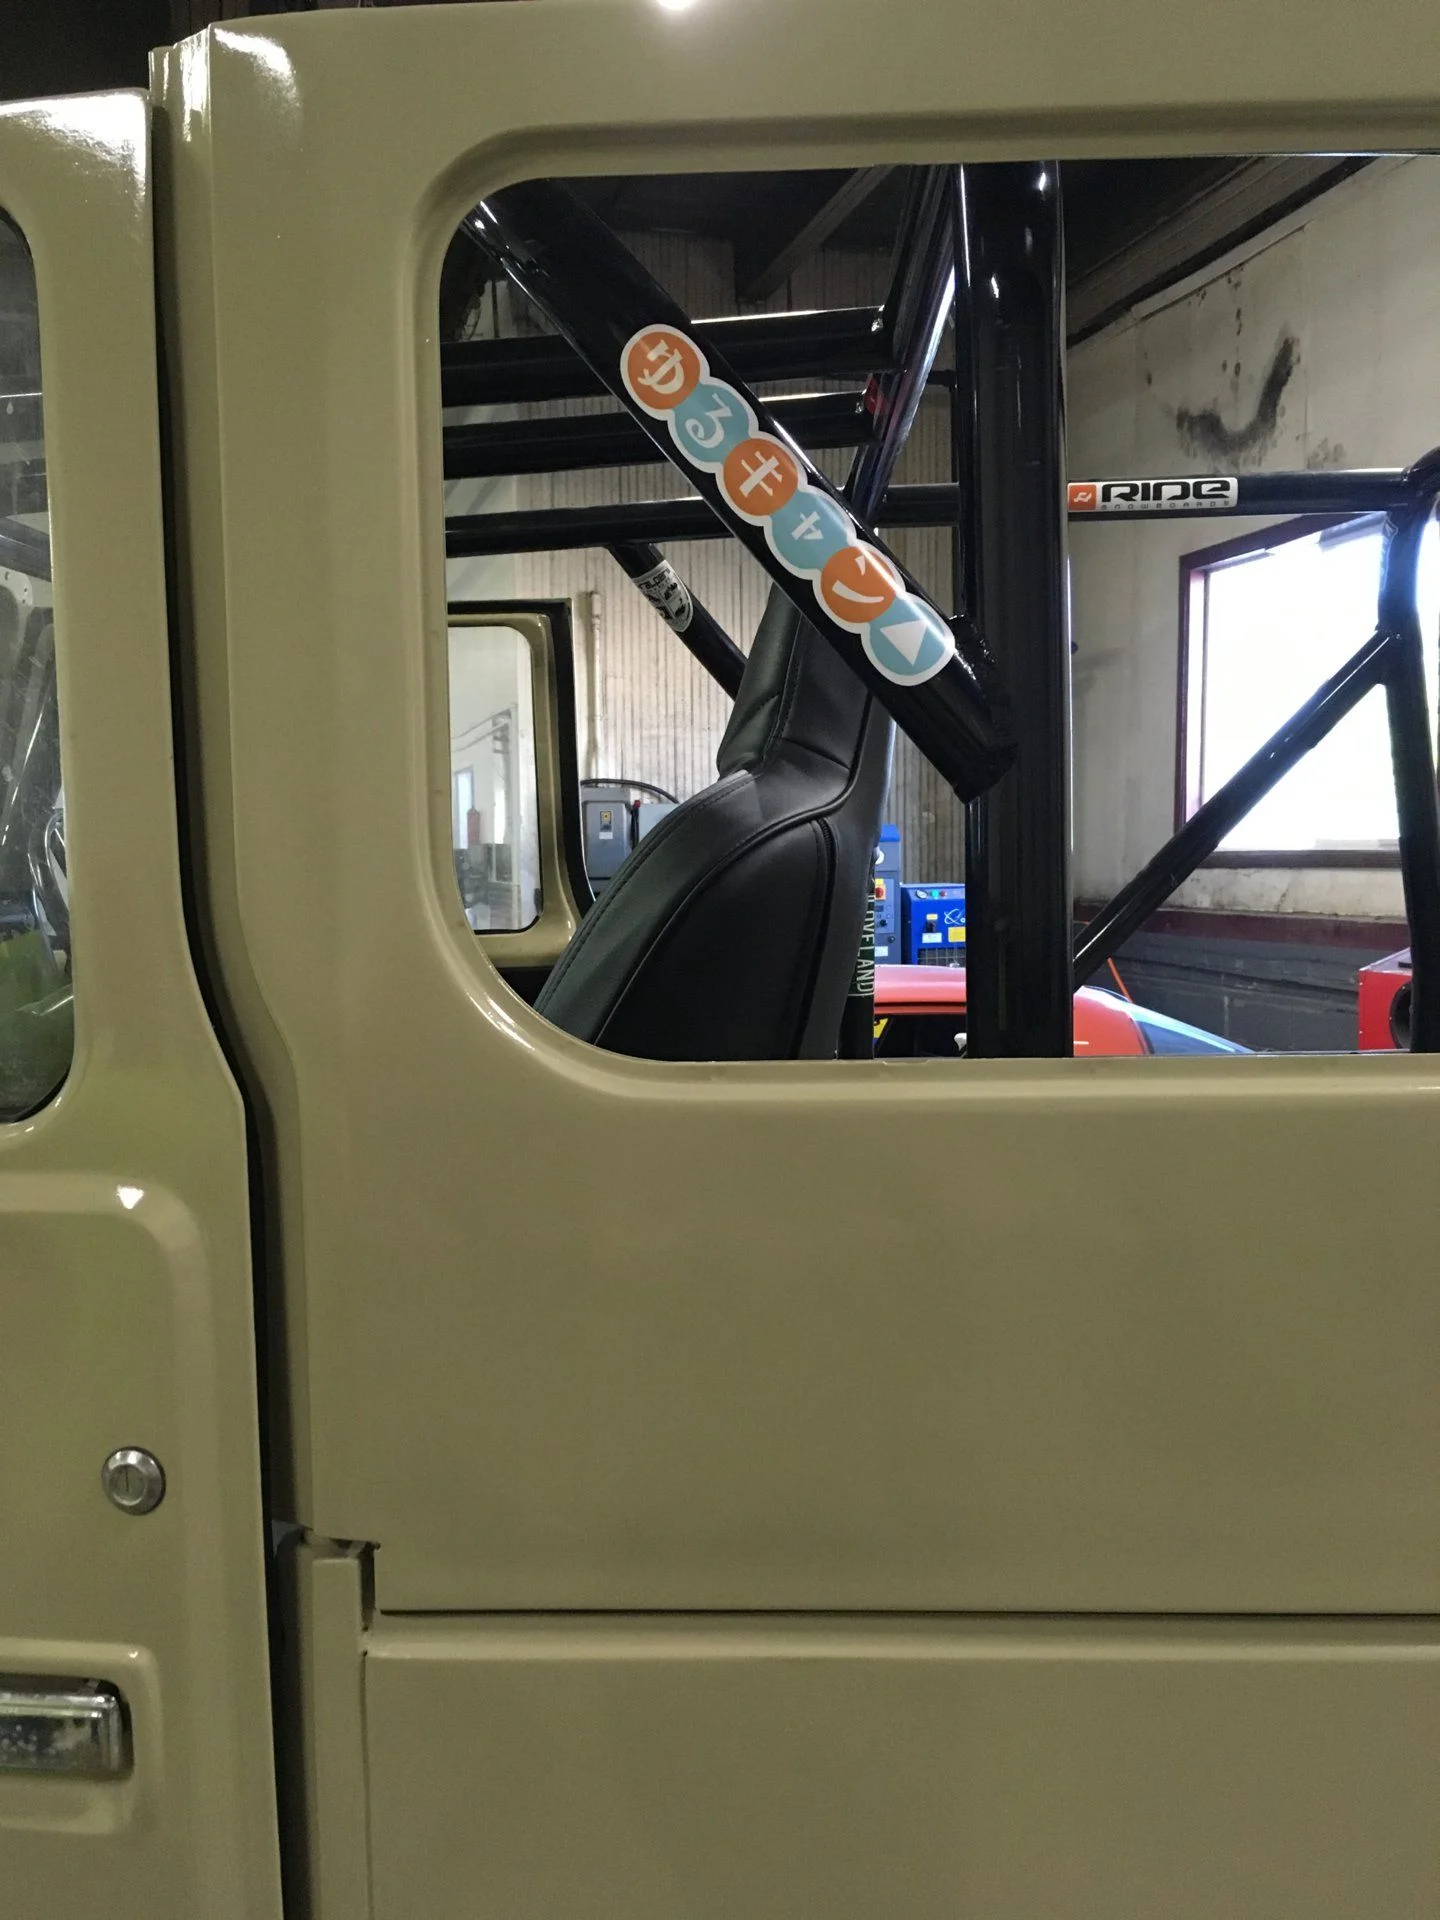
Then we got the side windows installed on the side with paint on it.
Next, we popped the unpainted hard top side on for a quick test-fit of the roof. It's a bit rough, but a full restoration on that will have to wait until after the current deadline.
Not pictured: We got the last body panels and rear ambulance doors painted, did a bunch of troubleshooting and testing on electricals, and started to figure out an exhaust system.
Pictured: Poking fun at Jeepers and their obsession with their trucks looking angry all the time.
Intelligent use of my valuable time.
I installed some very important stickers on the roll cage. (Not the Ride Snowboards one. That came pre-installed)
Then we got the side windows installed on the side with paint on it.
Next, we popped the unpainted hard top side on for a quick test-fit of the roof. It's a bit rough, but a full restoration on that will have to wait until after the current deadline.
Not pictured: We got the last body panels and rear ambulance doors painted, did a bunch of troubleshooting and testing on electricals, and started to figure out an exhaust system.
Pictured: Poking fun at Jeepers and their obsession with their trucks looking angry all the time.
Intelligent use of my valuable time.
- Thread starter
- #53
It's been a couple of weeks, so I'll update with what's gone on.
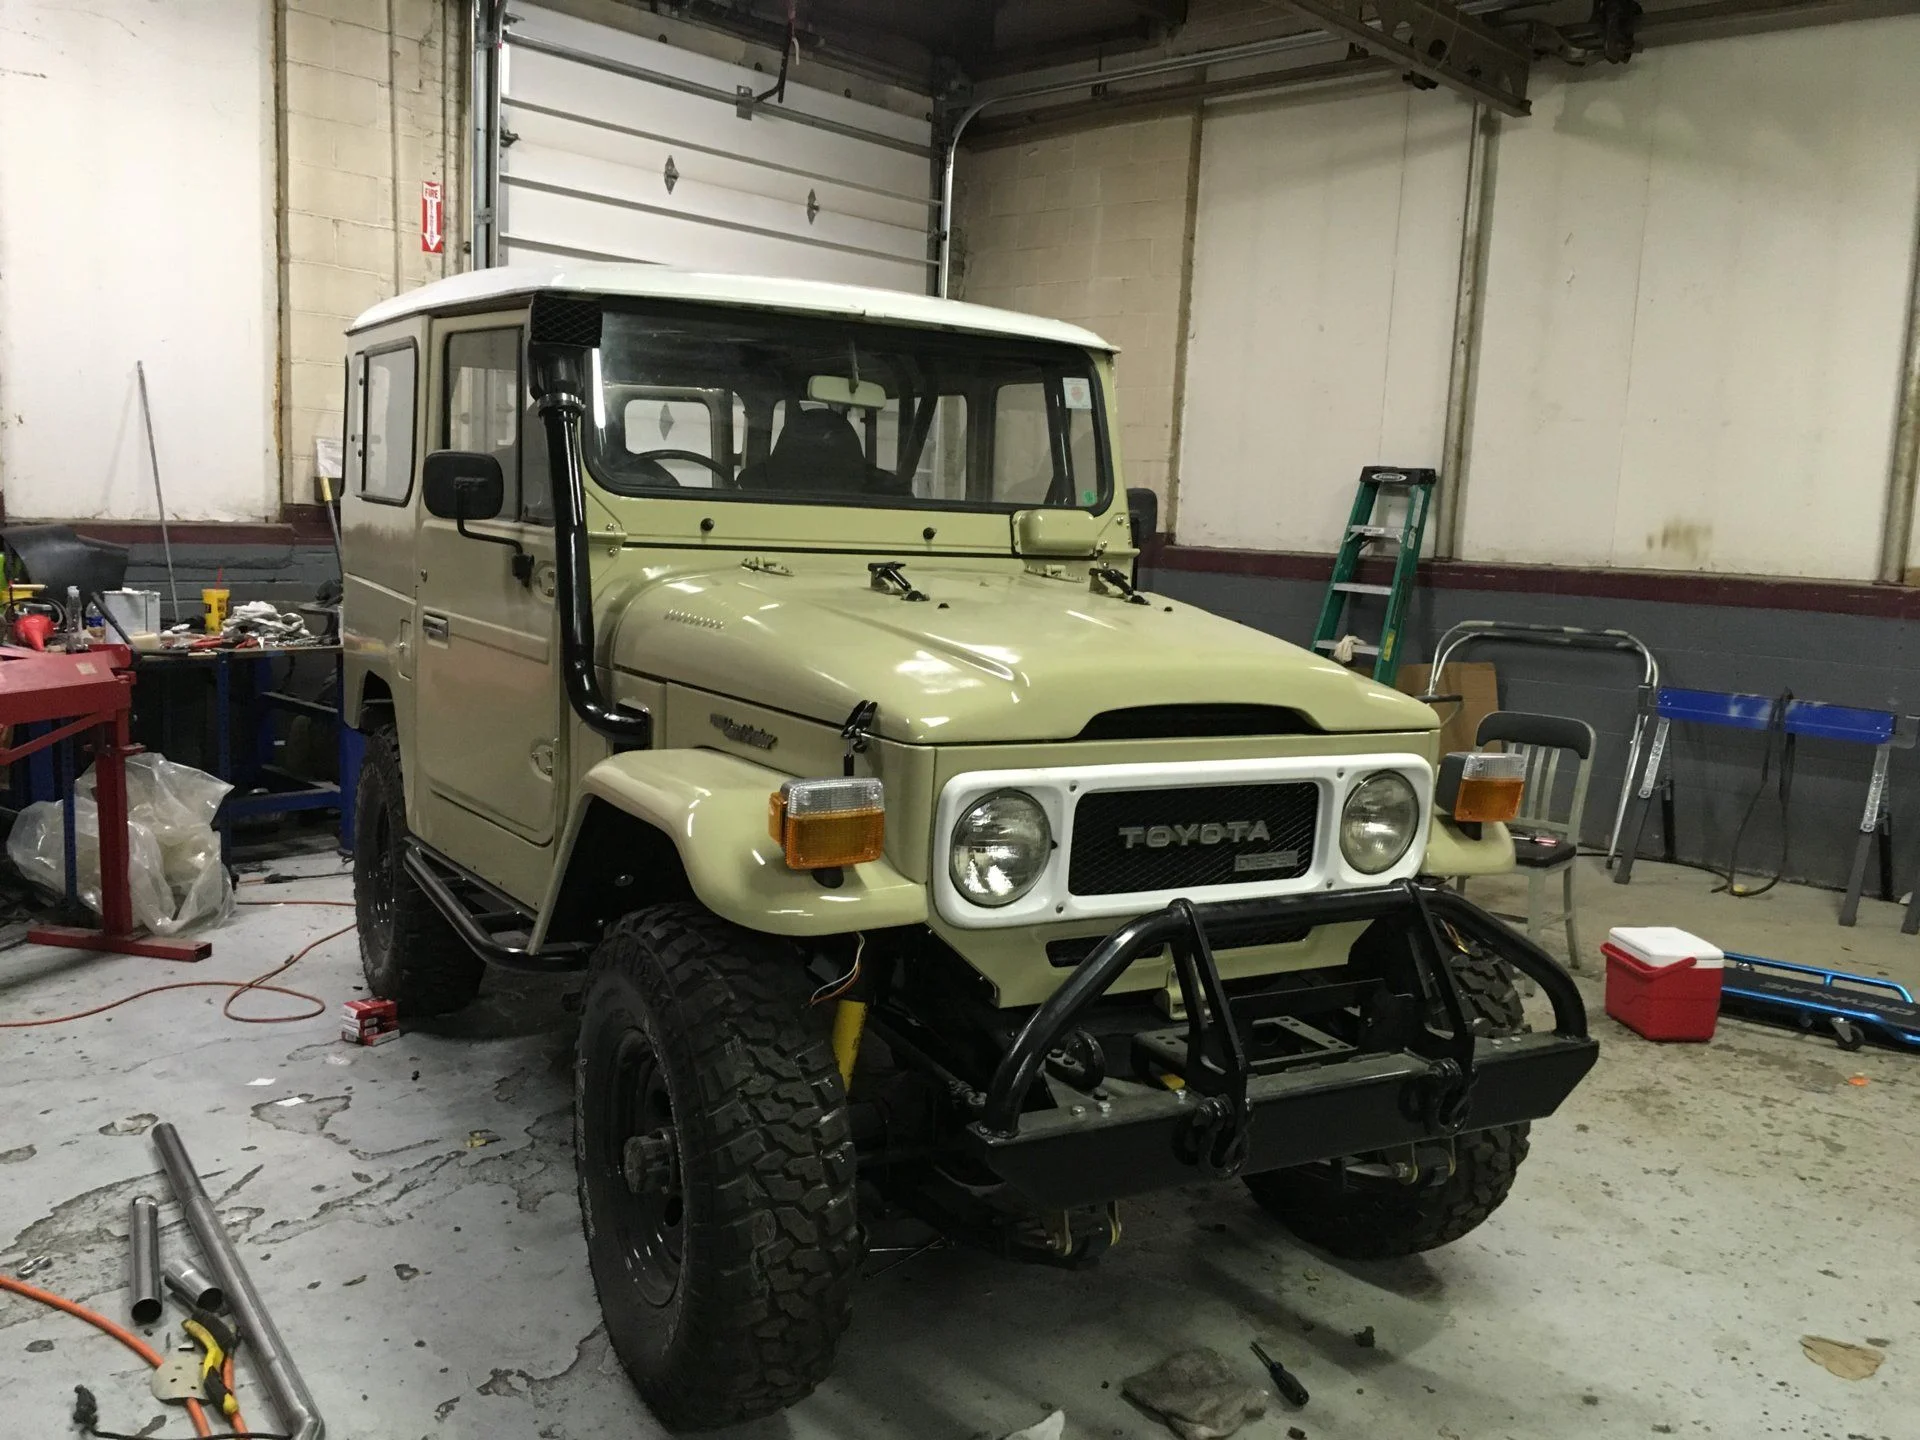
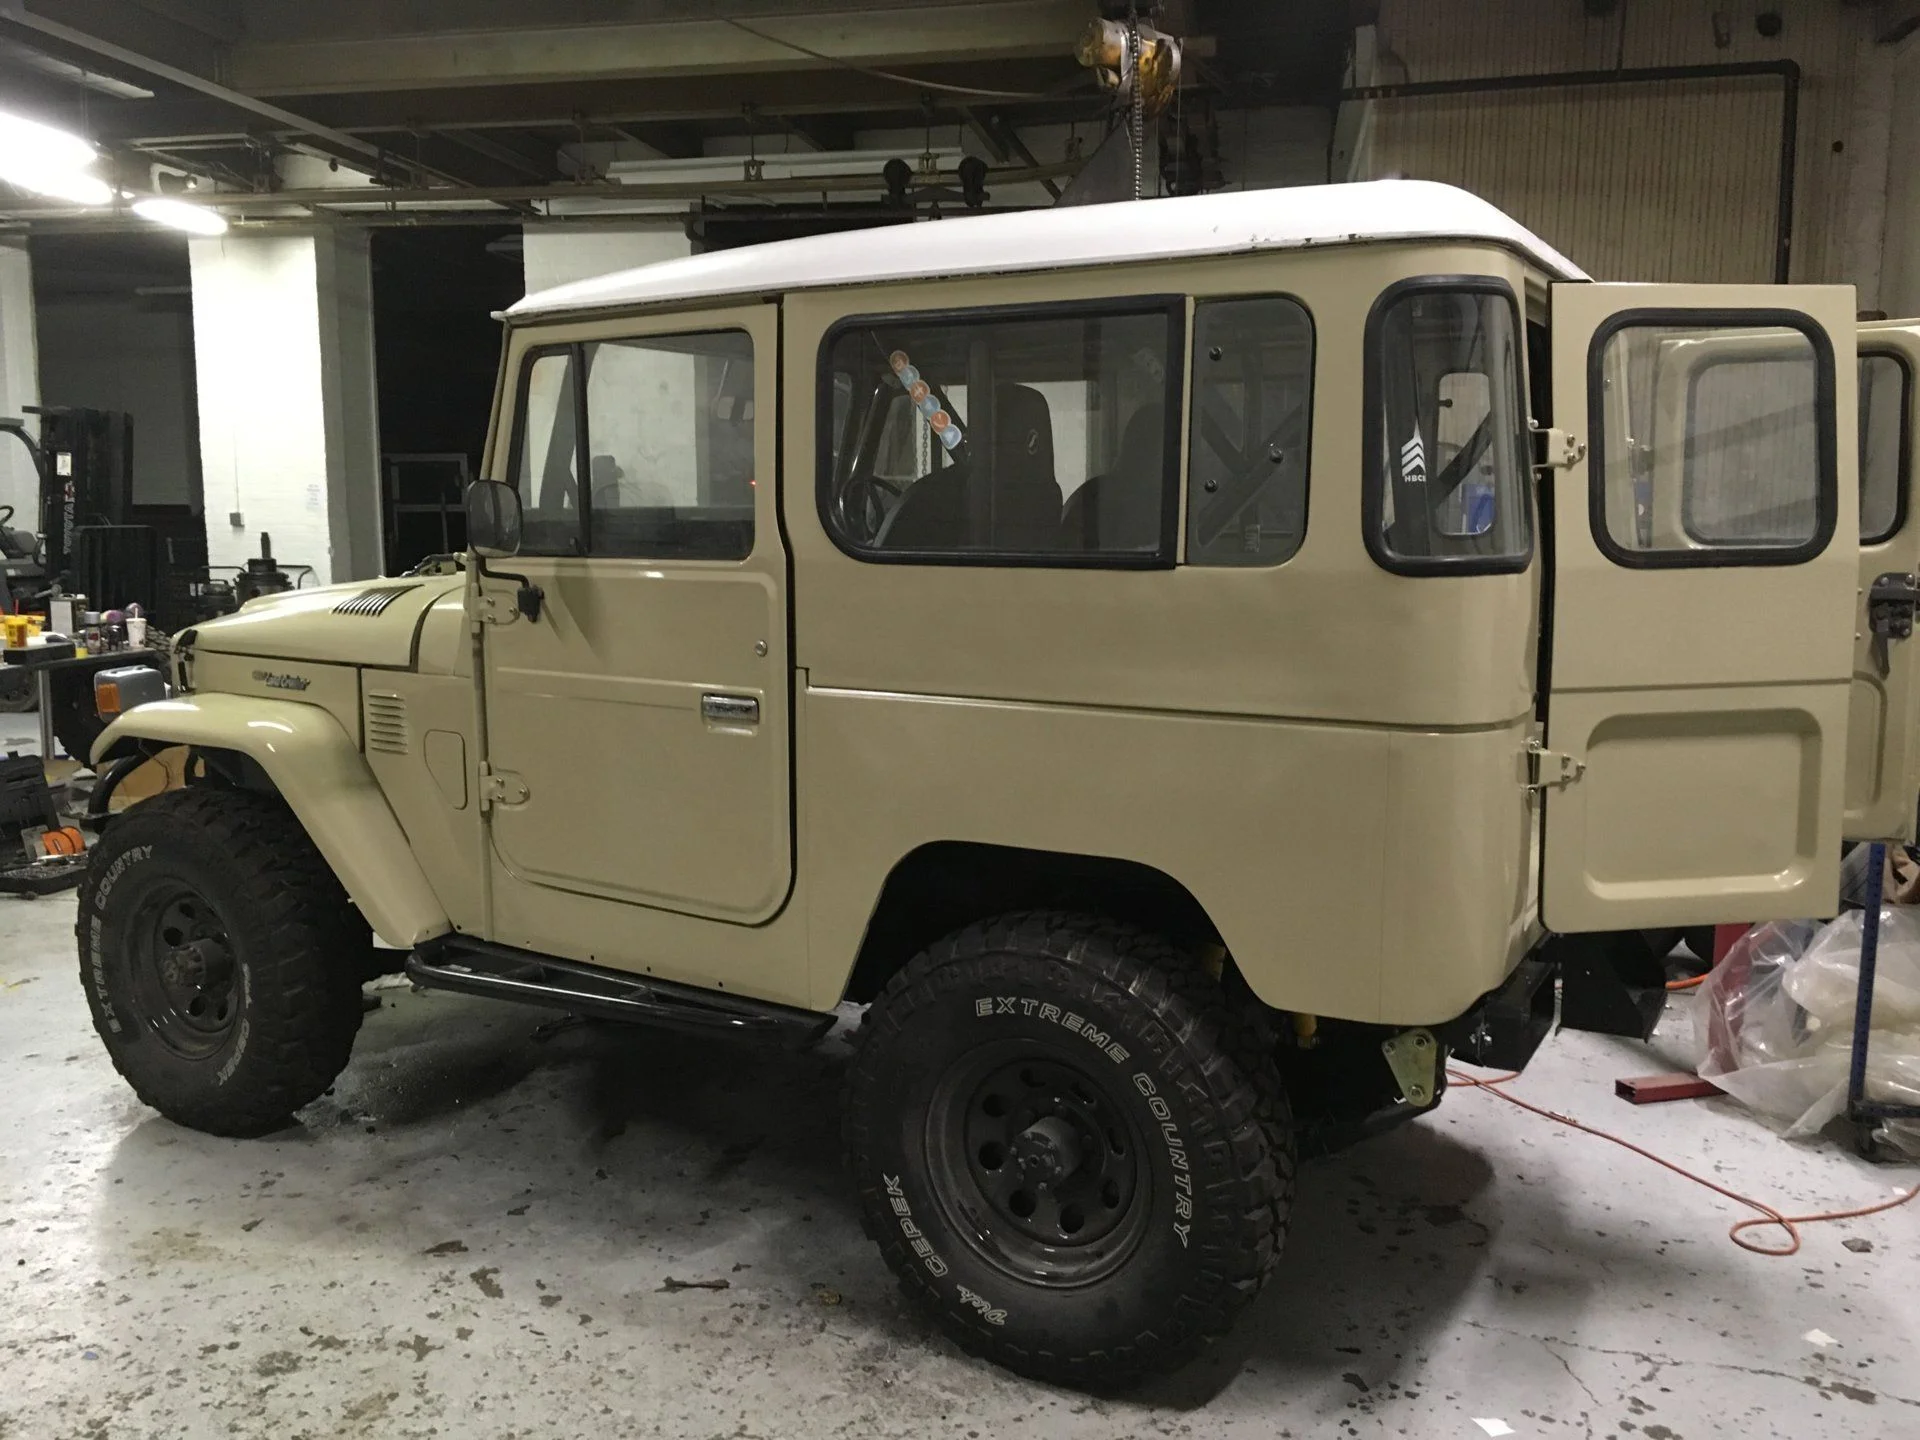
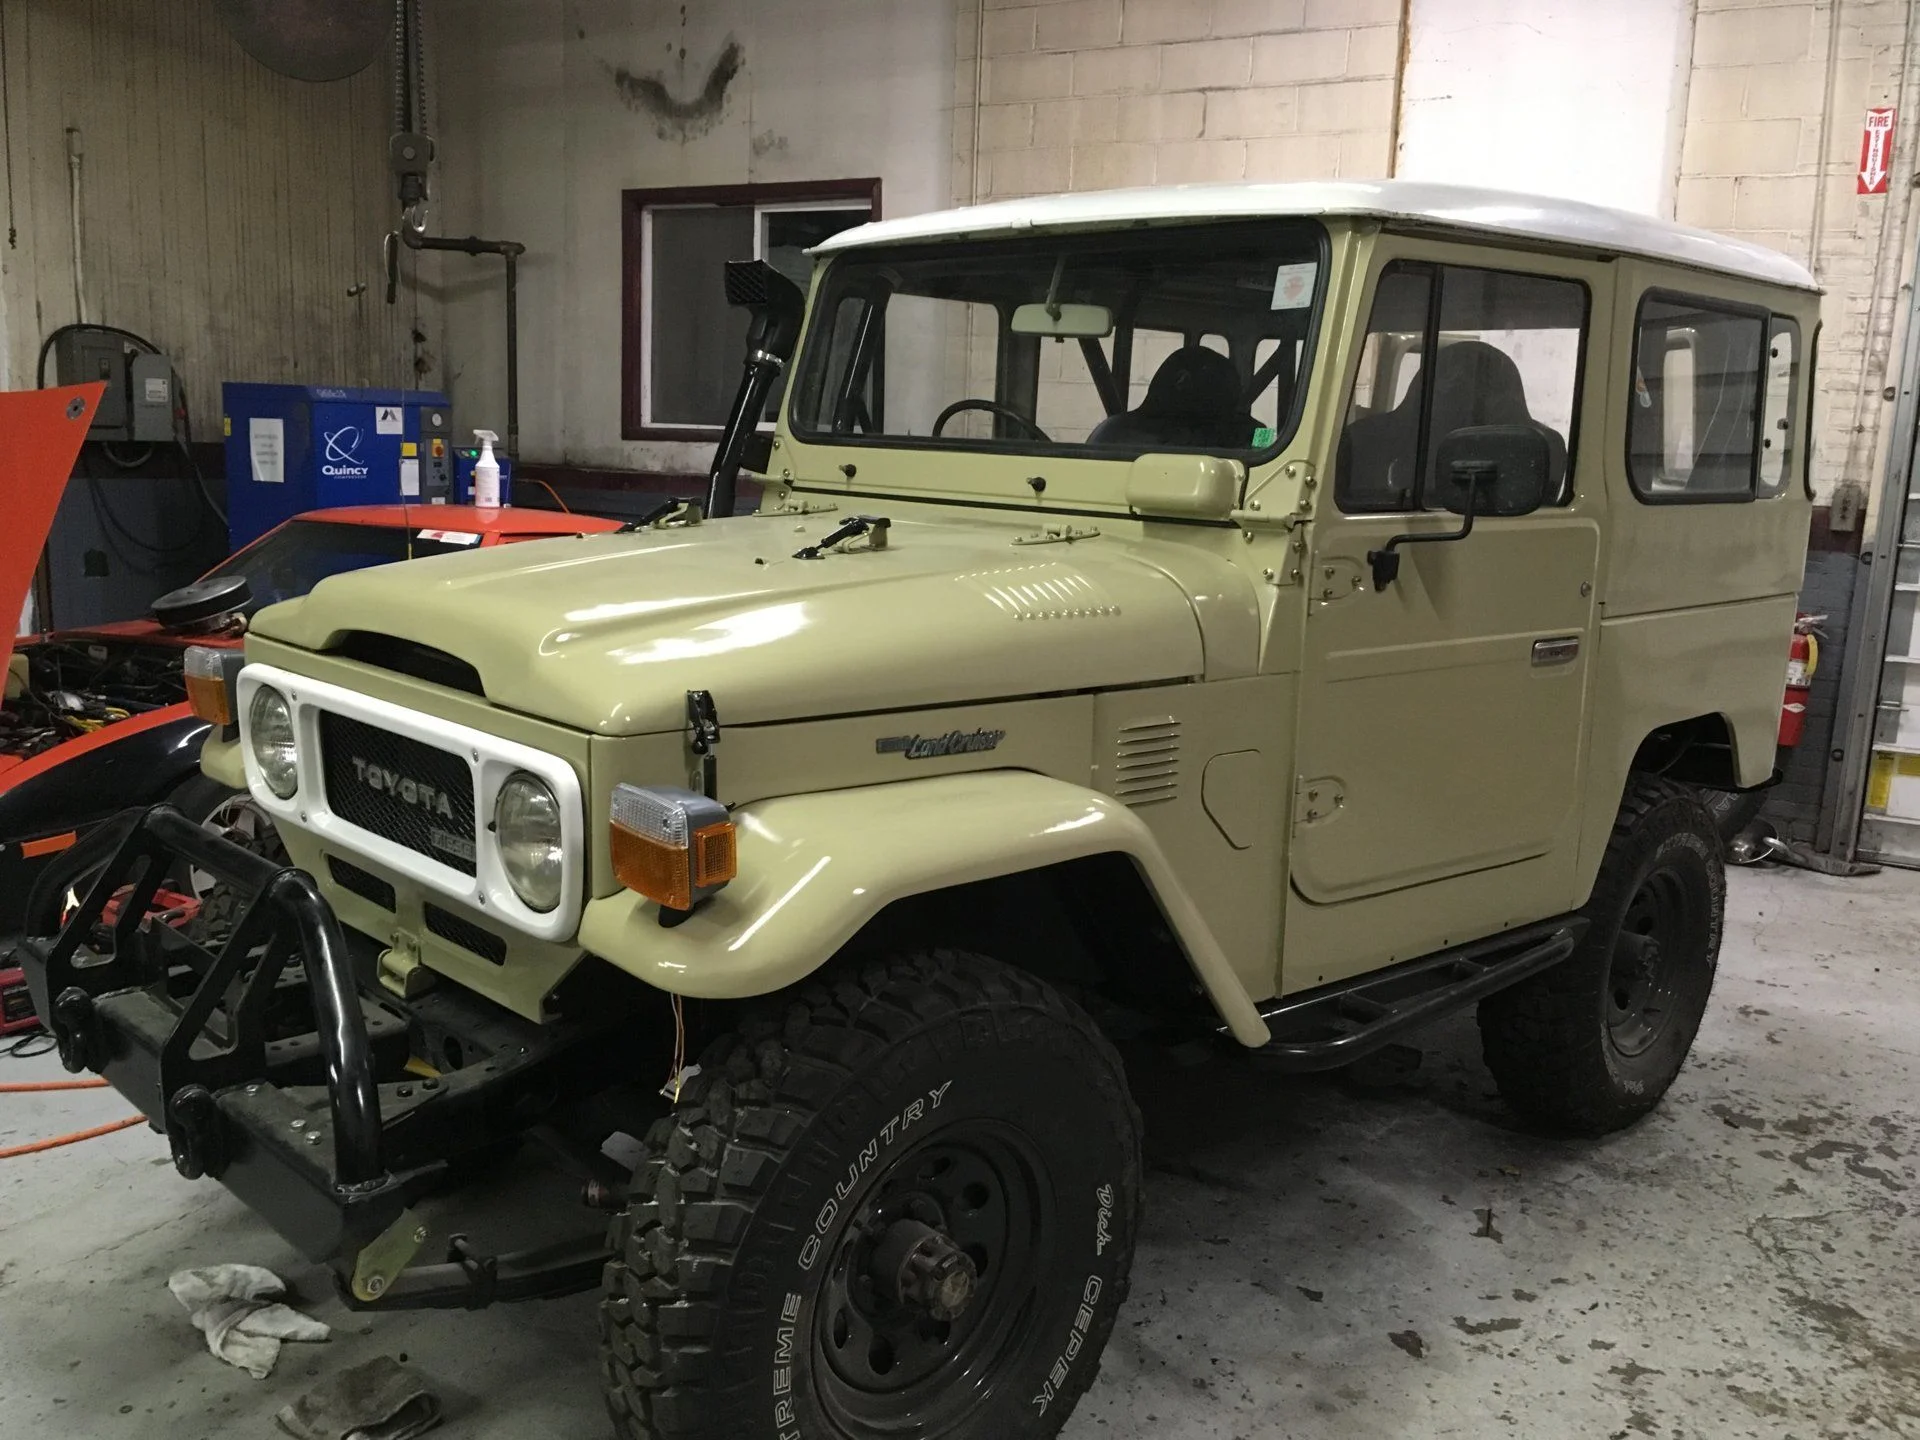
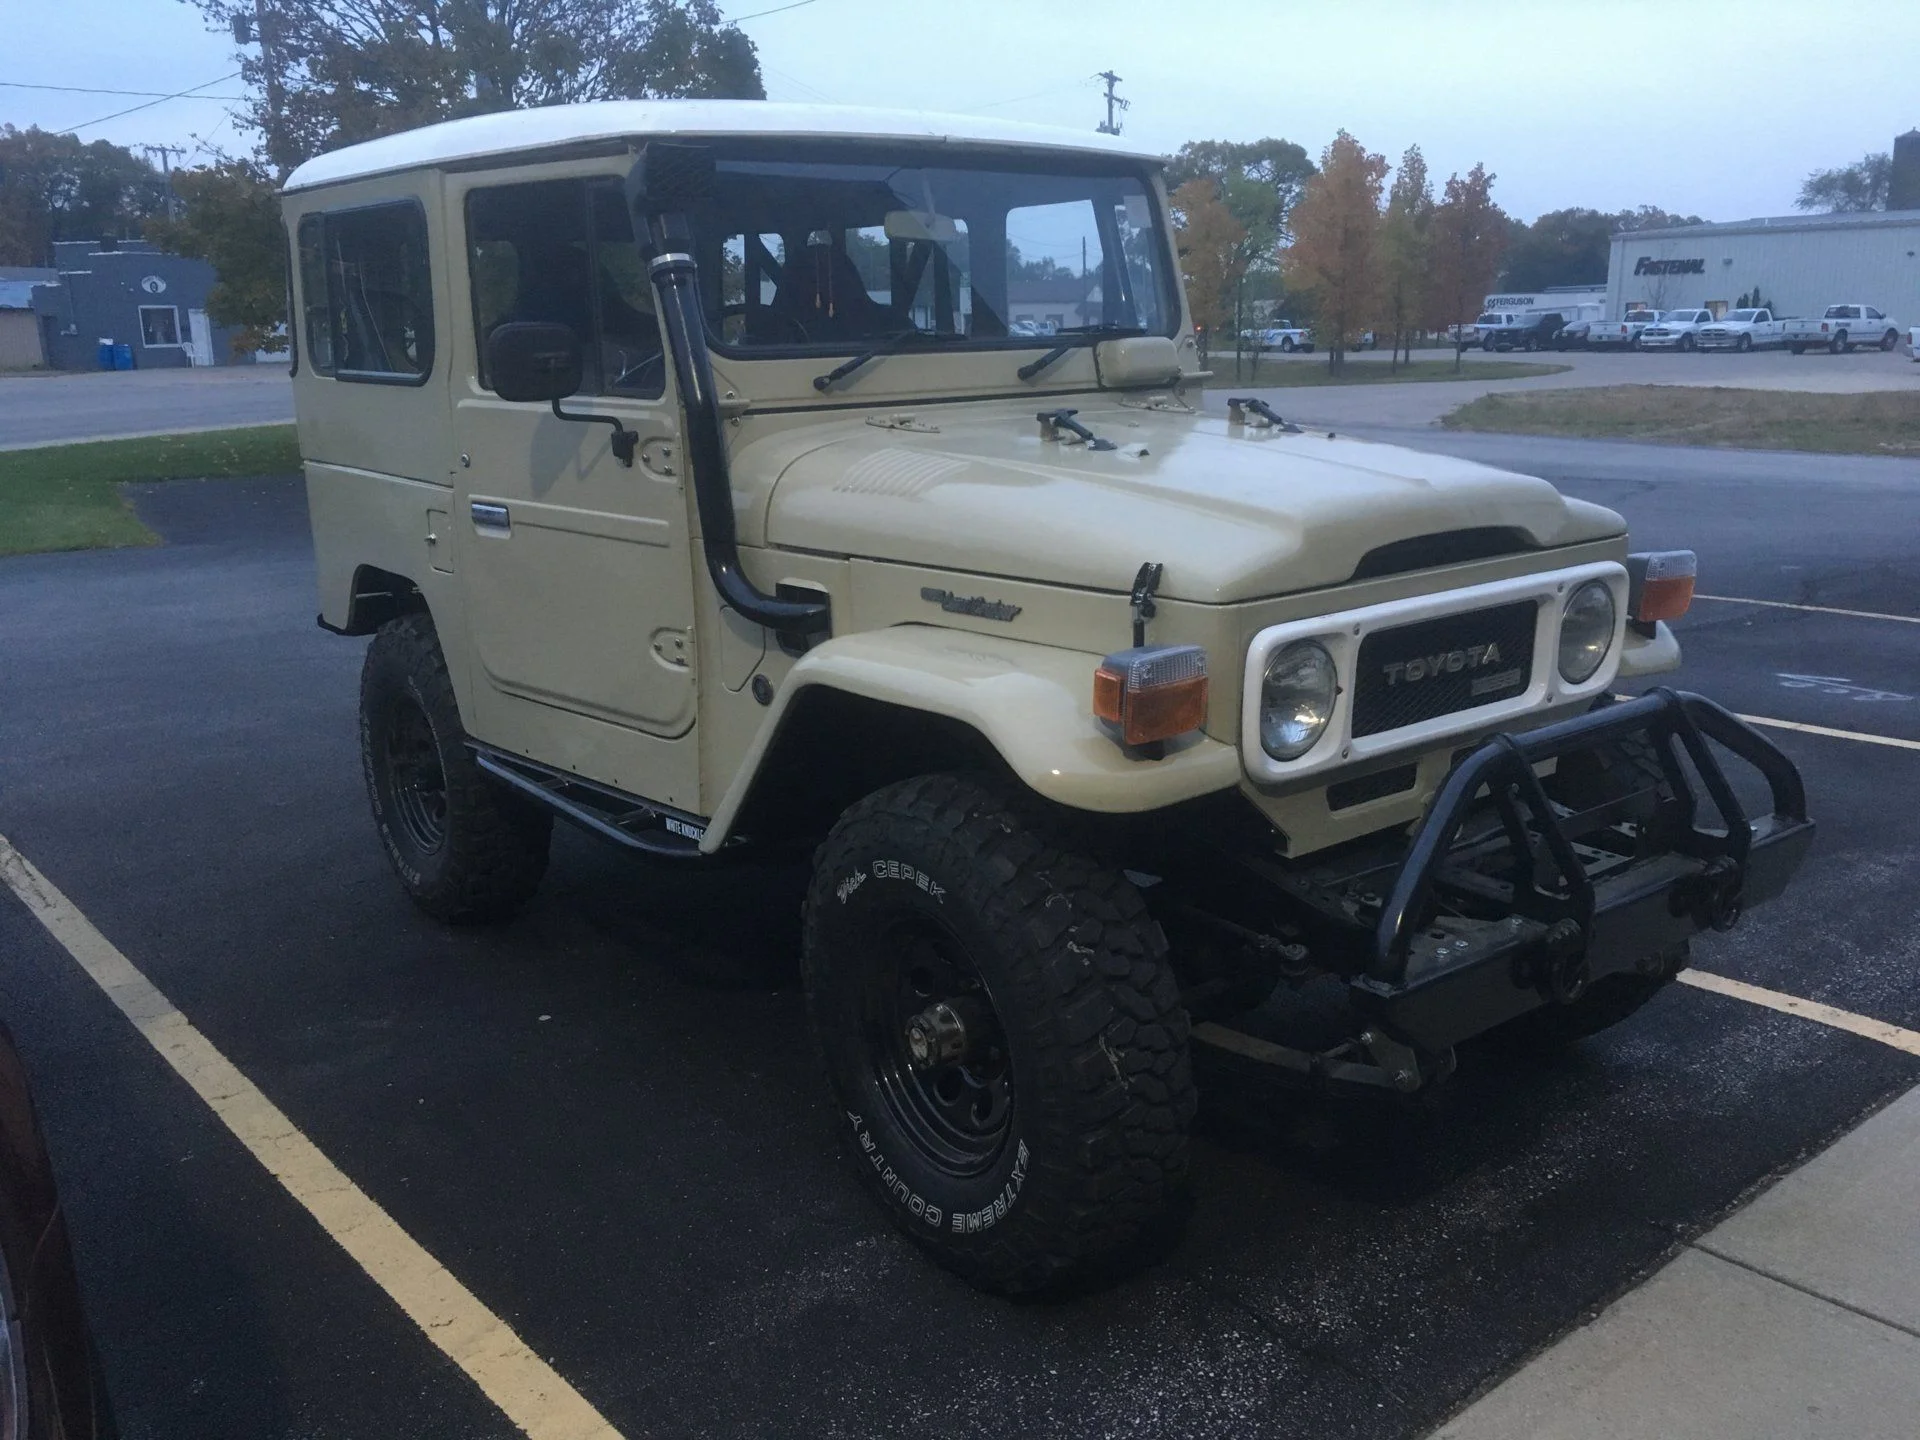
We have the truck fully together now. Seatbelts in, electrical figured out, insurace nd a temp plate on it (custom vanity plate on order) we even took it for a spin around the block a couple times! These pics are not *quite* fully assembled, but close enough!
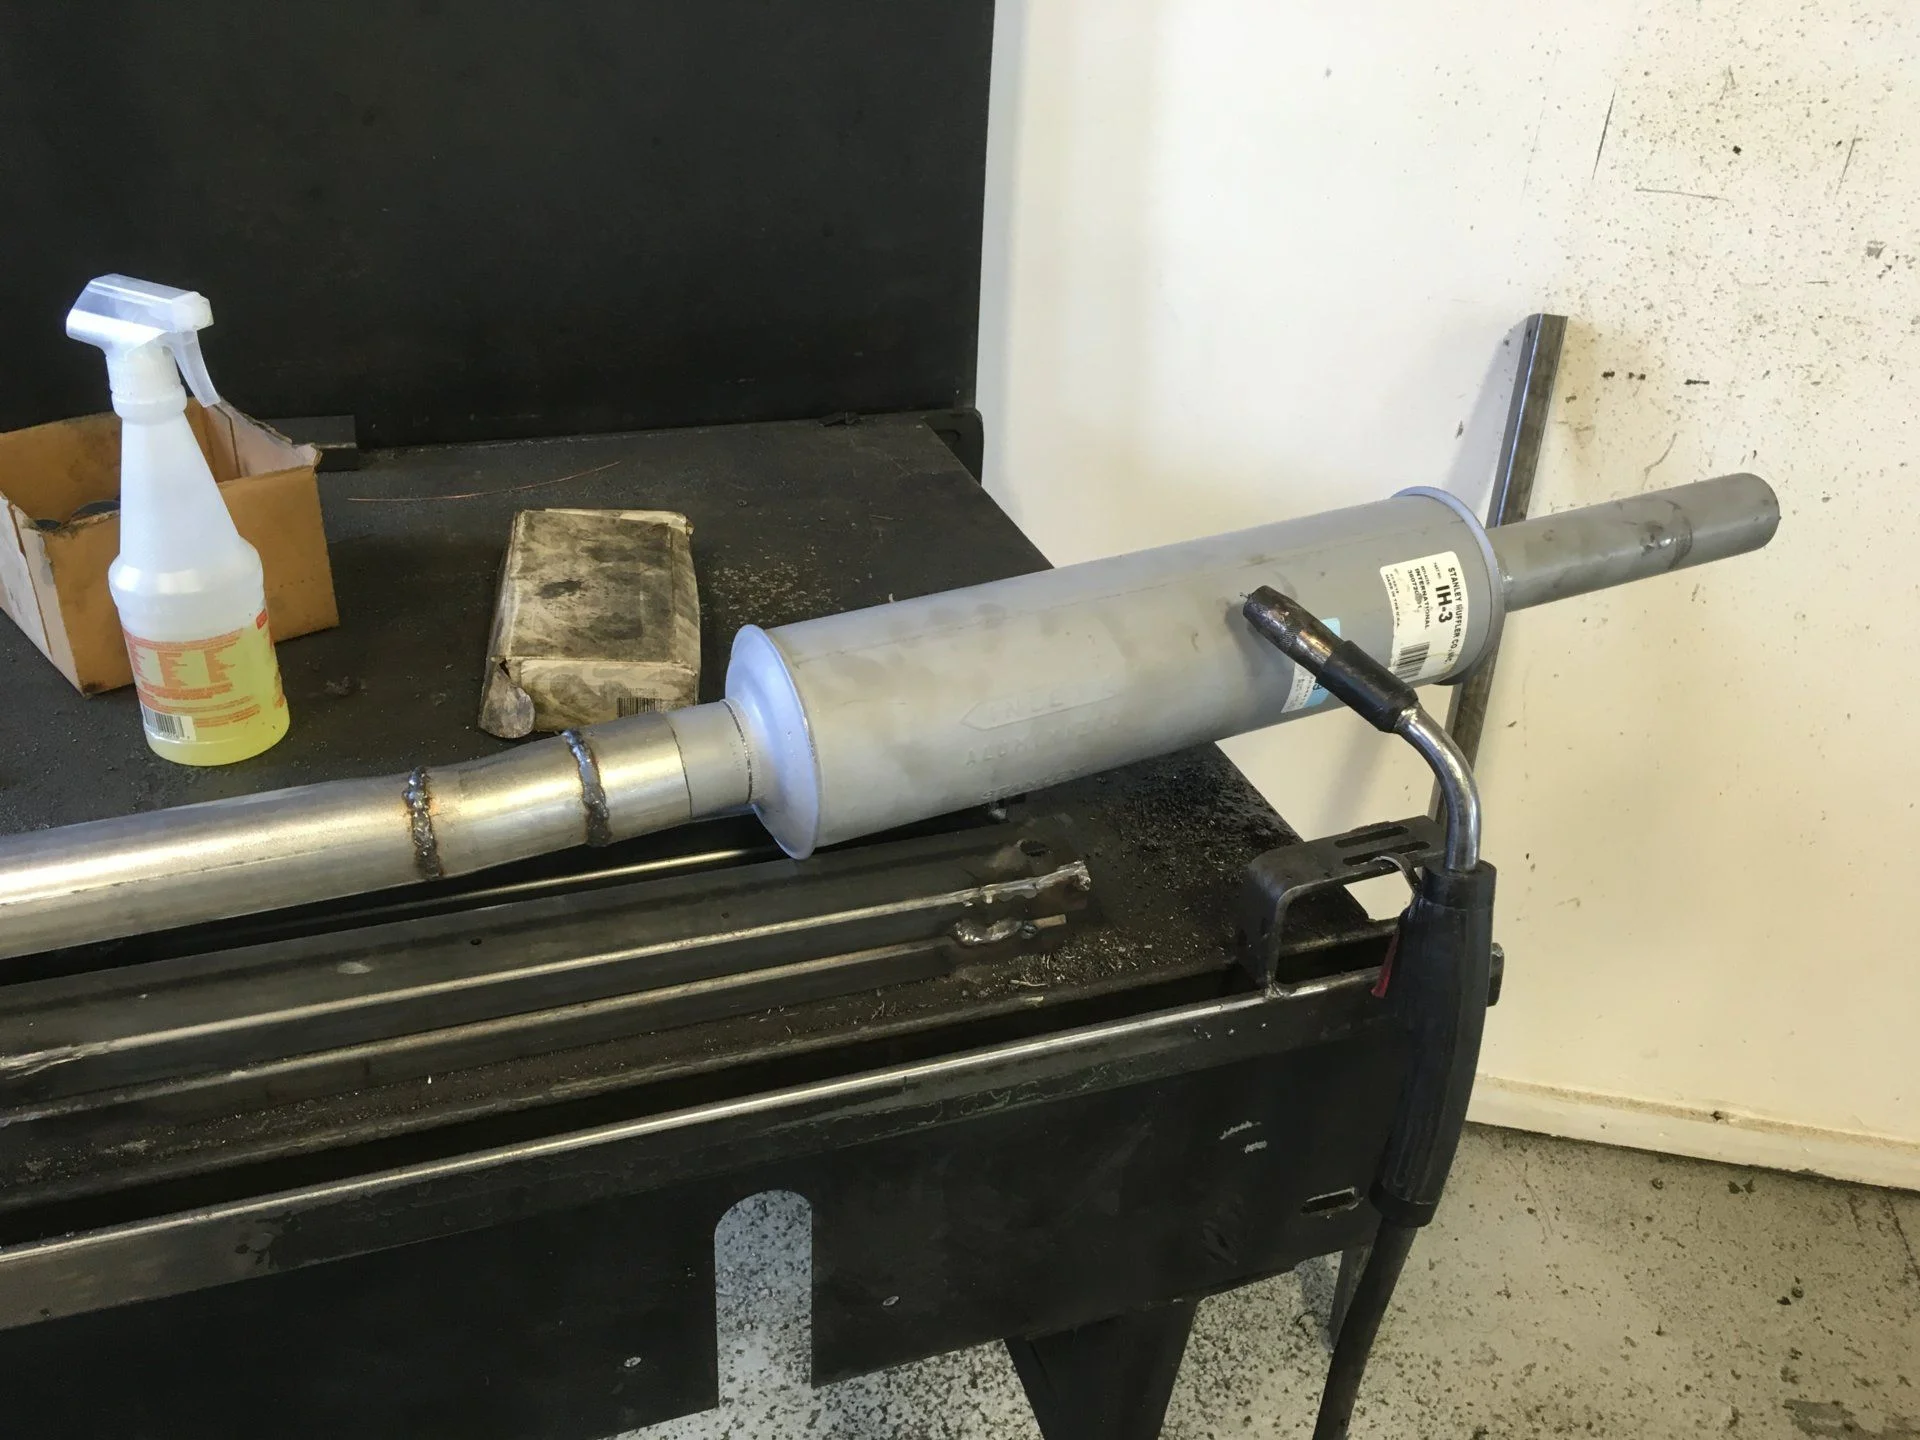
Here's most of the exhaust setup. Pretty small muffler. All of my other cars are disruptively loud, why deviate with this one? The whole exhaust system stays inside of the frame rails, so no interference from the rock sliders.
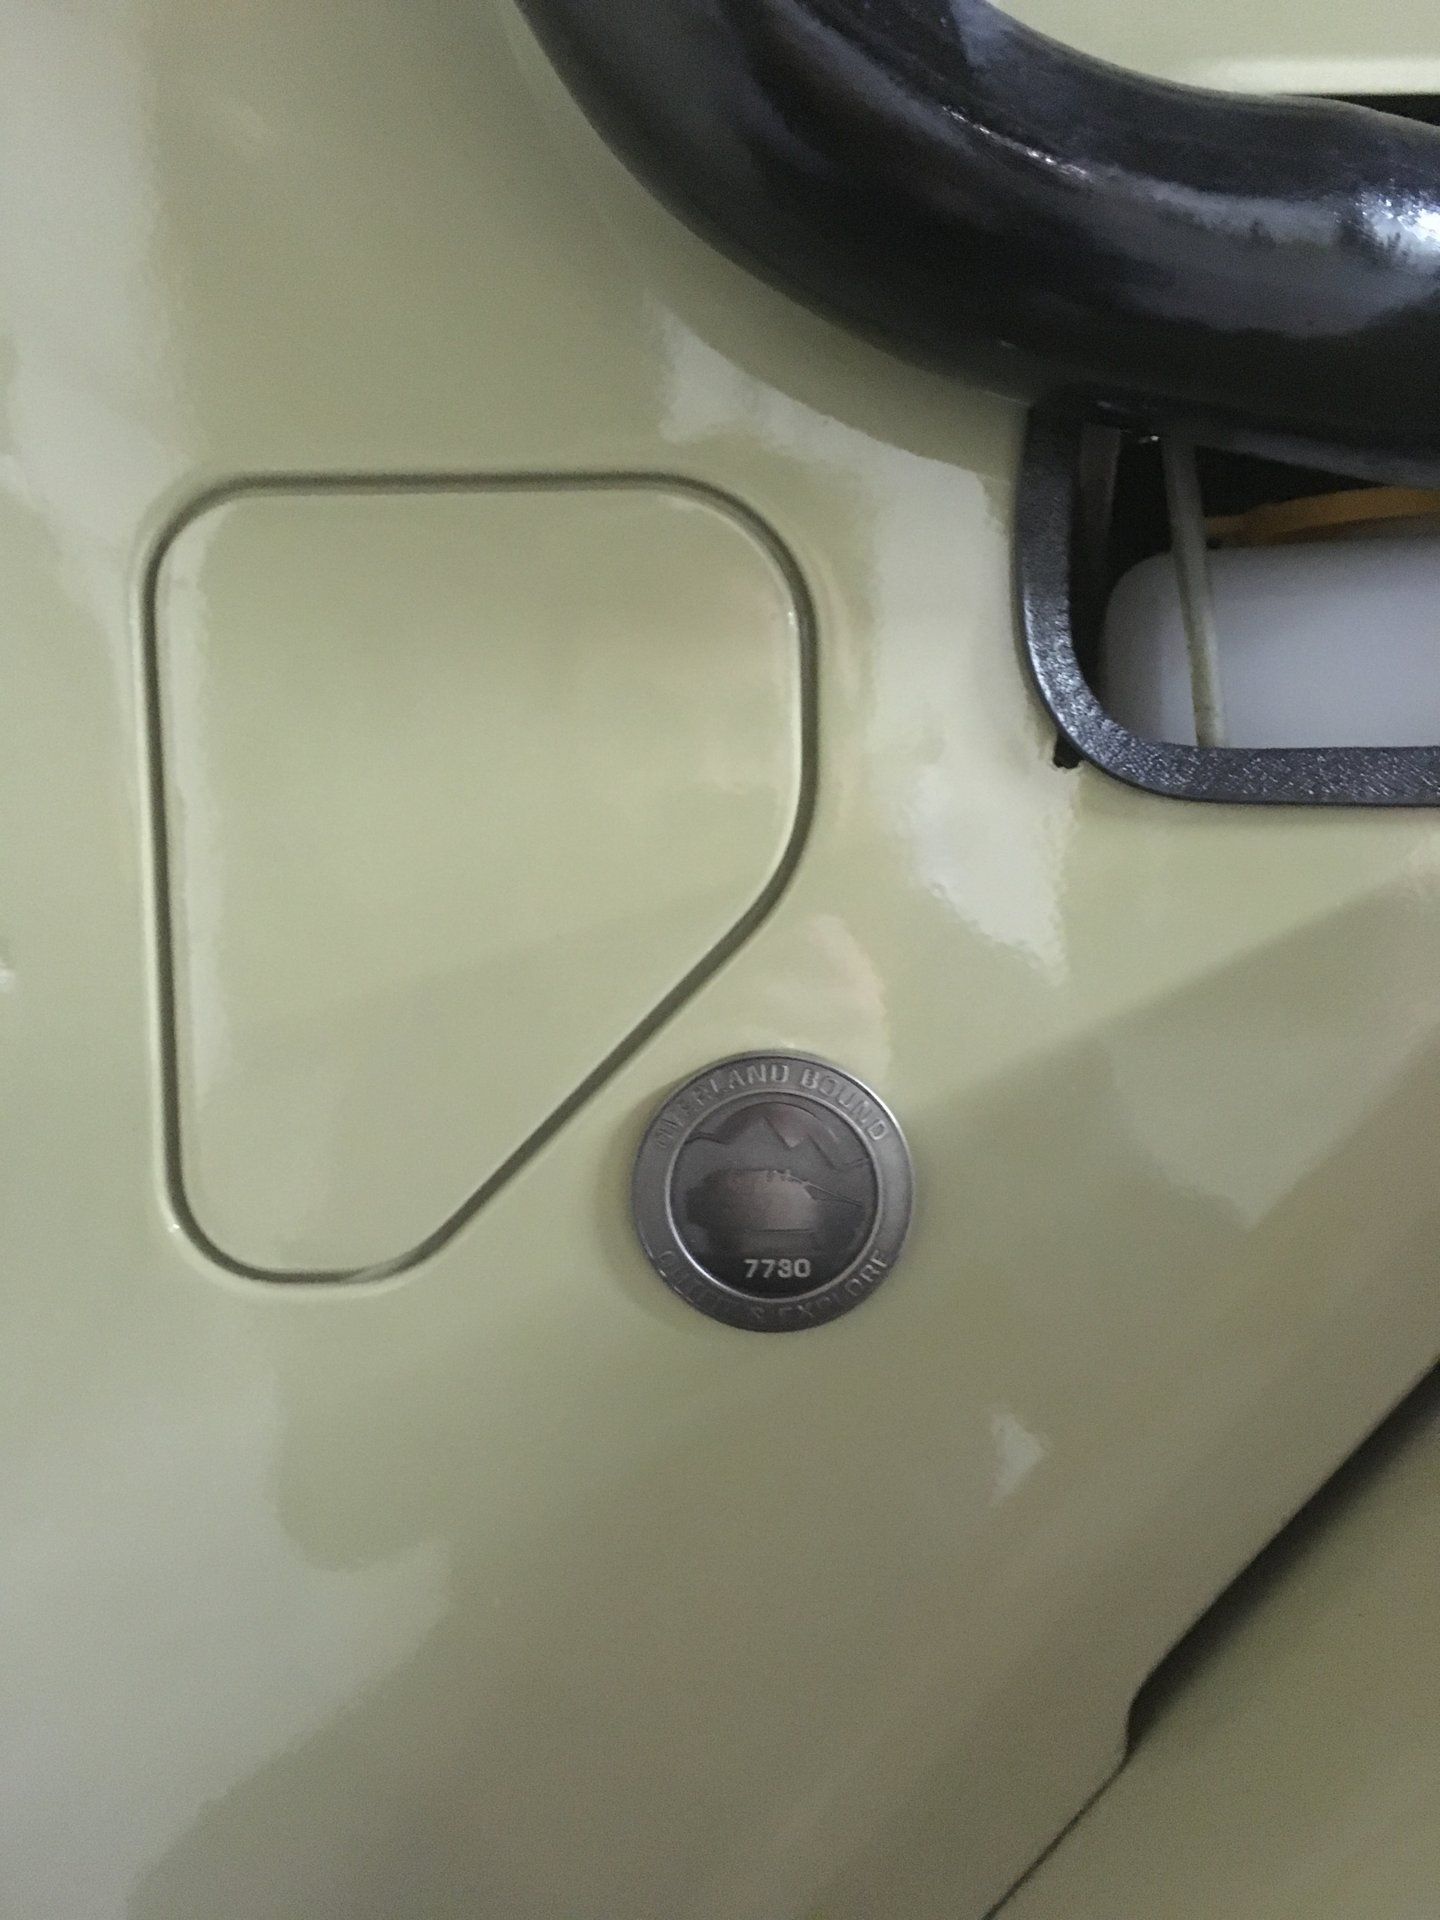
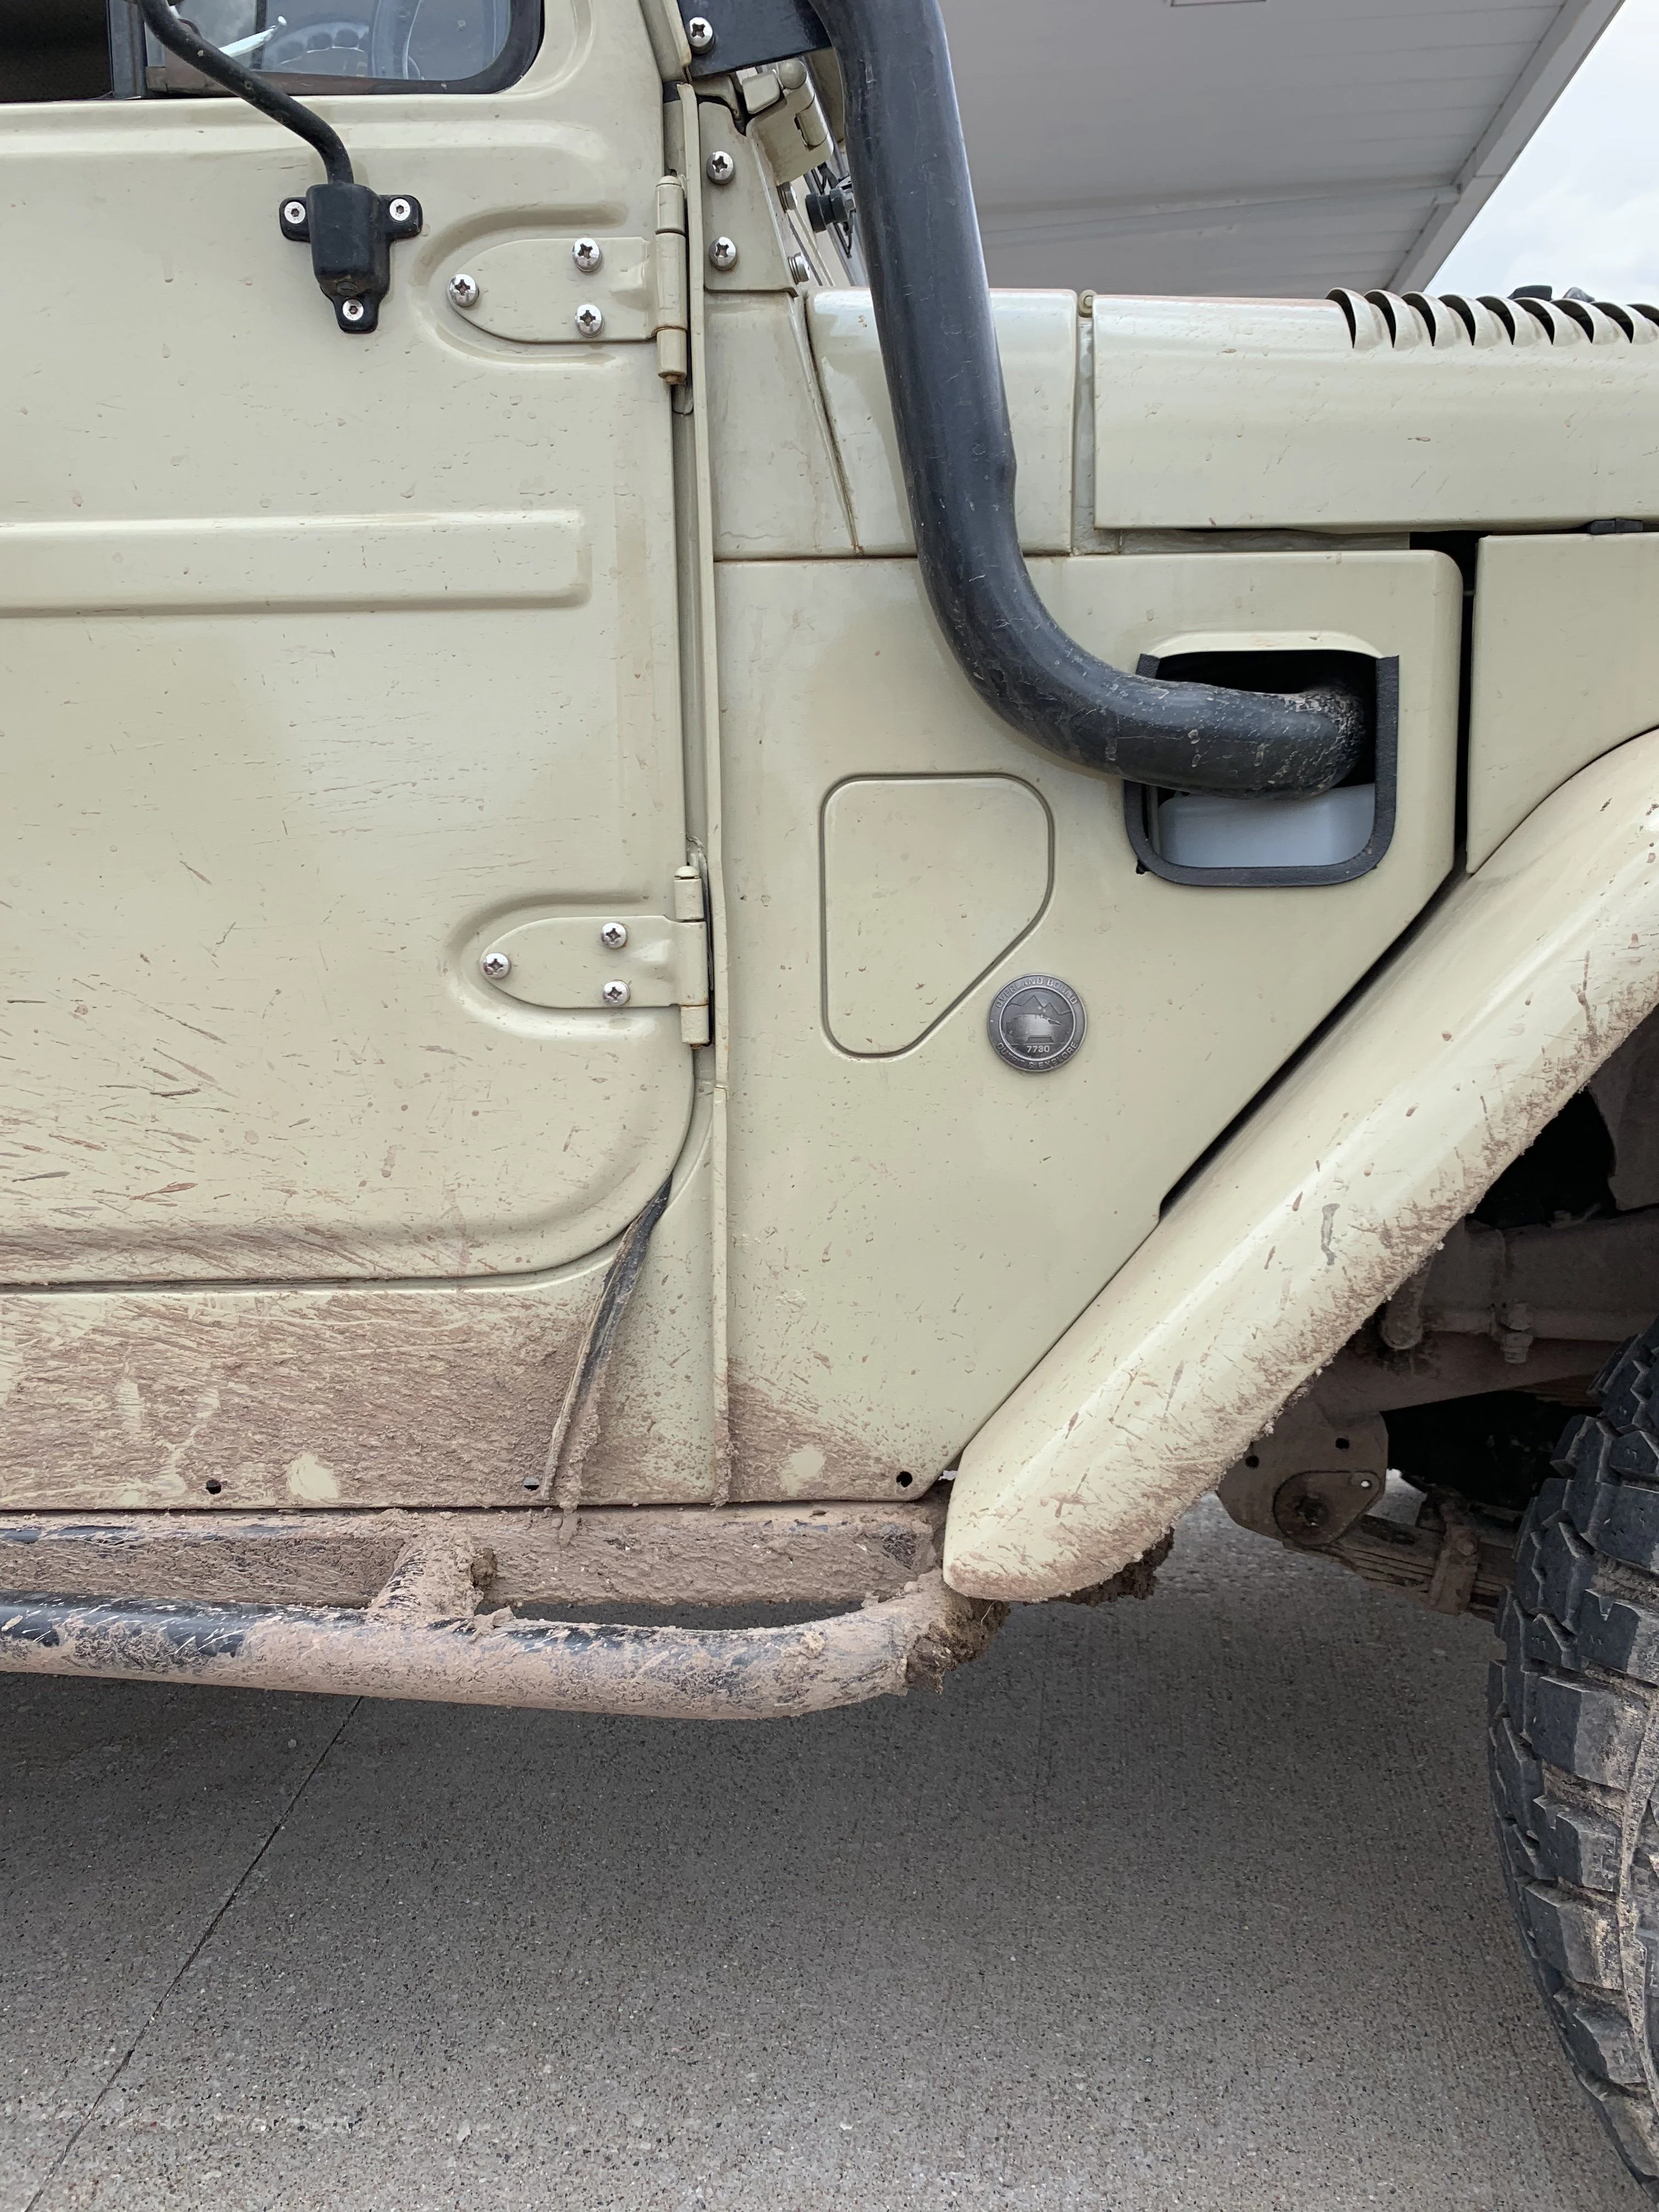
In the not-strictly-needed-but-fun category, I found and put on my membership badge for Overland Bound.
After that initial jaunt around the block, we wanted to make sure things were kosher under the hood, so we let it sit at idle for a few minutes. It stalled out. We were perplexed. Ended up doing some diagnostic work with help from a diesel-enthusiast friend but couldn't figure it out for certain. We fiddled with a few things, I replaced the plastic hand pump with a Bosch one, messed around with fittings a bunch, nothing. The awesome guys here on MUD helped me figure out that the fuel line returning to the tank wasn't correct, it should feed back into the pump. Made that change, now it runs like a champ.
About the same time, we decided we should take a look at the brakes. The inaugural trip for this rig is to North Carolina and back. Going through mountains with no idea how the brakes are holding up is ASKING for trouble. The front brake shoes were decent, but we COULD NOT get the right rear drum off. At least not until we got properly angry and cut it open.
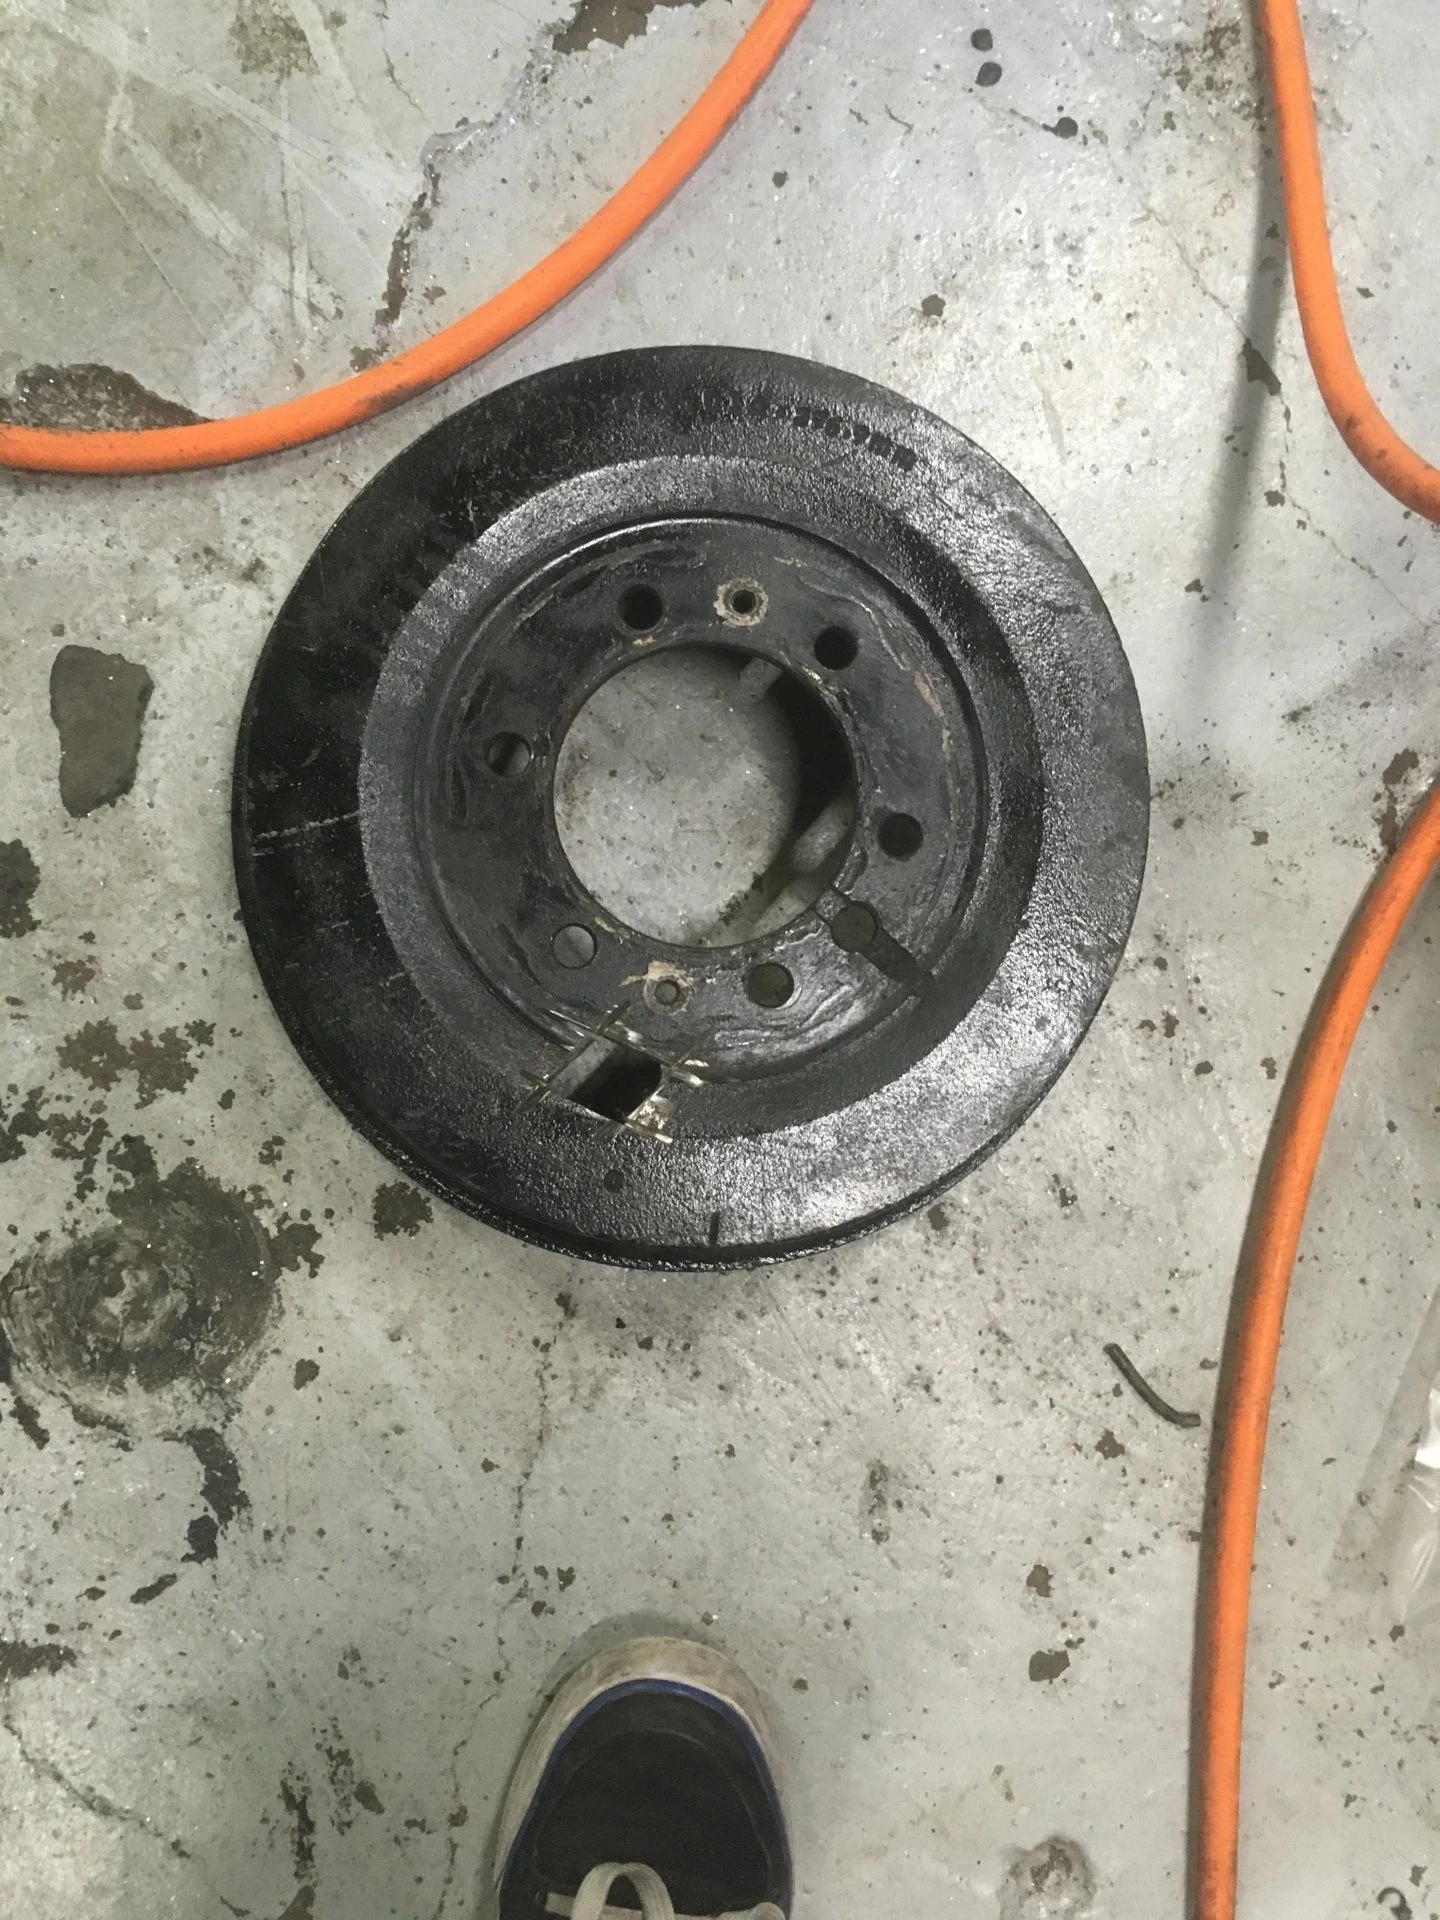
With that off, we can get the brakes fixed up in the next couple days (New shoes, drums, and a spring kit) so I hopefully won't go careening off a mountain pass.
When those brakes are together, I'll get to drive it home! Then will be a couple weeks of daily-driving it before we leave for Overland Expo East.
We have the truck fully together now. Seatbelts in, electrical figured out, insurace nd a temp plate on it (custom vanity plate on order) we even took it for a spin around the block a couple times! These pics are not *quite* fully assembled, but close enough!
Here's most of the exhaust setup. Pretty small muffler. All of my other cars are disruptively loud, why deviate with this one? The whole exhaust system stays inside of the frame rails, so no interference from the rock sliders.
In the not-strictly-needed-but-fun category, I found and put on my membership badge for Overland Bound.
After that initial jaunt around the block, we wanted to make sure things were kosher under the hood, so we let it sit at idle for a few minutes. It stalled out. We were perplexed. Ended up doing some diagnostic work with help from a diesel-enthusiast friend but couldn't figure it out for certain. We fiddled with a few things, I replaced the plastic hand pump with a Bosch one, messed around with fittings a bunch, nothing. The awesome guys here on MUD helped me figure out that the fuel line returning to the tank wasn't correct, it should feed back into the pump. Made that change, now it runs like a champ.
About the same time, we decided we should take a look at the brakes. The inaugural trip for this rig is to North Carolina and back. Going through mountains with no idea how the brakes are holding up is ASKING for trouble. The front brake shoes were decent, but we COULD NOT get the right rear drum off. At least not until we got properly angry and cut it open.
With that off, we can get the brakes fixed up in the next couple days (New shoes, drums, and a spring kit) so I hopefully won't go careening off a mountain pass.
When those brakes are together, I'll get to drive it home! Then will be a couple weeks of daily-driving it before we leave for Overland Expo East.
dodored
That ain't your cake Phillip! That's Simones cake!
Very nicely done thread. Thanks for sharing all that!
- Thread starter
- #56
Those are Corbeau Baja RS seats.
A turbo won’t happen for a long time. Pretty expensive, and I’ve got to restore the cash reserves I’ve just depleted on phase 1. Plus there’s also a tire carrier, a winch, front disc brakes, a roof rack, lights, dual batteries, ARB compressor, and lockers to buy and put on too...
A turbo won’t happen for a long time. Pretty expensive, and I’ve got to restore the cash reserves I’ve just depleted on phase 1. Plus there’s also a tire carrier, a winch, front disc brakes, a roof rack, lights, dual batteries, ARB compressor, and lockers to buy and put on too...
- Thread starter
- #57
Wow, It's been over a year. I have a year's worth of adventures and pictures, might as well share a few of 'em!
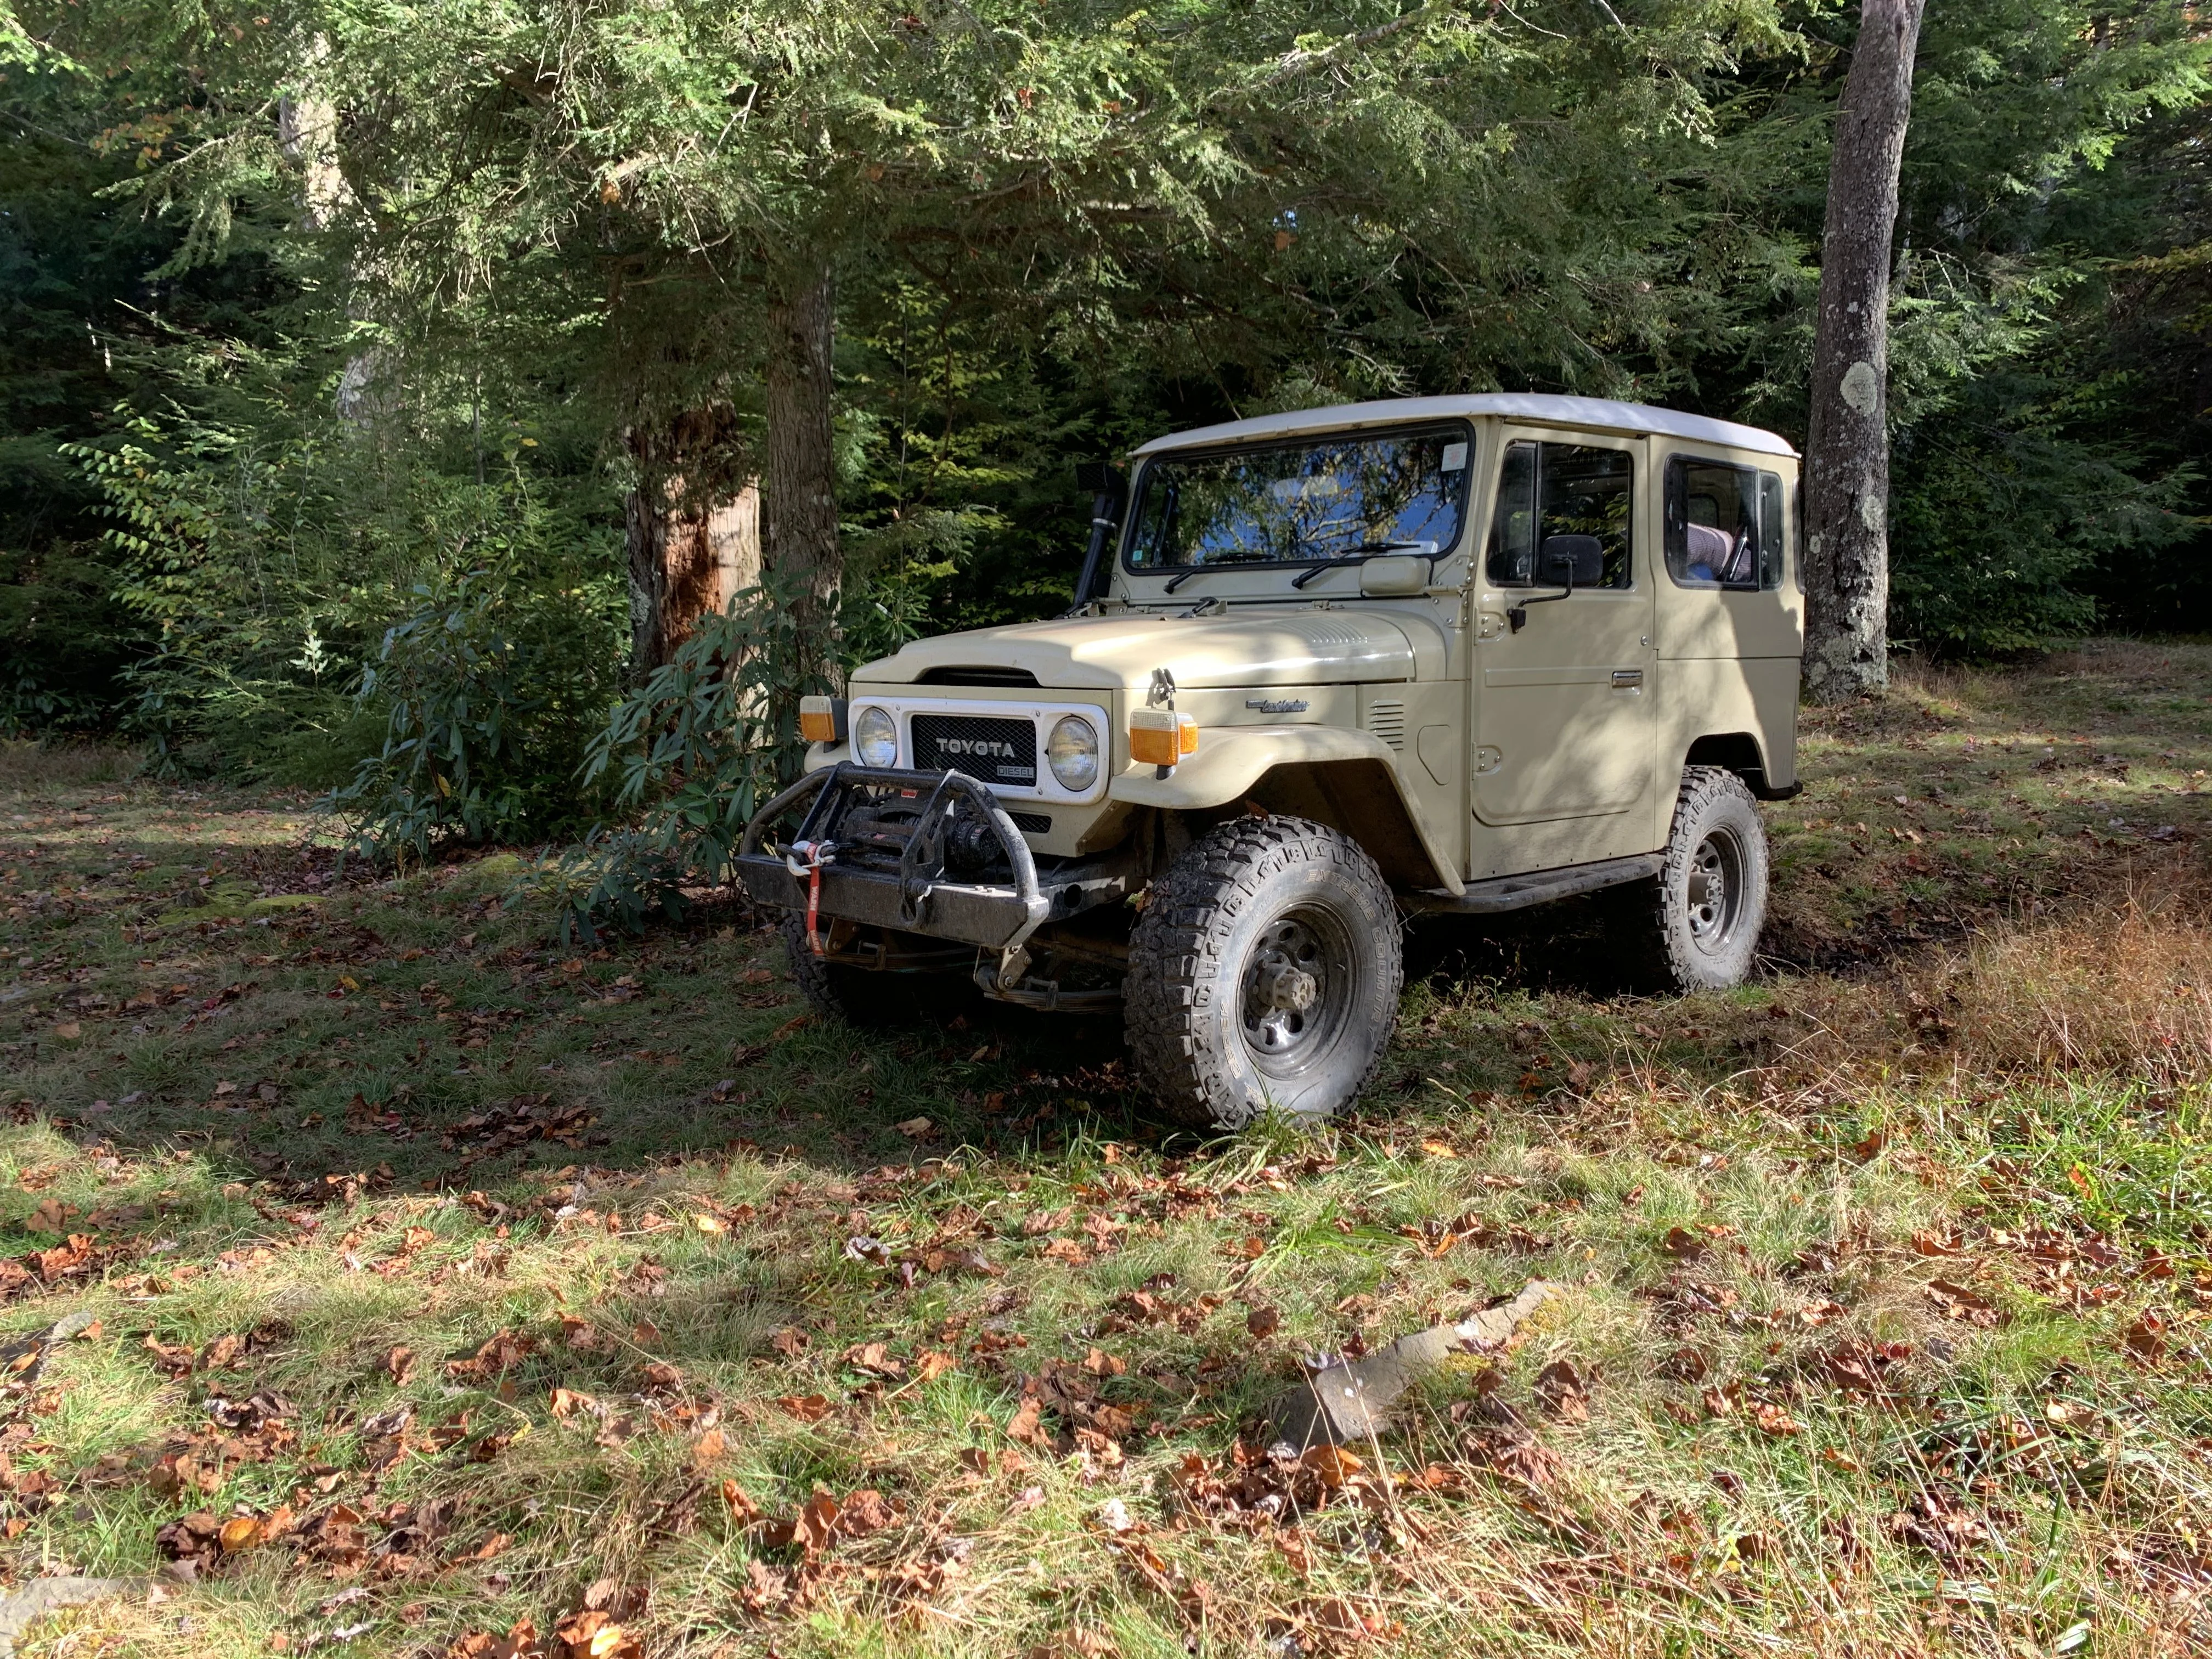
First, here's a shot of my first day properly driving the rig to work
I managed to have it on the road for about 2 weeks of shakedown before the original goal/deadline: Overland Expo East 2018. However, the DAY BEFORE we were supposed to leave, the engine died on me! I had just left home when it sputtered out and died. I reprimed the manual diesel pump, it started and ran for a moment, then died again. Turns out the mechanical fuel pump had given up the ghost. Fortunately there was an unaccounted-for switched hot lead in the engine bay, so we popped an off-the-shelf electric diesel fuel pump onto it and it ran beautifully. Better than before, actually. It seems the mechanical pump had been on the way out for a while, so the truck was pretty anemic before.
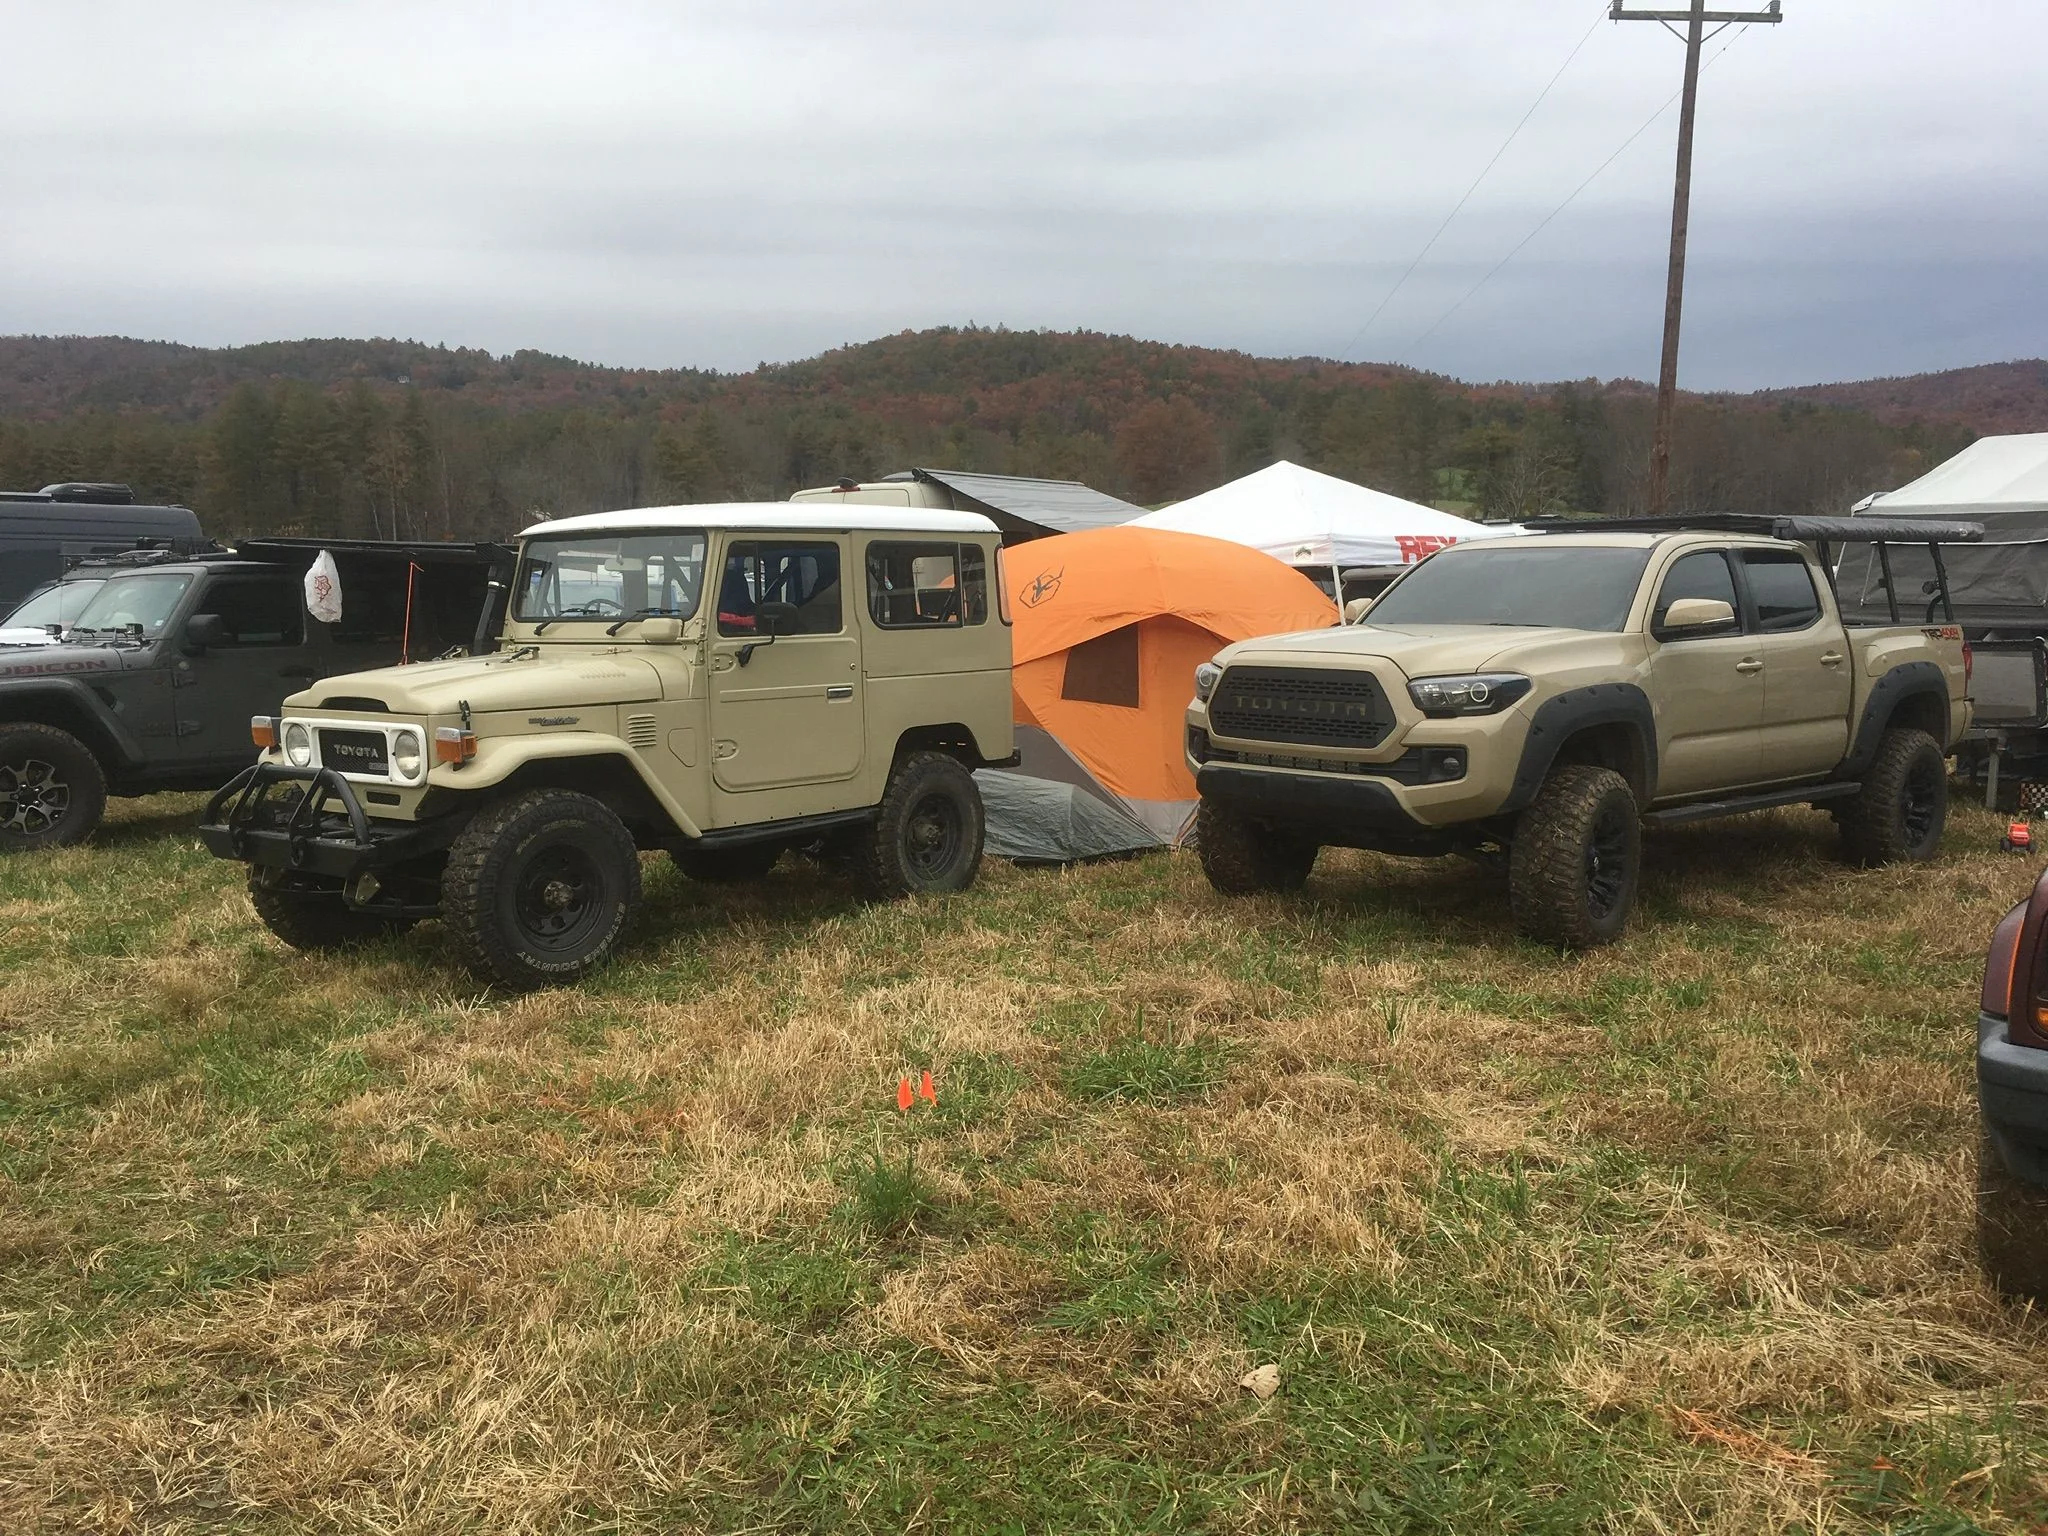
So, we made it to Overland Expo East 2018 and had a wonderful, muddy, cold time.
By the time we got home, it was almost mid-November, so she had to go right into storage. Spring 2019 arrives, I hop in the driver's seat, and the truck starts like I'd driven it yesterday.
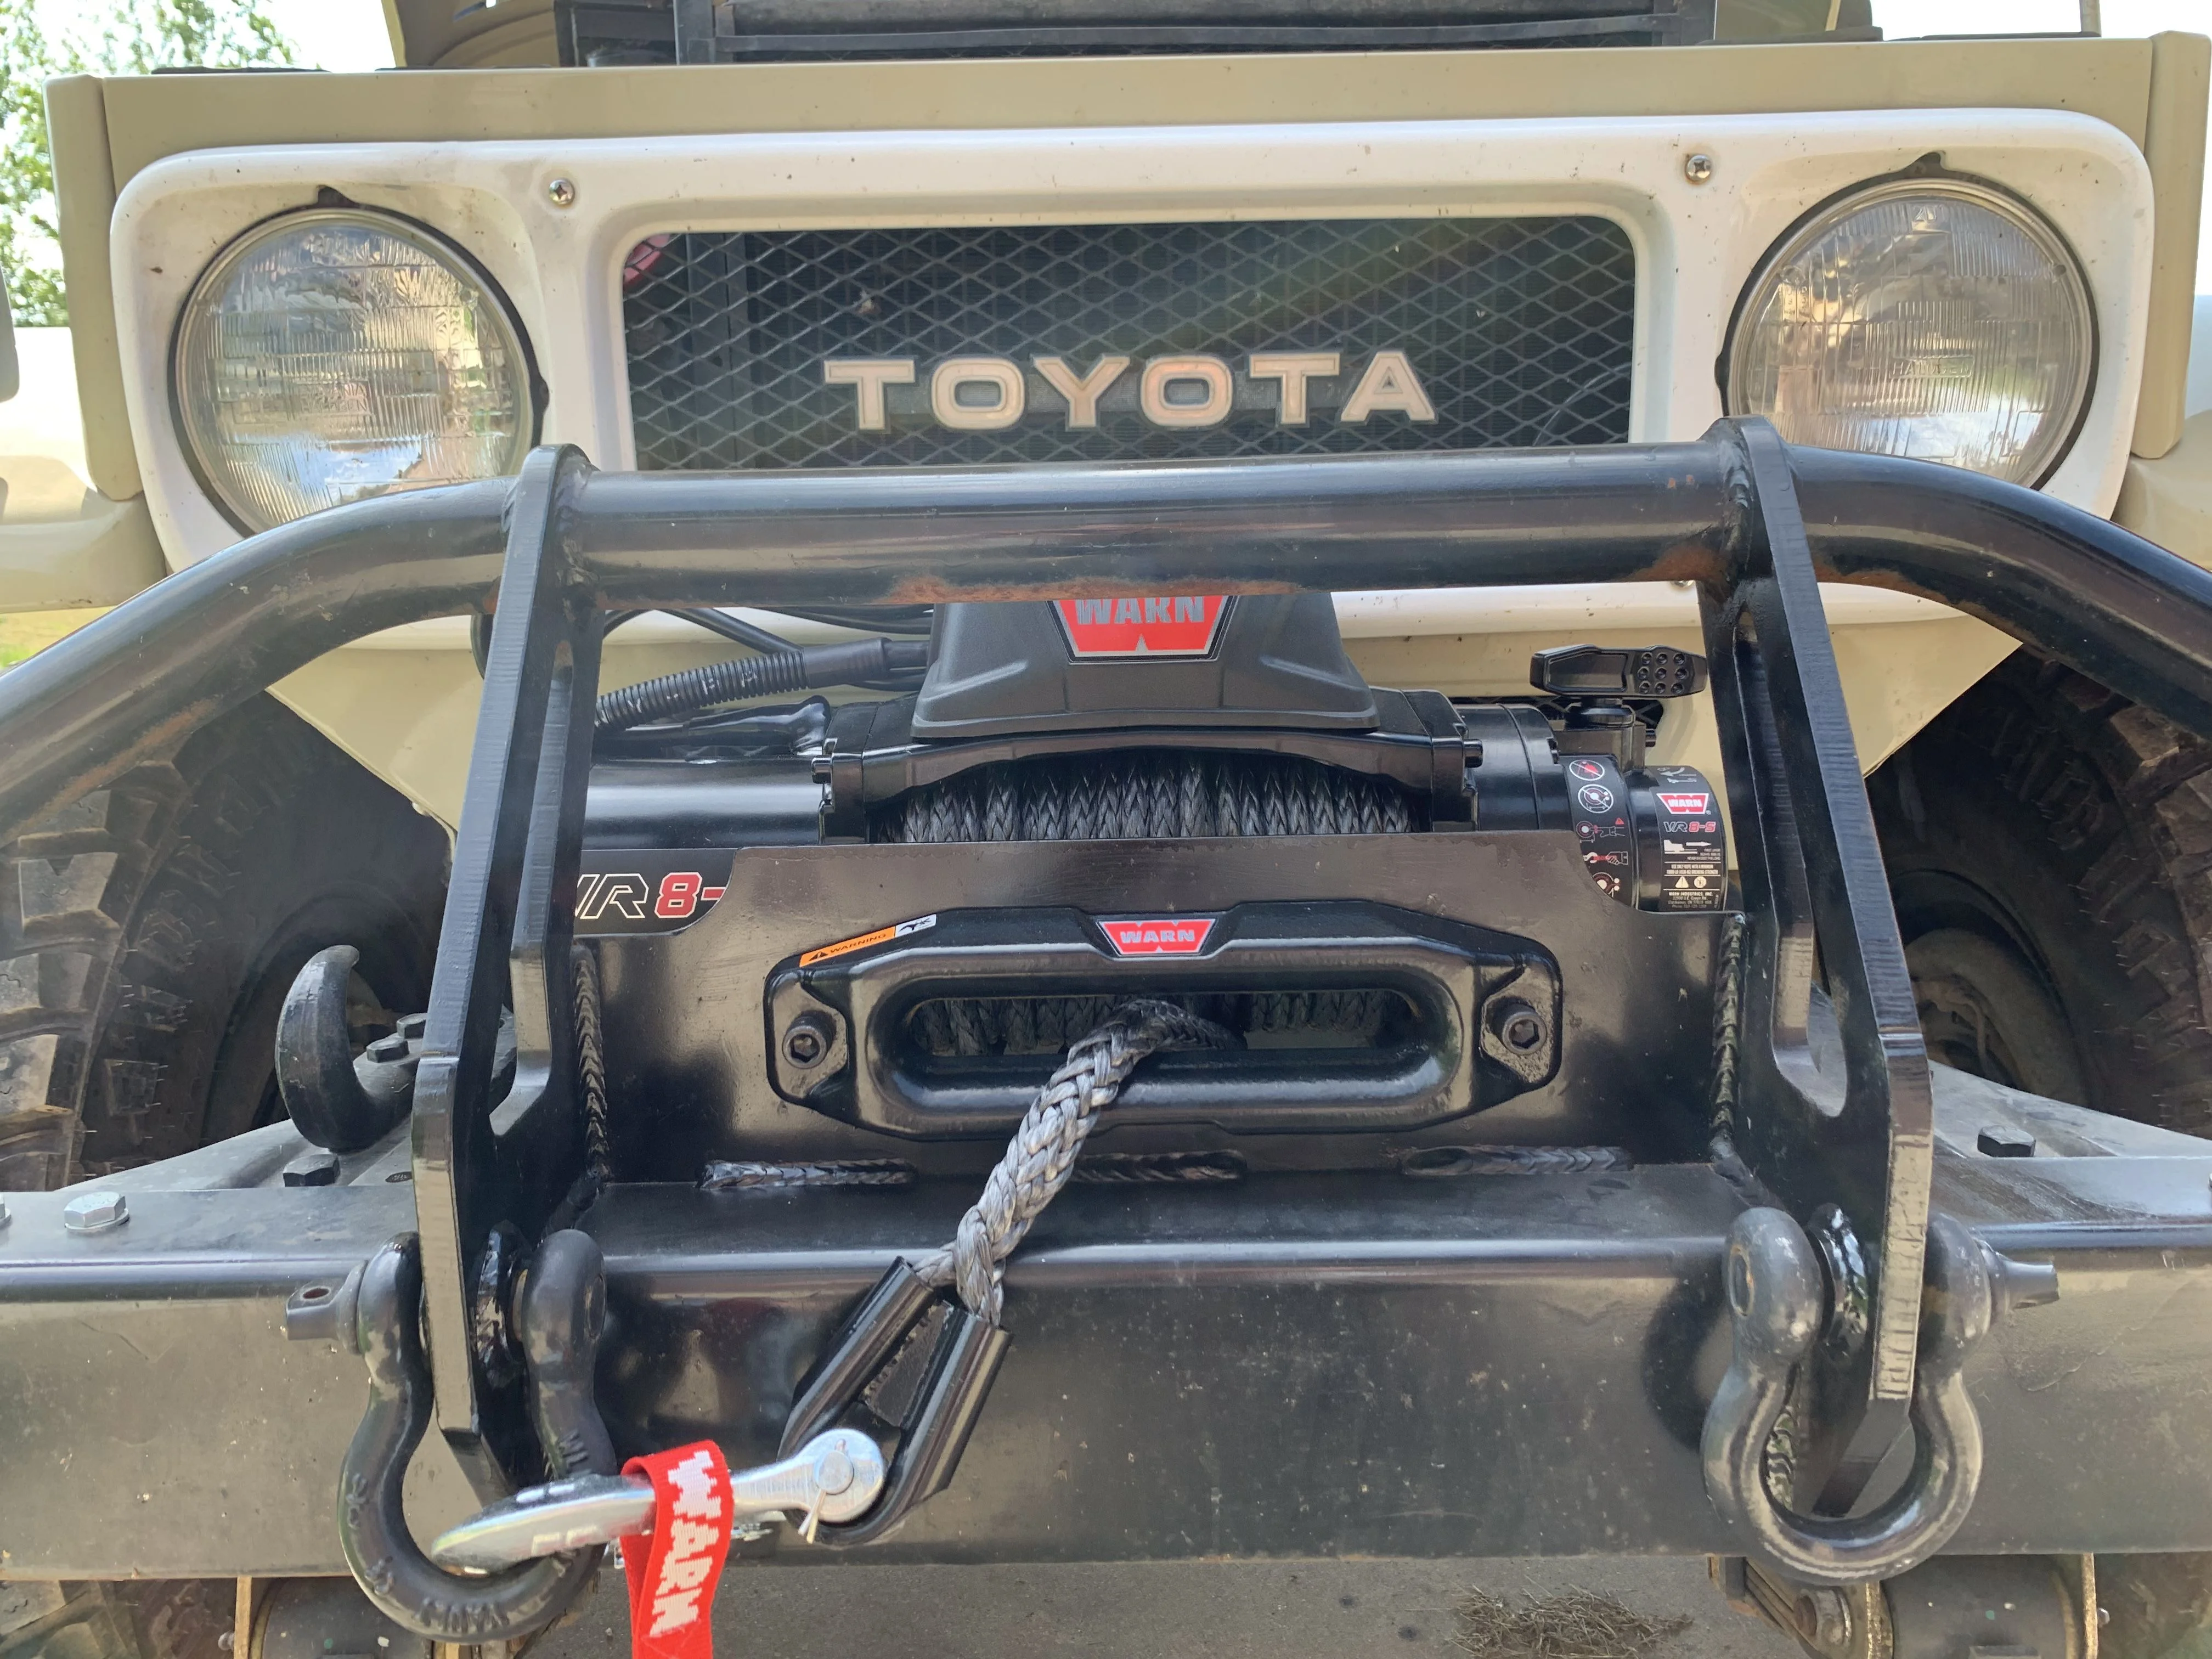
About this time, a buddy and I hatched a plan to take a week-long overlanding trip to the Upper Peninsula. While it runs, I had a couple things I wanted to do to the Landcruiser before I did a proper overland expedition. So step 1 was a winch to put inside that bumper. I don't want to cheap out of important gear like that, so I picked up a Warn. Synthetic line, for weight savings.
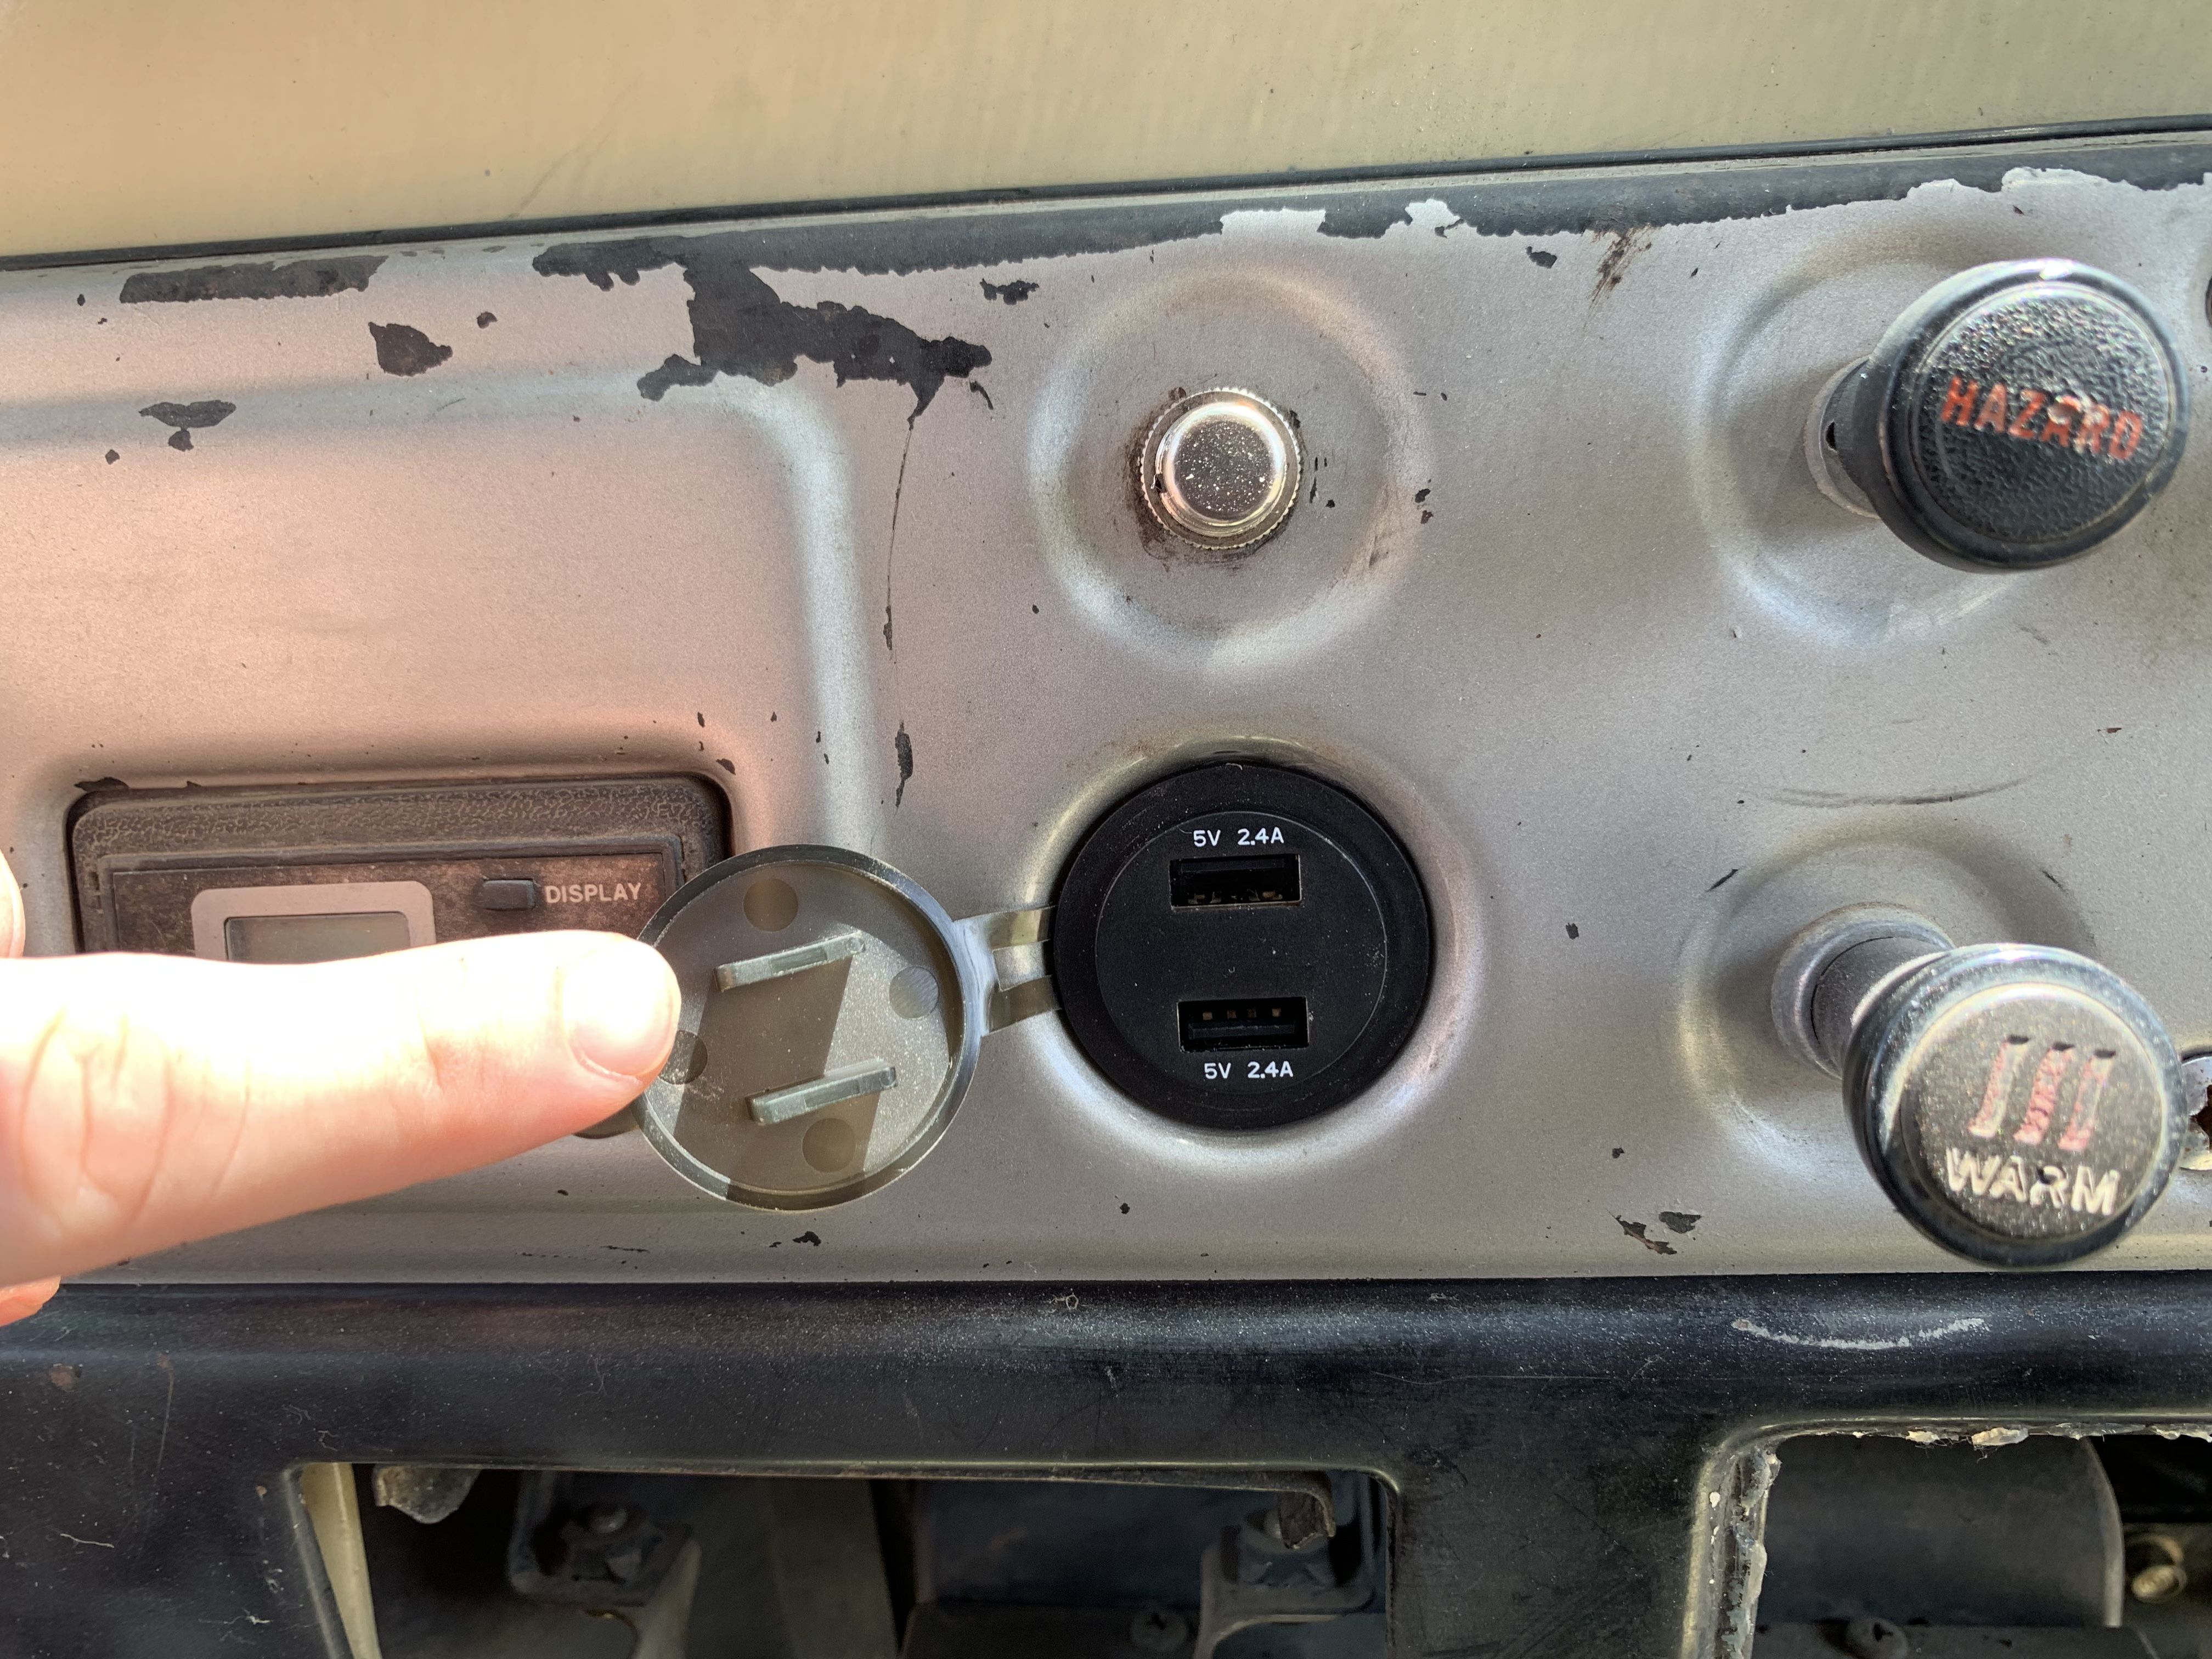
I also did a small interior mod that makes for a MASSIVE quality-of-life improvement. I ripped out the cigarette lighter and swapped it for a pair of USB ports. If someone smokes in this truck I'm making them walk home, so no loss there, but the dual USB ports make it really convenient for charging phones, the tablet I use for navigation, battery banks, GoPros, you name it. I love the wear/patina on the dash plate. Still gotta fill in the ashtray and radio openings though.
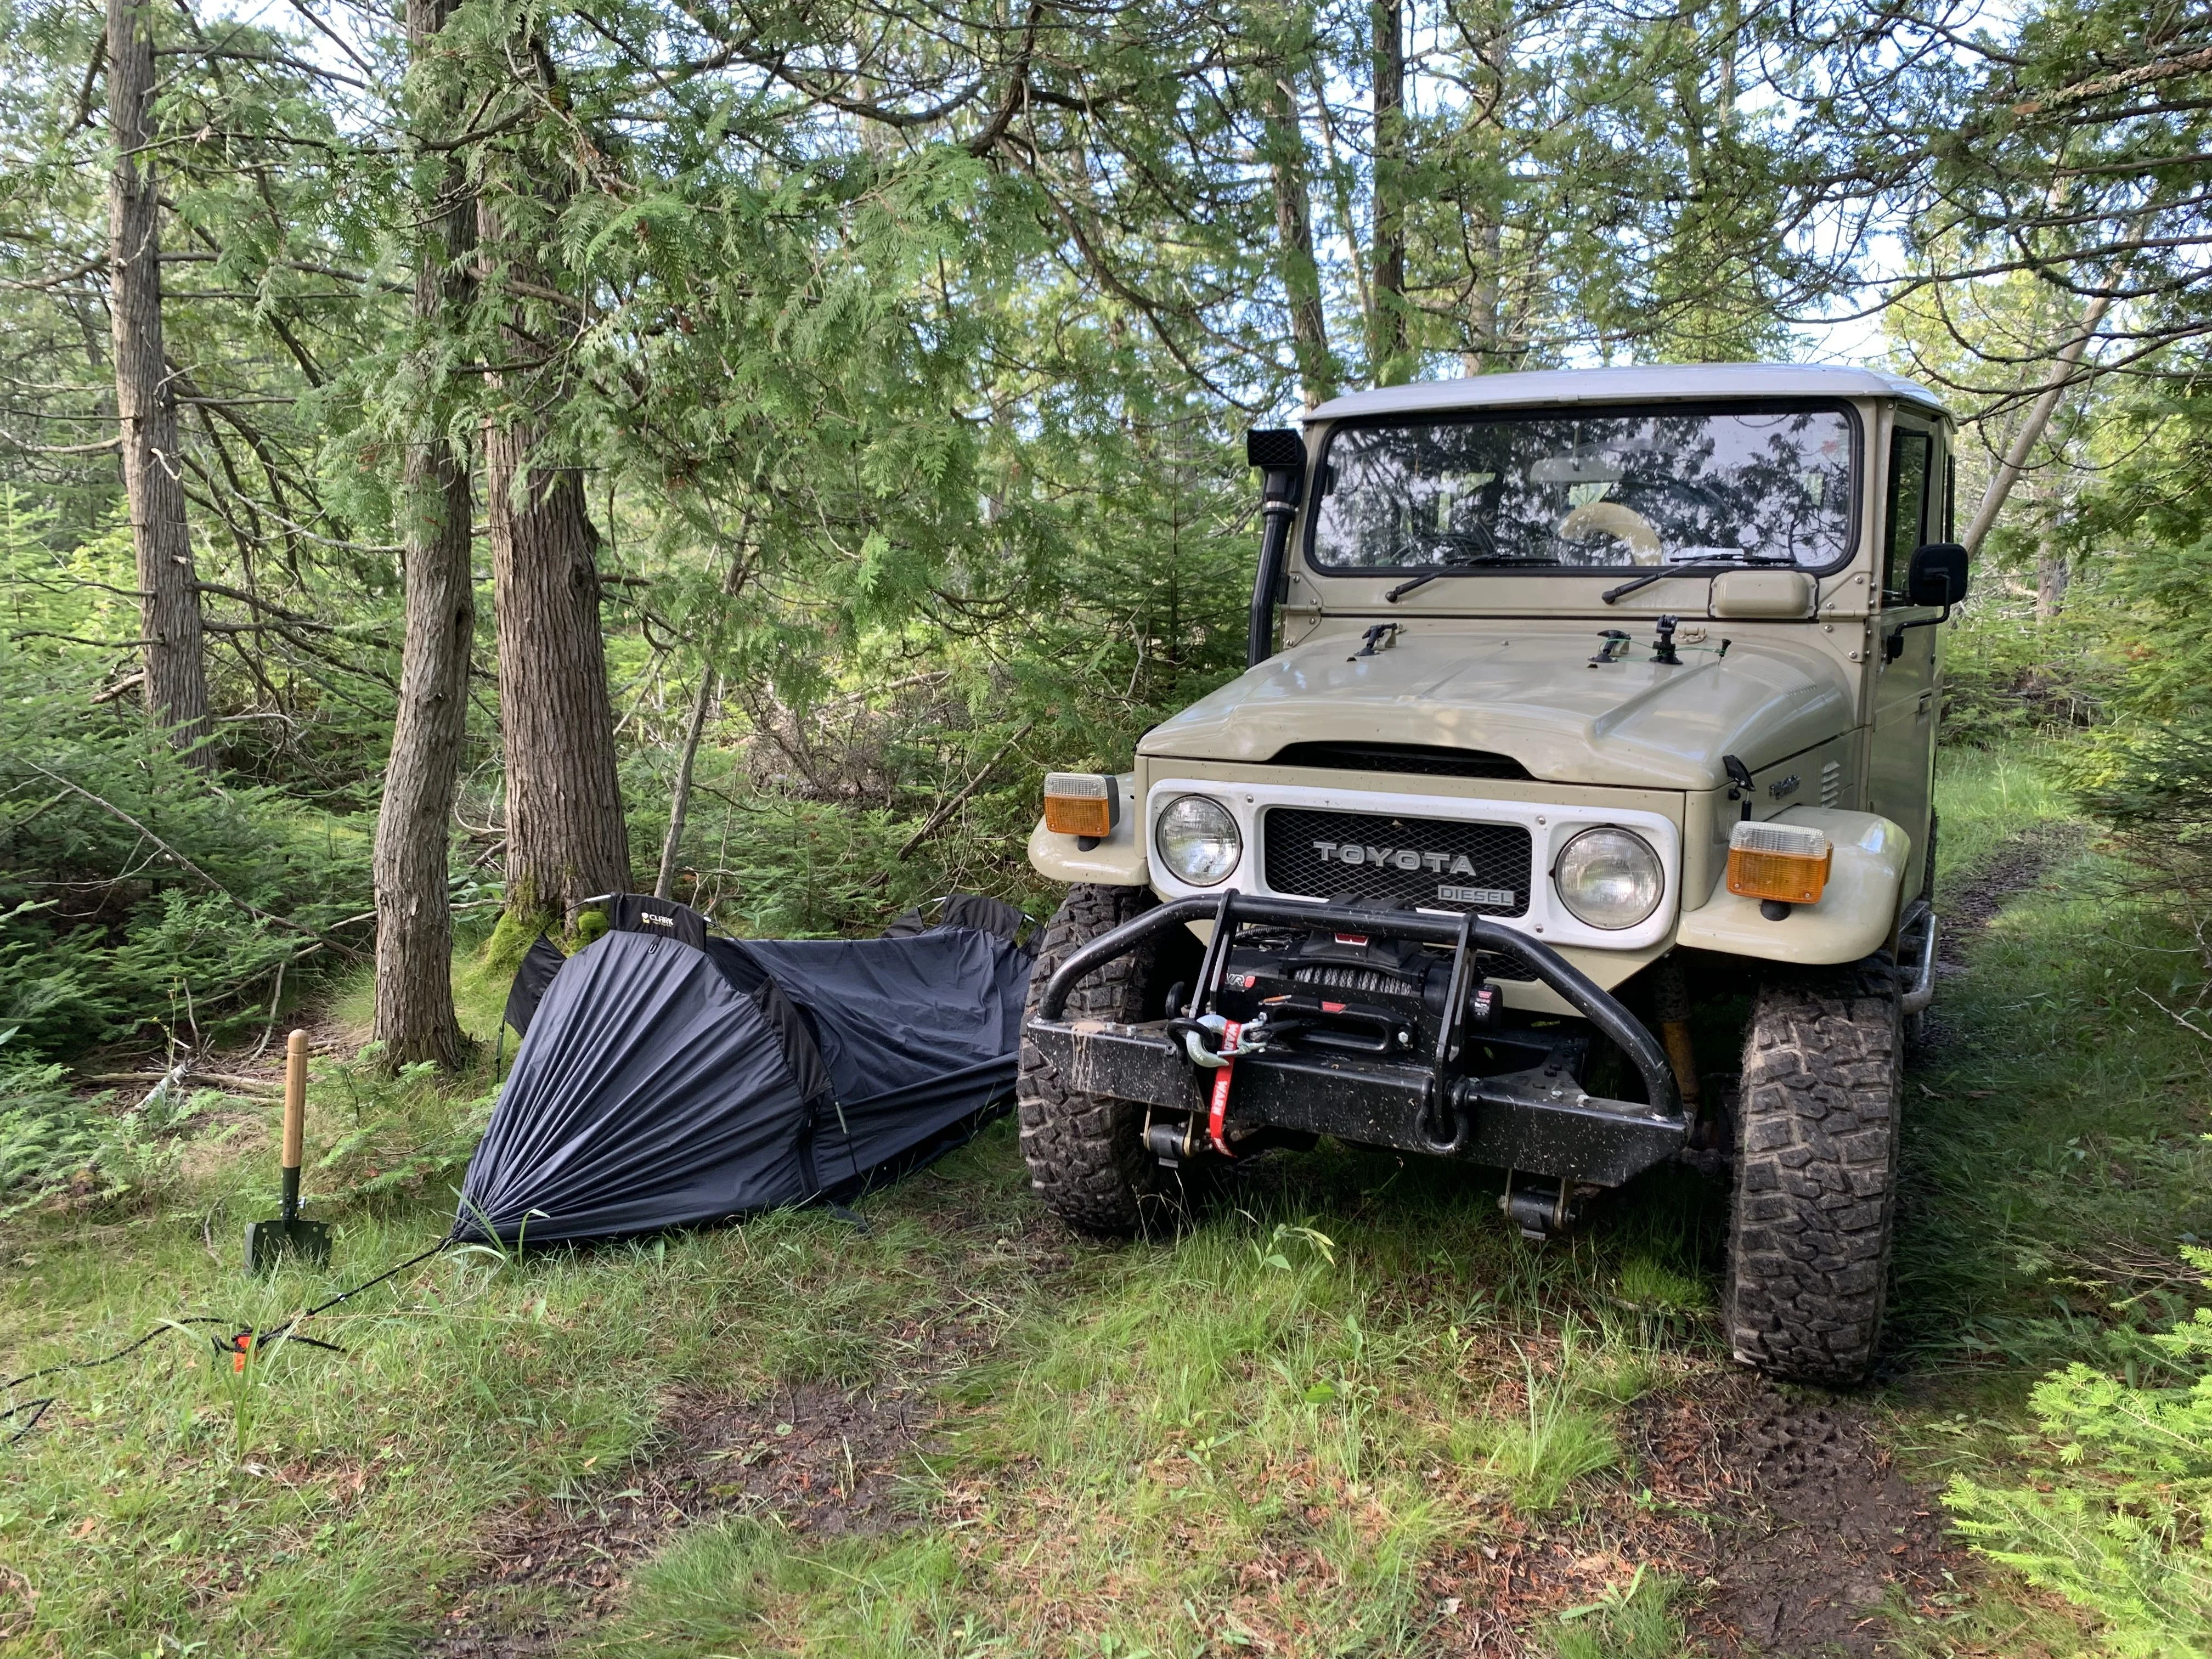
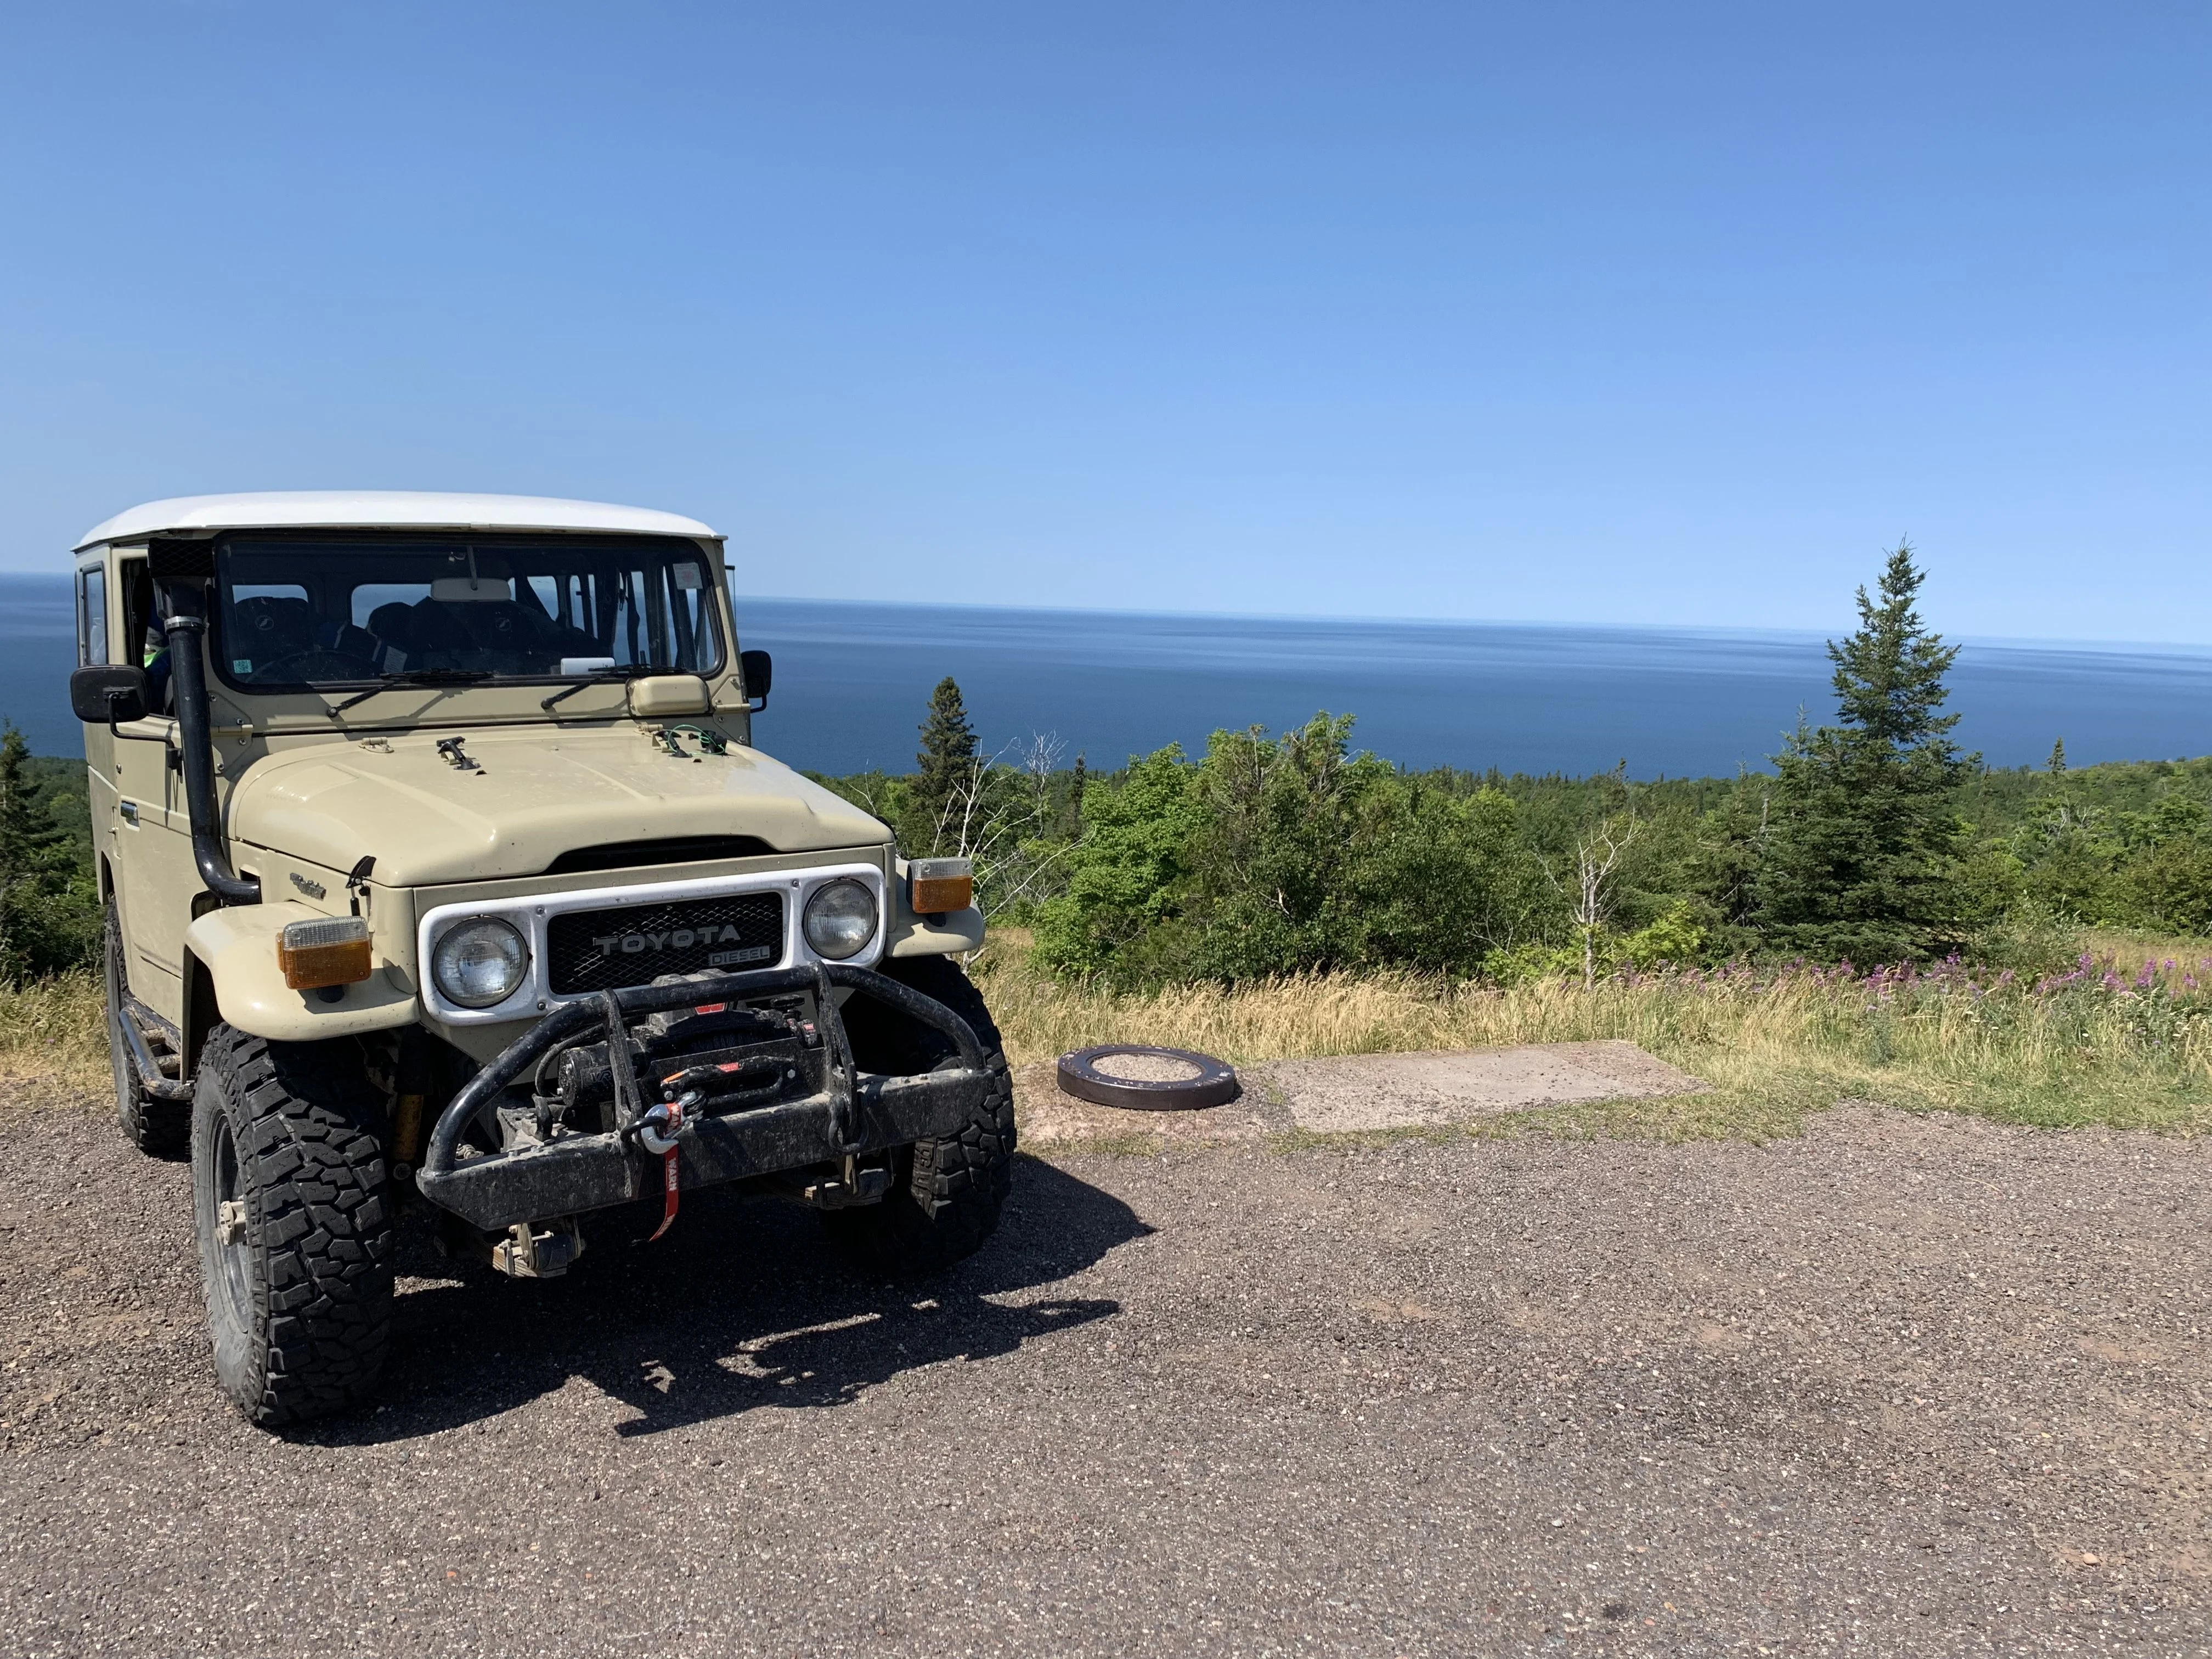
And with that I left on my first REAL overland adventure! Here's my campsite for the first night, just a tent next to the trail.
A couple days later taking a break on top of Brockway Mountain because it's the only place with cellphone service.
And here's my campsite the next morning. We'd been wheeling until 11pm to get to this spot. That is not my hat.
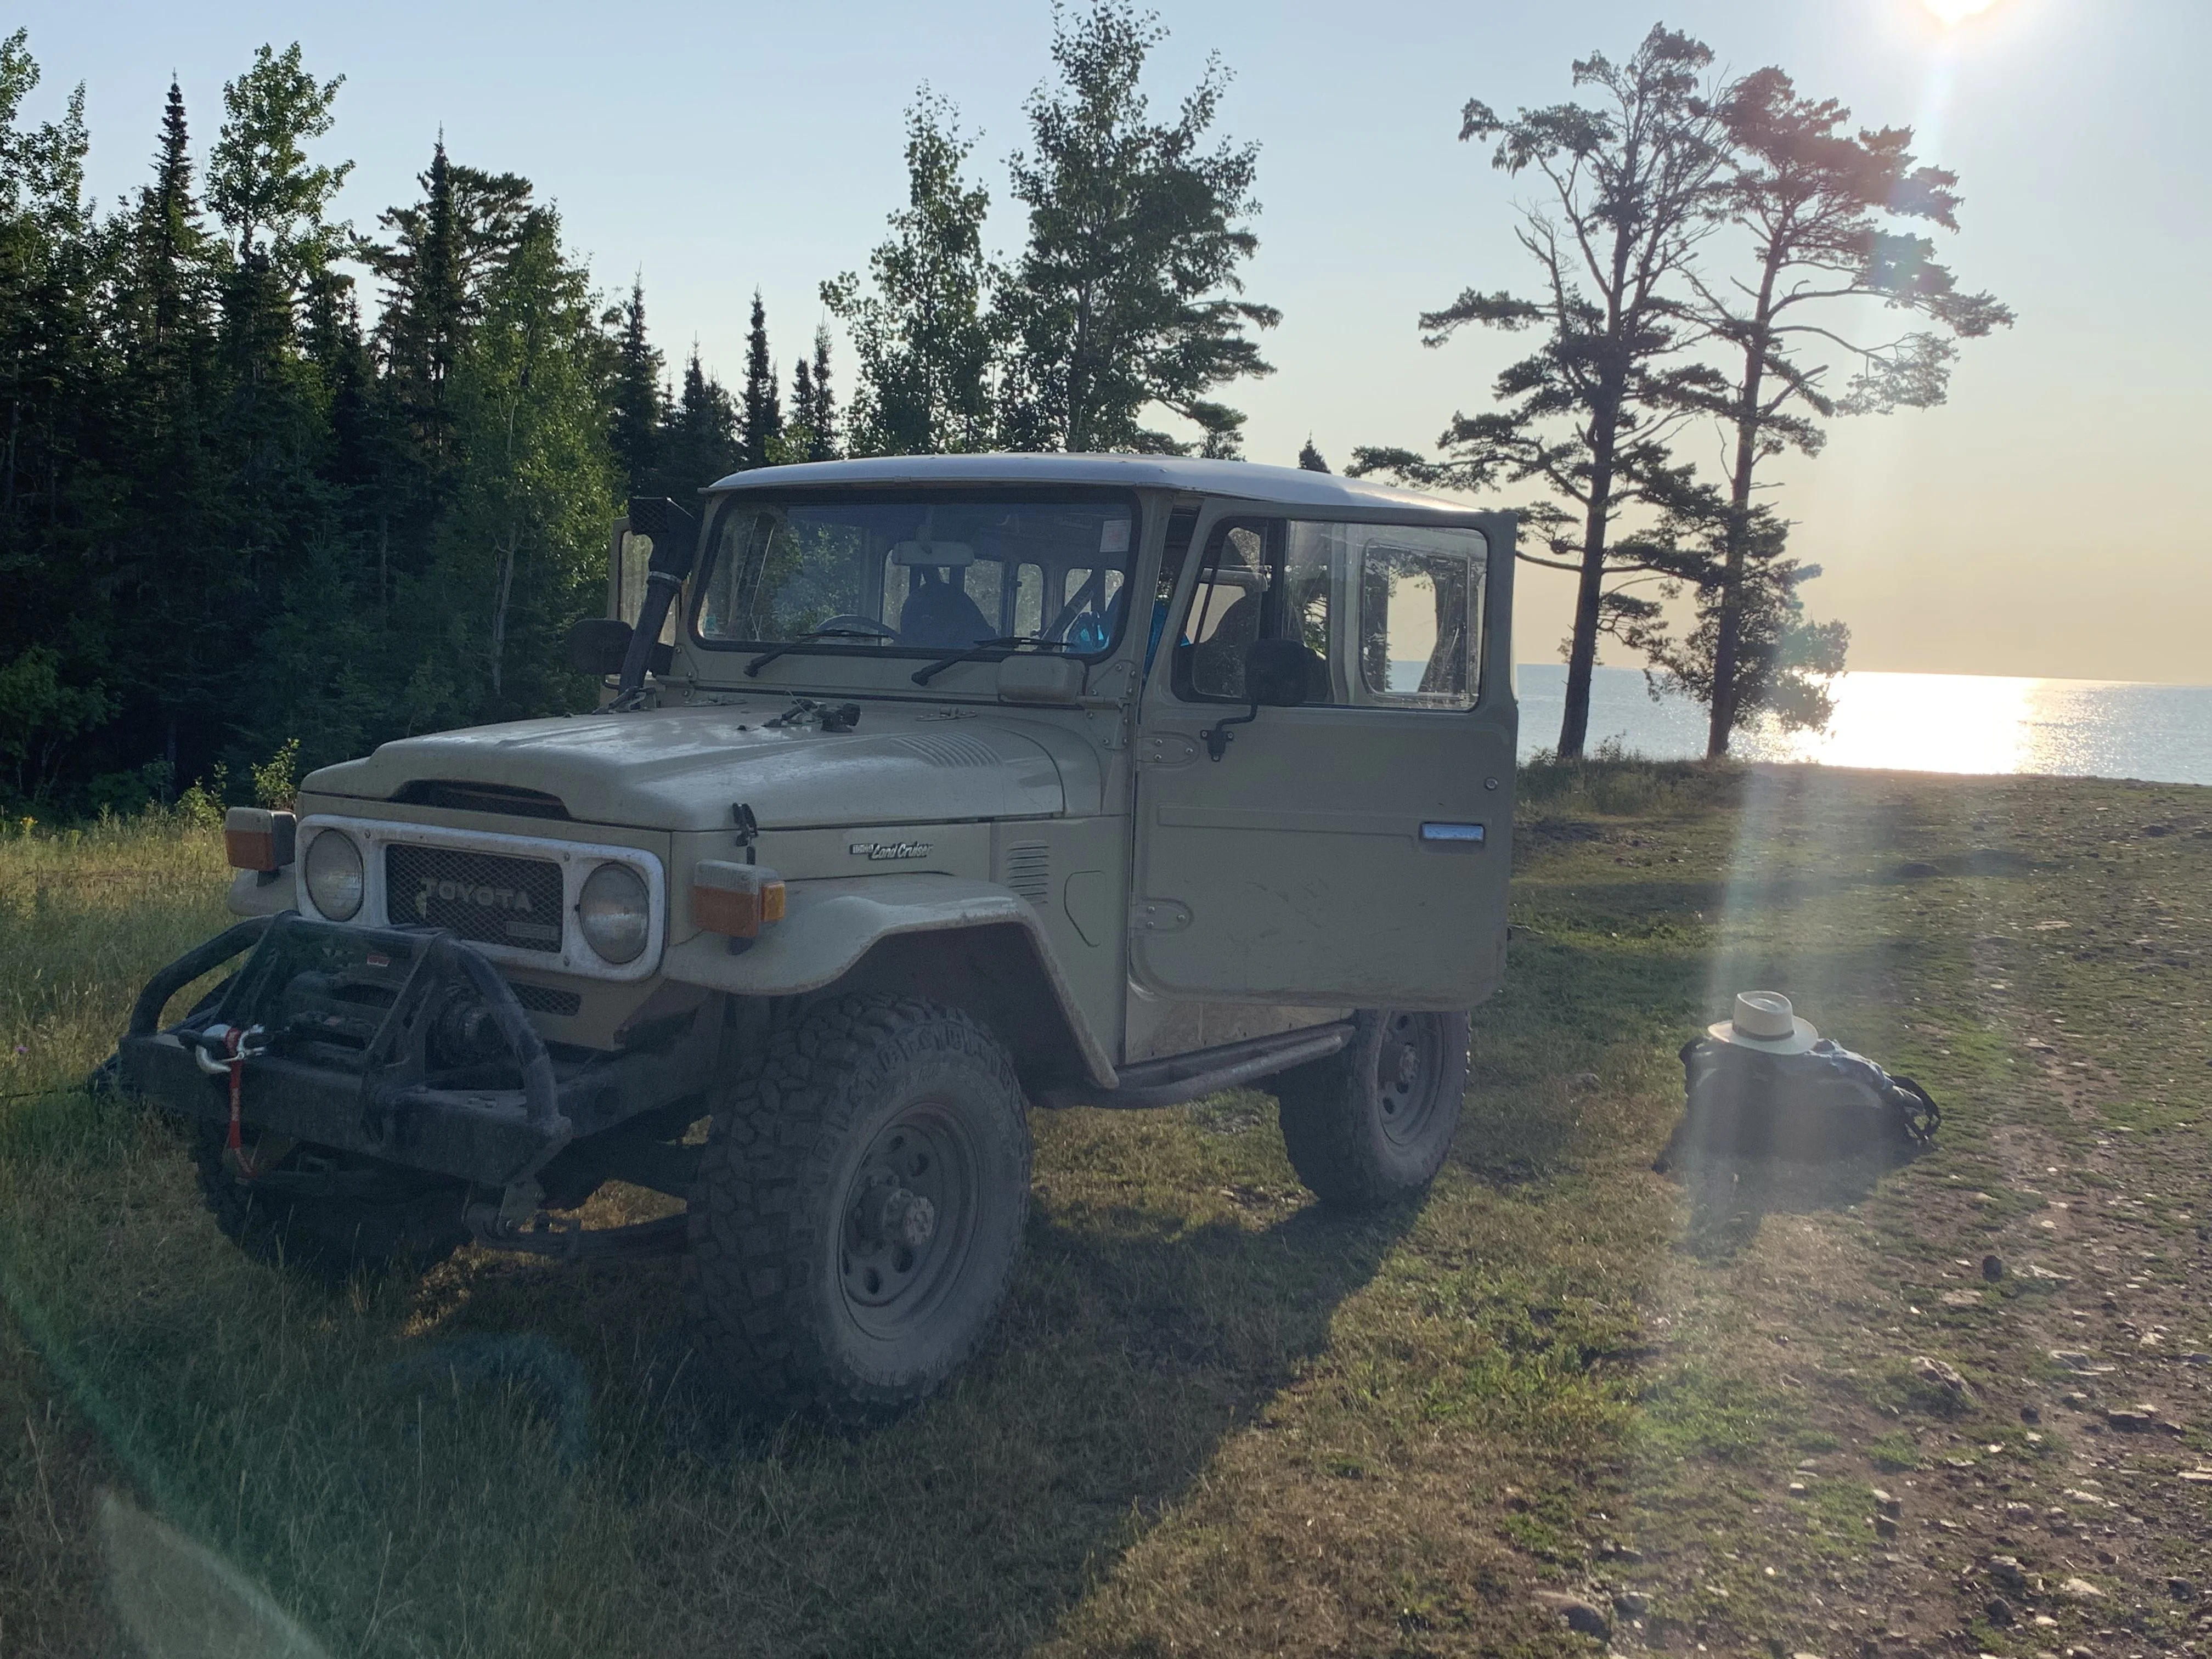
This isn't all the pictures, but you can get a rough timeline of the trip based on how filthy my truck got.
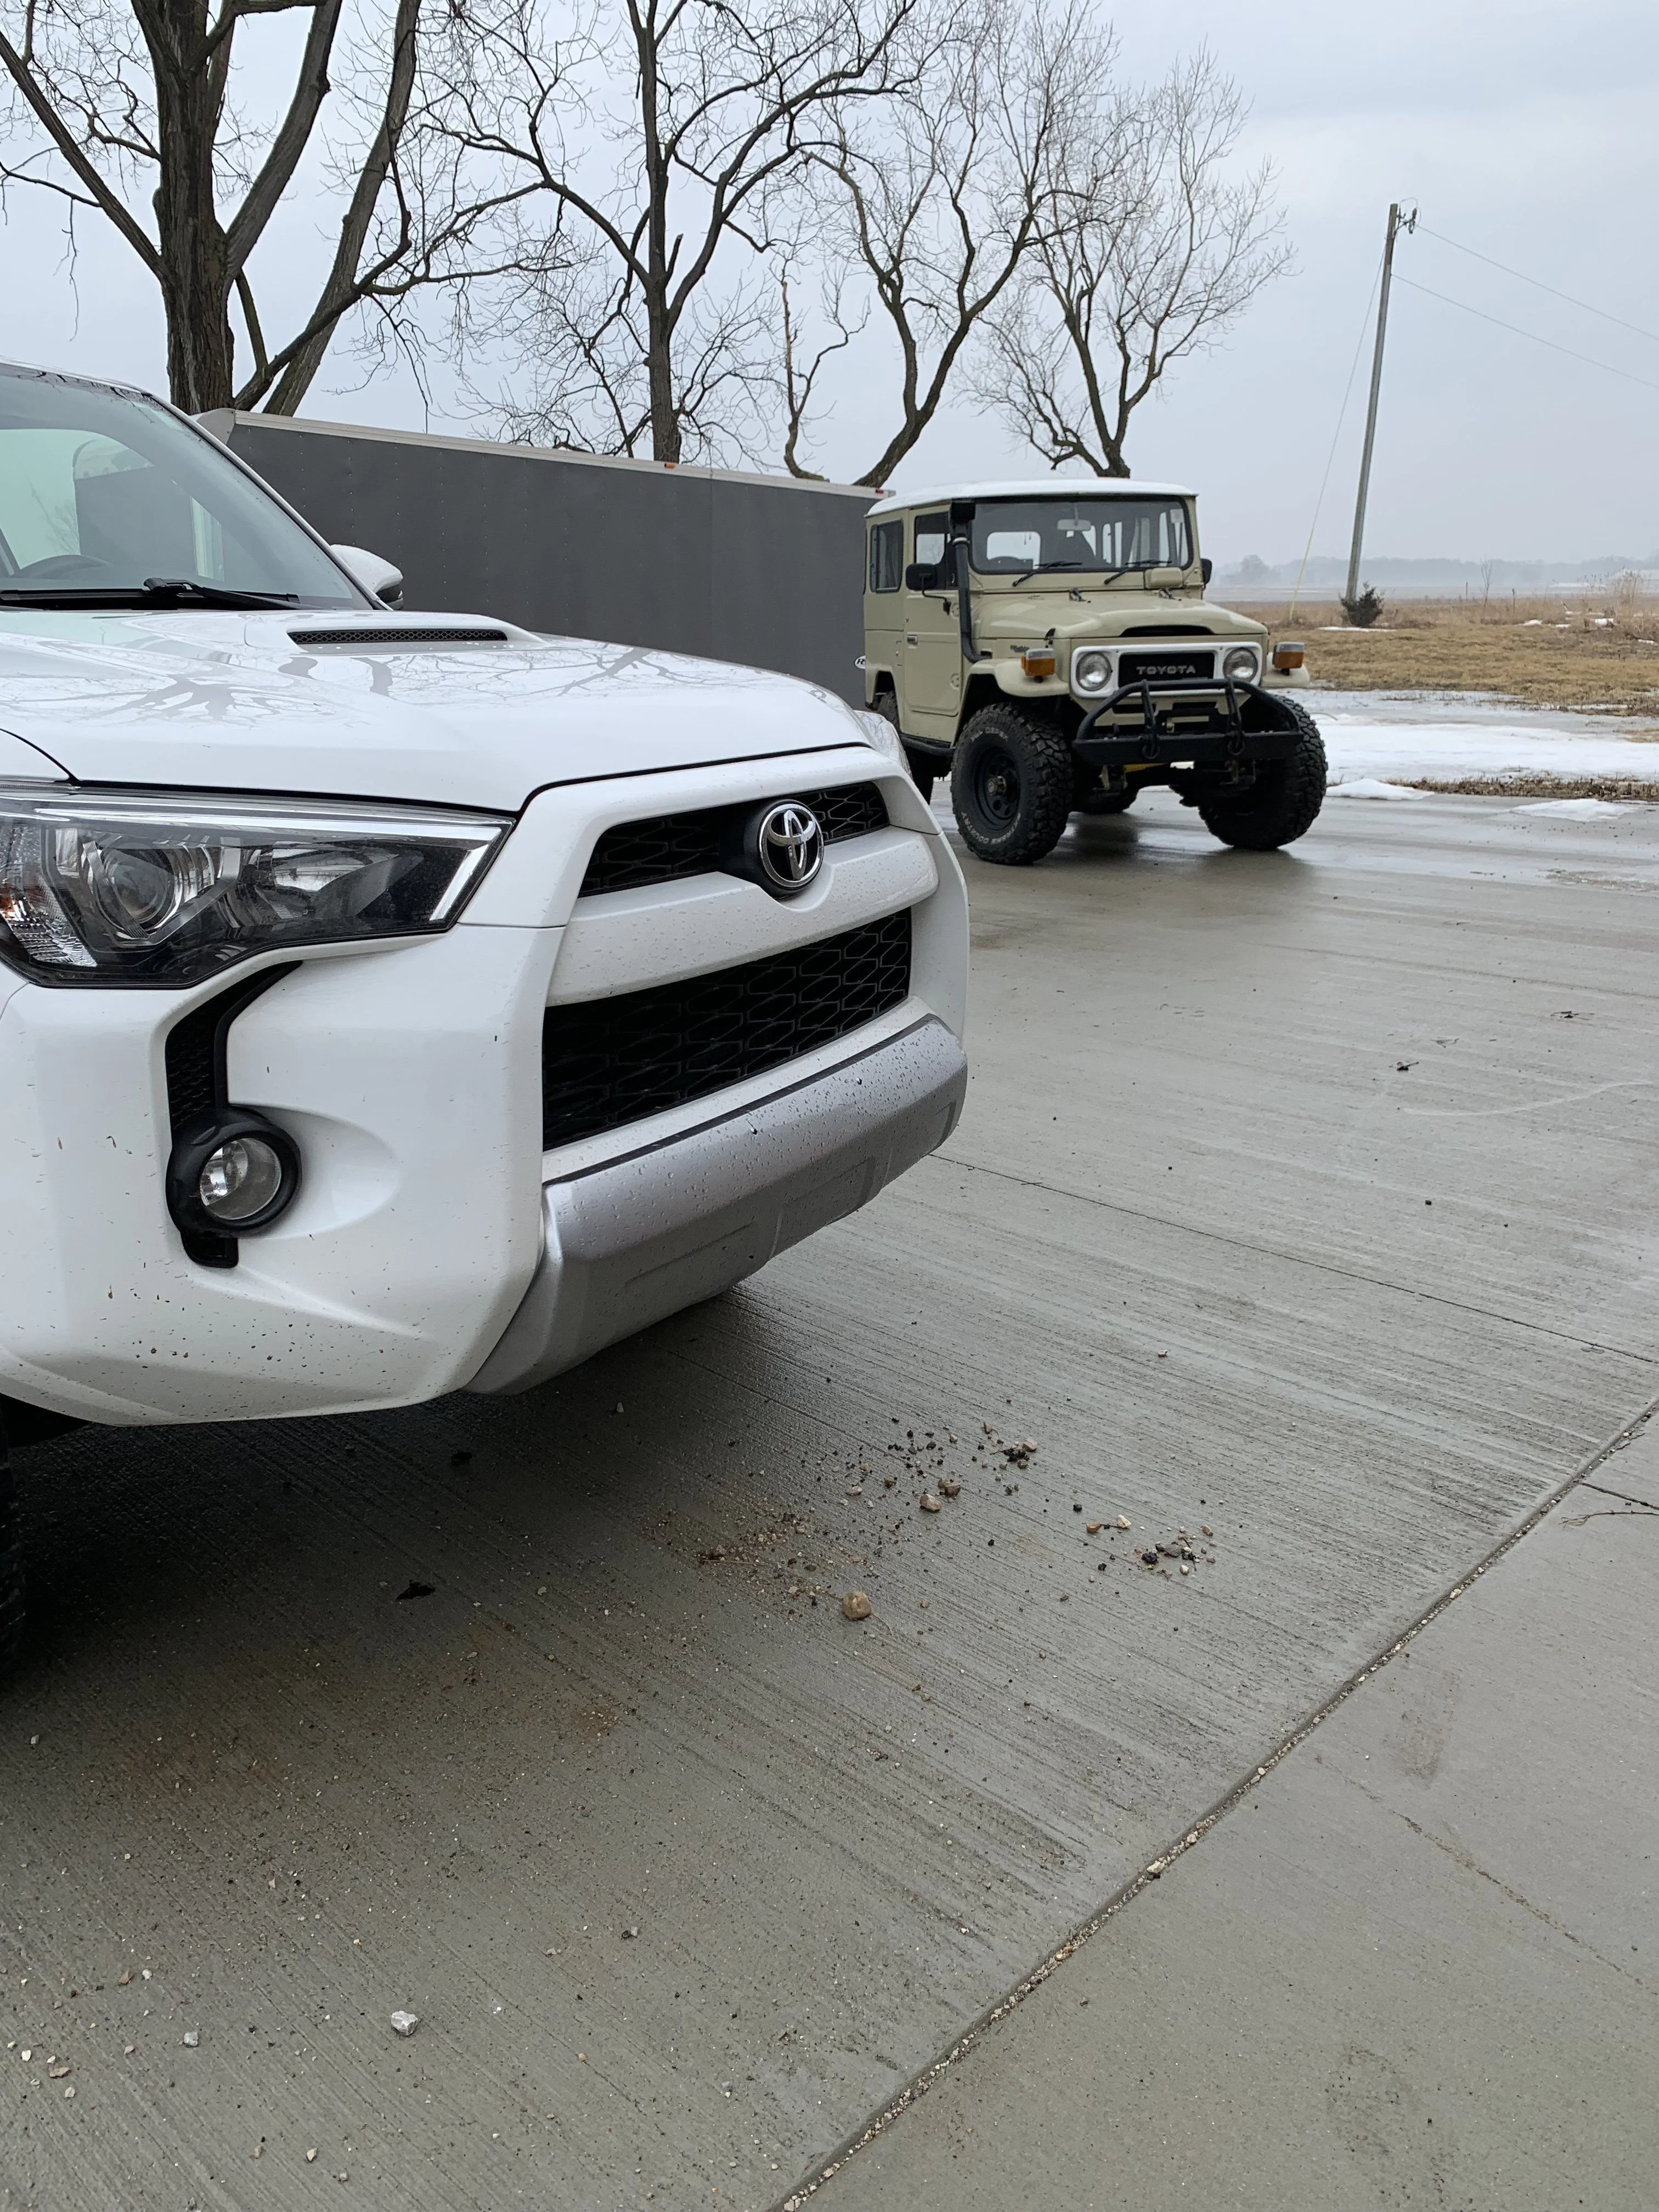
I actually ended up almost dailying the Landcruiser over the summer, because my normal daily was giving me grief. No pictures of that, but come October it was time for Overland Expo East 2019. A couple of the buddies from the U.P. trip came along this year.
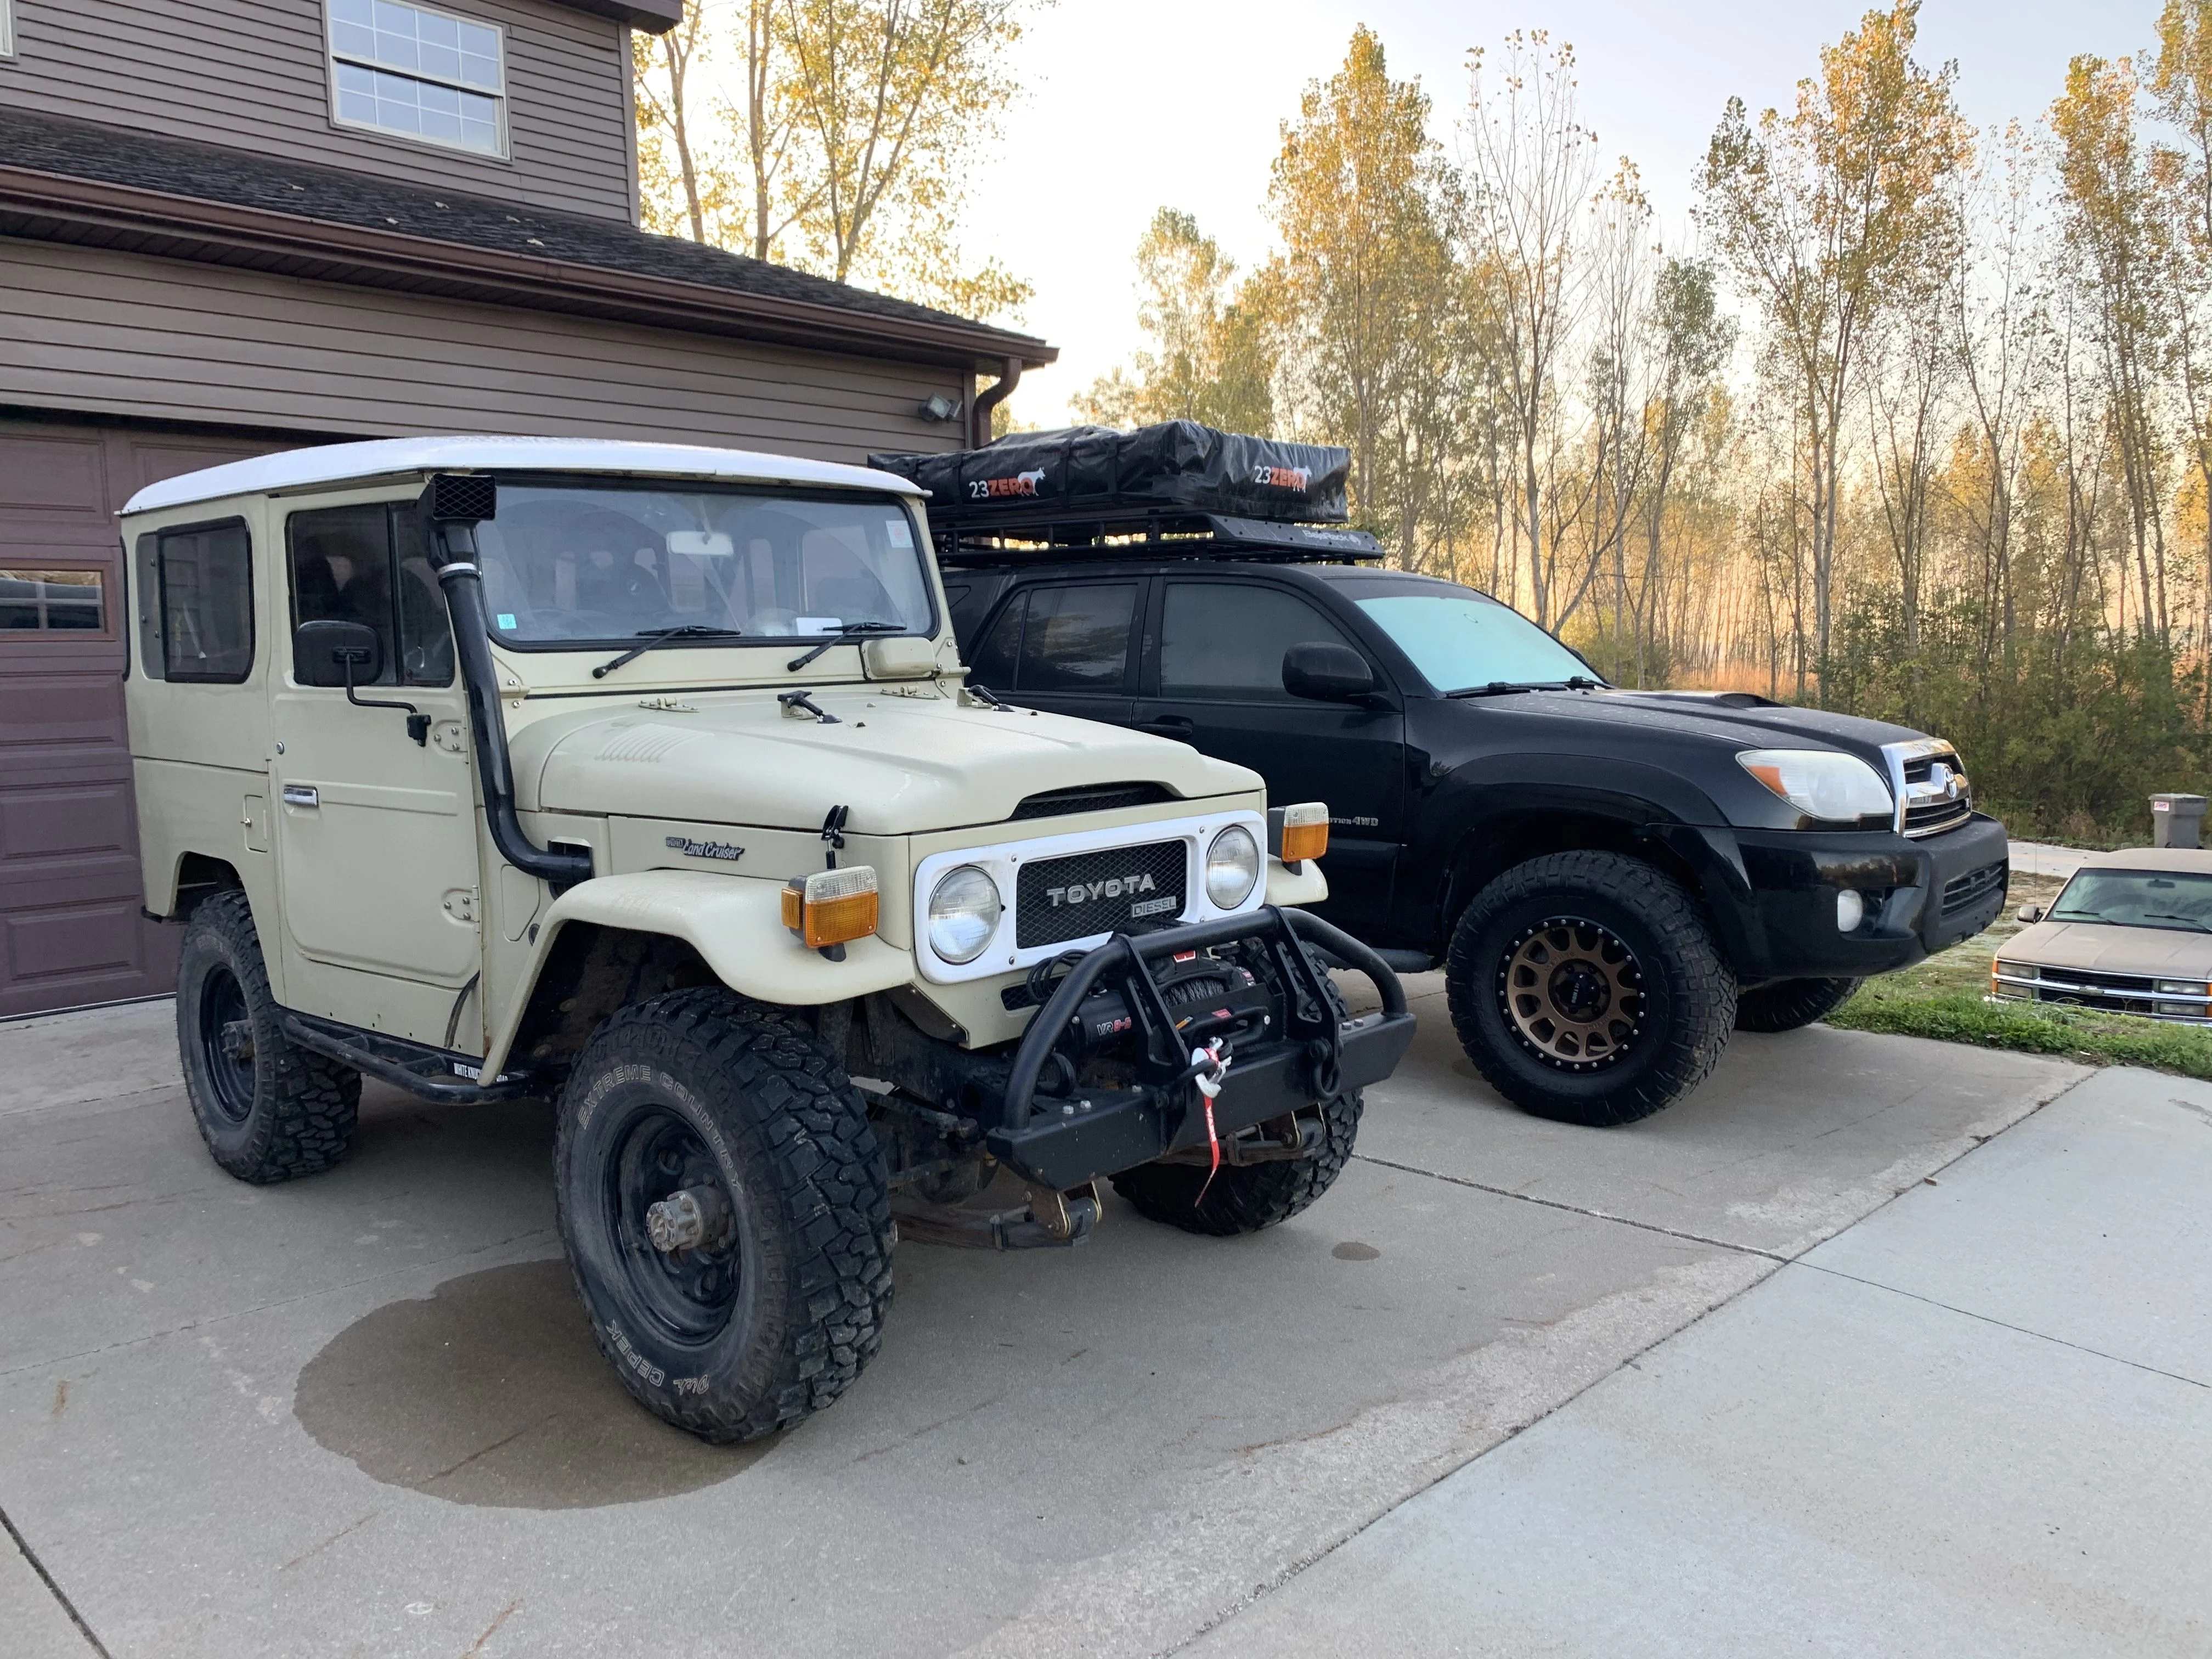
While we were at the Expo, Craig, owner of the 4runner there, got word on a pretty nice trail we could hit in West Virginia, so on the way back we drove that trail and camped out next to it.
So there we are, a 1-year update. Over the next couple months I want to get back in the garage so I can fab up a tire/cooler carrier. I'll document that process as it happens!
First, here's a shot of my first day properly driving the rig to work
I managed to have it on the road for about 2 weeks of shakedown before the original goal/deadline: Overland Expo East 2018. However, the DAY BEFORE we were supposed to leave, the engine died on me! I had just left home when it sputtered out and died. I reprimed the manual diesel pump, it started and ran for a moment, then died again. Turns out the mechanical fuel pump had given up the ghost. Fortunately there was an unaccounted-for switched hot lead in the engine bay, so we popped an off-the-shelf electric diesel fuel pump onto it and it ran beautifully. Better than before, actually. It seems the mechanical pump had been on the way out for a while, so the truck was pretty anemic before.
So, we made it to Overland Expo East 2018 and had a wonderful, muddy, cold time.
By the time we got home, it was almost mid-November, so she had to go right into storage. Spring 2019 arrives, I hop in the driver's seat, and the truck starts like I'd driven it yesterday.
About this time, a buddy and I hatched a plan to take a week-long overlanding trip to the Upper Peninsula. While it runs, I had a couple things I wanted to do to the Landcruiser before I did a proper overland expedition. So step 1 was a winch to put inside that bumper. I don't want to cheap out of important gear like that, so I picked up a Warn. Synthetic line, for weight savings.
I also did a small interior mod that makes for a MASSIVE quality-of-life improvement. I ripped out the cigarette lighter and swapped it for a pair of USB ports. If someone smokes in this truck I'm making them walk home, so no loss there, but the dual USB ports make it really convenient for charging phones, the tablet I use for navigation, battery banks, GoPros, you name it. I love the wear/patina on the dash plate. Still gotta fill in the ashtray and radio openings though.
And with that I left on my first REAL overland adventure! Here's my campsite for the first night, just a tent next to the trail.
A couple days later taking a break on top of Brockway Mountain because it's the only place with cellphone service.
And here's my campsite the next morning. We'd been wheeling until 11pm to get to this spot. That is not my hat.
This isn't all the pictures, but you can get a rough timeline of the trip based on how filthy my truck got.
I actually ended up almost dailying the Landcruiser over the summer, because my normal daily was giving me grief. No pictures of that, but come October it was time for Overland Expo East 2019. A couple of the buddies from the U.P. trip came along this year.
While we were at the Expo, Craig, owner of the 4runner there, got word on a pretty nice trail we could hit in West Virginia, so on the way back we drove that trail and camped out next to it.
So there we are, a 1-year update. Over the next couple months I want to get back in the garage so I can fab up a tire/cooler carrier. I'll document that process as it happens!
- Thread starter
- #59
Not a ton of pictures to share, but I’ll give a little update. I brought Kiwi into the garage so we can start the rear bumper build. That’s dad’s Nissan Patrol on the lift.

Pulled the step and light guards off and got some measurements. Steel is already here and just waiting to get cut.
I also picked up a milsurp 40mm ammo can, which I’m going to turn into a center console and place to bolt a cup holder. (Driving manual on the wrong side while holding a jumbo-large iced coffee is tricky)
I think it looks pretty neat in there. You’d think I planned it.

I also took measurements of the openings for the ash tray and radio in the dash. I’m going to CAD up and 3d print a piece to fit a smallish CB unit in the ash tray opening and a switch panel for the radio opening to hold the light controls and eventually compressor/lockers.
Pulled the step and light guards off and got some measurements. Steel is already here and just waiting to get cut.
I also picked up a milsurp 40mm ammo can, which I’m going to turn into a center console and place to bolt a cup holder. (Driving manual on the wrong side while holding a jumbo-large iced coffee is tricky)
I think it looks pretty neat in there. You’d think I planned it.
I also took measurements of the openings for the ash tray and radio in the dash. I’m going to CAD up and 3d print a piece to fit a smallish CB unit in the ash tray opening and a switch panel for the radio opening to hold the light controls and eventually compressor/lockers.
Awesome thread!!! Great work. Intrigued about the electrical diesel pump you used. Can share some details??Wow, It's been over a year. I have a year's worth of adventures and pictures, might as well share a few of 'em!
First, here's a shot of my first day properly driving the rig to work
I managed to have it on the road for about 2 weeks of shakedown before the original goal/deadline: Overland Expo East 2018. However, the DAY BEFORE we were supposed to leave, the engine died on me! I had just left home when it sputtered out and died. I reprimed the manual diesel pump, it started and ran for a moment, then died again. Turns out the mechanical fuel pump had given up the ghost. Fortunately there was an unaccounted-for switched hot lead in the engine bay, so we popped an off-the-shelf electric diesel fuel pump onto it and it ran beautifully. Better than before, actually. It seems the mechanical pump had been on the way out for a while, so the truck was pretty anemic before.
So, we made it to Overland Expo East 2018 and had a wonderful, muddy, cold time.
By the time we got home, it was almost mid-November, so she had to go right into storage. Spring 2019 arrives, I hop in the driver's seat, and the truck starts like I'd driven it yesterday.
About this time, a buddy and I hatched a plan to take a week-long overlanding trip to the Upper Peninsula. While it runs, I had a couple things I wanted to do to the Landcruiser before I did a proper overland expedition. So step 1 was a winch to put inside that bumper. I don't want to cheap out of important gear like that, so I picked up a Warn. Synthetic line, for weight savings.
I also did a small interior mod that makes for a MASSIVE quality-of-life improvement. I ripped out the cigarette lighter and swapped it for a pair of USB ports. If someone smokes in this truck I'm making them walk home, so no loss there, but the dual USB ports make it really convenient for charging phones, the tablet I use for navigation, battery banks, GoPros, you name it. I love the wear/patina on the dash plate. Still gotta fill in the ashtray and radio openings though.
And with that I left on my first REAL overland adventure! Here's my campsite for the first night, just a tent next to the trail.
A couple days later taking a break on top of Brockway Mountain because it's the only place with cellphone service.
And here's my campsite the next morning. We'd been wheeling until 11pm to get to this spot. That is not my hat.
This isn't all the pictures, but you can get a rough timeline of the trip based on how filthy my truck got.
I actually ended up almost dailying the Landcruiser over the summer, because my normal daily was giving me grief. No pictures of that, but come October it was time for Overland Expo East 2019. A couple of the buddies from the U.P. trip came along this year.
While we were at the Expo, Craig, owner of the 4runner there, got word on a pretty nice trail we could hit in West Virginia, so on the way back we drove that trail and camped out next to it.
So there we are, a 1-year update. Over the next couple months I want to get back in the garage so I can fab up a tire/cooler carrier. I'll document that process as it happens!