
Navigation
Install the app
How to install the app on iOS
Follow along with the video below to see how to install our site as a web app on your home screen.
Note: This feature may not be available in some browsers.
More options
Style variation
You are using an out of date browser. It may not display this or other websites correctly.
You should upgrade or use an alternative browser.
You should upgrade or use an alternative browser.
Build Slight Change of Plans--A BJ42 Build
Member Builds and Stories
This site may earn a commission from merchant affiliate
links, including eBay, Amazon, Skimlinks, and others.
- Thread starter
- #22
I'd consider galvanizing, but I really don't have a good lead on sources near me.
imo 2.5 and 33x10.5 or 9.5 if ya can find em are the way to go , no shims needed and keeps center of gravity lower , and it just looks right , 4 inch if i was doin 35s or bigger but then ya might as well put a big block or regear heavy in it cause the 3b will have issues wit em ,4 inch with 33 just doesn't look right to me just too much space inbetween tires and fenders imo


Last edited:
- Thread starter
- #24
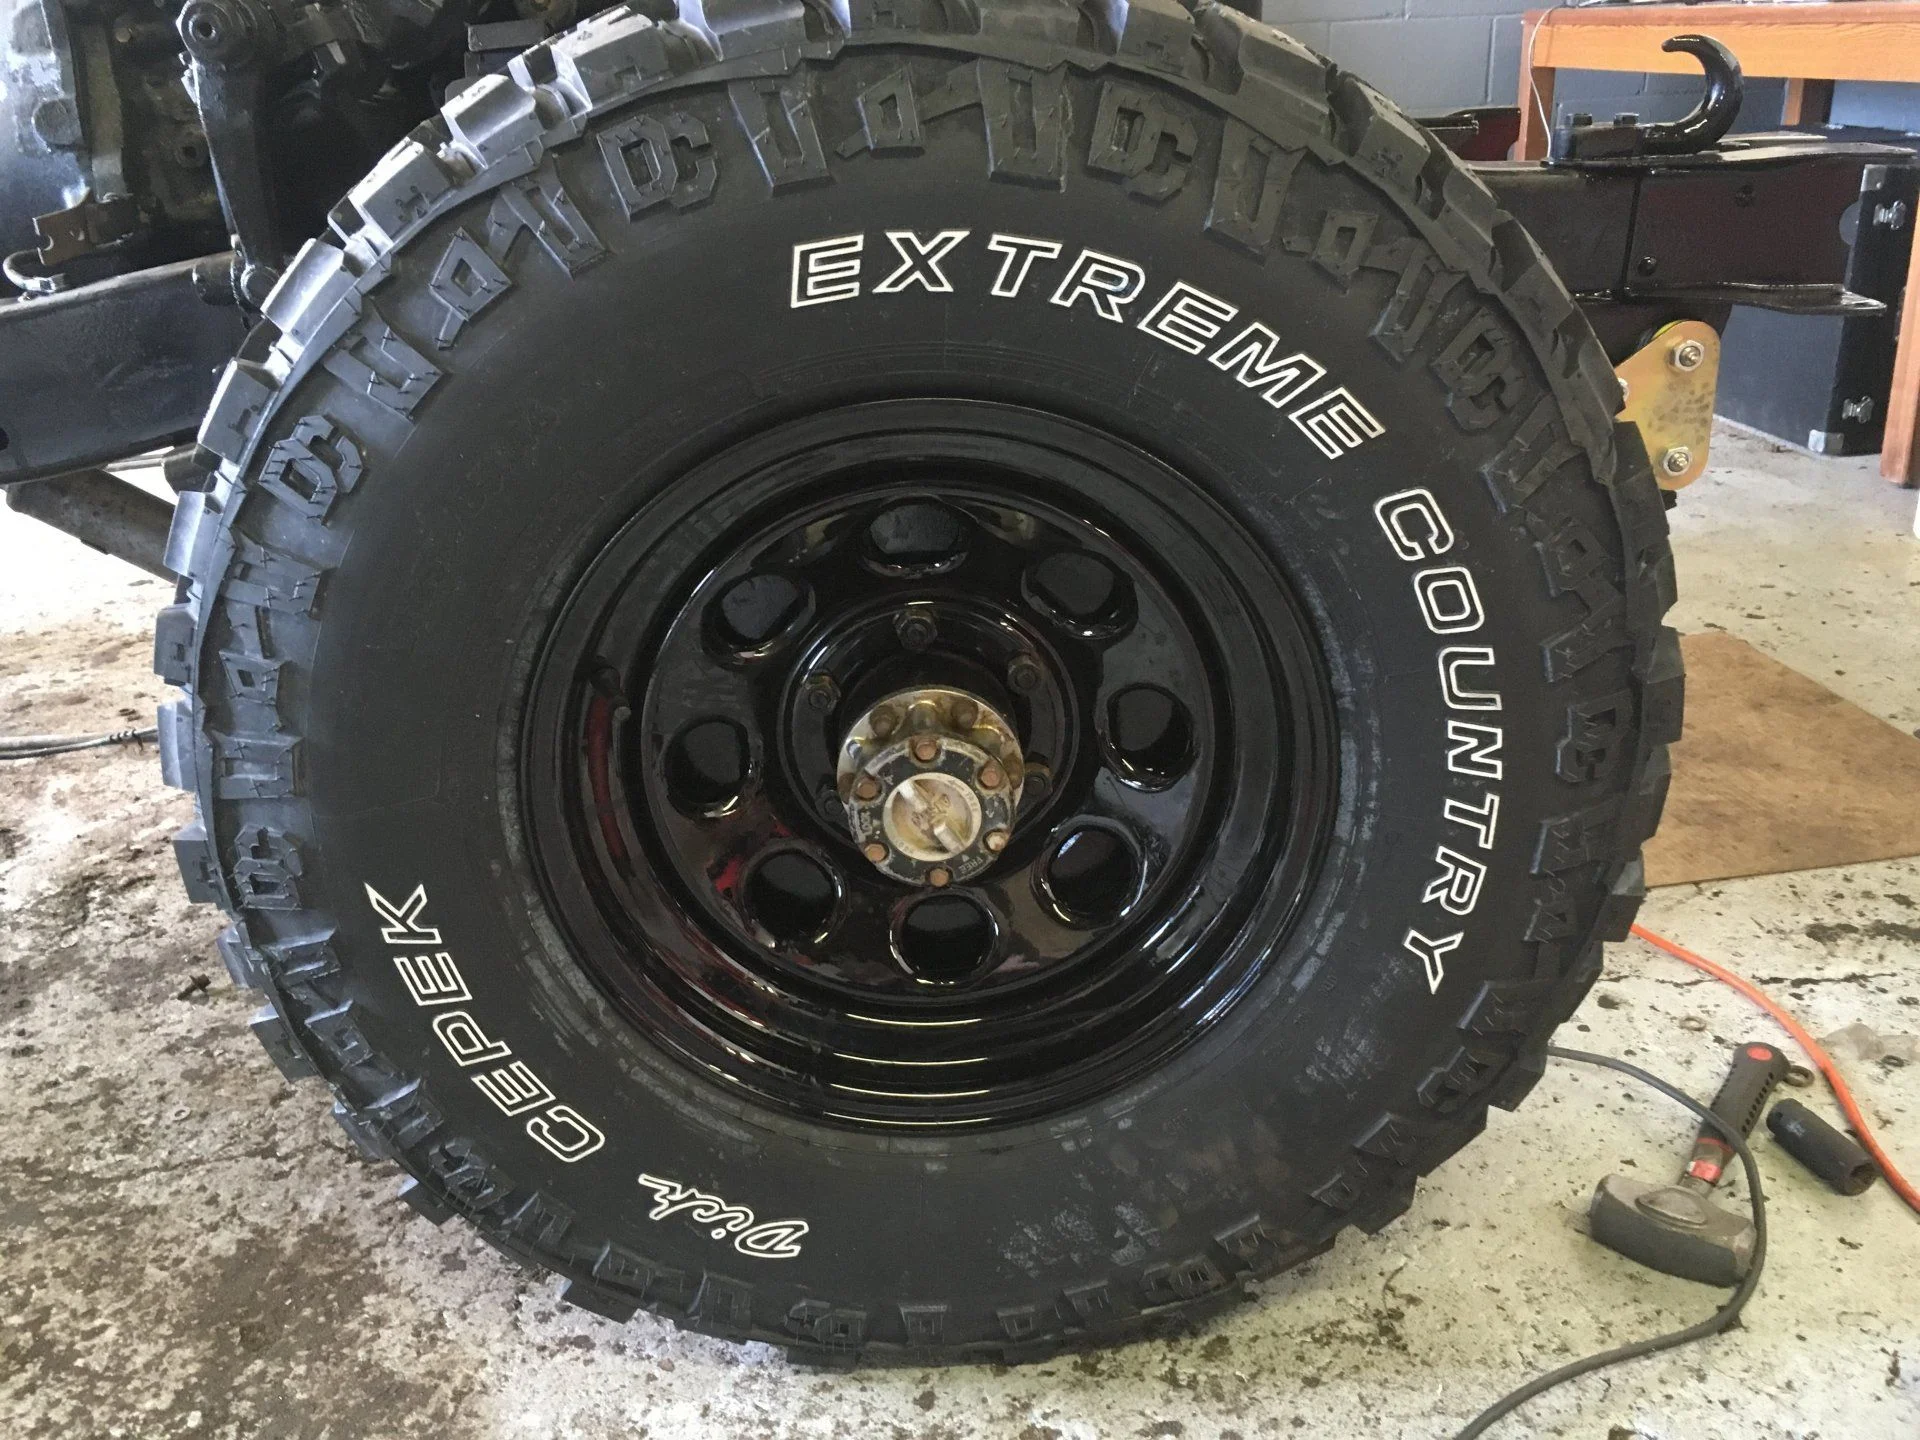
I agree, caper. I'm going to run Dick Cepek Extreme Country 255/85R16s, which are pretty much 33x10.5R16.
would love If these factory rims were 16s that would be the exact size I would have
Cant use 16' split rims because I love the center caps so much lol
Cant use 16' split rims because I love the center caps so much lol
Last edited:
just put a set of 255/85/16 toyo m55 on one of my cummins love them rims are 6.5 wide so fit perfect and can fully air up if wanted , cant do that 10.5 on factory (5.5 inch I believe)cruiser rims gota run soggy wit them or they balloon in the center , in fact I believe it to be illegal to run 10.5 on the factory rims , but I did it anyways as no one ever seems to have issues so I did it too lol

Last edited:
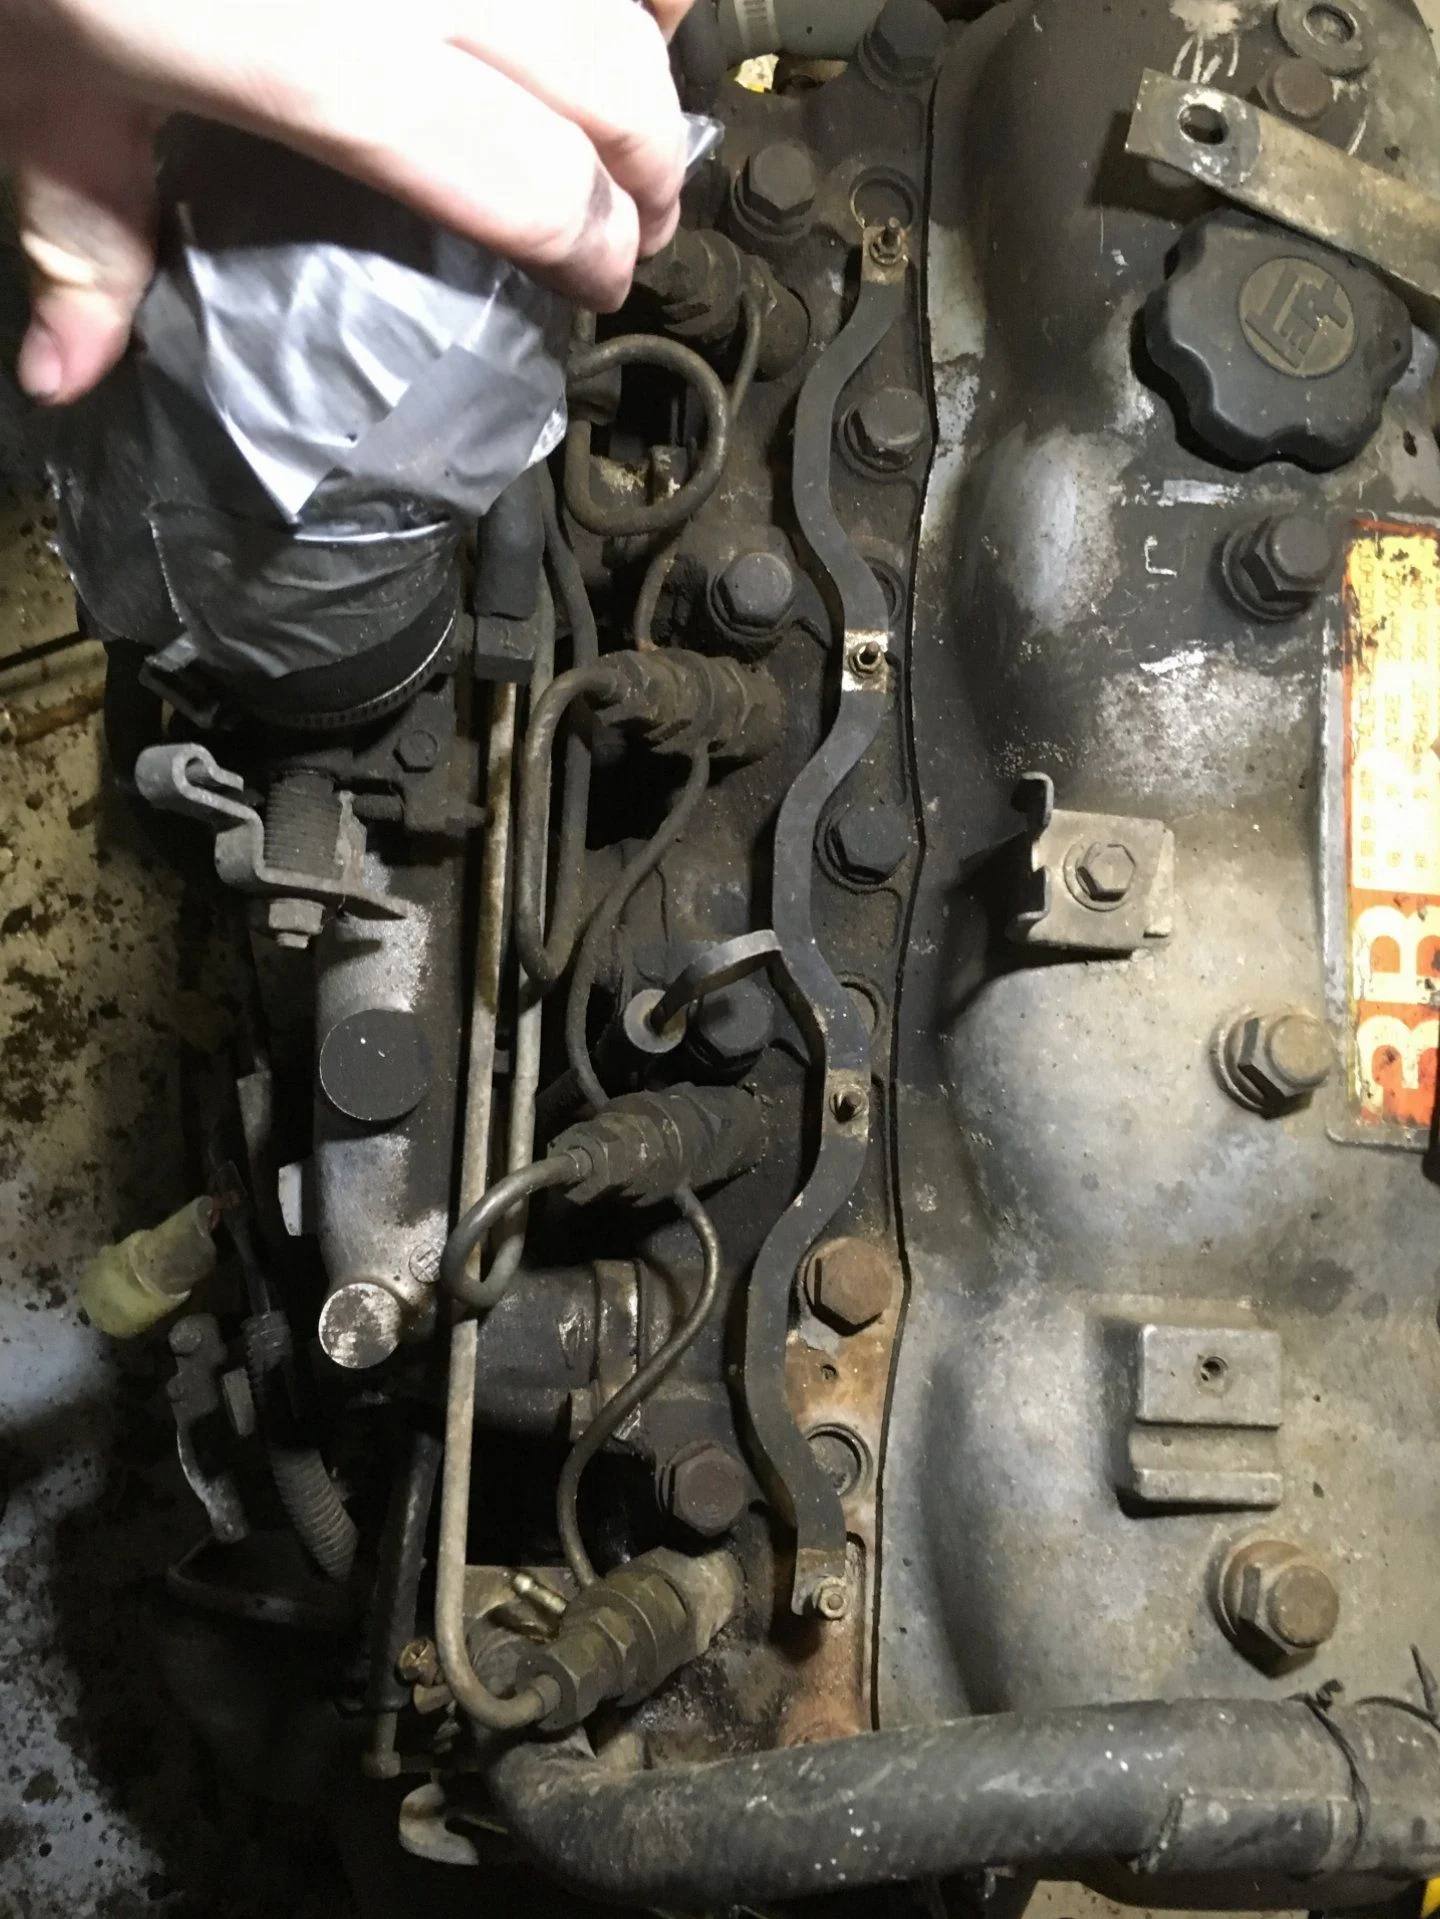
If you have a chance... can you post a detailed picture of the intake side of the 3B? I'm trying to get a reference for what's original on my truck.
- Thread starter
- #28
Oooookay guys, it's been a few weeks, sorry. I'll get right into the update!
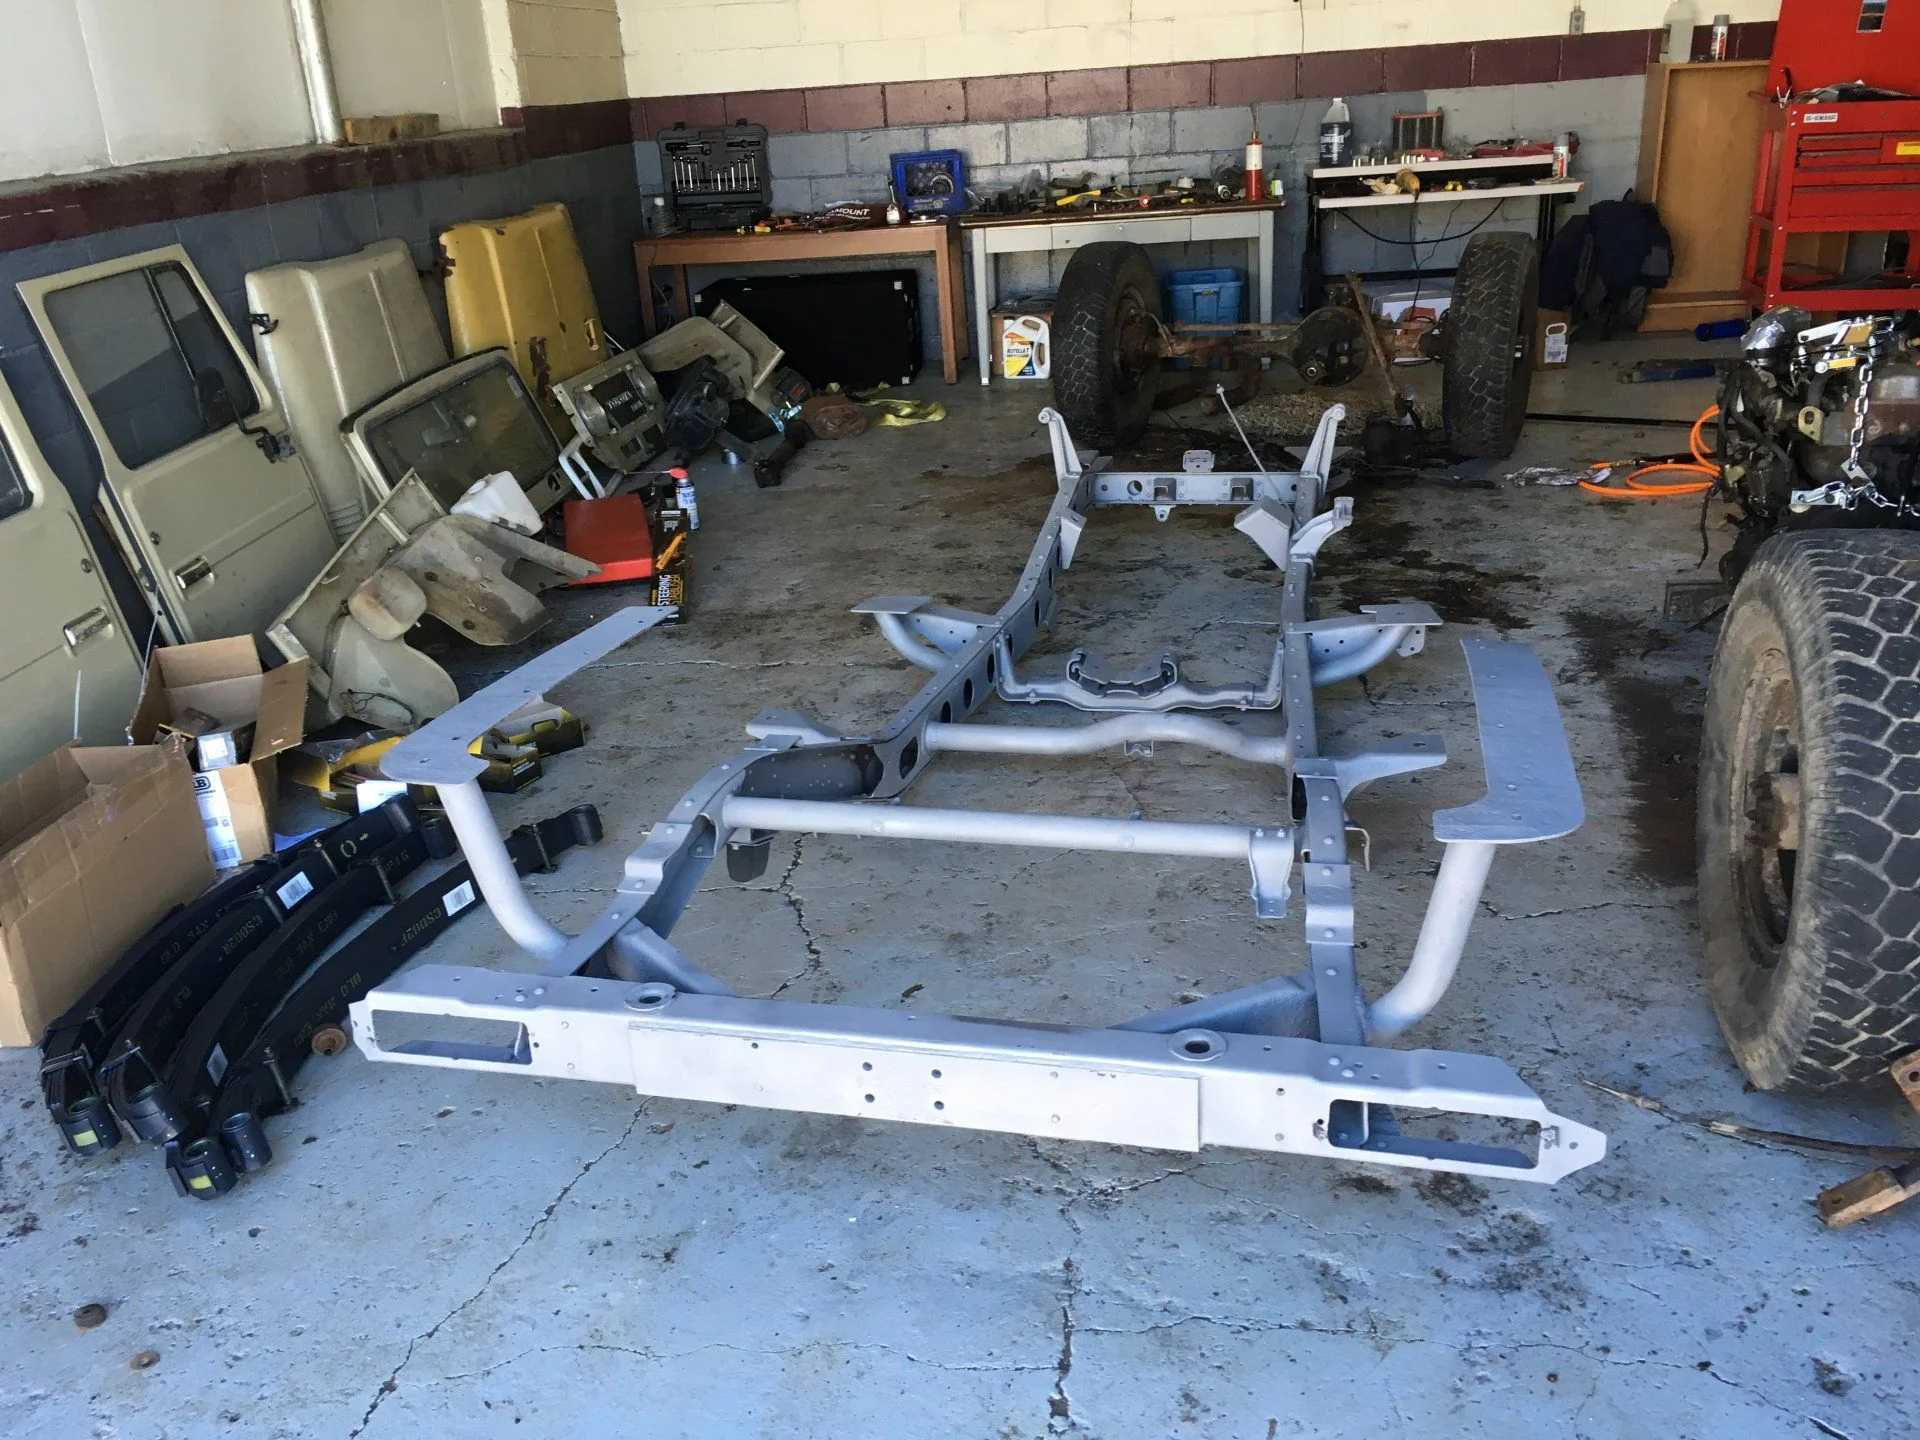
First we took a collection of parts to the local sandblaster. Here's what we got back:
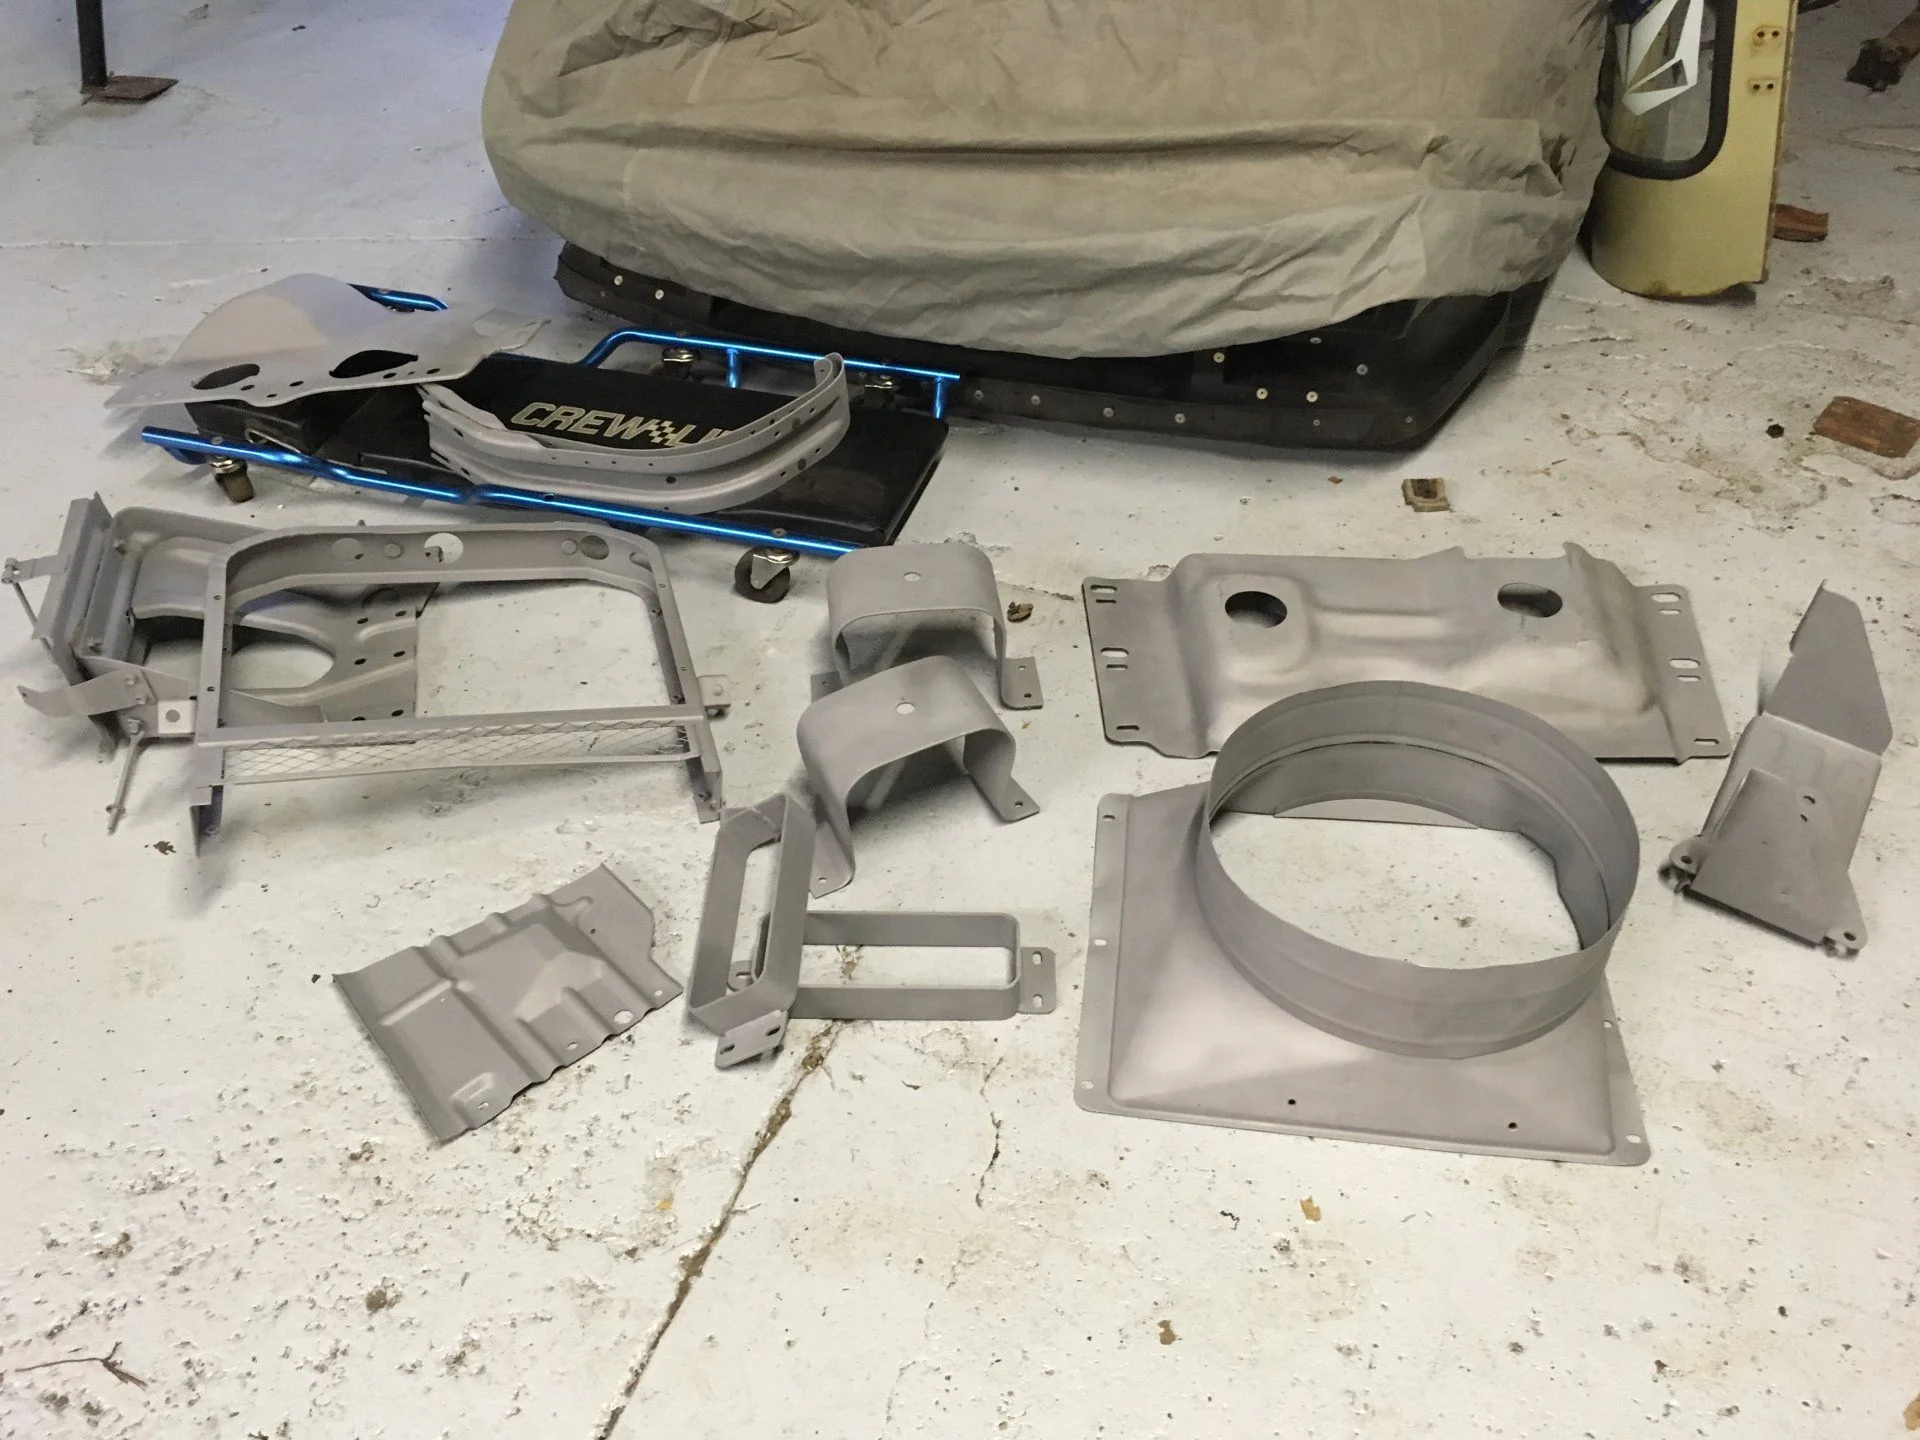
rear step, bumperettes, radiator frame and fan housing, front fender supports, battery tray, skid plates, and light guards, all cleaned.
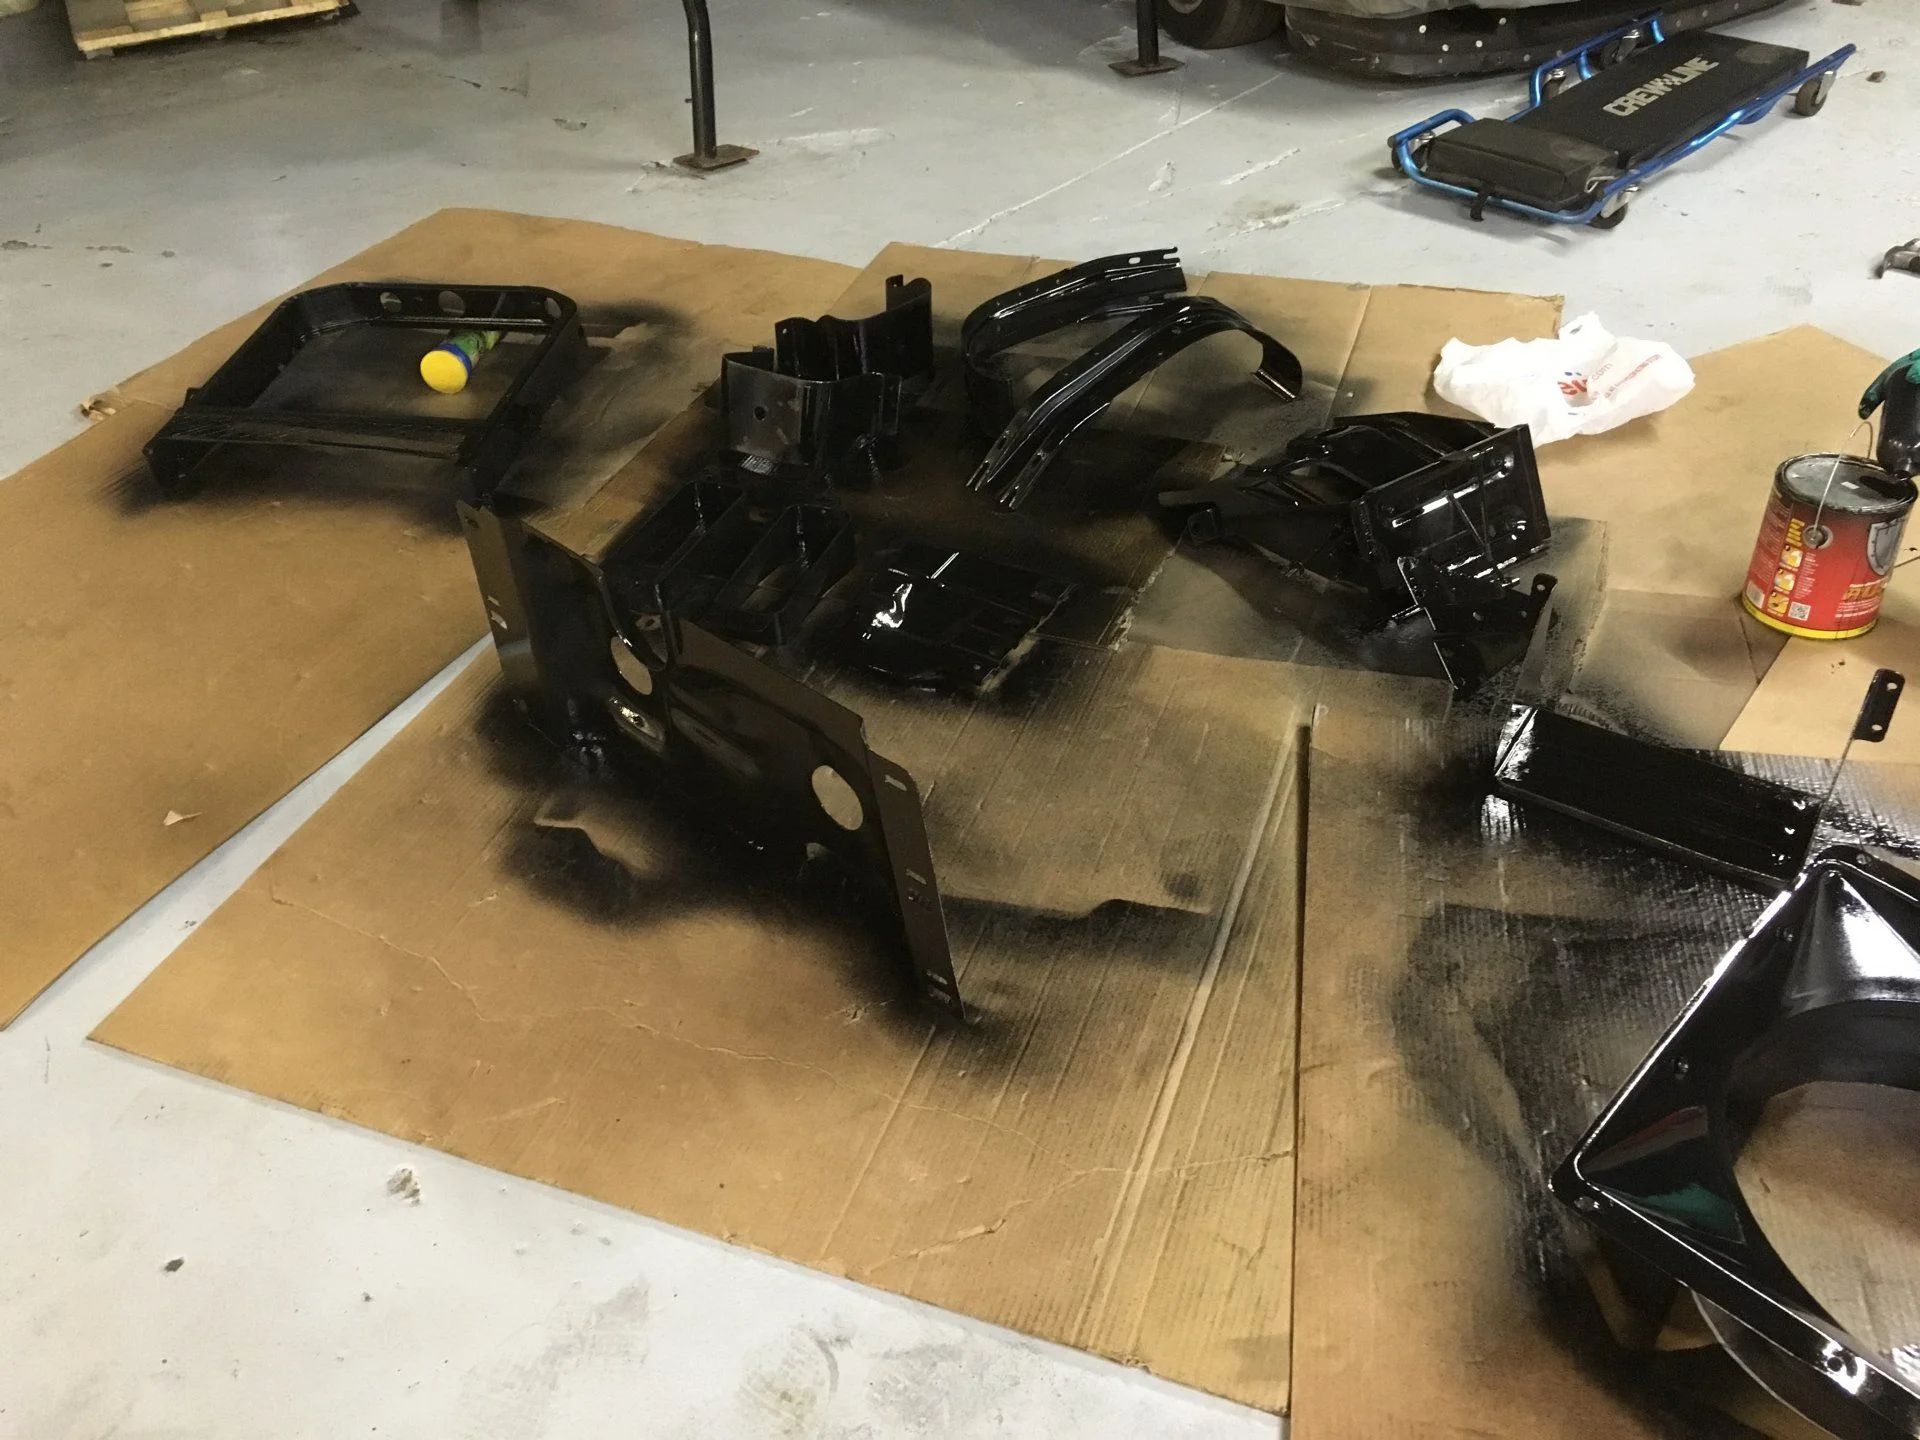
And here they are after a couple coats of POR-15
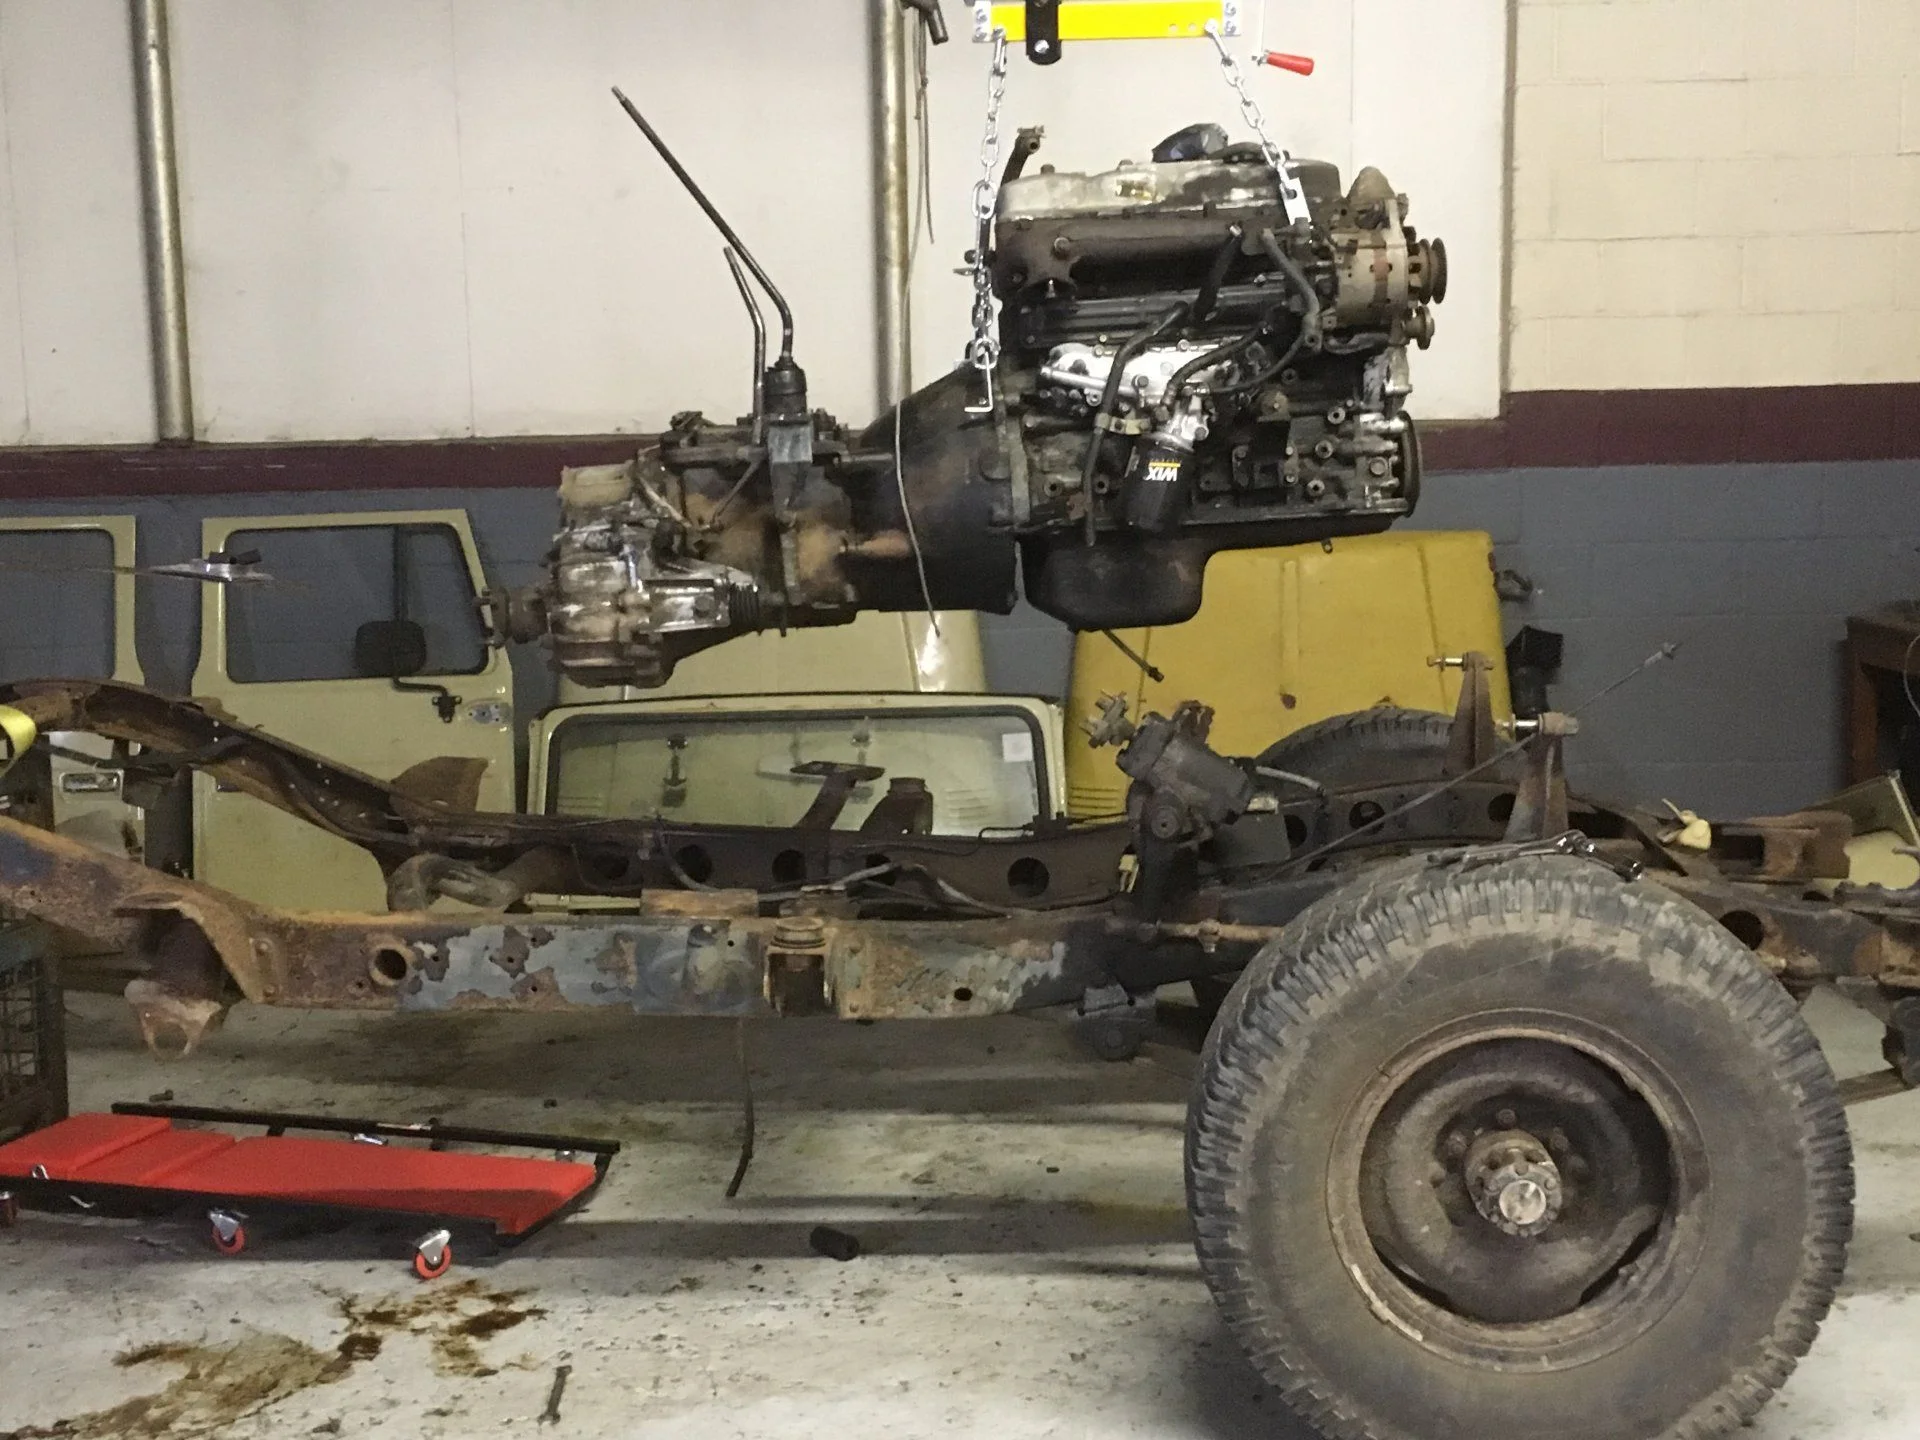
Then we pulled the motor and transmission off the frame, stood back, and asked ourselves what we had gotten ourselves into.
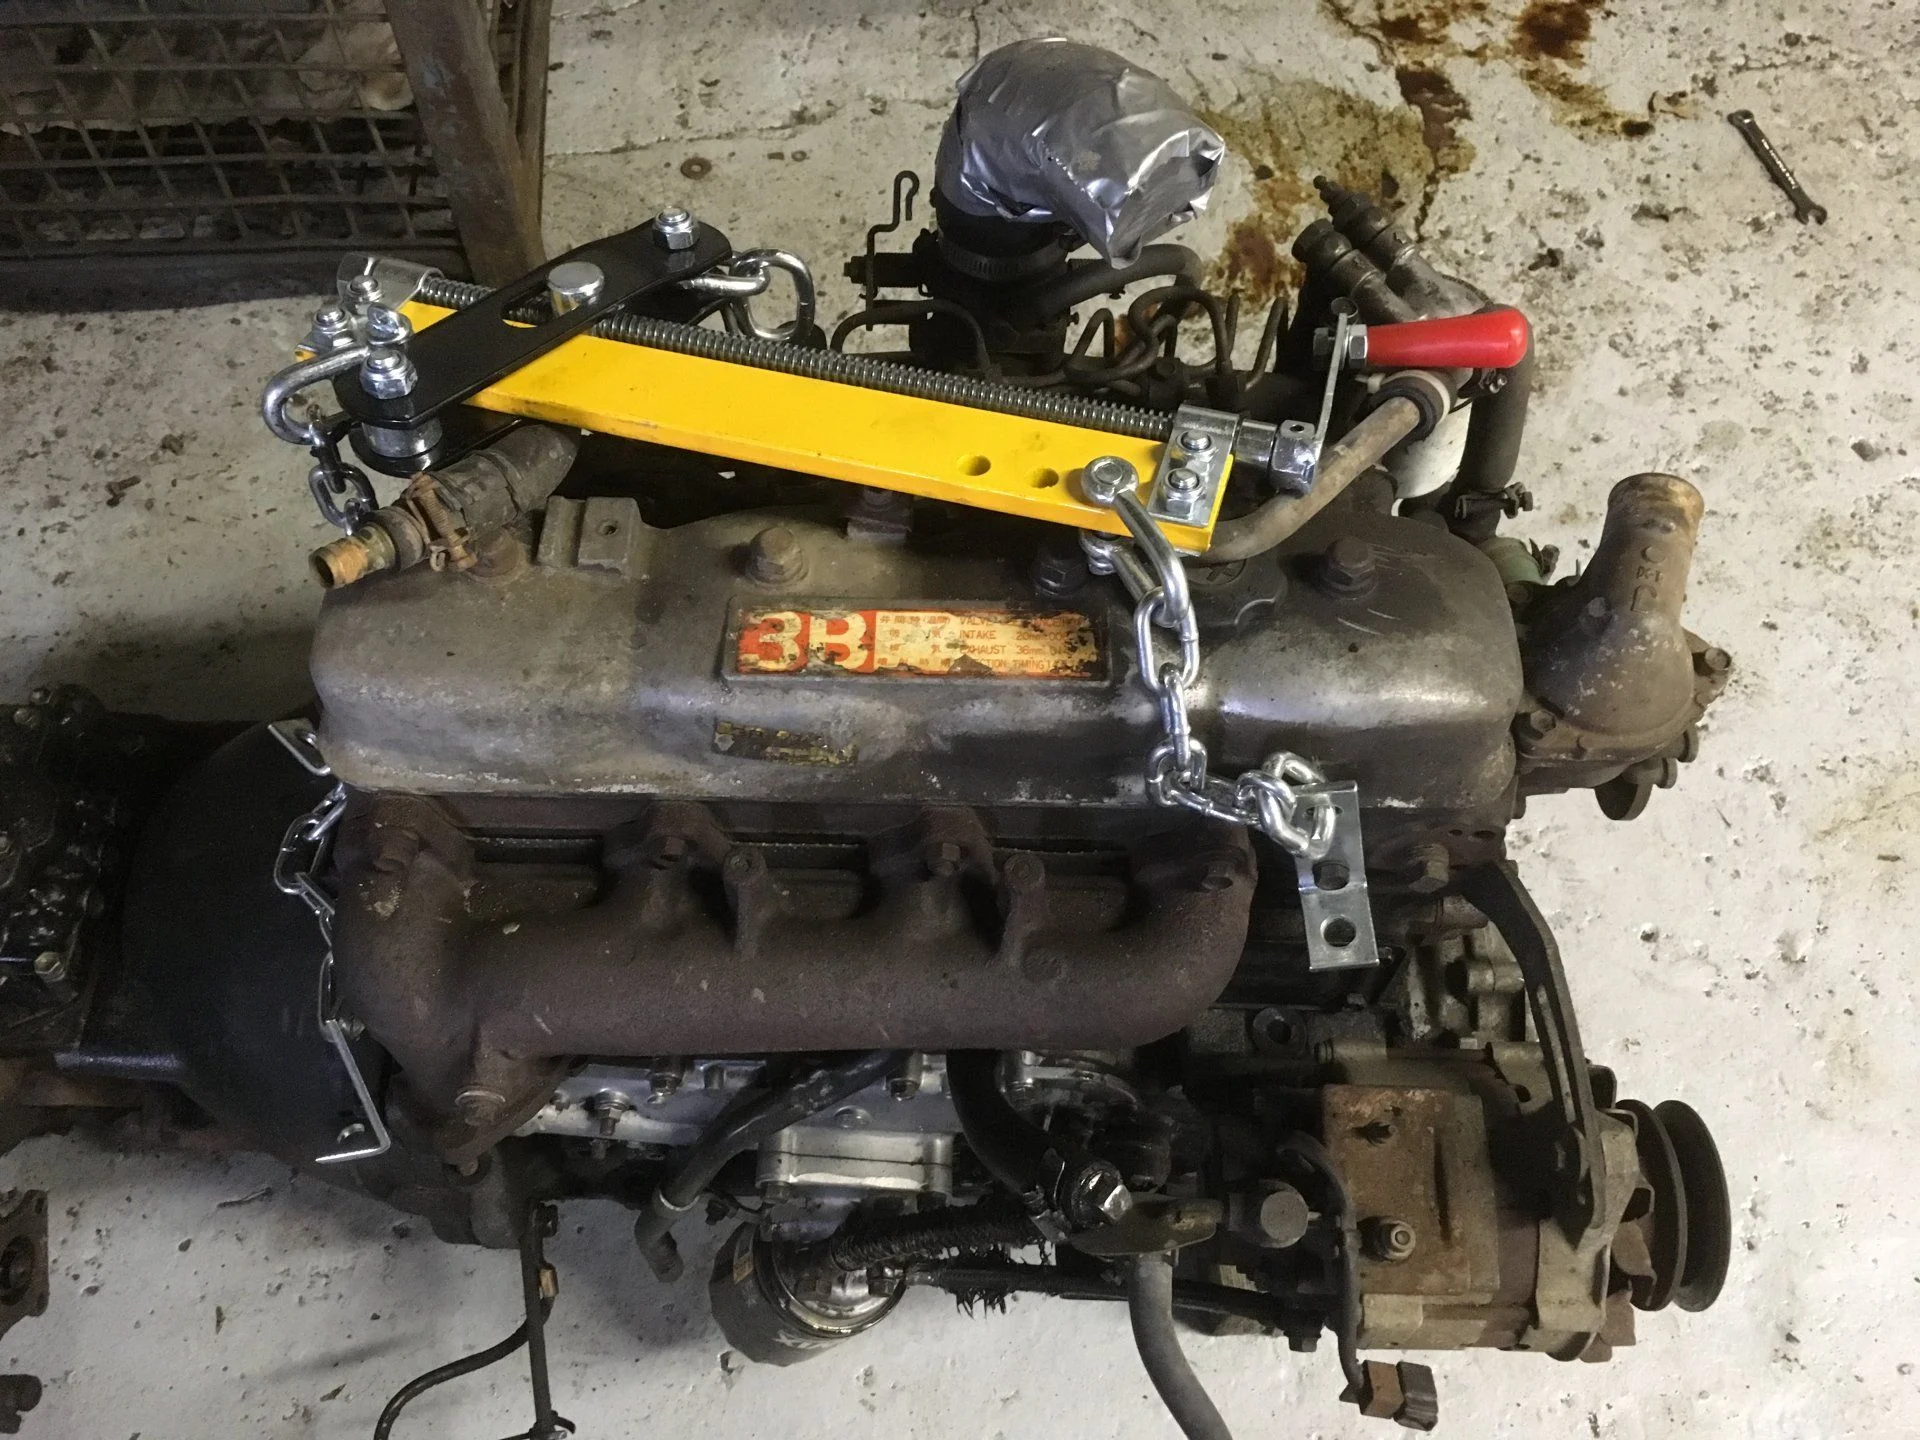
Here's an up-close shot of the engine on its blocks. I'm just including it 'cus I like the nitty-gritty pictures.
Not shown: the part where we pulled the front axle and steering gear off and took the bare frame to the sandblaster.
Shown: the unparalleled sexiness of a sandblasted frame that doesn't need any major work.
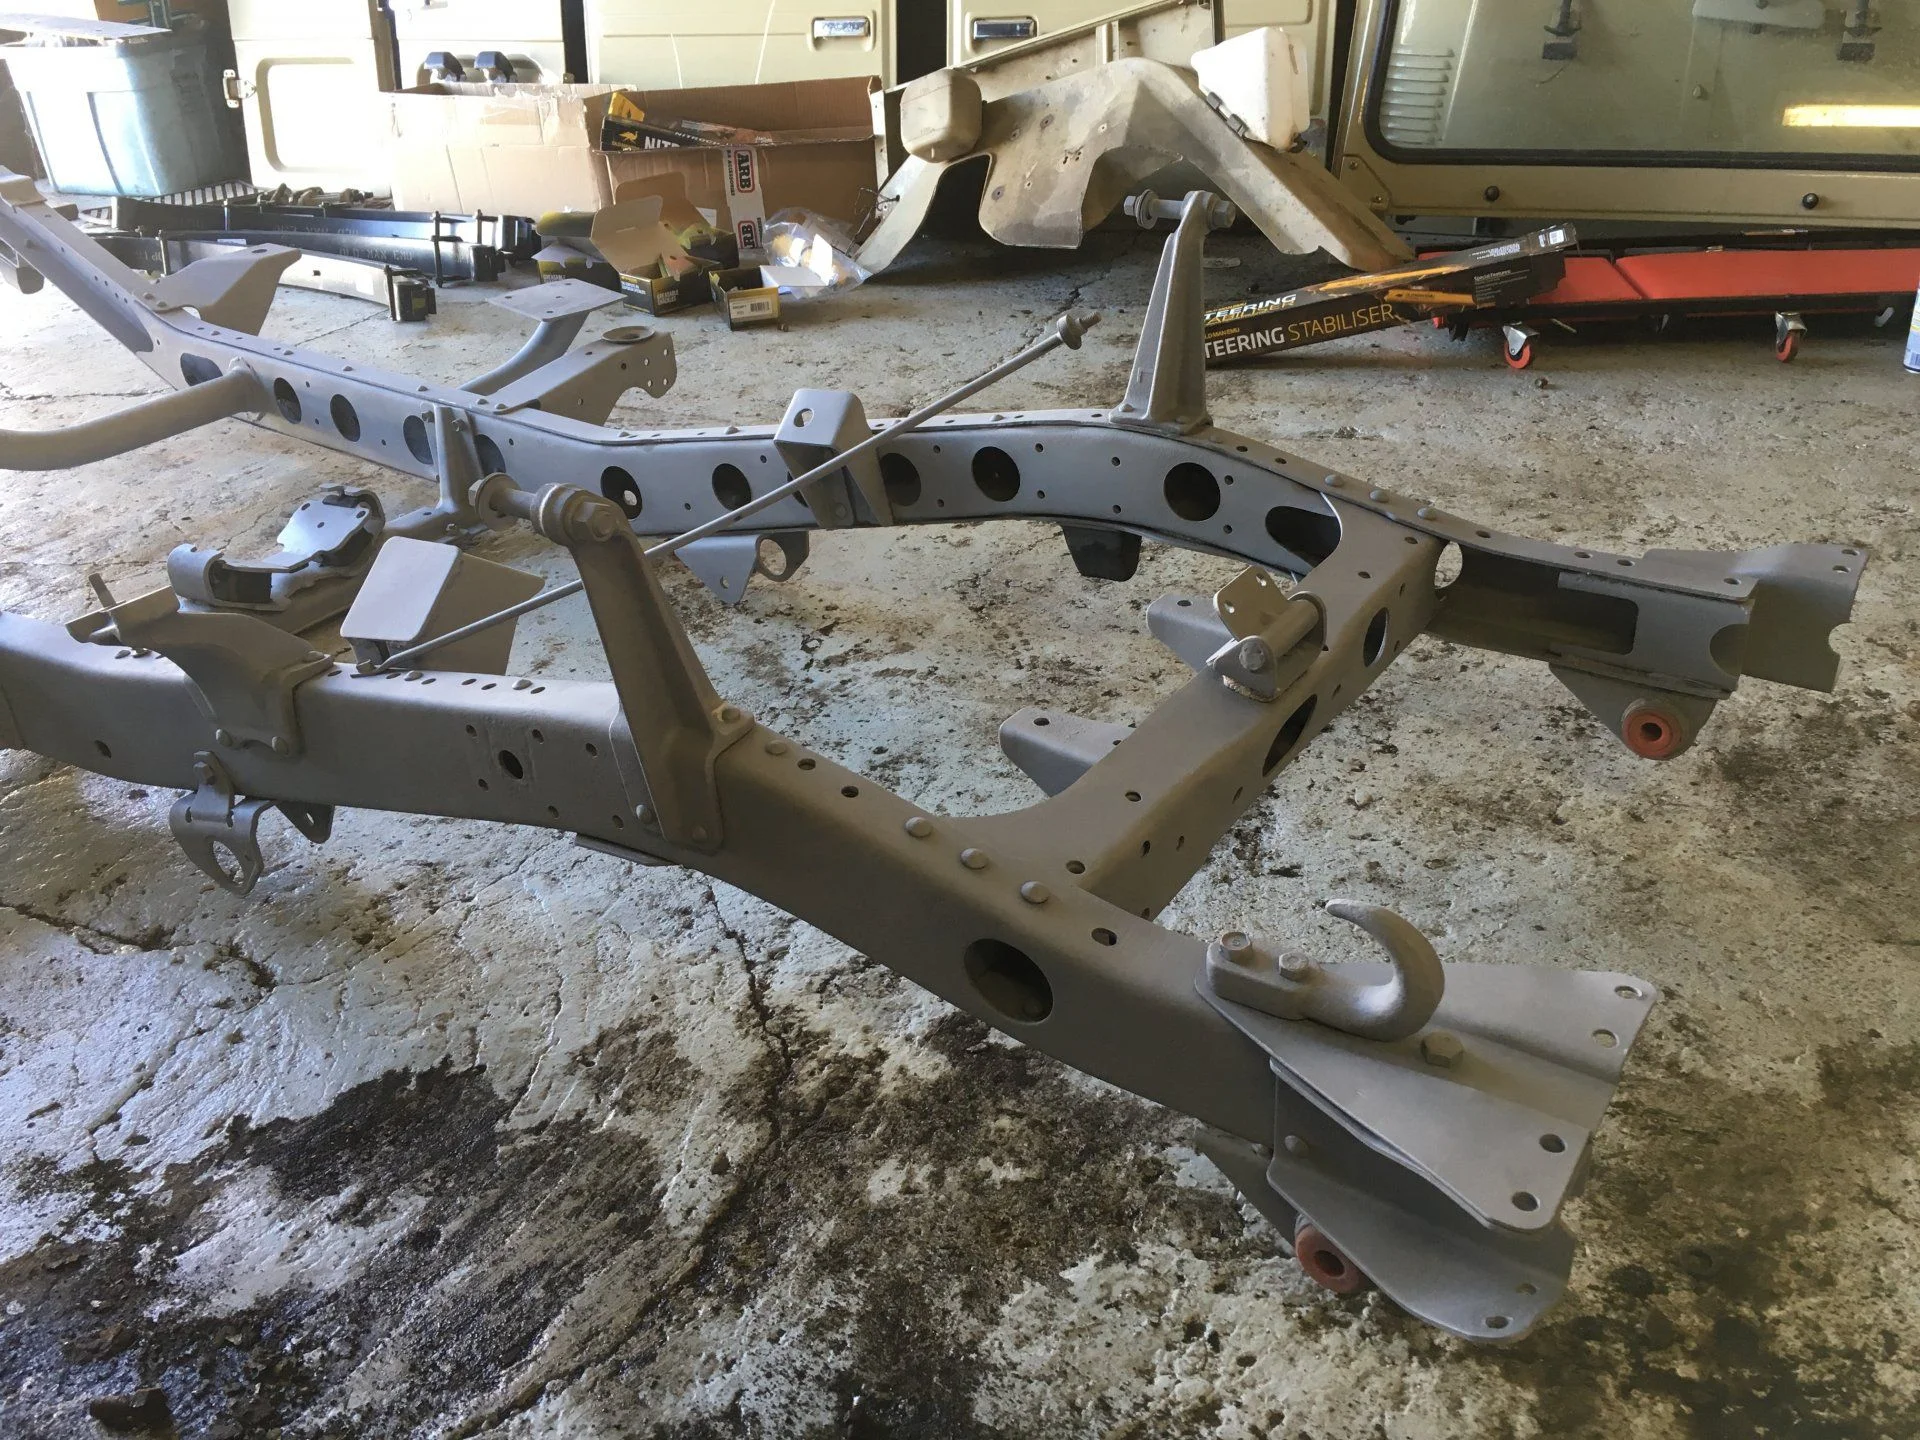
mmmmmmmm...
That's all the developments through yesterday.
This evening we got the first coat of POR-15 on the frame.
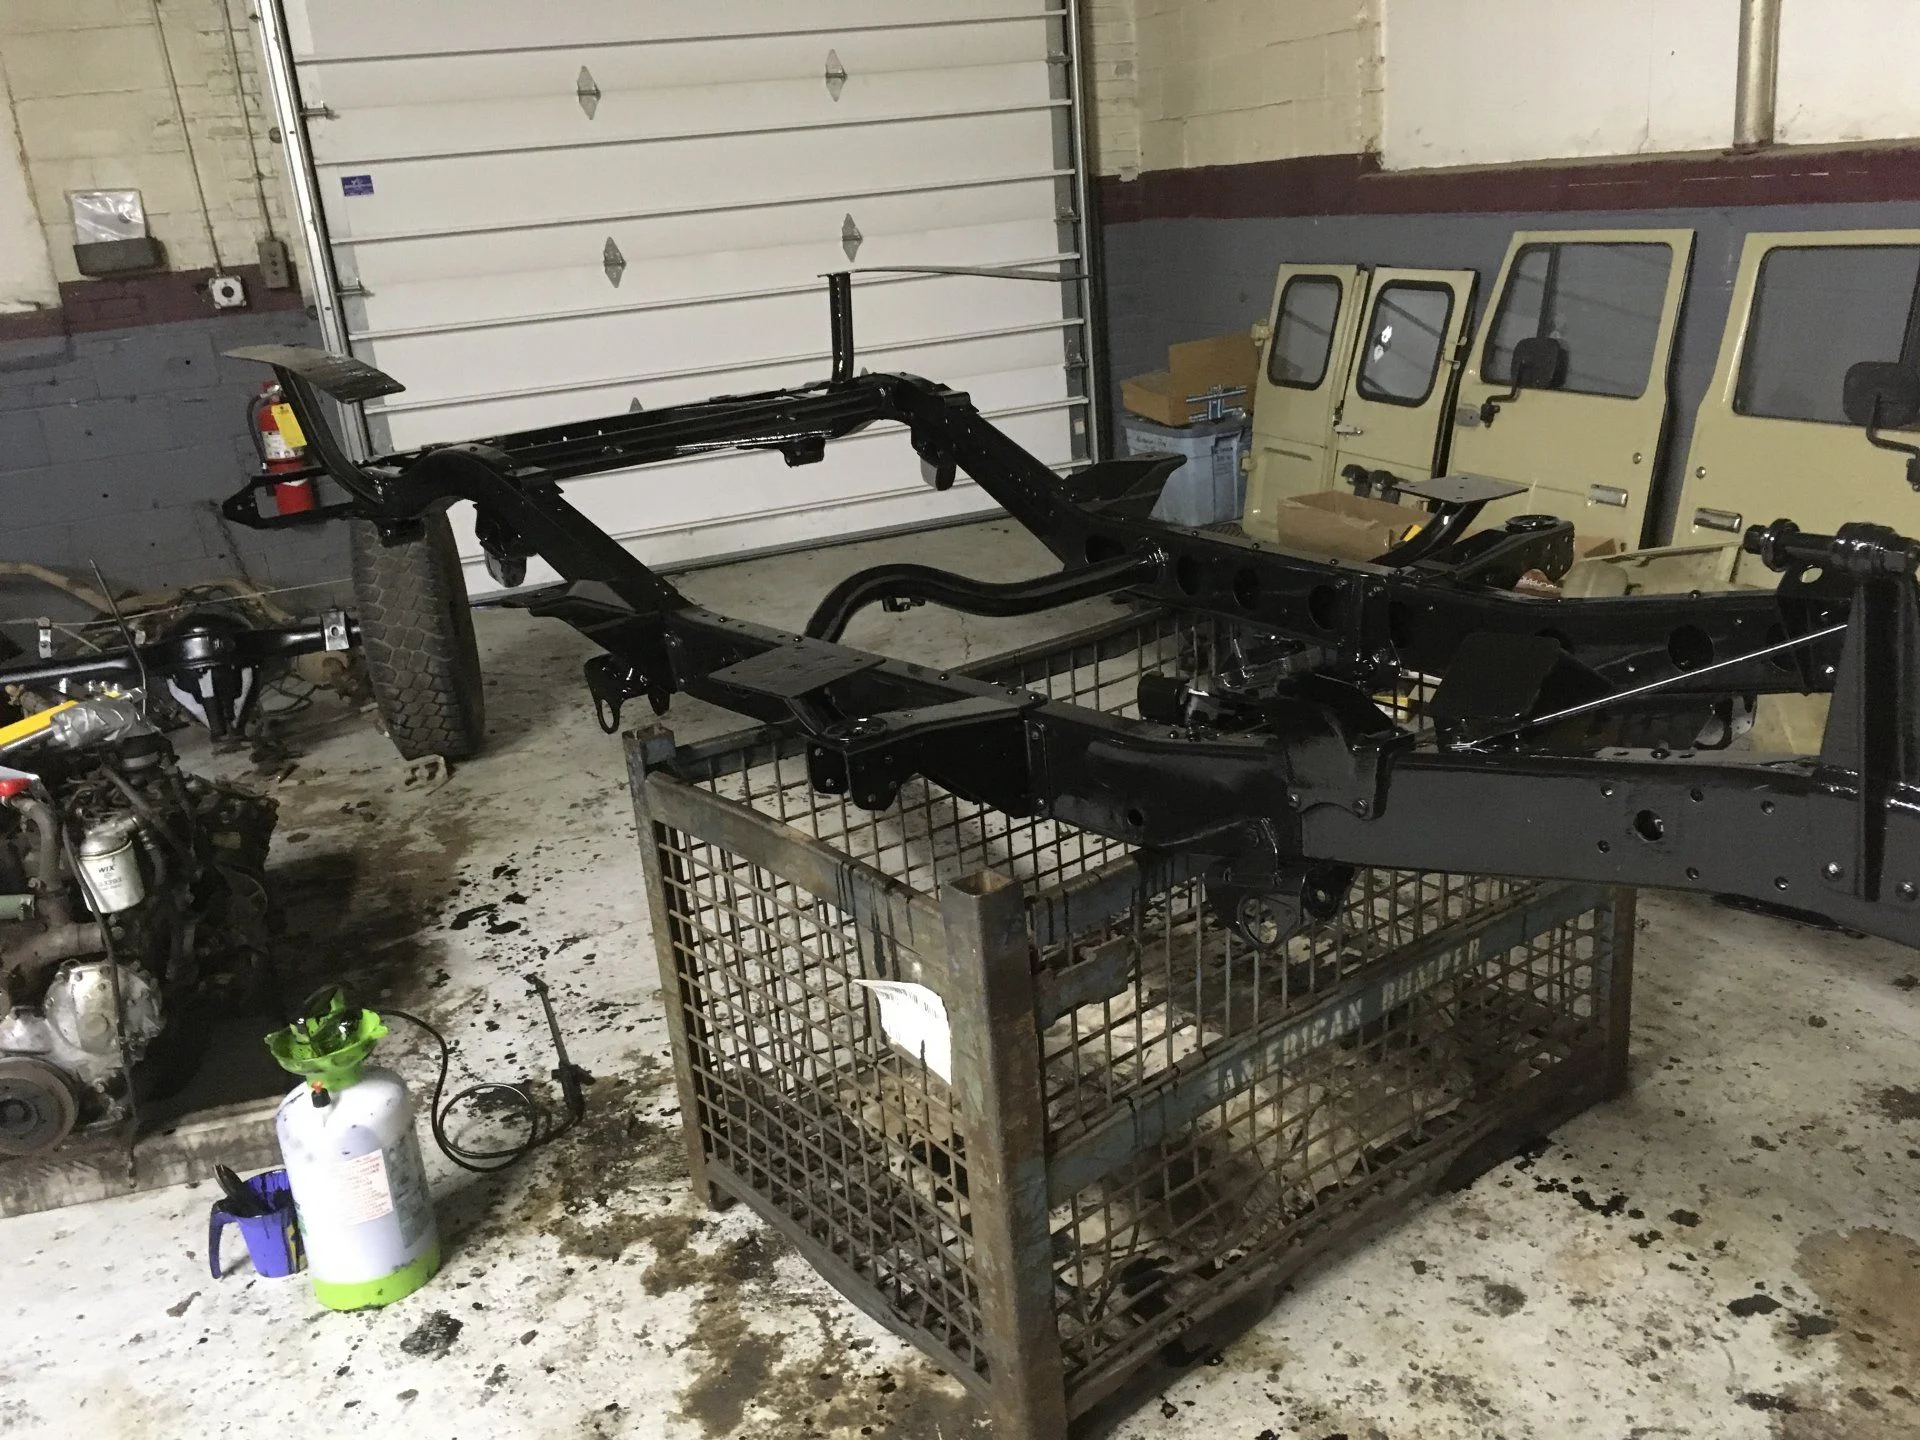
So that's where we're at as of tonight. Coat 2 of POR-15 will probably happen this weekend, then we start putting this malarkey back together. (Hopefully)
First we took a collection of parts to the local sandblaster. Here's what we got back:
rear step, bumperettes, radiator frame and fan housing, front fender supports, battery tray, skid plates, and light guards, all cleaned.
And here they are after a couple coats of POR-15
Then we pulled the motor and transmission off the frame, stood back, and asked ourselves what we had gotten ourselves into.
Here's an up-close shot of the engine on its blocks. I'm just including it 'cus I like the nitty-gritty pictures.
Not shown: the part where we pulled the front axle and steering gear off and took the bare frame to the sandblaster.
Shown: the unparalleled sexiness of a sandblasted frame that doesn't need any major work.
mmmmmmmm...
That's all the developments through yesterday.
This evening we got the first coat of POR-15 on the frame.
So that's where we're at as of tonight. Coat 2 of POR-15 will probably happen this weekend, then we start putting this malarkey back together. (Hopefully)
- Thread starter
- #29
@SuperDuperCruizer Sorry, I forgot to grab a picture for you while I was working. I'll try to get you some good pictures on Saturday.
@SuperDuperCruizer Sorry, I forgot to grab a picture for you while I was working. I'll try to get you some good pictures on Saturday.
You've already helped out with your recent engine picture. I see a plug in the block where the factory power steering bracket would bolt up. Mine has a pipe. I'm trying to sort out the fuel filter housing and the metal coolant pipe that bolts to the fan shroud. Do you have a temp sensor on the coolant pipe? For the fuel filter housing, I think I'm supposed to have a bleeder valve but the previous owner rigged a line up for the gauges and may have swapped a few things around in the process. No hurries though... I'm picking up a modified 3B radiator today from the shop and I still need to get the gas tank ready before I try to fire up the engine again.
Are you spraying por-15 on it or is this with a paint brush?
problem solvedwould love If these factory rims were 16s that would be the exact size I would have
Cant use 16' split rims because I love the center caps so much lol
")
16" Wheels / Rims for Land Cruiser FJ40 FJ45 FJ60 70 Series
- Thread starter
- #33
@nfs56 some of both. The small metal bits were HVLP sprayed, but the frame has been a combination of brushing and using a harbor freight garden sprayer to squirt paint inside the frame rails.
- Thread starter
- #34
Well, I'm back. I've been working on the truck a fair bit, but not much that was worth its own update for. We got the frame fully painted with a couple coats of POR-15, so now the project officially turns the corner towards putting all this madness back together.
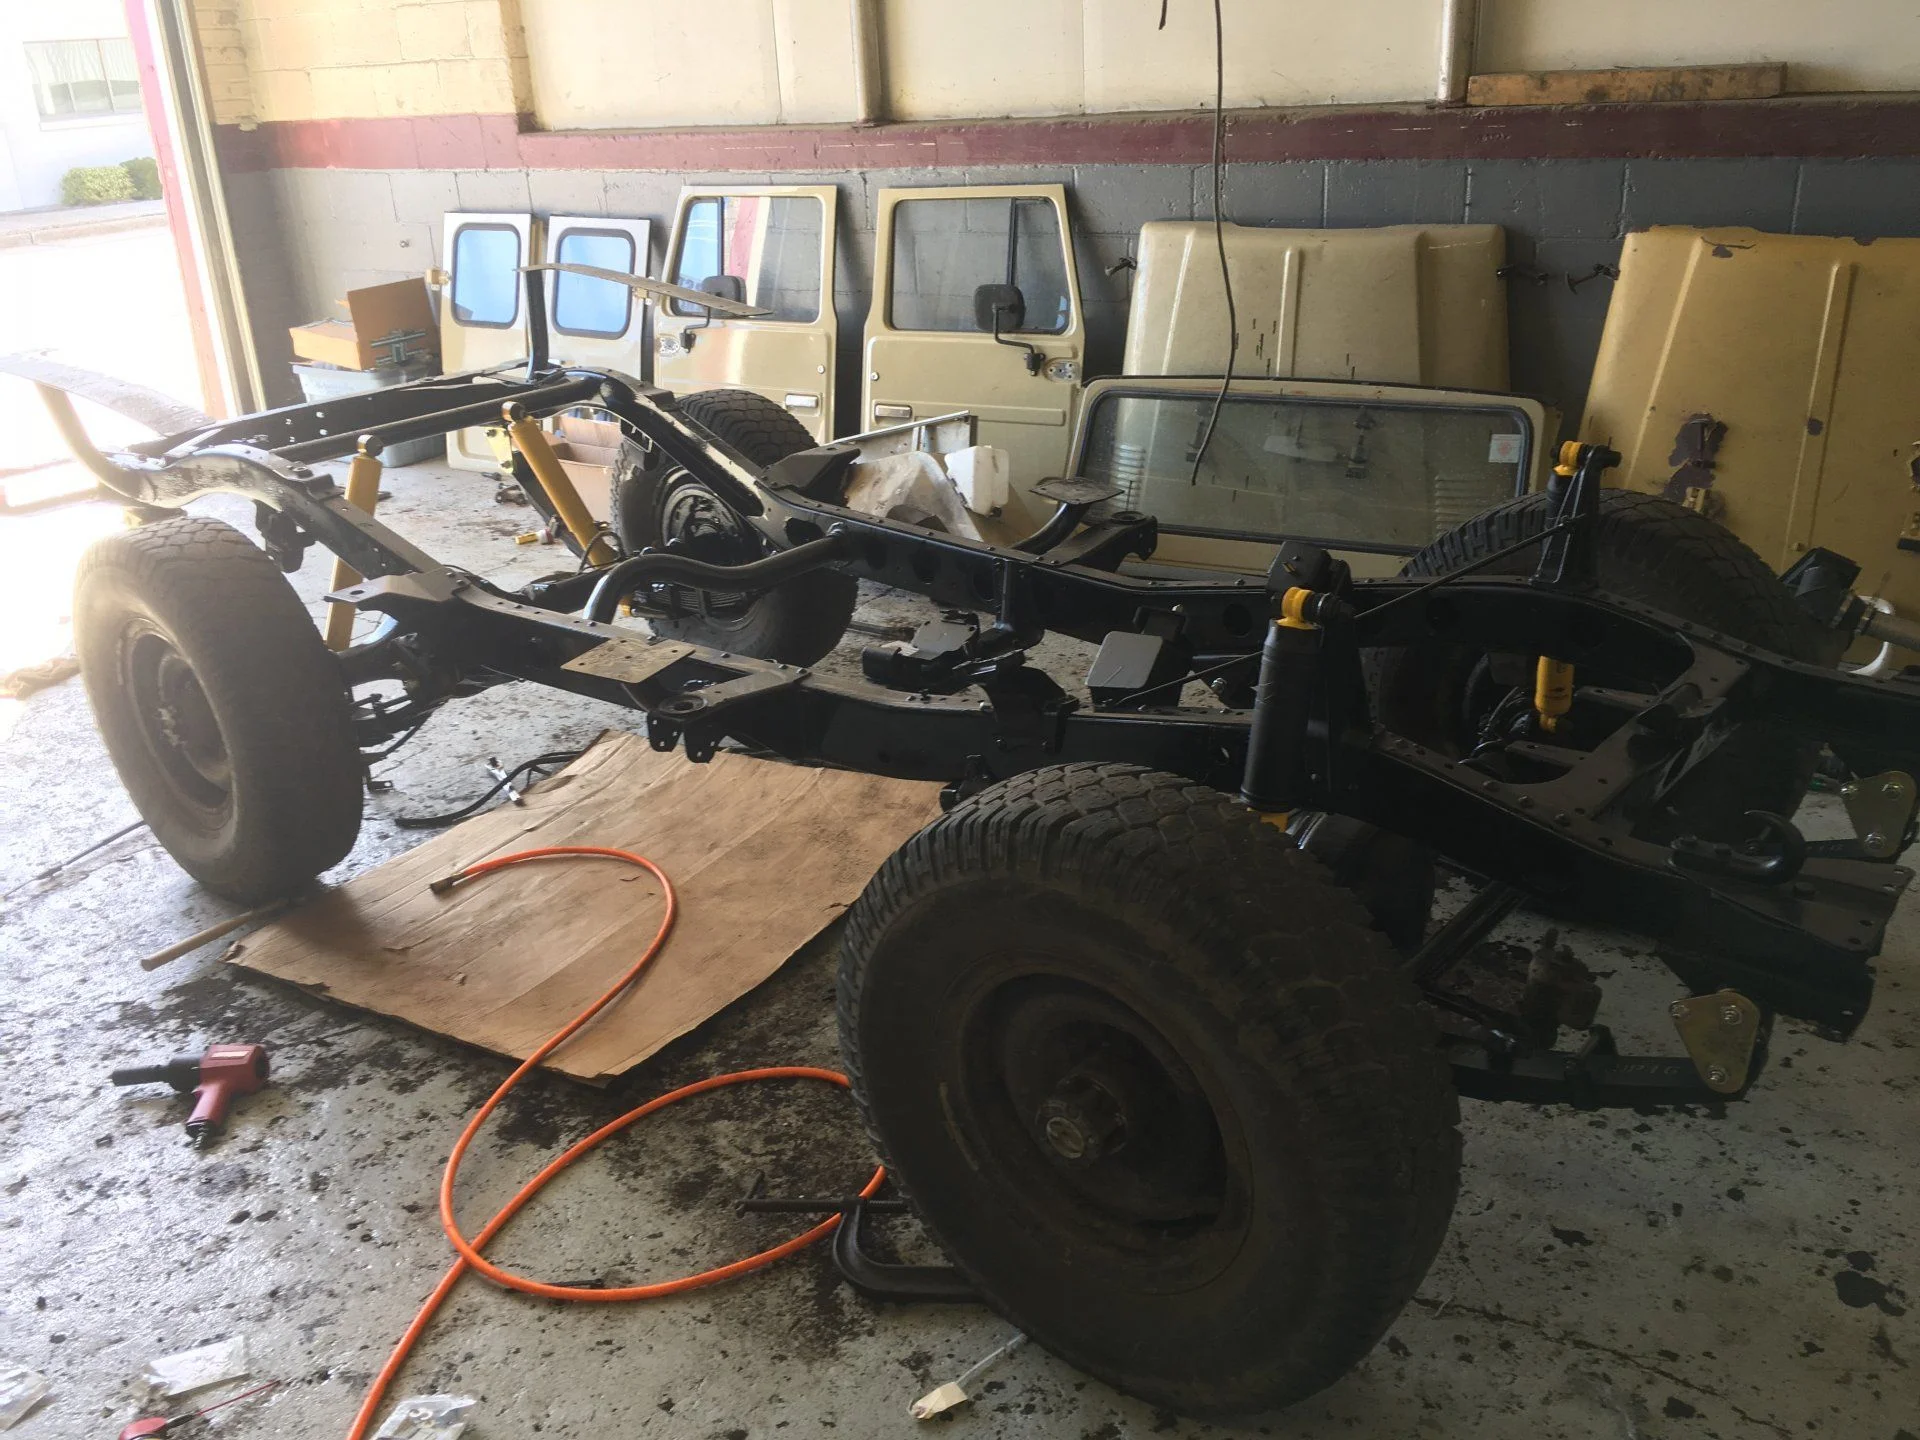
Here we have the front Old Man Emu springs, shocks, shackles and pins installed. (Tuesday night)
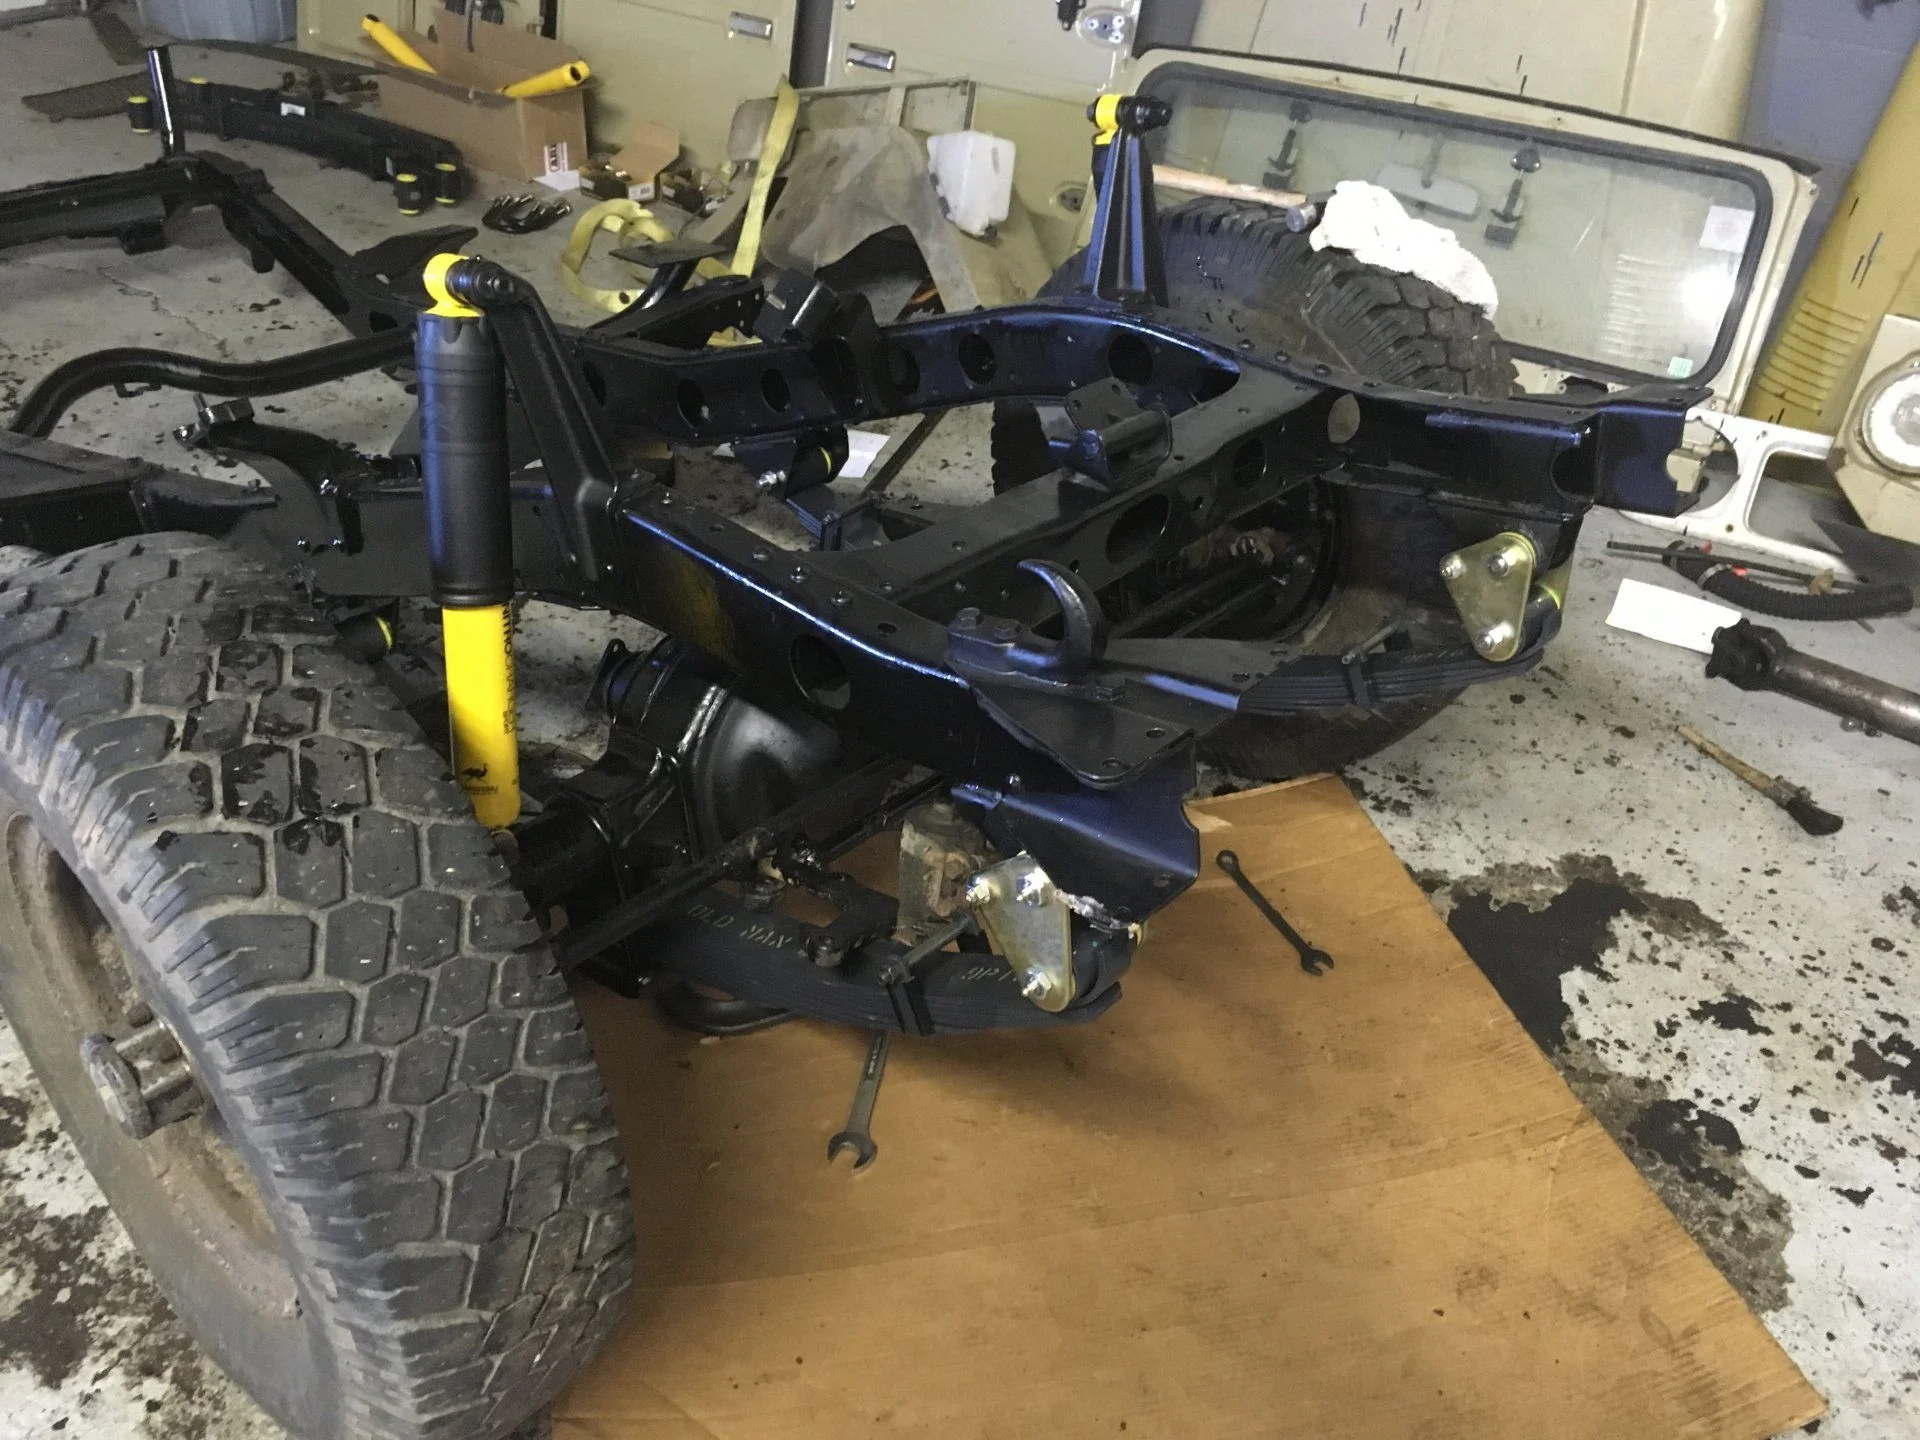
And a quick close up of it

Then, on Friday, a pretty heavy box got delivered.
Which I of course had to completely unpack.
Couldn't really do anything with them yet though, so on Saturday, we got back to suspension.

All installed!
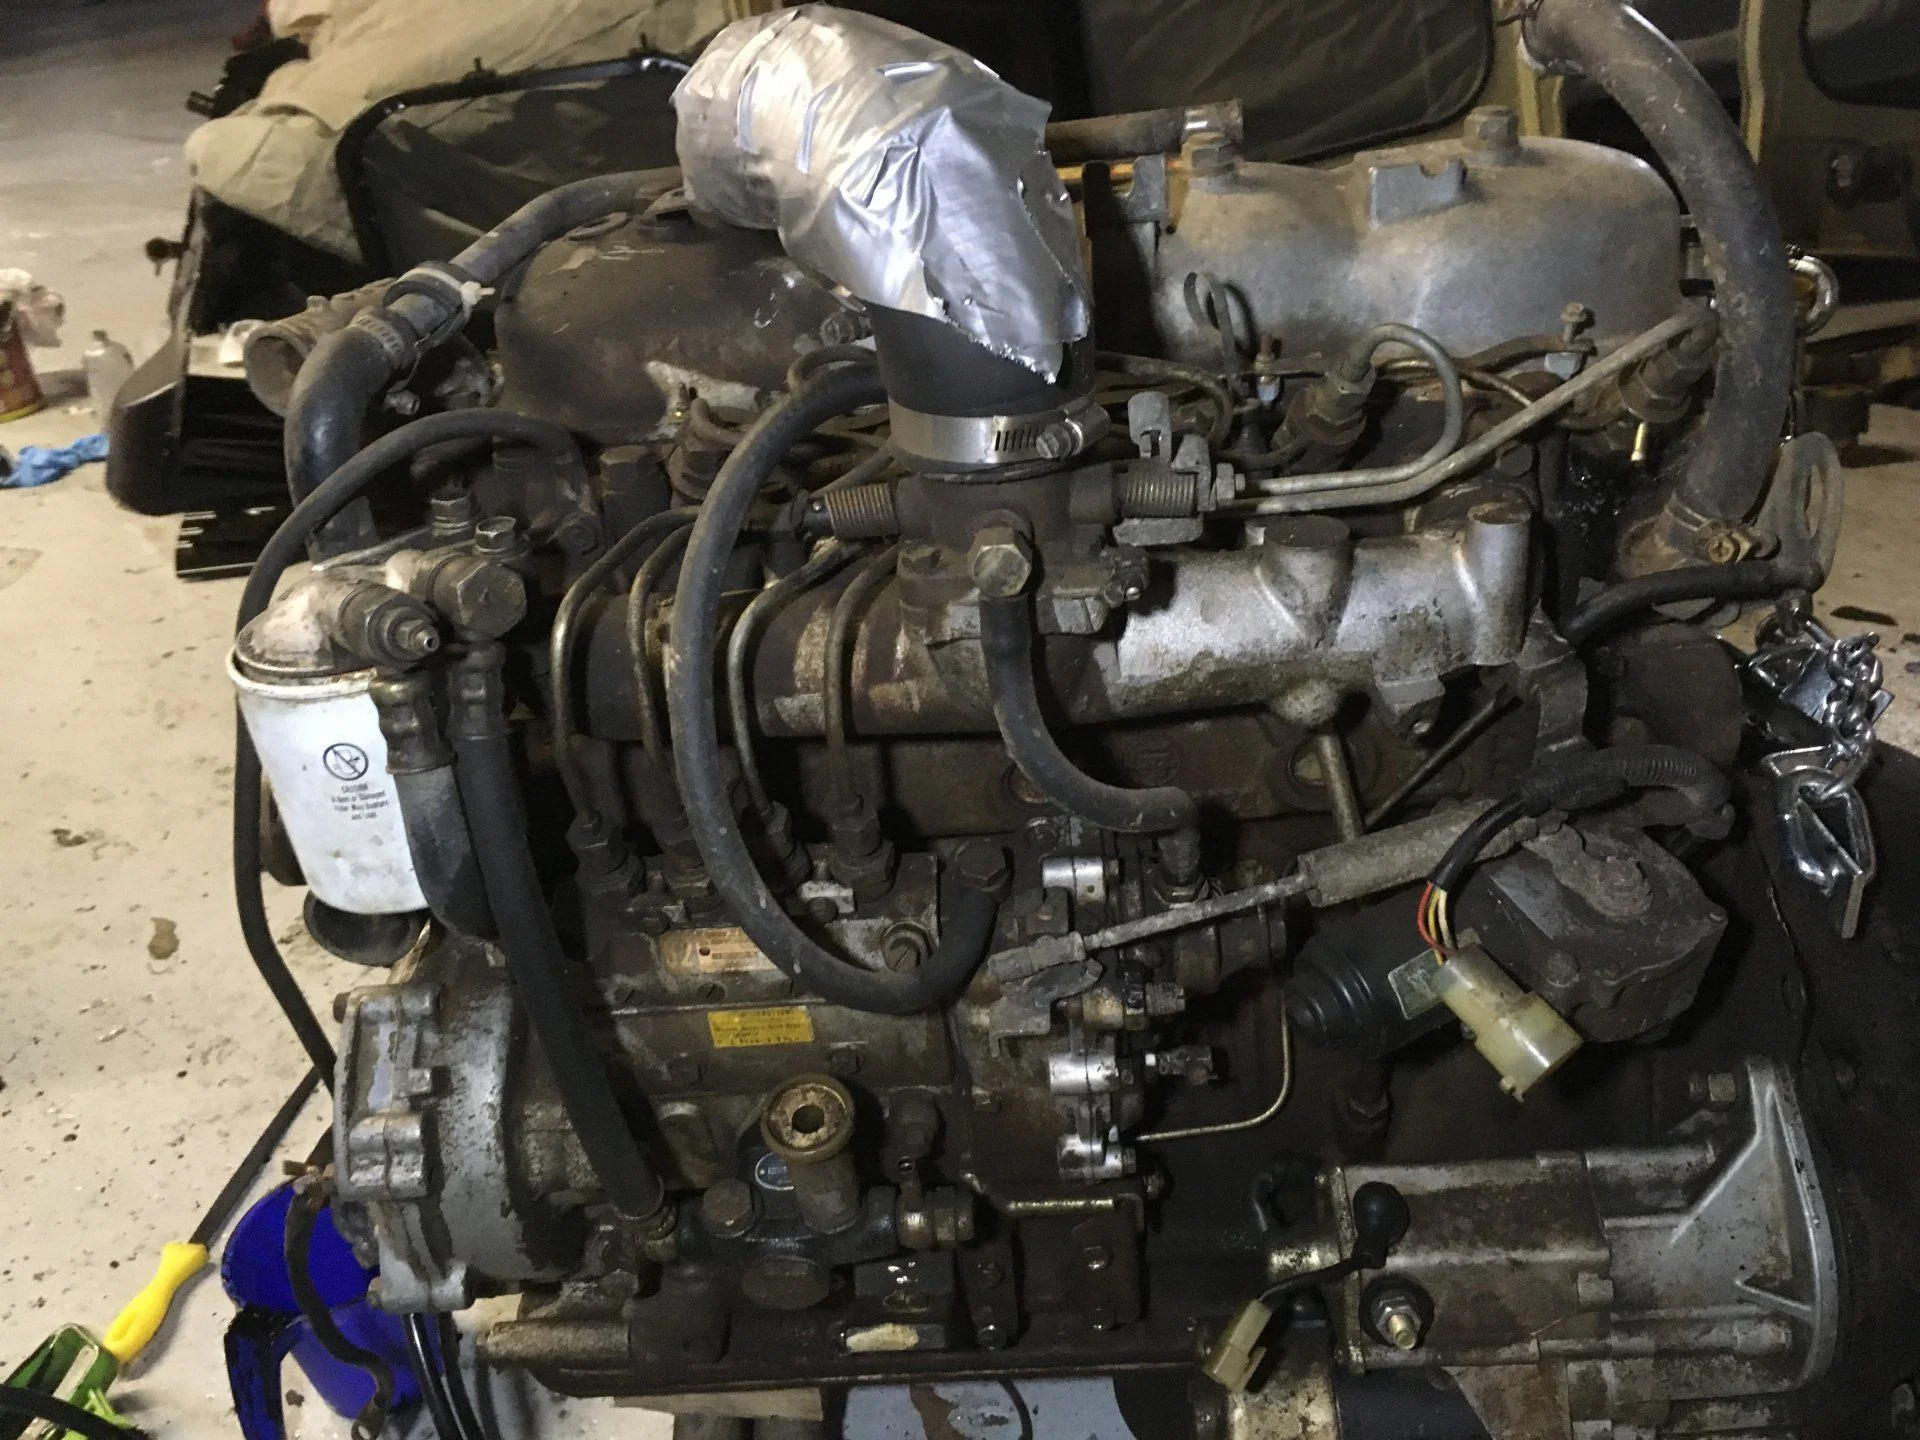
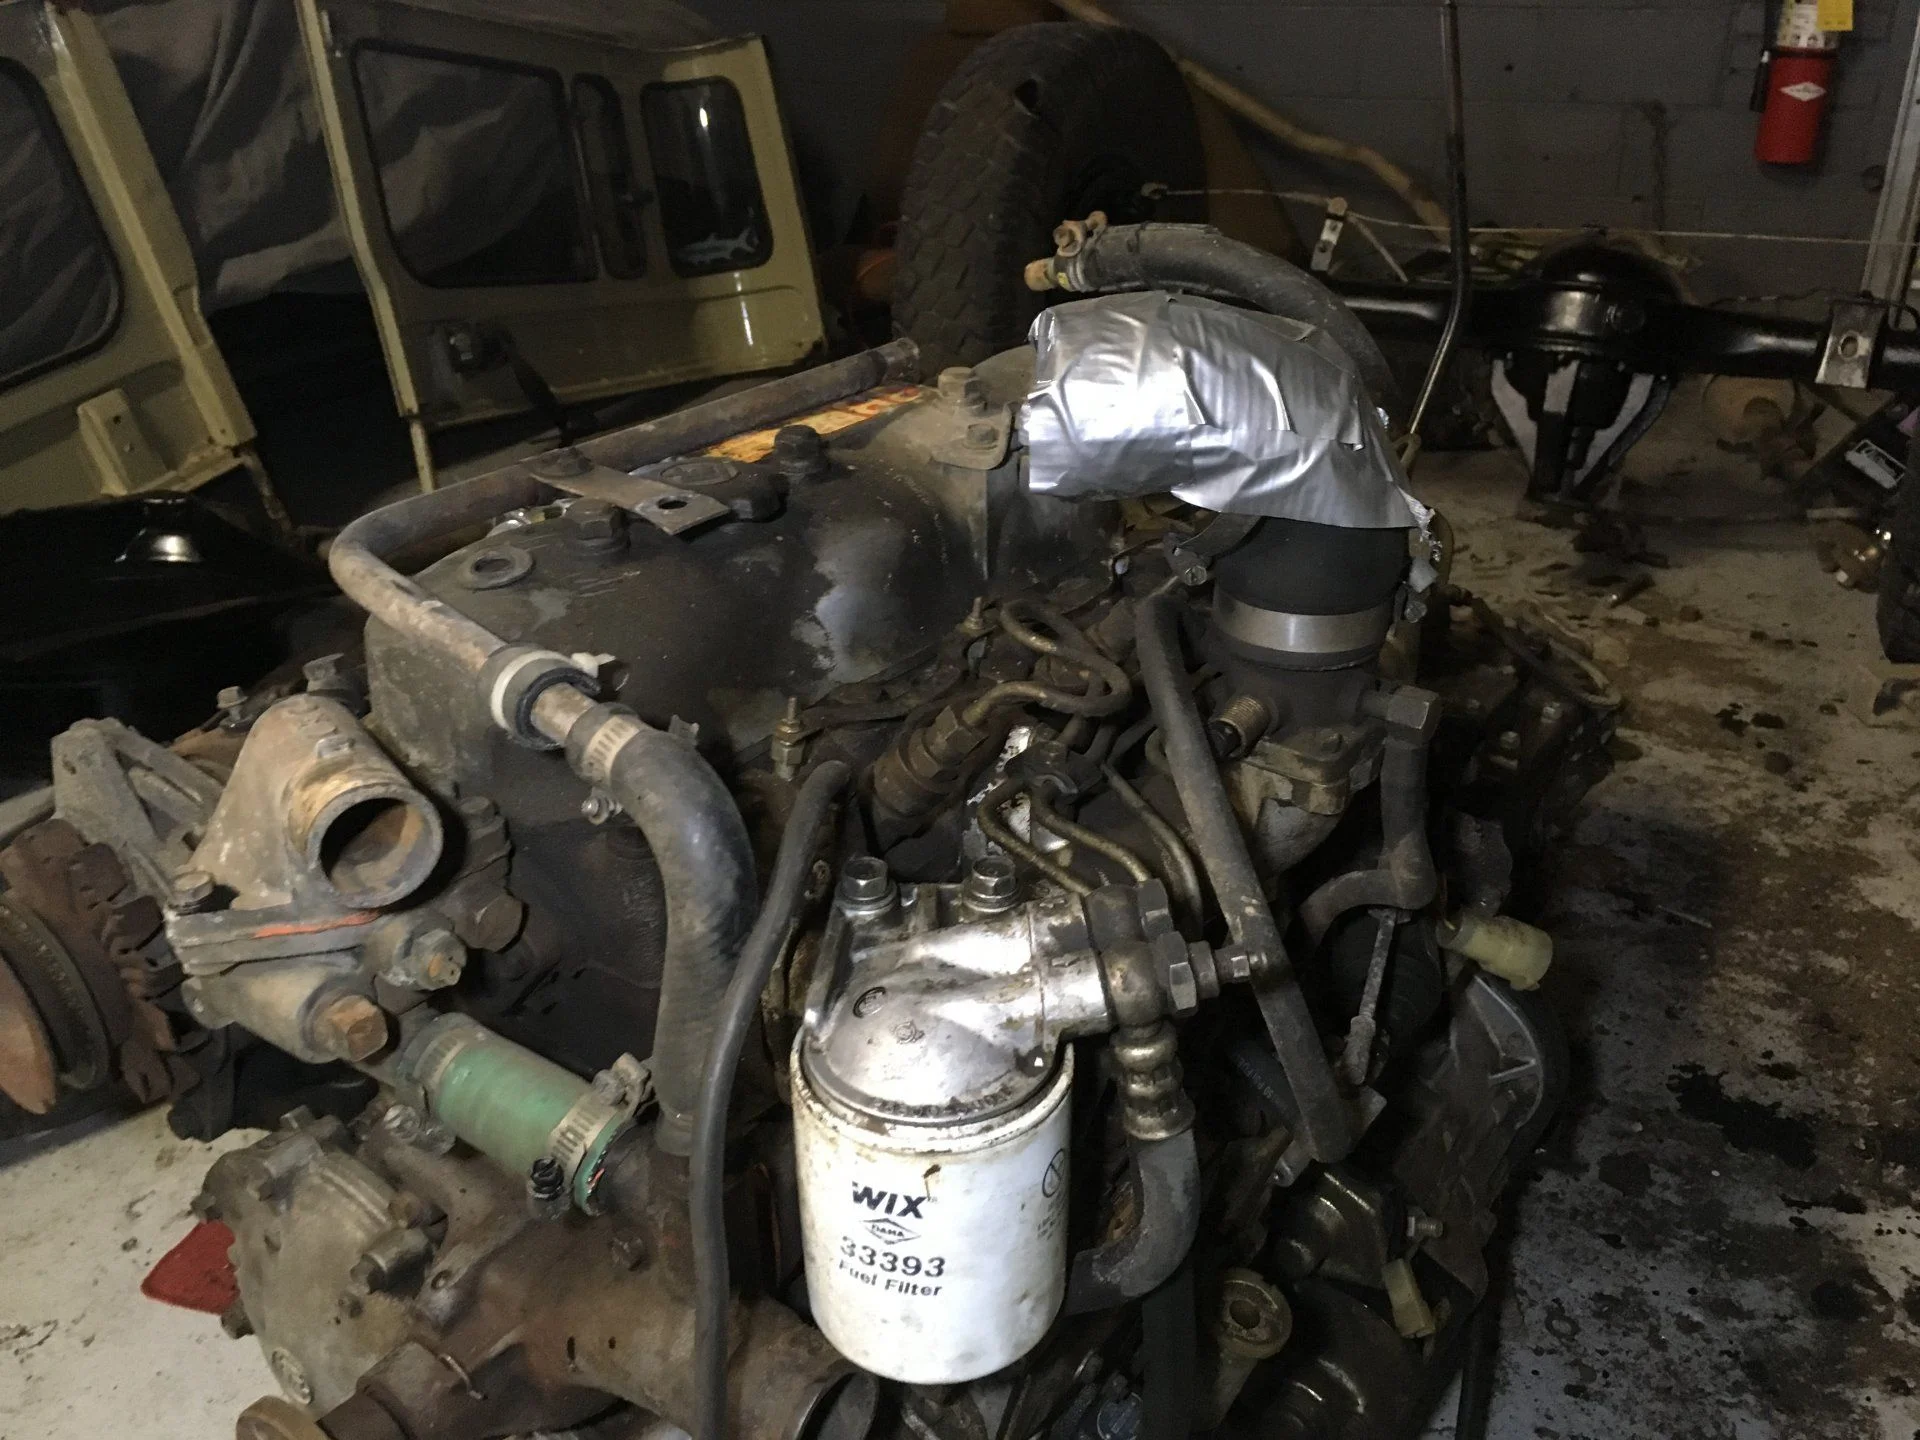
Then we decided that we were still on a roll, so dad and I got the engine reattached.
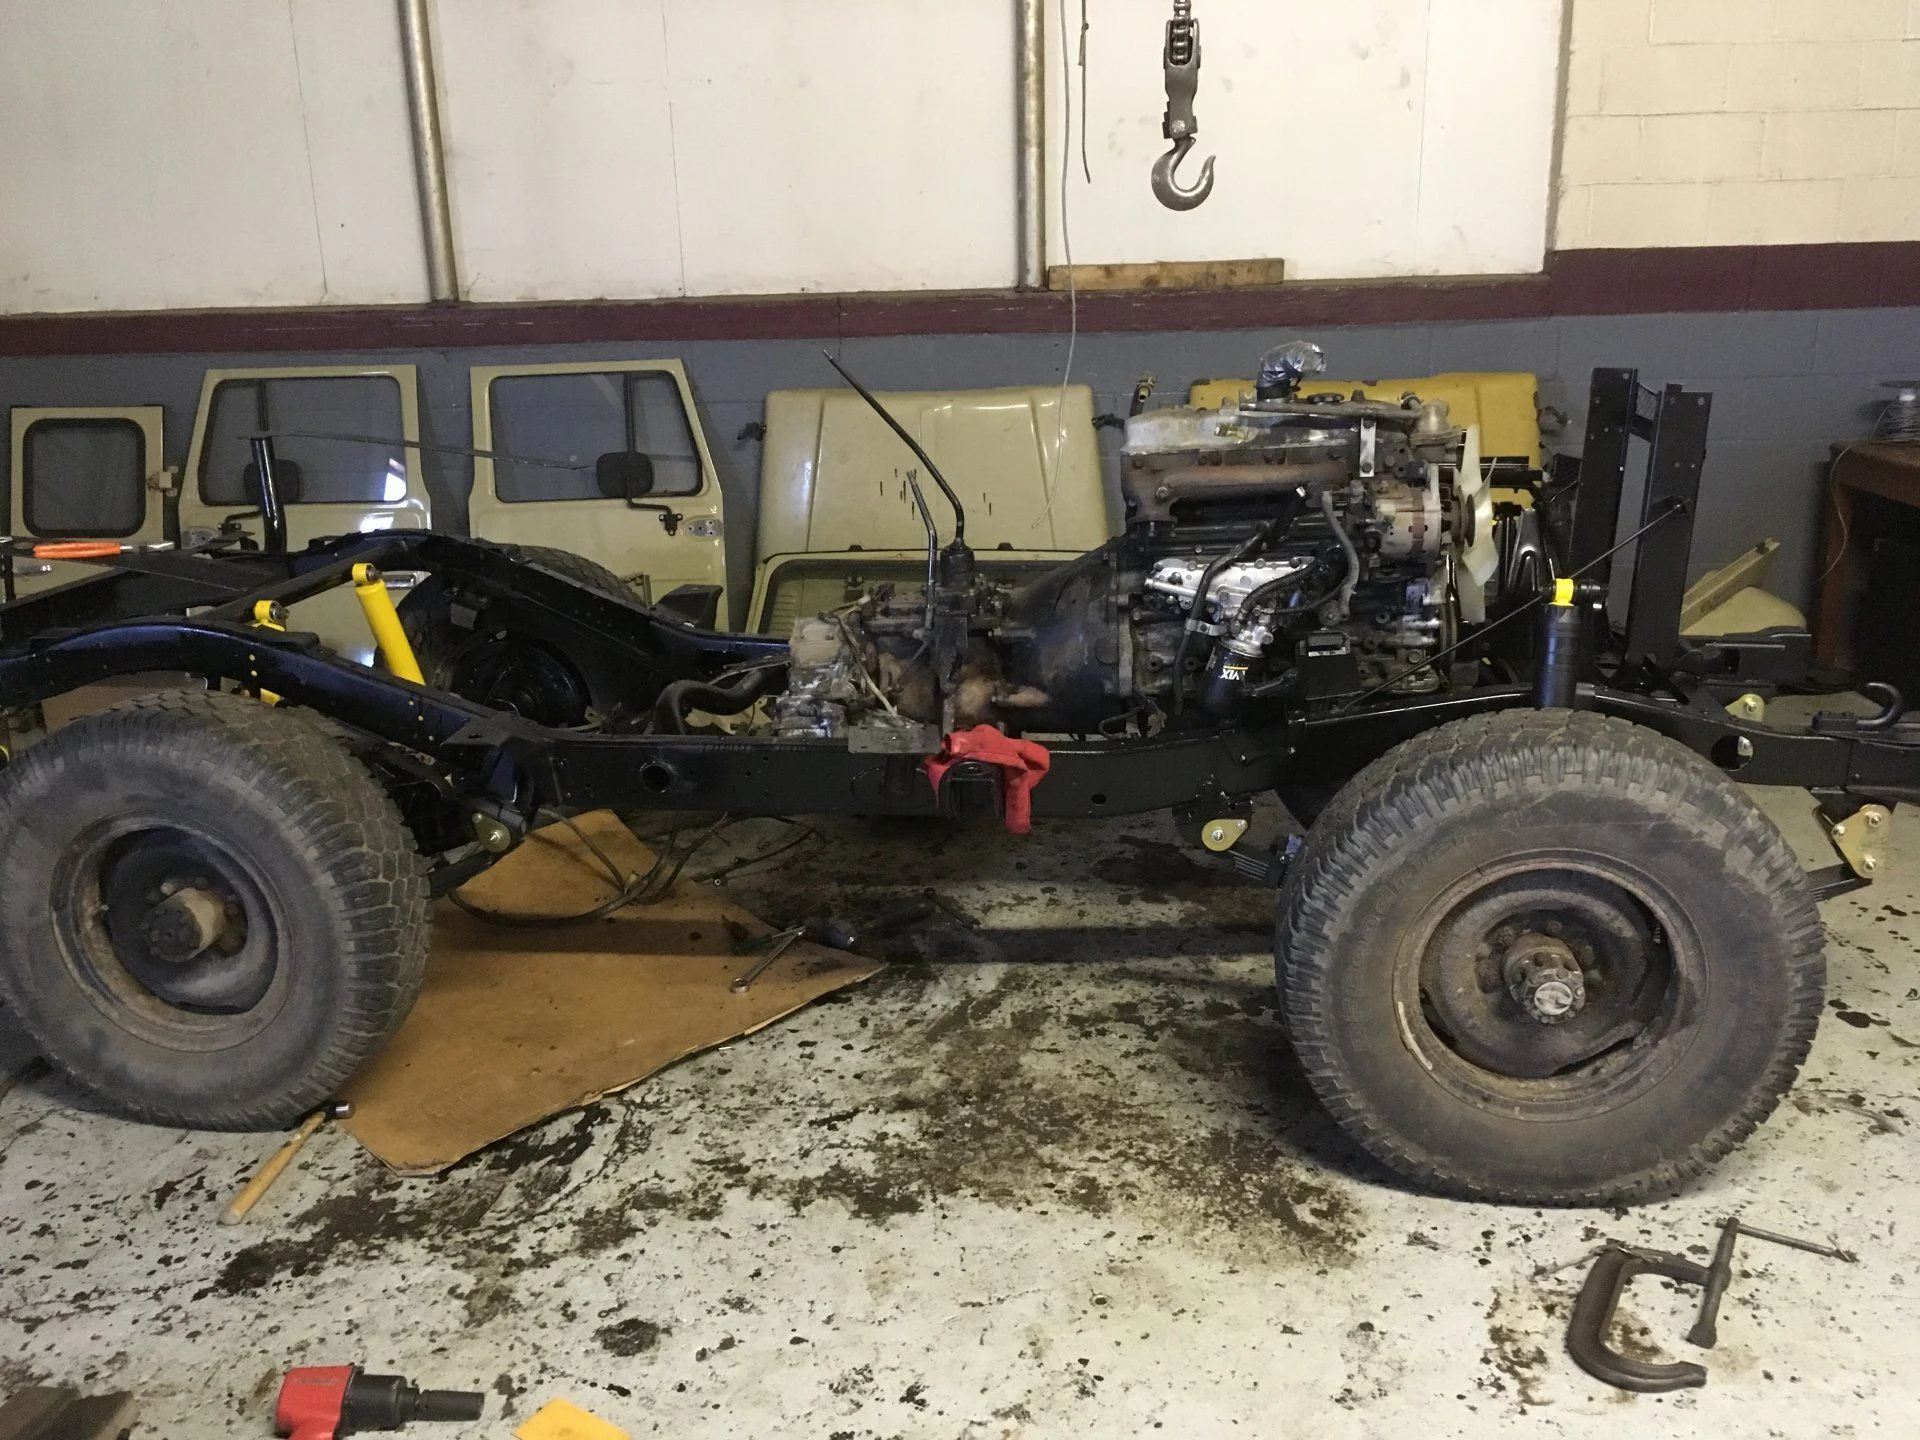
Finally, here are the much-delayed pictures of the engine that @SuperDuperCruizer was asking about
Here we have the front Old Man Emu springs, shocks, shackles and pins installed. (Tuesday night)
And a quick close up of it
Then, on Friday, a pretty heavy box got delivered.
Which I of course had to completely unpack.
Couldn't really do anything with them yet though, so on Saturday, we got back to suspension.
All installed!
Then we decided that we were still on a roll, so dad and I got the engine reattached.
Finally, here are the much-delayed pictures of the engine that @SuperDuperCruizer was asking about
Thank you sir... these pictures are very helpful.
God dam it those would be $2000 CDN by the time they got here for 5 dirty ole steel rims , they must be made of gold , they would be nice tho.
- Thread starter
- #37
Wow, it's been a bit too long... Sorry guys!
Updates are in order, I guess!
New wheels and tires were installed, and they look sick.
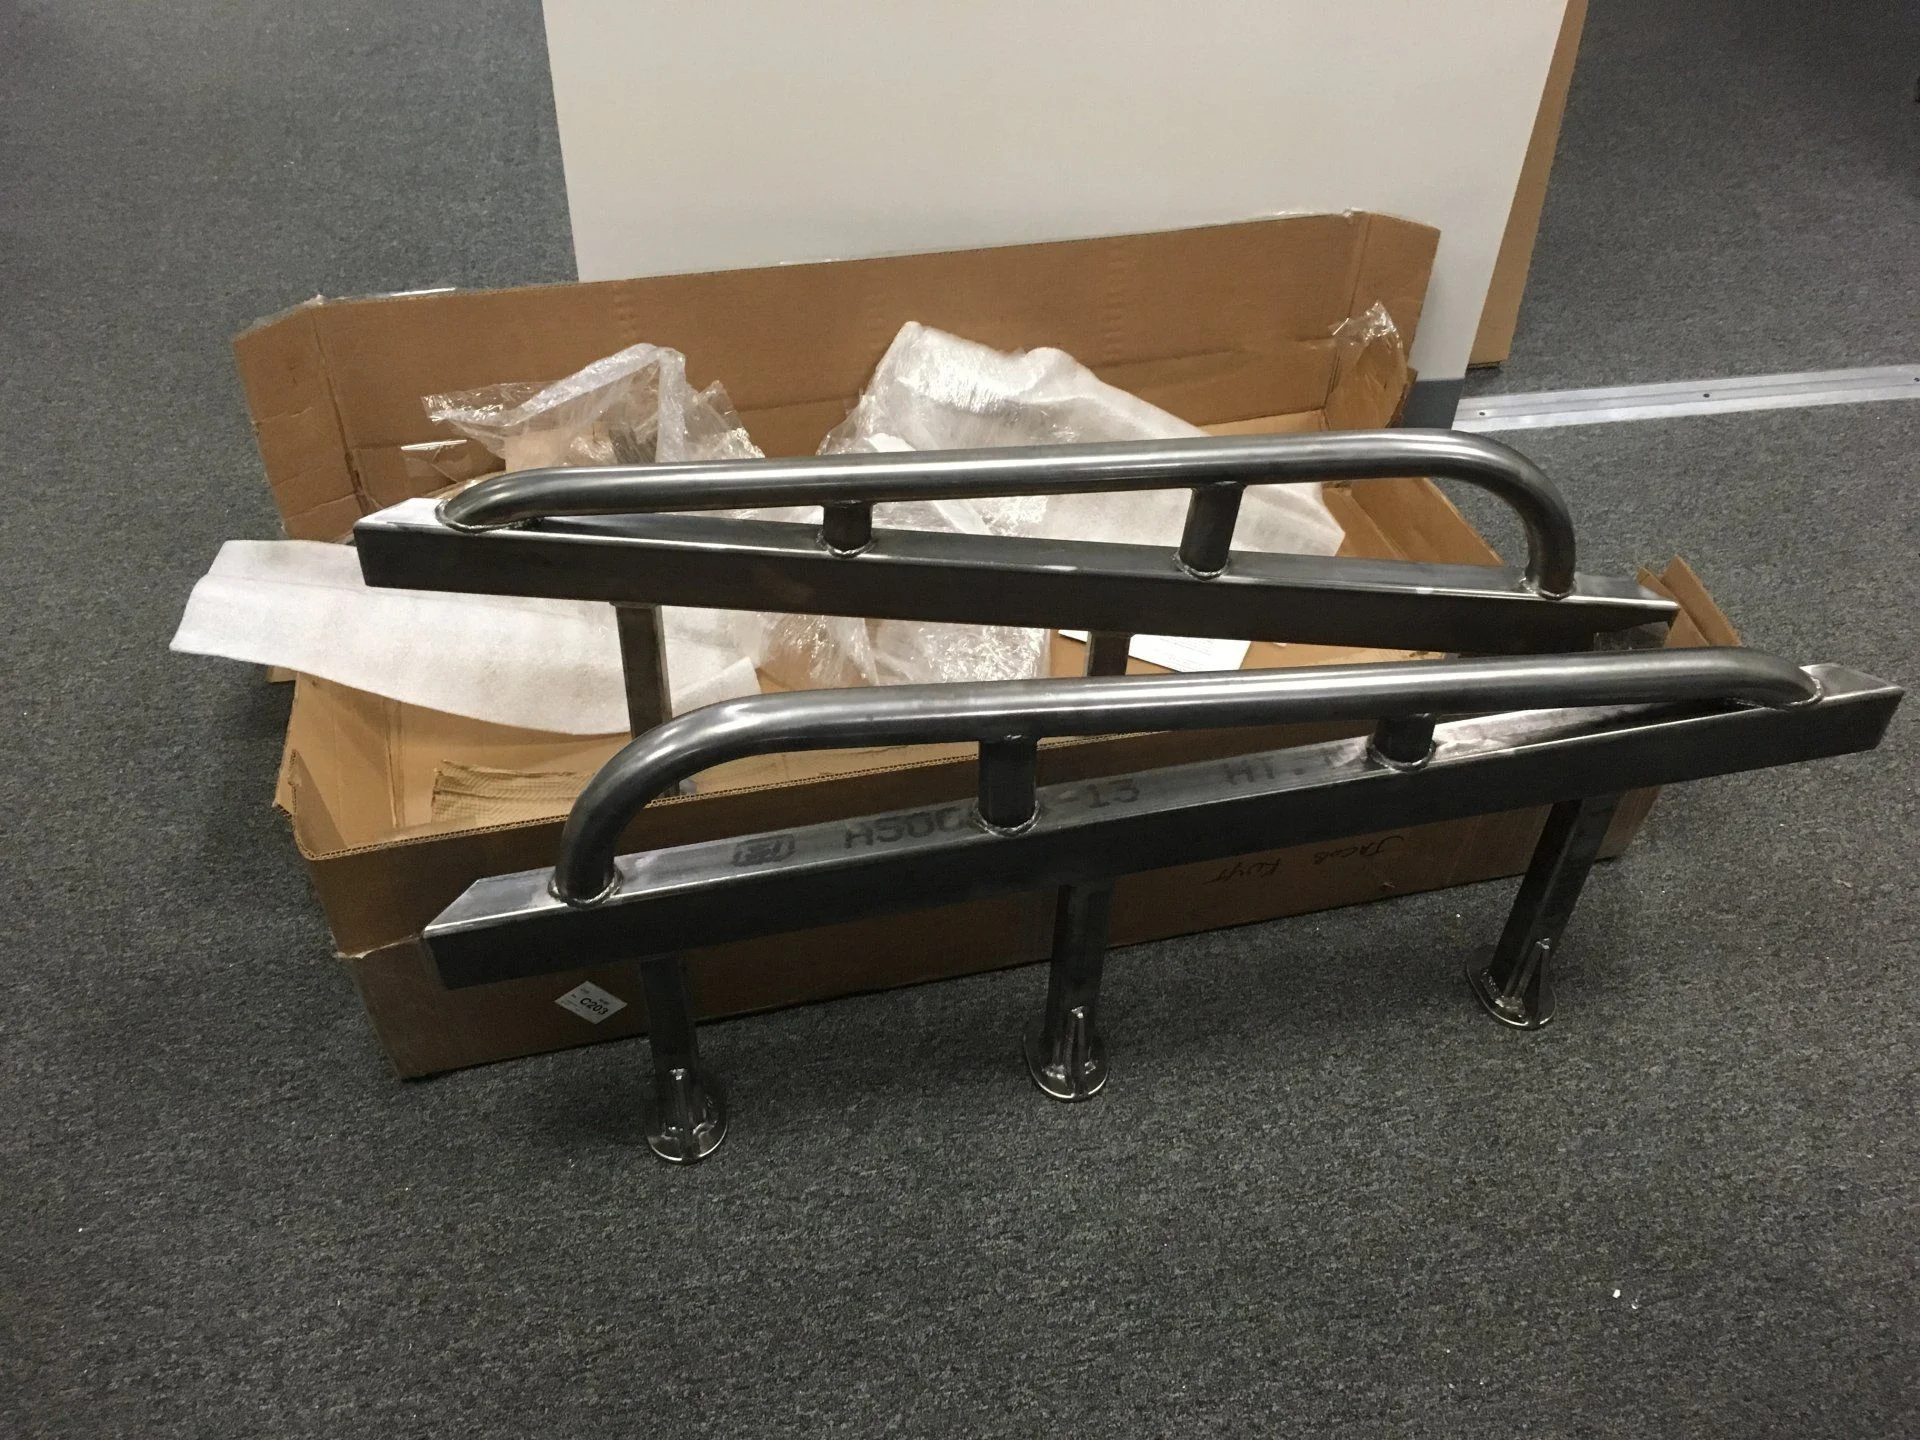
And then we (temporarily) reattached the fenders and tub, so we could get an idea of where the rock rails would go
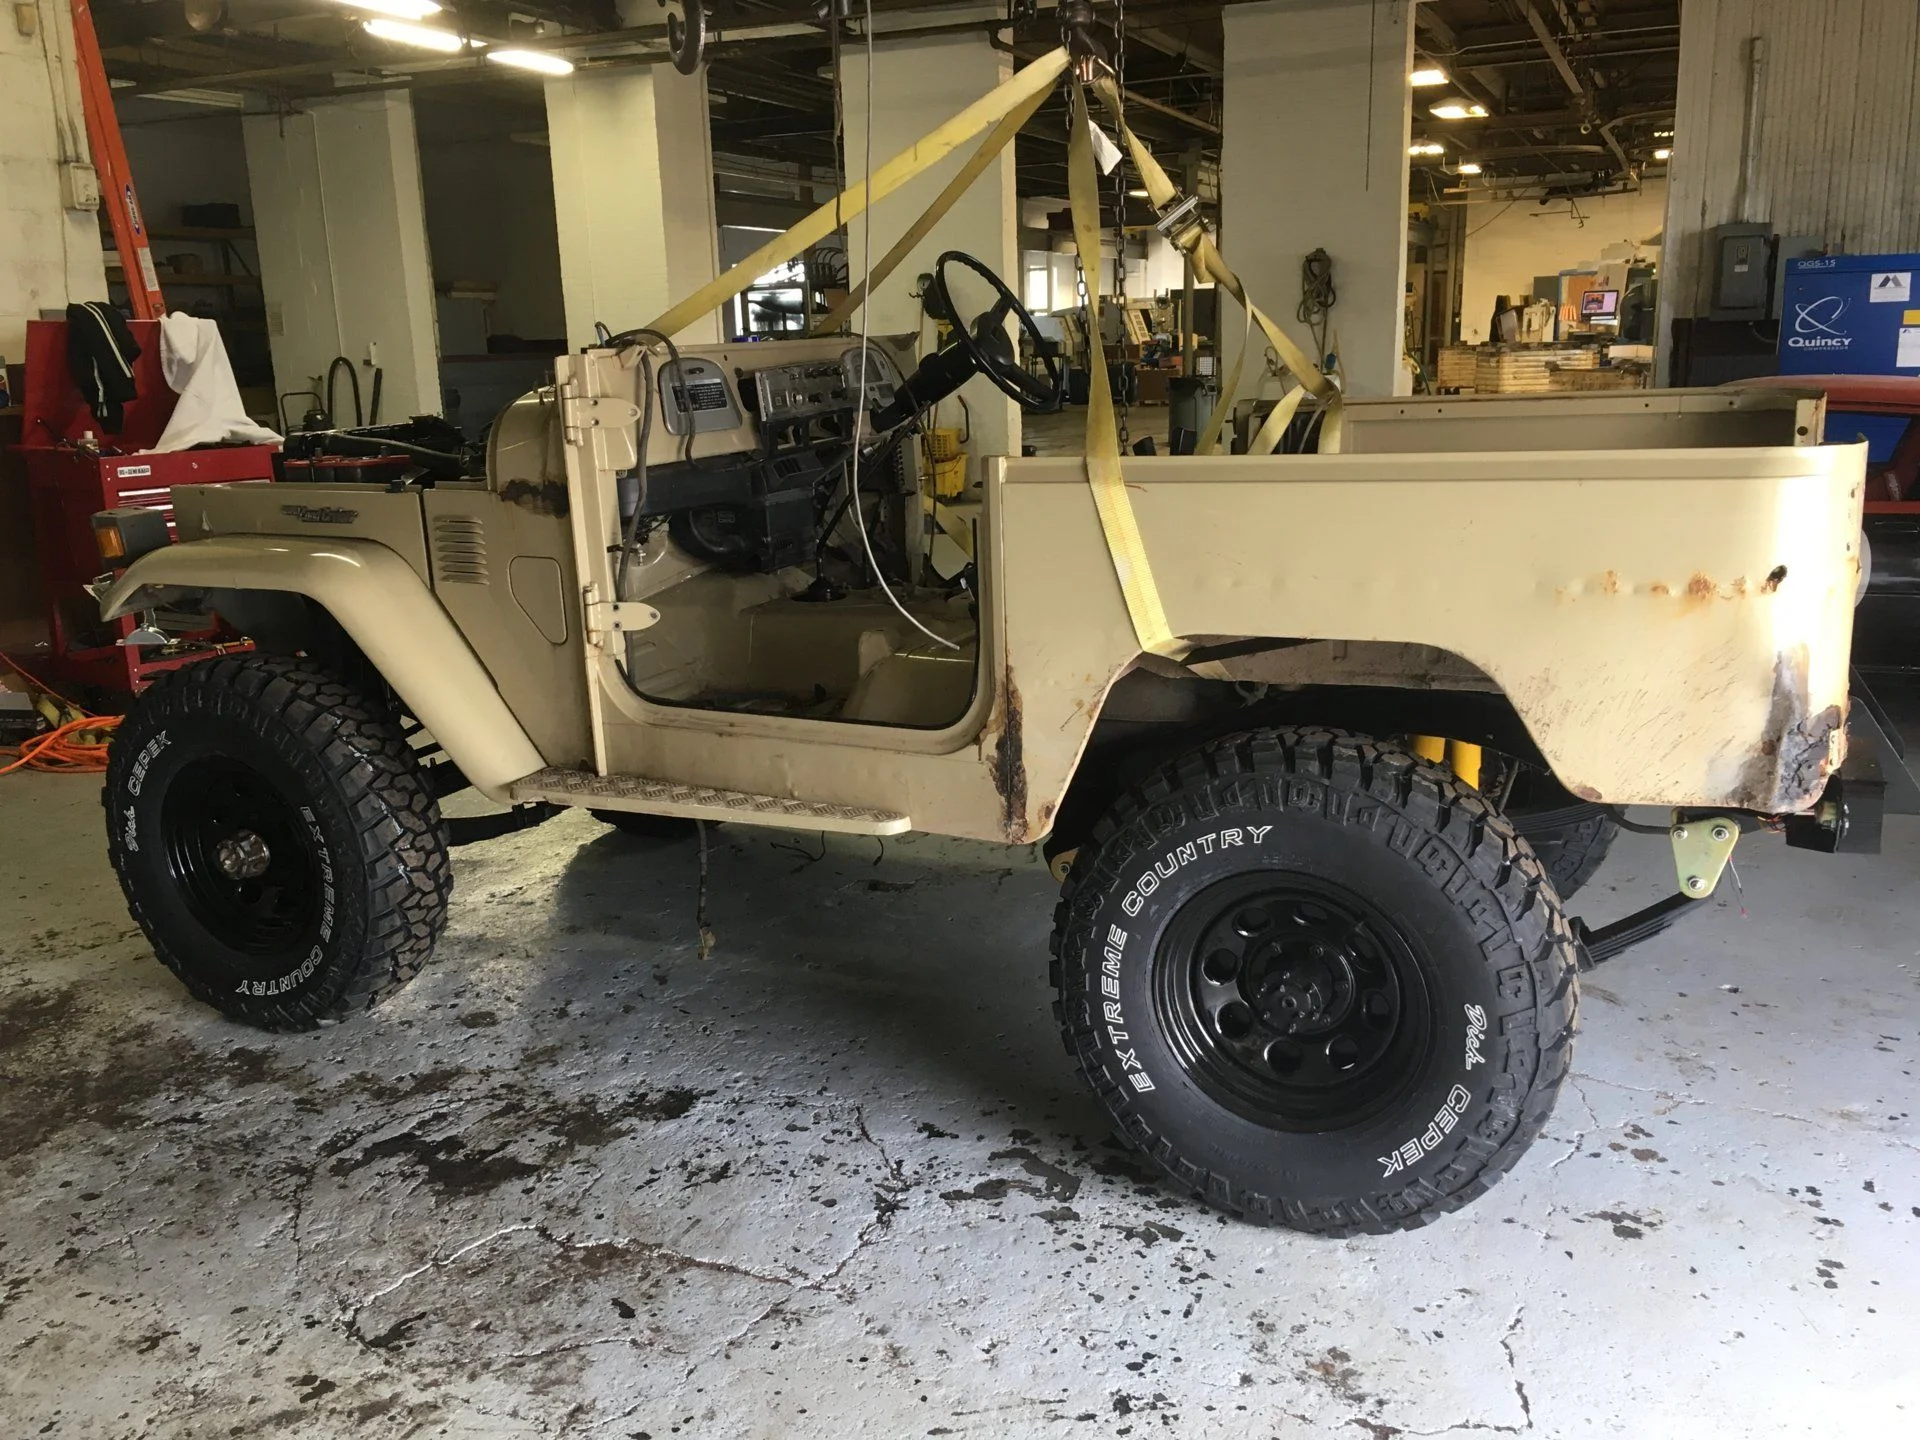
(wow, it almost looks like a working vehicle)
And here's the tub after getting taken off, and then put back on once the rock rails were welded on.
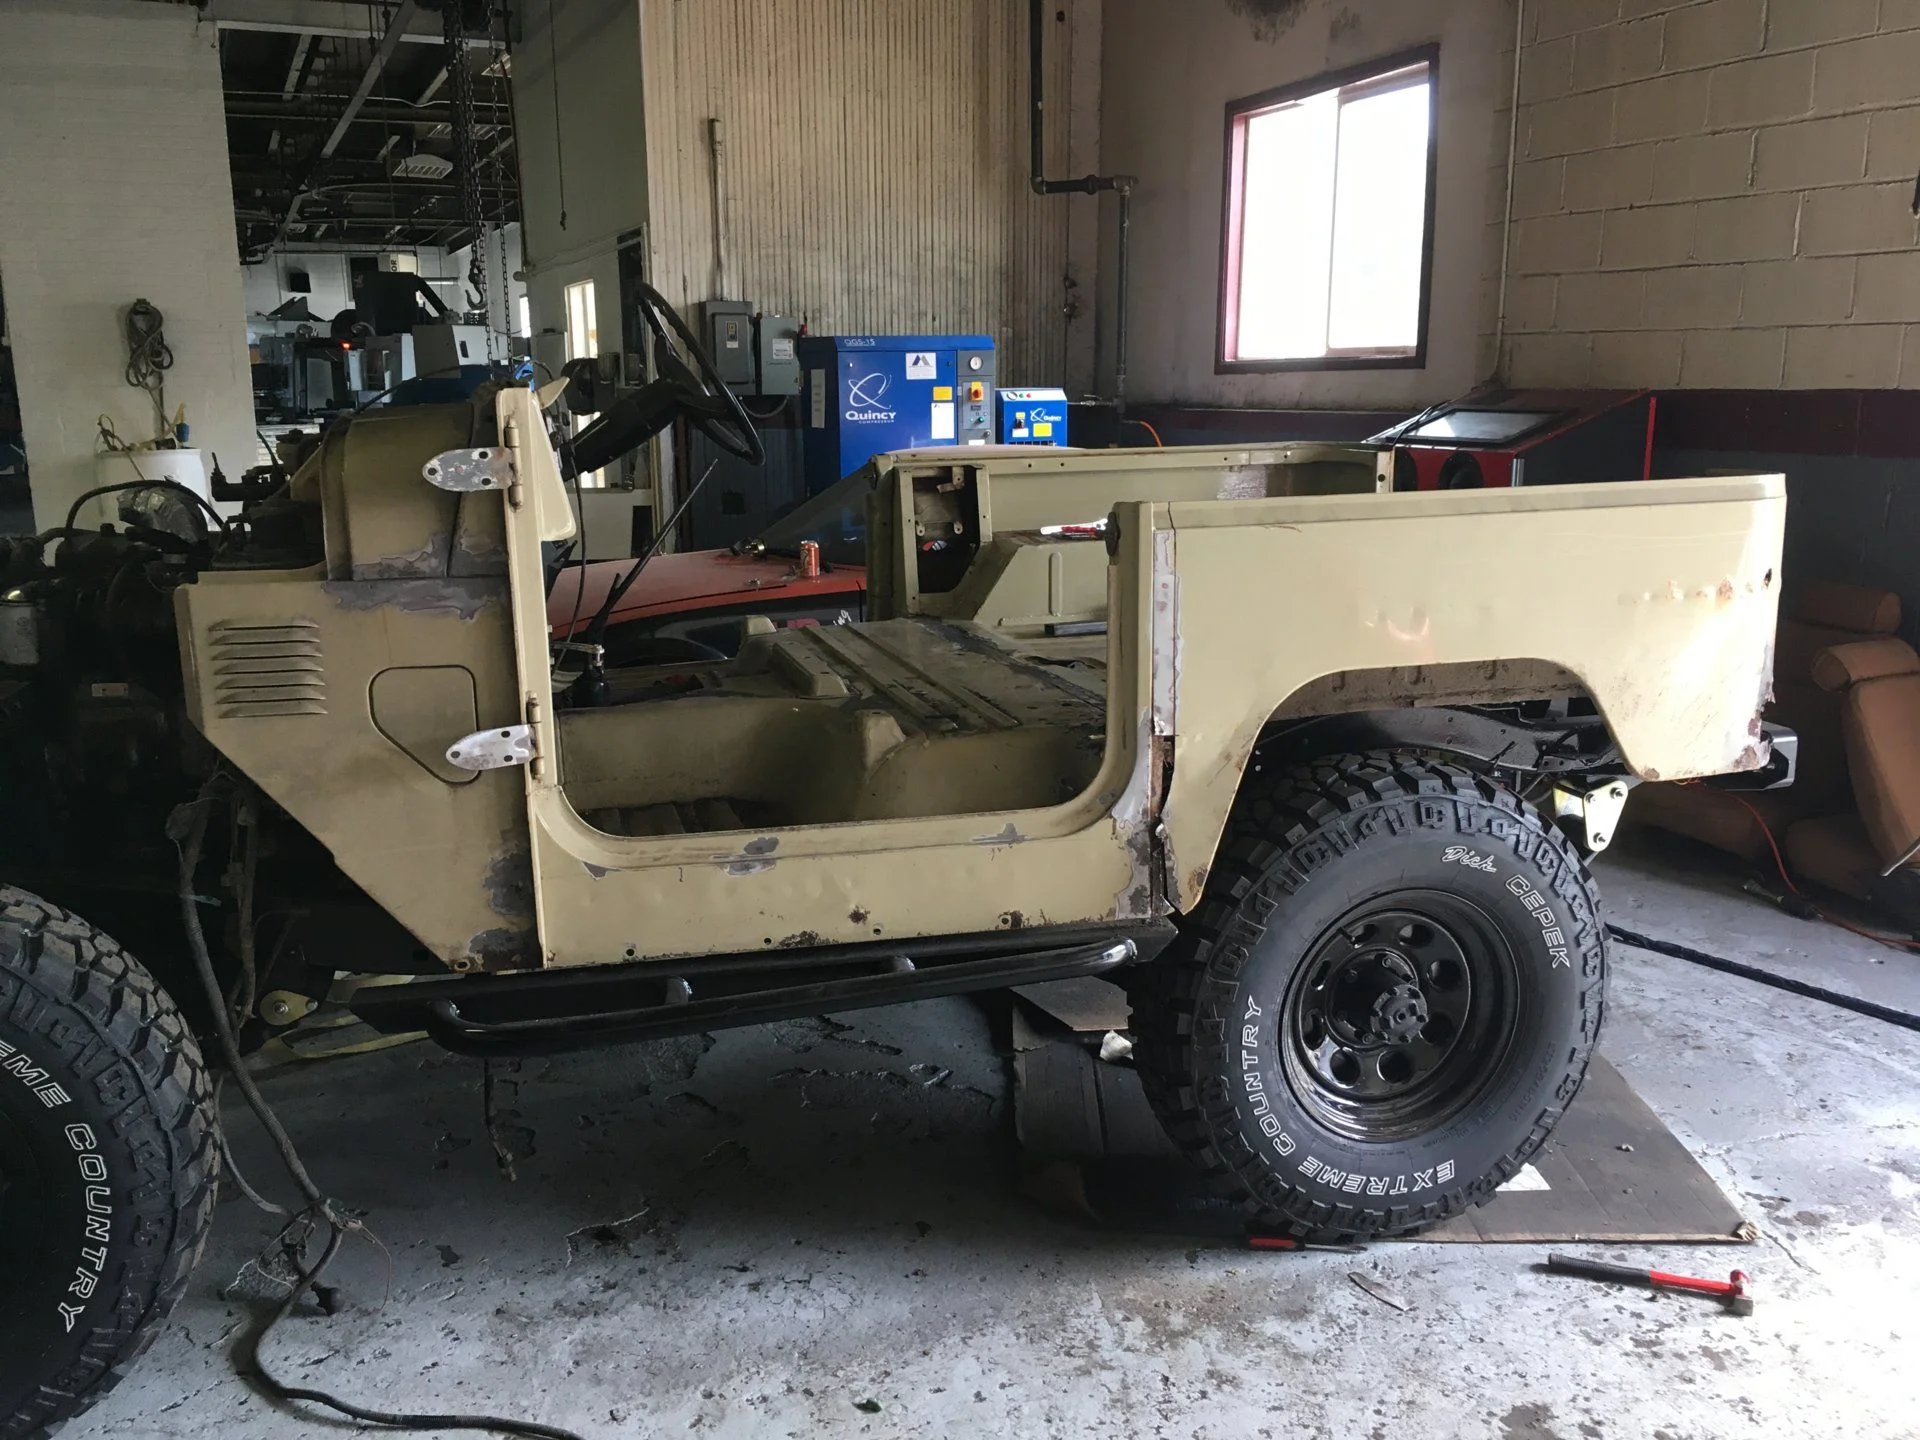
And then comes the really terrifying part where we start cutting metal off. Like this!
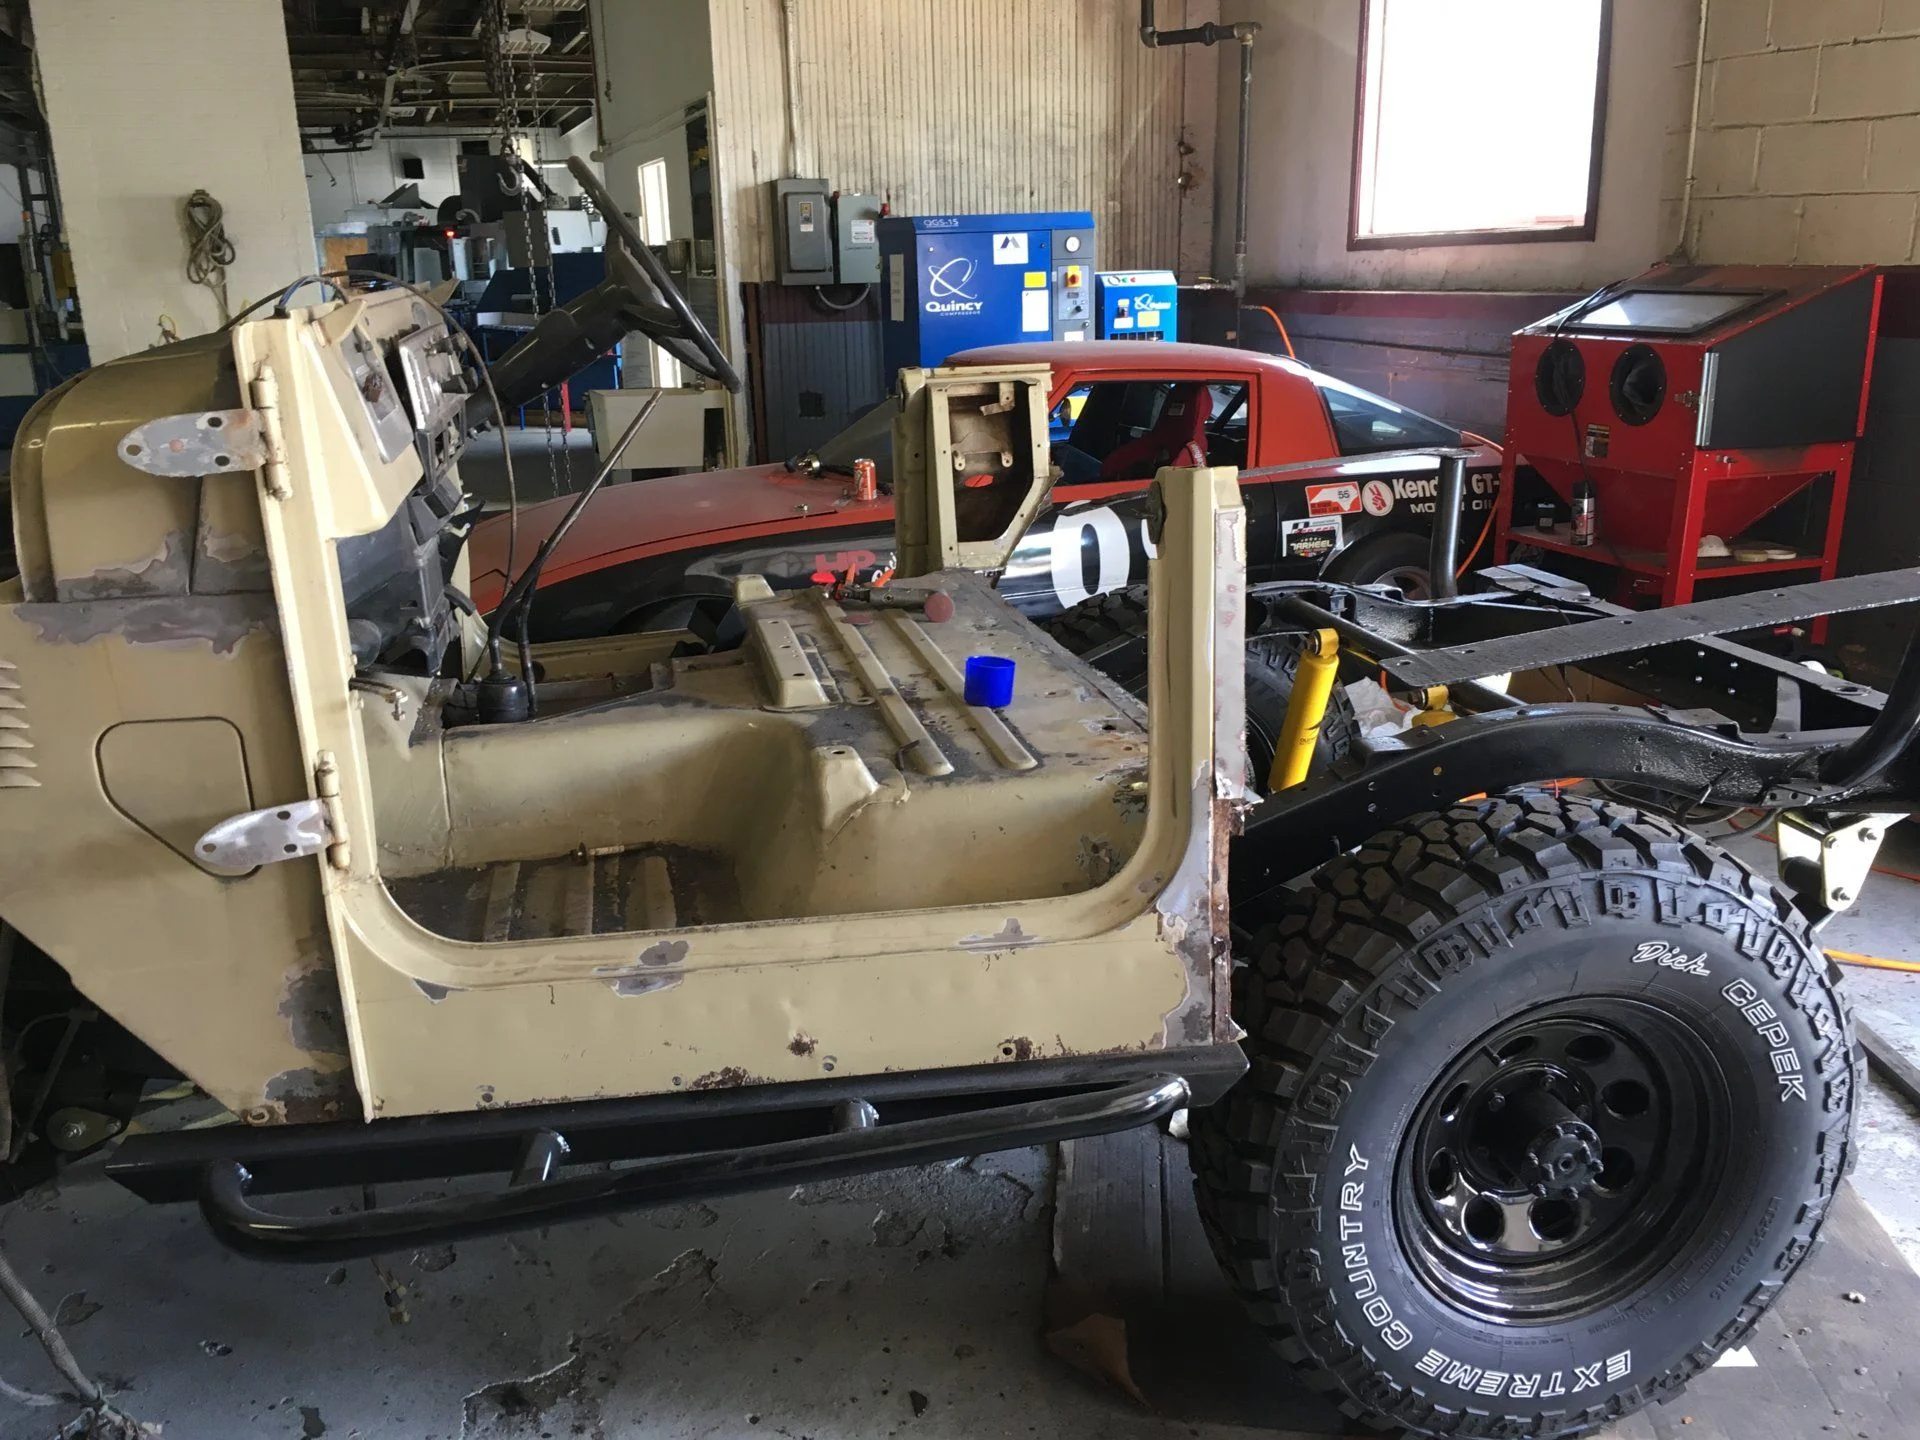
We also removed the fuel tank...

So we could do THIS

(faints slightly)
And here's the other half still on the frame.
And that's where we're to now!
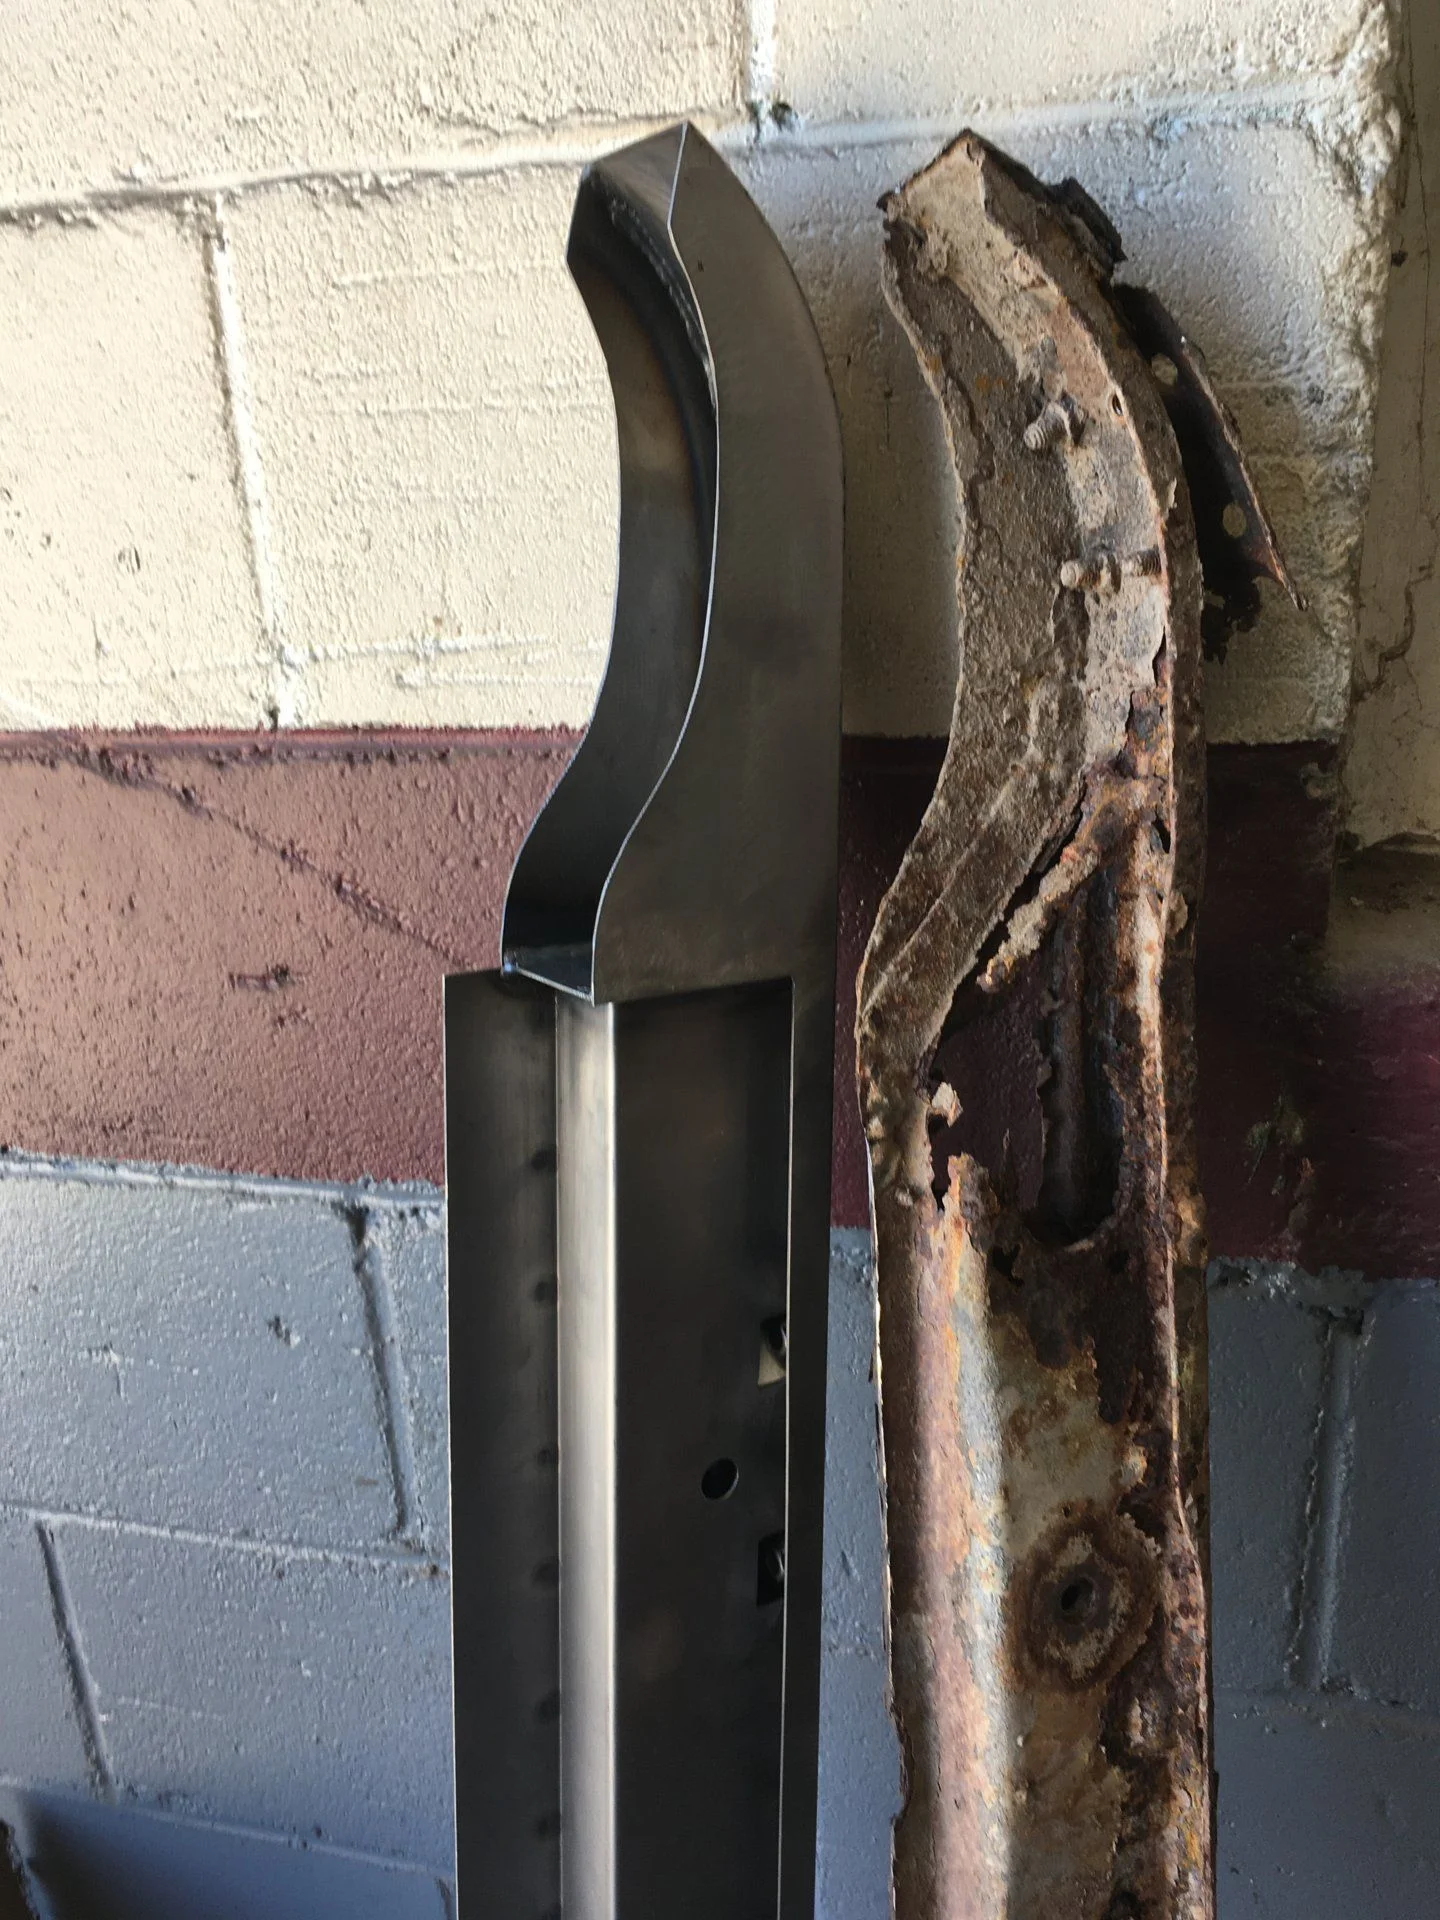
Most of the metal to replace the rear tub is in now. (Except that the people providing the rear fenders sent me one wrong one.)
Next is salvaging pieces off the old tub, and tacking the new one together.
Updates are in order, I guess!
New wheels and tires were installed, and they look sick.
And then we (temporarily) reattached the fenders and tub, so we could get an idea of where the rock rails would go
(wow, it almost looks like a working vehicle)
And here's the tub after getting taken off, and then put back on once the rock rails were welded on.
And then comes the really terrifying part where we start cutting metal off. Like this!
We also removed the fuel tank...
So we could do THIS
(faints slightly)
And here's the other half still on the frame.
And that's where we're to now!
Most of the metal to replace the rear tub is in now. (Except that the people providing the rear fenders sent me one wrong one.)
Next is salvaging pieces off the old tub, and tacking the new one together.
what are the wheel dimentions? 15x8 3.75 spacing? if so did you have any rubbing? also where did you find those rock sliders?
- Thread starter
- #39
The wheels are 16x7, 4 inch backspace. Pro-Comp series 98 rock crawlers. I bought them based on dimension recommendations I found around here. I don't know if they rub yet, since I (Still) don't have the truck together.what are the wheel dimentions? 15x8 3.75 spacing? if so did you have any rubbing? also where did you find those rock sliders?
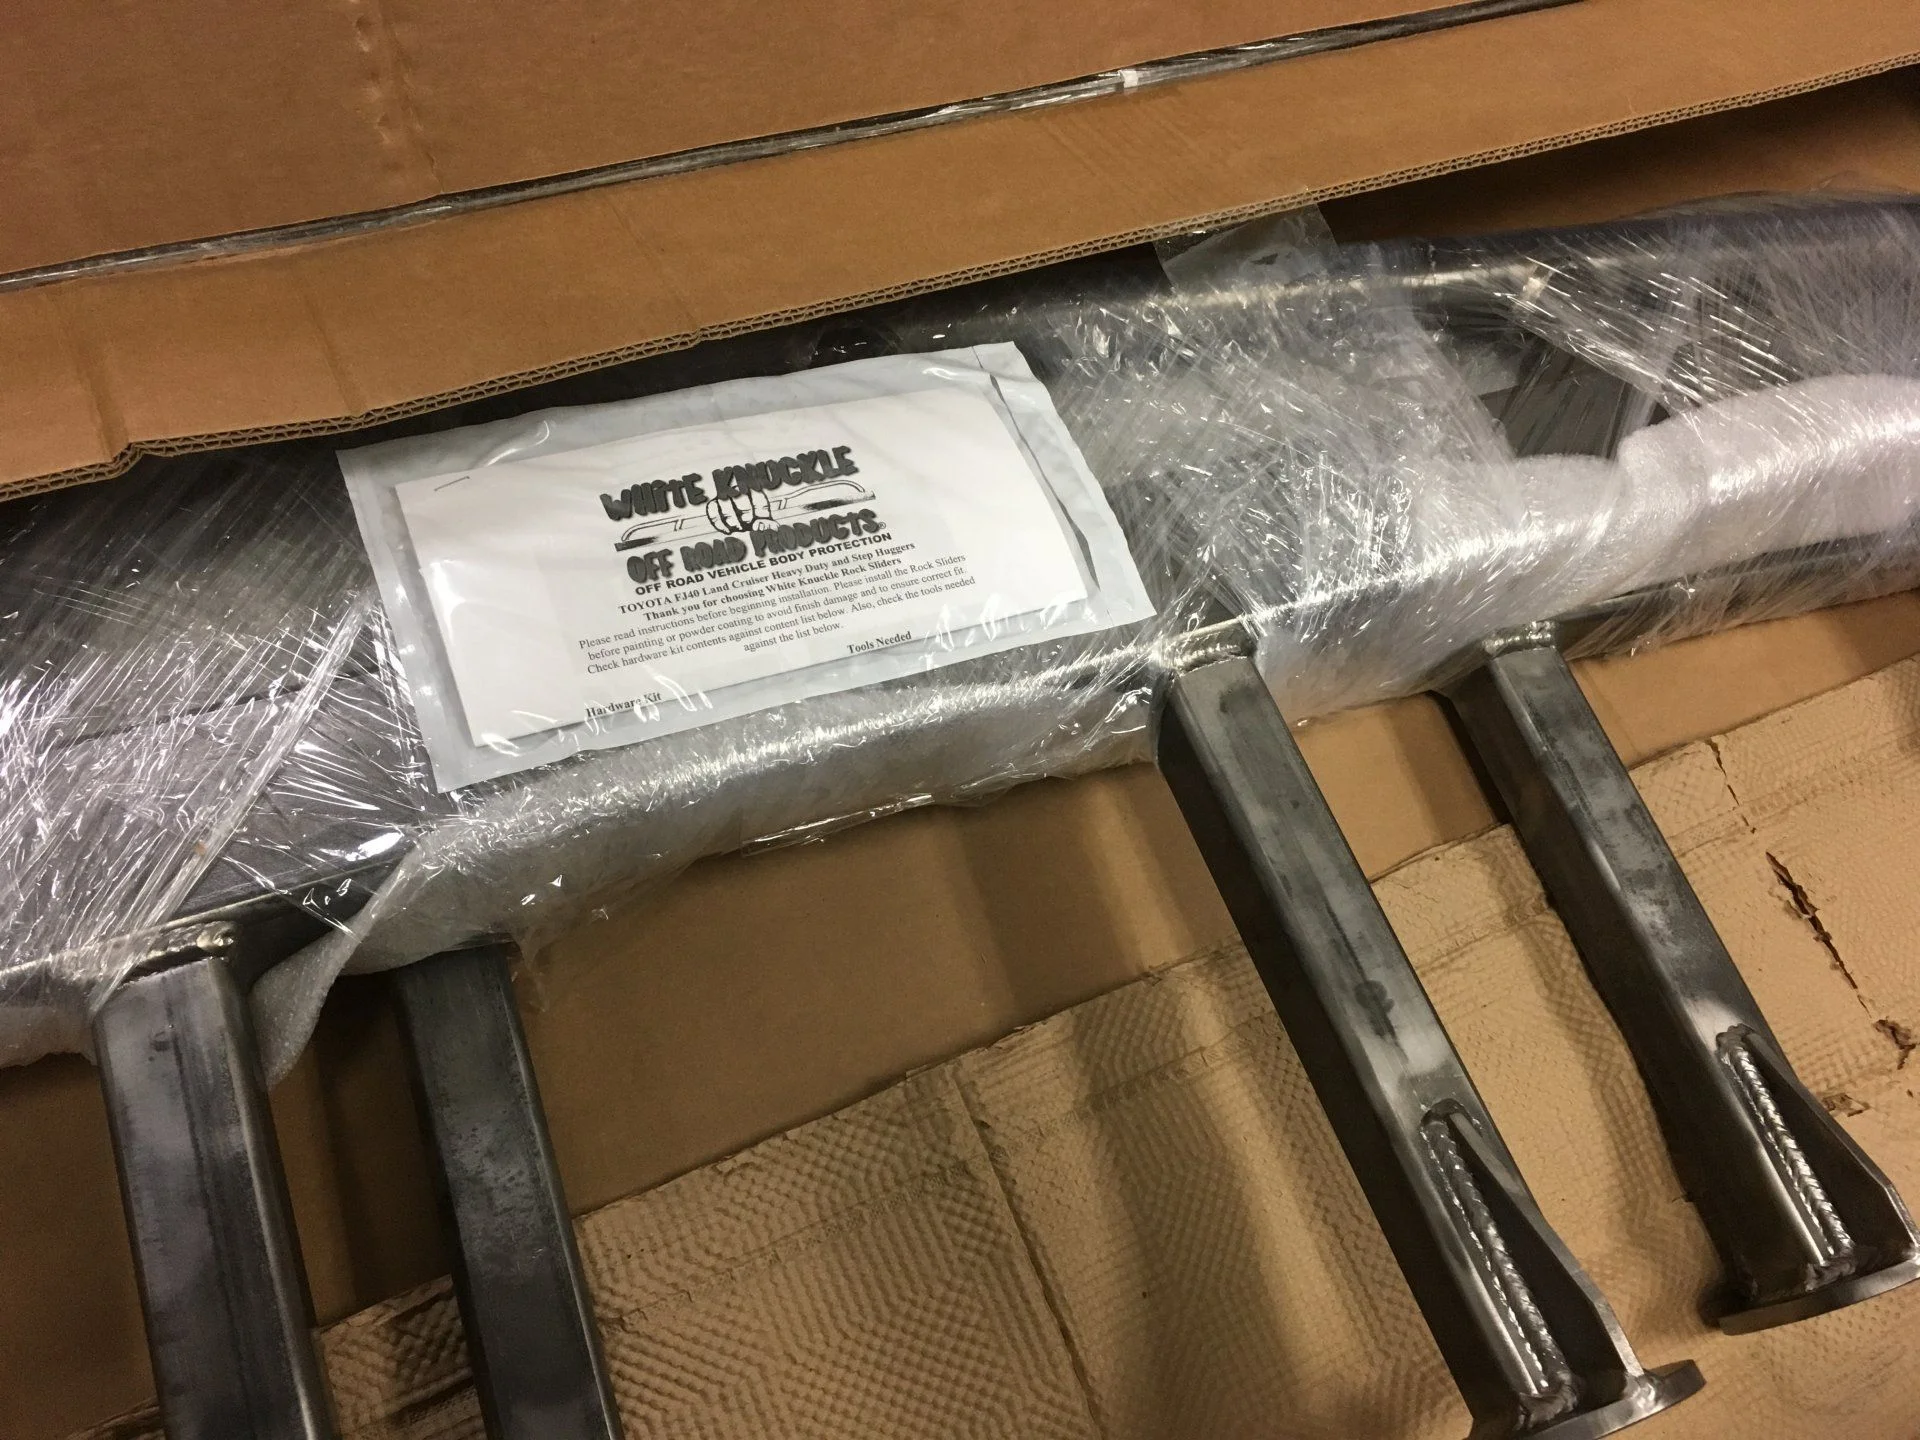
The rock sliders are White Knuckle Off-Road sliders.
- Thread starter
- #40
Hi guys, thought I'd check in for a moment. No pictures to share right now, but words ought to suffice.
So, from July to about November, summertime happened, by which I mean the workshop got really warm and house projects turned up, so basically nothing got done on the Landcruiser. However, I have been back to work on it the past few weeks. It's all been sandblasting, grinding, and cutting to get the front half of the tub ready for its new back end, and cut the pieces that we need to save from the back half off.
Oh, and we installed some decent LED lights in the workshop, so we can actually see what we're doing.
Yeah, that about covers it. I'll post a few pictures soon, things should start being photogenic in the next couple weeks.