KISS Drawers (Keep It Simple Storage) For 100 Series (5 Viewers)

This site may earn a commission from merchant affiliate
links, including eBay, Amazon, Skimlinks, and others.

Also wanted to give a shout out on the ChumBuckets tool bags- these things are great. Material is tough, and fits a surprising amount of tools.
View attachment 1714051
Thanks!

So what's the correct beer (brand/style), and quantity required, for proper assembly of the KISS drawers?

If I do 2 sets back-to-back, do I double the quantity of beers, or does the experience from the 1st set reduce the beer count by one or two?

Pacific Wonderland. 2 beers for basic assembly + approximately 1 per finishing step (ie top carpet plus stained drawers plus drawer liners would be +3). Subsequent drawer sets at the same recommended doses. Do not test drive until the next day or else you may be conducting a rollover test (spoiler alert, someone already did the rollover test for us and the drawers emerge unscathed).
 
Stupid question here. Do most folks paint pieces and them assemble or assemble and then paint?
If "thick" (bedliners, many paint coats or thick polyurethane) then apply after, as there are some real tight tolerances in drawer width and top piece to piece spacing, even screw lengths. If thin (stain, rattlecan), then before or after doesn't matter.

If you really want to apply a thick coating while disassembled you still can, but be prepared to shave/sand down at piece-to-piece interfaces and to possibly re-chamfer screw holes, or mask them off first.

(and not a stupid question! Adding to the FAQs...)
 
ok so I got around to installing the drawers together and ran into some issues.

If I try to bolt the drawers using the U bolts to the seat brackets the drawers are too far outwards and I can't close the tailgate and the driver side wing doesn't fit.

if I push the drawer set up further in to where I can close the tailgate then the rear seats won't recline.

Am I missing something here?

2001 land cruiser with rear AC.


Also how much resistance should the drawers have when pulling and pushing?
 
Finally, I used some nylon webbing from old straps to make a pull tab for the D/S wing. Pushed in some rivets and screwed it in on either side.

Better, though, is my new secret stash space (not so secret if I'm sharing it here, I guess!). I took out my sub enclosure when I removed the third row seat belts (I replaced the OEM sub with a Pyle sub a few weeks back but it still sucks; going to put in a powered Bazooka later) which left a big space behind the speaker grille. I detached the speaker grill and did some trimming with a Dremel so I could glue in rare earth magnets at the corners. Now the grill pops off and on, and I have usable stash space behind it. Going to put some Dynamat in there on the inside of the quarter panel and use some high density foam, like you find in a Pelican case, to create soft walls inside the space.

View attachment 1666182 View attachment 1666183 View attachment 1666184

for the nylon webbing handles did you drill a hole through first? I wanted to do something similar. I was thinking to just staple them in from the bottom?
 
ok so I got around to installing the drawers together and ran into some issues.

If I try to bolt the drawers using the U bolts to the seat brackets the drawers are too far outwards and I can't close the tailgate and the driver side wing doesn't fit.

if I push the drawer set up further in to where I can close the tailgate then the rear seats won't recline.

Am I missing something here?

2001 land cruiser with rear AC.


Also how much resistance should the drawers have when pulling and pushing?
@chudly sorry you're having issues during installation, none of what you are describing is expected or normal and I'm sure we can get it straightened out. Please email me and I'm always happy to help & answer questions.
 
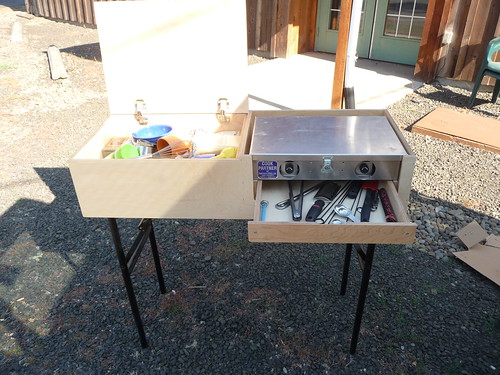
Hi folks, I built a side table that cantilevers off the side of the open drawer and stores on top of the drawer when not in use. The frame is 1" x 3/4" x 1/8" thick aluminum T-bar. The table top is about 18" square.

Here it is in use:
IMG_9934.JPG


It slides in on top of the drawer for storage:
IMG_9935.JPG


You still have pretty good access to the stuff in the drawers when it's stowed:
IMG_9937.JPG


I cut small slots in the drawer sides for the T-bar to ride in, and there are two screws & holes on the right side to keep it from flipping up. (I originally drilled for 1/4-20 screws, but they were overkill. Hence the other holes.)
IMG_9941.JPG


When you slide the frame to the left, the two screws go into the holes and the wood top drops down just outside the left drawer face, locking it in position.
IMG_9938.JPG


Lift up the table and slide it to the right to disengage the screws & remove. It's definitely a one-off, mostly cut-to-fit. But I can share the dimensions of mine if anyone wants to built something similar.
 
Last edited:
for the nylon webbing handles did you drill a hole through first? I wanted to do something similar. I was thinking to just staple them in from the bottom?
For the handles I put a little grommet in each end of the strap then used a small wood screw to drill each end into either side of the wing. Keepin’ it Simple!

2C7FBC39-AB55-4DC9-BF0A-9F7C90EC28BC.jpeg
5FF306E1-608B-49CF-A694-589CCE261278.jpeg


Looking at it again I suppose you could drill through and use a small nut and bolt; works either way!
 
for those who added a hinge for the "wings" and carpet did you put the hinge over or under the carpet? I plan to hinge the sides and do carpet on top. haven't decide what to do for the drawer faces yet.
I used standard piano hinges from Home Depot and put the carpet on top. Works just fine.

I put carpet on the drawer faces as well; easy to do and keeps the whole thing looking uniform.
 
Hi folks, I built a side table that cantilevers off the side of the open drawer and stores on top of the drawer when not in use. The frame is 1" x 3/4" x 1/8" thick aluminum T-bar. The table top is about 18" square.

Here it is in use:
View attachment 1722658

It slides in on top of the drawer for storage:
View attachment 1722659

You still have pretty good access to the stuff in the drawers when it's stowed:
View attachment 1722660

I cut small slots in the drawer sides for the T-bar to ride in, and there are two screws & holes on the right side to keep it from flipping up. (I originally drilled for 1/4-20 screws, but they were overkill. Hence the other holes.)
View attachment 1722663

When you slide the frame to the left, the two screws go into the holes and the wood top drops down just outside the left drawer face, locking it in position.
View attachment 1722662

Lift up the table and slide it to the right to disengage the screws & remove. It's definitely a one-off, mostly cut-to-fit. But I can share the dimensions of mine if anyone wants to built something similar.
Wow, that is a super slick way to do a cutting board, I LOVE the way it hides in the back when the drawers are in use! I'm adding that to my list of 'accessories' I would make (with proper credit/compensation!) if I ever take the leap and make this a full-time gig ;)
 
Mine are done, finally. Here is iteration one, already thinking about mods after the first successful weekend testing it out.

I called/emailed several paint companies - Olympic (PPG), Rustoleum, Behr - and asked them what product would have the best combination of abrasion resistance, off-gassing/VOC/smell, water resistance, and every single one of them steered me toward water-based finishes. In the end I chose glossy Behr interior/exterior porch & patio floor paint color-matched to the trim. I think they came out great! Bought a 46x93 anti-fatigue foam mat to throw on top.

IMG_20180614_201047.jpg
 
Mine are done, finally. Here is iteration one, already thinking about mods after the first successful weekend testing it out.

That looks really nice, matches very well. What did you apply it with? Roller/brush combo or did you have a sprayer of some sort? Mine are getting a bit scratched/chipped up so I'm looking for something a bit more resistant than my rattle can primer/paint job. About 3 years ago we painted our kids art table with a Sherwin Williams Proclassic latex that is supposed to have some proprietary acrylic polymer and it has held up VERY well but it never laid down nice, leaving roller and brush marks.

Thanks for any info you have!
Cheers,
rjones
 
Thanks @rjones , yes I used a combo of slanted trim brush and 4" foam roller. Nothing special, bought the most expensive ones I could find at the local Home Depot. It was a bit of work sanding (180/320 grit with an orbital) between each coat of primer and paint (I did two of each) so the end result is quite pleasing but it definitely isn't high-end cabinetry. To do that I think you'll probably need to spray it.
 
Mine are done, finally. Here is iteration one, already thinking about mods after the first successful weekend testing it out.[/QUOTE

That looks awesome.
 
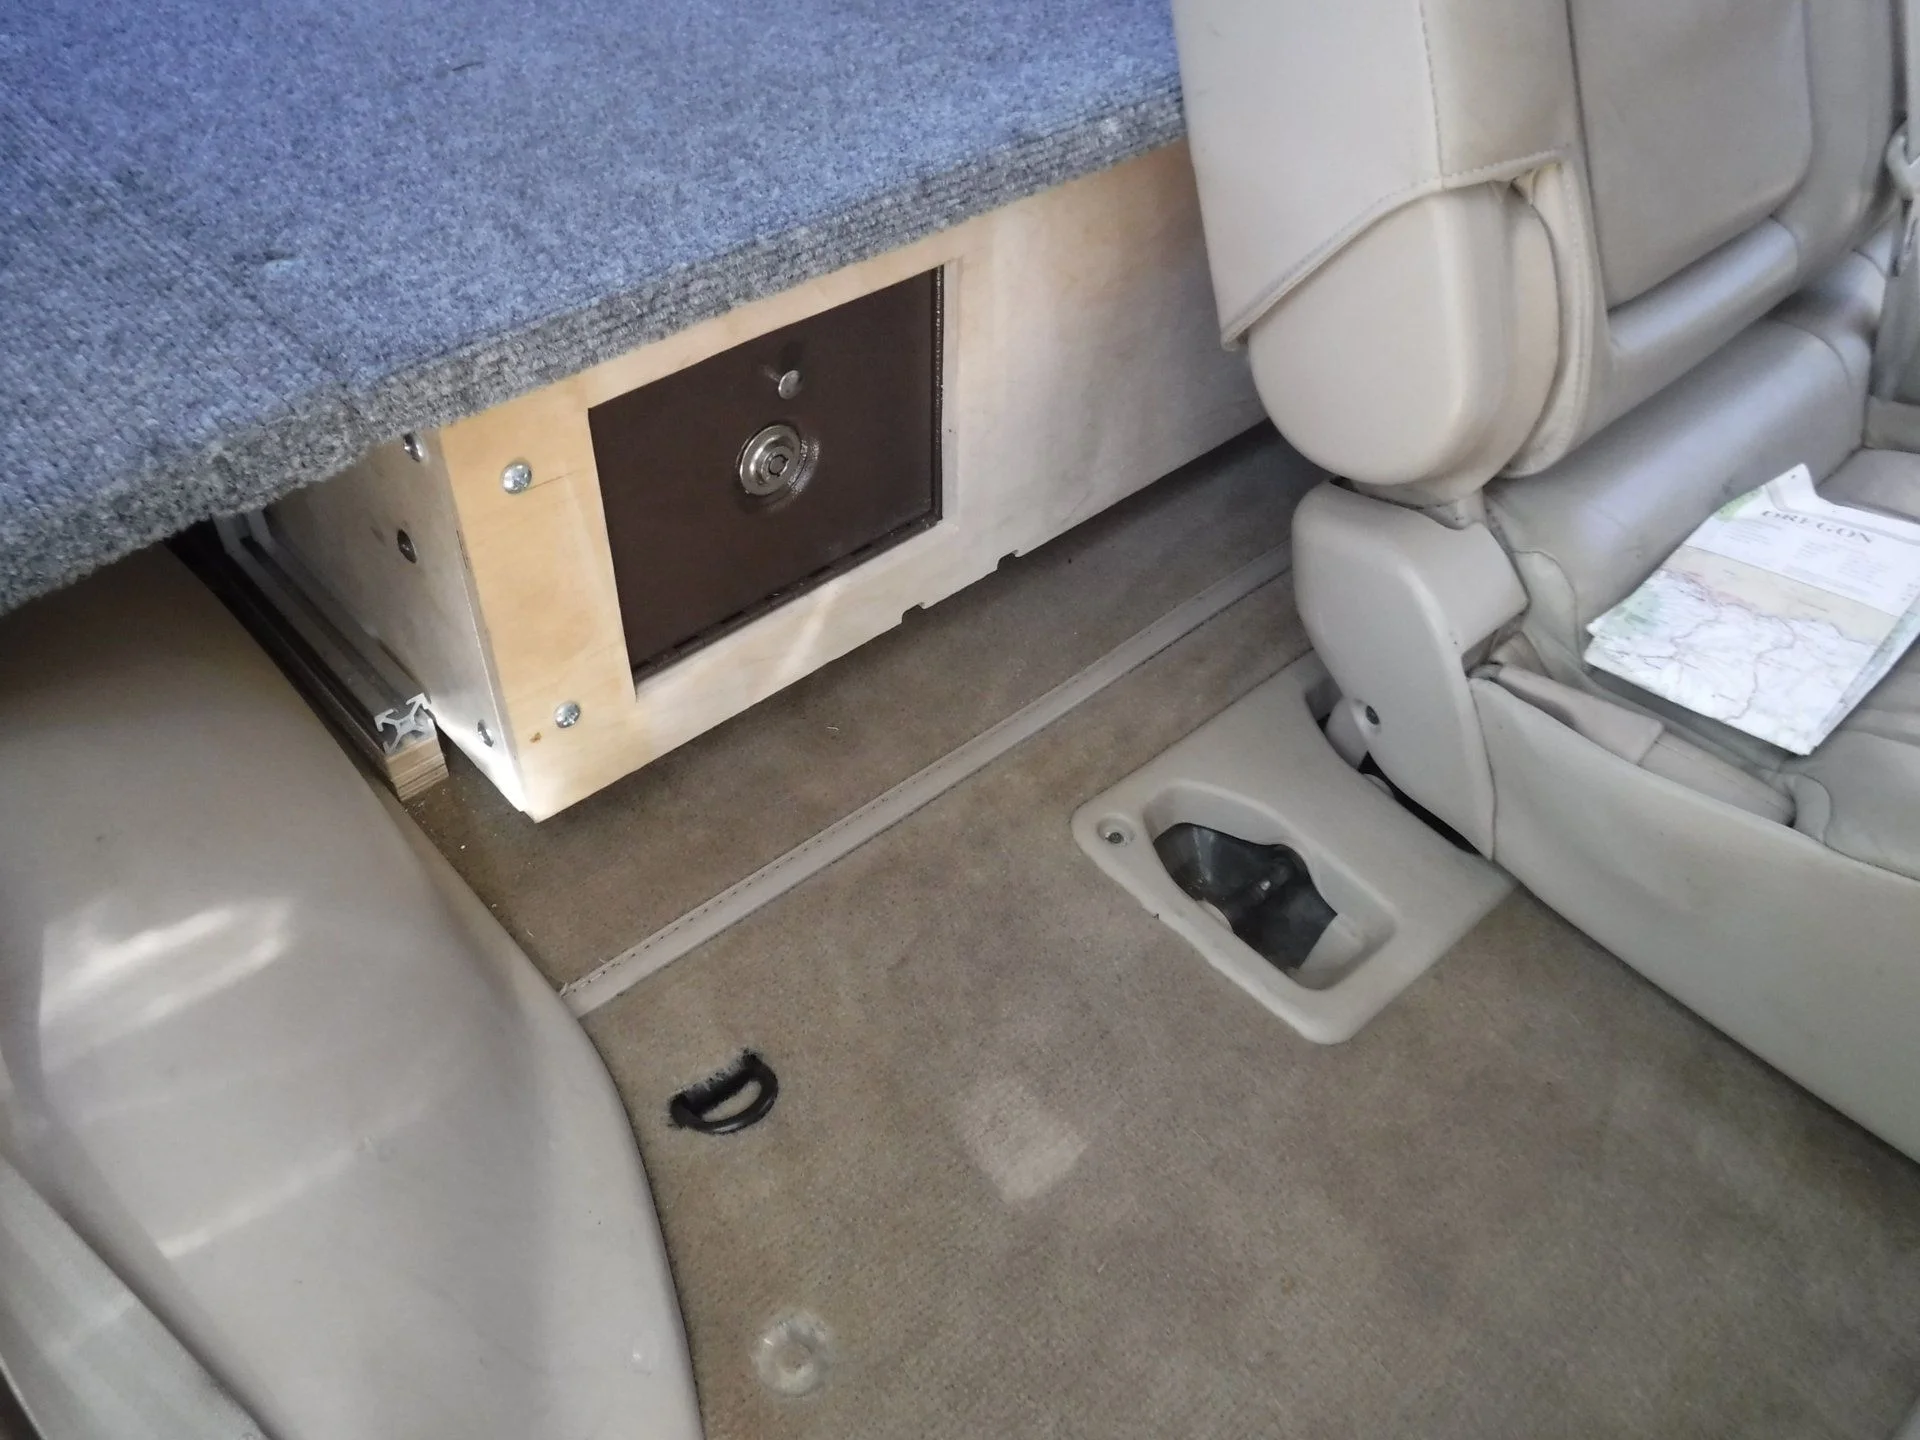
Here is a small project i did on my drawers. Had a small safe/lockbox sitting in the garage for years, took a look the other day and realized it fit perfectly in my drawer. I routed out a hole in the back of the drawer and mounted the safe inside using carriage bolts. Now i have a secret out of sight box to keep valuables if needed. Im hoping the hole doesn't hurt the structural integrity of the drawers but we will see.
 

Users who are viewing this thread

Back
Top Bottom