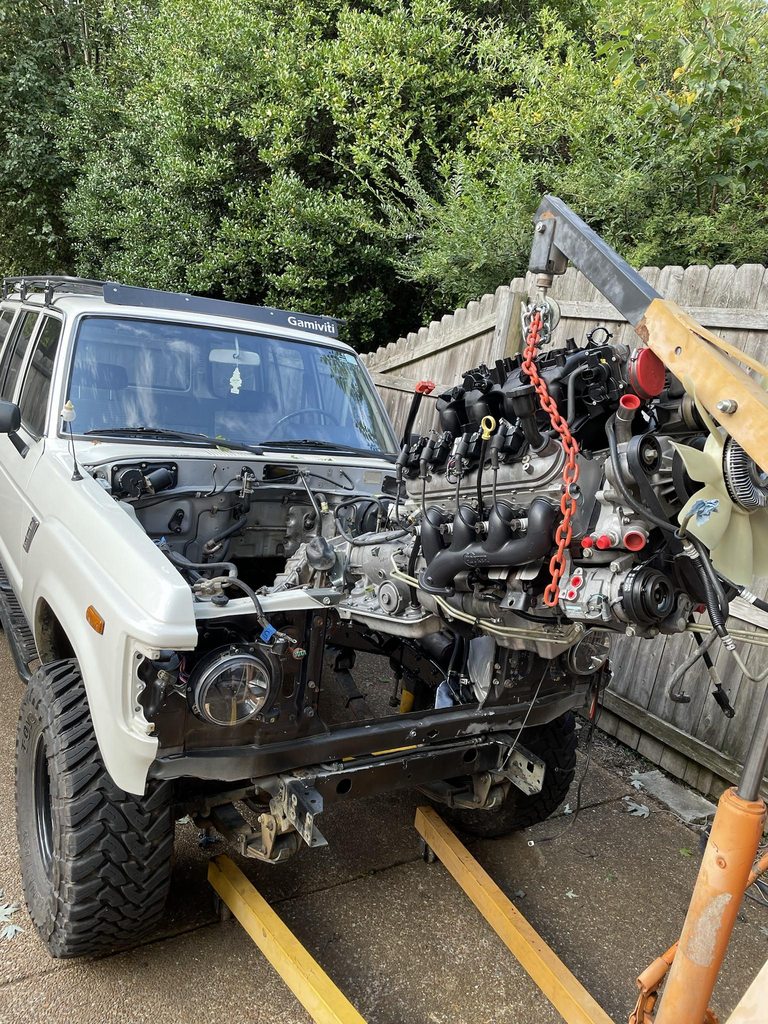
How to LS Swap a FJ60 or FJ62. Quick and dirty guide for regular folks wanting to do an engine swap in their driveway. (1 Viewer)

This site may earn a commission from merchant affiliate
links, including eBay, Amazon, Skimlinks, and others.

Joined
May 24, 2016
Threads
79
Messages
2,740
Location
Oregon
This thread looks like a lot, but you can totally do this. I have total faith in you!


I've been meaning to do this for a while now. I havent really seen any how to guides or anything online and this one isnt going to be absurdly thorough or anything but will get you onto the right track. If i forget something, ill do my best to go back and edit it and add what i forgot. This is just meant to be something to read and show you that its possible and you can totally do it. I honestly think that if you can work a floor jack, and can change a radiator out you can do a LS Swap on your 60. The most specialist knowledge youll need is to do very very basic mig welding. Ive been around guys doing it to miatas, 240sx, and other smaller cars and compared to that, the 60 is cake. Ill try and include ways to make this as easy as humanly possible for you, and offer a few examples for parts based on pricing, and basic fabrication level involved. This swap is really really simple, its just a lot of work. This thread is aimed at normal people doing this swap on their own and not "master mechanic" types, so the explanations will be simplified and (hopefully) thorough.

This will be a table of contents, each hyperlinked text below will quick jump you to a different step in your potential swap. That way you dont have to go digging through a bunch of posts to find what you are looking for:

-Engine differences, where do you start, what to look for?
-Bought an engine. Now what? What to do before you pull your 2f or 3fe
-Pulling your old motor out and installing adapter and transfer case to new trans (4l60e)
-Engine bay prep and installing your new motor into your cruiser
-Transmission Crossmember
-Heater Hoses
-Radiator and Hoses
-Transmission lines, Power Steering Lines and External Coolers
-Fuel System and Brake booster Vacuum
-Intake Ideas
-HVAC/AC Hoses
-Transmission and T-Case Shifters
-Wiring Part 1. Ideas, Tools, Harnesses, etc.
-Wiring Part 2. Gas Pedal
-Wiring Part 3. Wire Harness prep, Initial installation, measuring lines, computer/fuse/tac module mounting, loom
-Wiring Part 4. Standalone harness final installation
-Wiring Part 5. Wiring Resources. FSM. Wiring Diagrams. Helpful Videos
-.
-.
-Driveshafts and 4l60e transmission pan clearance
-Exhaust part 1. Ideas, parts, tools, planning
-Exhaust part 2. Welding it up and routing
-Finishing up, Topping off Fluids, Exhaust Heat management, troubleshooting, dyno tune
-DONT FORGET THE BOLT CHECK!
-Closing, planning and mindset, keeping your swap rolling smoothly during the build

-Notes on Aluminum radiators and electrolysis

If you have anything to add to any of the posts, let me know and i will add it to which ever post it pertains to, and quote your addition including any photos or links youd like to share.


This swap will focus mostly on gen3 motors and the 4l60e transmission for now, please feel free to add anything for other transmissions and Gen4 stuff and ill add it to the thread. Besides wiring, the gen3 and gen4 swaps should be pretty similar. For those of you who have already done this swap In the past, feel free to add anything you ran into along the way and ill add it along.


Please keep in mind, i just did this swap in my driveway, and I am by no means an expert, nor am I claiming to be. I am still learning every day about stuff. A buddy of mine who has done about 15 LS Swaps in a plethora of different vehicles still claims to not be an expert. This is just a space for folks to learn about stuff. If im wrong on something, please call me on it so i can fix the post. Also im not really the best writer out there so if my writing is hard to follow in spots or if i get rambling just message me if you need some clarification on anything.

Hey! This post has made it into the FJ60 FAQ!


Since its 2022 now i guess this has to be posted... but these are just suggestions and not qualified advise, do at your own risk, for offroad use only, filmed on location in Mexico.
 
Last edited:
Ok so you have decided that you are tired of driving in the slow lane with your foot on the floor or getting 9-10 mpg, now what???

This is the first part of your entire build, youll need to do things like budgeting out what you are willing to spend, where you are willing to make some sacrifices, and REALISTICALLY your ending budget. Read through this thread before you get started and create a parts list and make sure you have parts on hand to minimize downtime. Ill try and include as many part numbers as i can.

Doing all of the work yourself with tools you already have, you should expect to spend 7-15K on parts. Dont let this number discourage you. 7-15K is with you buying really nice stuff, replacing a lot of things along the way, and without you selling off your old stuff. This figure is with you purchasing a used motor in good condition. If you plan on ordering a brand new motor, say from GM performance, add about 9K-10K to that number. If you are in California, that might be your only option due to CARB, I dont have any experience with that, and people on here from california will have to chime in on it. I live in the south and dont have emissions, so i eliminated all of the emissions for the most part. This swap can be done for much much cheaper if you reuse your radiator, all of your ac system components, make your own trans crossmember, etc. It really just comes down to how you spend the money and what you spend it on


Once you have come to terms with the reality of the price of the swap, and youve talked your SO into it by telling her how much better fuel economy you will be getting, how much quieter the ride will be, and how much more reliable it will be.... You need to find a motor. But what motor??

So there are a few LS Motors along the years... Lots of engine codes and variants. Yes Vortec motors are LS motors. They are all Pushrod V8s with coil over plug ignition systems and they are all fuel injected with Aluminum cylinder heads. Vortec motors used Iron blocks for a long time, but some of the vortec motors came with aluminum blocks. All of the Car motors were Aluminum blocks for what i can tell. They are all small block motors. There are two different generations of these motors with some advantages and disadvantages to each.

The newest motors are not called LS at all and are called LT motors and are direct injection. This thread wont talk about these because those were out of my budget when i did my swap.

Im not going to go too much into detail on each of these.. you can read on google about the differences.

Car Motors-
-LS1/LS6 - 5.7L Aluminum Block
-LS2 6.0L - Aluminum block (NOT the same as the 6.0L Vortec)
-LS3 - 6.2L Aluminum block. this is the one i wish i could have afforded
-L99 - 6.2L Aluminum block, with Displacement on demand. If you have the money for a L99, buy a LS3
-LS7 - doesnt matter, too expensive
-everything else - I have no clue, all of the other car LS motors cost more than my entire swap so i didnt even bother reading about them.


Truck Motors (what you will more than likely be buying. Much more affordable and plentiful)
[Gen3]
-LR4 - 4.8L Cast iron block higher compression
-LM7(most common)/L59 5.3L Iron block
-LQ4/LQ9 - 6.0L Iron blcok

[Gen4]
-L20/LY2 4.8L Iron block
- LY5/LMF/LMG 5.3L Iron Block
-LC9/LH6/LH8/LH9 5.3L Aluminum
-L76/L77 6.0L Aluminum
-L96/LC8/LY6/ 6.0L Iron
-L92/L9H/L94 6.2L Truck Aluminum - if i had the money i would have gone with one of these. $$$


There are big differences between all of those motors. Besides displacement, they have different heads, different pistons and internals, etc. There is also a Huge freaking price difference between all of those. An aluminum 5.3 is going to cost more than an Iron 5.3. A 6.0 is going to cost more than a 5.3. Aluminum blocks are going to save you some weight right off the bat, but you sure as hell will pay for it. The weight thing kind of doesnt matter as much in a 60 versus say a 240sx. Youll pay for the larger motors too. 6.0 will be much more expensive than 5.3. Aluminum 6.0? Better turn out them pockets son!

There are also going to be different transmissions attached to these motors, most of the 6.0s have 4l80es behind them, most of the older 5.3/4.8 have 4l60es behind them. The newer motors have the 6 and 8 speed transmissions behind them. The most common and easiest automatic to run behind these things is the 4l60e. Its not the strongest transmission out there but on a stock motor will work fine. There was a very rare 5.3 that came with a 4l80e, and all of the larger 6.0 motors had the 4l80. The 4l80 is MUCH stronger than the 4l60e, but much harder to adapt to your stock transfer case. The 6l80e is slightly less strong than the 4l80, but has 2 more gears. If you want a 6speed, the 6l90e is the one you want. You can get the Gen4 computers to talk to the 6L80/6l90 transmissions, but to run them on a gen3 motor youll need to run a standalone harness to adapt it. Its doable, but youll need to set it up in HP Tuners for it to run right.

As far as manuals go, There are people running the stock 4 speed, H55fs, and NV4500s behind these things. I took out a h55f when i did my swap. Personally, I think the first gear on the h55f would be useless and the 5th gear would be pretty short, giving you a pretty high rpm at highway cruise. People do it all the time though and love it. So maybe look into that one. If i was going manual i would do a GM NV4500, if you get the gm one, i believe it bolts to the back of the motor just fine, and has a much deeper 5th gear.

There is a large disparity in price for Gen3 vs Gen 4. Part of this is due to the gen 4s usually having lower miles, a lot of them having aluminum blocks, etc. Gen 3 and gen 4 are not directly interchangeable, but a most of the parts are. The knock sensors, cam sensor and VVT are different, and the shape of the head ports are different. Older trucks use cathedral port heads which are rectangles with triangle points on the top of them, newer use rectangle port. Rectangle port heads flow better.


To be completely honest, buy whatever motor you can afford. You will see NO difference in gen 3 or gen 4 in your 60 besides installation and OBD stuff. No matter what anyone tells you. You could want the newer motor but dont get discouraged if all you can afford is a LM7. After driving a 60 with an aluminum block gen4 5.3, it was just like driving my iron block 5.3, and i paid much less for the motor.


There are also benefits to going gen4. Floating piston pins, improved timing chain, variable valve timing, revised coil packs, and coated piston skirts etc. While those are benefits (especially if you plan on adding boost), to me, the benefits dont outweigh the cons. The Con of going gen4 over Gen 3 is AFM (active fuel management). This is the engine automatically deactivating half of the engines cylinders under light load. They did this by using switching valve lifters and a lifter oil manifold in the lifter valley. These AFM lifters are notorious for failing, and these parts also cause an oil consumption problem. You can turn off AFM in the tune via HP tuners, or if you send off your computer, but your parts are still in the motor. If you plan on going gen4, plan on installing an AFM delete kit before you install it into your 60. Gen 4 ECMs are easier to set up and tune, and can do things like idle up for your AC up and control aftermarket electric fans better. It also can talk to aftermarket gauges better due to its updated OBD language.

Gen 3 has got slightly less power, older tech, you need a matching pedal and Tac module. PCM (engine computer) and Pedal computer (tach module) are separate. Older OBD2 language, harder to get your PCM to control an electric fan and idle up with AC, to name a few.


Quote: @Megadoomer "Great thread. I just did a 5.3 in my Pig and finished it last June. One thing I would add about the Gen3 and Gen4. The Gen4 basically came out in 2004 model years but in 2003 GM has a Late 03 GEN3 motor that is returnless fuel and DBW without AFM or DOD. The other difference I came across was the outer diameter of the cam bearings is larger on the late 03. Something that is good to know if you are going thru the motor like I did. I am not sure if other Vortec sizes have the same change, only worked with my 5.3 from a Silverado."

Big thing here while we are talking about engines. Once you decide on what motor and trans to buy, Make sure you get a COMPLETE engine with all of the accessories, wiring harness, Pedal and tac module if applicable, MAF, etc. As tempting as that cheap motor on FB marketplace looks that just needs heads or whatever, DONT do it. You want a complete motor from a good source.


If you are buying a crate motor from GM Performance, or an EROD motor from them, the motors WILL NOT come with AFM and you will not have to worry about the delete kit or the oil consumption issues. Thanks to @WSOPgold2012 for the info!

Quote:

"Per my GM Rep. The early 5.3L EROD crates and 5.3L had the AFM feature and was removed years ago, due to problems. 5.3L EROD IS NLA...


6.2L LS3, LS3 EROD crate and C&C kits do not have AFM.

Hot cam LS3 crate kits do not have."

1638918003499-png.2858488


- @TRAIL TAILOR

Quote:
"I would change this to, get the most complete engine for the money - a 140K 5.3 complete with working alt, starter, compressor, PS pump, intake for $1K is a lot better then a 70k 5.3 long block for $1500 that you then need to spend $2k in sub-$150 purchases to make usable in a vehicle" - @cruisermatt

If you are in the south east US, a great place to look for used motors is American Pickup and Salvage. Its in Paragould Arkansas. They helped me a lot with my motor and i was able to get a very low mile LM7 and trans for next to nothing.


If anyone has anything to add to this, please feel free. I am by no means an engine expert, these were all just things i took into consideration when buying my motor. This is just kind of a start for people to get people researching the differences between all of them and what to maybe look for.


At the end of the day though, none of this stuff matters. Buy the lowest mileage motor you can get your hands on. 4.8/6.0/5.3 doesnt matter, its all 2-3x the power of the junk you are about to pull out of your truck. Buy the motor to fit your budget. Id rather have a 70K mile LM7 than a 250K mile LS3
 
Last edited:
At the end of the day though, none of this s*** matters. Buy the lowest mileage motor you can get your hands on. 4.8/6.0/5.3 doesnt matter, its all 2-3x the power of the junk you are about to pull out of your truck. Buy the motor to fit your budget. Id rather have a 70K mile LM7 than a 250K mile LS3

I would change this to, get the most complete engine for the money - a 140K 5.3 complete with working alt, starter, compressor, PS pump, intake for $1K is a lot better then a 70k 5.3 long block for $1500 that you then need to spend $2k in sub-$150 purchases to make usable in a vehicle

Obviously this ^ advice is for the driveway DIY guy, a professional shop including my own is going to steer you towards lower mileage engines, new accessories.

I have not found any discernable differences in internal wear/longevity in any of the sub-250k engines I've been into (many)
Added!
 
OK so you found the motor, bought it, and youre at home now...now what?

Borrow an engine hoist, or get one from HF. You can use M10x1.5 bolts in the unused bolt holes in the heads as lifting points for your engine hoist Attach a chain between these two bolts and use it for the lift hook. The heads are mirror images of each other, so you will have holes in the front and the back. Be very careful lowering your motor to the ground. You can support the bottom of the front of the oil pan with 2x4s stacked up to be the same size as the bottom of the oil sump, and set it flat on the ground. The Oil pan will not crush like a LC oil pan would. Just lower it down slowly. Put a jackstand or something under the trans and support the motor from tipping over sideways while it sits on the floor. There are a few things youll want to do before you even touch your 60.

Also there are a few things youll want to do before you even get started on this swap. Once you have the motor in your possession, Go ahead and Drain the block plugs (located on the bottom of the block, one small and one larger allen key) and get ALL of the orange s*** out. You do not want any of that GM orange coolant in the motor.

(OPTIONAL) Also, this is the time to do your engine mods if your budget allows. Want to do a cam, valve springs, and intake for a EASY extra 50-90hp? There will be no easier time to do this than right now. Want to run a LS6 intake on a Truck motor because it looks better? Do it now.

For those of you, like me, who got a COMPLETE motor from a reputable source, and are able to just use the motor without needing it rebuilt. The Engine swap starts here.

-First thing youll need to do is Decide on some Exhaust. I personally ran the Hooker LS Swap Cast iron manifolds. They arent as flashy as headers, but they work, are available ceramic coated, and will clear your frame. You are welcome to do some reasearch to see if you can get the Camaro/Corvette manifolds to fit to save you some money, but I can tell you now, the Hooker Manifolds clear the frame rails on both sides perfectly, and work well. The Manifolds i used were black ceramic coated PN: 8502-3HKR. While you are here, this is a perfect time to remove your old Manifolds, remove the gasket and realize that one or two of your old header bolts are broken and stuck in the back of your heads. This is SUPER SUPER common and not any cause for alarm. Get the broken bolt or bolts out and order ARP MANIFOLD BOLTS PN: 070-134-1202. For the gasket, you will want to use the AC Delco MLS Gaskets no matter what you run. These are the absolute best gaskets you can buy for these motors.

Photo of the manifolds on the motor. This is the only pic i have where they are clearly on there, This is actually a few steps down the road so lets not get ahead of ourselves.
lAGaEEoh.jpg


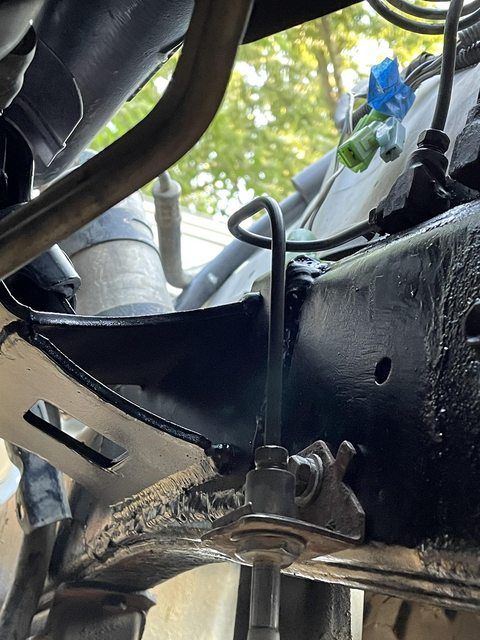
Manifold- Frame clearance (more on the brake line right there later)

FmVXRTXl.jpg


-Next there are a few easy things to do. Replace all of your plugs with whatever came on your motor from the factory. AC Delco. Not denso or NGK, AC Delco. For my LM7 this was AC DELCO PN: 41-962. Youll notice, that when you pull your old plug wires that most of them broke. Replace those too with AC DELCO wires. Noticing a trend here? Try and stick with stock parts when you can. LM7 Plug wires AC DELCO PN: 9748HH. There are two different lengths of spark plug wires, keep that in mind. Measure your old wires and see what you have.

If you are removing some emissions stuff, go ahead and Plug your EVAP Purge solenoid. For the LM7 I used ICT BILLET . Dont remember the part number on this one, they have 2 of them for different motors. You can easily match this up on their site.

For the easiest integration of the oil pressure and water temp for your gauges order the marks4wd water temp sensor adapter PN MFK707G3L and the Oil pressure adapter PN MFK40375. These will adapt the factory water temp and oil pressure sensors so all you will have to do is run the stock wires from the harness to them. The water temp adapter screws into an allen cap bolt in the passenger bank head towards the back. The oil pressure adapter screws into the back of the valley cover

Next youll want to remove the entire wiring harness from the motor. This is pretty easy and takes no time. Be careful not to cut your fingers or rip out any sensors. You can actually sell this harness or keep it. If you keep it, you will have a TON of extra OEM colored wire at your disposal with the appropriate end delphi pins. Once your harness is off, remove the PCM or ECM and either send it off to have VATS removed (vehicle anti theft, your truck will not run without this turned off). The better option here is find a local tuner with a dyno. Take it to them and tell them you want the VATS removed, any emissions you are removing turned off, Tell them your diff gear ratio and your ACTUAL tire diameter. If you get a good tuner, they will be able to put a good safe base tune on the computer as well to work off of until your swap is done. When your swap is completely done youll want to get it on the dyno for a full tune to get the most of the motor and transmission. If you are using a Gen 3 motor with a red blue or a blue green PCM with IAC drivers in it, (more on that in the wiring section.) Tell the tuner to switch the AC Request type to Analog 12v if you are wanting to control yourAC Idle up and electric fans with your PCM. I am unsure about gen4 control. If your blue green PCM doesnt have the extra drivers you wont be able to do this. I believe on gen4 it is much much easier.

From here youll want to drain and remove the pan from your transmission. Buy the appropriate AC DELCO gasket and trans filter. Empty the fluid and do not reuse. Put your new filter on (it just pushes into place) and re install your gasket (WITHOUT SILICONE) and do not over torque the bolts. They are lower than you are thinking. 98-108 INCH lbs. These are very easy to strip. You can either fill it with some oil now, or wait til its in the truck. Youll need the motor running to fully fill it. I filled mine with some while it was in the garage. I used Redline D4 ATF for the fluid. Use whatever fluid brand you want to as long as it meets the requirement of whatever trans you are using.

While you are doing the transmission work, now is a good time to remove your transmission lines from your truck. You are welcome to reuse the hard lines if you want but its pretty not ideal. They are in the way, super close to your new exhaust that youll be running right there, and if you use the H3 oil pan you lose the mounting bolts to mount them to your oil pan. They are also pretty spaced out from your motor and take up a bunch of dead space.

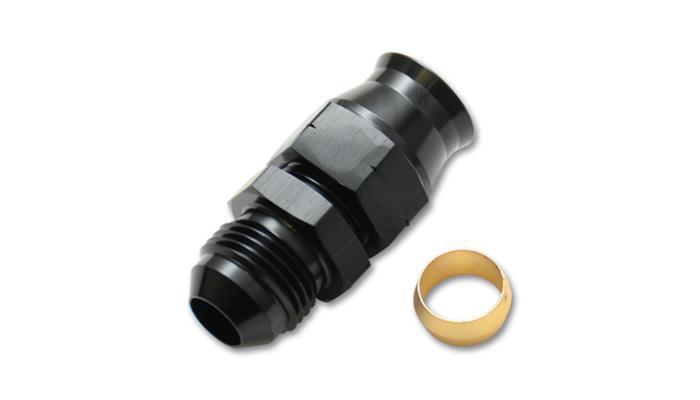
If you ARE going to use the hard lines, cut both lines right in the front of the oil pan, then use these hard line to -6 AN adapters. From there you will be able to run AN hose up to your trans cooler or rad.

The other way, which IMO is far superior is to disconnect the lines completely from the side of the transmission, and use these AN fittings on the transmission itself.

This will give you a -6 fitting right off the side of the transmission, you can then run 2 -6AN 90* fittings onto your an hose and run them and tuck them in and away from your exhaust. More on this later. For now, just do the adapters. If you have filled the trans, youll want to cap them when you install into the engine bay

Once that is done youll need to decide on an OIL PAN. There are quite a few out there, but the easiest one to get clearance is the H3 pan. JEGS PN:809-19212593. I think its sold out there now, but you can find them all over the internet, they are just old stock Hummer H3 pans and come with the windage tray and pickup tube. The gasket is built into it too just put rtv in the corners and make sure you dont overtorque the bolts. These break off super easy as well. Super easy install. Once installed, go ahead and toss an oil filter on there (i used mobil1) and fill it up with oil. Some people say not to do this, but i did it and had no issues at all.

Go ahead and install a brand new AC and Serp belt while the motor is out too.

Next remove both fuel lines from the fuel rail (if you have a gen 3 motor). If you have gen 4 it is returnless (more on that later) so just remove one. If you have a gen3 motor, keep the return line but cut the metal hose 3 inches from the flex hose. This should give you a quick connect, the black flexible hose, and 3 inches of metal hose to use.


Here you will decide on whether or not you will be running a Mechanical fan, or an Electric fan. E fan will be a little more complicated to set up, but will give you a VERY slight power increase, and i mean slight. I originally wanted to run a mechanical fan but due to a poor supplier was forced to run an E fan. The absolute best Efan you can buy still will never output as much airflow CFM as a stock mechanical fan. If you are using an e fan take the old mechanical fan off of the motor if its on there.


Lastly, you will need to decide on which motor mounts to use. I personally used the @Well Sorted mounts. These were by far the easiest to use. They are revisions to the old TLC motor mounts, and are keyed to the frame. You put them on, put 2 bolts into them and then weld them to your frame. They use the stock GM rubber motor mounts. @cruisermatt also makes badass motor mounts that reuse the Stock GM motor mounts as well. Both are wonderful options. Using either of these two motor mounts will save you a bunch of time moving the motor around to find the right position in the engine bay

This is a great time to replace old worn out motor mounts with new AC DELCO motor mounts! if using either of these mounts
 
Last edited:
At this point you will be ready to pull your old motor. To give some perspective on why i think that all of you guys can do this swap, i had never ever pulled a motor before this swap. This might be pretty commonplace knowledge to some of you but im including it for people who might have never pulled a motor before.


First thing youre going to want to do is to take the truck up to a shop and have the AC Lines evacuated. Do this while the truck is still running and driving. Do not just open one of the lines and let it leak out. When you get home, remove your Tcase skid plate and your radiator splash guard thing. put all of the old bolts back into their holes so you dont lose them.

Next (and the order of this stuff doesnt really matter) youll want to drain your transfer case, transmission, engine oil, power steering, and coolant. When you drain this stuff, leave something under it and let it drain over night so it gets to drip as much stuff as you can out of it.

While you are letting everything drain, start taking off the front of your truck. You can leave your fenders on, but your front bumper needs to come off (if you still have the stock bumper riveted in place you can leave it on, its not mandatory), Remove the two headlight surrounds, then remove the center grille assembly. Use painters tape and tape all of the little screws to the parts so you dont lose them. Once those are out, remove your lower valence and put the 6 bolts back into the fenders so you dont lose them. From here you can remove the upper radiator support bar thing that is right in front of your radiator. Go put them in a safe area, you wont be touching these again for quite a while. Now you can carefully remove your AC Condenser, save the rubber grommets and bolts, set aside. Do the same for your radiator and your Drier. You should have full access to the front of your motor now.

From here you need to just start disconnecting stuff. The easiest way to go about it is find the electrical connectors that are connecting the engine to the body. When you disconnect something, put painters tape on it and number it, write down the corresponding number in a booklet or something. On a desmogged motor there will only be like 17 things you have to unplug. dont forget about the plugs under the passenger side of the motor on the starter and the ones connecting to the transfer case. You will also need to disconnect the fuel and return lines and remove your intake. The ground wire coming off the body next to your battery connects to the passenger side motor mount. I just cut that one, it was hard to get in there. Lastly remove your speedo cable from your T case.

***when the motor is completely out, you will never ever again have a chance to replace your speedo cable this easily. I highly recommend you replace it now, even if it is working. Thats if you are keeping your stock gauges. If you are switching to GPS gauges or something you can remove it as well. The stock gauges to me look 10000000x better than any of the after market gauges, but thats just like my opinion man

Now get a buddy to help you remove the hood to store somewhere safe.

Once you have everything disconnected, go back and check again to be sure. Get your engine hoist and connect it to the hooks on the motor and put light pressure on it. Put a jack under the transfer case and also put light pressure on it. Unbolt the motor mounts and disconnect the crossmember from the frame and then remove the crossmember from the trans. At this point you should have everything disconnected. You can now remove the motor/trans/tcase in one long piece. It is helpful to get a buddy working the jack behind the t case and one person lifting the motor as they pull on the jack. Youll pull the engine up and pull it back some. Once the engine is up and into the radiator core support you can start lifting the motor higher to get the t case to clear the core support as you pull it out. This sucks, and was probably one of the worst parts of the swap for me. Make sure you find some way to secure the chain to the hook. When the hook jumps a link on the chain you will die inside a little bit. What i did was use a smaller chain and wrapped it around the hook and used mini D Rings to secure the rings so it wouldnt move.


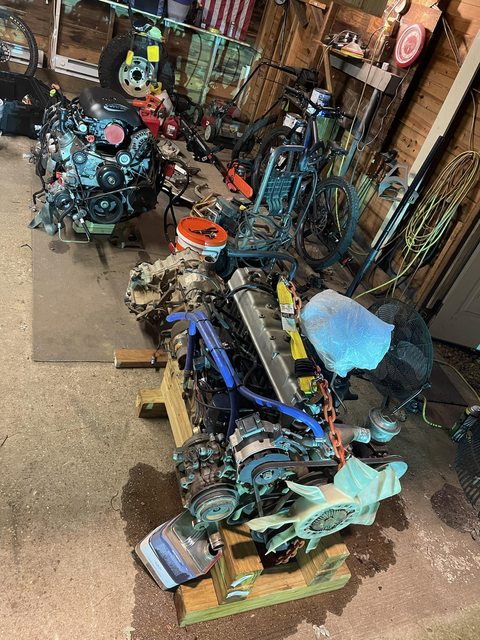
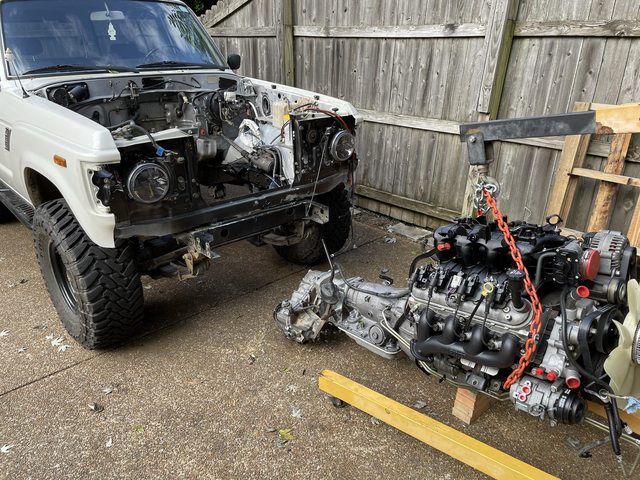
Once its out, set it on the ground near your other motor in your garage or wherever, and support it by the oil pan bolts with wood and by the trans or t case. Be careful because the oil pans on the 60s suck and might break if you put the weight of the motor onto the sump part.

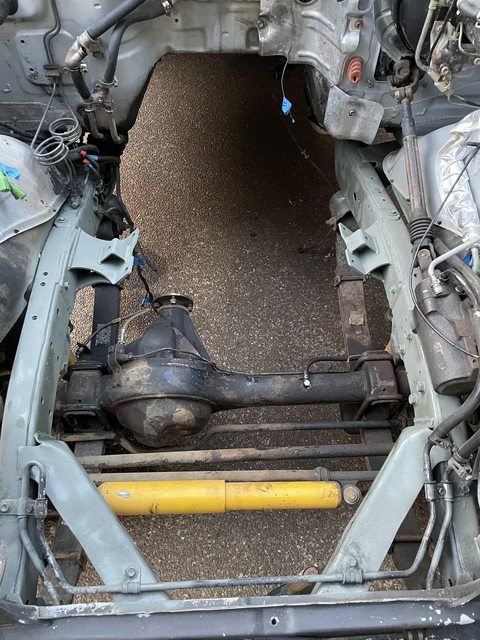
Your engine bay will look kind of like this:

5LxiMhel.jpg


2 motors side by side

N4Ku6rzl.jpg


**if you are using a H55f with your swap and its already connected to your t case disregard this next stuff. If you are using a h55f and its not connected to the case, this will pertain to you. For all advance/marks adapters this will apply

From here you will want to disassemble your transfer case from your transmission. This is pretty simple, just take all the bolts out until you get both sides off. Putting it back together is more important. Here are a few very helpful videos of assembly that will help you with removal


@orangefj45 has a great video


@OTRAMM also has a great video


Once you have the transfercase removed, sell your old motor and trans or whatever. Selling your old stuff can help offset some of the cost of the swap and could help another cruiser owner out. Karma is real and trust me, with the swap youll need some good karma

anyways, once the transfer case is removed, clean it with some gas or brake cleaner, take every bolt and run it on a brass wire brush to get the old crap off of the threads. Some people paint the outsides of the case, the PTO cover, and the trans output shaft cover at this point. It makes a swap look really pretty and professional.


So depending on what transmission you are running, at this point it gets a little different. If you are using the 4l60e or 4l80e or 6l80e you will use an adapter to mate the transmission to your transfer case. The adapter you will use for a H55f i believe is on the bellhousing side. If you are using a 4l60/4l65/4l80 etc, you HAVE TO USE A 2WD TRANSMISSION!!

4l60e (1997 and newer) to FJ60 19 spline split transfercase - Advance adapters PN: 50-0408A
4l60e (1993-1996) to FJ60 19 spline split transfercase -Advance Adapters PN: 50-0408
4L80e to FJ60 19 spline split transfercase - Advance Adapters PN: 50-1701
6L80e to FJ60 19 spline split transfercase - Advance Adapters PN: 50-9612
GM NV4500 to FJ60 19 spline split transfercase - Advance Adapters PN 50-0214
LS to Toyota H55f - Advance adapters PN: 713027-EK

From here forward, i will be talking about mating a 4l60e to a split case using the marks/Advance Adapter (they are the same thing). This is a really really good time to buy a transfer case rebuild kit from @orangefj45 or @cruiseroutfit

The adapter piece is pretty straight forward. Youll want to follow the GOD AWFUL instructions in the kit. You basically take off the cone looking output shaft cover from the transmission, measure from the trans to a spot on the output shaft and cut it off. The spud shaft will slide onto the cut output shaft and convert the gm output to toyota. I wont go too much into detail unless you need me to, but here are a few things to remember while you are doing this.

- you can always cut more but you cant add material. Measure a lot before you make the cut.
-Set the spacing for the VSS sensor after installing the smaller hexagon piece. Before installing the larger piece, or else youll have to take it back apart. to set the gap. use feeler gauges for this.
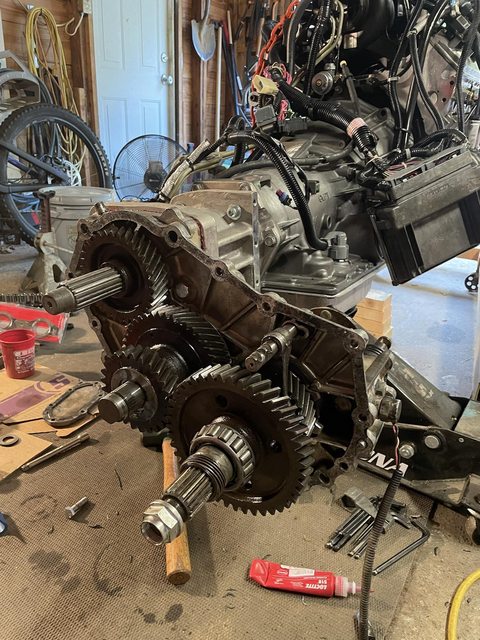
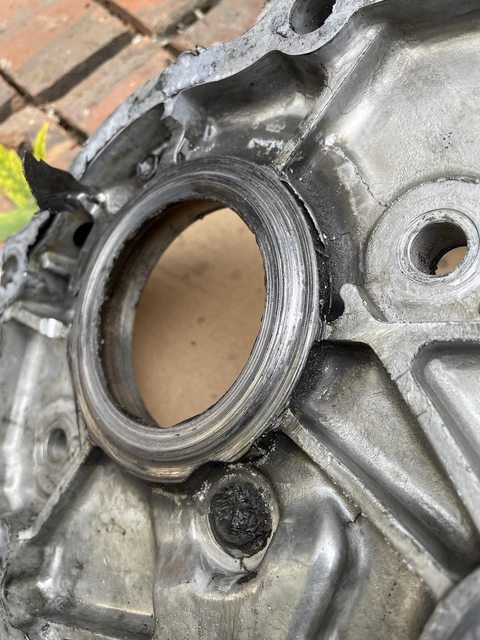
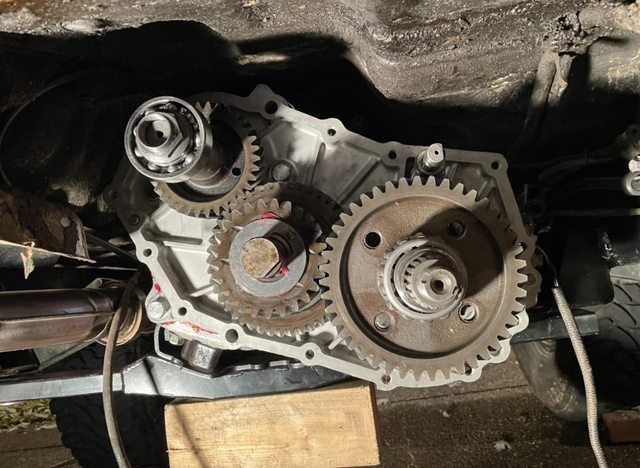
- Know which (toyota) output gear you have (top left gear when looking at all of the gears in the case), and whether or not you will need to use the AA little spacer or not. More than likely... youll need to use their spacer that they provide. I misread the instructions, didnt use it, and nuked my transfer case. When they are talking about the OEM spacer in the instructions, they are not talking about the longer PTO spacer. They are talking about the earlier transfer cases that had a spacer for the oil seal to ride on.


CKd03F5l.jpg

lIarCZwl.jpg


7zONYfLl.jpg

NOTE!!!!!! The top left gear, input gear, in this picture is WRONG. This is what happens when you dont use the spacer if you need to. See how it is so inset to the case body, and the gear isnt perfectly lined up to the idler gear? The input gear will be spaced out slightly from the case and will be flush with the idler gear when its installed correctly. This is what will happen if you dont use the spacer:

rzcOHpQl.jpg


This is how it should look:

v2BuWR9l.jpg

geXChWil.jpg


To assemble the transfer case, follow one of the two videos i posted above. Note, both Georg and otramm use anerobic sealer and not silicone rtv for the case halves. Install the PTO cover last, look inside, there should be NO space on the trans output shaft where your pto spacer is, your thrust washer on your idler shaft should not spin more than 1 or 2 degrees, and you should be able to turn everything by spinning the output of the transfer case.

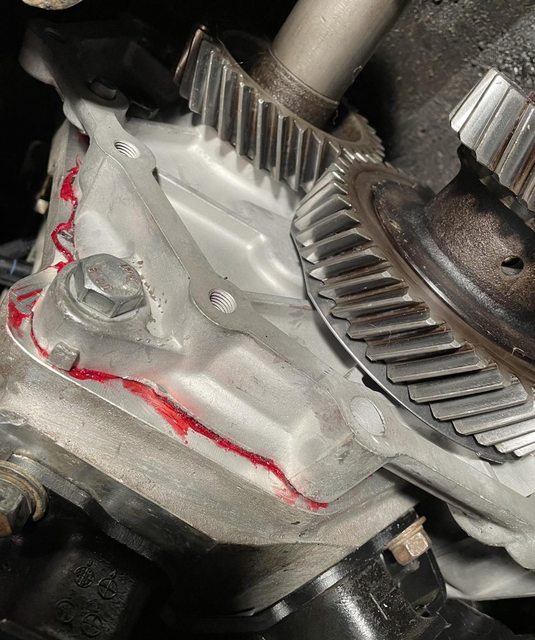
*** When you are installing the little bracket plate for your transfer case shifter, you will need to make some modifications to it. First youll want to cut the top two mounting ear things off the top of it. Im not really sure what these are for but they are kind of in the way, so I just cut them off of mine so the plate doesnt even make that upper angle and its flat.

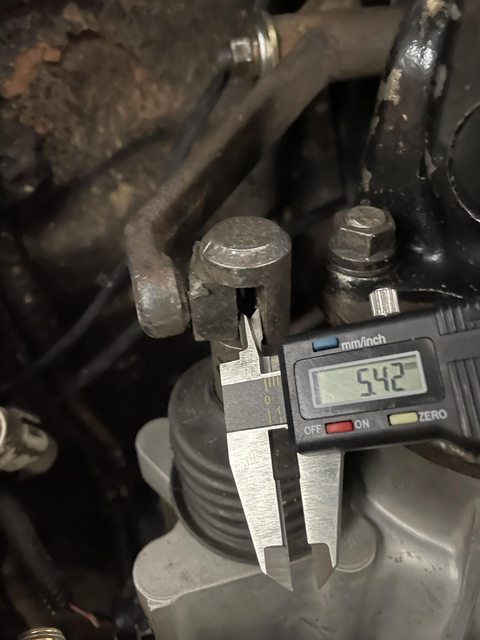
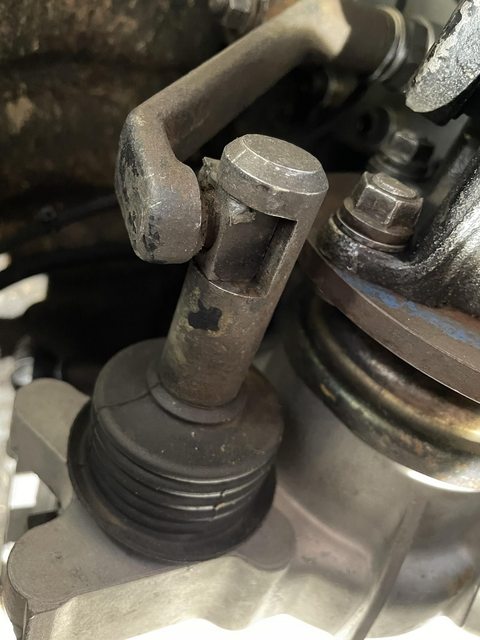
If you were to use the 3 supplied spacers in the kit with the bolts to mount it to the side of the adapter, The plate will be spaced out too far. You will notice that the little plastic cube on the bottom of the shifter arm doesnt sit down in the notch on the High/Low shift fork on the transfer case. Here are a few examples:

SJAVa4dh.png

siVmnY9l.jpg


So as you can see theres like a 5mm gap. Youll want to take your 3 steel spacers and measure 5mm off one of the ends and cut it as straight as humanly possible. Band saw is the right tool for this. Once you cut the 5mm off save the end pieces that you just cut off. Now you will use the allen head bolt, a washer, the small side you cut off, then the plate, and then the longer side of the spacer in that order to mount the mounting plate onto the side of the adapter. This will pull the entire plate in 5mm closer to the side of the adapter. You still need to use both pieces of the spacer though if you want to reuse the bolt that came in the kit, thats why you are putting the smaller one on the outside of the plate and the longer one on the inside. Keeping this smaller piece will still allow you to use the same bolt. If youd rather not use both cut pieces, you can just get a bolt thats 5mm shorter or one that wont bottom out in the threaded hole of the adapter.

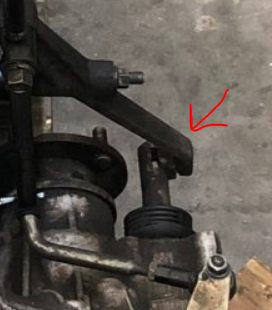
So the trick with shortening the steel spacers brings the mounting plate inboard 5mm and at the same time brings that little plastic square thing into sit flush in the shift fork but it messes up the angle and orientation of the shifter on the pivot shaft thing. Think of this shifter arm as a right triangle. To remedy this you need to add 5ish mm to the inside of the shifter arm on the bolt that it pivots onto (the one that bolts into the side of the plate that you bolted to the t case adapter). The easiest way to do this is to use 2 flat 16mm washers and a new wave washer. I only had one 16mm washer on hand so i went 16mm split lock washer > 16mm flat washer > 16mm wave washer > Shifter arm > 16mm wave washer > Smaller washer > then finally the nut. Its a lot of washers and stuff in there but it works flawlessly and takes up the weird misspacing. If you just use flat washers and no wave washers when you tighten the outer bolt it will cinch the arm down and you wont be able to move it.

You should have something like this afterwards:

xrBgPIQl.jpg


Its still not perfect vertically, but thats on Advance adapters, they should have mounted the plate down 2-3 mm from where it is supplied in the kit. This advance adapters kit kind of sucks.


Reading the AA directions or looking at the pictures online can be a little daunting but its not that bad. Just make sure you dont make the mistake i did with the spacer and youll be all good.

Once everything is assembled, give it a little bit of time to dry and fill it with gear oil to make sure you dont have any leaks, and its easier to fill while its sitting in your garage. I used redline 75w90. Use whatever brand you like best.


At this point, your motor is ready to be installed into your 60, however your 60 is not ready yet.
 
Last edited:
Hoping to attempt this with my wife's 62 at some point, and I am not smart, so a lot of the knowledge pooled in one thread is greatly appreciated. I have many of the threads bookmarked that I have read. I love the details of this one. Seems almost like a step by step guide. Thanks for taking the time.
 
Hoping to attempt this with my wife's 62 at some point, and I am not smart, so a lot of the knowledge pooled in one thread is greatly appreciated. I have many of the threads bookmarked that I have read. I love the details of this one. Seems almost like a step by step guide. Thanks for taking the time.
You got it man, it seems pretty daunting at first, but once you break it up into a bunch of small projects, it moves along pretty well and isnt too bad. The swap itself isnt that difficult, its just very labor intensive and can get overwhelming. Breaking it down into parts helps A LOT so you are just tackling one small part each time you go out to work on it.

Im hoping this thread can just be a quick resource for people to check on, so they dont have to have 50 bookmarks saved on different build threads where they have to wade through posts talking about the weather, or what sandwich they ate or whatever. Just quick info
 
As im about to have a swap done I read everythin about swaps. This was a great read...ty. it gave me confidence in my LS3 selection....then concern with the AMF issue. I asked J about it. He mentioned The ERODS no longer use AMF. Im back to excited!!!

Screenshot_20211207-065059_Chrome.jpg
 
Last edited:
Once you have your Transfer Case all moved over to your new motor, and have done all of the LS motor prep you are planning to do, and you are sure you have done all of it... Seriously, do as much as you can to it while it is out of the truck. It will save you a lot of hassle.

At this point you should have an engine bay that looks kind of like this:

5LxiMhel.jpg


From here, you can hit all of this with a pressure washer to get the dirt and debris out and start removing stuff you wont be needing anymore.

Decide if you are going to want to keep your Charcoal canister, and remove it. If you are going to keep it, place it aside to be reused, if you arent going to use it just chuck it. I used a one way breather valve attached to the stock vent line that runs along the frame rail and ran it up behind my wiper bottle in the engine bay and havent had any issues so far.

Remove your Hood hinges, remove your carb fan, remove all of your vacuum switching valves and smog stuff. Go ahead and remove your AC lines completely for now and set these aside. Youll reuse these. If you are reusing your Evaporator, plug off the two lines on the firewall with some tape. Remove your power Steering High pressure line. Put something in the empty ports on your box to block stuff from falling into it. There are a few hard lines for engine coolant that run above the trans tunnel that can be removed as well. Unbolt your diff breather hose holder from the frame rail, and remove all of your rubber fuel lines coming off of the hard lines on the frame in the passenger side and cap the hard lines. From here you can either clamp your Fuel feed line right as it exits the fuel tank, or drain your fuel tank. After blocking the flow of gas, remove the entire Fuel feed hard line. If you are looking at the lines on the frame rail in the engine bay, this line is the lower line. Also completely remove the choke cable and the pull switch from the truck, youll never need to use this ever again. The trick to making your engine bay look clean on this swap is removing as much old unused stuff as you can and hiding as much as you can.

(OPTIONAL) you can go even further and remove even more stuff to paint the inside of your engine bay. This is kind of the only time youll ever have to do this. I didnt do it, but if you are looking for a like restoration quality swap, this would be the time to do it. Some of the stuff inthere can be wrapped up in painters plastic or something else to protect it from being painted.

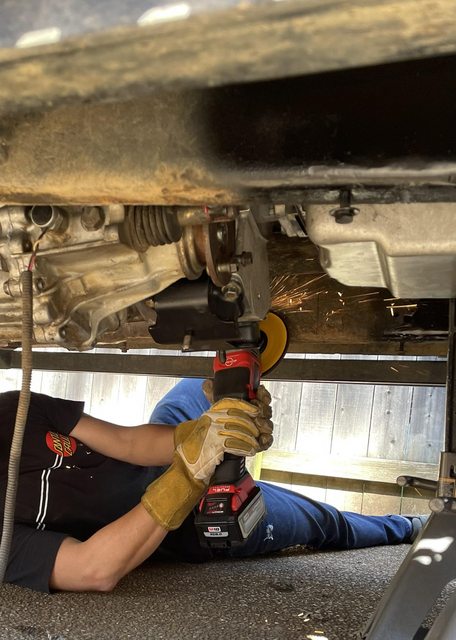
Once you have everything removed, you can start cutting off the mounts. There are 6 mounts in total you will have to cut off of the frame. the two old motor mounts above the axle, the inner trans mounts, and the outer trans mounts. 6 inch angle grinder or a plasma makes super quick work of this, but a normal 4.5 grinder works also. Definitely wear a respirator, gloves and quality eye protection in here because youll just be sitting in a giant cloud of dust. Grind off the mounts, flap the frame smooth on all 6 of them. The inner passenger side trans mount sucks and you have to be careful because you have a bunch of lines there in the way. You can unbolt the lines from the frame and move them out of the way to get better access to them.

Here is the engine bay with a bunch of stuff removed. This picture was taken before the ac lines and power steering lines were removed and before painting. Notice all of the flags of blue painters tape. These are all numbered so you can remember what things are.

K54jWUJh.jpg


Lastly, there is a brake line T that you will notice directs the front axle brake line to the center of the truck. Remove the line from the bottom of the T and very carefully cut the T off of the bracket and move it so it points to the front of the truck, use a few good tacks to hold it in place. Or you could just buy another brake line T, theyre not very expensive. You will need to use a brake line bender or if you dont mind if it looks kind of lumpy, your hands, to bend the brake line into a position that is usable. Use the brake line bender though. The reason you are repositioning this T is because in stock form, it will interfere with your future exhaust. On my swap we just bent a new line and bolted it in for a nice clean look. With the Hooker manifolds this isnt absolutely needed but improves the routing quite a bit

FmVXRTXl.jpg

F0MWsT0l.jpg


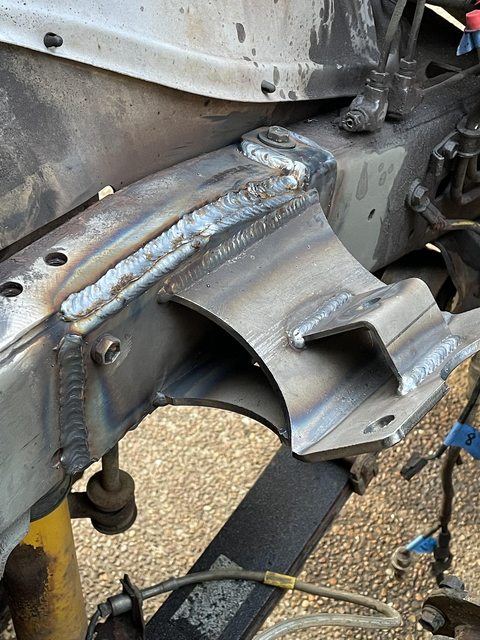
Once you have everything out you have some options. If you use the @Well Sorted Motor mounts, from here you will just bolt the motor mounts in and weld them to the frame. The mounts will offset your motor to the driver side and give you proper transfer case pinion angle, its really super simple, two bolts in each to factory bolt locations. There might be a slight gap on the top because the frame doesnt perfectly come to a right angle right there so instead of one giant fat weld you can run two beads. And maybe clean up the surface metal a bit better than i did

DNqkp4Pl.jpg


The other option is to run other types of motor mounts that arent keyed to your frame. They will need to be placed and tacked in with the motor and trans in the engine bay. You will basically offset the motor to the driver side about 1.5-2 inches and tilt it back little by little until you have proper pinion angle on the transfer case output. Lots of moving and checking, moving and checking. When you are satisfied with the positioning. Tack the mounts, pull the motor out and then burn them in. Definitely stay away from the Advance adapters motor mounts here, as they interfere with your exhaust.


Once your motor mounts are fully welded in, go ahead and spray some rust converter on your frame rails, prime, and paint the frame rails and motor mounts. I forgot to take a pic of my frame painted black, but here is it all primed with etching primer.

BR0VdMLl.jpg


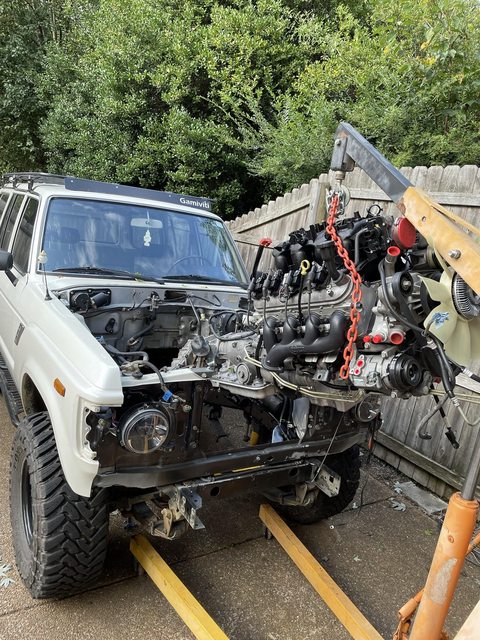
Once your frame is all painted up you can go ahead and install the motor/trans/tcase in one piece. Definitely get some buddies to help you with this. It is long and unwieldy. Its basically the opposite of the removal of the 2f. Carefully guide the motor and trans assembly into the engine bay and down the trans tunnel and be careful not to bash in your sheet metal. This is a trial and error approach and youll find that you will clip some things on the way in. Have someone working a floor jack under the transfer case once the T case is down in the trans tunnel and have them help guide the whole thing back in straight. I didnt remove the intake doing this, but keep in mind, its plastic and not very hard to remove. Once its above your motor mounts, slowly lower the motor down and bolt the motor mounts on the engine to the motor mounts on the frame. From here you will tighten the bolts on the motor mounts finger tight. Leave the Jack under the trans/tcase to support it and not put too much stress on the floor jack.

Dd83XQul.jpg

lAGaEEol.jpg

D8v6Q3Xl.jpg

TDYtVr3l.jpg


Now that the motor is in, and its bolted in on the motor mounts, youll need a to do your crossmember. This is a spot where you can either make your own crossmember to save some money out of square or rectangle tubing and flat stock, or just buy one. If you are using a 4l80e, the land cruiser shop makes an awesome crossmember kit. If you are using a 4l60e, and want to stay with the rubber mount, the Advance adapters crossmember is okay. I used it but you really need to make a quick modification to it to make it a little better. On the two bolt holes on the outside of the arms, you can go to ACE and buy some small steel spacers that fit the included bolts in the kit. They have some that are the exact length of the square tubing. Take a step bit and open the holes up to accept the spacer, and weld them in. Grind the welds smooth and youll have steel reinforced mounting points and your steel tubing wont bend when you tighten your bolts up.

zs57Zwil.jpg

xFGZUv1l.jpg


Side note, the advance adapters 4l60e adapter doesnt have the proper bolt hole spacing on the adapter itself, you will have to modify your OEM trans mount and open up the holes some with a step bit to make the stock mount work. Its not hard but kind of unbelievable that they sell the kits like that.

After you have selected the crossmember you are planning on using, or made your own. Install your transmission mount to the transmission or adapter. Then bolt your crossmember to the trans mount. This will give you roughly where you will need to grind the paint off of your frame to weld on the crossmember mounts. Buy cheap grinding wheels for getting this frame coating off, the frame coating, dirt, grease and whatever else is under there will clog up your grinding wheels super fast and ruin them.

A61JPPMl.jpg


with the frame cleaned up you can tack your crossmember mounts to the frame and do a light dry fit. If everything lines up correctly, your pinion angle looks okay, and your drivetrain looks straight, go ahead and finish welding the mounts in and paint them. Once dry fully mount all of the bolts for the trans mount and crossmember. Fully tighten these bolts down. Then go up and fully tighten down your motor mount bolts. Remove your jack and your motor is officially in the truck on its own weight!
 
Last edited:
As im about to have a swap done I read everythin about swaps. This was a great read...ty. it gave me confidence in my LS3 selection....then concern with the AMF issue. I asked J about it. He mentioned The ERODS no longer use AMF. Im back to excited!!!

View attachment 2858385
Do you mean the active fuel management? Thats pretty awesome if the new motors coming from GM Performance already removed all of the AFM stuff so you dont have to. It wouldnt make much sense for them to include it in motors they are selling specifically for motor swaps haha. If you confirm this is what you mean, ill add it to the post above
 
Do you mean the active fuel management? Thats pretty awesome if the new motors coming from GM Performance already removed all of the AFM stuff so you dont have to. It wouldnt make much sense for them to include it in motors they are selling specifically for motor swaps haha. If you confirm this is what you mean, ill add it to the post above
Yes, according to @TRAIL TAILOR All that dsnt exist on the Erod Kits. New Crate Motors no longer have the AMF!
 
Nice ill get it added. I didnt even look at those because they were above my budget haha.
I got lucky with CRO + Shiba exploding.... put it all into my rig :rofl: :rofl: :rofl: :rofl: :rofl:
 
@dbbowen

Per my GM Rep. The early 5.3L EROD crates and 5.3L had the AFM feature and was removed years ago, due to problems. 5.3L EROD IS NLA...


6.2L LS3, LS3 EROD crate and C&C kits do not have AFM.

Hot cam LS3 crate kits do not have.

J
Awesome! Thanks for the info! Going to add it into the first post. Man, Hot cam LS3 crate kit sounds freaking bad ass
 

Users who are viewing this thread

Back
Top Bottom