Builds Here we go (FJ-40 getting a 3B/Turbo/H55f)...

This site may earn a commission from merchant affiliate
links, including eBay, Amazon, Skimlinks, and others.

Dan,

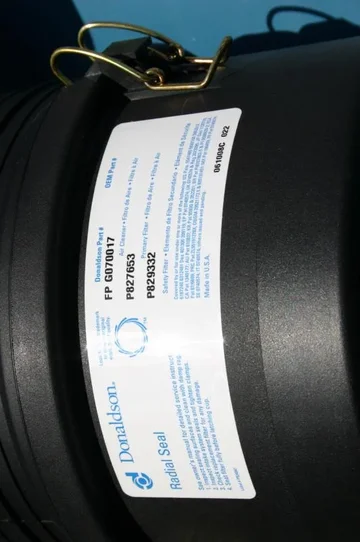
Is that Donaldson from the FPG series? I've been lookin at them online and when I called the local distributer I forgot to ask if the elbows rotate on the models with the elbow. I assume they do - would you happen to know?

They do indeed rotate.

It is an FPG. Since the inlet to the turbo is 3 inches, I just bought the FPG with a 3 inch outlet so that I didn't have to adapt between different sizes. A smaller filter would fit better, and certainly flow MORE than enough air but since it fits....
donaldson 4.webp

That's the part number for that one. IIRC, it's just the last two numbers that indicate the outlet (straight or elbow).

They are plastic, but they aren't in the least bit cheap. Actually, the metal band seems lighter than the plastic FPG filter.

Dan
donaldson 4.webp
 
nice job, teaching your mom to weld... that is too cool.

cheers

The rack she made came out pretty well. If it gets painted and installed tomorrow, then I'll see if I can't snap a pic or two...

Didn't get as much done as I had hoped today, as the day began with a trip into town followed by a very tasty lunch (Spinach Enchiladas with egg overeasy on top from The Range--oh, it's yummy).

But, after that, Dad and I got a good bit of work done. Dad spent the afternoon cleaning various parts and prepping the front hubs for powder coating. That meant removing all the studs and getting them into the blast cabinet. We also made a fancy tool for loosening the bolts that hold the rotor to the hub by drilling a few holes in a large chunk of wood. It made it VERY easy to get them loose. Why didn't I think of doing that earlier?

Here's Dad loosening the rotor bolts with the custom special tool/chunk of wood.
dad wrenching.webp

Then I did indeed powdercoat a backing plate for the rear axle. Here's a taste of what's to come...
backing plate 1.webp
backing plate 2.webp
dad wrenching.webp
backing plate 1.webp
backing plate 2.webp
 
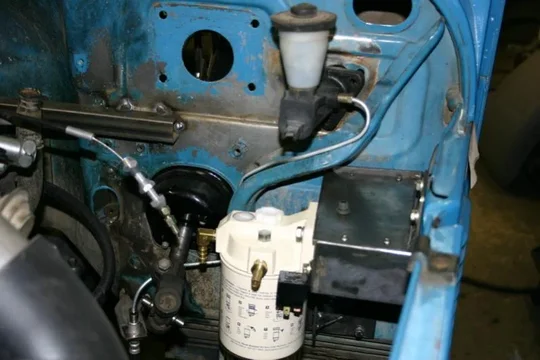
Then I decided to get cracking on a fancy bracket. It will serve two purposes:
  1. It will hold the Racor fuel filter
  2. It will have a small switch panel just for the starter and glow plugs--and all wired to bypass the rest of the truck's electrical system. Just a very simple way to get it started and drive home if push comes to shove. It's right by the EDIC, so it would be a one man job to start the truck right there.

I always like seeing the process for building the boring things like this, so I figured I'd take step by step pictures and explain the process if anyone is wondering how you fabricate stuff like this.

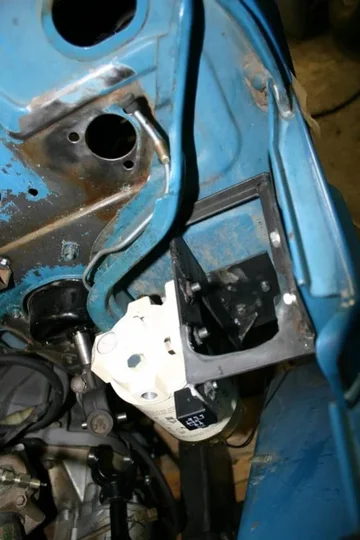
First I made a panel that matched the contour of the firewall. In my case, there were unused bolt holes that originally held the carb cooling fan. So, I made a simple plate that would bolt to those holes.
fab 1.webp

Next I tacked a vertical piece of metal to that plate. I set this at approximately the plane on which I wanted to mount the Racor. I also tacked a little gussett to this vertical piece just to stiffen it up a bit.
fab 2.webp

To that vertical piece, I laid another piece of metal perpendicular to it, so that it runs horizontally. In that piece of metal I drilled two holes to mount the Racor fuel filter.
fab 3.webp
fab 1.webp
fab 2.webp
fab 3.webp
 
Once that was done, I made a plate to use the other two bolt holes originally for the carb cooling fan. These are located just above the louvered inlet. I also cut a piece of metal to length to join the plate above the louvers and the bracket I had been making. This makes the bracket really, really strong because it's supported on two sides. It also slightly stiffens the wing of the tub a little.
fab 4.webp

And the same thing but with the Racor bolted on...
fab 5.webp

And a picture from the top, so show you how much extra room there is (not a whole lot, but there's plenty here).
fab 6.webp
fab 4.webp
fab 5.webp
fab 6.webp
 
Last two for the night...

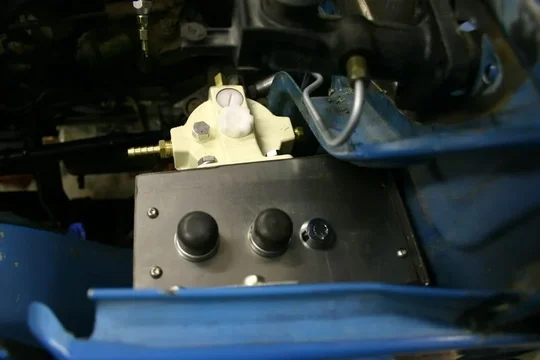
With that part of the bracket done, all that remains is to put some skin on it. On the top there'll be a single plate with two large pushbutton switches. They both have rubber boots to protect them. One will glow the glow plugs, the other will crank the starter.

Here's two pics of one of the switches loosely set in place to gauge the size and to see how much room I'm working with for the wiring. Plenty of room really.
fab 7.webp
fab 8.webp

The glow plug relay will be mounted on the fender I think, and the starter has the relay built onto it, so these switches (which are rated for quite a lot of current) should be more than adequate. I will need to figure out how to make some nice faceplates for the switch panel (and for a gauge pod inside the truck), I don't know how fancy a trophy shop or engraving shop can get, but I'm not looking for anything TOO fancy. Just a single plate with some labels, but they have to be able to locate them to match my switches.

Anyone ever had a switch faceplate made? Wayne: I saw the ones you made for the HZJ-40 and it's lockers--was that a custom shop you used, or would I be able to find something similar here in New Mexico?

Tomorrow I've got to round up the 50mm carrier bearings so I can finally install the ARBs, as well as keep plugging away with some of the cleaning and powdercoating work. It's kind of a lot of work to do right now, but with any luck this truck will never need more than a good wash to keep it looking nice and pretty for Dad.

Dan
fab 7.webp
fab 8.webp
 
keep up the good work.

faceplate: i made mine from 3/16" aluminum plate, careful measuring, drill press, jig saw, tiny belt sander and a die grinder. i was happy with the results.
 
keep up the good work.

faceplate: i made mine from 3/16" aluminum plate, careful measuring, drill press, jig saw, tiny belt sander and a die grinder. i was happy with the results.

That's about what I am planning on. What about the lettering? Did you bring that plate to a trophy shop to apply the labels to the plate you had made?

So, we decided that we really want to clean up the engine now versus later. So, that brings up a few questions....
  • Who rebuilds IPs for a decent price? The N-D shop in town told me it would be about $1600 to rebuild our pump! :yikes:
  • Gaskets. I will be removing all the accessories from the block to clean it and paint it, so should I order a gasket kit (like SOR sells) or would I be better off to collect the part numbers and see if CDan can get them?
  • Or would I be better off just buying a complete rebuild kit? We don't really know the health of the engine (that's why I was planning to just run it as is for a bit first), so would simply rebuilding it now be a good idea? Or would I be better served just cleaning it up and then deciding if I should rebuilt it?
  • I'll replace the clutch, front and rear main seals, water pump whatever I do, is there any other PM I'm missing if we don't completely rebuild it?
  • Should I replace the freeze plugs, or leave them unless they start leaking?
  • I don't know the exact month/year of this motor. It came out of a BJ-73, and that's about all we know about it. Is there any way to pinpoint the date? It seems to make a difference in terms of some of the parts that we need.

I called FROR this morning, and they said that our relay rod would ship today. Next up I will call Kurt and see if he's got the 50mm ARB carrier bearings. And then I will be making a trip into town to get some hardware, and stop by CDan to order some more parts (like a few of the differential studs that need replacing). Oh, and then I'm going back up to the shop to tinker some more. I love my job right now! (because I'm pretty much just sitting at home getting paid while my employer tries to schedule some training)

Dan
 
Digging your build :cool:

PS your 50mm bearings left today!

I appreciate the fast service. I HATE it when I do something so stupid as to not order what is obviously required. The worse part about it is that when we first went to put the ARBs in, we realized the bearings were different. So we (Alia176 was helping) called his wife to see just what part numbers were on his.... wait for it.... 80 series setup kit. That's right, we had the right pieces ready to go a few weeks ago.

Yeah, I'm a smarty. ;)

Glad you're digging it. I'm getting pretty pumped about it myself (and it's not even mine--but it's good practice for my 45 ;) )

Dan
 
Well, I finished up my little filter bracket/switch panel today. I like it!

First I cut the bracket a bit to make more room for the pushbutton switches...
plate 1.webp

Then I cut a bit of steel for the end, just to make it look a bit more finished on the forward end. I also cut a 16GA plate for it and drilled/tapped M4 screw holes to hold it all together.
plate 2.webp

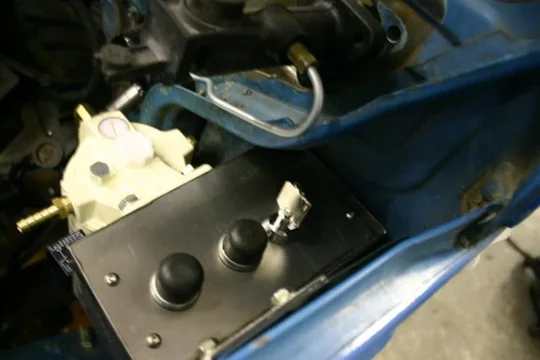
That done, I drilled holes for the switches. On the far right is a security key that will shut off power to the two switches, which will probably just live in the glove box or tool box. Then there's two heavy duty pushbuttons, one will glow the GPs, and the other will crank the starter.
plate 3.webp

These are in addition to the normal controls. The idea is that if everything else fails, that one person could pop the EDIC control arm off, and use these two switches to get the truck running in a pinch.
plate 1.webp
plate 2.webp
plate 3.webp
 
And here's the panel with the security key installed (because I know you were dying to know what on earth that would look like)
plate 4.webp

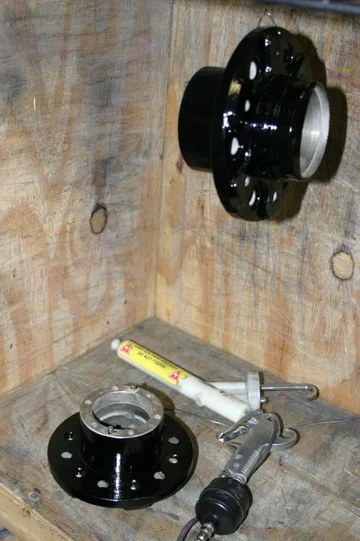
I also got some more powdercoating done. Here are the front wheel hubs. I'm waiting on new wheel studs to arrive (probably early next week) before I assemble it with the new rotors, but they are coming out nicely.
hubs.webp

I bent up a clutch line, but I'm not so sure I like it. There's not much room between the master cylinder and that rib, and I really don't like the idea that my line might rub on that rib, so I think I'll bend another one up. I'm thinking maybe of going ABOVE the brake booster and then down to the bracket with the flex line.
clutch line.webp
plate 4.webp
clutch line.webp
hubs.webp
 
I "wasted" a few hours fabricating a cart for the plasma cutter. First, I was tired of picking it up to move it (it's pretty heavy). Second, the filter that we had on there sucked. I could go through a new tip in a day or two if I was using it a lot. I decided that the fix would be a better filter, so I got a TP filter for it, and decided that if I was going to use the filter, I might as well protect it a bit.

Here's the result. I'm already wondering how I lived without it. I guess it was a worthy distraction...
cart 1.webp
cart 2.webp
cart 3.webp
 
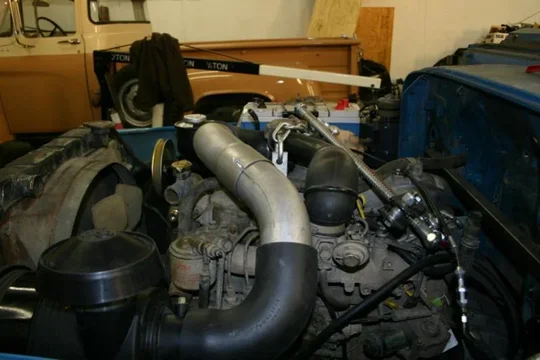
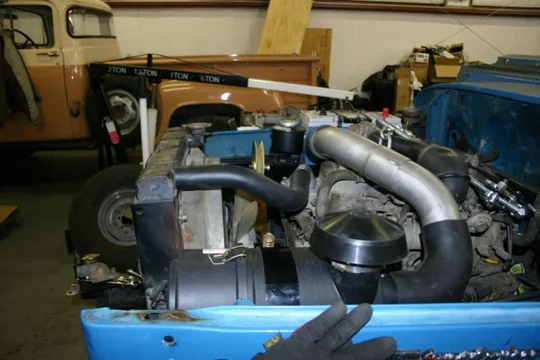
Last thing I got done today was to pretty well get my intake run from the Donaldson to the inlet of the turbo.

These 3" 45 degree bend pieces are actually Donaldson parts, and they bends are REALLY nice. You can cut them at any point and you will still have a full 3" diameter tube to weld to!

I like how it fits, but the only thing I'm not so sure about is if there will be enough flex in the two rubber elbows to account for the engine rocking and shaking, or if I will need to make a cut in the center section and put in a flexible straight tube section. Any ideas there?

Here's the intake:
intake 2.webp

intake 1.webp

intake 3.webp

That was easier to cut and fit than I had imagined.

That's it for today. Tomorrow I'm running into town to go talk to some people about getting some power steering lines made, but some bolts, and then it's time to start welding up more of the roll cage.

Dan
intake 1.webp
intake 2.webp
intake 3.webp
 
So searching the web it looks like a "hump hose" is the normal solution to build in a little bit of flex.

Like this:
Hump Hose

I think I'll see if I can't order one and get it on the way, because I can certainly weld the intake tube like it is now, and if it needs the hump hose, cut a section out and insert the hump hose in it's place.

Dan
 
You can get the hump hose at your Donaldson rep too - don't know how good the pricing is though, I haven't dug that deep yet

3" is part #P105608
 
Last edited:
Cool. I'll get one ordered one way or another I think...

A box arrived from Japan4x4. Awesome!

Here's the new T-stat housing, without the cap on it (since the cap is on the radiator). Ooooooohhhhh....
t-stat housing.webp

And some of the hoses I ordered (from a BJ-42).
hoses 1.webp

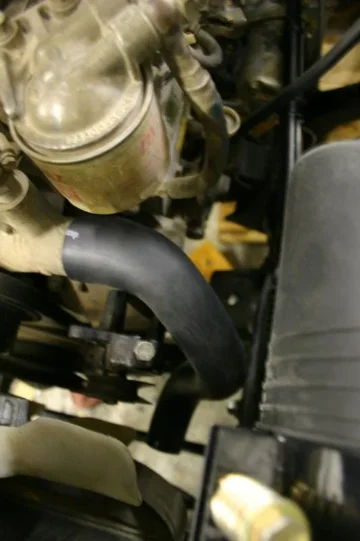
And here's trying out the hoses. I like it! The upper hose has to be shortened just a bit because I mounted the engine farther forward, but no sweat!
hoses 2.webp
t-stat housing.webp
hoses 1.webp
hoses 2.webp
 
Another view of the upper hose. You can see that the radiator is slightly pushed out because I haven't yet trimmed the hose.
hoses 4.webp

And here's the bottom hose (at least the main hose, there's a short section that extends this to the radiator itself). It's going to work!
hoses 3.webp
hoses 5.webp

With that done, I ran into town with the radiator to get it modified/get a new one made that will work with those hoses. Should be ready early next week. Exciting stuff? Yep.

OK, I'm off to the shop for more work!

Dan
hoses 3.webp
hoses 4.webp
hoses 5.webp
 
So.... What have I been doing?

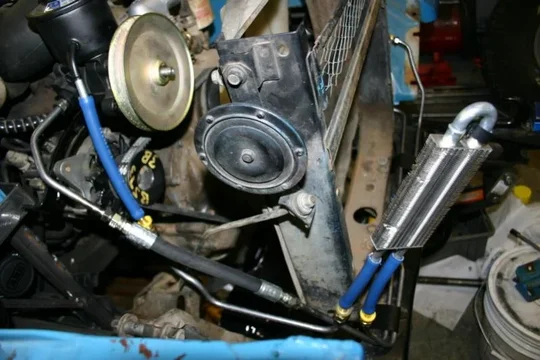
Well, yesterday I bought a bunch of hydraulic tube. That stuff is expensive! And then this morning I got motivated and bent it all up for the power steering. It's 3/8" tube, and I reused the fittings for the pressure line from the pump to the PS gearbox. I also had JIC fittings brazed on for the return line, because that way I could then screw on barbed fittings to make it all work out.

I didn't take any pictures of the process, but here it is all finished.
ps 1.webp

And the left side...
ps 2.webp

And here's the right side. The PS cooler obviously needs to be mounted to the radiator support, and those pictures are taken with everything loose, but that looks like it will work to me!
ps 3.webp
ps 1.webp
ps 2.webp
ps 3.webp
 

Users who are viewing this thread

Back
Top Bottom