Builds Here we go (FJ-40 getting a 3B/Turbo/H55f)... (2 Viewers)

This site may earn a commission from merchant affiliate
links, including eBay, Amazon, Skimlinks, and others.

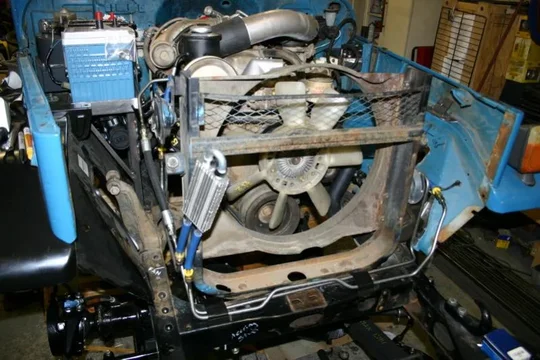
Two more pics of the PS lines and whatnot...

The left side is basically copied from the RHD Hilux Surf halfcut I scrapped, which for some reason had a small section of flex line from the gearbox to the return line, so I just duplicated that here. It also made it easier for me to fabricate, because I can be sloppy with the flex line. :hillbilly:
ps 4.jpg

And here's another view of the right side. I'm not exactly sure if this is the PS cooler I want to stick with or not (the fins are really flimsy, and I would prefer it have an integral mounting bracket), or even if I need a PS cooler (the return line might just cool the fluid enough), but it's what I'm going with for now...
ps 5.jpg
ps 4.jpg
ps 5.jpg
 
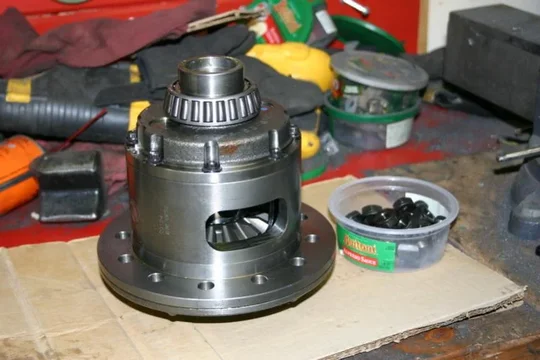
Not only did I get the PS lines fabricated today, but on my way back from town with the PS lines (I had them brazed and the flex line done at a hydraulic shop in town) I stopped by Alia176's, and we installed the ARB air locker into one of the differentials.

I really, REALLY need to get a proper spanner wrench. The one I made to do the job actually broke, and I'd much prefer to not have to use the hammer and chisel to adjust the thing.
arb 1.jpg

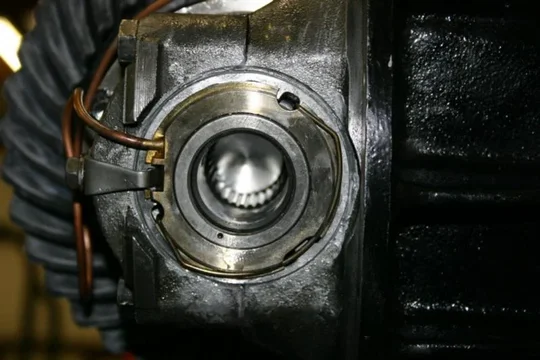
And here's the gear pattern with it all said and done...
arb 2.jpg
arb 3.jpg

Tomorrow I think I'm going wheeling. I wish there was more snow, but it is what it is. But when I get back, I'll probably try to trim the PS flex lines and get the lines really mounted to the frame.

It's very good to get that job out of the way. I'm still waiting on my relay rod to arrive from FROR, but other than that I think the steering can be checked off the list. I've got the bits coming in to finish up the axles and put it back on its wheels hopefully early next week, and maybe get to dealing with the wiring...

Dan
arb 1.jpg
arb 2.jpg
arb 3.jpg
 
Thanks for the pics Dan - I picked up a 10' length of tube last week for the same purpose :cheers:
 
Thanks for the pics Dan - I picked up a 10' length of tube last week for the same purpose :cheers:

Small world....

Great minds think alike....

I used 3/8" tube, and I was able to bend it with just a little handheld bender. I used some PVC pipe as a cheater to help get the bends smoother, but no sweat. The hydraulic shop actually wanted to know how on earth I made the bends, as their bender couldn't make such tight bends as close together as mine came out. The location and bends along the front crossmember was taken directly from the factory PS lines (this truck had PS originally, so while it's not exactly the same, I at least had a model). Make sure you leave room for the front bib bracket.

So, if you can't do it with a handheld bender, you're a girly-man! ;)

Now that they are done, I wish I would have gone to a junkyard and taken the fittings in the best shape I could find. Not that my fittings aren't fine, but they aren't PERFECT. Yeah, I'm like that.

Dan
 
So, I've been busy...

First off, the relay rod from Front Range Off Road came in. Definitely worth the $60 to buy a custom relay rod. It's beefy.

Here it is. Keep in mind that this is with the axle at pretty much full droop. The frame is on jackstands, and the axle housing is on the springs pulling them down.

Front the front...
relay rod 1.jpg

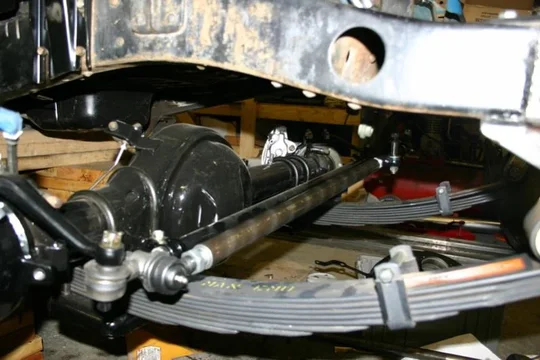
From the side... I kind of wish I would have mounted the steering gearbox just a bit farther back to make the relay rod a little more parallel to the tie rod, but this isn't too bad. I think we can live with this.
relay rod 2.jpg

And from the other side.
relay rod 3.jpg
relay rod 1.jpg
relay rod 2.jpg
relay rod 3.jpg
 
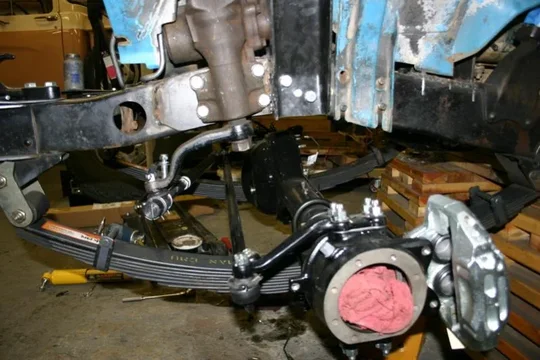
Here's both sides with the wheels turned all the way to the right... This should be the worse steering geometry the truck can ever see, so like I said--we can live with this.
ps 4.jpg
ps 5.jpg

And here's the steering stabilizer. I'm not so sure that this will work, but then again this is with the suspension fully drooped, which is going to be the absolute worse case scenario for the angles of the steering stabilizer.
ps 6.jpg
ps 4.jpg
ps 5.jpg
ps 6.jpg
 
With that fancy new relay rod (OK, so it's just a standard relay rod, not so fancy) on, I decided to install the second ARB.

So, the bearings (the new 50mm ones--thanks Kurt!) were pressed on...
arb 1.jpg

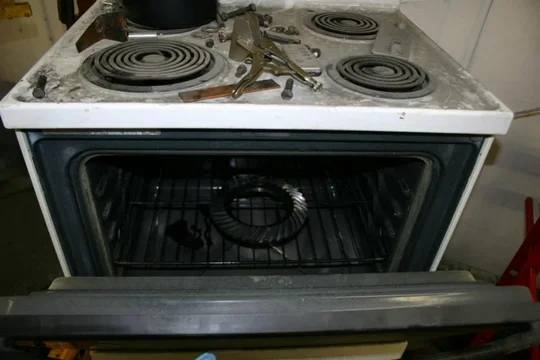
Then I put the ring gear in the oven (yes, I have an oven in the shop--for powdercoating, but no worries about having to steal the kitchen oven here), and got it warm enough to slip onto the ARB.
arb 2.jpg

And it slipped right on. Thank goodness for welding gloves. At 200 degrees F, that ring gear is a hot little potato.
arb 3.jpg
arb 1.jpg
arb 2.jpg
arb 3.jpg
 
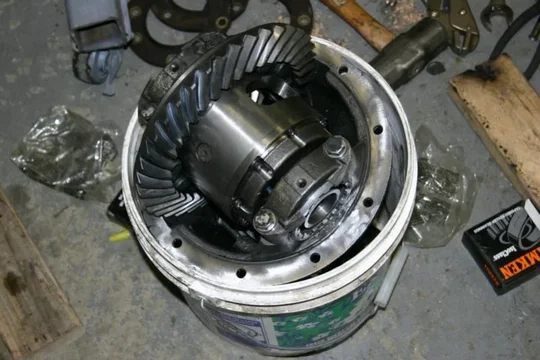
And here's the final pattern when it was all said and done... This was the front diff, and I really doubt it even had 1000 miles on it since new. I will swap this diff to the rear axle I think. It doesn't even have the shiny wear patterns on it yet (and even has a touch of rust on the backside of the ring gear from sitting--lame!), so I figure putting it in the back will be like putting a new differential in the axle that does 99% of the work.
arb 7.jpg
arb 8.jpg

And here's the final assembly, with the dial indicator still attached to check the backlash.
arb 9.jpg
arb 7.jpg
arb 8.jpg
arb 9.jpg
 
Here's the only puzzlement with the ARBs...

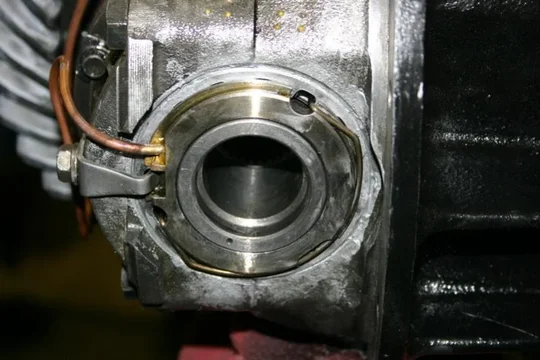
On the second one (the one in these most recent pics) I installed the air ring. I think I installed it right (and I did it the same as the first one), but the air ring rocks back and forth when the gears turn. The keeper obviously limits the movement, and it only rocks back and forth by 1/8" but still...

Did I do this right?
arb 10.jpg
arb 11.jpg

That's it for today. Tomorrow I'm going to go pick up all the replacement axle parts from CDan, and the new radiator. If I'm really good, I should be able to get the radiator in and let it idle and get really up to temperature--which means I'd be able to run a good cooling system flush while I was at it...

Dan
arb 10.jpg
arb 11.jpg
 
that relay rod looks acceptable but i "think" the 70 series drop arm is a bit deeper angle, email Lowenbrau and ask him. he should know.
if you are worried about the angle of the stabilizer you can always make up a block for between the L mount and the frame but to be honest i wouldn't worry about it.

love the idea of the bucket for the diff.
 
Funny thing is that I looked at a 70 series pitman arm because they are a touch shorter, and don't have as much droop.

I guess the real moment of truth will come when I set the weight back on the wheels and let the springs compress to set it at it's normal ride height.

I've thought about either making a block for the stabilizer, or just making a "taller" L mount, if I could find a reamer to match the taper on the pin. It would be wicked easy to fabricate, but like you said, I may just not worry about it at all. Not only should a stabilizer not be required, but it might also bolt right up with the axle at ride height without a problem. Although then the stabilizer might be the thing that limits axle droop, and that wouldn't be so acceptable either.

Dan
 
Well, the radiator is back. I had it recored with a 4 row core, and had the outlet on the bottom moved to the left side. Fits like it's supposed to!

The radiator itself. I had hoped they were going to get us a new top tank, but oh well, it'll still work beautifully.
radiator 1.jpg

And here's the bottom hoses. I really can't ask for better than that!
radiator 2.jpg

And a last overview showing about how much we need to trim from the upper hose.
radiator 3.jpg
radiator 1.jpg
radiator 2.jpg
radiator 3.jpg
 
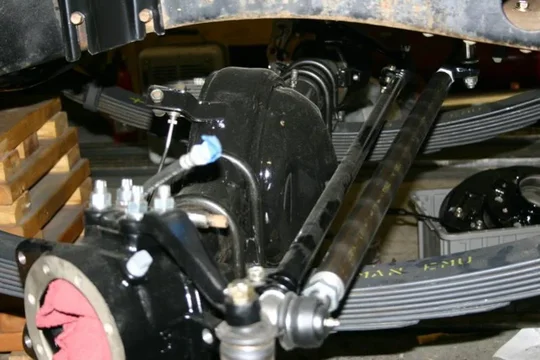
And finally (since I only had 3 hours to work on the truck this morning with Dad) here are some pics of the steering linkage with the weight of the truck on the axle. Much better angles here.
steering 1.jpg

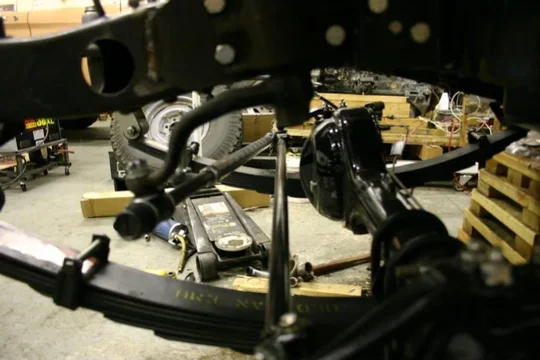
And a more level closeup view of the relay rod and tie rod... I am liking the idea of putting a spacer on the L bracket for the steering stabilizer or something just to make it more parallel to the relay rod. Seems like just a half inch would do wonders for those bushings.
steering 2.jpg

And a side view...
steering 3.jpg

We also removed all of the studs from the from diff, then cleaned the flange. It's ready to install the third member into the front axle, which means the front is all ready to go back together pretty much. Same story with the rear axle.

Basically, when I get home (in about a week--weak) the truck will be back on it's wheels. And with the radiator connected, I'll start the engine in the frame and let it really idle with a good radiator flush going to clean out the engine, and probably some Seafoam in the oil to help clean up the inside of the motor before I get around to replacing seals and cleaning up the outside of the engine.

Unfortunately, that's it until I get home, but it's coming together nicely. Dad is home tinkering with the truck, so he might get a good bit done while I'm at work.

Dan
steering 1.jpg
steering 2.jpg
steering 3.jpg
 
Enjoying the read greatly Dan.

I wish I'd gone the powder-coating route myself, but there's always next time. :rolleyes: You're getting some nice results with it, that's for sure. How much did the DIY powder coating set up cost?

Thanks. I'm enjoying the read too, now that my employer has decided to take away all (OK, not all, just a bunch) of my days off in December. :mad::mad:

It's coming along nicely when I get to work on it. ;)

I have the Caswell Hobby gun setup (roughly $200), an el-cheapo electric oven (free-$50). Other than that it's just the powder. $15 of powder lasts a LONG time. I like the powder coating mostly because it's faster than paining IMHO. No waiting for stuff to dry is great, and it doesn't matter what the temperature is in the shop to powder coat. The oven is going to be 400 degrees no matter what! Also, all you need is a vacuum to clean it up, no overspray to worry about, etc...

Speaking of working on the truck....

I get roughly 24 hours at home this time, so naturally Dad and I were up working on the 40. First off, I cut the intake hoses and installed a hump hose to give it some flex. It doesn't look as funny as I was expecting it to.
hump hose 1.jpg
hump hose 2.jpg
hump hose 3.jpg
hump hose 1.jpg
hump hose 2.jpg
hump hose 3.jpg
 

Users who are viewing this thread

Back
Top Bottom