First Time Pig "Build"

This site may earn a commission from merchant affiliate
links, including eBay, Amazon, Skimlinks, and others.

actually it is NA that has things backwards ...
51% of all the countries are RHD. that makes us the minority, if we were not so stubborn we would accept the RHD with open arms.

just sayin.
 
quote:
Ford changed to left-hand-drive in the 1908 model year. A Ford catalogue from 1908 explains the benefits of placing the controls on the left side of the car:
“The control is located on the left side, the logical place, for the following reasons: Travelling along the right side of the road the steering wheel on the right side of the car made it necessary to get out on the street side and walk around the car. This is awkward and especially inconvenient if there is a lady to be considered. The control on the left allows you to step out of the car on to the curbing without having had to turn the car around.
In the matter of steering with the control on the right, the driver is farthest away from the vehicle he is passing, going in opposite direction; with it on the left side he is able to see even the wheels of the other car and easily avoids danger.”

one of the first things i found driving RHD in a LHD country ... it also a REAL benefit for those with physical disabilities. i sold a number of RHD LC to handicap individuals for this reason ...

but yah, it seems you are right. i can't find the website i used way back when that showed 51% of the countries drove RHD ... it was quite detailed.
i will change my info ... for now.
 
well, as discussed in the email, the cross link part number
45460A ROD ASSY, TIE
45460-69135 1 $412.69
has the ends included and will work from arm to arm.
the other part number i posted comes with the ends but is too long ... i think ... for your application. it is for the 60 PS box, now, IF you can give me a measurement of the existing arm to crosslink hole then i can go measure what i have in the garage ...
in the pic you can also see the difference in strength between the 70 series arms and the 40/55 series ...
this is a 42 series axle.
hopes this helps.

Great pictures - Thank you!
 
For fun...


image-3055466719.jpg


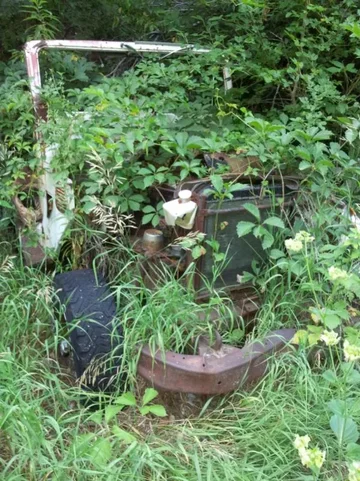
See how rare Pigs are in this part of the country.

image-3055466719.jpg
 
What? Our 40 was also vine covered...now it's a DD, what's the problem?

What kind of vine is that, Pighead?

Don't look legal to me. Hahahaha.

That's great. Don't think the other one will see the road again.

I've requested pics from when the PO twice removed first saw at body shop in NM. No greenery, I'm assuming, but covered in 6" of sand. Haha.
 
Delancy,

Seeing your post in the classifieds, You've decided to go completely stock for a 72?

Sticking to stock, in my opinion, makes the rebuild alot easier. No decisions to make, just rebuild or replace with new.

Good luck with your sale. Remember this is a hobby and give yourself a break once in awhile.
 
Delancy,
You've decided to go completely stock for a 72?

I believe so, Ron.

This won't be the last "build" and think a complete stock approach adds to the cool factor of this one.

Sticking to stock, in my opinion, makes the rebuild alot easier. No decisions to make, just rebuild or replace with new.

Agreed. Keep it simple and as originally intended.

Rebuild seems the only choice for the majority, since replacement parts aren't readily available, but my personal goal is to leave as much intact, as possible.

Edited: keeping stock with the attempted elimination of the port installed rust.

Remember this is a hobby and give yourself a break once in awhile.

This is my break. Haha.

Necessary diversion from reality....
 
Last edited:
So a slight update: While working on Delancy's list, I found that the engine (04111) and valve grind (04112) kits are discontinued for the F.

Sorry Chris.

They are still available for the F.5

For the F engine, all of the gaskets and seals have to be pieced together going through the catalog one component system at a time.

From another thread.
 
More bobm goodness


image-3742024866.jpg


image-3887311917.jpg


Not sure where this goes though. Ha.


image-577928267.jpg


More from camotubebender's part out


image-1899810470.jpg


image-4238415842.jpg


image-1796326395.jpg

Not sure, but appears this may have been re-cored at some point in the past.

Something's been done.


image-3994548244.jpg


image-2941827588.jpg


Waiting on Josh from Cruiser Corps to show with the front clip. Had a hard time getting there, so he offered to bring to me, to which I'm indebted for. He left OKC at 8, it's 1:30 one way, and he's turning around the second we're done unloading.

image-3742024866.jpg


image-3887311917.jpg


image-577928267.jpg


image-1899810470.jpg


image-4238415842.jpg


image-1796326395.jpg


image-3994548244.jpg


image-2941827588.jpg
 
All here.

Still need to patch the lower fenders, but expected.

One small hole in the inner fender I didn't recall, but the size of a half dollar, not a manhole like the one it's replacing.

Couple broken bolts to extract, signals came from Atwoods, but the emblems are in very good shape.

image-2602810175.jpg

image-2602810175.jpg
 
Last edited:
You know that feeling when daylight breaks and you really get a good look? (I honestly don't, but heard about it)

Lower valance will need some work.


image-3403630325.jpg


image-955745237.jpg

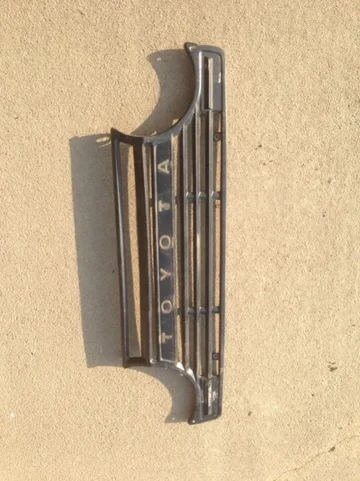
Grille's good, but no bezels.

image-3772675830.jpg

Keeping the chrome I had, anyway.


image-413626104.jpg


Couple contrary bolts aren't wanting to give way to separate....yet.

image-317084089.jpg


image-2442057015.jpg

Small hole to patch

image-3983464866.jpg

Obligatory acid rain rust


image-1017760523.jpg

Know the old saying "It's hard to polish a turd"


image-1535742125.jpg

Guess if you try hard enough stabilizing the turd with expansion foam....


image-2914433915.jpg


image-3951227747.jpg

Nice, huh?

Small ding to work on above the fender patch area


image-1570019479.jpg

Emblems are decent and will allow honoring promise in other thread where I bought mint condition emblems for a song.
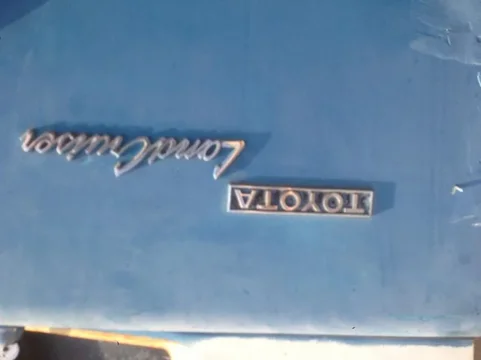


image-1026701321.jpg

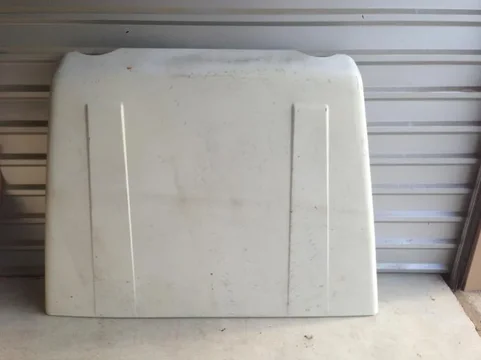
Hood is perfect, at least!!


image-408094046.jpg


image-3086494880.jpg

I should've paid closer attention to these components. Would have, if I'd known it was the blue 71 I'd wind up with, opposed to the green 72 that I initially wanted.

C'est la vie....

image-3403630325.jpg


image-955745237.jpg


image-3772675830.jpg


image-317084089.jpg


image-2442057015.jpg


image-3983464866.jpg


image-1017760523.jpg


image-1535742125.jpg


image-2914433915.jpg


image-3951227747.jpg


image-1570019479.jpg


image-1026701321.jpg


image-408094046.jpg


image-3086494880.jpg


image-413626104.jpg
 
Last edited:
busted bolts
if the area behind the bolt is clear then just center punch (important to be exactly center) and drill with a bit 3 sizes smaller all the way through at least the threaded nut depth.
then go up to the 1 size smaller than the thread inner diameter. this will catch the busted bolt and thread it out the back.
usually if you try and bring the busted bolt back out the normal way then the rust behind the nut causes problems
M6 and smaller then usually you can just drill 1 size smaller and the bolt will break free and walk out the back.

just a suggestion ... take your time ... penetrating oil or Loctite FREEZE and release helps.
 

Users who are viewing this thread

Back
Top Bottom