Drum brakes over-adjusting and getting hot after rebuild (1 Viewer)

This site may earn a commission from merchant affiliate
links, including eBay, Amazon, Skimlinks, and others.

Yes, it's hard to believe that this common issue is because of the size of clip (the same two part #s show up for 81-84 FJ40s, 60-series, and 70-series) Anything with that configuration of rear drum brakes

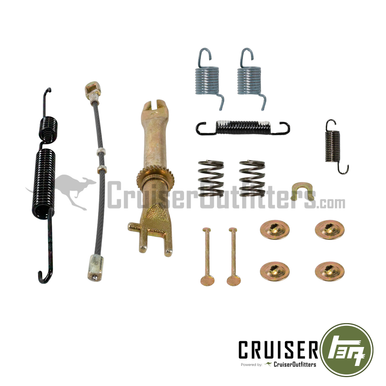
And it always seems to happen to people who rebuild with aftermarket hardware kits. It did with me. Every aftermarket kit I've seen seems to come with the smaller-style C-clip as a replacement for the 'E'-clip on the outer lever.
 
Last edited:
Exactly right @Spike Strip - I'm hoping that if the washer doesn't fix the issue that the factory c-clip does.

Hey @cruiseroutfit just a bit of tech for you regarding the drum brake rebuild hardware kit you sell. No complaints here -I have been and will continue to be a satisfied customer - but this is drilling down on one of your products (other retailers sell similar ones too) and looking at it under the metaphorical microscope. The brake hardware kit has one potentially incorrect part that seems to cause the over adjusting issue. I'm currently testing one of two possible fixes and will follow up on results, but somebody linked an older thread on the topic where the problem is solved via the two fixes. Just thought you'd like to be part of the conversation since I used your product and because you seem to like the occasional geek-out over tweaky tech stuff!

To boil it down: the clip that comes in the hardware kit that holds the adjusting lever in place seems to be wrong. Toyota used a different style clip that holds the lever a little tighter. I'm still running the potentially incorrect clip but using a flat washer behind the lever to tighten things up. Otherwise the original clip is still an active part from Toyota, and installing that should also be a way to take up the excess play in the lever and tighten things up. Once the excess play is gone,, the lever should stop adjusting the star wheel at the appropriate point.

Bring me up to speed on which kit we are referring too, we have a handful of different drum hardware kit.
 
Bring me up to speed on which kit we are referring too, we have a handful of different drum hardware kit.
I believe it is this kit - p/n BRHWKITL. I’m not at home to check my invoice but I can confirm that tonight.
 
I believe it is this kit - p/n BRHWKITL. I’m not at home to check my invoice but I can confirm that tonight.

Copy, and it's the horseshoe clips that are too large?

1693352325726.png
 
Copy, and it's the horseshoe clips that are too large?

View attachment 3414663
Kurt, it's the small "e-clips" directly below what you have circled. What we're finding is that Toyota originally used not only the larger horseshoe clips you circled, but they also used slightly smaller horseshoe clips as well. The smaller horseshoe clips were used instead of the "e-clips" and they were thicker. The working theory is that the slight extra thickness reduces axial play in the adjusting lever, preventing them from over adjusting. With the skinny e-clips in place the lever has too much play and can grab too many pawls on the star wheel - even when it shouldn't be grabbing any at all because the brake shoes have reached the proper adjustment point.

There's an older thread where replacing the thin e-clips with the smaller horseshoe clips fixed the problem immediately for some people. I have not tested it yet because I'm waiting for the dealer to get me a couple.
 
@cruiseroutfit Here's a comparison of the two "horseshoe clips". Things get stacked onto the post on the forward shoe in this order: parking break lever, larger horseshoe clip, adjusting lever, smaller horseshoe clip. The smaller one is Toyota p/n 90213-06013 as shown. The larger clip has the little point protruding from the round side, the smaller one does not.

1693411580700.png


Thanks @Spike Strip for the photo.
 
@cruiseroutfit Here's a comparison of the two "horseshoe clips". Things get stacked onto the post on the forward shoe in this order: parking break lever, larger horseshoe clip, adjusting lever, smaller horseshoe clip. The smaller one is Toyota p/n 90213-06013 as shown. The larger clip has the little point protruding from the round side, the smaller one does not.

View attachment 3415191

Thanks @Spike Strip for the photo.

Cool, that all jives. We stock hundreds of the smaller 90213-06013 as our part PB06013 so very familiar with it.

1693413340005.png


Both sizes are used on the rear axle. One for the bellcrank pivot pin (left in diagram) and the other for the park brake shoe lever (right in the diagram).

The two for the RH/LH shoe levers would be included the BRHWKITL.

The bellcrank one would come separately and our side shows that as the smaller PB06013

I'll have to peak at some of my Cruisers and loose axles and see if we have that backwards?

I'm quite confident the 06013 is used for the bellcrank as that same part is used well into the 100 Series too

1693413498553.png
 
Cool, that all jives. We stock hundreds of the smaller 90213-06013 as our part PB06013 so very familiar with it.

View attachment 3415203

Both sizes are used on the rear axle. One for the bellcrank pivot pin (left in diagram) and the other for the park brake shoe lever (right in the diagram).

The two for the RH/LH shoe levers would be included the BRHWKITL.

The bellcrank one would come separately and our side shows that as the smaller PB06013

I'll have to peak at some of my Cruisers and loose axles and see if we have that backwards?

I'm quite confident the 06013 is used for the bellcrank as that same part is used well into the 100 Series too

View attachment 3415208
Thanks for bringing the knowledge. Yes the smaller horseshoe clip is also used on the bellcrank, that’s exactly right. Like I said I’m going to try that part on the adjuster lever and report back. Might be another week or so. Interestingly in that parts diagram the bellcrank clip is callout number 47601C and the adjuster lever uses the clip with callout 47601E - different numbers.

We may be collectively barking up the wrong tree here, but this is the best working theory we have right now.
 
Last edited:
Update: the washers have mitigated but not solved the issue. The brakes go longer before the over adjust to the point of getting hot, and the left side almost doesn’t overadjust at all.

Just picked these up, I’ll pop them in tomorrow and see what happens.
0A95FC62-40AD-4CC6-B88D-774FB233D2F0.jpeg
 
New clips installed, now we see what happens. I kept the washer just to see what happens, maybe it will need to get removed at some point. They do fit exactly in the groove in the post, even with the washers in place, so there’s that.

A6640323-0919-4A5B-A87F-780777212C6B.jpeg
 
I think limiting or controlling the movement of the adjustment lever is the key. The washer helped but didn’t ultimately solve the problem. Maybe this will. If not I rip things out and try something else.
 
@HemiAlex Joe H was messaging me last night about how he worked through this on his 62. He had some interesting thoughts and it would be good if he could put them down here for posterity, but I don't know his handle ... hence paging you.
 
I've been commuting daily with the setup from post 93 with zero issues. No excessive heat at the rear drums, great brake action and pedal feel, functioning parking brake. In addition to commuting miles I drove from Denver to Omaha and back earlier this week. I've used my parking brake every time I get out of the vehicle, like I normally do. I believe I'm at 8-10 clicks before I get a solid parking brake, so I may adjust that back to spec, but also ... if it ain't broke, don't fix it.

Again here's the photo of the fix that worked for me:
1695477881414.png


That's a washer behind the adjustment lever, and part number 60213-06013 on top of the lever to secure it in place. @Spike Strip you mentioned the e-clip going behind the adjustment lever, and that may work, but I'm not pulling this apart to find out. It's not on the parts diagram either.

@cruiseroutfit Just to tie a bow on this thread, this is the solution I landed on after six weeks of trial and error - and it seems like this may not happen for everybody, but isn't uncommon either. I wonder how many people check the temp of their drums after a rebuild if the wheels aren't completely binding! Whatever the case for others, the stock hardware kit did not work for me and needed the modifications seen above.
 

Users who are viewing this thread

Back
Top Bottom