
Just snooping around and found your repaint, awesome! What a nice looking wagon. I'm with Andrew, Moab 2018. I'll bring the 55 back if you 70 guys show up and maybe Andrew and me won't get lost this time. ")
Follow along with the video below to see how to install our site as a web app on your home screen.
Note: This feature may not be available in some browsers.
This site may earn a commission from merchant affiliate
links, including eBay, Amazon, Skimlinks, and others.
Also, if anyone is interested, the Troopcarriers of Australia facebook page has a .dxf CAD file for all the rear panels so anyone can cut them with access to a CNC machine. I didn't use it, but it's cool to know it exists!
Does it include the floor ?
What a great build. I like the tall mirrors and it looks like they are convex. Where did you source them?
Thanks,
Doug
how do they actually open with 100 lbs? like do they open soft and close soft, or is there a hard close or a fast open? i saw all the posts on the TOA page, but few talked about force and the speed/softness with which they actually open. i am thinking that because the weight is already supported, you could go really low force on the small door especially and get smooth opening and easy closing. might even go a shorter one on the small door. what do you reckon now after fitting yours?They're 20" gas shocks with 100 lbs of force.
how do they actually open with 100 lbs? like do they open soft and close soft, or is there a hard close or a fast open? i saw all the posts on the TOA page, but few talked about force and the speed/softness with which they actually open. i am thinking that because the weight is already supported, you could go really low force on the small door especially and get smooth opening and easy closing. might even go a shorter one on the small door. what do you reckon now after fitting yours?
 Untitled by CA18 Sean, on Flickr
 Untitled by CA18 Sean, on Flickr
 Untitled by CA18 Sean, on Flickr
 Untitled by CA18 Sean, on Flickr
 Untitled by CA18 Sean, on Flickr
 Untitled by CA18 Sean, on Flickr
 Untitled by CA18 Sean, on Flickr
 Untitled by CA18 Sean, on Flickr
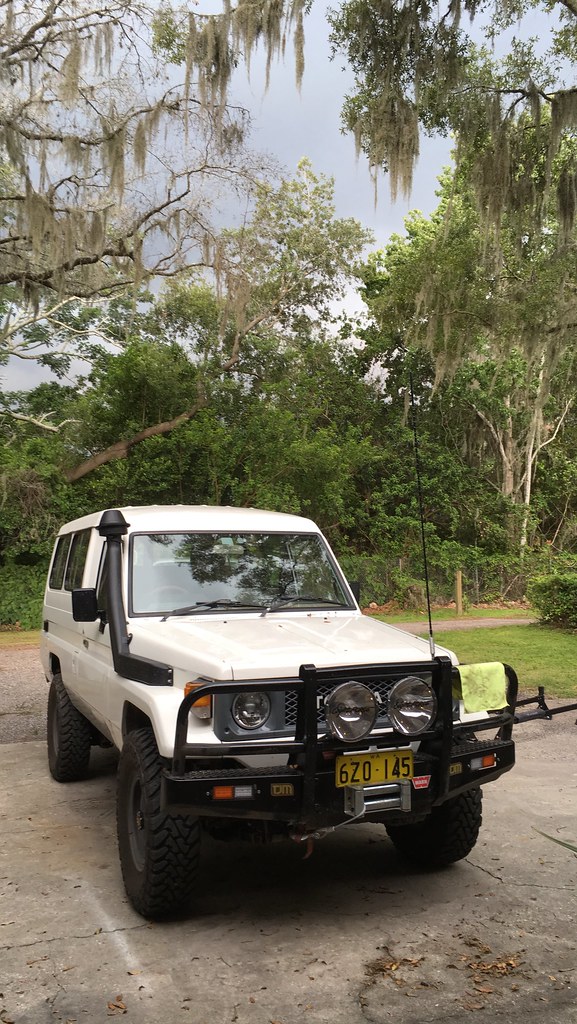 Untitled by CA18 Sean, on Flickr
 Untitled by CA18 Sean, on Flickr
 Untitled by CA18 Sean, on Flickr
 Untitled by CA18 Sean, on Flickr
 Untitled by CA18 Sean, on Flickr
 Untitled by CA18 Sean, on Flickr
 Untitled by CA18 Sean, on Flickr The troopy was a big hit. Lots of guys coming up saying all the exotic cars are cool, but the cruiser has "character" haha.
 Untitled by CA18 Sean, on Flickr
 Untitled by CA18 Sean, on Flickr
 Untitled by CA18 Sean, on Flickr
 Untitled by CA18 Sean, on Flickr
 Untitled by CA18 Sean, on Flickr
 Untitled by CA18 Sean, on Flickr
 Untitled by CA18 Sean, on Flickr
 Untitled by CA18 Sean, on Flickr
 Untitled by CA18 Sean, on Flickr
I recommend replacing the studs and the lock nuts for the manifold to the head interface as well as for the Turbo and down pipe hardware as well.
Don't take a shower and put dirty undies back on.
I recommend replacing the studs and the lock nuts for the manifold to the head interface as well as for the Turbo and down pipe hardware as well.
Don't take a shower and put dirty undies back on.
 Untitled by CA18 Sean, on Flickr
 Untitled by CA18 Sean, on Flickr
 Untitled by CA18 Sean, on Flickr
 Untitled
 Untitled