About time I did a buildup thread (2 Viewers)

This site may earn a commission from merchant affiliate
links, including eBay, Amazon, Skimlinks, and others.

excellent job man, your shop seems to be outfitted with most everything needed to tackle a build such as this keep up the good work and keep us posted with progress reports and pics :beer:
 
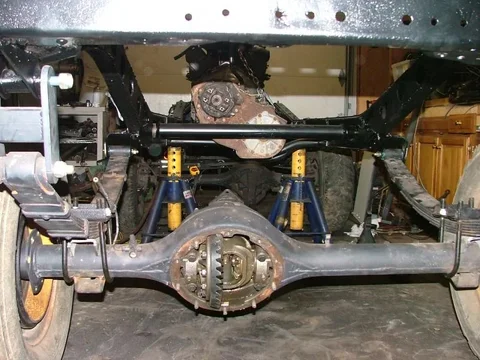
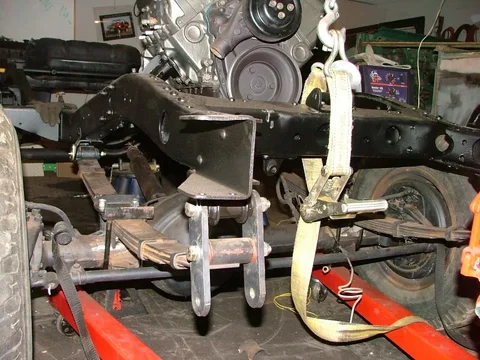
I got the motor put back in, springs on with new hanger pins from MAF, and said "screw it". Time for an SOA. I figure I'm moving tto Colorado and want to have some fun out there. HEres the cliffs notes: Measure, cut, weld, measure again. The pinions "should" point at the outputs minus 1-2 degrees for u-joint lubrication when the full weight is on the rig. 0 degrees is bad, FYI. I took the long ass lift shackles and drilled new holes at stock length after I made sure they would have the required range of motion for the springs to completely flattn out. I left them long for now incase I want the extra height. Cut and turn is coming but not until about the last thing so they are where they need to be with the full weight on the truck.

Picture 068.jpg

Picture 072.jpg
Picture 068.jpg
Picture 072.jpg
 
Hey, heres something cool. My rear doors were shot so I wanted to weld them together and make a drop tailgate. Cut some steel, burned it in, and had the gate. Its ugly but it is cheaper than buying one. ( yeah, I know thats been done before but I'm not done yet. ) I had the hinges to make a drop gate but only 1 latch.......hmmm..... So I made a big ass swing gate. the latch I had would only work on the passenger side but the driver side hinge mount was a little thin. I just flipped it upsidedown and mounted it that way. Added an extra hinge to the gate so there are 3 on the driver side and mounted the latch to the other. I works really well and fits great. The damn rust is now on the top inside but that is getting taken care of soon. Enjoy.

Picture 077.jpg

Picture 079.jpg

Picture 082.jpg
Picture 077.jpg
Picture 079.jpg
Picture 082.jpg
 
Picture 083.jpg

Picture 084.jpg

Also got some new goodies from the hydraulic shop. DOT approved, plus 1" on the short hoses at the knuckles, and plus 10" at the frame soft lines.

Picture 081.jpg
Picture 083.jpg
Picture 084.jpg
Picture 081.jpg
 
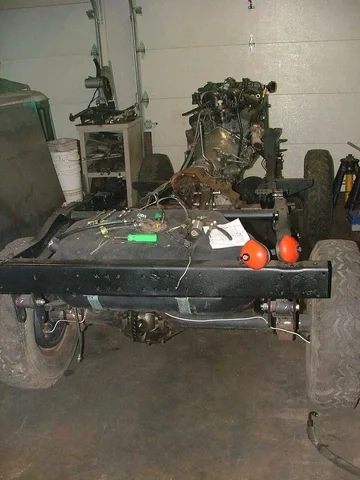
As of right now here is how it sits. I have about 2 months to get it done because we need to get the house on the market and a garage full of cruiser is no good for that.

More to come............

Picture 085.jpg

Picture 086.jpg

Hey, theres the lower piece welded to the column. ;)
Picture 085.jpg
Picture 086.jpg
 
Last edited:
nice to see it saved

It will be hard to believe the difference once it is painted most people would have thought it impossible


Nice post and seeing it all at once shows how much work has gone into it already eh?


:cheers:
 
...my favorite build so far

no doubt my favorite build thread....cool fab work...engineering savy I wish I had.
 
Thanks for the props everyone. :beer: I've been working like a madman here lately. Got it painted and started to get her back together. If I ever have some time I'll post up some pics of the progress. Time is not on my side anymore. Tick Tock.......
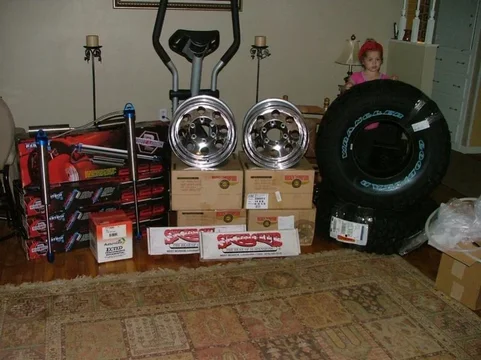
 
I always have to go back through the pictures to see where I was. It's crazy seeing how much has progressed since the last post. I came across a very rare oppertunity to pick up a lot of goodies for a great price. The planets kinda aligned and I got some things I really wanted and some I shouldnt have bought (or bought'n as I hear it around here alot).

Picture 010.jpg

I got the wheels I have wanted since I was 18, tires, and shocks. Probably too much shock for what I need but they are BADASS!! I also got an Ected for the wifes 8.8 in her XJ, and some Double Flex control arms for resale. Also got some corbeau seats.

Picture 011.jpg

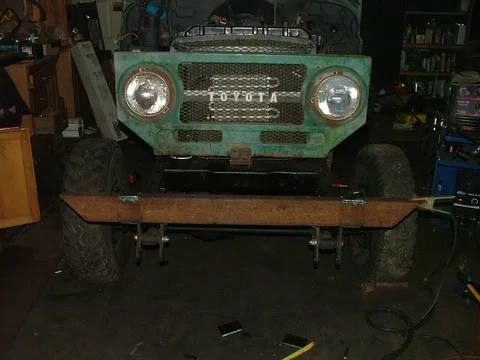
Time is pressing so I made a simple bumper out of 2x4" steel.Notched it at the bumper mounts and also notched the mounts. I had to beat it it witha sledge but it is all pretty flush together. Welded everything in and It's good to go.....for now. Still need to burn in the winch plate and box in a hole for a winch cable.

Picture 035.jpg
Picture 010.jpg
Picture 011.jpg
Picture 035.jpg
 
The rear tank is out of a late 80's S-10 Blazer, I think. I've been through so many different parts it's hard to keep track. I actually beat the top-front to "wrap" around the crossmamber and sit higher. So high the floor actually touches the hoses.

Picture 034.jpg

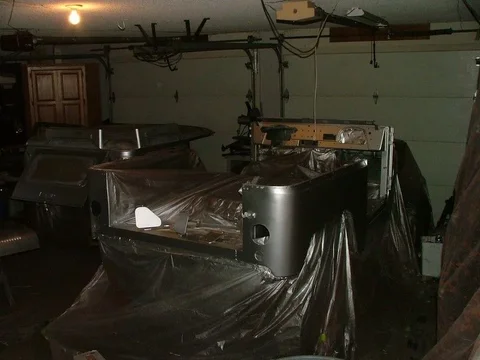
I went ahead and put the body back on. It was still square after all this time which was nice.

Picture 047.jpg

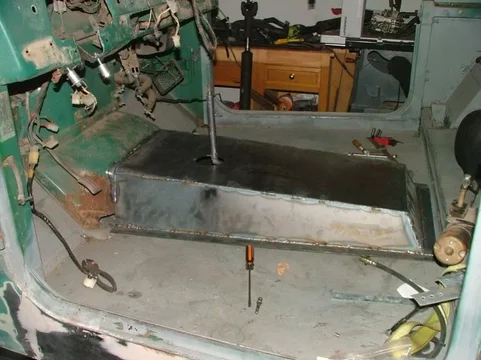
I got another sheet of 16 gauge and tore into making a trans tunnel. I cut the factory tunnel apart to use the front where it is contoured to the firewall/ kick area. Started cutting out pieces of 16ga and came up with this.

Picture 045.jpg
Picture 034.jpg
Picture 047.jpg
Picture 045.jpg
 
I have been saving the old quarter panel, partially for the gas door section, partially because I wanted to flatten it out and mount it on the wall. :hmm: I cut out what I needed and scrapped the rest. I mounted the tank to put the filler on the driver side, mainly because thats the side I like it on. It also made it easier to run the fuel lines as compared to the exhaust. I marked where the filler needed to go, cut it out, and frenched in the filler door and spout.

Picture 057.jpg

About that time I also threw on a 35 and plotted where the fender should be cut. When I mounted the axle I wanted the front of the tire to be inside the front of the well as I had previously cut it. That is where I wanted the well to start and didn't want it going back foward. With the 35 that meant moving the axle back another inch or so. I ended up having to chop quite a bit out of the rear but it looks pretty sick.

Picture 064.jpg

Got some tail lights placed, too.

Picture 062.jpg
Picture 057.jpg
Picture 064.jpg
Picture 062.jpg
 
Time to mount the seats. I was debating on buying sliders for em and really didn't want to spend the money. I still had the original seats in the attic which were eaten up by mice and weathered pretty bad. I pulled them down and ended up robbing the slider off of the driver seat, modified it to work with the corbeau, and was good to go there. I bent up some tube to make a simple frame, plased out some brackets for the pass side and glued it all together. It was kind of hard to determine placement because the 62 column is 4" shorter than the 40 column. (good to know, wish I had when I mounted that.) The frame is about 1/2 above the tunnel. It mounts to the angle iron I welded into the sides which will be mounted to the cage when I can afford new dies for the bender.

Picture 067.jpg

Oh yeah, I also got a set of Autometer gauges in the deal I got earlier. I took a piece of polished stainless (actually a mudflap :p) and marked where I wanted to cut. I really liked the configuration they were sitting in the box they came in so I went with that. That also meant cutting up the dash a bit more. Got it cut, bent the lower to contour with the roll of the dash (with a vice and a broom handle) and got it mounted. I burned up 2 hole saws cutting the holes. Ended up having to plas the speedo hole and spend alot of time filing. Since the pic I added green LEDs for turn signals and a check engine light from the painless harness (same deal). It looks really good with the dash pad on.

Picture 069.jpg


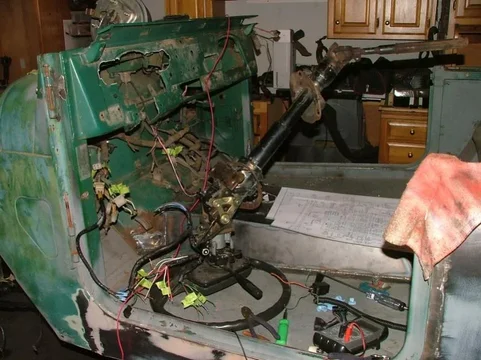
I started tackling the wiring for the column. I wanted to use all the switches on the column instead of the dash so it took some time to figure. Everything should work like it's supposed to. Still waiting on the wiper relay and getting all the lights going (to fire the flasher) before I can be sure. I think I have enough diagramed out to be able to re-create it easily, well somewhat.

Picture 072.jpg
Picture 067.jpg
Picture 069.jpg
Picture 072.jpg
 
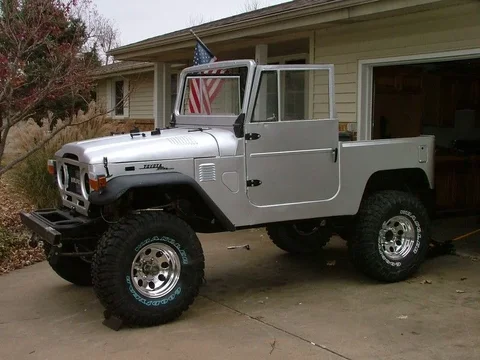
The wife has been pressing me about painting it, and with the warm days, well not cold as hell days, going away I went ahead and started masking. I bought a gallon of Rustoleum rusty metal primer (because its dark) and a gallon of Rustoleum "aluminum" paint. I figured the dark primer would darken the aluminum to just the color I wanted. Got it primed and shot, and the aluminum was still aluminum. Super bright, blingy friggin aluminum. Wifey actually said it looked like I "chromed" my truck. I know you guys don't know me very well, but I HATE chrome. Polished aluminum......mmmm:rolleyes:, stainless.........maybe, but chrome. Nope, not for me. But you know what, it was done. Not going to mask it and do it again. Not this guy. And you know what, I'm glad. I don't think I could be happier. After putting on the trim it looks better than I could have thought.

Picture 089.jpg

I got my tires/wheels mounted. On a Sunday. Guess where the only place to get that done n Sunday??? Wal-Mart. Did you know at Wal-Mart " Put the whitewalls in and don't even worry about balancing them" means whites out and go ahead & balance 'em. Didn't want to wait another 2 hours and I got the balance for free, so I took them. Finally, finally got to pull the fenders out of the attic. I have been wanting to see them mounted since I sprayed them however many years ago. Put them on, aprons on, bib on, hoods just sitting there (wrong bolts). Oh yeah, I got wood...

Picture 099.jpg

Also put another light in the rear. They will be the turn signals as the red light is running lights and brake. It has to do with the 62 column. I want to put a side marker on the rear but I almost need to put it where the filler door is. We'll see what happens. I think I need it to be legal.

Picture 096.jpg


Started putting the felts in the door for the window. I had to pull the upper door off the install the outer wiper and it sits so high I couldn't get the upper all the way out. It lacks about 2" and hits the ceiling. Got it done but it wasn't easy. I'll have to do the other side outside. Bezel is mounted and headlights in. I need to finish the wiring which I need the wiper relay from a 62 to do. I also ordered a DIY bedliner kit from ebay which oughta be done next weekend. Well, it looks sick, I cant help but to stop and stare whenever I see it. Can't wait to get it done now.
Picture 089.jpg
Picture 099.jpg
Picture 096.jpg
 
Last edited:
WOW :eek:

You got skillz man!

When you are done you gotta put up a before and after comparison.

Nice cruiser...great job!
 
You know what sucks??? I have owned a 40 for around 5 years and have never even driven one. Shoot, I haven't even ridden in one. How sad is that? :frown:

Shouldn't be too much longer, though!!! ;)
 

Users who are viewing this thread

Back
Top Bottom