Looking good. Wish I had been brave enough to do my own quarter panels. I paid a bodyshop to weld on some CCOT quarter panels and they butchered it. The guy even claimed he had restored 40s before.
Navigation
Install the app
How to install the app on iOS
Follow along with the video below to see how to install our site as a web app on your home screen.
Note: This feature may not be available in some browsers.
More options
Style variation
You are using an out of date browser. It may not display this or other websites correctly.
You should upgrade or use an alternative browser.
You should upgrade or use an alternative browser.
About time I did a buildup thread
- Thread starter xjnation
- Start date
This site may earn a commission from merchant affiliate
links, including eBay, Amazon, Skimlinks, and others.
More options
Who Replied?Hell of a deal. Good looking body work there. And don't be too worried about that bondo. As long as there is good solid sheet metal on the other side it will last many years.
And just wait until you get to test out those brakes. Freshly rebuilt drum brakes will the put the cruiser on its nose.
And just wait until you get to test out those brakes. Freshly rebuilt drum brakes will the put the cruiser on its nose.
- Thread starter
- #24
Thanks for the props. This is my first time doing any project of this magnitude. Things would have been very different if I wasn't so cheap. oh yeah.... I only had $150 in the shotgun. I later traded the same guy a .410 and a mauser for a 75 J10. parted it out, got $400 fot the trans/t case and got a set of D44s for my efforts. I think I might take the f/3 speed combo and build a buggy. I'll hopefully be getting a bender from ebay in the near future so that'll be the next project. Time to cash out my vacation time.

Brakes
it's nice to see someone actually using(and making them looks awesome) the drums that were actually supplied with the 40 you are building. my 68 has drums at all 4 corners and i have been comtemplating if i should just rebuild them, or go disc. some have said discs are not good for the mud and or water, and then i wonder if ill be spending more time on the rocks then the mud....my funds are LOW too, so a disc conversion may not be in order at the momment. though all the parts for the 4 drums are NOT cheap either... almost 700!
i need some advice!!!! thanks
your axles and brakes look great!
The shackles front and rear were pretty rough so I ordered a set of 1.5" lift shackles from Ebay. (bad idea in retrospect. They hang WAY low in the front.) I pulled the axles front and rear, wire wheeled them to death, and gave them a fresh coat of paint. I sprayed them gloss black first with a coat of flat over top. I like flat black better but wanted the better rust protection of gloss. Should've not been so cheap and just gotten POR-15.
View attachment 187123
The drums were hard to remove but I finally got them off. New wheel cylinders, shoes, springs, freshly turned drums.... it went together alot easier than coming apart.
View attachment 187124
View attachment 187125
it's nice to see someone actually using(and making them looks awesome) the drums that were actually supplied with the 40 you are building. my 68 has drums at all 4 corners and i have been comtemplating if i should just rebuild them, or go disc. some have said discs are not good for the mud and or water, and then i wonder if ill be spending more time on the rocks then the mud....my funds are LOW too, so a disc conversion may not be in order at the momment. though all the parts for the 4 drums are NOT cheap either... almost 700!
i need some advice!!!! thanks

your axles and brakes look great!

Coolerman
SILVER Star
- Joined
- Jan 5, 2004
- Threads
- 143
- Messages
- 6,766
- Location
- Paint Lick, KY
- Website
- www.globalsoftware-inc.com
All right! Another one saved from the scrap heap! Glad I'm not the only one who thinks a rotted Cruiser is worth the time to fix...
- Thread starter
- #27
it's nice to see someone actually using(and making them looks awesome) the drums that were actually supplied with the 40 you are building. my 68 has drums at all 4 corners and i have been comtemplating if i should just rebuild them, or go disc. some have said discs are not good for the mud and or water, and then i wonder if ill be spending more time on the rocks then the mud....my funds are LOW too, so a disc conversion may not be in order at the momment. though all the parts for the 4 drums are NOT cheap either... almost 700!
i need some advice!!!! thanks
your axles and brakes look great!
Disc brakes are actually better for mud and water because they clean out faster. Properly adjusted drums do have more surface area and stopping force. Keywords: properly adjusted. A front disk conversion can be done cheaply if you find the salvage parts at a deal. Either way, $ is involved. I got all my parts at cool cruisers and it was no where near $700, but there are a few dislikes about their wheel cylinders. I don't know either way because the truck is still at least a month from driving.
Great thread ! I truley understand your avatar lol ! Looking good

Josie'sLandCruiser
Stop calling it a "FJ."
Hi All:
Wow! Great thread!
Awesome (re) build!
Your sheetmetal work is very impressive!
Thanks for sharing with us!
Regards,
Alan
Wow! Great thread!
Awesome (re) build!

Your sheetmetal work is very impressive!

Thanks for sharing with us!
Regards,
Alan
- Thread starter
- #30
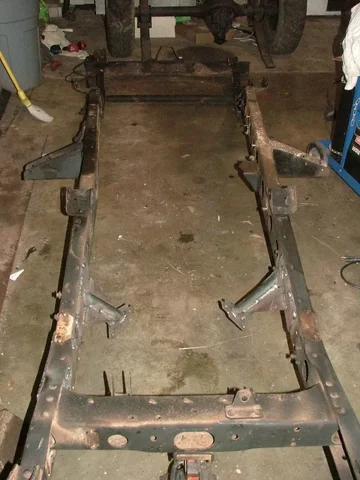
Been a while since I've posted in this thread. I've been too busy on the 40 to post up, but heres a little more: I went ahead and pulled the body to get the frame cleaned up,

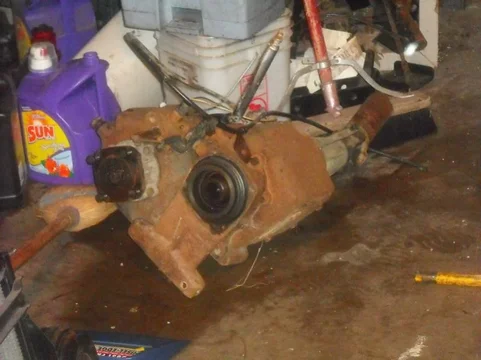
also made it easier to install the next goodie!I ended up getting the 3fe/a440f and the split case and dropped it in. It was huge! Wayyyy too long. With a little finessing I got it to mount up to the factory mounts which located the motor perfectly, but everything else was too big.


Not much room for a driveshaft at all. I ended up selling it to a guy in texas for his 40. I warned him about the length but he said he had alot of wheelbase for it.


also made it easier to install the next goodie!I ended up getting the 3fe/a440f and the split case and dropped it in. It was huge! Wayyyy too long. With a little finessing I got it to mount up to the factory mounts which located the motor perfectly, but everything else was too big.


Not much room for a driveshaft at all. I ended up selling it to a guy in texas for his 40. I warned him about the length but he said he had alot of wheelbase for it.
- Thread starter
- #31
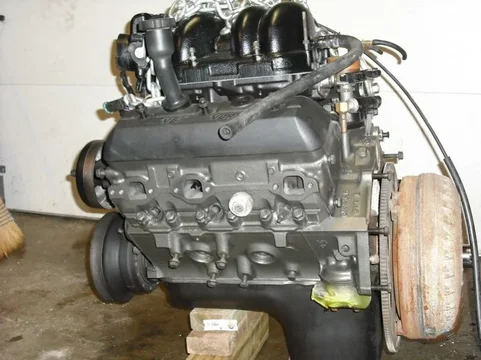
Ya know what?? I LOVE CRAIGSLIST!! I came across a guy who wrecked a 93 S10 Blazer and was parting it out. The drivetrain was recently replaced with reman'd parts and I got a 4.3, 4l60e, NP231 combo for a great price. They were a little dirty but I still had my magic wand (yeah, I know it sounds cheesy but it works) and then POOF!
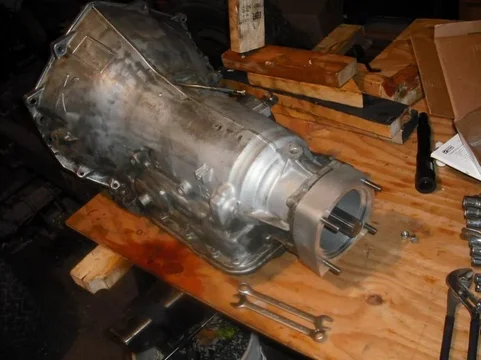
I also acquired a Downey 700r4 to 3 speed case from Mark (65swb45) so I could use the stock case. That meant I had to tear into my first auto trans to replace the output shaft . I got a master rebuild kit from ebay and a manual and did the damn thing. It was a LOT easier than I had thought. The trans was apart in about 2 hours and new shaft put in.

I used the 40 frame as a bench to work on. Every part was placed in order of removal, outlined, and numbered for reference.


I also acquired a Downey 700r4 to 3 speed case from Mark (65swb45) so I could use the stock case. That meant I had to tear into my first auto trans to replace the output shaft

I used the 40 frame as a bench to work on. Every part was placed in order of removal, outlined, and numbered for reference.

Last edited:
- Thread starter
- #32
Got the trans put back together. Soaking the clutches almost took longer than reassembly except for one thing. Here's a hint.... if the teflon shaft seals are OK, leave them the hell alone. I was held up 2 days waiting on another new set and a special $20 piece of plastic to install them. Once everything was together, I mounted it to the block and installed the adapter plate for the t-case. Then trimmed the pan for clearance and started to mount the t-case. It was a tight fit.
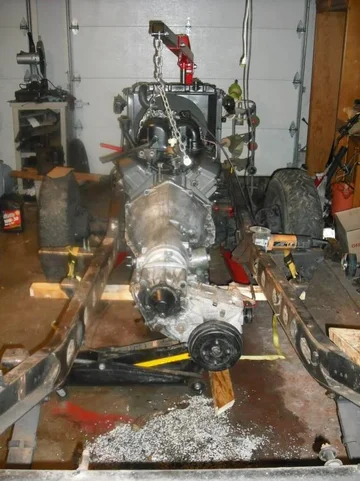


The very next day I came across a TH-350/NP205 combo for $100. The TH350 and 4l60e both have 27 spline output shafts. With the help of an aluminum spacer it would bolt right to the back of the auto. You know what that means.... The original output shaft had to go back in. It only took about 45minutes or so this time. So now I have a centered rear output and a passenger offset axle. hmmm.....


The very next day I came across a TH-350/NP205 combo for $100. The TH350 and 4l60e both have 27 spline output shafts. With the help of an aluminum spacer it would bolt right to the back of the auto. You know what that means.... The original output shaft had to go back in. It only took about 45minutes or so this time. So now I have a centered rear output and a passenger offset axle. hmmm.....
- Thread starter
- #33
- Thread starter
- #34
Yes, the slip yoke has been replaced with a 32 spline 1350 cv output. So I had read about "spinning" the axle to give a driver side pumpkin. The theory being that the offset of the pinion is on the passenger side so the angle is less dramatic. You have to trim the housing just a bit for the ring gear to clear but its not that bad. I made a trace of the original clearanced spot, flipped it, and broke out the plasma cutter. It went together perfectly.

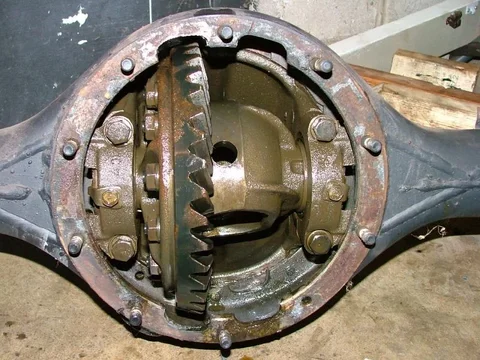

It still trips me out to see the diff on the "wrong" side.


It still trips me out to see the diff on the "wrong" side.
- Thread starter
- #35
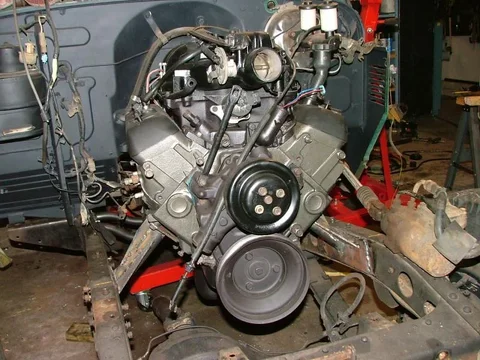
So I got the Drivetrain mounted. Solid mounts all the way around. The reason being I'm a little leary about the aluminum spacer between the trans/case. I offset the motor about 2" to the driver side and the end of the case about 5" to the driver side. Its also pushed as far foward as possible. Apparently I didn't take any pics of the crossmember I built but they'll pop up later. The output on the case is directly in line with the pinion. Running a cv shaft I wanted all the angle to be at the tcase, not the pinion.


- Thread starter
- #36
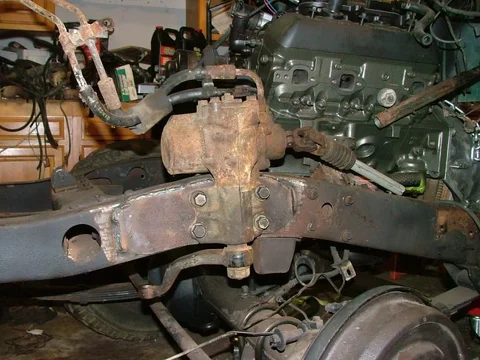
Now it was time to mount the steering box. I cut 2 3/16 plates to fit the frame and clamped them together. Chucked them up in the drill press and drill the FJ-62 box pattern in them. Then I clamped the outer plate to the frame and drilled the outer holes.

I took the plas and cut oversize holes in the inside of the frame. I got some spacers that would fit from the inside of the frame and be flush with the oppisite outside frame edge. Then I clamped the 2 frame plates and spacers together and welded the spacers to the inside plate only.

That way when I sandwich the frame it all fits perfectly and will keep the frame from collapsing under stress. Mounted the box and it was good to go. FYI 99-03 chevy truck body bolts with the 18mm mead fit the 62 box loke they were made for it. The shoulder on the shank fits the hole spot on and the head fits the relief on the box.


I took the plas and cut oversize holes in the inside of the frame. I got some spacers that would fit from the inside of the frame and be flush with the oppisite outside frame edge. Then I clamped the 2 frame plates and spacers together and welded the spacers to the inside plate only.

That way when I sandwich the frame it all fits perfectly and will keep the frame from collapsing under stress. Mounted the box and it was good to go. FYI 99-03 chevy truck body bolts with the 18mm mead fit the 62 box loke they were made for it. The shoulder on the shank fits the hole spot on and the head fits the relief on the box.

- Thread starter
- #37
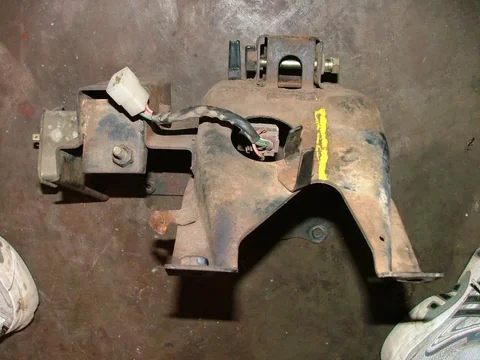
Now it was time to mount the column. I really wanted a tilt column and had a 62 column laying around. A little cutting and welding I had it in. I had to cut the factory mount "ears" off so I could get it into the hole in the dash I cut before I could figure out how to mount it. Once I did that I welded a plate with the correct hole spacing onto it and braced it so it would bolt up. Oh yeah, I had to clearance the factory pedal hanger/dash brace to fit this big ass column in. It takes a 1" aluminum spacer but it bolts into the factory location. I could have built the bracket to angle up so the spacers would be obsolete, but  it works. It'll all be hidden by the column covers anyway. I took the factory lower mount plate off the original column and put it on the 62 lower(had to split it and reweld it). It came out really well ,I just hope it works with seat location, I had to guess.



- Thread starter
- #38
- Thread starter
- #39
- Thread starter
- #40
Once the frame was clean I cut some steel to box the rear rails. Another hint: dont use the plasma cutter over a clean frame. That nice brown spot is the result.
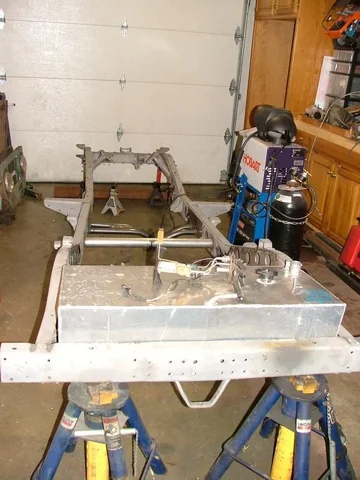
The rear box came out ok, except I forgot how to weld for a minute. Also got the frame coated in Ace rust stop. Thought I'd like it after a few posts I'd read here but now I wish I'd used Rustoleum. It is harder.

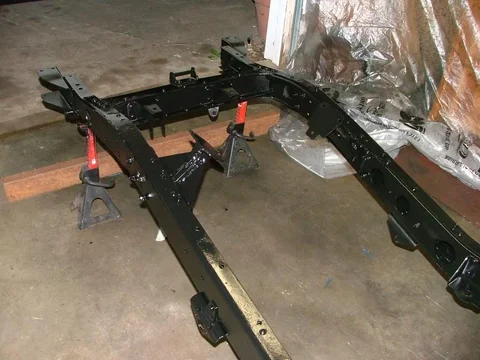


The rear box came out ok, except I forgot how to weld for a minute. Also got the frame coated in Ace rust stop. Thought I'd like it after a few posts I'd read here but now I wish I'd used Rustoleum. It is harder.


Similar threads
- Replies
- 3
- Views
- 651
Users who are viewing this thread
Total: 1 (members: 0, guests: 1)

