1978 LPB Teardown and Rebuild (1 Viewer)

This site may earn a commission from merchant affiliate
links, including eBay, Amazon, Skimlinks, and others.

Thanks for the info guys - those are all the names I was thinking of as well. I have to get the tranny apart now that I have gotten organized. Then I can get a proper list made up of what I need.


Could you fit a 16" rim in that blasting
cabinet of yours?

Not mine but the ones at work are 24x24x36 and 48

what are you going to finish the aluminum with? clear coat? raw? if you have said, sorry, i missed it.

I'm going to do the aluminum in clear powder and the steel cases in black. The six bolt cover, the companion flanges and any other small steel bits will be plated in clear or yellow zinc.

Kevin, your nearest Toyota dealer should be able to help, if they have
microfiche for the old Landcruiser parts.
Peter

That depends on the parts guy. Some are very un-helpful and Toyota Canada charges a big premium on parts. It is often cheaper to get them in the US and ship them.

Kevin:

The T-case is looking great all cleaned up! If you were closer, I'd tell you to bring them over and clear coat them here. I really can't get enough of the clear powder coat on our bits. It's like an engine that you really want to pet!
Dan

Dan - how do you keep powder off the areas where you don't want it with your home PC system? I plan to mask off those areas with high temp tape that my PC guy gave me.
 
I stayed after work today and blasted the steel parts - bell housing, front bearing cover and 5th gear extension. Also gave a quick touch-up on the aluminum parts - top plate, split cases and PTO cover with the higher power blasters.

Sorry - no pics - I'll get a shot tomorrow
 
Dan - how do you keep powder off the areas where you don't want it with your home PC system? I plan to mask off those areas with high temp tape that my PC guy gave me.

For the clear, I don't mask at all. I put plugs in the holes I don't want to tap, but even tapping the holes once it's baked isn't a big deal at all. Other than that, I just sort of avoid it with the gun, and if it gets somewhere I don't want I carefully wipe it up with a rag before it goes into the oven. (a CLEAN paper rag works well here). If I can't use a rag, I gently blow it off.

The clear is MUCH easier, because if you get a few flecks astray you won't ever see it. The colors are more critical, because you'll certainly see them later. For those I use the high temperature masking tape at the edges, and you can use aluminum foil for the big areas.

Hope that helps! For the most part, I think it's easier to tap threads than to mask them well enough (plus I'd probably be tapping the hole anyhow), and to wipe/blow powder off of the parts I don't want it. The high temp tape doesn't adhere real well, so it's a pain to apply, but once it's on there it stays put.

On the aluminum, outgas it, outgas it again, and outgas it once more. And, I always make sure the aluminum stuff especially cools pretty gradually. I turn the oven off, and a half hour later crack the door. Maybe a half hour after that I open the door all the way, and 15 minutes after that I take the part out.

Dan
 
try Toyota Parts Zone - Toyota Auto Parts, Toyota Accessories . Select Land Cruiser and then select year and other options. It then gives you the 4 catagories, then select the area you want. When you do you will see a little blue icon up top called "get info", click that and you will get the drawings like Toydiy use to have.

I use Doug at Rusty Wallace Toyota, his prices are as good as Cdan(who would not ship to Canada last time I contacted him) he ships to Canada and will send it USPS so you don't get fawked over by brokerage fees. He has got me parts that Canadian dealers say are NLA.

HTH's
Daryl


Who can I get in touch with for small parts that I may need? I've read that CDan and beno can find those little things like the plugs in the top cover etc. I have dealt with 4wheelauto before with success. I know I need a few things but I'll wait til I get a complete list before actually ordering anything. I need the boot for the clutch fork at the bell housing....

Another thing I need is the boot for the shifter - Georg supplied the new one here but it seems to be incorrect compared to the old one. I ran the part number through toyDIY but that site is useless now without the exploded diagrams - it just says its a shifter boot but I can't see where it says for what. I'll call orangefj45
View attachment 508303

View attachment 508304

View attachment 508305
 
Awesome info Daryl - thank you.

Dan - when I did my two 8274's I had the PC guy do his 5 stage wash and then took them home to mask. That way I could get really picky and anal with them. Threaded holes are no biggie but the bearing, seal and shaft holes I don't want any powder in. What about the gasket surfaces? I plan to mask them off - or maybe bolt the splitcase together and just mask the seals
 
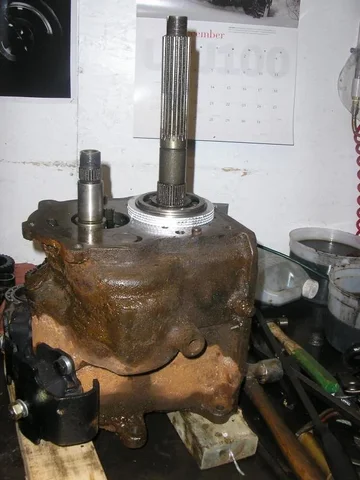
So I tackled the main case tonight. Went pretty well. A bit slow without the actual SST. I got all the bearings out with just a good selection of pry bars working on the snap ring grooves. 5th gear was tight on the output shaft - had to use the 1/2" impact and an big three jaw puller.
P1010001.webp

P1010002.webp

P1010003.webp
P1010001.webp
P1010002.webp
P1010003.webp
 
The output shaft "center bearing" is also tight on the shaft. I actually put the case on the floor on its front face, put the snap ring back on and used an 8lb sledge to get the bearing to move on the shaft. I could only get it to move 1/2" before there were conflicting gears inside the case. I then used a rubber hammer on the other end of the shaft to push the bearing out of the case (because it is stuck good on the shaft).

Still not enough there to grip with a generic puller.

So I'm going to make some washers at work tomorrow and put them under the snap ring and get out the BFH again. If I can get another 1/2" of movement on the shaft I can get my puller under the bearing.

About the 8lb sledge - I tried my air hammer first. Then a smaller hammer with a block of hardwood. Then the sledge with a block of hardwood until the hardwood split. Still no movement so I figured since I am going to chop the end off this shaft anyway for the Toybox install all bets were off. Funny thing is after several nice square hits I did no damage to the shaft that I can see. The nut still threads on.
P1010004.webp
P1010004.webp
 
Oh yeah! Good times. I'm just glad everything moved and nothing was seized solid. Had my son helping with snap rings and holding her steady until he lost interest and started playing with some strong magnets I have.
 
If I had the skills I have a shaft that's cut in the H55 on the shelf I'd love to pull and trade with you.. I'd even pay to get the one that's not cut..
I really don't need a toybox in the 45.. But I lack your skills at removal.. I"ll continue to watch to determine if it's even worth trying.
 
Yeah - it's always a bummer to hack a perfectly good shaft. Kinda makes it a one way deal - there's no going back (without sourcing a new shaft)
 
Last edited:
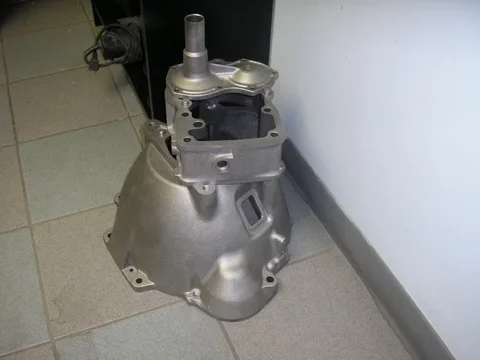
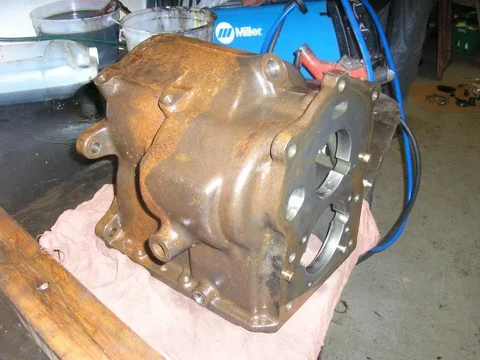
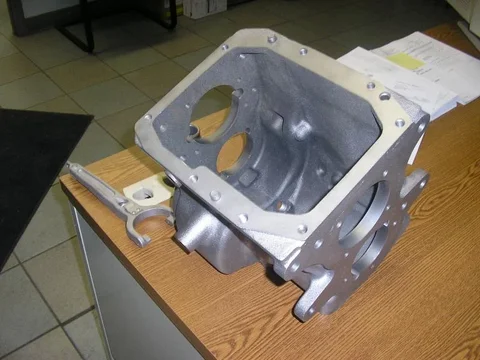
Here are a couple shots of my blasted parts I said I would get... The steel stuff really shows the difference from rusty to shinny

P1010002.webp

P1010001.webp
P1010001.webp
P1010002.webp
 
And now to get that last bearing out of the case.


The washers - 3.56" ID x 4.56 OD x 0.125 thk aluminum
P1010003.webp
Four washers on the bearing
P1010004.webp
Put the snap ring back on
P1010005.webp
P1010003.webp
P1010004.webp
P1010005.webp
 
Stand it up on the nose - make sure the counter shaft is not interfering with the output shaft
P1010006.webp
Three taps with the hammer on the shaft
P1010007.webp
et Voila
P1010008.webp
P1010006.webp
P1010007.webp
P1010008.webp
 
Pull out the shafts
P1010009.webp
Washed and ready for blasting tomorrow
P1010010.webp
P1010009.webp
P1010010.webp
 
Dropped it all off at the powder coaters today. He's going to phosphate wash them and bake them for me to pick up tomorrow. Then I can mask them to give back to him Monday.

I realized a while ago that I need to clearance the splitcase for the Toybox shift bar that protrudes from the back of it. Still haven't done it so that's on the list for the weekend.

Blasted thing!
P1010002.webp

P1010001.webp
P1010001.webp
P1010002.webp
 
It looks great. I like the ingenuity with the custommade washers.
 
Dropped it all off at the powder coaters today. He's going to phosphate wash them and bake them for me to pick up tomorrow. Then I can mask them to give back to him Monday.

I realized a while ago that I need to clearance the splitcase for the Toybox shift bar that protrudes from the back of it. Still haven't done it so that's on the list for the weekend.

Blasted thing!
View attachment 509601

View attachment 509600

Wait, you're going to powdercoat the transmission housing? I see the bar has been raised for me whenever I get to my 45 then.... GREAT idea if you've got it stripped down anyway...

Very nice Kevin, makes me think I can get my input shaft swapped without the SST, just taking a bit more time...

Dan
 
The input shaft was easier than the output to remove because the shaft comes with the bearing whereas with the output shaft you're fighting the friction fit on the shaft as well as the bearing-to-case. You can only pull the output shaft by roughly 1/2" before 1st gear bottoms out on the inside of the case.


And I am powder coating the bell housing, clutch fork and bearing thingy too :D.
 

Users who are viewing this thread

Back
Top Bottom