Awesome build. I cannot wait to see the finished project.
Navigation
Install the app
How to install the app on iOS
Follow along with the video below to see how to install our site as a web app on your home screen.
Note: This feature may not be available in some browsers.
More options
Style variation
You are using an out of date browser. It may not display this or other websites correctly.
You should upgrade or use an alternative browser.
You should upgrade or use an alternative browser.
1978 LPB Teardown and Rebuild
- Thread starter Awl_TEQ
- Start date
This site may earn a commission from merchant affiliate
links, including eBay, Amazon, Skimlinks, and others.
More options
Who Replied?DanS HJ-45
SILVER Star
Dan is going to be apoplectic.
You have raised the bar SO high that Dan will now have to quit his job in order to devote enough time to achieve this new level of perfection... you have simply re-defined the term.
Don't tempt me....
Kevin: you've got a PM...
Dan
There is road tax to, it goes by weight over here, unless a vehicle is over 25 years old you pay about 1600 to 2400 Euro per year on tax for a decent 4x4.
But still cheaper then buying à house here.
Here in Australia I pay $1,000 per year just to register my Land Cruiser - this is because it is a 6 cylinder. If it were an 8 cylinder I'd pay nearly $1,400 per year. Petrol costs about $6 - $7 per gallon... I'm just glad we are not (yet - the new 'Carbon Tax' is expected to add another 20% to that cost) gouged as much as the Europeans are. You have to love a rig to drive it here

Our houses are the most expensive in the world right now on average.
Man, I miss my $32 registration in New Mexico.... OK, back to Kevin's OCD restoration


Josh
The side steps you sold me will eventually be a part of it
Had I known that I would have probably just given them to you. Very nice build.
I have been following this build since the beginning and I finally had to tell you that this is my favorite build currently. The powder coating is absolutely stunning on the drive train, guess you won't ever have to worry about this one rusting away.
Awl_TEQ
Supporting Vendor
- Thread starter
- #588
Thanks
Speaking of rusting away, your comment made me think of the tranny case. One wouldn't think a big, heavy,thick case would actually pit and rust away but you can clearly see the damage from rust on this case. This picture shows the case after washing in solvent and blowing off with air. The near surface is nice and smooth but the far half is pitted pretty good. Given enough time corrosion will get through anything.


Speaking of rusting away, your comment made me think of the tranny case. One wouldn't think a big, heavy,thick case would actually pit and rust away but you can clearly see the damage from rust on this case. This picture shows the case after washing in solvent and blowing off with air. The near surface is nice and smooth but the far half is pitted pretty good. Given enough time corrosion will get through anything.

Good thing you saved it when you did. Given it's that pitted after 'only' 26 or 27 years, I'd just that in just another 50 - 75 years it would have rusted away to nothing
It is fortunate that it was a mine truck - the way you guys salt the roads up there, it would probably have rusted through completely by now if it were driven on the Alberta roads regularly.
Cheers,
Josh
It is fortunate that it was a mine truck - the way you guys salt the roads up there, it would probably have rusted through completely by now if it were driven on the Alberta roads regularly.

Cheers,
Josh
Did you blast that stuff in your blast cabinate if so what size compessor do you have?I don't seem to get very good results out of my cabinate.
Awl_TEQ
Supporting Vendor
- Thread starter
- #591
I did it mostly in my cabinet using a 60 gallon single stage compressor but it runs flat out and I have to let it cool down regularly. I finished them at work where we have virtually unlimited CFM and a bigger cabinet so I could reach the ends better.
Make sure your media suction hose is not plugged - I reverse the air flow by plugging the gun with my free hand every couple of minutes to keep the line clear.
Make sure your media suction hose is not plugged - I reverse the air flow by plugging the gun with my free hand every couple of minutes to keep the line clear.
Awl_TEQ
Supporting Vendor
- Thread starter
- #592
Thanks to Georg, as well as Brendan @ Marlin I received the missing clamp spacer that was holding me up on the Toybox install. In PM'ing with Brendan (freds40), he was helpful with a couple of questions I had. I mentioned I'd like to add a set of the Marlin super-duty-extra-sealing-best-design-ever front inner axle seals to the shipment and asked how much I needed to $end to cover the extra cost..... "Don't worry about the seals. They're on us." was the reply 
This is not a rant:
I can see how guys doing a Toybox install for the first time can get frustrated with the lack of instructions and the fear of cutting the output shaft (on a 5spd). Or the difficulty of getting the Toybox onto the shaft after it is cut. It is incongruous that Marlin can be so helpful and so unhelpful at the same time. They are great on the phone or email or PM's. The product is of great quality. A Toybox install is not that difficult when you know the details but it is definitely not a bolt on bumper type of thing. A one page photocopied blurb of details and a couple of sketches would go a long way to ease the customers apprehension about what is for most guys a big time modification. I'm a pretty handy guy and knew going in there may be a couple hangups. I had no deadline for completion, no rush. Other than the missing part it all went quite well and even that was resolved with a minimum of fuss. I guess what I'm saying is it's not as bad as some guys have made is sound. But I do freely admit to learning from their missteps.
So, the clamp was installed. Stuck the 5th gear shift arm in after blasting and painting the little arm. Sealed the 5th extension housing and the first adapter plate to the tranny and torqued the bolts.
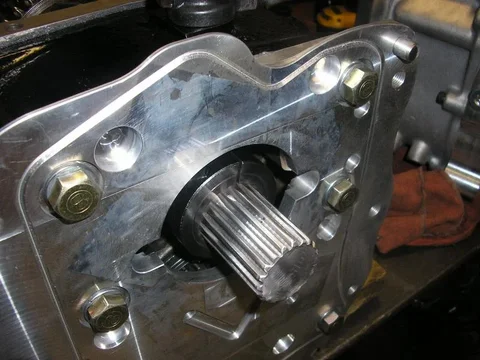
Then it was time to cut the shaft. No pics but I measured a few times and wrapped some electrical tape at the appropriate spot - copied Rufus and clamped a 2x4 to the plate to use as a rest. Broke out the grinder with a cut off disc - got my little guy to turn the input shaft slowly while I concentrated on a steady hand - set the rag plugging the open housing on fire - smoked up the garage and got'er dun.
I chamfered the end of the shaft and used a set of mini files to de-burr the splines. Still did not fit. So I tried some fine grit sand paper and a small screwdriver to sand all the splines a bit. Still didn't fit. So I got out the 2" air grinder with a 3M maroon scotch-brite disc and polished the splines both on the top and between each spline. Slid right on cleanly.
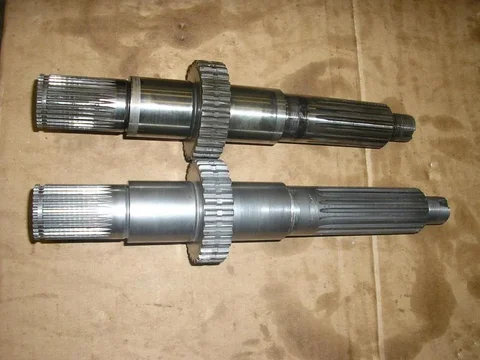
Something I noticed during all that - the output shaft was a fairly rough finish in the machining from Toyota. Quite lumpy surfaces in the valleys between splines and on the tops of the splines. The Marlin female receiver was very nicely machined and very smooth. Once the shaft was smoothly polished up they mated easily.


This is not a rant:
I can see how guys doing a Toybox install for the first time can get frustrated with the lack of instructions and the fear of cutting the output shaft (on a 5spd). Or the difficulty of getting the Toybox onto the shaft after it is cut. It is incongruous that Marlin can be so helpful and so unhelpful at the same time. They are great on the phone or email or PM's. The product is of great quality. A Toybox install is not that difficult when you know the details but it is definitely not a bolt on bumper type of thing. A one page photocopied blurb of details and a couple of sketches would go a long way to ease the customers apprehension about what is for most guys a big time modification. I'm a pretty handy guy and knew going in there may be a couple hangups. I had no deadline for completion, no rush. Other than the missing part it all went quite well and even that was resolved with a minimum of fuss. I guess what I'm saying is it's not as bad as some guys have made is sound. But I do freely admit to learning from their missteps.
So, the clamp was installed. Stuck the 5th gear shift arm in after blasting and painting the little arm. Sealed the 5th extension housing and the first adapter plate to the tranny and torqued the bolts.

Then it was time to cut the shaft. No pics but I measured a few times and wrapped some electrical tape at the appropriate spot - copied Rufus and clamped a 2x4 to the plate to use as a rest. Broke out the grinder with a cut off disc - got my little guy to turn the input shaft slowly while I concentrated on a steady hand - set the rag plugging the open housing on fire - smoked up the garage and got'er dun.
I chamfered the end of the shaft and used a set of mini files to de-burr the splines. Still did not fit. So I tried some fine grit sand paper and a small screwdriver to sand all the splines a bit. Still didn't fit. So I got out the 2" air grinder with a 3M maroon scotch-brite disc and polished the splines both on the top and between each spline. Slid right on cleanly.
Something I noticed during all that - the output shaft was a fairly rough finish in the machining from Toyota. Quite lumpy surfaces in the valleys between splines and on the tops of the splines. The Marlin female receiver was very nicely machined and very smooth. Once the shaft was smoothly polished up they mated easily.

Awl_TEQ
Supporting Vendor
- Thread starter
- #594
I set the top on and held it down while I ran it through the gears - got 5 plus reverse - seems all good. I might get the transfer case done tomorrow. I have new bolts for the transfer case and top on order so I'll just use the old ones to hold it together for now. Still have some parts to powder coat too.
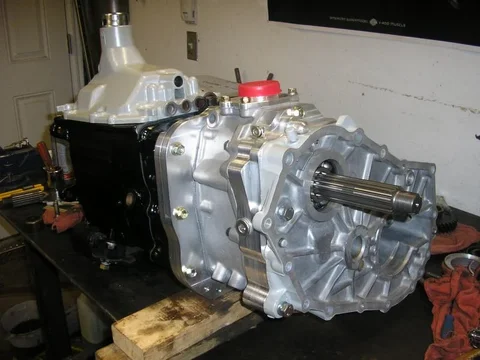
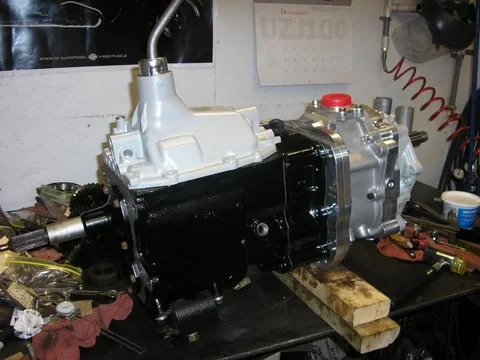


crushers
post ho
THAT is beautiful.
a work of art.
a work of art.
I love it, can you sent me one in a higher res. for on my monitor?


I'd like to see a picture of that burning rag ... 
Nice work!

Nice work!
Awl_TEQ
Supporting Vendor
- Thread starter
- #598
THAT is beautiful.
a work of art.
Thanks Wayne
I love it, can you sent me one in a higher res. for on my monitor?
I thought I got one today but the flash screwed it up - I'll get you one though.
I'd like to see a picture of that burning rag ...
Nice work!
 - I stomped it out and had to open the doors to clear the air
Awl_TEQ
Supporting Vendor
- Thread starter
- #599
I cleaned off the bench now that all the tranny parts are used up. Everything left must be from the t-case 
I washed and dried the gears etc. and started to pull the bearings off the output shaft. Rather than go in to the shop (30 min drive away) to use the press I thought I'd try and pull them off. I started by grabbing the cage figuring it wouldn't hold and it didn't...
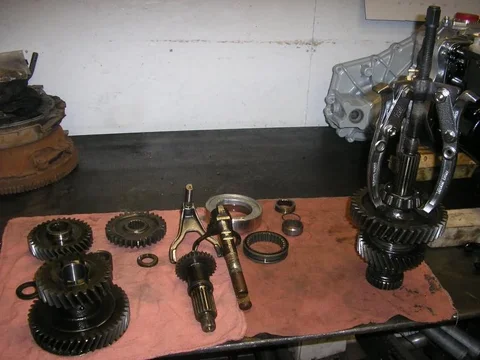
so I grabbed the gear and pulled it off

And again on the other side
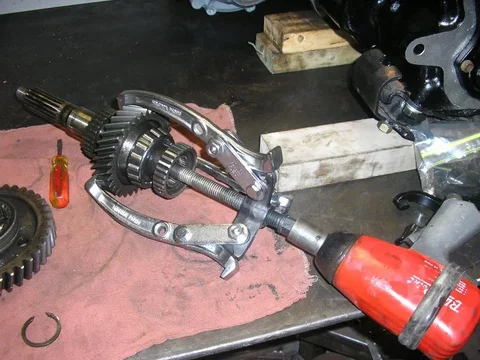


I washed and dried the gears etc. and started to pull the bearings off the output shaft. Rather than go in to the shop (30 min drive away) to use the press I thought I'd try and pull them off. I started by grabbing the cage figuring it wouldn't hold and it didn't...

so I grabbed the gear and pulled it off

And again on the other side

Similar threads
Users who are viewing this thread
Total: 1 (members: 0, guests: 1)


