What have you done to your Land Cruiser this week?

This site may earn a commission from merchant affiliate
links, including eBay, Amazon, Skimlinks, and others.

My first two years with Ruftoys was a wild ride. I took a bag of tools with me EVERYWHERE. It seemed like at least once a week I would be under the hood in the parking lot of the law school trying to get something working good enough to get me home again! My wife and my parents questioned my perseverance; my answer was always the same: it's a machine. It has a finite number of parts. Sooner or later this phase of working through deferred maintenance will end.

It took two years, but it did end. And by the end of those two years, I was sure that I would rather be a Landcruiser mechanic than an attorney. So I passed the Bar, hung my license on the wall, and started looking for a place to open Mark's Off Road.😊

BTW, next week will mark 40 years of my owning Ruftoys.
Was talking to a potentially new 40 owner and mentioned that Rome wasn’t built in a day…

Mark- will be making an attempt at surfacing for air late next week and will check for the steering boxes.
 
Back in 1975, I did the same thing…I was no brilliant mechanic with skills above and beyond. Took every vintage motorcycle restoration a few blocks and did that over and over and over incase I had to walk home…. Funny that I never did

For the Land Cruiser I carried my 2 Toyota manuals, extra carb, stock distributor, wiring, duct tape, hi-lift jack, tools, flashlights galore and remember…no cell phones back then. My FJ40 was only 9 months old. I still carry two tool rolls but now extra cell phone charging cables.
 
My first two years with Ruftoys was a wild ride. I took a bag of tools with me EVERYWHERE. It seemed like at least once a week I would be under the hood in the parking lot of the law school trying to get something working good enough to get me home again! My wife and my parents questioned my perseverance; my answer was always the same: it's a machine. It has a finite number of parts. Sooner or later this phase of working through deferred maintenance will end.

It took two years, but it did end. And by the end of those two years, I was sure that I would rather be a Landcruiser mechanic than an attorney. So I passed the Bar, hung my license on the wall, and started looking for a place to open Mark's Off Road.😊

BTW, next week will mark 40 years of my owning Ruftoys.
I'm not a person who gets starstruck but after reading about them for all these years, it was really cool to see your rigs in person.
 
Away we go! Removing the last 24 bolts that I haven't removed (Not counting the hard top). Removed the two rear heat shields and soaked and wiggled the body mount bolts. I'll let them soak for a few more days (and applications of heat and PB Blaster).

20251012_143320576_iOS.webp


Found another wasp nest, I think this is the last one, hiding under the heat shield.
20251012_150546210_iOS.webp
 
@MatthewMcD So that’s one of the magnetic induction heat tools? You’ve used it? If so, it worked? I can’t take the smell of PB Blaster anymore after 2 decades of soaking nuts and bolts…

By the way I saw this video on window track parts… I remember you did yours…I’d like to do mine
 
@MatthewMcD So that’s one of the magnetic induction heat tools? You’ve used it? If so, it worked? I can’t take the smell of PB Blaster anymore after 2 decades of soaking nuts and bolts…

By the way I saw this video on window track parts… I remember you did yours…I’d like to do mine
Yes, I bought it on eBay in 2020. I was using it to anneal brass...then I bought the FJ40 and found out what it is really designed for. :)

It does work, but it does not get you away from the smell of PB Blaster, or I should say you will have to get used to the smell of burning PB Blaster.

@knuckle47 Just watched the video, my only concern is he uses a flathead screwdriver, don't do that. Use plastic trim tools so you don't f-up your paint. I have a set that was, like, $5, but it included a 1" wide blade that was perfect for applying even pressure to get the keepers compressed and push them through the holes.
 
Last edited:
Away we go! Removing the last 24 bolts that I haven't removed (Not counting the hard top). Removed the two rear heat shields and soaked and wiggled the body mount bolts. I'll let them soak for a few more days (and applications of heat and PB Blaster).

View attachment 4009711

Found another wasp nest, I think this is the last one, hiding under the heat shield.
View attachment 4009713

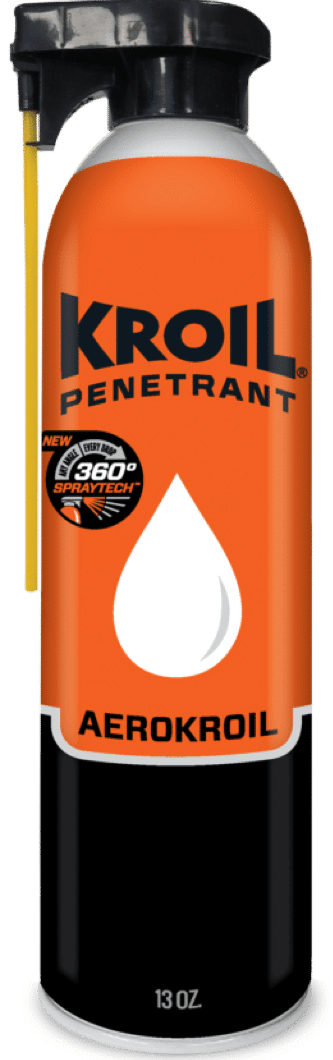
I used a good bit of KROIL on my 1971 Cruiser when I first got it. I didn't/don't know much about auto mechanics but it worked well enough that someone who does asked me where to find it.
 
Kroil works very well (Project Farm). Rather expensive…but works. I also like PB Blaster.

But my all time favorite is a home brew called Ed’s Red. Primarily for cleaning weapons…guns/rifles but outstanding on rusted bolts. And a fraction of the cost of any other store bought stuff.
 
Last edited:
Have to say this evaporust works really well. I thought this fill tube was toast but decided to drop it in the 5gal bucket and see what happened. I had to scrub it with a wire brush a few times and left it in for days at a time. It is pitted but not severely. Some primer and paint and back in service it goes
IMG_0468.webp
IMG_0466.webp
 
Have to say this evaporust works really well. I thought this fill tube was toast but decided to drop it in the 5gal bucket and see what happened. I had to scrub it with a wire brush a few times and left it in for days at a time. It is pitted but not severely. Some primer and paint and back in service it goesView attachment 4009875View attachment 4009876
If you watch it carefully; you will be able to remove rust from painted parts with it. Error on the side of too little time and it turns out really well.
 
I put the hardtop on for the first time in a few years. I took it down to fiberglass and metal, treated the metal with POR-15, then primed and painted with Petit EZ Poxy (boat paint). The inside of the lid has lizardskin heat and sound coating and a fresh liner.

The lid got scuffed while being stored in the garage, so I have to to some touch-up. No biggie.

I also added the gas hatch struts from City Racer for the rear lift door. They're great!

IMG_1136.webp
 
Have to say this evaporust works really well. I thought this fill tube was toast but decided to drop it in the 5gal bucket and see what happened. I had to scrub it with a wire brush a few times and left it in for days at a time. It is pitted but not severely. Some primer and paint and back in service it goesView attachment 4009875View attachment 4009876
I use the heck out if it. VW apron soaking.
This is way cheaper and the same stuff. A gallon makes 16 gallons.
17603897234685516703682064758567.webp


17603896571942968877880033322575.webp
 
I put the hardtop on for the first time in a few years. I took it down to fiberglass and metal, treated the metal with POR-15, then primed and painted with Petit EZ Poxy (boat paint). The inside of the lid has lizardskin heat and sound coating and a fresh liner.

The lid got scuffed while being stored in the garage, so I have to to some touch-up. No biggie.

I also added the gas hatch struts from City Racer for the rear lift door. They're great!

View attachment 4010355
Matt, was the boat paint just a matter of convenience, or do you recommend it for a particular reason?
 
Matt, was the boat paint just a matter of convenience, or do you recommend it for a particular reason?
I had planned on using topside marine paint. It’s formulated for fiberglass (and can be applied with a roller and brush using the roll and tip method).
 
RIP to the fallen soldiers. Got my winter project lined up now. Figuring out how to bend and flare NiCopp to replace these rusted out hard fuel lines. View attachment 4010481
View attachment 4010483
This was one of my favorite winter projects.

Not sure about your application, but there shouldn’t be any need to flare the fuel lines.

You’ll use an 5/16” brass ferrule (“olive”) and tube nut to create a good fit at the carburetor, and a small piece of rubber to the fuel pump.

I’ve had really good luck with a cheap harbor freight tubing bender.
 
I hotwired mine today

I was heading home from work, planning on continuing a house project my wife and I spent the weekend working on, when about 4 miles from home I lost all power. No dash, no accessories, nothing. If my lights were working, it was too bright to tell. After making sure everything was connected, no fuses were blown, fusible link was fine, I tested the hazards and they were working. Seemed the issue was the ignition switch.

Luckily, I had some wire in the tool box under the DS seat, so I made a jumper for the always hot and switched wires, and a separate jumper to get it started. Once I got it home and on the bench it seemed to be fine.

IMG_9230.webp


IMG_9231.webp
 
Back
Top Bottom