My 405,xxx mile valve job.... (1 Viewer)

This site may earn a commission from merchant affiliate
links, including eBay, Amazon, Skimlinks, and others.

Joined
Aug 10, 2004
Threads
346
Messages
4,921
Location
Southampton, NY
Soo, back in December, I had an intermittent missfire on cylinder #2 :(

After a few days, it went from intermittent to a hard miss :eek:

I was hoping for a bad plug, wire or maybe a bad injector, but after doing a leakdown test, it turned out to be a leaky exhaust valve :(

69404477501835941622.jpg

25914012480313506344.jpg

70691351268652183574.jpg


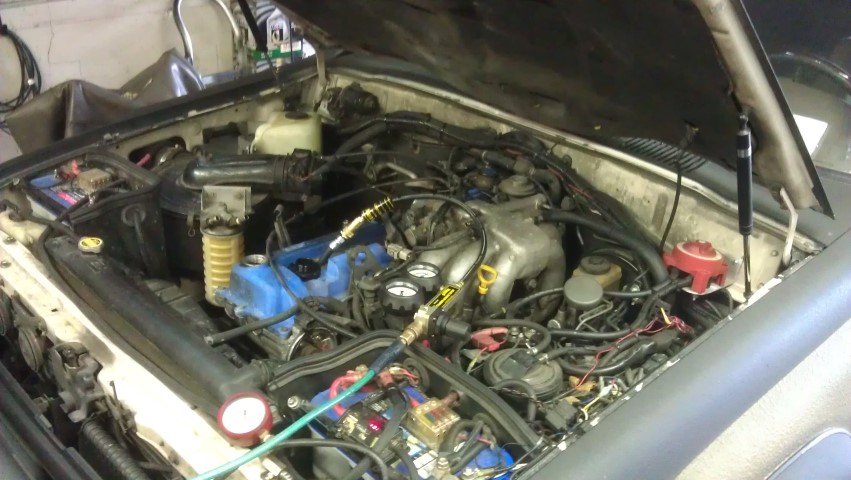
I had put off replacing the valve seals for far too long and it coked up the valves and ports so badly with carbon deposits that a valve got stuck and burnt a nice chunk out of it :eek:

40218082952205498012.jpg

79971075006148791261.jpg

61881539396876026810.jpg

28094156732322849889.jpg

44289331024574356137.jpg

97569227668966860460.jpg

13111276274656824273.jpg

91991491342523807520.jpg

52598898900962302826.jpg

93875907383082416724.jpg

96039318703284441615.jpg

64632290674780616129.jpg
 
Having not dealt with this particular machine shop before, I printed out the FSM procedures, gave them a DVD copy of the FSM and made it clear that I didn't want to get a call from them saying they snapped the cams :eek:

Once they had it apart, they suggested replacing the other exhaust valve on #2 and even had an aftermarket valve on hand, but I was adamant about using all new OEM parts.

Seeing that I was so picky, they call up the next day and suggested I just replace all of the exhaust valves instead of grinding the old ones, so I ordered up the rest....

20679195328721965570.jpg

39524090861601251289.jpg


I must say, I was worried, but they did a fantastic job on the head.

61665748379606270802.jpg

90026350066980687882.jpg

36396930967034610636.jpg

39788702585836243927.jpg

29426929805870401360.jpg

02417200994041215760.jpg

21715938314040979956.jpg

65875787050287949540.jpg

38164769368710398495.jpg


Unfortunately, while doing the last 90* sweep torquing it down, one of the bolts pulled the threads right out of the block (F@CK!!!)

83327835619970287809.jpg


I've NEVER had this happen on an iron block before.....Aluminum, yes, but never an iron block.

The original bolt that came out of this particular hole was a little wobbly, but I didn't think much of it at the time since I had ordered new bolts anyways.

Made a call to TimeFastener to see about getting a Time Sert kit and after giving them some quick mearsurements, they had a kit on the way (for those interested, it's M11 x 1.25 with a 28mm insert)

57270399328920968109.jpg

26424668999327694421.jpg

65093452755037535581.jpg

77107974951702406186.jpg
 
Of course this also meant having to order another HG and fresh bolts from CDan ($$$)

Installed the Time-Sert on shredded hole #9 and also put one in hole #7 cause it just felt kinda iffy on the last sweep.

51420132588459725714.jpg

56717998745952239177.jpg


After chasing all the holes, we dropped the head in, torqued down everything perfectly and the cams went in with ease :)

39424510288480416162.jpg

78036518358915261076.jpg

06869804531548190674.jpg

38229683451153455667.jpg

15113206978886534055.jpg

28268546647787428519.jpg


Ordered up a set of HPS silicone hoses, but decided to bypass the rear heater, so only used a few of them.

Also replaced the radiator hoses, heater control valve and T-Stat just because....

86353156565239601511.jpg

73093856469074521339.jpg

45590627569981331076.jpg

23555192265488434211.jpg

87424258213831688316.jpg

22023850828861222615.jpg

94516598191726913794.jpg


Replaced all of the vacuum hoses under the manifold with silicone tubing, gave the injectors a quick cleaning before replacing the seals, then installed a new fuel filter before slapping the manifold back on....

69093999323812681640.jpg

89111172421493990697.jpg

88732014989671847385.jpg
 
When I bypassed the rear heater, I used extra long pieces for the U-Turn to make changing the #6 plug easier....
I also had the opportunity to wrap the wiring harness with heat reflective tape while the EGR valve was out....

40950934258274122864.jpg

49227193106408091001.jpg

07020244762352233718.jpg

18185611586217896868.jpg

29909446547800498992.jpg

60819909252681658314.jpg

45613197504337503259.jpg

47436658027941906620.jpg


She fired up and idled perfectly right off the bat :)
 
Checked the timing and it was dead set at 3* where I figured I'd leave it for the initial break in before bumping it up.

99102871961034776887.jpg

35164813013524603835.jpg

87715059775220667587.jpg

87161395498817729740.jpg

58372014682127049030.jpg

97159620264670084046.jpg

23710760000224989141.jpg

47439445760878392261.jpg


Only issue I had was that my speedometer stopped working :(

Turned out to be a loose ground wire behind the manifold that I found a few days later when I had her back on the lift (oops)

I'm happy to say she's been running tip top :)

Changed the oil at about 500 miles, then put another 500 miles on her last week without issue (zero smoke, zero oil consumption) :cool:

Can't wait to hit that million mile mark :D

77891036682761910969.jpg
 
Looks good, love the yellow valve cover.

How did you clean the block? How much did they shave off the head? I'm trying to figure out a good way to clean up my block surface without a shop vac or anything to suck up the dirt (no power in my garage).

I did the same thing with the extra length on the heater hoses, makes accessing some things easier and if you have a leak or split you have a little extra to cut a fresh end.

If I pulled the head bolt threads out I would probably sit down and throw up.
 
Probably the most concise head removal thread ever. Good work! Was there still visible cross hatching on the cylinder walls?
 
How much would it have cost you if you had paid someone to do it for you?
 
Very cool posts. How does time sert work? Out of curiosity, why did you not paint the other manifold?
 
Great write up, thanks for sharing !!!
 
Very cool posts. How does time sert work? Out of curiosity, why did you not paint the other manifold?

I don't think he painted either of them. I'm guessing the one that looks painted is simply a new one. There was a picture of one with a crack in it.
 
Cost is going to be more than you think but way less than paying somebody. I am in the middle of the same job but without putting new exhaust valves in or new manifold.
These are BALL PARK for OEM parts
Gasket kit $200
Valve guides $250
Head bolts $250 (he bought two sets!)
my machine work was $800, had the same basic stuff he did but i also had some old exhaust studs removed from the manifold.

I also did front motor mounts $160
alternator rebuild (had parts)
injectors to witch hunter $150
all new exhaust studs and nuts $50?

I already had newish fuel filter, plug wires, water pump and a lot of "while you are in there stuff" so i skipped that. But if that stuff is old then it adds a lot to parts.

For me i am luck enough to have two shops locally that i would trust to do this, ACC and Beno. I dont know what Beno would charge but ACC is around $2500-$3500. No way would i let anyone other then one of the experts do a job like this on my truck. Even finding the "right" machine shop is a very stressful situation.

PS. Snake eater, sorry if you wife is reading this and i get you in trouble! Hope it is not bad form to post prices like this in someone elses post.
 
What are the before and after compression results?

Does it have original rings? Any work done to the lower end?
 
Genuinely impressive you did this job yourself. Big job! Congratulations that it turned out well!
 
I saw the yellow going on the valve cover. I thought "what the f&%$. That is going to look stupid." But with the CAT sticker i actually really like it, good job!
 
And the total cost is?

Just a quick tally from the Toyota invoices I have on hand.....$1,736.64 in parts before coolant (which I had to pickup at the local Toyo dealer)

Also have to factor in $480 for the head work, $156.57 for the Time Sert kit and about $200 in silicone hoses and constant torque breeze clamps :hmm:

Looks good, love the yellow valve cover.

How did you clean the block? How much did they shave off the head? I'm trying to figure out a good way to clean up my block surface without a shop vac or anything to suck up the dirt (no power in my garage).

I did the same thing with the extra length on the heater hoses, makes accessing some things easier and if you have a leak or split you have a little extra to cut a fresh end.

If I pulled the head bolt threads out I would probably sit down and throw up.

I started off with a plastic scraper and a shop vac for the crusty stuff, then soaked everything down with a mixture of GM Top Engine cleaner and MOPAR combustion chamber cleaner for a few days before wiping it all down with bathroom towels I swiped from the house (shhhhh) :redface:

When I pulled the threads, I'm pretty sure the everyone across the street heard me droppin F-Bombs while stopping around the shop and pulling out what's left of the hair on my head :bang:

Probably the most concise head removal thread ever. Good work! Was there still visible cross hatching on the cylinder walls?

Yes, still visible :)

How much would it have cost you if you had paid someone to do it for you?

R&R for the head is like 21 hours book time (not including the head work)

I charge $85/Hr for mechanical at my shop + List pricing on all parts, so if a customer brought in the same job, they'd be crying when I handed them the bill :crybaby:


Very cool posts. How does time sert work?


Users who are viewing this thread

Back
Top Bottom