Builds Intro: Ugly Betty(so far)

This site may earn a commission from merchant affiliate
links, including eBay, Amazon, Skimlinks, and others.

Thanks guys, much appreciated. :cheers:

For the tech part, I am happy to report that the leaking P/S box has been rebuilt and after some light testing this weekend it seems fine.Need to find some time to really test it properly and also to turn up the fueling some more :hillbilly:
 
yep, this is one of those threads that you sit down on a stormy winters eve and review from start to finish.
 
What a great build!Thanks you so much for the detail and attention that you have provided. I can only hope my 40 can one day even partially resemble this rig, by far my favorite!
:cheers:
 
This has just been an incredible post. Thanks for sharing. Also thanks for the beautiful and detailed pictures. It's time I bring my 40 out of hibernation and start the fun all over again.

:cheers:
 
Thanks guys :cheers:

Took Olive out for a sleep-over with her friends ;)

DSC_0314.JPG


:steer:
 
Time for an update ;)


I fitted some custom bushes(to replace the old OEM ones) from the onset but the right rear one I over-tightened during the tub installation causing some small cracks/splits. It bothered me so I kept an eye on it for the last 18 months but after a recent excursion it had collapsed completely.I decided to replace both sides in the rear and removal turned out to be a pita as I had to loosen the entire cage etc ..


The new ones


I also wasn't happy with the aussie AM bonnet hinges and at the first signs of rust I replaced them with OEM


My initial turbo oil return banjo was a bit of a hacked job and it caused my initial hose to be burnt/chaffed badly. I modified a new hose with some spring but eventually a buddy sourced me a propper fitting- it goes straight down initially and then turns out making for a much better routing.


:cheers:
 
Last edited:
Hello buddy !

Can you please explain how to connect that cable? I want to do the same!! i have a 1975 BJ40 24 V

I also decided that it was time to fit that EL wire instrument cluster upgrade


That EL wire is an awesome improvement indeed !

:cheers:
 
Unfortunately mine is 12V and not 24V so I .. However check out post 87 in https://forum.ih8mud.com/40-55-seri...gauges-into-stock-cluster.html?highlight=wire
for the installation instructions.Drew is the supplier and very helpfull so shoot him a Q if you need further help.

:cheers:


Just an update for everyone who ordered right off the bat - everything is "in", except for the EL wire. Even though I ordered it on the 29th, the idiots came back telling me they wrote my address wrong on the package, so it got returned to them. :bang:

With luck I'll get the wire early next week and can ship from there.

If you're interested, I created and uploaded an instruction manual for the installation. Beware, its 14mb, so download it only if you're patient/really interested: http://www.cruiseruser.com/instructions.pdf
 
Time to get going on the last chapter of normal work on Olive. Unpacked the bits and pieces ...


Testing fitment after all the layers of paint and the manner of removal :oops: .


Some of my old rubbers were new and just needed a clean


still fits perfect ...


But the twin channeling was shot and I wanted to get to the insides of the frame ...


The left overs ...


The one door was missing the upper rubber and felt with the result ...


The quarter vent windows also need new rubbers and a refurbish ..


Rust Bullet no longer has an SA agent due to some fallout over a Guarantee with head-office. I couldn't do another direct import from the USA and so found the Belgium version of RB. It is identical i.r.o looks , smell, texture, preparation, application, dilution, removal and also sticks to your hands like sh!te. Today the weather was just right so I could start shooting all the cleaned up bits and pieces with the required 2 coats ...


If all goes to plan I will start shooting some color after work tomorrow
 
Received a long awaited parcel in the post today

DSC_0450.JPG


Will get on with it as soon as Olive is home


DSC_0451.JPG


In the mean time I got going on the Aussie LRT that she came with.That red desert dust becomes a very tough caked muck when mixed with diesel :eek:

DSC_0446.JPG


:cheers:
 
Welcome back! Can't wait to see thefinal stage of this dream rig come together.

I replaced the channels on the rear sliders of my troopy back in about 2003 or so when Toyota still made the felts. Glad I did it as I don't think they make it any more (I remember that all four felts cost me over $600). I wish I had one more set for Lexie. Looking forward to seeing what you do to address that.

Josh
 
Theo,

do you have any pics of the P/S gearbox rebuild? I am needing to do the same to mine for $OR has the rebuild kit in terms of gaskets and o-rings and figured if bearings are shot I can find replacements after measurement but mine is leaking a little as well. My sliding window inside felts were toast as well and after no luck with any options for a replacement I went with a late model pop out vent window style top instead so that I could finish my resto but would rather have kept my sliders. I am also about to swap back to 4.11 R&P's for the 3.70's arent doing it for me with 33's

thanks
Rob
 
That switch is cool!

Where are you going to mount it to your dash?

Thanks. I am still looking for some examples so ... :meh: 
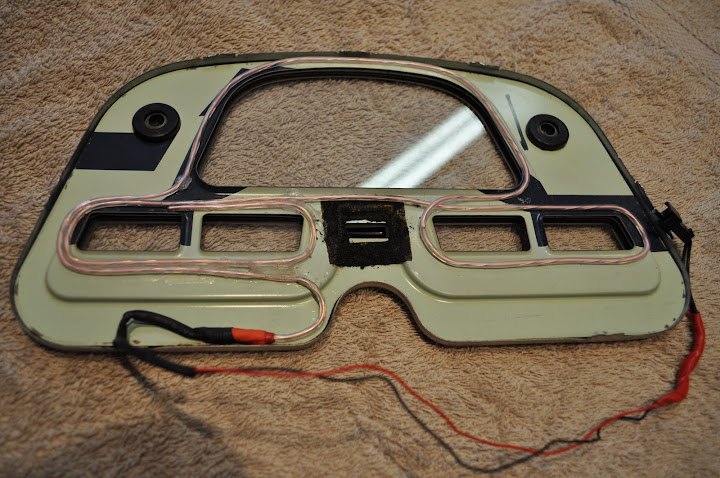
But I won't be drilling holes in my dash any time soon

Welcome back! Can't wait to see thefinal stage of this dream rig come together.

I replaced the channels on the rear sliders of my troopy back in about 2003 or so when Toyota still made the felts. Glad I did it as I don't think they make it any more (I remember that all four felts cost me over $600). I wish I had one more set for Lexie. Looking forward to seeing what you do to address that.

Josh

Thanks Josh. Yeah I too tried Toyota Japan but those felt rubbers are not available any longer. Then I got advice here to try the twin rubbers from the Toyota Hi-Ace minivans which are but at 1K per piece for something I would have to cut to make fit just didn't appeal to me. So I searched and eventually found a shop that sells the stuff per foot - not OEM but the profile is close enough - will post pics when I have installed them.

Theo,

do you have any pics of the P/S gearbox rebuild? ..

Sorry Rob I don't - I outsourced the rebuild of the box to an expert.

:cheers:
 
Awesome work. Great trip photos. Thorough job going through the rig... I like it. Done right.
 
Theo,

do you have any pics of the P/S gearbox rebuild? I am needing to do the same to mine for $OR has the rebuild kit in terms of gaskets and o-rings and figured if bearings are shot I can find replacements after measurement but mine is leaking a little as well. My sliding window inside felts were toast as well and after no luck with any options for a replacement I went with a late model pop out vent window style top instead so that I could finish my resto but would rather have kept my sliders. I am also about to swap back to 4.11 R&P's for the 3.70's arent doing it for me with 33's

thanks
Rob

I wondered what happened to your sliders.

I love my 3:73s with 33s. What is your boost running at?

I'm sure glad I got felt for Patches when I did. I look forward to seeing your felt when it's done. Perhaps you can make a little kit to sell on Mud:D

Josh
 
I love my 3:73s with 33s.

What revs do you run @ 120km/h in 5th with that combo, Josh ? You do have the H55F box ?

Rob, what is wrong with the 3:73s - are your complaints directed at off road or on road ?
 
I like newly painted parts ...

DSC_0468.JPG


It deserves new OEM rubber ...


DSC_0470.JPG


DSC_0474.JPG


Do not clean the "beeswax"- like substance before fitment, as it aids in giving you a proper grip to install it

DSC_0472.JPG


DSC_0476.JPG


next the glass using new hardware

DSC_0477.JPG


The end result

DSC_0480.JPG


With a short break in the torrential rain that we have had I managed to get some "Rust Bullet" brushed into all those hard to reach areas and seams on the inside bottom half of the doors ..

DSC_0460.JPG


Then it was on to those sliding window frames.Toyota doesn't stock the OEM twin-felt rubbers for the 40 ser.I was advised to use the Toyota minibus rubbers but they were not a perfect fit and I was loathed to cut something, that expensive.Instead I found a perfect match and the stuff was sold by the meter ! :hillbilly:

Doesn't look like much

DSC_0485.JPG


but with a bit of pressure

DSC_0483.JPG


and it becomes a perfect fit ito height, width and depth.

DSC_0488.JPG


Now I just need to figure out what the magic trick is to get the glass in before I resort to the conventional violence :confused:

Also found time to dig out the old A/C system that will be going back to Aussie to a friend's son.

DSC_0482.JPG


:cheers:
 

Users who are viewing this thread

Back
Top Bottom