- Thread starter
- #201
A few updates. For anyone who runs into the same problem with the 1HDFT airbox and intercooler piping interference that I did, it looks like there are two options:
1. Aftermarket airbox - I heard back from PDI and mine should ship in August but based on how long it took the intercooler to get through customs, I can expect it by September... so:
2. There's an earlier 1HDT lid that' still in production with the PCV inlet on the other side. Only $38 at Partsouq (plus $$$ shipping of course). Part no. 1770517010

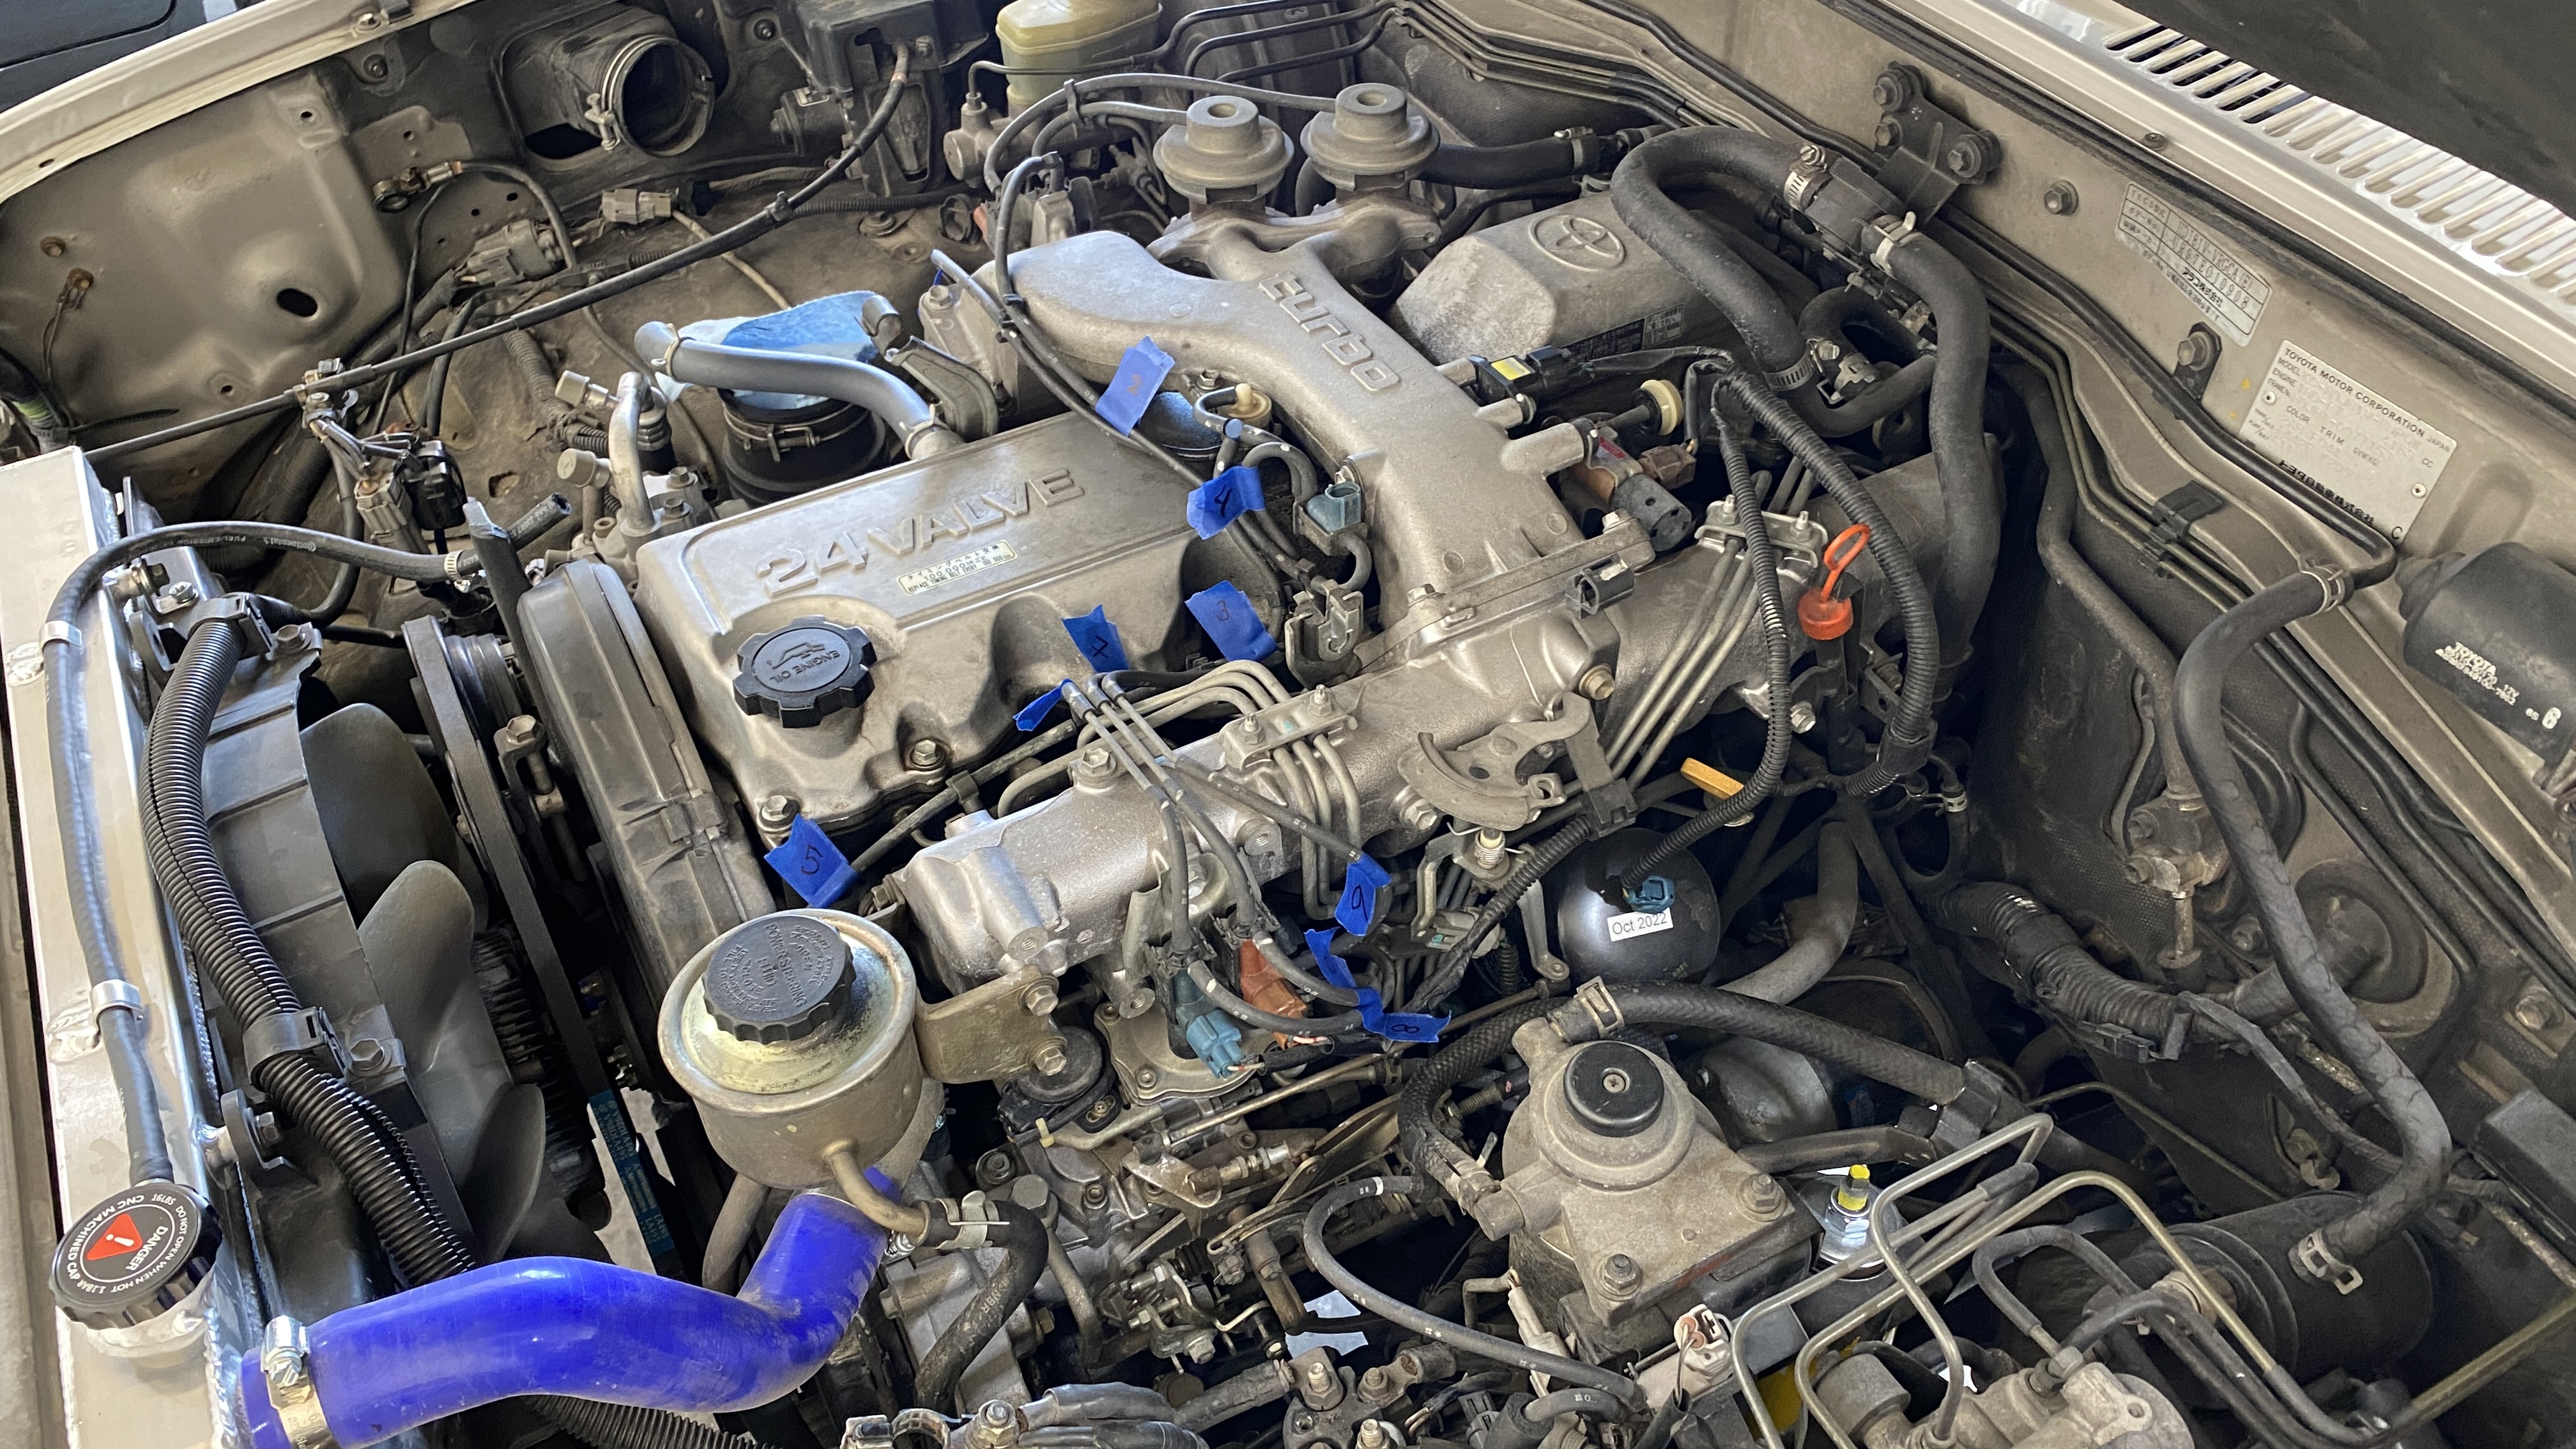
Got a blank for the EGR Exhaust outlet and had my buddy tig up the EGT port. Also got a new gasket:
The distance from the plate to the wall of the exhaust manifold is about 42mm so we'll meet halfway with the probe
Makes for a pretty clean install though I know the ideal spot would have been right in the middle of the manifold. Anyone have any hard data on EGT temps for just cylinder 6 vs an average of all cylinders?
I impulse bought this steering shaft seal/bearing when I saw there was only one left at some Land Cruiser etsy shop. Reading up on it later though I think it might be a solution looking for a problem. Probably just gonna run the OEM dust seal instead.
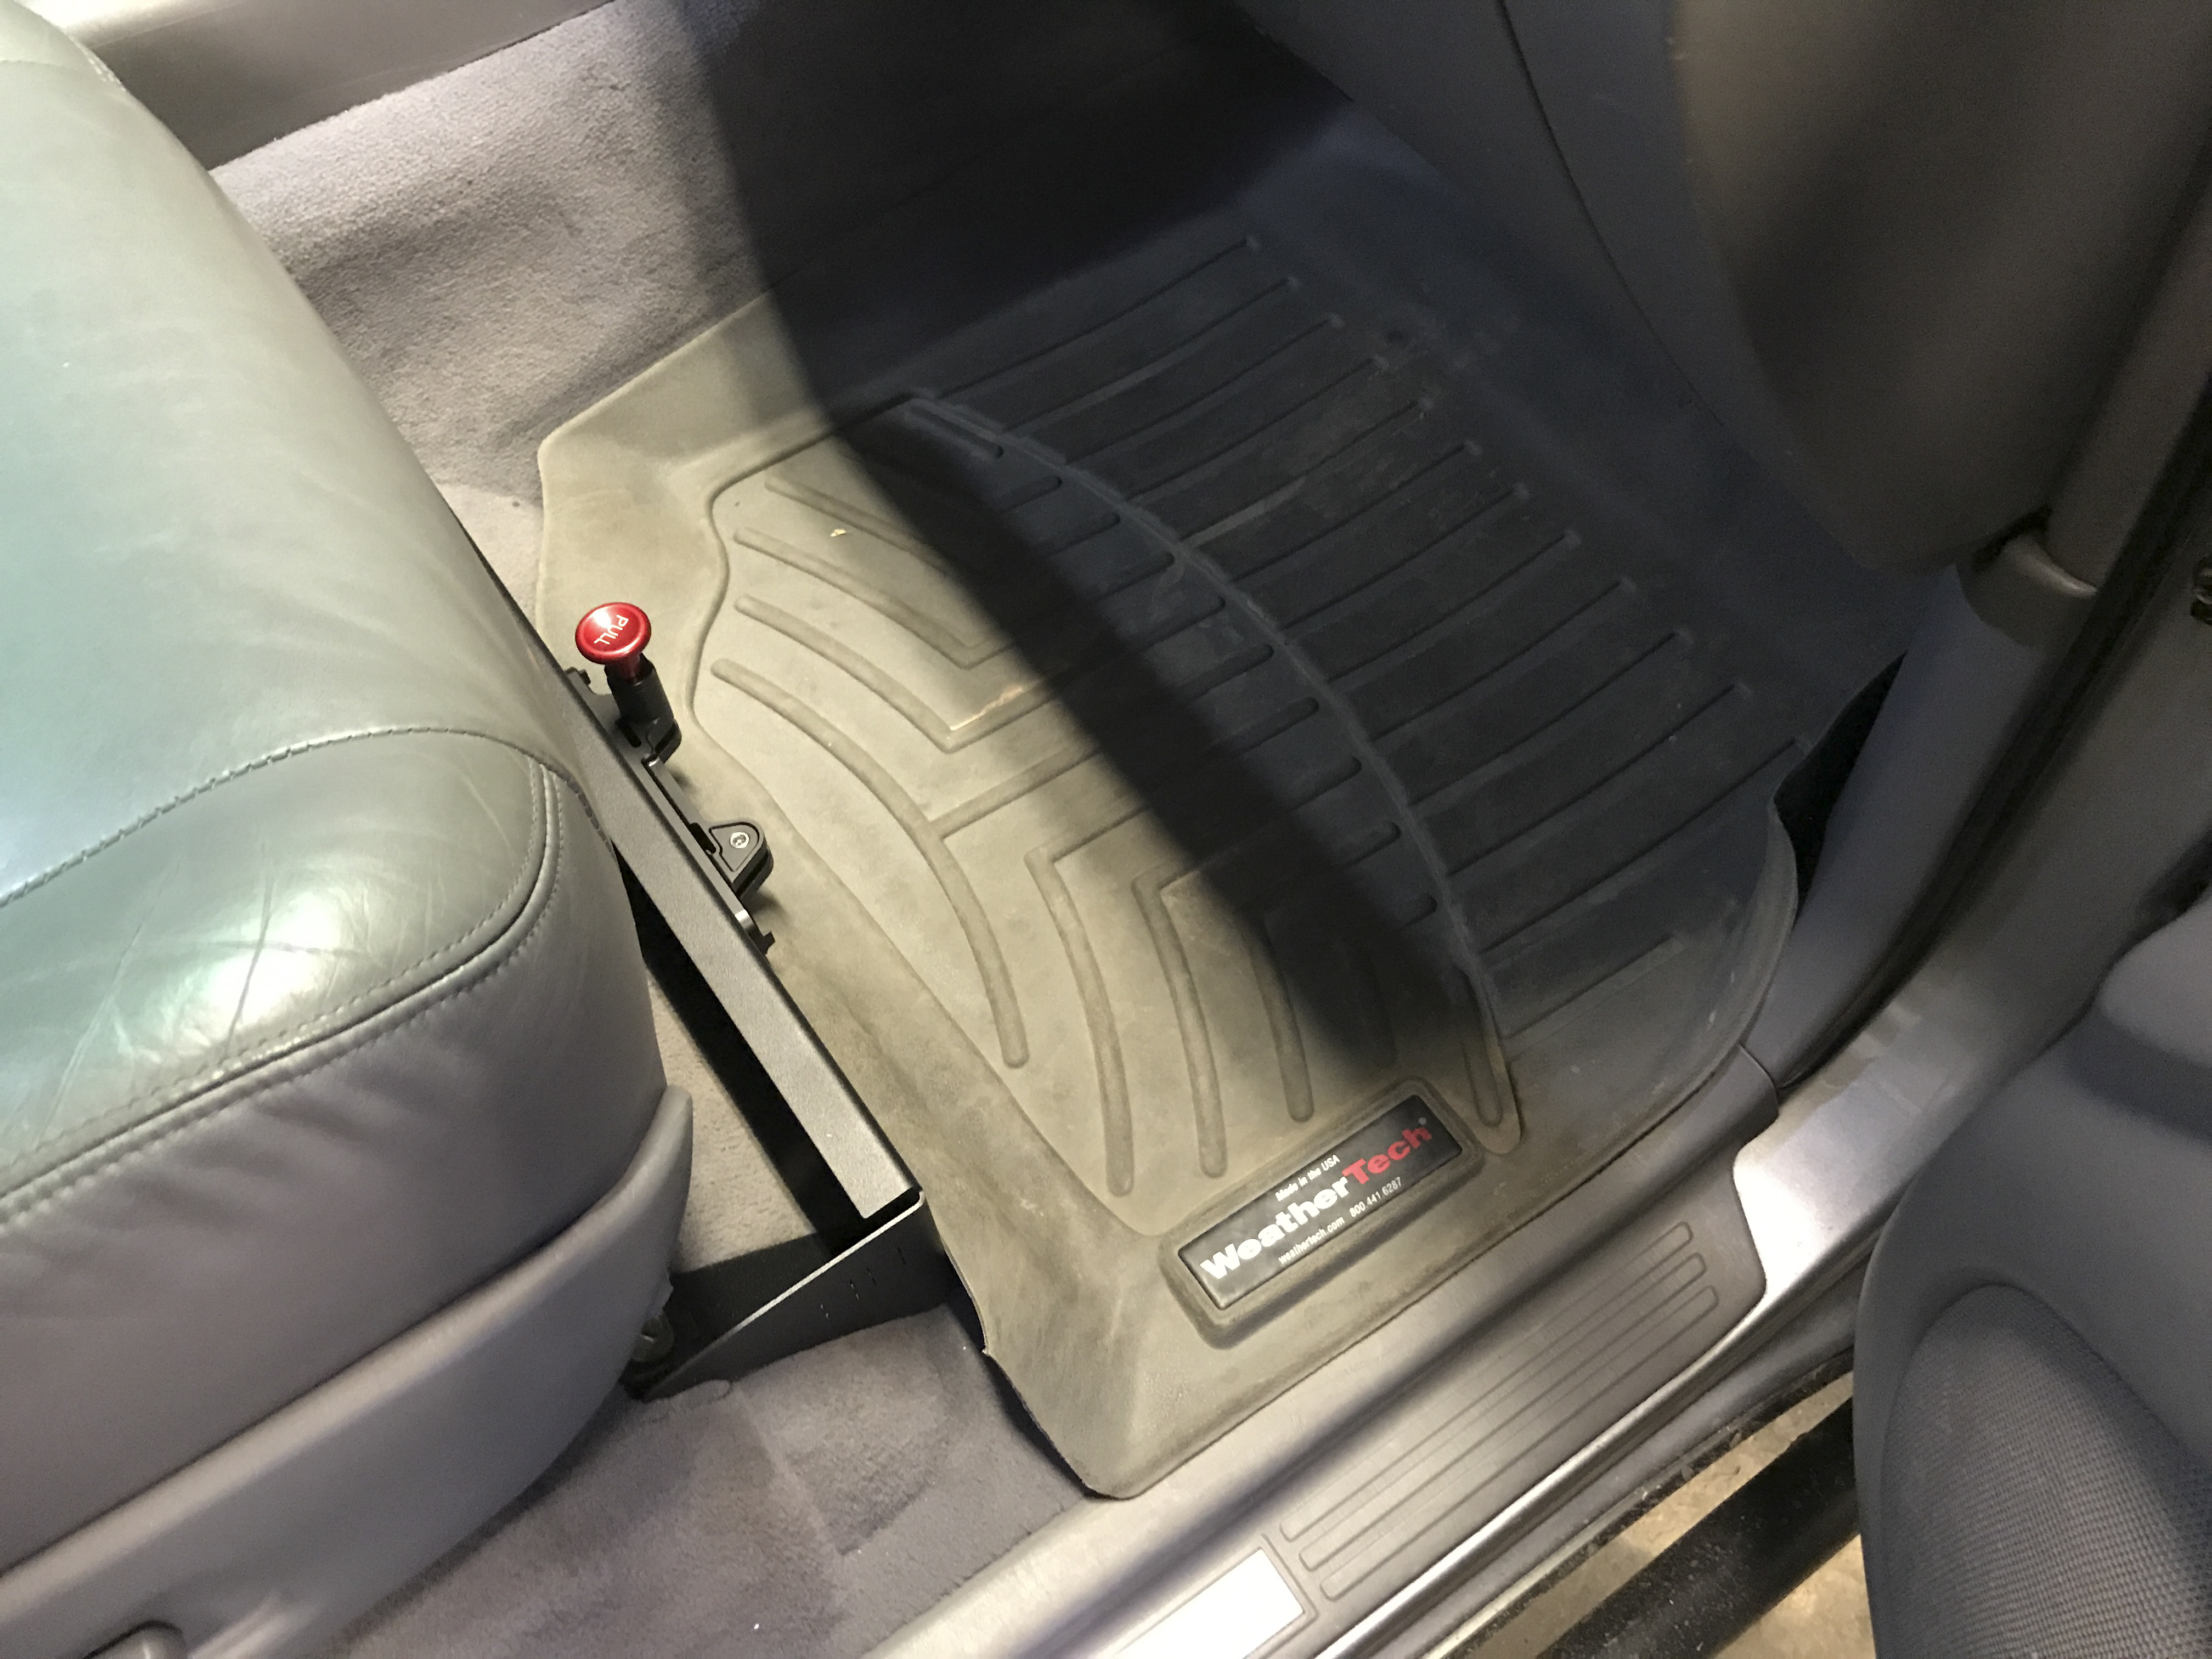
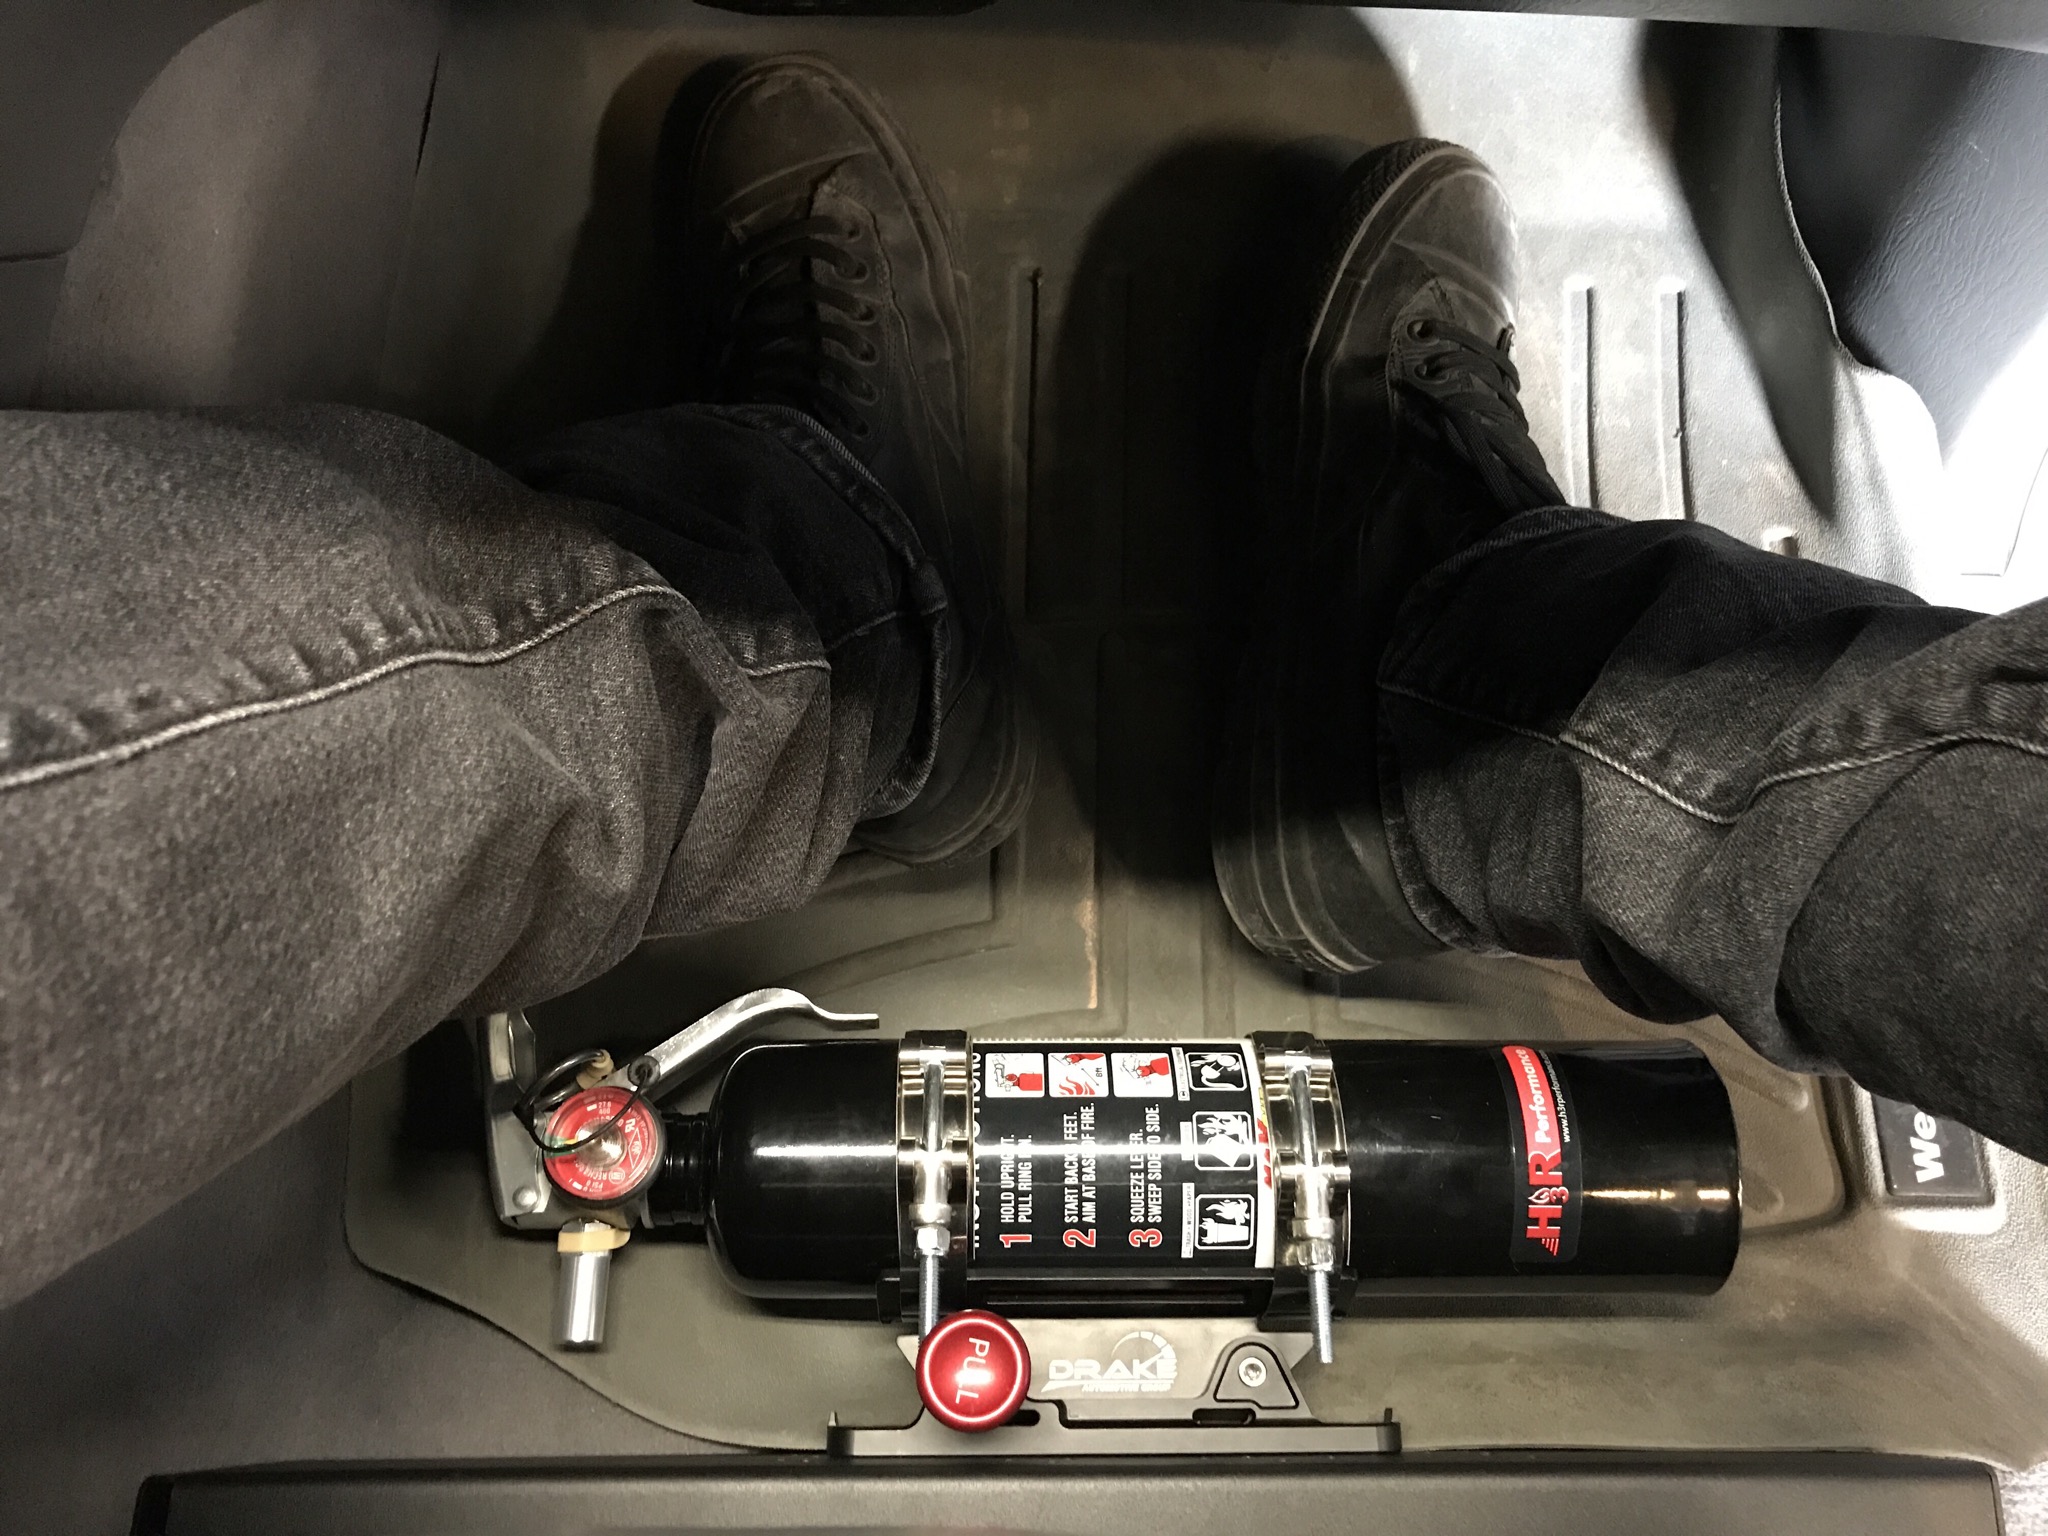
And finally I was pleasantly surprised to see this show up today, IYKYK, I'm just happy I got this fire extinguisher mount.
My main issue is that it interferes with the floor mats, which are not flexible. So I'll either have to modify the mats, or more likely see if I can run it upside down.
I had this setup on my old 100 and it was great.
1. Aftermarket airbox - I heard back from PDI and mine should ship in August but based on how long it took the intercooler to get through customs, I can expect it by September... so:
2. There's an earlier 1HDT lid that' still in production with the PCV inlet on the other side. Only $38 at Partsouq (plus $$$ shipping of course). Part no. 1770517010

Got a blank for the EGR Exhaust outlet and had my buddy tig up the EGT port. Also got a new gasket:

The distance from the plate to the wall of the exhaust manifold is about 42mm so we'll meet halfway with the probe


Makes for a pretty clean install though I know the ideal spot would have been right in the middle of the manifold. Anyone have any hard data on EGT temps for just cylinder 6 vs an average of all cylinders?
I impulse bought this steering shaft seal/bearing when I saw there was only one left at some Land Cruiser etsy shop. Reading up on it later though I think it might be a solution looking for a problem. Probably just gonna run the OEM dust seal instead.

And finally I was pleasantly surprised to see this show up today, IYKYK, I'm just happy I got this fire extinguisher mount.


My main issue is that it interferes with the floor mats, which are not flexible. So I'll either have to modify the mats, or more likely see if I can run it upside down.


I had this setup on my old 100 and it was great.