HZJ40 RestoMod v3.0 (New, improved, and now with fewer sparkplugs)

This site may earn a commission from merchant affiliate
links, including eBay, Amazon, Skimlinks, and others.

More work done on Gunner this weekend.
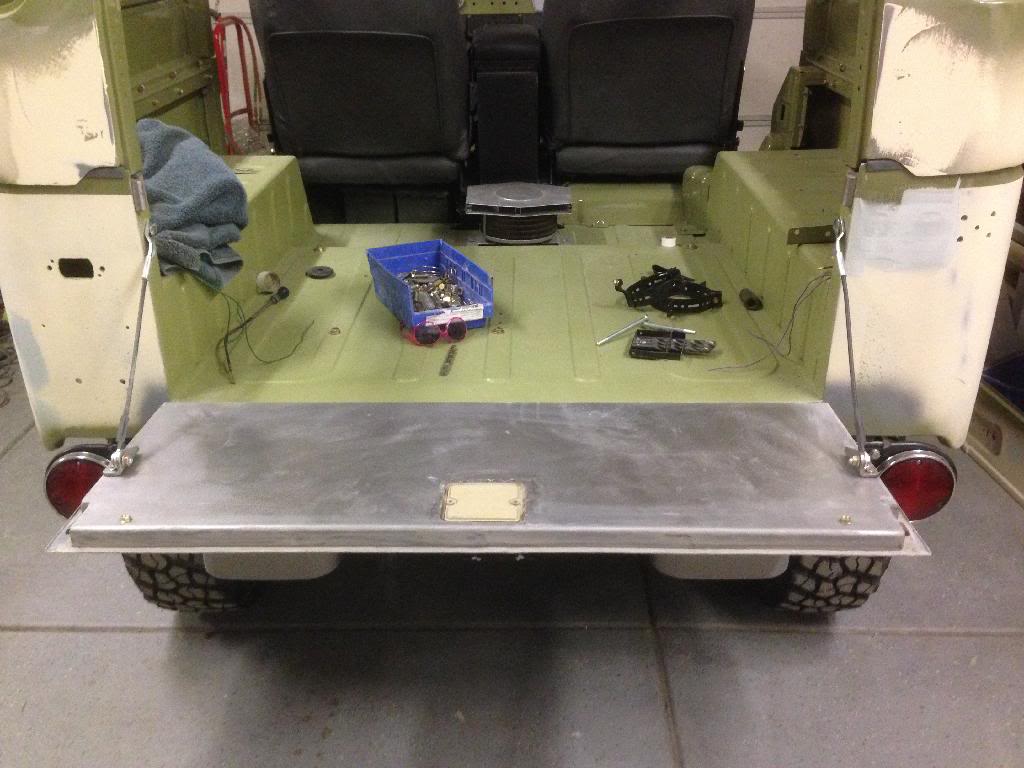
I cam very close to finishing up the tailgate project. I had a local fab shop bend me an 18ga sheet to form the rear cover as I didn't have access to a brake large enough to accommodate this thing.


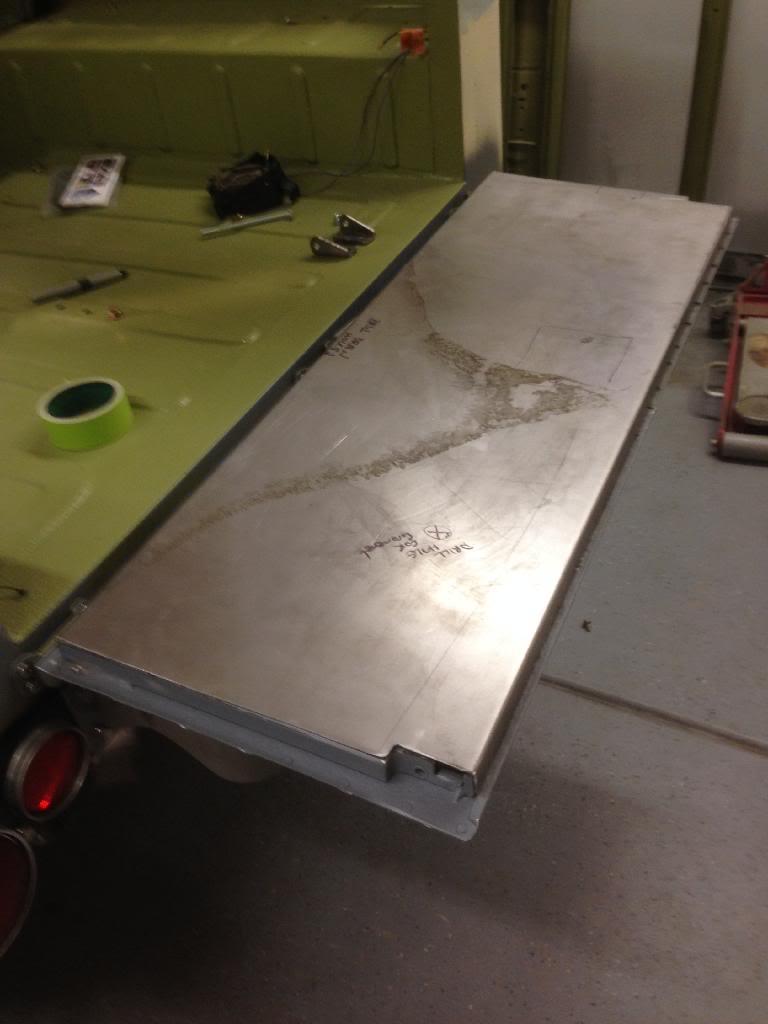
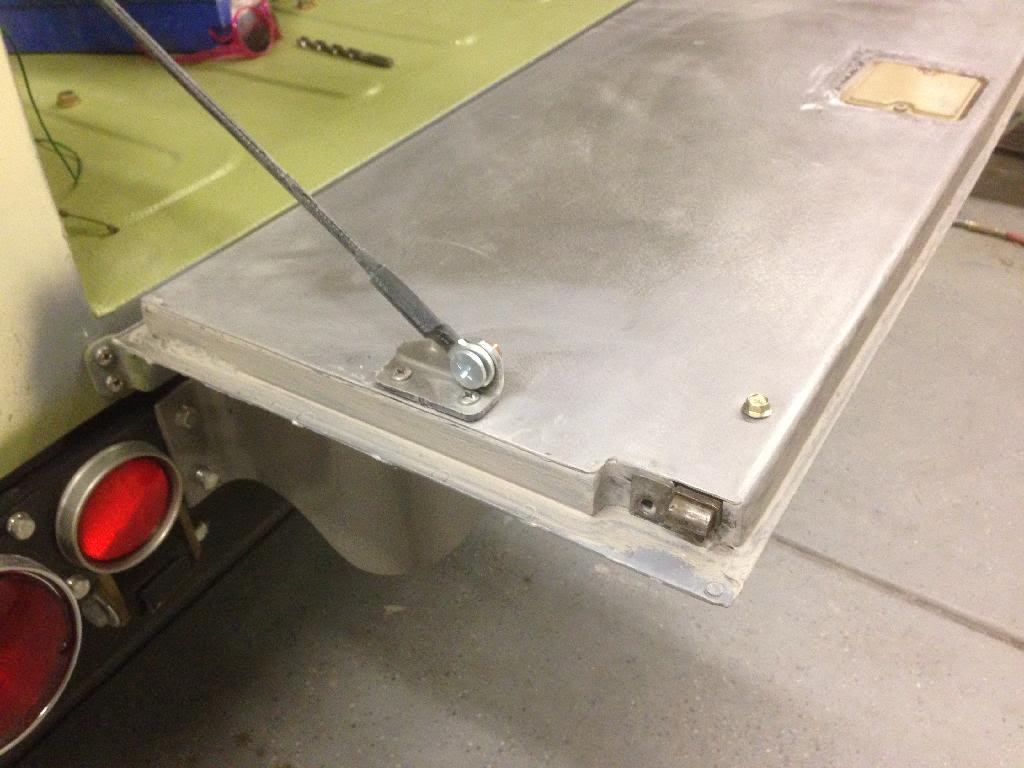
I needed to come up with some sort of access panel to get at the latch mechanism so after some thinking, my best 'cruiser buddy donated a FJ60 rear hatch to the cause and I salvaged the small panel off of it.


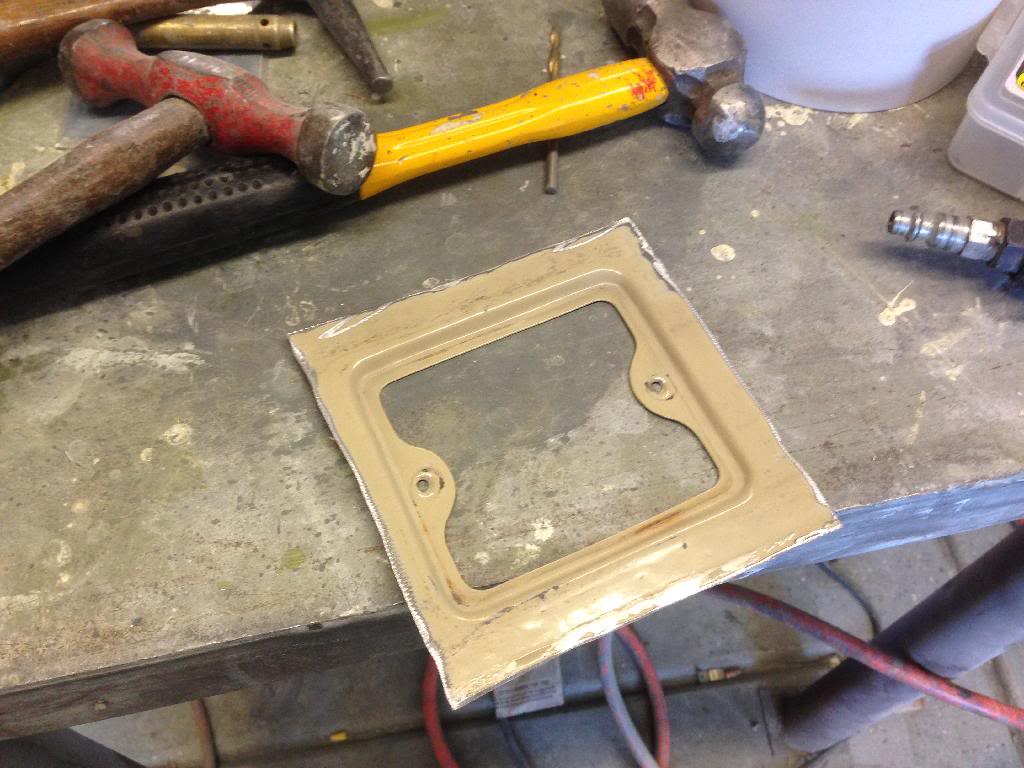
After some some grinding, hammering and welding I got it installed to my satisfaction.


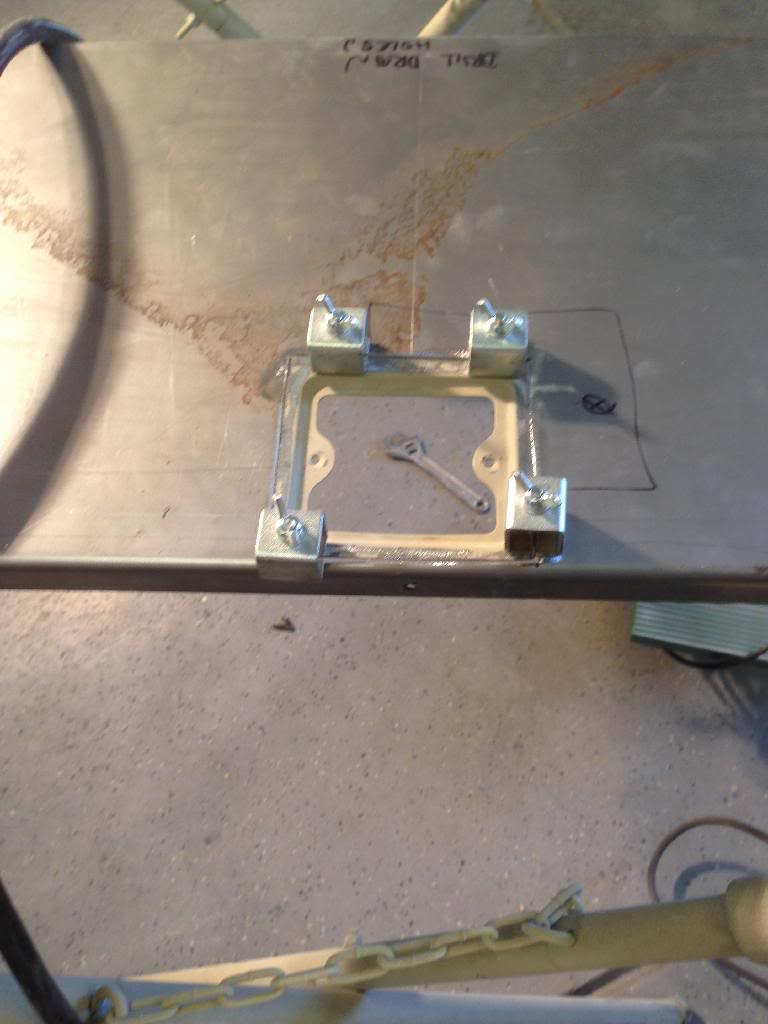
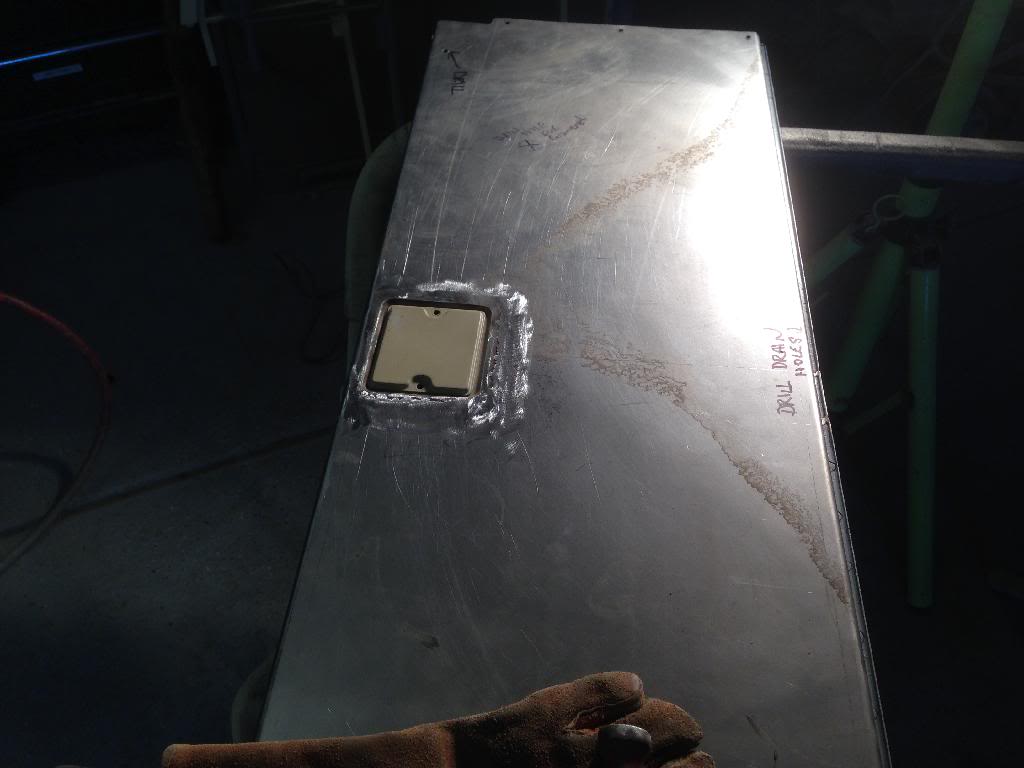
Then I was able to finally weld the back onto the box frame. I drilled three holes in the bottom to serve as drains, should any water ever get in there, then seam sealed the whole thing with some 3M seam sealer.

I picked up a pair of FST style tailgate brackets off eBay and found a pair of GM tailgate straps that worked out well. Some measuring, drilling, a couple riv-nuts later and, zang-a-rang, I've got a working tailgate!


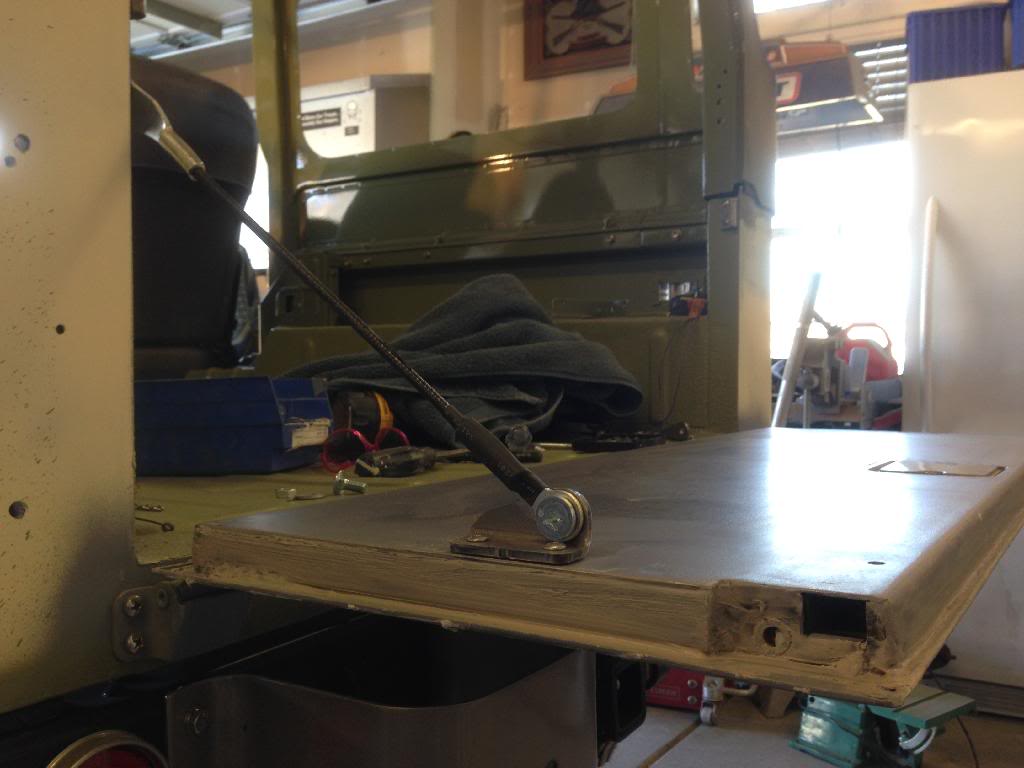
Got the tailgate project finished up:


Started mocking up the homemade tire carrier:


Hardtop test fitted:


I also found a good deal on a new/unused Con-Ferr 22 gallon auxiliary tank on Craigslist yesterday.


It's missing the mounting straps and hardware but came with a skid plate. I'll probably hit a junk yard and start looking for a pair of straps I can adapt to mount the tank.

This one has a baffle down the centerline but no fuel sender so I cut a 2" hole for a factory sender. The factory sender needed to have the arm bent somewhat to work better with the Con-Ferr tank. It won't quite reach the bottom and I'm perfectly ok with that. When the gauge indicates empty, I'll likely have 3 or 4 gallons in the tank.


I'm debating on whether or not I should have the tank sent out to a shop for rust proofing inside I peered in there with a flashlight and can see a few small surface rust patches and I'm thinking it would be nice to have this sucker sealed up with some sort of epoxy.
Here is a rough sketch of my proposed fuel system setup as well:
 
Last edited:
Resto-Mod

I just reviewed your build thread. Very Nice Work!! I like the color choice.
I enjoy seeing an FJ40 getting the attention that you have put in this rig. Great Transformation from OLD to NEW!
Gary
 
I've got a short update to post...


I got burned out on body work so I started playing more and more with my swing out tire carrier. I have already fab'ed up the swinging arms and now I'm working out just how/where to mount the tire carrier and basket.

I am working with a local fabrication shop to bend up some 2" DOM tubing to serve as the tire carrier mount. I realize I could have simply used the same 2-1/4" box tubing I used for the swinging arms, but I really think what I've got drawn up will work very nicely and look much less homegrown. It involves some somewhat complex bends so I'm asking the shop to do the CAD design on it for me.

Anyway, I did end up with with a novel approach to capping the carrier channel. I was originally planning to just use some scrap 1/4" flat stock to cap the ends of the bumper, but I accidentially noticed that the 1" shackles I bought from IPOR over a year ago might serve very well on the ends of the bumper. I bought these things and ended up not using them so I figure this is a better purpose than just letting them rust in a box somewhere.
I took each shackle and milled off .250"x.500" and joining two together, I was able to get the correct fitment to make bumper ends out of the IPOR shackle mounts. Here are a few photos:


Contrary to what I take for the norm, I opted to put the tire on the passenger side. I think I can keep it low enough to prevent my 3/4 view from being obstructed by the tire. Here is a rough mock-up of where I intend to mount the tire:


Thanks!

There has been a change of plans with the carrier. I was originally trying to put the tire on the passenger side to try and keep the reverse backup light from being blocked. Well, as it turns out the basket covers up the reverse light just as much as the tire. I had some trouble trying to get clearance between the tire and the latch lever. I made the axis of the swinging arm about 3" too short to give good clearance between the tire and the quarter panel when the arm is fully opened. So, I decided to move the tire back to the driver's side where there's a bit more room since the latch is about 3" off-center.

I also got the basket pedestal tacked up and checked for clearance...


Also, I got my 8274 mounted up to a 4+ Bumper.

Dave Gore at 4+ gave me a really good discount for being a 'mud member and I am really impressed by the quality of the part. It is really heavy duty and even came with hardware, which was a pleasant surprise.


Also, I'm all but done with the tailgate project now.

Everything was painted, powder coated or zinc plated and put back together tonight. Just need to glue in the weatherstripping and it's all done.


Here are a few pics of the results:


Last edited:
What a great build! Very impressive.

~ Carl
 
Ran into just a teensy-weency snag on my 'cruiser. I managed to leave enough water in the block to crack it when I left it outside for a weeklast winter. So I've had to completely source another 3FE. It's not been a total loss though. At least I have a complete set of spare parts for my truck and I identified, in the interim, that I was using the wrong flywheel bolts for a 2F flywheel. Yikes!

The replacement donor engine was relatively low mileage and is showing strong compression (151-159) on all cylinders. I've got it all cleaned up and ready to go. Just waiting on the replacement flywheel bolts and than I'll start making progress.

More to come.
 
Just catching up on you tthread, your wiring looks great, very professional.
 
I've been furiously doing bodywork for the past two days. The wife and baby are out of town visiting family so I'm a bachelor for the next 48 hours. Since blocking, priming and more blocking panels is not exactly resto-mod porn worthy, I took some photos of the little speaker mounts I made out of some scrap sheet metal. These are only big enough for 4" speakers, but it should be enough for me.

The rear panels attache to existing holes in the quarter panel sill. Tonight, I'm blasting and priming them and will coat all the speaker panels with tintable bed liner to match the interior. I'm hoping that this way they will look somewhat original(ish) and not stand out too much.


I added a 12v outlet to one for convenience:


The front panels will attach to the lower cowl support:


Note the "farmer John" sheet metal brake:

 
Last edited:
Also, this is 3FE #2 to replace the engine I had freeze on me over the winter. This one is out of a '92 and was very clean, dry and had excellent compression.


Bodywork sucks:


I tried to have all the metal on the truck re-chrome plated but the only shop in town (I could afford) could only do ferrous steel. So, lacking a better option, I had the pot metal bits powder coated in "chrome". It doesn't look too bad.


Someone gave me a couple Jerry Can holders so I had them powdercoated and have attached them to the wheel wells:


I live in Nevada and carrying a few extra gallons of water is always a good idea.

Also, I got the tailgate hardware zinc'ed and installed:


The addition of the sound system was a last minute thing... but, I decided that although I never listen to the radio, an antenna may be a good idea in the future. I placed it close to the cowl/windshield frame to keep it protected from branches.


The cool thing about the '92 80 series 3FE is that this one came with the optional upgraded alternator, which I believe is rated at 90A.

 
Last edited:
And of course... rear cup holders:


I have a sweet set of late year jump seats that I am just dying to put in the truck. But, as I have a 2 year old... we are probably more than a decade away from that being ok with the wife. So, I grudgingly accepted the fact that I was going to have to use a bench seat for the baby. Don't even get me going on why it is black and not charcoal. Let's just say, I tried. Hard.


Also, since I've completely filled the FJ62 fuse panel, I decided to add a second stand-alone panel for future expansion. At some point, I may add an on-board air compressor and/or auxiliary fuel tank switching valve and will need more fuse positions. I thought this was a great place to put them as it's out of the way and doesn't even really look out of place. The best part is, the wires will be hidden from view as I cut a rectangular hole in the speaker grate and flush mounted the panel:

 
Occupied myself tonight with some odd jobs. I have been working on rebuilding the windshield wiper assembly.

Oh boy.


Also, I remembered why I kept a polishing wheel on my bench grinder now. It came in really handy on the wiper arms and door lock cylinders.


Last edited:
Looking great! Good idea on the polishing wheel, I'm going to use that for my wipers arms and other bits, thanks!


...via IH8MUD app
 
The steering wheel restore was probably the easiest thing ever on this truck. I started by sanding the oxidation off of the plastic with 120 grit. I did this for about 4 minutes and said, "screw this". I sent it out to a fellow 'cruiser head in WA who did all the work for me. I think it cost me $175 and I figured there's no way I'd ever get it looking as good as Chris was able to get it. I can dig up his contact info if you like.
 

Users who are viewing this thread

Back
Top Bottom