Today I replaced my Pipe T's for the heater hoses. This
should be included in your 90k service, but most shops (even Toyota) usually don't do it. If your service was done at Slee, they are one of the few that do it. That should tell you something.
It could leave you stranded and overheating somewhere far from home. For less than $15 in parts and about an hour, you can do it yourself. This is a 1

job for anyone with very basic tools. Long arms would sure help too. Toyota will charge you $100-$200+ to do it, so save yourself some time and a few bucks. Cheap insurance when you're far from home.
After some trepidation and fretting over replacing these with SS, brass or OE plastic, I decided that the OE ones lasted me 100k, I'll just replace with those. These Pipe Ts connect the hoses that carry coolant to your heater radiator. One side carries much hotter coolant than the other, so that side will likely fail long before the other. Just replace them both.
This job is a real PITA because you almost have to crawl into the engine bay to get at these things. Once you get there, you have to really bend and stretch to reach the clamps. Make sure you wear gym shorts or something without a belt otherwise you'll really dig into your fender. Remove the engine cover to get the best access.
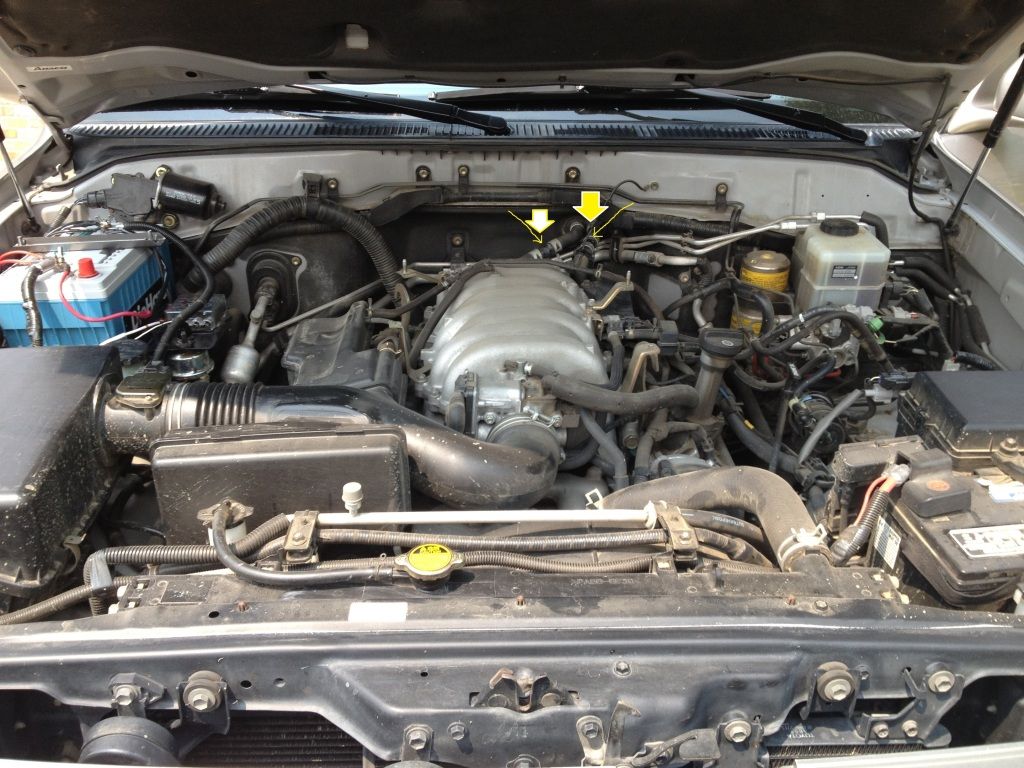
They are located here:
[URL="http://i1216.photobucket.com/albums/dd364/coflytyer/mud9.jpg"]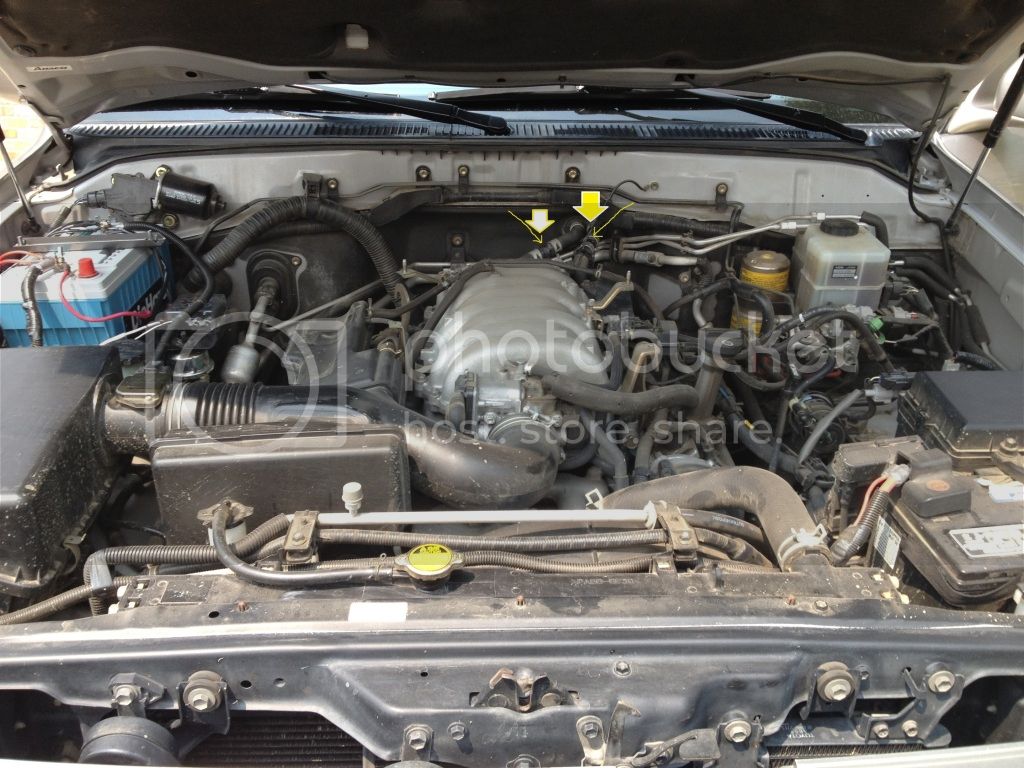
[/URL]
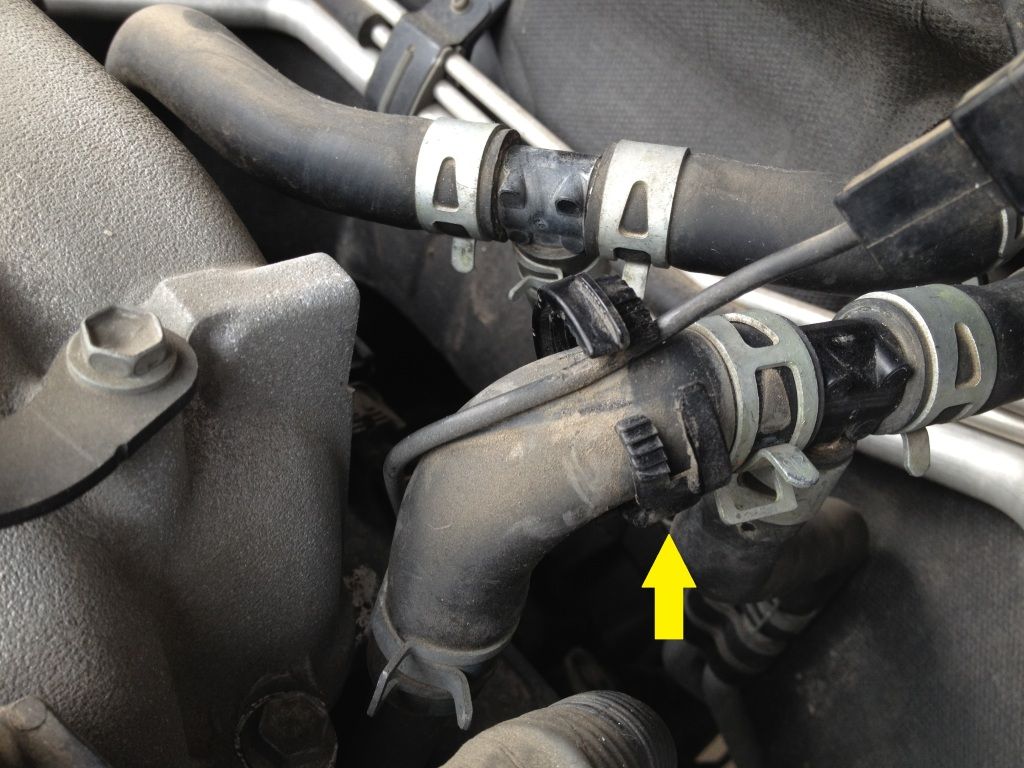
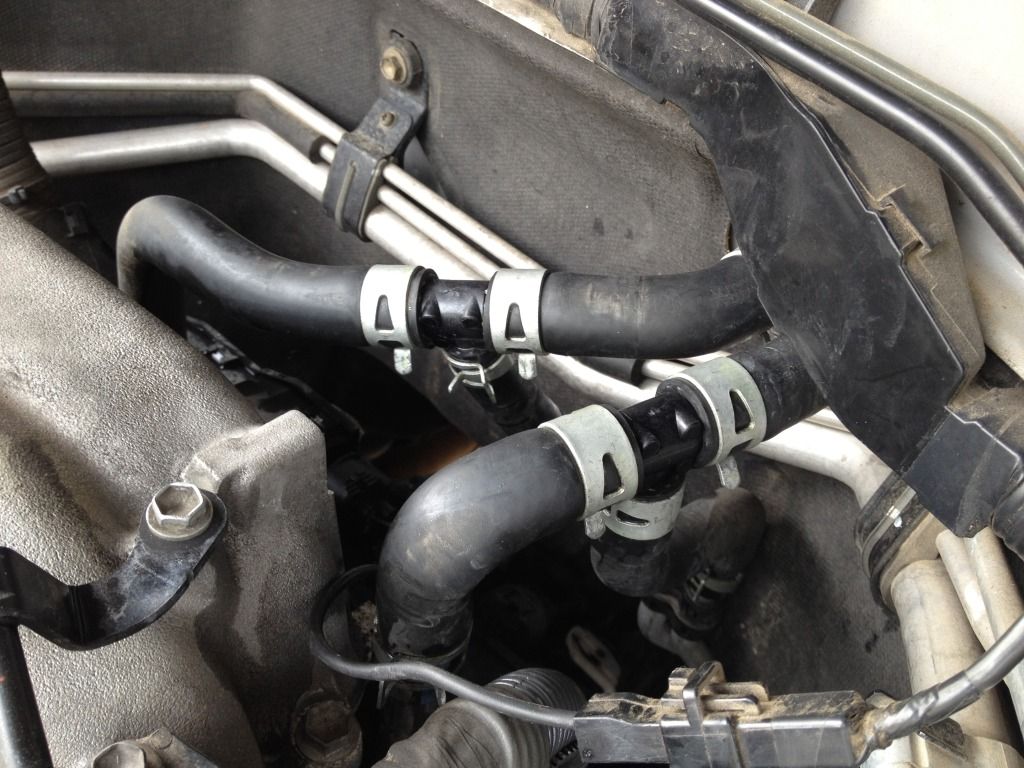
close up
[URL="http://i1216.photobucket.com/albums/dd364/coflytyer/mud10.jpg"]
[/URL]
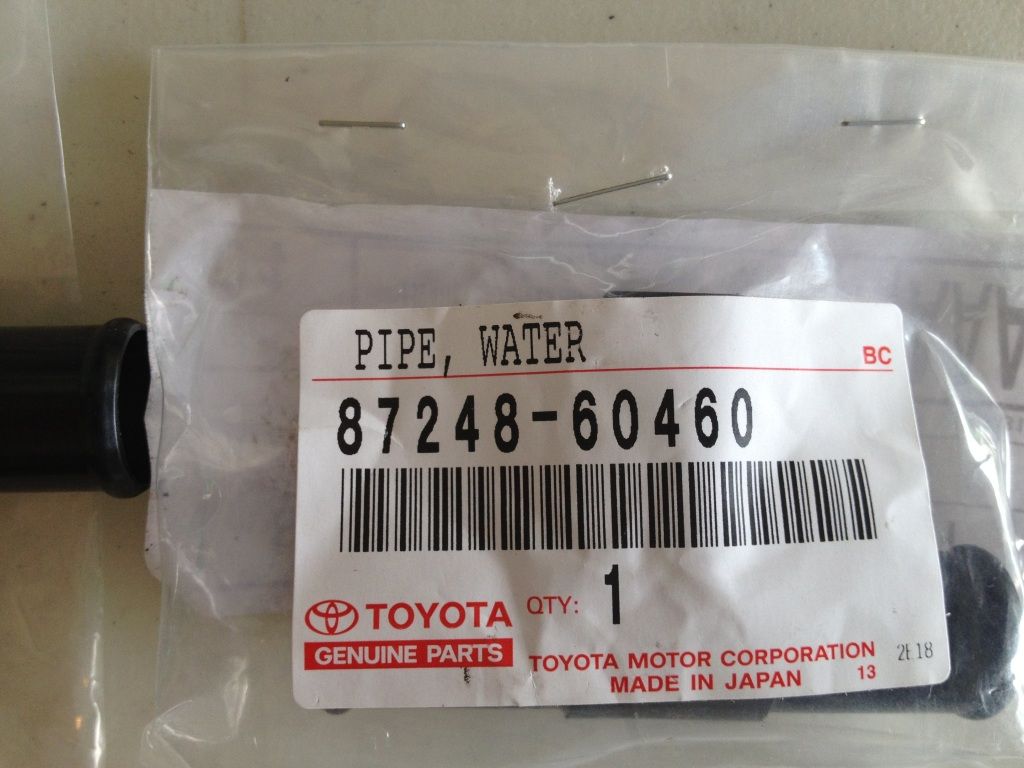
Part # 87248-60460
[URL="http://i1216.photobucket.com/albums/dd364/coflytyer/IMG_0892.jpg"]
[/URL]
Tools you need:
Step stool
Pliers
A flathead might help in prying off the hoses
Blanket or something to drape over your fender to make it more comfortable
Soapy Water
I used a stepstool and a moving blanket draped over the fender/engine bay. It's still a long reach. (I'm only 5'9") I parked facing slightly downhill in my driveway to try and keep the coolant loss down to a minimum. I did have to move the stool a lot to get in the best position to unseat the hoses. You'll see what I mean when you do it. There's a reason why Uncle T charges so much.
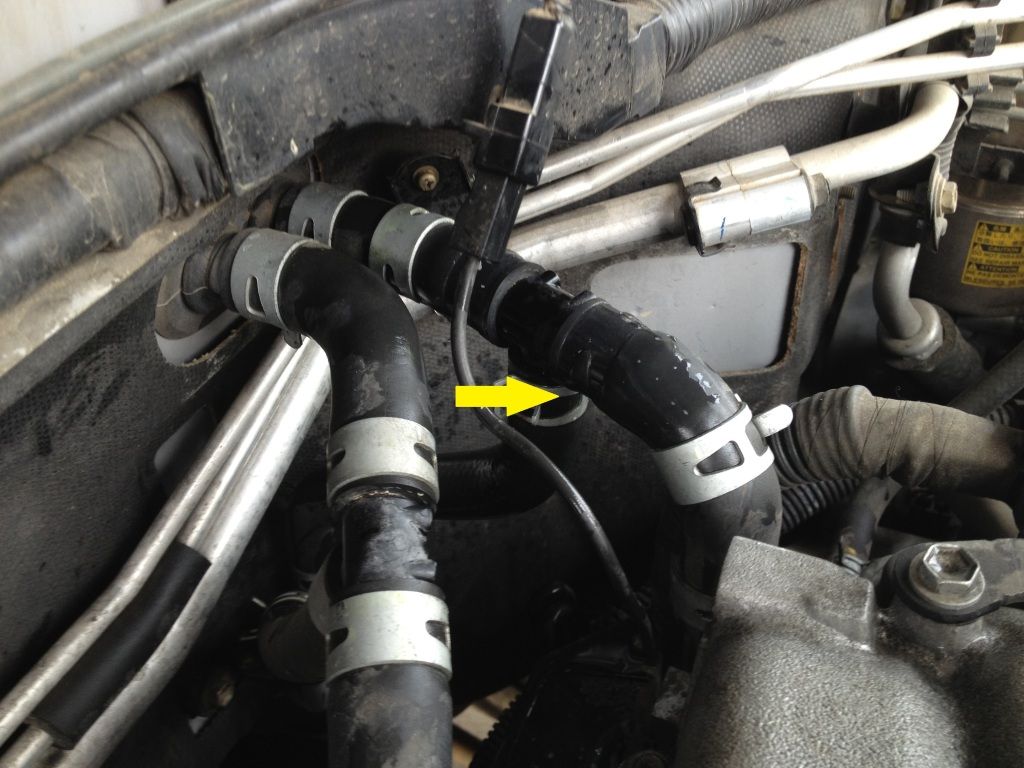
[URL="http://i1216.photobucket.com/albums/dd364/coflytyer/mud13.jpg"]
[/URL]
There is a ground wire that's clamped to the heater hose. Just unclip that plastic clamp and set it aside. Now you can move that ground wire out of the way.
[URL="http://i1216.photobucket.com/albums/dd364/coflytyer/mud1.jpg"]
[/URL]
The real PITA is getting at the clamps with your pliers. Other members suggested using oil or lubricating spray to make it easier to rotate the clamps to get at the nubs. I didn't want any oil left on there collecting dirt and grime, so I used a water bottle filled with soapy water and a tiny hole poked in the cap. Easy to spray a stream of water right on the clamps and help them slide.
The shorter the handles on your pliers, the easier it will be to get those clamps. The curved head of channel-locks makes it even easier. Spray some soapy water and have a go at those clamps. Just slide them back off the T's.
[URL="http://i1216.photobucket.com/albums/dd364/coflytyer/mud2.jpg"]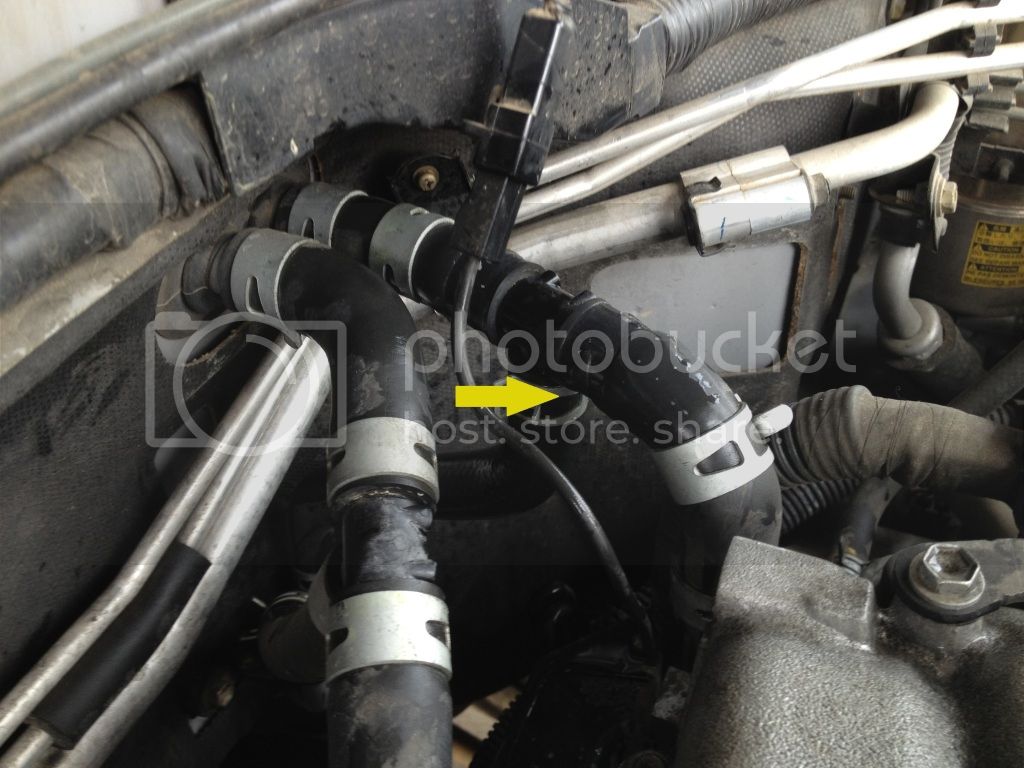
[/URL]
I did one set of clamps at a time, but it's probably easier to do them all at once. Once you get the clamps off the T, carefully work the hoses off. This is where you'll likely break the T's if they're brittle. If you've got over 150k and they've never been changed, it might be worth clamping the hoses so you don't lose any pieces down into the lines. But I think that's unlikely too. If it does break, I would just remove the entire hose and fish them out that way. Although, you'll likely lose more coolant too. It may be worth it to drain a little out of the petcock at that point.
There's not a lot of room to clamp them anyway, and you're likely to break them just trying to do that. I say just go slow and careful and you wont need to clamp them. It takes a little work to get them off, so take your time and be patient. You'll be in an uncomfortable spot, so don't get frustrated and start yanking things around.
If you're parked slightly down hill, you'll get a small amount of coolant from the firewall side to run out when you pull the first hose. Maybe less than 1 cup worth. You could try to catch this in a clean cup and refill the radiator with it, but it's such a small amount, I just caught it with a towel.
Replace old ones with new Pipe T's, reconnect the hoses, squirt some soapy water and work those clamps back up onto the T's. You could turn those clamps to give them easier access the next time you do this. I just put them back in the same indentations they already made on the hose originally. 90K from now, when I change them again, I'll just replace the hoses and clamps too.
New ones
[URL="http://i1216.photobucket.com/albums/dd364/coflytyer/mud5.jpg"][URL="http://i1216.photobucket.com/albums/dd364/coflytyer/mud5.jpg"][URL="http://i1216.photobucket.com/albums/dd364/coflytyer/mud5.jpg"]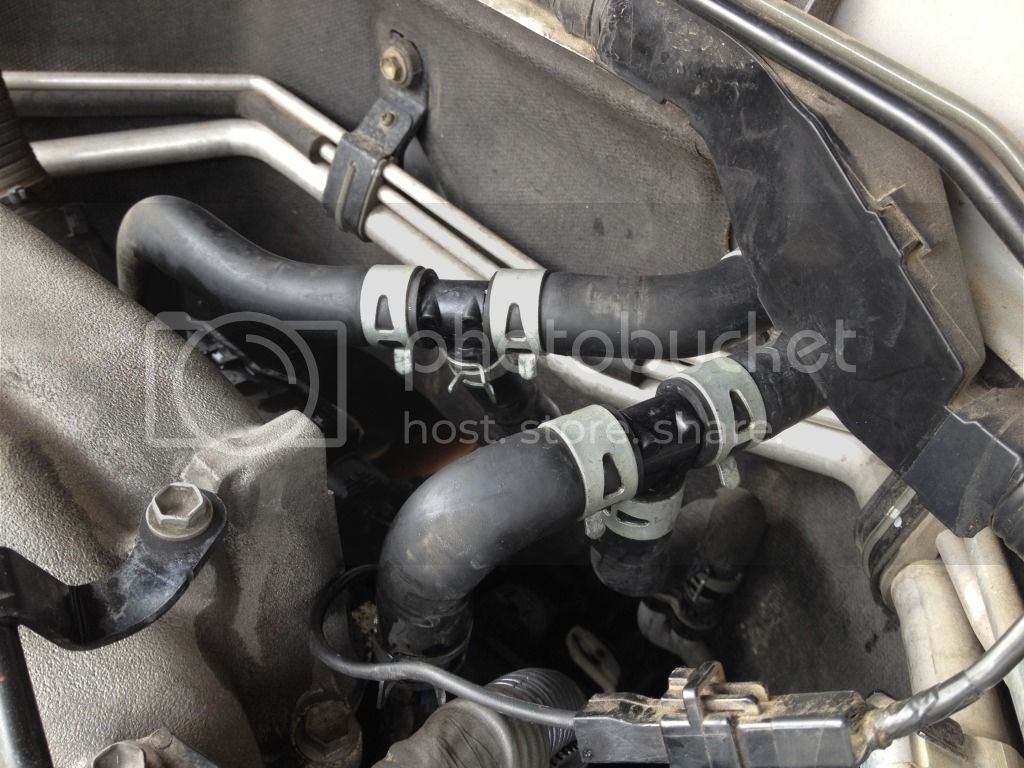
[/URL][/URL][/URL]
Replace that plastic snap clamp on the ground wire and pick up your tools. At this point you could burp your coolant system, but I don't think it's necessary. The tiny amount of coolant you lose doing it like this is coming from the heater side. You never lost any coolant from the block. Although, I did it anyway. I turned the truck around so It was facing uphill, opened the radiator cap, started the truck, turned the heater on high, let the coolant circulate and added maybe 1/2 cup to top it off.
Last, check for leaks. Hopefully, you just saved some $$, gained some piece of mind and improved the longevity of your system.
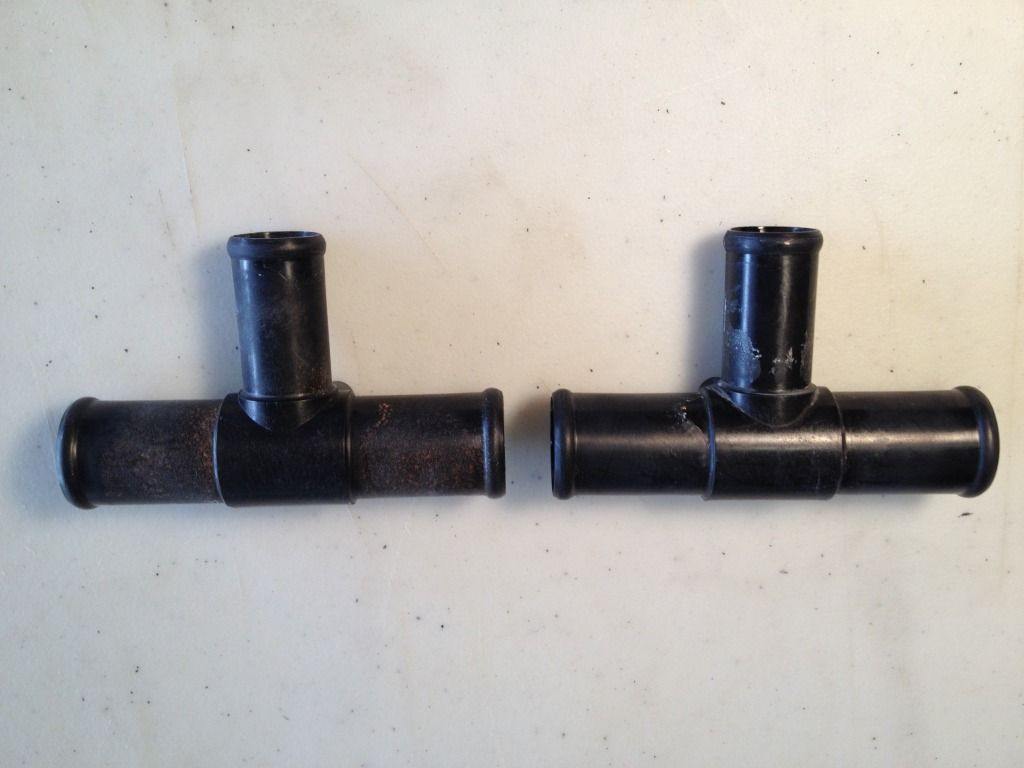
Old ones
[URL="http://i1216.photobucket.com/albums/dd364/coflytyer/mud7.jpg"][URL="http://i1216.photobucket.com/albums/dd364/coflytyer/mud7.jpg"][URL="http://i1216.photobucket.com/albums/dd364/coflytyer/mud7.jpg"]
[/URL][/URL][/URL]
One of my T's was in perfect condition, the other didn't break on me, but you can clearly see what the heat has done to it over the years. I *think* I had plenty of time left, I squeezed it pretty hard and it didn't break, but I'm glad I replaced it. YMMV. I'll keep the other in my truck as a spare.....just in case. Someone else might need it for a trail repair! Thanks to those members who answered my questions when I looked into doing this. This probably isn't on the top of everyones list, but with the high milage most of us have, plastic + heat + time = failure. I think it's pretty important.
Stan


") looks like something very useful to have in the toolbox.
looks like something very useful to have in the toolbox.