Builds Big Red Toy (1 Viewer)

This site may earn a commission from merchant affiliate
links, including eBay, Amazon, Skimlinks, and others.

I'll get off it after this, but here is what Doug did with his remote oil filter:
Looks like he had to put some $ up to make it all work too...

attachment.php


From this page:

https://forum.ih8mud.com/diesel-tech-24-volts-systems/400148-journey-begins-6.html
 
I'll get off it after this, but here is what Doug did with his remote oil filter:
Looks like he had to put some $ up to make it all work too...

From this page:

https://forum.ih8mud.com/diesel-tech-24-volts-systems/400148-journey-begins-6.html

That looks really nice. Thanks for the link and the concern.
Out of curiosity, what damage would it do if it stayed the way it is? Does it just drop oil pressure and take a little longer to return to the block or is there something I'm completely missing here?
 
Last edited:
Dang good looking 60 you have there. How do you like the snorkel that you have on there? Where did you get the sliders? Once again, very nice. Can't wait to get mine all together and running.
 
That looks really nice. Thanks for the link and the concern.
Out of curiosity, what damage would it do if it stayed the way it is? Does it just drop oil pressure and take a little longer to return to the block or is there something I'm completely missing here?

There may be still plenty of pressure to get oil up to the top end and through the turbo, but as you start to turn things up on this old mill, I would not want to restrict flow in any way. Bearings do love oil!

Adding fittings to your filter housing may not change a thing on the gauge either, the restriction may be in the remote filter assembly it self.
But it would relieve the stress on the lines and prevent a kink in the line later on.

YMMV

The truck you have built looks awesome! Just go easy till your sure :steer:
 
Dang good looking 60 you have there. How do you like the snorkel that you have on there? Where did you get the sliders? Once again, very nice. Can't wait to get mine all together and running.

Bluehawk,
Thanks man, I love the snorkel, my issue is the airbox. It's a bit smaller than what I would prefer. Just be ready to keep cleaning bugs from your filter, unless you turn it around like i did for the winter. I got the sliders from http://www.cruisinoffroad.com/ the guy is great, very professional and timely. the sliders were the first ones he made for a 60/62 frame. I'm debating whether or not to get my rear bumper made by him, but that will be later down the line as funds become available. I look forward to watching your build.

BTW Big Red is a 62, not that I'm a stickler for these kinds of things. :cheers:

There may be still plenty of pressure to get oil up to the top end and through the turbo, but as you start to turn things up on this old mill, I would not want to restrict flow in any way. Bearings do love oil!

Adding fittings to your filter housing may not change a thing on the gauge either, the restriction may be in the remote filter assembly it self.
But it would relieve the stress on the lines and prevent a kink in the line later on.

YMMV

The truck you have built looks awesome! Just go easy till your sure :steer:

Pacer,
Thanks for your input, info like this is how I learn and is always welcomed. The oil pumps into the filter right away, you can feel it in the lines, it just takes a second for the gauge to register. I'm wondering if I need to add a bit more oil for there to be no lag. I went to look for fittings today and didn't find any at the local auto store. I swung by tractor supply and the ones I need ( two male ends with a 90* angle ) were out of stock. I'll try to swing by that store Davegonz linked me to sometime next week.
I'm very careful with this rig because the cost of building it and the time I waited for it to be drivable still pains me. I don't race it, and I don't get caught up in the foolhardiness that some guys get caught in when wheeling. I've broken lots of rigs being stupid but those were paid for by uncle sam :D. This one is my baby and my son already claimed it as his when I die. He's 5 and he can't wait.
I'm installing new springs next and a few accessories, then I'm just going to take it easy and hopefully do some camping.

If I don't see anyone online tomorrow, y'all have a happy thanksgiving with your families and loved ones, this will be the first one I spend with my son and I'm excited.:beer:
 
Last edited:
Christmas came early around my house today.

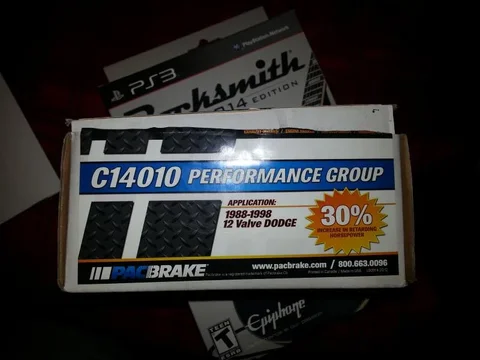
I distinctly ordered a set of Cummins springs but got this box instead.

valve box.jpg

The box says 6 valves, but there were 8 in there like I ordered, so not too worried.

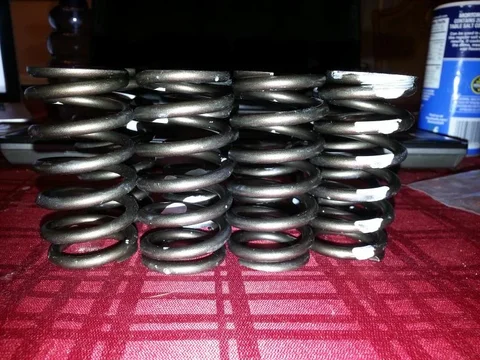
Here they are, I tried compressing them with my hands, apparently 60# is too strong for my weak arms.

valve springs.jpg


Another gift to myself.

yellow top.jpg
this is the secondary battery. In a perfect world I would have a red top for a primary, but the battery that is on there works fine for now.

Trying to get this in the new air box.
air filter.jpg

I might hold off on the airbox is the space is too tight until I replace the current primary battery with a red top that will sit back to back with the yellow top.


On another note, I plug one leak and find another. Now it's the steering box and there's oil under the transmission cross bar at the bottom. I had the oil pan regasketed so that's not where it's coming from. We'll see what the daylight shows.

ps I haven't forgotten about the 90* fittings. Will get to them soon.

valve box.jpg


valve springs.jpg


yellow top.jpg


air filter.jpg
 
it's too cold to type so here are some pics.

a buddy's good at fabing anything so this was easy for him.

battery tray.jpg

We were worried that the batteries won't fit, but it looks like it's gonna be just perfect. It's not done yet so there's room for some obstacle to pop up.

dual battery.jpg

battery tray.jpg


dual battery.jpg
 
Damn fine battery placement! Can you not send one of the yellow tops back and get a red one? (i saw that was your ideal bat setup)
 
**** fine battery placement! Can you not send one of the yellow tops back and get a red one? (i saw that was your ideal bat setup)


Thanks, I was gonna do that, but upon further research I decided to keep them the same.Two Yellows will have more than enough amps to crank Big Red to life and can handle several complete drain and recharge cycles better than the red tops. I don't intend to have a separator between them and since they would have unequal cranking power, one battery would be drawing from the other.
This keeps it simple and even.

yeah that makes sense. although i am still a dual battery dumbass hahaha.
 
yeah that makes sense. although i am still a dual battery dumbass hahaha.

Don't worry man, I spent weeks researching it and I still feel like i'm a dumbass. I'm sure if you ask 4 other dudes you'll get 5 different opinions. For my applications this should work fine, at least in theory. Time will tell.
 
I spent weeks researching it and I still feel like i'm a dumbass.

yep, thats usually how it goes for me :lol:
As long as you can start the engine off the main battery, even with the lower CCA, seems all should be well.
:cheers:
 
yep, thats usually how it goes for me :lol:
As long as you can start the engine off the main battery, even with the lower CCA, seems all should be well.
:cheers:

with this setup, they are both the main battery and the auxiliary battery. I just have to remember not to run them for too long without turning the rig back on.
 
I guess it's mandatory update time.

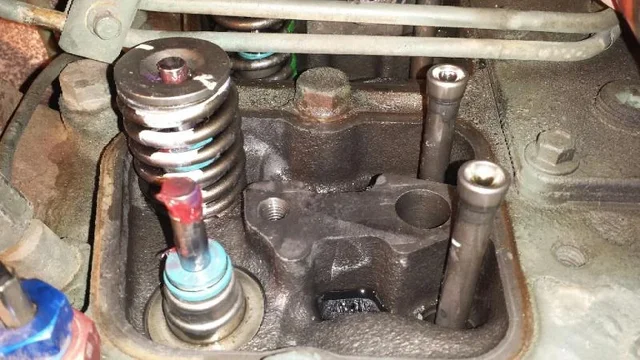
Here's what a friend has done today, despite the freezing weather. I'm having him replace the old valve springs with heavier duty ones. I was thinking of doing it myself, but that would mean waiting till the middle of next week before I can get to it. Here's the quick and dirty, sorry too tired to type in detail

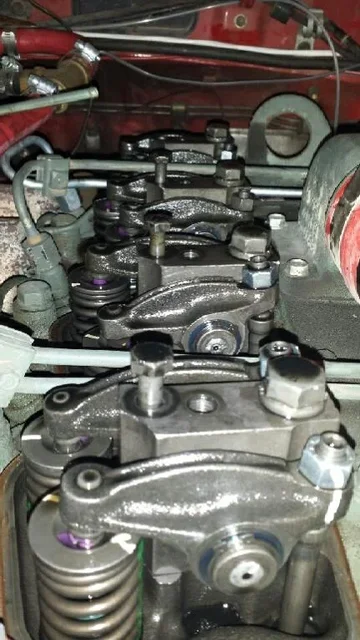
Take off covers
old no covers.jpg

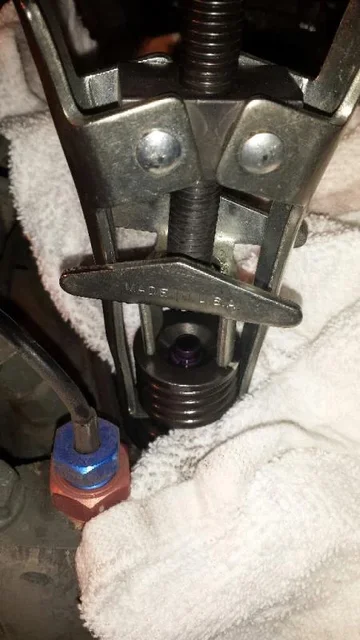
compress the spring to take out
compress the springs.jpg

compare old springs to new heavy duty ones.. feel better about this decision
old and new valve spring.jpg

Replace valve seals while in there
new valve seals.jpg

Done
no valve covers.jpg

One less thing to obsess about.

old no covers.jpg


compress the springs.jpg


old and new valve spring.jpg


new valve seals.jpg


no valve covers.jpg
 
Last edited:
How did he keep the valves from falling down into the cylinders?

Some people get pen magnets and clip the pen to the side of the head to hold the valve up.

You can also take spark plugs out and either put a large wooden dowel rod inside so the valve rests on the rod, or you can buy an adapter for an air compressor to screw into the spark plug hole and hold pressure in the cylinder to keep the valve up.

I've also heard of people putting rope down in the combustion chamber. However, this is a Cummins, so no spark plug holes, only injector holes, and I can see in his pics that the injectors were not removed, hence my question :D
 

Users who are viewing this thread

Back
Top Bottom