Builds ?????????80 tm Build Input Requested

This site may earn a commission from merchant affiliate
links, including eBay, Amazon, Skimlinks, and others.

Done with tires, short of swapping.


image-3215444456.jpg


image-197915112.jpg


Conventionally balanced, since I've faith I won't be chunking these, and can always knock the weights off, feed air sifts through the Monster Valves.

One wheel required 6ozs, the rest .5-2. That's pretty impressive if you ask me.
image-3215444456.jpg
image-197915112.jpg
 
Got bling?

image-2036760763.jpg

Wish I had painted. Don't like the bling.

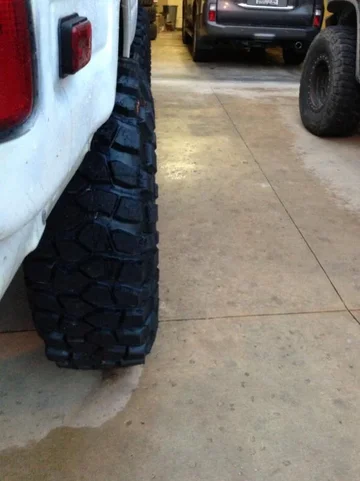
The Krawkers are noticeably rougher than the KM2, but on slightly damp streets, handle fine.

Know in the market for longer wheel studs, if anyone has any insight on the "where" for ARPs.

Visually speaking, would feel comfortable with 3/8"-1/2" longer, but irrelevant considering the open lugs.

Definitive depicted measurements for KM2s and Krawlers, mounted and installed, with 35psi, the width taken from the widest part of tire bulge.

KM2 345/75/16 on OEs


image-163944025.jpg


image-3733914418.jpg


Krawlers 37x12.5x17


image-3021915595.jpg


image-2845674648.jpg
image-2036760763.jpg
image-163944025.jpg
image-3733914418.jpg
image-3021915595.jpg
image-2845674648.jpg
 
It may take a little getting used to.

Feel like I need a grille to match...one for the teeth, not 80.

If I keep them bare, decided I'll chrome the sliders and bumper to match.
 
They'll surely see more rock rubbing than the OEs with the 345s, since a straighter profile on the sidewall.

I'd have rattle canned, but oh well. Save that for an OCD meltdown day in the future.

Probably be a good idea to carry a couple of bolts for these.


image-3311272614.jpg


Sure look like a TPMS stem and they were always getting dislodged.

Glad I don't live in a nanny state, either, since they stick out, a bit.


image-3564950498.jpg


They growl. Sitting at 35psi now, to check for leaks, and they're loud.

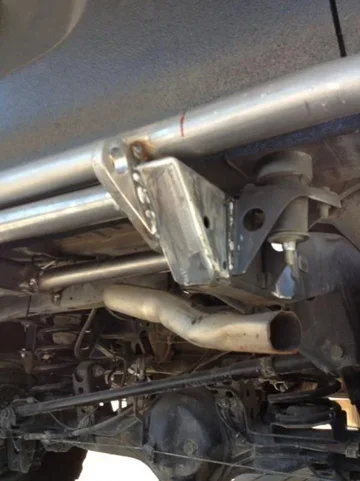
Fixed my exhaust level, though.
image-3311272614.jpg
image-3564950498.jpg
 
Time to open them there fender wells, :hillbilly:.
 
Blink said:
I can't tell if you are joking or being serious.

Nor can I.

devildogcruiser25 said:
Don't bother trying to figure it out. Chris is a looney toon. ;)

He knows.

You've another surprise coming.

Oh Jon will hear from us pansies!!!

Bahahaha. I severely embellished your lack of love for the FJC. Hahahah.

Do me a favor, please.

Give this to Jeremy, :flipoff2:, tell Dave he still can't weld for chit, and if Cowboy is there, let him know his hometown homey's still rocking the Dud's.
 
VCCruzr said:
Time to open them there fender wells, :hillbilly:.

It's coming, as is the rear treatment.

Didn't want to derail the other thread, so was PMing, then app crashed. Guess can outline here for input.

Considering this ( someday I'll learn to use auto cad).

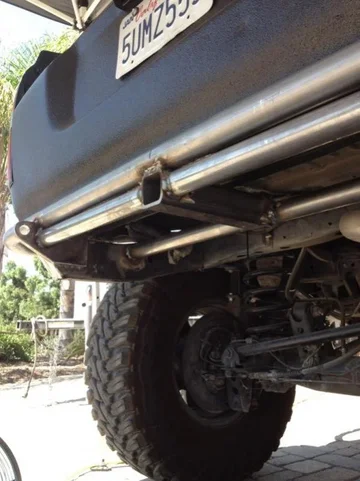
A rear crossmember that has 1 1/4" ID, and has to penetrate both the inner and outer frame rail web, ( why I was asking if you did on the other thread) but remain open at the ends.

My concerns.

Would 3/8" wall with 1 1/4" ID be sufficient?

Should there be plates attached to the inner and outer frame rail to run cross through, or would holes drilled be sufficient?

It's a kill two birds with one stone type plan, so can me modified, but thinking the lesser diameter penetrating the frame rail may leave enough meat around to weld.

So here's a general outlay.

Taper the bottom of the rear frame rail to follow the angle of the lower fender quarter.

(These are rough lines, not cut lines and have to disregard the "new cross" notation. It would locate 17" aft of the back of axle housing. Would have to cap the outer rails with separate.


image-1546361284.jpg


Then plate the lower frame rail and the end of the rail similar to this guys, though not sure whose this is. Bahahaha.


image-661705337.jpg


image-2770468561.jpg


Difference being the lower frame rail will cut, probably interfering with the body mount support, to gradually decrease to around 2 1/2" at the end of the rail, which, I'm thinking, would be at the outer edge of the lower tailgate seam.

Edited: can see more what I'm talking about on the lower rail cut in your pic, Derrick.

Draw a straight line level to the world, from the lowest point of the recovery bracket you welded on, forward.

Remove that and plate it, so the rear frame would be close to the width of what your recovery bracket is.
image-661705337.jpg
image-2770468561.jpg
image-1546361284.jpg
 
Last edited:
Luke111 said:
Very nice!!!!!

Thanks, Lou.

Maintaining a function over form on the bare aluminum will be difficult, but have plenty of other items to keep the wheels turning, for now.

Hopefully I'll forget I don't like it. Bahahaha.
 
PM sent, linky no worky for me.
 

Users who are viewing this thread

Back
Top Bottom