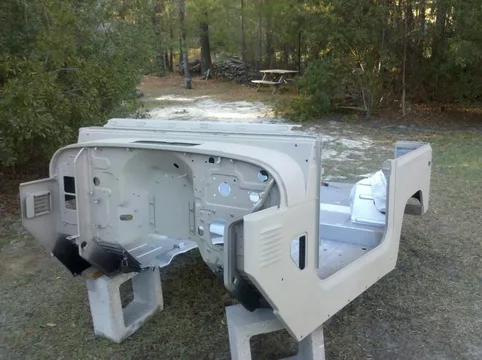
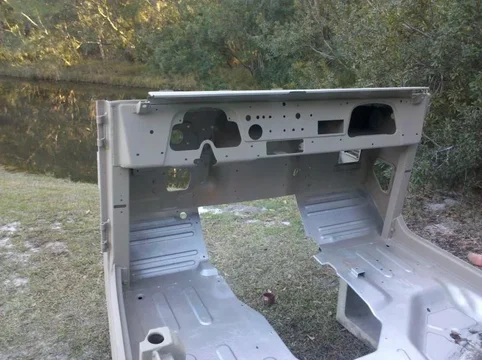
great!!!!
Navigation
Install the app
How to install the app on iOS
Follow along with the video below to see how to install our site as a web app on your home screen.
Note: This feature may not be available in some browsers.
More options
Style variation
You are using an out of date browser. It may not display this or other websites correctly.
You should upgrade or use an alternative browser.
You should upgrade or use an alternative browser.
'76 FJ40 Skinny Wallet RestoFresh
- Thread starter fj user
- Start date
This site may earn a commission from merchant affiliate
links, including eBay, Amazon, Skimlinks, and others.
More options
Who Replied?I am in the same situation with my 40 as well....
This is great. it also gives me more insentive to pull the tub off and do the frame like you did.
Thanks for the push!
This is great. it also gives me more insentive to pull the tub off and do the frame like you did.
Thanks for the push!
- Thread starter
- #23
I am in the same situation with my 40 as well....
This is great. it also gives me more insentive to pull the tub off and do the frame like you did.
Thanks for the push!
Thanks! Maybe you and the others can help me decide whether to rattle can this thing flat khaki (Krylon Camo) or take it to a paint shop and have them match the original color. I sprayed some flat khaki to see what it looks like, and color-wise, it looks good. I haven't prepped for paint yet, so ignore the rough spots. What do you guys think? It's tempting to save the money. This will never be a show rig, but I don't want to ruin the value either. What do you think ball park price would be to bondo, prep and spray the outside of the tub?
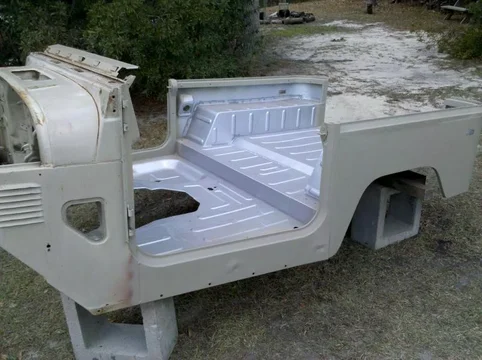
Will certainly cost lots more than a rattle can! Looking great. Keep the pics coming.
Nice job. Looking good.
I have no idea what a paint shop would charge. I am in the same boat. I am doing a complete restoration on a 77 and have decided to try and paint it myself. What can it hurt? A decent spray rig and $160 Dupont acrylic enamel. There is always 1500 grit sandpaper and more paint, right?
I have no idea what a paint shop would charge. I am in the same boat. I am doing a complete restoration on a 77 and have decided to try and paint it myself. What can it hurt? A decent spray rig and $160 Dupont acrylic enamel. There is always 1500 grit sandpaper and more paint, right?
It depends what you are going to do with it.
- Thread starter
- #27
- Thread starter
- #28
So you will be able to (have to?) run the liftgate/barn door style hardtop with that rear tub right? I like the way it's coming out! Proof you don't have to spend years and years and lots and lots of $$ to get these things looking good again!
- Thread starter
- #30
thanks! it's been rewarding so far. yeah, I'm on the lookout for a rear hatch and channels to convert my hardtop. most people in the south seem to run without tops, so i think that will be a longer term project after (if) I get this thing going.So you will be able to (have to?) run the liftgate/barn door style hardtop with that rear tub right? I like the way it's coming out! Proof you don't have to spend years and years and lots and lots of $$ to get these things looking good again!
I'd call it more of a resurrection then a restore! This is one very lucky FJ40 getting a second chance at life. Not only that but to come back better then it ever was! Keep up the very nice work.
- Thread starter
- #32
I got the rear main seal and oil pan gasket done this weekend. Apparently I was living in a parallel universe thinking I could replace the rear main without pulling the clutch/flywheel - so that added some time to the job. The oil pan gasket had it raining profanity  . Used the string trick in the corners but still a royal PITA. Glad that's done!

Got the intake/exhaust manifold on and exhaust installed.
By this point I was so ready to get the body back on the frame that I decided to manhandle it without using a hoist. Not recommended, but ultimately very satisfying. I'm missing one poly bushing, so only installed two at the back.


Got the intake/exhaust manifold on and exhaust installed.
By this point I was so ready to get the body back on the frame that I decided to manhandle it without using a hoist. Not recommended, but ultimately very satisfying. I'm missing one poly bushing, so only installed two at the back.


Thanks! Maybe you and the others can help me decide whether to rattle can this thing flat khaki (Krylon Camo).......This will never be a show rig, but I don't want to ruin the value either.
I know it is late now but you made the right decision. I didnt have the money to do a showroom finish so I went the same route you did only OD green (link in my sig line).
There is no way you hurt the value. The truck will look darn good from 20', you get to enjoy driving the truck so that helps you not burn out, you can use it for what it was meant for (off-road) and not worry about scratching your gazillion $ paint job. This way you can start driving the truck and making it 100% mechanically sound and then, if you ever get a hankering, strip it back down and finish it for show.
I think you are doing a heck of a job. You mentioned getting burned out in a previous post. The best cure for that is getting to drive that bad boy. Keep up the great work.
- Thread starter
- #34
I know it is late now but you made the right decision. I didnt have the money to do a showroom finish so I went the same route you did only OD green (link in my sig line).
There is no way you hurt the value. The truck will look darn good from 20', you get to enjoy driving the truck so that helps you not burn out, you can use it for what it was meant for (off-road) and not worry about scratching your gazillion $ paint job. This way you can start driving the truck and making it 100% mechanically sound and then, if you ever get a hankering, strip it back down and finish it for show.
I think you are doing a heck of a job. You mentioned getting burned out in a previous post. The best cure for that is getting to drive that bad boy. Keep up the great work.
Thanks man! It's good to hear from somebody who's been down this road. How's that Krylon Camo holding up? That's what I used to spray mine. Just curious, how well does it clean up?
Got the hydraulic system all together and starting on the wiring. Sent the Aisin carb off to Mark for a desmog rebuild and ordering some odds and ends. Hope to be on the road by May...
When it was first sprayed it had a rough texture and was hard to wash. I think I wet sanded it with some really fine paper, maybe 1600 and that helped a lot. If you use a courser paper, you will see the sanding marks. It is a fine line between getting it "washable" and leaving sanding marks.
Mine is holding up very well. The top is never on so the truck always stays in the garage(that is funny because my 100 series stays outside). I have not had to repaint anything. I have not had any remorse about doing it this way. When I go offroad, I don't worry at all about ruining my paint. I love it.
- Thread starter
- #36
When it was first sprayed it had a rough texture and was hard to wash. I think I wet sanded it with some really fine paper, maybe 1600 and that helped a lot. If you use a courser paper, you will see the sanding marks. It is a fine line between getting it "washable" and leaving sanding marks.
Mine is holding up very well. The top is never on so the truck always stays in the garage(that is funny because my 100 series stays outside). I have not had to repaint anything. I have not had any remorse about doing it this way. When I go offroad, I don't worry at all about ruining my paint. I love it.
Good to know - I'll wet sand it as soon as I can!
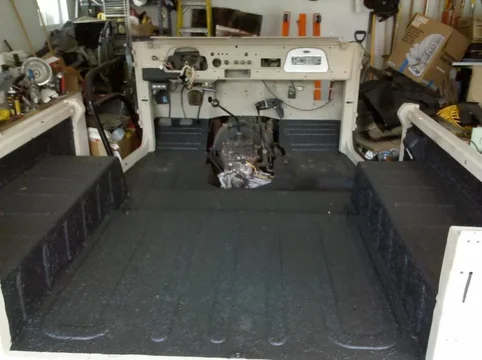
Got some more work done this weekend - rolled Duplicolor Bed Armor on the inside of the tub. I wasn't all that impressed, but can't be too picky for $80. Still working on getting all the wiring run and the heating and fuel system plumbed...

Josie'sLandCruiser
Stop calling it a "FJ."
Hi All:
An impressive re-build project - you have made lots of progress in a short amount of time!
Regards,
Alan
An impressive re-build project - you have made lots of progress in a short amount of time!

Regards,
Alan
- Thread starter
- #38
Hi All:
An impressive re-build project - you have made lots of progress in a short amount of time!
Regards,
Alan
Thanks Alan. Progress seems slow these days even though I'm still putting in the time. I got the tank installed and the fuel lines are run up to the firewall. Got the new rag joint in and steering wheel installed. Blower assembly got new gaskets and installed. Hopefully get the heater rebuilt and installed tonight. Most of the wiring is done, but scratching my head on a few connections. My next issue will be wiring the coil/igniter. I can't find the old igniter so I either need to get a new/used one or research the HEI a little - I'm ignorant when it comes to that stuff...

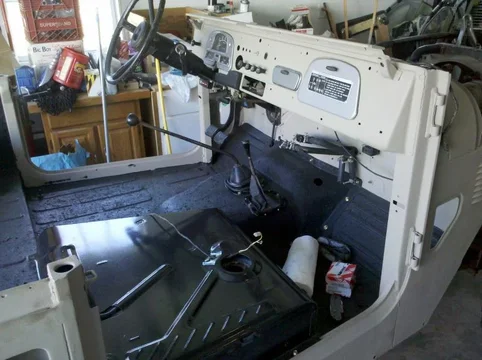
Looks like my garage! 
nice, don't get burnt out, you are truckin' right along!
Similar threads
Users who are viewing this thread
Total: 1 (members: 0, guests: 1)

 ), I went ahead and roughed up the paint, primed and sprayed the mofo! Not too shabby for the money spent.