Builds 1983 Cruiser Story (1 Viewer)

This site may earn a commission from merchant affiliate
links, including eBay, Amazon, Skimlinks, and others.

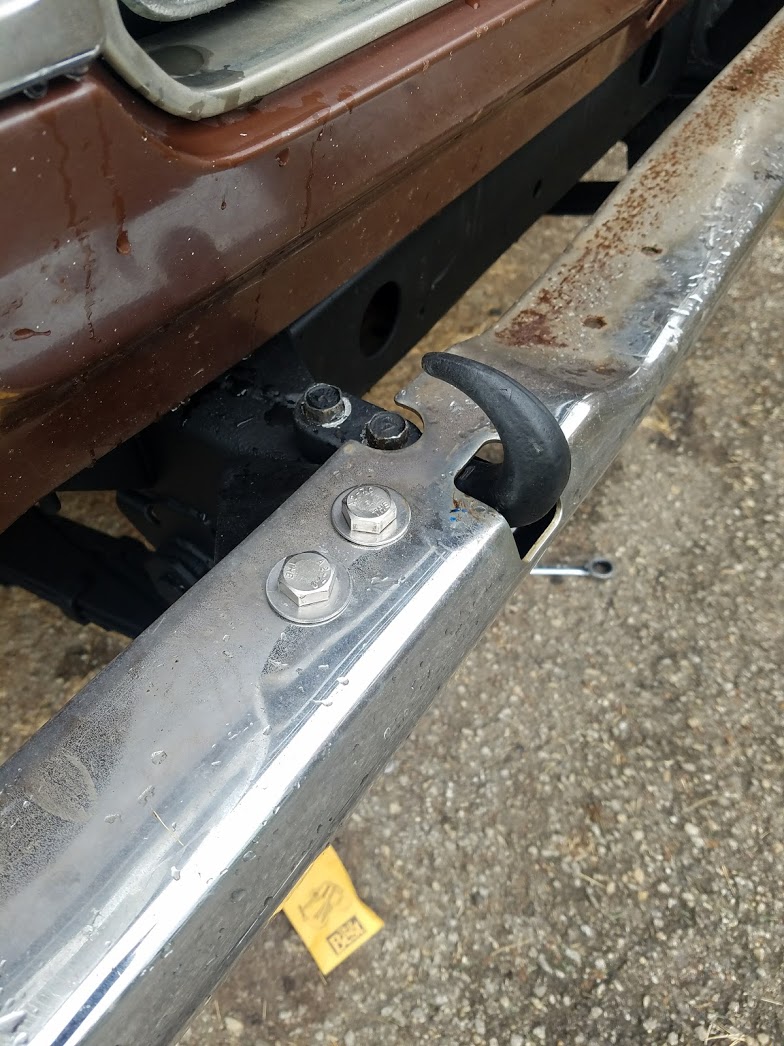
A small update on the '83 the frame is mostly finished. I just need to pop the front bumper off and finish it off.

4QhzjIS.jpg


I've also got the intake and exhaust manifolds off of it to cap the EGR and replace the original gasket. Still haven't touched the gas tank but that is coming soon!


And in slightly bigger news, we added second Cruiser to the family last Friday!!!

mzMXp2g.jpg


RC9DGM7.jpg


StYINsr.jpg


It's a 1986 with 216K on it, I wasn't necessarily looking for another Cruiser but this one popped up locally and was a decent deal so, I guess now the wife has one, too!

My neighbors love me....

This '86 has been hacked together but the price was right! Other then cleaning it up, I have't done anything to it... Well... Except cap the 4 blatantly obvious vacuum leaks.... It's desmogged with a Weber carb. These photos make it look better than it actually is, its been resprayed with a poor "bondo" rust fix that's bubbling and flaking pretty badly. Drives pretty well, though!
 
Slow but moving in the right direction!

I've finally finished the frame, in my opinion, I've done the best possible frame restoration as I could while keeping the body mounted to it. I spent many hours under the track with the grinder, wire wheel brushes and wire brushes. I removed all of the rust that I could and got as much of the frame to bare metal as I could, I rolled on/bomb canned everything I could on the frame with at least two coats of Rustoleum Pro High Performance Enamel, more coats on areas that will see more exposure. For the inside of the frame, I used Eastwood's rust encapsulator then their "internal frame coating". I'm pretty happy with the finished product! Hopefully all of the work adds a couple of years to it's useful life!

lVyqQJ0.jpg


prpBmwq.jpg


After this my goal was to finally re-install some parts that have been taking up my work bench in the garage like new brake calipers, old bumpers, hard lines, etc.

cVY5TC7.jpg


I got tired of waiting on the new carriage bolts from Cruiser Parts, (they were waiting to ship until the last piece of my order came in) so I went over to Fastenal, then to the local hardware store and spent too much on stainless bolts, flat washers, lock washers and nuts but it looks better than I thought it would!

ehwFnVu.jpg


New calipers and hard lines.

oe1l8md.jpg


Same on the other side:

zlOpioa.jpg


I also have to say, my cheap old Harbor Freight Flare kit still makes pretty nice Double Flares!

KdrrwAY.jpg


And for posterity:

lpsqqhz.jpg

Looks somewhat familiar:

FJ60-and-FJ62-3.jpg
 
Love the write-up and your progress as yet another addict. :)
I absolutely love the stock wheels when they're shined up and looking good...just don't think it gets better. Mine were long gone when I got my cruiser and I've since updated to a different style of aftermarket wheel - but I always admire that classic look. One day I'll get a set and have them chromed up. Keep up the great work.
 
I had my gas tank cleaned and sealed recently, cost was $90.00 at a local radiator shop. They chemical cleaned it and used red Kote tank sealer. I was going to do it myself with the above mentioned chain method but the tank baffles made me take this route. I had some rust inside my tank was why I did it. The shop said they do them all the time and can repair tanks with some small pin holes in them. Good write up, glad you saved the 60.
 
Time for another update! We now have fully functioning brakes and clutch! :woot:

New Centric Brand Master Cylinders for the clutch and the brakes. There is a new slave hiding in there too.

9M5CWgQ.jpg


Installed the new Monroe gas shocks all around.

xBDwTv4.jpg


ft7wVDx.jpg


8otfnzX.jpg


HGRwmZV.jpg


rfWldSS.jpg


I also was able to add some more Desmog goodies.

Jim C smog pump delete.

pO1trreg.jpg


XJzXqvM.jpg


I believe the famous driver's side motor mount as failed (looks like it) and I have a new one en route. This would explain the broken down pipe.


ow8A4D1.jpg


FINALLY got my stainless 1/8" BSPT pipe plug for the intake manifold, @FJ40Jim should stock these bad boys! I would've rather paid him a little more and not have to chase (Parker, Fastenal, Kwik-Set, etc then ultimately McMaster around!)


OH! And I got married and we got the photos back! The Cruiser wasn't finished so we had to use my MG!

RjxXYKE.jpg


And finally, DRUMROLL PLEASE! This one is for all of the NAYSAYERS!!!!


+


++


+++


++++

mWyk3ud.jpg


Why is that Cruiser on a rollback you ask??

Well, I'll answer that. Here's two hints:

gBOdNn3.jpg


lwWuVzM.jpg


Hmmm, looks like its at a shop... Why would Ian a completely competent shadetree mechanic take his truck to a shop?


Well, not just any shop but the stealership???

KfIPOwC.jpg


Whats this??? Looks like a new part hiding under there?

ACqee5X.jpg


ytT8BR7.jpg


8R8dDlS.jpg


vOdLPhY.jpg


Yep that's a brand new gas tank replaced FREE OF CHARGE under recall by Oxmoor Toyota in Louisville. Thank you, Oxmoor! It appears the the rumor going around that this has "dried up" is not true.

I only gloat because I want to help you! It's worth the call, I got the run around for 2 months until (while on my honeymoon) I got a voicemail that all of the parts were in!

I'm pretty excited in case you couldn't tell...

Anyway, I think I may still be on schedule to lite it off by the end of the month!

Thanks for looking, if you have any questions, comments, concerns just ask!

Cheers!
 
Last edited:
UPDATE: SHE LIVES! Started it yesterday, ran under its own fuel delivery system for the first time in at least 10 years! Even drove it down to the end of the street and back!

Got the intake and exhaust manifold back on. Protip, bolt those together off the truck and mount the entire assembly.

O7hXCr7.jpg


UWQExKBg.jpg


Getting all 5 bolts as well as the gaskets and insulator lined up was a huge PITA. But I eventually got it.

The moment of truth, I finally pulled the carburetor up from my basement work bench, it had been sitting since the rebuild.

PfGFD1A.jpg


Got the rest of it snapped together, put new fluids in it, plugged all of the vacuum ports, cranked it over a few times to fill the float bowl, gave it a shot of starting fluid and she roared to life (open down pipe), good oil pressure, alternator is weak but hey!


Took it down the street to show off for the neighbors, all the gears worked, clutch works, stops on its own, what more can you ask for?

ayTyJBt.jpg


Lola approved.

M9XcejZ.jpg


The drivers side had been up against the fence since i had the truck dropped off so I finally got to scrub it really well! Cleaned up ok.

Gs2SQvd.jpg


2bwHGmL.jpg


4tkJXxu.jpg


New quarter badges and tail light lenses!

dV4tOhM.jpg


DXf8JFX.jpg


Now for the fine tuning! More to come.
 
Extremely nice journey to this point. Also, extremely beautiful bride. She is lucky to have so many Land Cruisers in the family. The MG ain't so bad. Looking forward to seeing that thing on the road. :flipoff2:
 
Awesome! Lola approved!
 
Well, I now have a working e-brake and fully functioning brakes all around (needed properly bled).

The bell cranks on my truck were completely seized. They were also a bear to disassemble, terribly corroded.

k9Fs7x2.jpg


As you can see one of them was mangled, not sure how someone manage to bend it this much while mounted to the truck!

nXejKYg.jpg


N01QxUR.jpg


spoMZj2.jpg


K3nZsCv.jpg


Lots of heat!

u83g2oJ.jpg


After lots of heat, lots of hammering I finally had them both apart, one took a massive beating to removed and it actually flattened the pivot pin so bad I could not fit the retaining clip, nothing a vise and cutting wheel couldn't fix. Ugly but effective, there is enough clearance for this to all still fit an work.

oksT4Pn.jpg


I also "massaged" out the bent bell crank arm to flat and was able to begin reassembly!

QQ1HF1k.jpg


The '83 now has a functioning emergency brake!


Once I got all of that sorted, I needed some help bleeding the brakes, that's why I got married! Of course, she got the clean job pumping the pedal...

0aUDJOx.jpg


Once the brakes and clutch were bled it was time for another test drive. At this point the truck had been driven to the end of the street, then around the block. With those I went ahead and licensed and insured it. Yesterday the plan was to go to the gas station and put some petrol in her, the closest gas station is a Speedway about 1 mile from my driveway.


SUCCESS!

tur5mME.jpg


It's funny, being the longest trip I experienced something I had not experienced with this truck before. Once I turned the key off something started running. It kind of freaked me out because what ever it was was vibrating and didn't sound good. Emilee noticed my concern and by the time I popped the hood she was already worried enough to get out of the truck asking if it was going to catch fire. haha

Turns out it was the dang carb fan! An unhealthy one at that. I just pulled the fusible link apart for now. Good to know the sensor is working! I'll have to disassemble the fan later. I'd like to keep it!
 
You'll need that fan in top condition. I have not heard mine run yet. That would involve a running truck. Very nice brother Ian. Ok forward to your updates.
 
Doesn't this particular vehicle have bottle openers on every door? I was excited to see the gas station picture. You will be there many times over! Congratulations on the journey.
 
Congrats! Nice 60 and good thread. We had an '85 in Gunmetal in my family for 25+ years. Sadly no more. But I have a 30th Anniversary 76 to ease the pain.

Before you go on the highway, please consider replacing the seat belts on both 60s. The seat belt material after 30 years is no longer safe in an accident.

This is documented elsewhere on Mud. The parts for the 60 may be gone but you can get new tan belts for the 70 and use those instead.
 
This thread is fantastic. Any more info on the second 60 you got?

Thanks! It is a 1985, its been resprayed and is pretty rotten, frame is solid enough but it lived a tough life. It was driven on and off and poorly maintained with just enough of whatever it needed to keep it on the road. It has 218K on it, it was local here in Louisville. I paid $3K for it.

My plan was to clean it up, fix some of the botched repairs/desmogging and flip it to another enthusiasts for hopefully a little profit after I got the brown one running. Then a friend of mine and i took it to get a beer, he fell in love with it and bought it! I sold it to him for $3100. haha.
 

Users who are viewing this thread

Back
Top Bottom