
Chrome bumper carriage bolts still seem to be available from Toyota. I don't have the part number, but i saw them on a site recently... sorry can't remember which one...
Navigation
Install the app
How to install the app on iOS
Follow along with the video below to see how to install our site as a web app on your home screen.
Note: This feature may not be available in some browsers.
More options
Style variation
You are using an out of date browser. It may not display this or other websites correctly.
You should upgrade or use an alternative browser.
You should upgrade or use an alternative browser.
Build 1983 Cruiser Story
- Thread starter Ian Crawford
- Start date
Member Builds and Stories
This site may earn a commission from merchant affiliate
links, including eBay, Amazon, Skimlinks, and others.
mattressking
10 digits to freedom
Bolt: 90112-12041
Nut: 90179-12058
That's the top carriage bolts. The ones on the bottom side are:
Bolt: 91659-41222
Nut: 94130-61200
All are still available, I just ordered them.
Nut: 90179-12058
That's the top carriage bolts. The ones on the bottom side are:
Bolt: 91659-41222
Nut: 94130-61200
All are still available, I just ordered them.
love when one is saved.
keep it coming.
keep it coming.
- Thread starter
- #24
Another update, I've pulled the carb and disassembled for cleaning/rebuilding. something like 80 pieces... Honestly I thought it would be more. Good times, did I mention I hate smog carbs? I hate smog carbs.
I put down some butcher paper on my work bench to help keep track of everything I recommend you do the same.


Pretty girmey in there! The Secondary Jet was completely clogged/blocked.


Here's your "exploded" view!

Anyway, while all of those lovely little parts were soaking in gallons of carburetor cleaner I was able to get some time in under the hood and start getting ride of unneeded parts (desmog). First I wanted to pull the air rail. I had been soaking it with PB Blaster for about 2 weeks, I'd heard it can be a SOB!
Of course every pipe off of the air rail broke when I was removing the securing nut, but hey, I don't need that anyway, the fittings did come off of the cylinder head portion (injector?) Well, turns out that was the easy part.
I hit everything again with a healthy coat of PB Blaster and started in on the injector portion in the head. Cylinder one. It took a bit of force but it popped free and screwed right out. Cylinder 2. That thing did not budge, hit it with more PB blast and move on. Cylinder 3. No dice. PB blast and onward. Cylinder 4. Nope. Cylinder 5. Twisted right in half with nearly no force. Awesome. Cylinder 6, pucker factor was high, if you've been back around that area you know how much of a pain it is to get to. The Cruiser Gods were looking down on me and the '83... Came right out, no issue.
So, what am I supposed to do with 2-4 and the broken number 5.... Soak them in more penetrant and let it sit over night. That evening while helping the lady with dinner I went out and kept hosing them down. After work the next day I went out and tired again, it's a darn shame propane torches don't work upside down, I think heat would've helped tremendously.
Cylinder 2, I gave it a bit more mustard and nothing.... Cylinder 3, I cranked down and is twisted right off.. as in broke right off. Sweet. Now remember, these have been soaking in PB Blaster on and off for 2 weeks. I decided to quit while I was ahead and mix up the old mechanics secret of 50/50 ATF and Acetone, I poured that over 2-5 and let it sit for the night.
Last night, I went out right after work and gave it the old college try again. 2 broke off and 4 broke off. Yay.
Time to get the drill...

Not fun but at least these have "pilot holes" pre-drilled since they are ported")
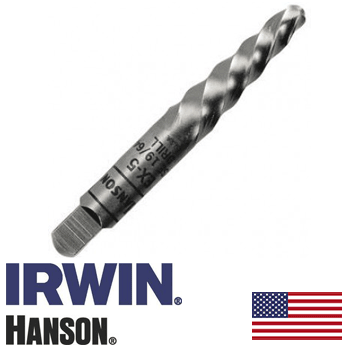
Grabbed my number 5 Easy Out Extractor and 3/8" drill bit and went to town drilling out the center of each injector(?). No issues there.
The top of the easy out is a 10mm Square to I grabbed a 10mm socket and my 1/2" drive ratchet and started on the extraction process. I started with number 5. Again, all hosed down with ATF/Acetone and PB Blast. I started the easy out and it dug in perfectly and I'll be damned if it was so tight I couldn't budge it once dug in. At that point I decided I would either get the injector out or break the Easy Out... I grabbed my cheater bar and supported the socket with one hand and wrenched down with the other.
POP! I knew the easyout just broke. Looked down and it was still in tact, twisted the ratchet and sure enough the injector was free!! Twisted it right out. I've done quite a bit to this truck but this was by far the most satisfying feat yet!

The remaining came out the same way as I worked my way forward. It took so much more force than I would've expected. But hey, they are out and I didn't have to go about any of the shadetree mechanic "fixes" that were going through my head.

Lola was as happy as I was.

Even after two weeks of soaking the threads were still dry as you can see, I'm not too impressed with penetrating oil these days... More to come!
While I'm on this subject I searched and searched on how and where to find info in removing rusted air rails and stuck injectors. Hopefully the forum will pick up on these tags and be able to help people in the future. I went about it how I did above but in reflection, I would've done it differently as I am now "experienced" in the matter.
I would've started from the beginning and removed the securing nuts and rail then cut off the injectors as close to the cylinder head as I could then go after them directly with the easy out.
3/8" drill bit and Number 5 Easy out Extractor.
TAGS: RUSTY AIR RAIL; AIR INJECTION RAIL; AIR INJECTOR RAIL; AIR RAIL REMOVAL; BROKEN AIR RAIL; BROKEN AIR RAIL INJECTOR; DESMOG; DE-SMOG; AIR-RAIL; AIR RAIL STUCK IN HEAD; (please feel free to add!)
I put down some butcher paper on my work bench to help keep track of everything I recommend you do the same.
Pretty girmey in there! The Secondary Jet was completely clogged/blocked.
Here's your "exploded" view!
Anyway, while all of those lovely little parts were soaking in gallons of carburetor cleaner I was able to get some time in under the hood and start getting ride of unneeded parts (desmog). First I wanted to pull the air rail. I had been soaking it with PB Blaster for about 2 weeks, I'd heard it can be a SOB!
Of course every pipe off of the air rail broke when I was removing the securing nut, but hey, I don't need that anyway, the fittings did come off of the cylinder head portion (injector?) Well, turns out that was the easy part.
I hit everything again with a healthy coat of PB Blaster and started in on the injector portion in the head. Cylinder one. It took a bit of force but it popped free and screwed right out. Cylinder 2. That thing did not budge, hit it with more PB blast and move on. Cylinder 3. No dice. PB blast and onward. Cylinder 4. Nope. Cylinder 5. Twisted right in half with nearly no force. Awesome. Cylinder 6, pucker factor was high, if you've been back around that area you know how much of a pain it is to get to. The Cruiser Gods were looking down on me and the '83... Came right out, no issue.
So, what am I supposed to do with 2-4 and the broken number 5.... Soak them in more penetrant and let it sit over night. That evening while helping the lady with dinner I went out and kept hosing them down. After work the next day I went out and tired again, it's a darn shame propane torches don't work upside down, I think heat would've helped tremendously.
Cylinder 2, I gave it a bit more mustard and nothing.... Cylinder 3, I cranked down and is twisted right off.. as in broke right off. Sweet. Now remember, these have been soaking in PB Blaster on and off for 2 weeks. I decided to quit while I was ahead and mix up the old mechanics secret of 50/50 ATF and Acetone, I poured that over 2-5 and let it sit for the night.
Last night, I went out right after work and gave it the old college try again. 2 broke off and 4 broke off. Yay.
Time to get the drill...
Not fun but at least these have "pilot holes" pre-drilled since they are ported
Grabbed my number 5 Easy Out Extractor and 3/8" drill bit and went to town drilling out the center of each injector(?). No issues there.
The top of the easy out is a 10mm Square to I grabbed a 10mm socket and my 1/2" drive ratchet and started on the extraction process. I started with number 5. Again, all hosed down with ATF/Acetone and PB Blast. I started the easy out and it dug in perfectly and I'll be damned if it was so tight I couldn't budge it once dug in. At that point I decided I would either get the injector out or break the Easy Out... I grabbed my cheater bar and supported the socket with one hand and wrenched down with the other.
POP! I knew the easyout just broke. Looked down and it was still in tact, twisted the ratchet and sure enough the injector was free!! Twisted it right out. I've done quite a bit to this truck but this was by far the most satisfying feat yet!
The remaining came out the same way as I worked my way forward. It took so much more force than I would've expected. But hey, they are out and I didn't have to go about any of the shadetree mechanic "fixes" that were going through my head.
Lola was as happy as I was.
Even after two weeks of soaking the threads were still dry as you can see, I'm not too impressed with penetrating oil these days... More to come!
While I'm on this subject I searched and searched on how and where to find info in removing rusted air rails and stuck injectors. Hopefully the forum will pick up on these tags and be able to help people in the future. I went about it how I did above but in reflection, I would've done it differently as I am now "experienced" in the matter.
I would've started from the beginning and removed the securing nuts and rail then cut off the injectors as close to the cylinder head as I could then go after them directly with the easy out.
3/8" drill bit and Number 5 Easy out Extractor.
TAGS: RUSTY AIR RAIL; AIR INJECTION RAIL; AIR INJECTOR RAIL; AIR RAIL REMOVAL; BROKEN AIR RAIL; BROKEN AIR RAIL INJECTOR; DESMOG; DE-SMOG; AIR-RAIL; AIR RAIL STUCK IN HEAD; (please feel free to add!)
This is awesome. I also have an '83 in Copper Brown Metallic. Love the color. If you need any seat fabric, SMS Auto Fabrics in Oregon City, OR just made a new roll of OEM reproduction fabric for me. I re-did my front seats and it turned out great. I need to take some better pics, but the pic of the seat is the re-upholstered seat, and the door panels are the original fabric.


- Thread starter
- #26
This is awesome. I also have an '83 in Copper Brown Metallic. Love the color.
View attachment 1457858
Great looking ride! Mine won't look that good without paint and body work! That's great they made new material, All of my seats are in good shape, no tears!
Was just looking back at your seats and they do look great. My rig was re-painted about 8 years ago by the prior owner, so I got lucky on that front when I bought it. For anyone curious, that is a light/medium OEM suspension, with 31" tires.
- Thread starter
- #29
Well, you guys may heave been right... It seems the Toyota recall may have run dry here in 2017. I can't hardly get a call back or an answer from the local guys for over a month. I keep getting the ole " we're waiting to hear back from corporate" line...
I'm still left with a gas tank what has some rust on the topside, it's drained but still has some old "gas" that has the same consistency of molasses...
First, do any of you know of a reproduction tank that's available? Or an aftermarket tank that still utilizes the factory straps?
If not, I've repaired a few gas tanks over the years, including a few MGB tanks, they're not as big as the Cruiser's but it's all the same stuff, right? I think I am going to tackle this one in the coming weeks.
Man-a-fre sells an extended range tank that is pretty nice... if you have deep pockets.
Man-A-Fre FJ60 Long Range Replacement Fuel Tank 38 Gallon - Man-A-Fre
Man-A-Fre FJ60 Long Range Replacement Fuel Tank 38 Gallon - Man-A-Fre
- Thread starter
- #31
Man-a-fre sells an extended range tank that is pretty nice... if you have deep pockets.
Man-A-Fre FJ60 Long Range Replacement Fuel Tank 38 Gallon - Man-A-Fre
Haha yeah, that seems to be the only option, I would like to retain the spare under the truck. Man-A-Fre has some awesome stuff, but they are proud of it! And rightfully so!
I guess another option could be finding a used one in the part out section, but then that's a crap shoot too. You may end up with one that is the same or worse than what you already have.
I wouldn't mind seeing a write up on your tank repair/restoration if you decide to go that route though.
I wouldn't mind seeing a write up on your tank repair/restoration if you decide to go that route though.
- Thread starter
- #33
I guess another option could be finding a used one in the part out section, but then that's a crap shoot too. You may end up with one that is the same or worse than what you already have.
I wouldn't mind seeing a write up on your tank repair/restoration if you decide to go that route though.
I'll do it!
Guessing you've read threads about putting a chain in the tank w/ some sort of thinner (seafoam?) And swing the tank side to side to scuff out the crud.Well, you guys may heave been right... It seems the Toyota recall may have run dry here in 2017. I can't hardly get a call back or an answer from the local guys for over a month. I keep getting the ole " we're waiting to hear back from corporate" line...
I'm still left with a gas tank what has some rust on the topside, it's drained but still has some old "gas" that has the same consistency of molasses...
First, do any of you know of a reproduction tank that's available? Or an aftermarket tank that still utilizes the factory straps?
If not, I've repaired a few gas tanks over the years, including a few MGB tanks, they're not as big as the Cruiser's but it's all the same stuff, right? I think I am going to tackle this one in the coming weeks.
Some guy sent his off and had it resealed and the inside glazed? @Spike Strip? It was about a month plus ago maybe. He was happy w/ the results. I know Spike talked back and forth w/ him about it and other options.
Wait... found this:
https://cruiserworld.eu/parts/new-products?prod_id=354572
@FJ73Texas has ordered from these guys a few times and never had an issue with them.
https://cruiserworld.eu/parts/new-products?prod_id=354572
@FJ73Texas has ordered from these guys a few times and never had an issue with them.
- Thread starter
- #36
Wait... found this:
New products | Cruiser World
@FJ73Texas has ordered from these guys a few times and never had an issue with them.
Ouch! I'll try repairing mine first!
I've brought back 2 62's and an old bronco II from the dead now, all had been sitting for years. 3 times I took the tanks to a radiator shop near here, they soaked em for close to a week each. They even welded a hole shut on one. Total cost was 60 bucks a tank. I didn't coat the insides, I haven't heard good things about coatings. I did as soon as I got them back throw in some oil and swish it around to coat the bare metal. There may be some particles in the bottom of the tank, but the filter does a good job and I change it regularly once a year
- Thread starter
- #38
Prog
Local radiator shop here wanted $675!?!?
I've brought back 2 62's and an old bronco II from the dead now, all had been sitting for years. 3 times I took the tanks to a radiator shop near here, they soaked em for close to a week each. They even welded a hole shut on one. Total cost was 60 bucks a tank. I didn't coat the insides, I haven't heard good things about coatings. I did as soon as I got them back throw in some oil and swish it around to coat the bare metal. There may be some particles in the bottom of the tank, but the filter does a good job and I change it regularly once a year
Local radiator shop here wanted $675!?!?
Yeah I know I priced a different shop here as well , he wanted to cut holes in it coat it and weld the holes shut . I kept wondering how that affected the coating after he welded it . He wanted 550.Prog
Local radiator shop here wanted $675!?!?
- Thread starter
- #40
Hmm, I may call around to a few more. The several I did call all pointed me to the shop that wanted $675. That originally quoted 350 to 375 over the phone (I was very upfront with the condition). I dropped off the tank and later that morning they called and said "after looking at it, it was more work than we thought" and the new price would be $675. I told them I'd be there shortly to pick it up.
I can't help but think the upped price had to do with me dropping it off in a nice truck and being nicely dressed for work....
I can't help but think the upped price had to do with me dropping it off in a nice truck and being nicely dressed for work....